Blending Life - The Pugilist: calling it "done"

Thanks for the tip, tcrazy, unfortunately in this case it didn’t work:


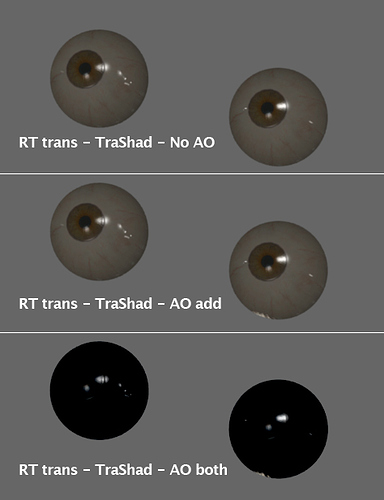
I use the eyeballs as an example because they have the same basic setup – a RT trans layer (sclera & cornea) covering the diffuse-textured eyeball and iris/pupil.

With no AO or with only additive AO, there is no problem. But using the “Both” option for the AO (additive & subtractive), the tarballs at the bottom result. This is what was happening with my “sweat layer” on the figure.

I use the AO-Both option because it improves the shadow contrast while providing the extra fill and “AO look” for the other parts of the figure. AO-Add alone doesn’t look as realistic imo.

I may have to bake the subtractive AO effect and apply it as a texture so I can preserve the RT trans, especially in the eyeballs, where the IOR factor contributes a great deal to overall effect.

Does this occur if both layers are part of the same mesh?

I’m not sure how to fix this one… possibly a matter best left to composit over with nodes?

You may also want to try adding in a tiny row of faces (separate mesh) that intersects the lower eyelid and the globe of the eye to catch the light and simulate the build up of tears which collect on the ridge of the lower eyelid - especially due to all that sweat on his face and the fact that he may have received a couple of blows to the face…

Just an idea for ya! :wink:

I like how this one is shaping up!

Josh

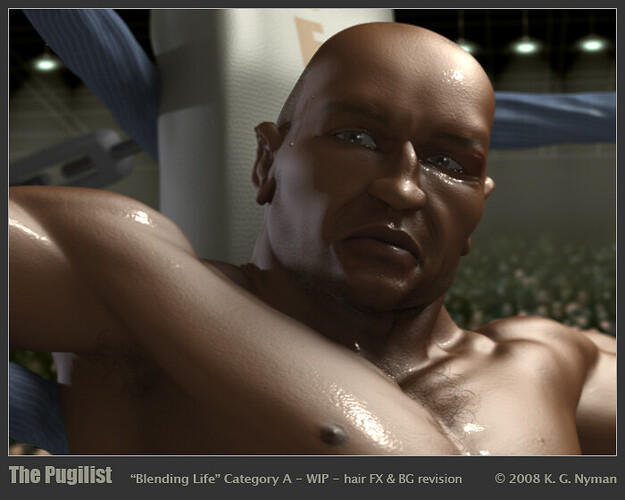
I think this is going to be my mantra throughout this project. Besides the AO/RT Trans conflict, I’ve also run into the ZTrans/Defocus node conflict, which nearly screwed the entire idea of the sweat layer. But by rendering many Render Layers separately and with different settings, then recombining all this in the compositor, I’m getting closer to home:


I’ve also discovered that the Defocus node isn’t terribly accurate in simulating a true plane of focus, so I’ll also be using the Compositor to re-establish the sharpest focus on the eyes and that part of the face (in the WIP above this little bit of compositing was done in Photoshop).

I don’t like the Add-only AO as much as using the Both option, so I’ll be trying to bake the subtractive AO tonight – unfortunately the bake takes about as long as a render, and that means many hours given the mesh density so far (Multi-res level 3).

@ joshC – thanks for the comments… I’ll be tweaking things right up to the last minute, I’m sure. I wanted to see the sweat-layer effect before adding any more high-spec stuff around the eyes, I don’t want the sparklies to overwhelm the expression :smiley:

Tales of woe – I’ve begun to run into some of Blender’s less endearing “features” lately. First, I found yet another operation that seems to eat RAM and VM like candy – deleting Vertex Groups. I had duped my main mesh a number of times to begin creating hair meshes (in order to preserve the main meshes’ editability) for eyebrows, body hair, beard stubble, etc., and was deleting the few unused vertex groups as I went along so I could make new ones for hair particle control. I didn’t know that each deletion was jacking the VM usage up by 50 to 70 Mb. Doesn’t take that many of these to push VM usage past my system limits – bingo-bango, Blender crashes, much work lost. Recovered some with an autosave file but still a few hours down the drain.

Finally get all the hair stuff done, been running test renders successfully for hours, push all the buttons for a full-out render with SSS and AO and all that jazz, hit F12. Lately I do this just before retiring for the night and let it cook while I snooze.

Woke up this morning to a really great render – everything is black. No, not ethnically black, just really, really, really black. I check all my settings – they’re OK, the lights layer is enabled, no probs except…

…for some reason (and Zeus only knows for sure) Blender has decided to forget where all my textures are located – every single slot in the Image Texture panel shows “Cannot find an image.” Even when I press Reload. Even when I actually re-establish the link using the “load image” icon. Blender just got stupid on me, refuses to “see” any texture images. Another 9 or so hours shot to hell.

So instead of pretty pitchers you get a rant, 'cause it’s 7am and I ain’t even had coffee yet and I have to troubleshoot this damn file.

Argh.

EDIT_____
A little later. Saved screwy file under a new name as a safety move, reopened it, and all texture images are now recognized. Dodged a bit of a bullet there, maybe. Render time still lost, but not work on the file. Would have been able to fix it with Append, maybe, but you never know. So check back in another 8 or nine hours for a real update.
Worth the hassle of re-rendering, I guess:


A few small places I’ll need to re-sculpt the “stubble” mesh around the jaw, but otherwise in fair shape. I’m saving the eyelashes for real meshes as I think that will give me better control over the results.

I also took the time while this was cooking to revise the “crowd” image for the BG billboards, repainting them for better implied detail and adding some coloration to tie them into the main subject better. Also revised the tonal qualities of the lights and atmo haze.

Really great work!

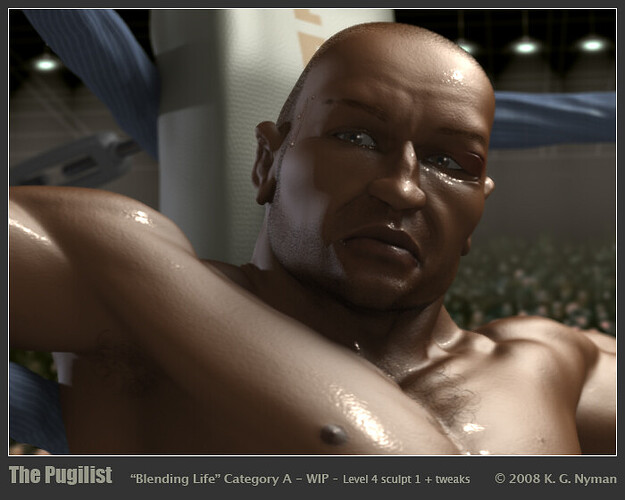
Upped the Multires to Level 4 and added some expressive detailing:


I’ve also added eyelashes, though they don’t show much in this image but do contribute to overall effect, and tweaked the ring details and background a bit. I have just some minor sculpt touch-ups to do before I try a full-rez render – I think I’ll shoot for a full-page magazine width of 2550 pixels, with whatever the depth turns out to be, haven’t yet calc’d it.

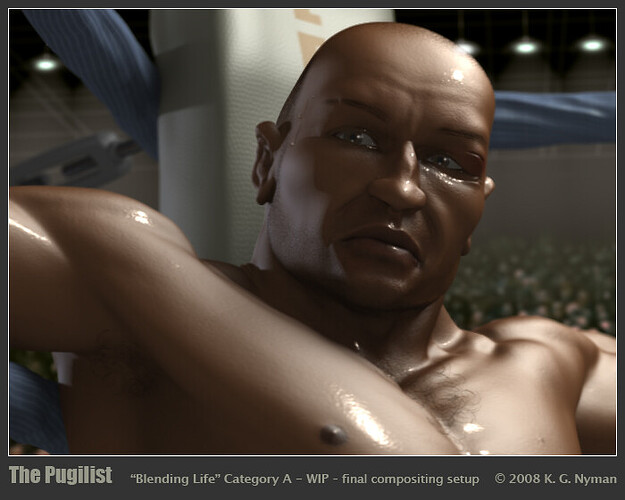
Subtle tweaks and a final Compositor setup show here, with everything (except the frame) accomplished in Blender, one of my goals for this image because of the nature of the Blending Life event.


I’ve softened the skin relief (normal) texture just a bit since it looked a little harsh in the full-size trial I did earlier, fixed a few issues with Ztrans in one of the shaders (I was getting an odd bleed-through of the BG images through the hair particles of his facial stubble), and added a little more sculpt detailing (his eyebrow scar now has a sculpted component). I’ll be burning full-size test renders next.

I think the sweat looks too specular, like he has a thin layer of gel on :stuck_out_tongue:

I think the sweat would smear in his battle, ya dig? So it wouldn’t be so specular in such small spots. I think this is mainly only on the bicep part. Awesome stuff, I’m fond of the ropes particularly :smiley:

This is really REALLY late, but it seems like if he was as tired as the sweat puts him out to be, then his mouth would be open a little to help him breathe.

Thanks for the feedback, Sammaron, and you’re right about a lot of it. The sweat layer is very hard to pull off, and it actually is like a thin gel layer, but I’m having trouble controlling it well in spots where I want to minimize it. Painting the spec map doesn’t do as much as I’d like, and futzing with the Shader specs tends to make it too little in the important areas. So now I’m trying an increased texturization on it to break it up into smaller spots, with a larger Hardness value that should reduce the size of the highlight points. This is based on seeing the effect with less bump/normal texture, which as you say makes it look like a coating. We’ll see.

I need the mouth to stay as is to hold the expression he has. He’s a trained athlete, maybe a little long in the tooth but still far and away above the average in physical development, so I think he’d probably not have to resort to mouth breathing unless he was beat up a heckuva lot more :wink: As for how much he’s sweating, that doesn’t really always correlate to level of exhaustion, some people just sweat a lot.

Maybe you need to use a Node material and mix in different spec materials. This is more complex but should give you the nessecary control to actually specify which area gets how much spec.

musk, thanks, that’s a very good suggestion. I haven’t used Materials nodes yet, so it’s time to put on my student cap :wink:

st, st, st, st… s**t!

Two days of tweaking and oh, so slow, test renders and I finally solve the problem of the sweat layer, then nearly 36 freakin’ hours into a final full size render, which looked fine about 4 hours ago, ready to finish up, and then this when I wake up:


Microsoft C++ Runtime Library
Program: c:…\blender.exe
abnormal program termination


Sometimes the only thing that seems to be in the way of getting this project done is Blender itself. :no:

EDIT_____________

After cooling down some and with a cup o’ java at hand I’m doing a post-mortem and realize that the crash seems to have ocurred after the render had actually finished, because Save Buffers had time to write an .exr file. Blender, you’re forgiven, but on parole :ba: On parole because it’s possible that the .exr write was involved in the crash – no error #'s or other useful info in the message, so it will remain a mystery, I guess.

Memory wasn’t an issue this time, as I had checked everything in Task Manger periodically before hitting the sack and Blender was cooking along with about 600Mb out of the 1gig I have installed, and VM was at much less than half the allocated ceiling, which I had boosted to 4 gigs for the rendering process.

Anyway, this might be a good object lesson for the use of the Save Buffers option when doing this kind of edge-walking. Without it, I’dabeenscrewed.

I’ll post an image result after I get the rest of the compositing done.

6 hours later and 8 or 9 Blender crashes later (all in the Compositor trying to do what worked perfectly well at 1/2-size), I still have no final image. WTF?

I can composite the BG. I can composite the FG (ring & boxer). I just can’t seem to get all these Render layers to work all at once, something always crashes Blender (and not the same thing, either), at least not at full render size (1275x973). At 1/2-size things worked just fine. And it does not seem to be a memory issue (at least not RAM or VM) because the crashes happen when everything is operating well within normal limits. Maybe it’s a vid card issue, but if so, it’s something that only Blender has trouble with – I’ve worked on 250Mb+, 40-layer Photoshop files at twice the pixel dimension of this render with nary a hiccup, worked without probs in Maya PLE and the Unreal Editor simultaneously (with P-shop also open now and then), and while things get slow sometimes, they don’t fold up and die.

I have tried saving various parts of the Compositor elements out as .exr files but when bringing them back into a new Compositor setup for final compo, I find there is no alpha info in the .exr, and no Z info, either. I thought OpenEXR was supposed to be the only format that does preserve these image characteristics? I might as well be using a 24-bit .bmp.

I’m open to suggestions about how to get around this apparent hangup.

EDIT________________

OK, just found the info about Multilayer format, guess I’ll try that next.

OpenEXR does save Z-Buffer and Alpha if you specify it in the render panel. Need to press the RGBA and the ZBuffer button. I also suggest to use the full OpenEXR format (32Bit) instead half (16bit) if you are using Blender for Compositing.

Thanks, musk, I’ll check those settings as I proceed. From what I’ve read, Multilayer seems to be sort of tailored for Blender use, I’ll see if that offers any other usefulness.

Chip, there’s a simple way to prove or disprove whether the crashes are intrinsically Blender bugs or if they only occur with Blender being run on your specific hardware: Run the test renders on a friend’s machine, or rent a compute server at a render farm (almost wrote “Blender farm” - I guess all that blending is getting to me). :wink:
It may cost a few dollars, but if someone is going as far as you do with respect to realism and thus complexity, it may well be worth it. (After all, with a little bit of luck, you might save like, say, 1260 bucks next year if you keep going like this). :smiley:
I do however not know if the increased rendering speed does outweigh the setup time, since you are only rendering a single frame.

@ dexterity – good suggestion, thanks. I’ve considered using a render farm many times, but the nature of the file construction doesn’t allow it. The reason I’m using the Compositor so heavily is because the scene must be rendered in sections – the ring and the figure, using AO+SSS, and the BG, with no AO. They can’t be rendered together unless I split stuff off into different scenes, and that would be very complicated at this point, since I didn’t plan for that at the beginning.

There’s also the problem with the DoF. Because of the ZTrans nature of the “sweat layer” (a Multires level 3 dupe of the main figure with special shading), the figure is blurred to the max by the Defocus node when rendered direct – the ZTrans confuses the Defocus node something terrible. But by using a special “Z-only” Render Layer (figure mesh only, no lights, no ZTrans), I can pipe a separate Z channel into the Defocus node and get the results I need. There’s also a masking node that broadens the area of sharp focus after the DoF is applied – it’s not really a very good imitation of a true focal plane, so it needs a bit of workaround.

So all in all, the render farm would be of limited use since the final image depends do much on the Compositor and multiple passes at different render specs. If the render farm could output to the OpenEXR or Multilayer format, providing the massively-long-to-render elements as a ready-to-Composite file, then it would be a big savings on render time (and wear and tear on my blood pressure :wink: ) to output just the AO+SSS layers to EXR, and render the other stuff local (they take only minutes), for subsequent final compositing as shown here:


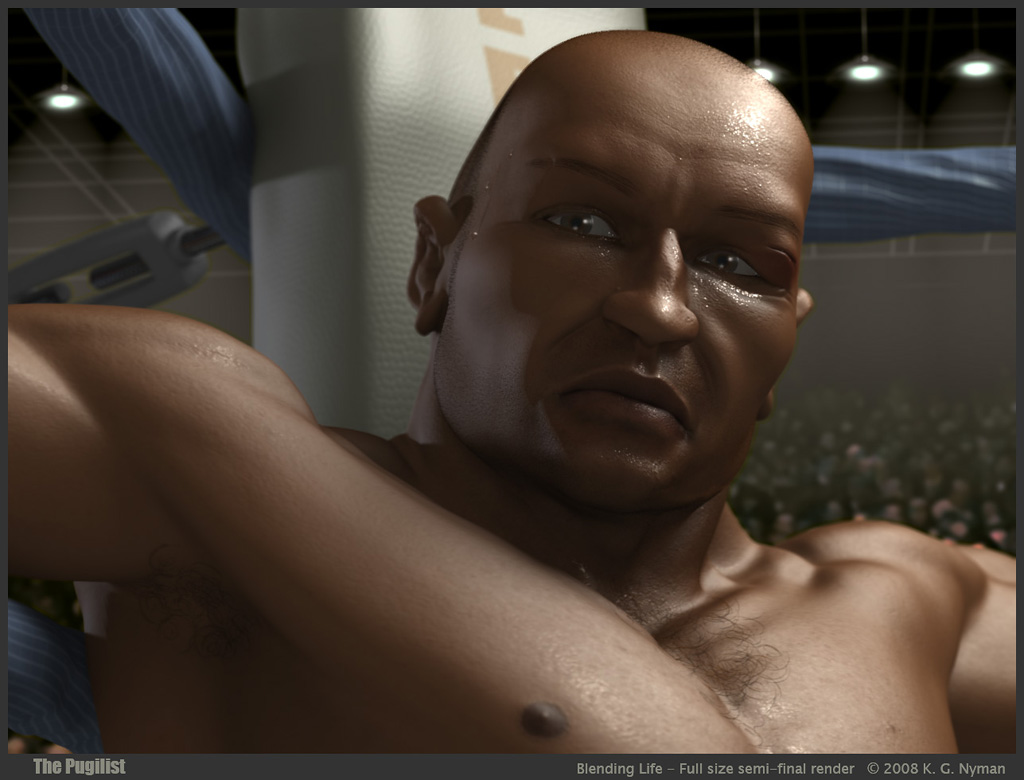
But that would take a lot of coordination with the render farm, and test renders – not sure there’d be enough time even if I were to start now to get to squared away. As is, the Save Buffers option also Saved My Bacon :D, and with musk’s good word on the EXR settings (thank you!), I’ve been able to salvage the final image despite the crashes. Semi-final actually, because I’m not 100% happy with the eyebrows and may spend time tweaking them. Also, the actual final image will be larger, this one has been reduced to 1024 wide for attachment in the forum. Actual is about 1270 x 935.

Adapt & overcome!

Took a few days away from Blender to clear my head of the image, then came back and fixed a number of weaknesses – eyes (better coloration, etc, at the join between eyeball & lids), eyebrows (no longer looking painted on), and some mini-touch-ups to some of the speculars that looked out of place (a little Compositor touch-up work).


Looks final to me other than size – this one is again reduced for forum attachment so it’s easier to get C&C. The final render will be around 1250x970. I also want to ask Len about presentation requirements – framing, etc. – whether there are any standard formats he’d like used.

C&C very welcome.

I really don’t know what to say other than that I think it looks great! Well done!