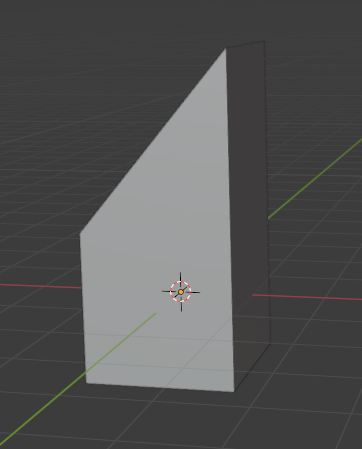
So I’m doing some blendshapes that are being controled by Drivers.
Everything was working fine until I animated and hit play. Now some of the blendshapes (even the ones that are not animated) are changing values from 0.000 to 0.000000 and sometimes to 0.000001 or 0.000004…(as you can see on the image).
In Blender I don’t see any artifacts, but if I import an .fbx into Unity, the geometry starts flickering (as you can see on the image)
If I delete those drivers on those blendshapes everything works fine.
But I need those blendshapes…
So what are the drivers? That seems like the obvious next question.
I’d be surprised if the Unity import respected the vertex group, which might be responsible for the difference in output there, but I can’t say I’m up-to-date on how Unity imports shapekey animation managed by drivers.
1 Like
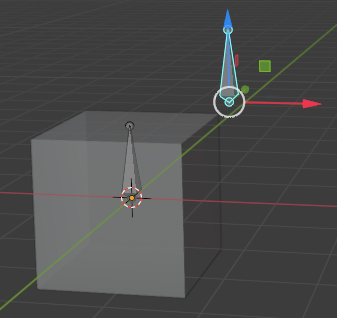
The drivers are some some bones controling the blendshapes by an average value like this one. 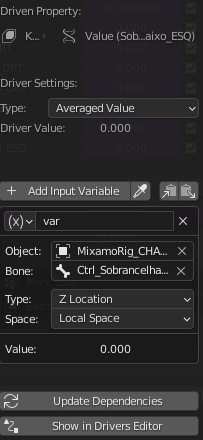
So if that’s a fluttering driver, do you have some Z translation in the controlling bone that shouldn’t be there? When the driver is at 0.0001, is the bone’s location also at 0.0001? Or is there a precision issue happening somewhere in the pipeline?
You might try changing a driver like that to use single property drivers instead of transform channels. Like, right click on Z location of bone → copy as new driver. Those are the raw fcurve values, before constraints, and won’t be vulnerable to as many precision issues. (Sorry I can’t offer a screenshot, I’m on somebody else’s computer and I don’t know how it works…)
In some cases I have 0 animation, zero keys and that fluttering happens anyway… even if I create a keyframe at 0.000
I do not really understand how to what you’ve suggested, can you explain it better, please?
------
I have all those bones (that control the Drivers) parented to the head bone… it seems that if I remove the parenting the issue is gone… (but that is not very helpful… because I want the controllers to follow the head)…
Unfortunately, I can’t give you files or screenshots, not for a few days. I can maybe walk you through steps needed, but our interfaces may vary, and it might not be as clear as either of us would prefer.
Let’s take the example of the driver you’ve provided. You are driving a shapekey we’ll call “Shape” with the Z location of a bone we’ll call “Ctrl”. (Because the names are long and cropped, we’ll use those names.)
So first, delete the existing driver for Shape. There are a number of ways to do that; I would right click on the value of Shape in the Properties viewport and select “delete driver.”
Next, we’ll create a new driver. Select Ctrl while in pose mode. Open a sidebar (n key for me) and look on the “Item” tab. Somewhere on this tab is the local Z position of the bone, as determined by manual posing and keyframes. Right click in that field containing the Z position and choose “Copy as new driver.”
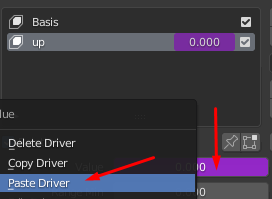
Now, select the object containing the shapekey. In the properties viewport, in the list of shapekeys, right click on the current value for Shape and select “Paste as new driver”.
If you look on your driver editor, you’ll see that you have a driver that is subtly different from what you had before. It is still being driven from the local Z position of Ctrl. However, now, it’s being driven directly by the Z position property of the bone, rather than the Z position transform of the bone. The difference between those two things is that the former doesn’t have any math done on it, while the latter has been run through a number of functions that each subtly lost the precision that allowed it to comfortably be zero.
I hope that helps some.
So here’s a screenshot demonstrating the kind of drivers I’m recommending:

In this case, I’m driving a bone’s Z scale by the Z location of some other bone. Your needs will vary (can’t guess from your screenshots the exact things you’re driving.)
Doing this kind of driver will prevent as much math operating on your drivers, which will lead to greater precision in their values. (It will also prevent the drivers from reading values that come from bone constraints, which may or may not be a good thing in your case.)
Hi! Thank you for all your help, but I think I’m missing some step…
I’m doing a simple scene with just a cube to try to replicate what you’ve said.
So, I create a Blendshape called “up”
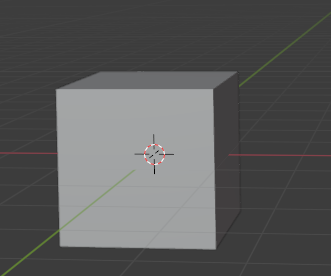
Then I created a simple armature with a main bone and the 2nd bone that I want to use as a controler for the shape
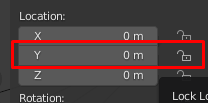
O copied as a new driver the Y Location
![]()
Then on the shape I pasted it
I updated Dependencies.

But when I move the bone on the Y axis nothing happens…
What am I missing?
(my scene here)
OK, got it! I was being stupid and copied the “lock” information instead…
It’s all good! Thanks!
1 Like
ok… back to the drawing board again…
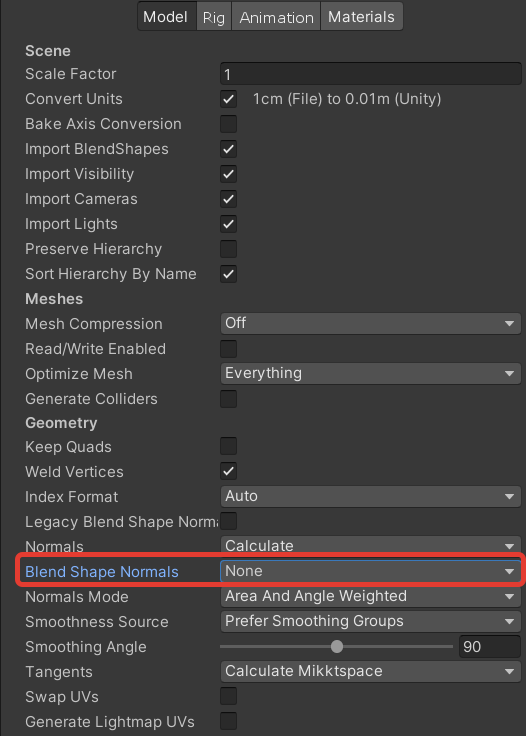
I’m still having problems with the blendshapes inside Unity. ![]()
In Blender everything seems ok… there is no flickering on the blendshapes values.
What more can I do?
So, you’ve solved one problem! This is a different one.
I couldn’t help you much without a file-- and there’s a good chance that I couldn’t with one either, because I’m not familiar with Unity.
However, one thing I’d recommend looking at is the vertex group limits on the shapekeys. Like I said before, I’d be surprised if the exporter took these into account. You can bake these limits into the shapekey by setting a single, vertex group limited shapekey to 1.0 and then using “new shape from mix” from the shapekey specials menu (the downward pointing triangle to the right of the list of shapekeys.) That will give you a new shapekey that doesn’t need to be limited.
2 Likes
Hi Morgana!
Thank you for your suggestion. It helps a bit.
Conclusion:
To avoid error on the Blendshapes inside Blender I should use the method explain by @bandages .
Although, I use a Driver to control the Blendshapes values, the animation values, on the controller, will not go into Unity.
But, If I just animate directly on the Blendshape sliders (so boring…) and do what Morgana suggested it will work fine.
1 Like