I am trying to rig a new character of mine, trying to do it via bone heat.
I’ve read plenty of threads regarding this method and flipped through some tutorials.
It seems to come down to either parenting the mesh to the armature and choosing “apply bone heat” or applying an armature modifier to the mesh, selecting all the bones in weight paint mode and then choosing “apply bone heat”.
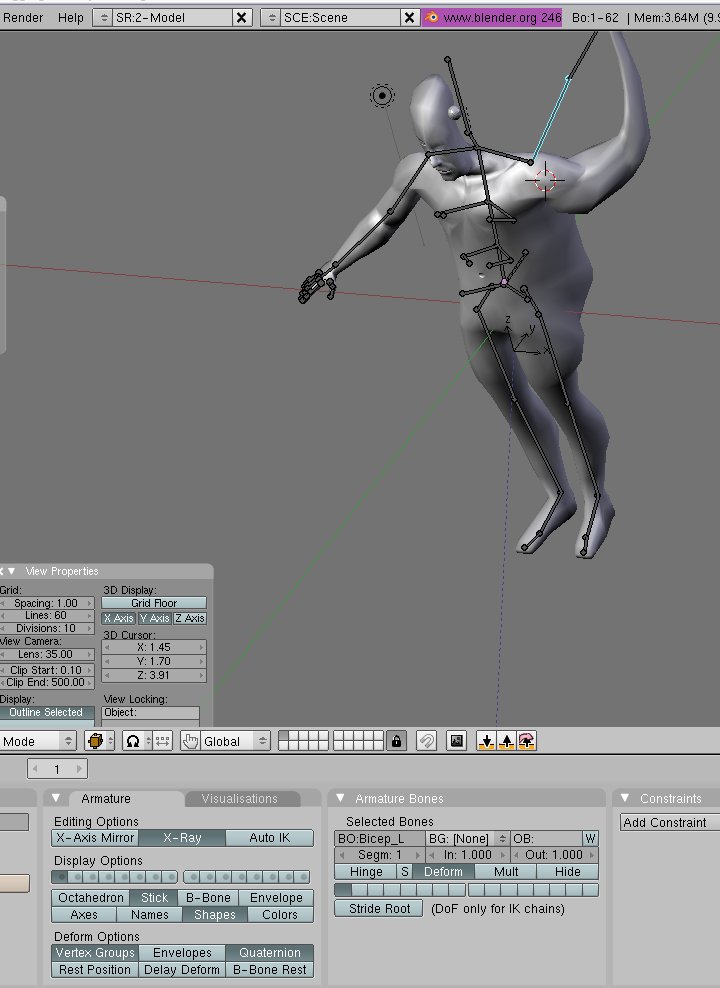
Well, by now I have done both of these methods and my mesh DOES recieve bone heat but not in a proper way! Moving an arm bone moves the hip area as well, for example (see picture).
How do I solve this?! Is there a way to choose the influence or strength of bone heat?
i could be wrong but i think what bone heat does is try to calculate what they think is most likely weight painting giving the mesh. Of course it isn’t going to do that perfect every time and can’t read your mind to tell what you want. So I think using the bone heat is a way to get a good starting point that you may need to tweak further. You can weight paint by using the mode drop down menu to get into weight paint mode and then use the sub brush to take the influence of the hip away from the arm bone.
Hi,
select each arm bone one at a time.
whilst posed like your screen would be good.
each time, go into weight paint mode,
in the Paint Dialog window, Set Weight to 0.0.
Now paint over the torso around the deformation.
repeat for each bone in the arm until the torso is unaffected.
this should easily fix your problem.
If you only want to affect certain faces, press f while in weight paint mode and select faces with right click, paint/subtract with left.
n brings up the brush properties when in weight paint.
When face select isn’t on, you can select bones with right click.
Your armature should be in pose mode before selecting weight paint mode on your mesh.
I was aware of that. I might have been under a delusion caused by posts like here http://dreamsgate.wordpress.com/2008/06/09/rigging-bone-heat-weighting/ where the author clearly states “It is really that easy (…) my simple little rigs all perform beautifully” - and that’s just what I wanted: Having my own “little rig” perform without too many hassles
Yeah, I’ll do that just now. Thanks! Will keep you posted
Right now, I am under the impression that I might be better off just weight painting all the bones myself. Whatever I try, bone heat always gives me ridiculous results.
The problem is that your rig needs to be more anatomically correct. Give him some ribs and a pelvis to prevent the arms from fighting the spine for influence over the torso.
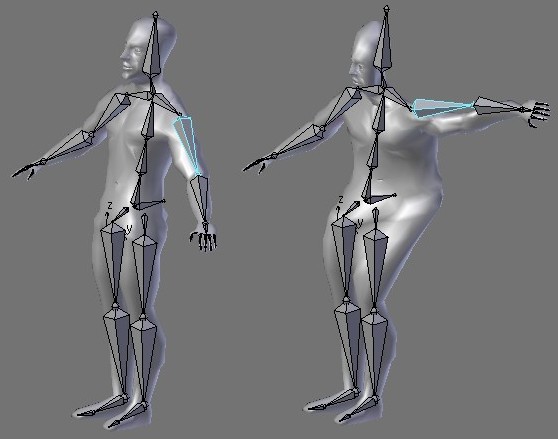
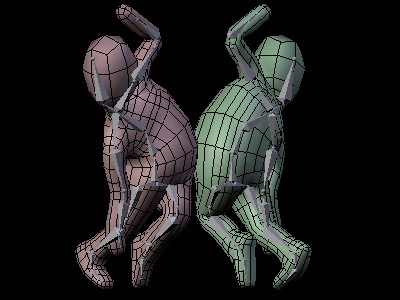
With only a basic understanding of muscular and skeletal anatomy/mechanics, I was able to get these deformation results with no weight-painting at all:
The heat-weighting function doesn’t give the expected results because the mesh normals are incorrect. The normals can’t be corrected because there are overlapping/duplicate vertices. Those verts aren’t found by Remove Doubles because the scale of your model is quite large.
So, in Object mode scale your meshes and armature to about 30% of their current size (don’t forget to Apply the scale). Then select all verts in Edit mode, Remove Doubles and Recalculate Normals. Now just re-parent the mesh to the armature . . . you’ll be much happier with the new results.
I got good results with a nice clean manifold mesh, as can be seen here, but once you have overlapping pieces, and seperate pieces ( and backwards normals ) you will run into problems.
Holy SMOKE! That did the trick! Are you married yet, Cire? Otherwise I’d consider… well, forget that But WOW do I thank you!! jumps around in what might resemble a happy dance
How did you find out about the scale and duplicate verts, I wonder?
I wonder if it is necessary for the scaling? With the object selected, and in F9 in edit mode, why don’t you merely change the “Limit” value in the Mesh Tools panel - and then do a Remove Doubles?
 Moving an arm bone moves the hip area as well, for example (see picture).

 But WOW do I thank you!!
  jumps around in what might resemble a happy dance