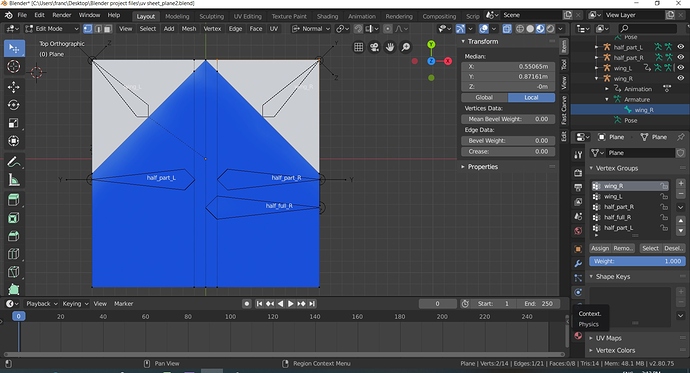
I have just taken the plunge into bones animation and having all sorts of problems. I want to animate 3 seperate folds on each side of a sheet, without using a mirror modifier. The first fold of the white triangle on each side of the sheet is not a problem. However when I try to fold the " half_full_R " bone, the bone " wing_R " gets left behind. Also I am not sure which vertice to assign to the " half_part_R " bone or whether there is any specific parenting or other settings to do to make this work. I have attached a final render showing the result of the folds. Any help with this would be appreciated.
Link to blend file: https://www.dropbox.com/s/avkv9ls51q4x9e5/sheet%20fold%201.blend?dl=0sheet fold 1.blend (744.5 KB)
Hey, I did not look at your file ![]() but bones left behind is usually do to a parenting error. Looking at what you have posted, the paper is missing a fold. Take a look at the pic I posted you will see (orange is the paper) also how I rigged it. my bone parenting is Bone_Main > Bone_body > Bone_wing & Bone_CF. NO vertices are assigned to 2 different bones. If you have any questions post back
but bones left behind is usually do to a parenting error. Looking at what you have posted, the paper is missing a fold. Take a look at the pic I posted you will see (orange is the paper) also how I rigged it. my bone parenting is Bone_Main > Bone_body > Bone_wing & Bone_CF. NO vertices are assigned to 2 different bones. If you have any questions post back
The main issue in that file is that you have a bazillion armatures and a bazillion armature modifiers. You don’t want that. You want only a single armature and a single modifier. Join your armatures into a single armature; use a single modifier targeting that armature. After that, you might have other things to worry about, but you’re not going to get anywhere without until you do that.
Thanks for your help, I will try this out, but just a question first; Should I be in “Global” or “Normal” for the Transform Orientation?
For the object (paper) “Global” or “Local”, for ‘pose’ bones you want “Local” or “Gimbal”.
Here is a link to the file if you want to have a look. File Saved in 2.76 !!! _ If your using 2.8 just “Append” the 2 ‘Objects’ = Armature + Plane into your version
https://drive.google.com/file/d/1hPxj-pnpEwylM-uSmJV684Ty-LFufKDm/view?usp=sharing
For work in both edit and pose, I work in normal mode, which gives me local bone axes.
But considering that all your bone should be bending in a single axis, you could just add transform locks to the bones and not worry about what orientation you were in.
Fantastic! Your file has helped greatly . Thanks very much.
Whats the procedure to apply transform locks?
In pose mode, select a bone. Look on properties/bone/transform. Click the lock icons. Also available from sidebar/item.


