I got the details using similar steps but “DIFFUSE” or “NORMAL” instead of “COMBINED”.
Glad you figured it out. How’s the final jacket look?
I got the details using similar steps but “DIFFUSE” or “NORMAL” instead of “COMBINED”.
Glad you figured it out. How’s the final jacket look?
I do not have that one handy but take a look at this one, plz.
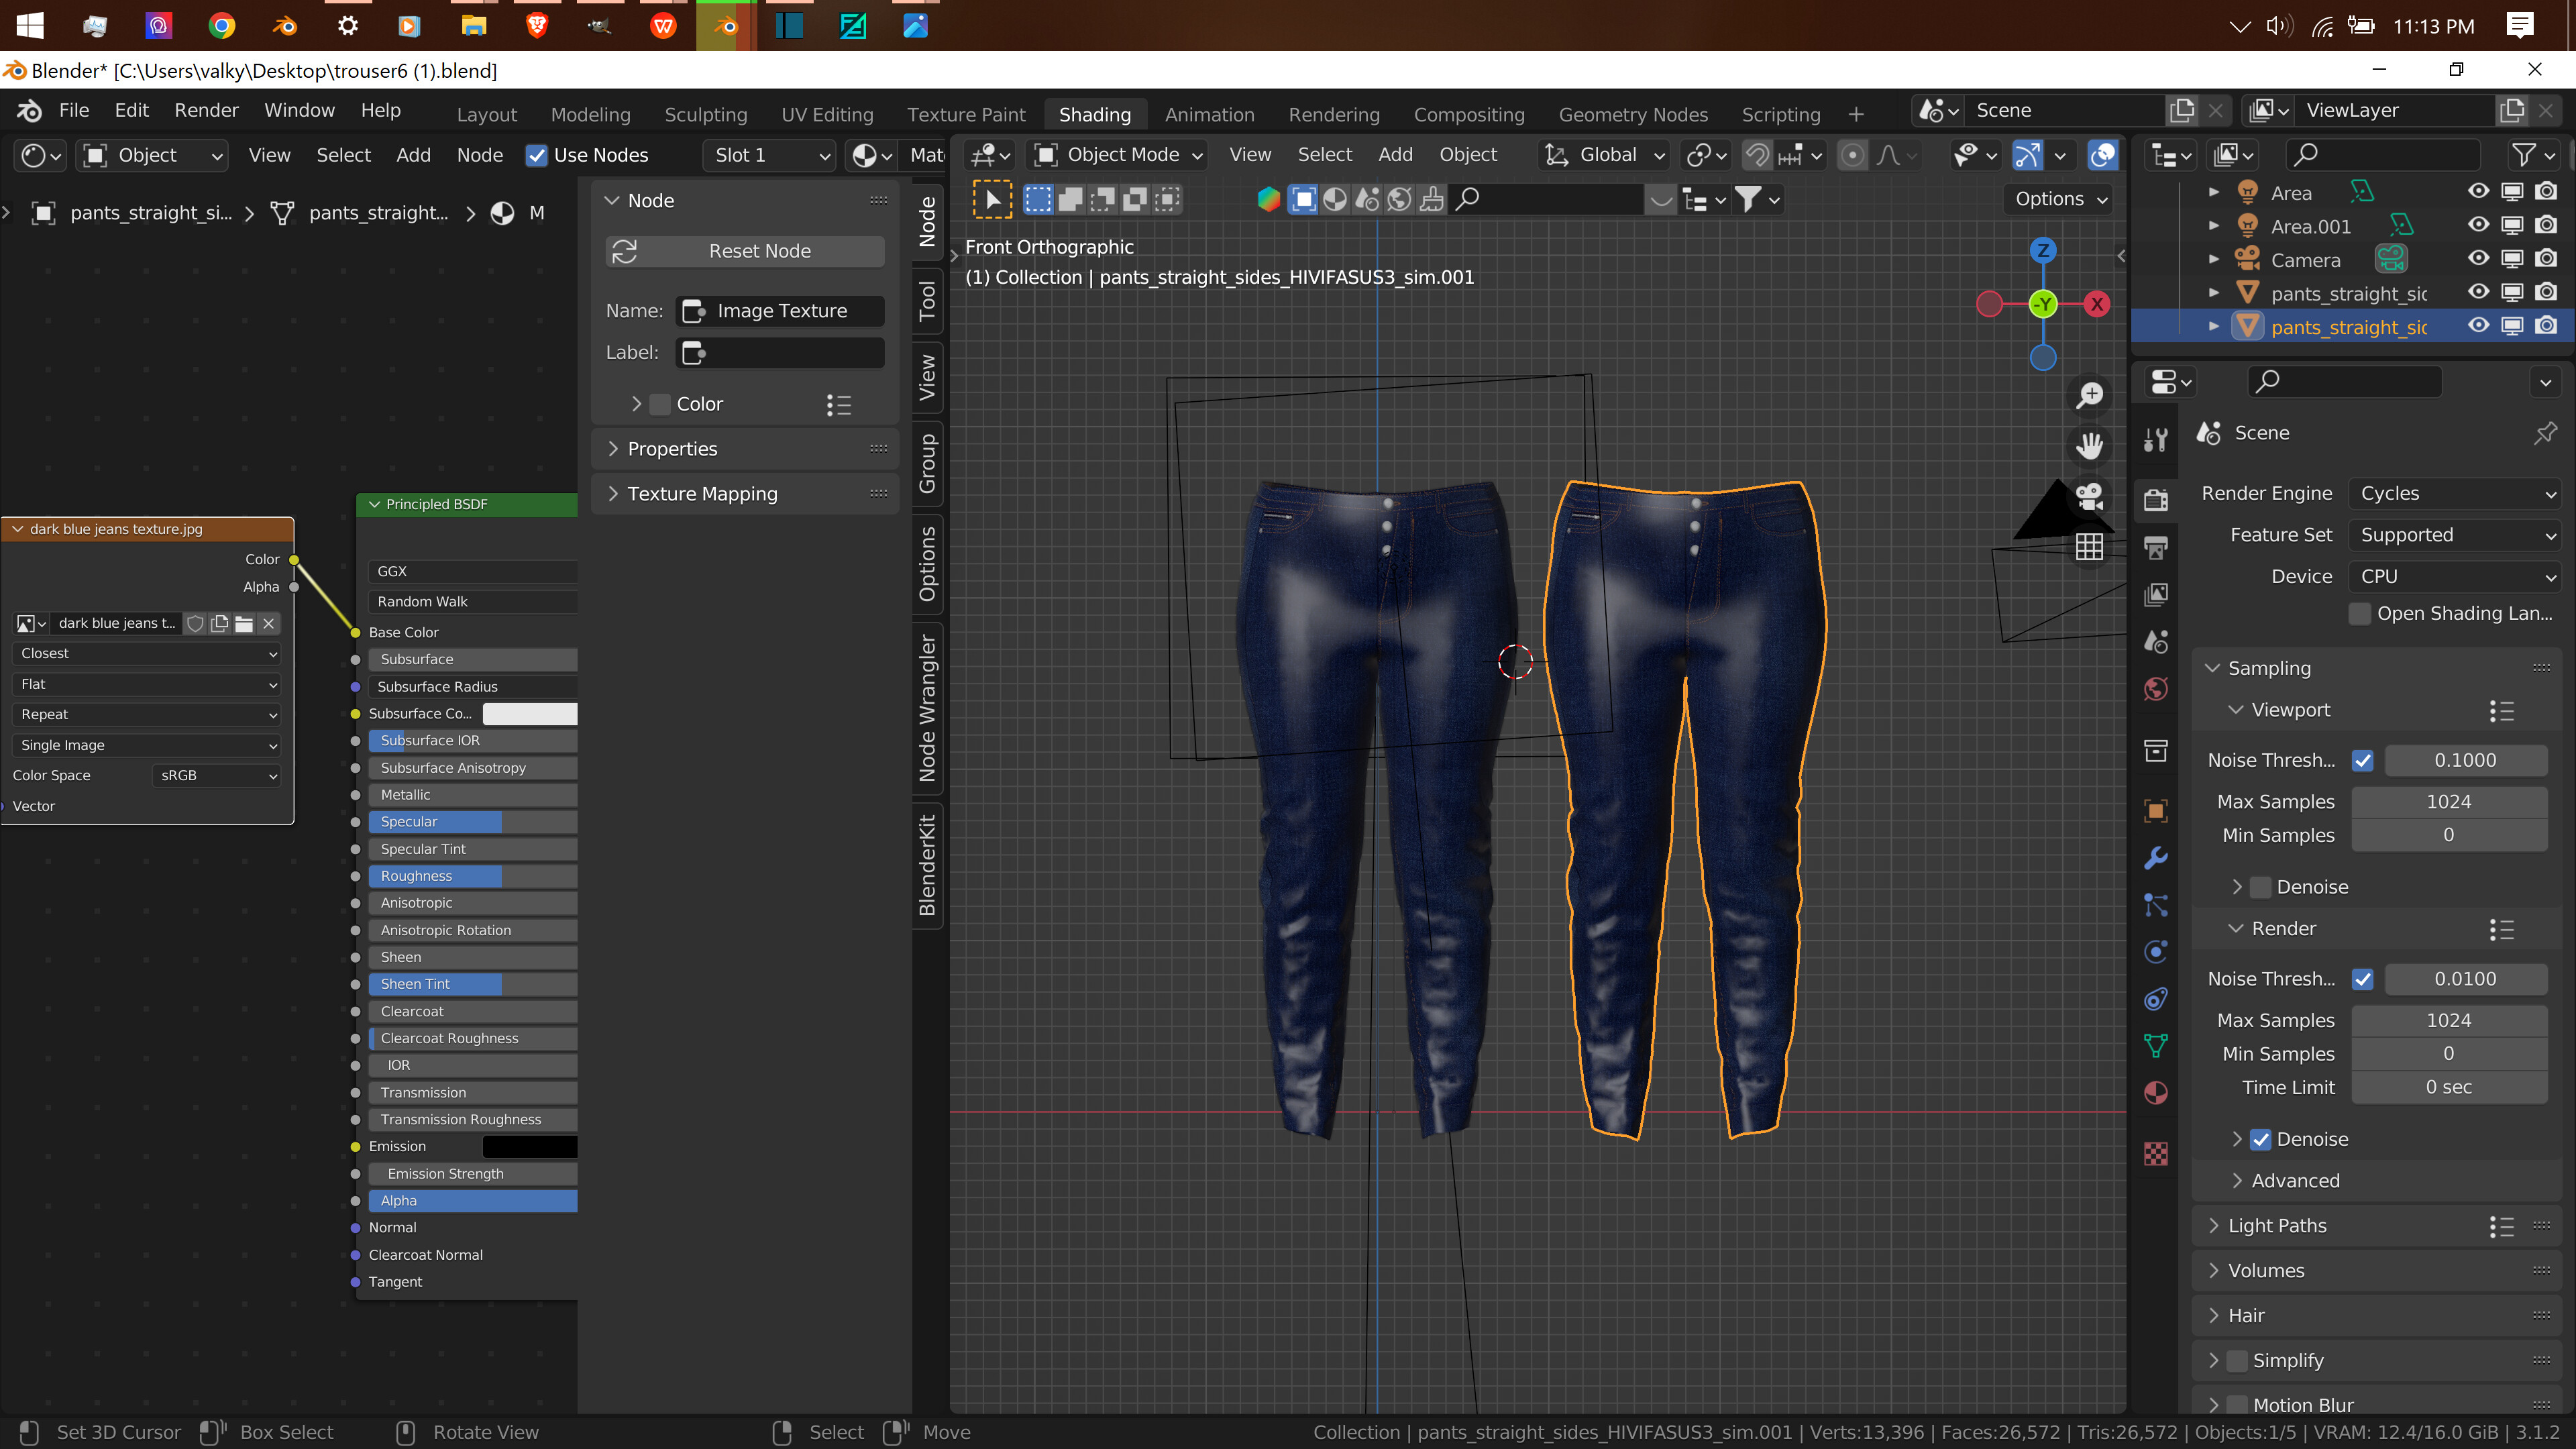
Blue Jeans
The only issue I see is lighting, ![]() some parts of the image are way too dark. I don’t know how to solve it.
some parts of the image are way too dark. I don’t know how to solve it. ![]()
![]()
![]()
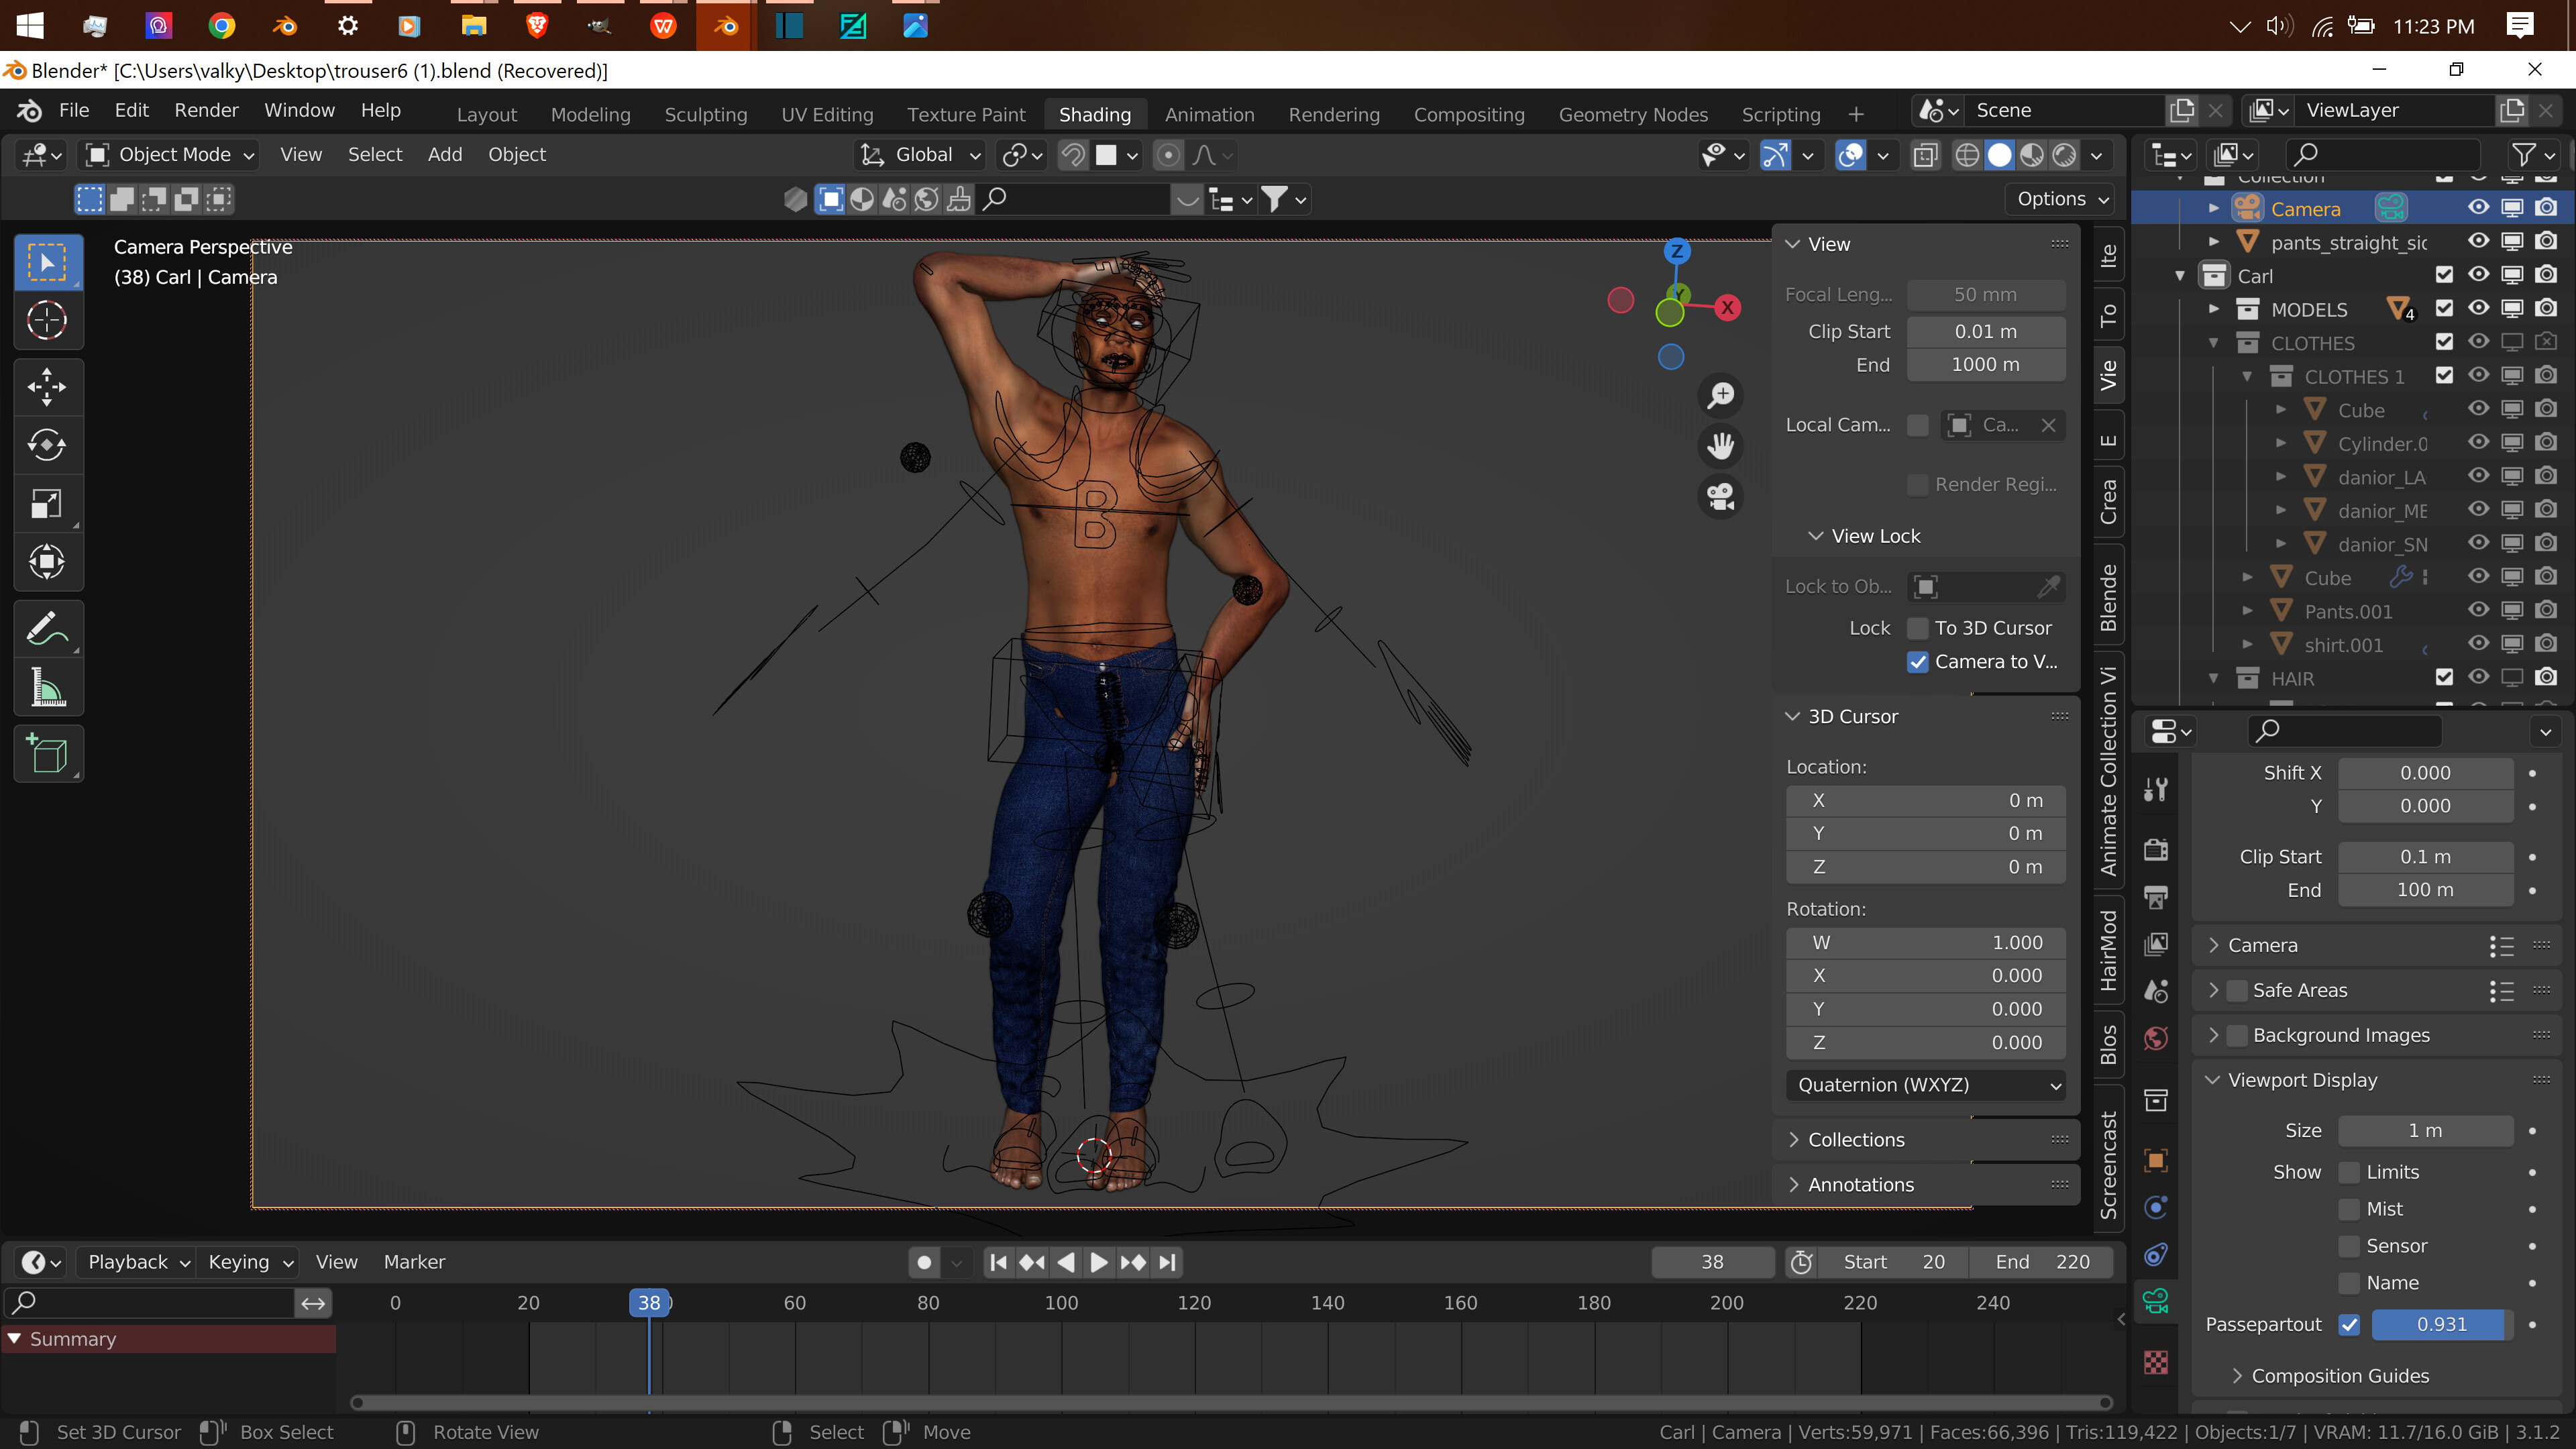
Anywho, I have a completely different question now. NOoow they want me to add the jeans to a mannequin & do a turnaround animation on it. Do you have any idea of how to do it?
Blue Jeans folder
If I recall correctly, combined bake takes into account lighting. If the darkness is a problem, you could try adjusting the lights so the dark areas are lit to the degree you’re looking for, and rebaking.
Or maybe editing in Photoshop.
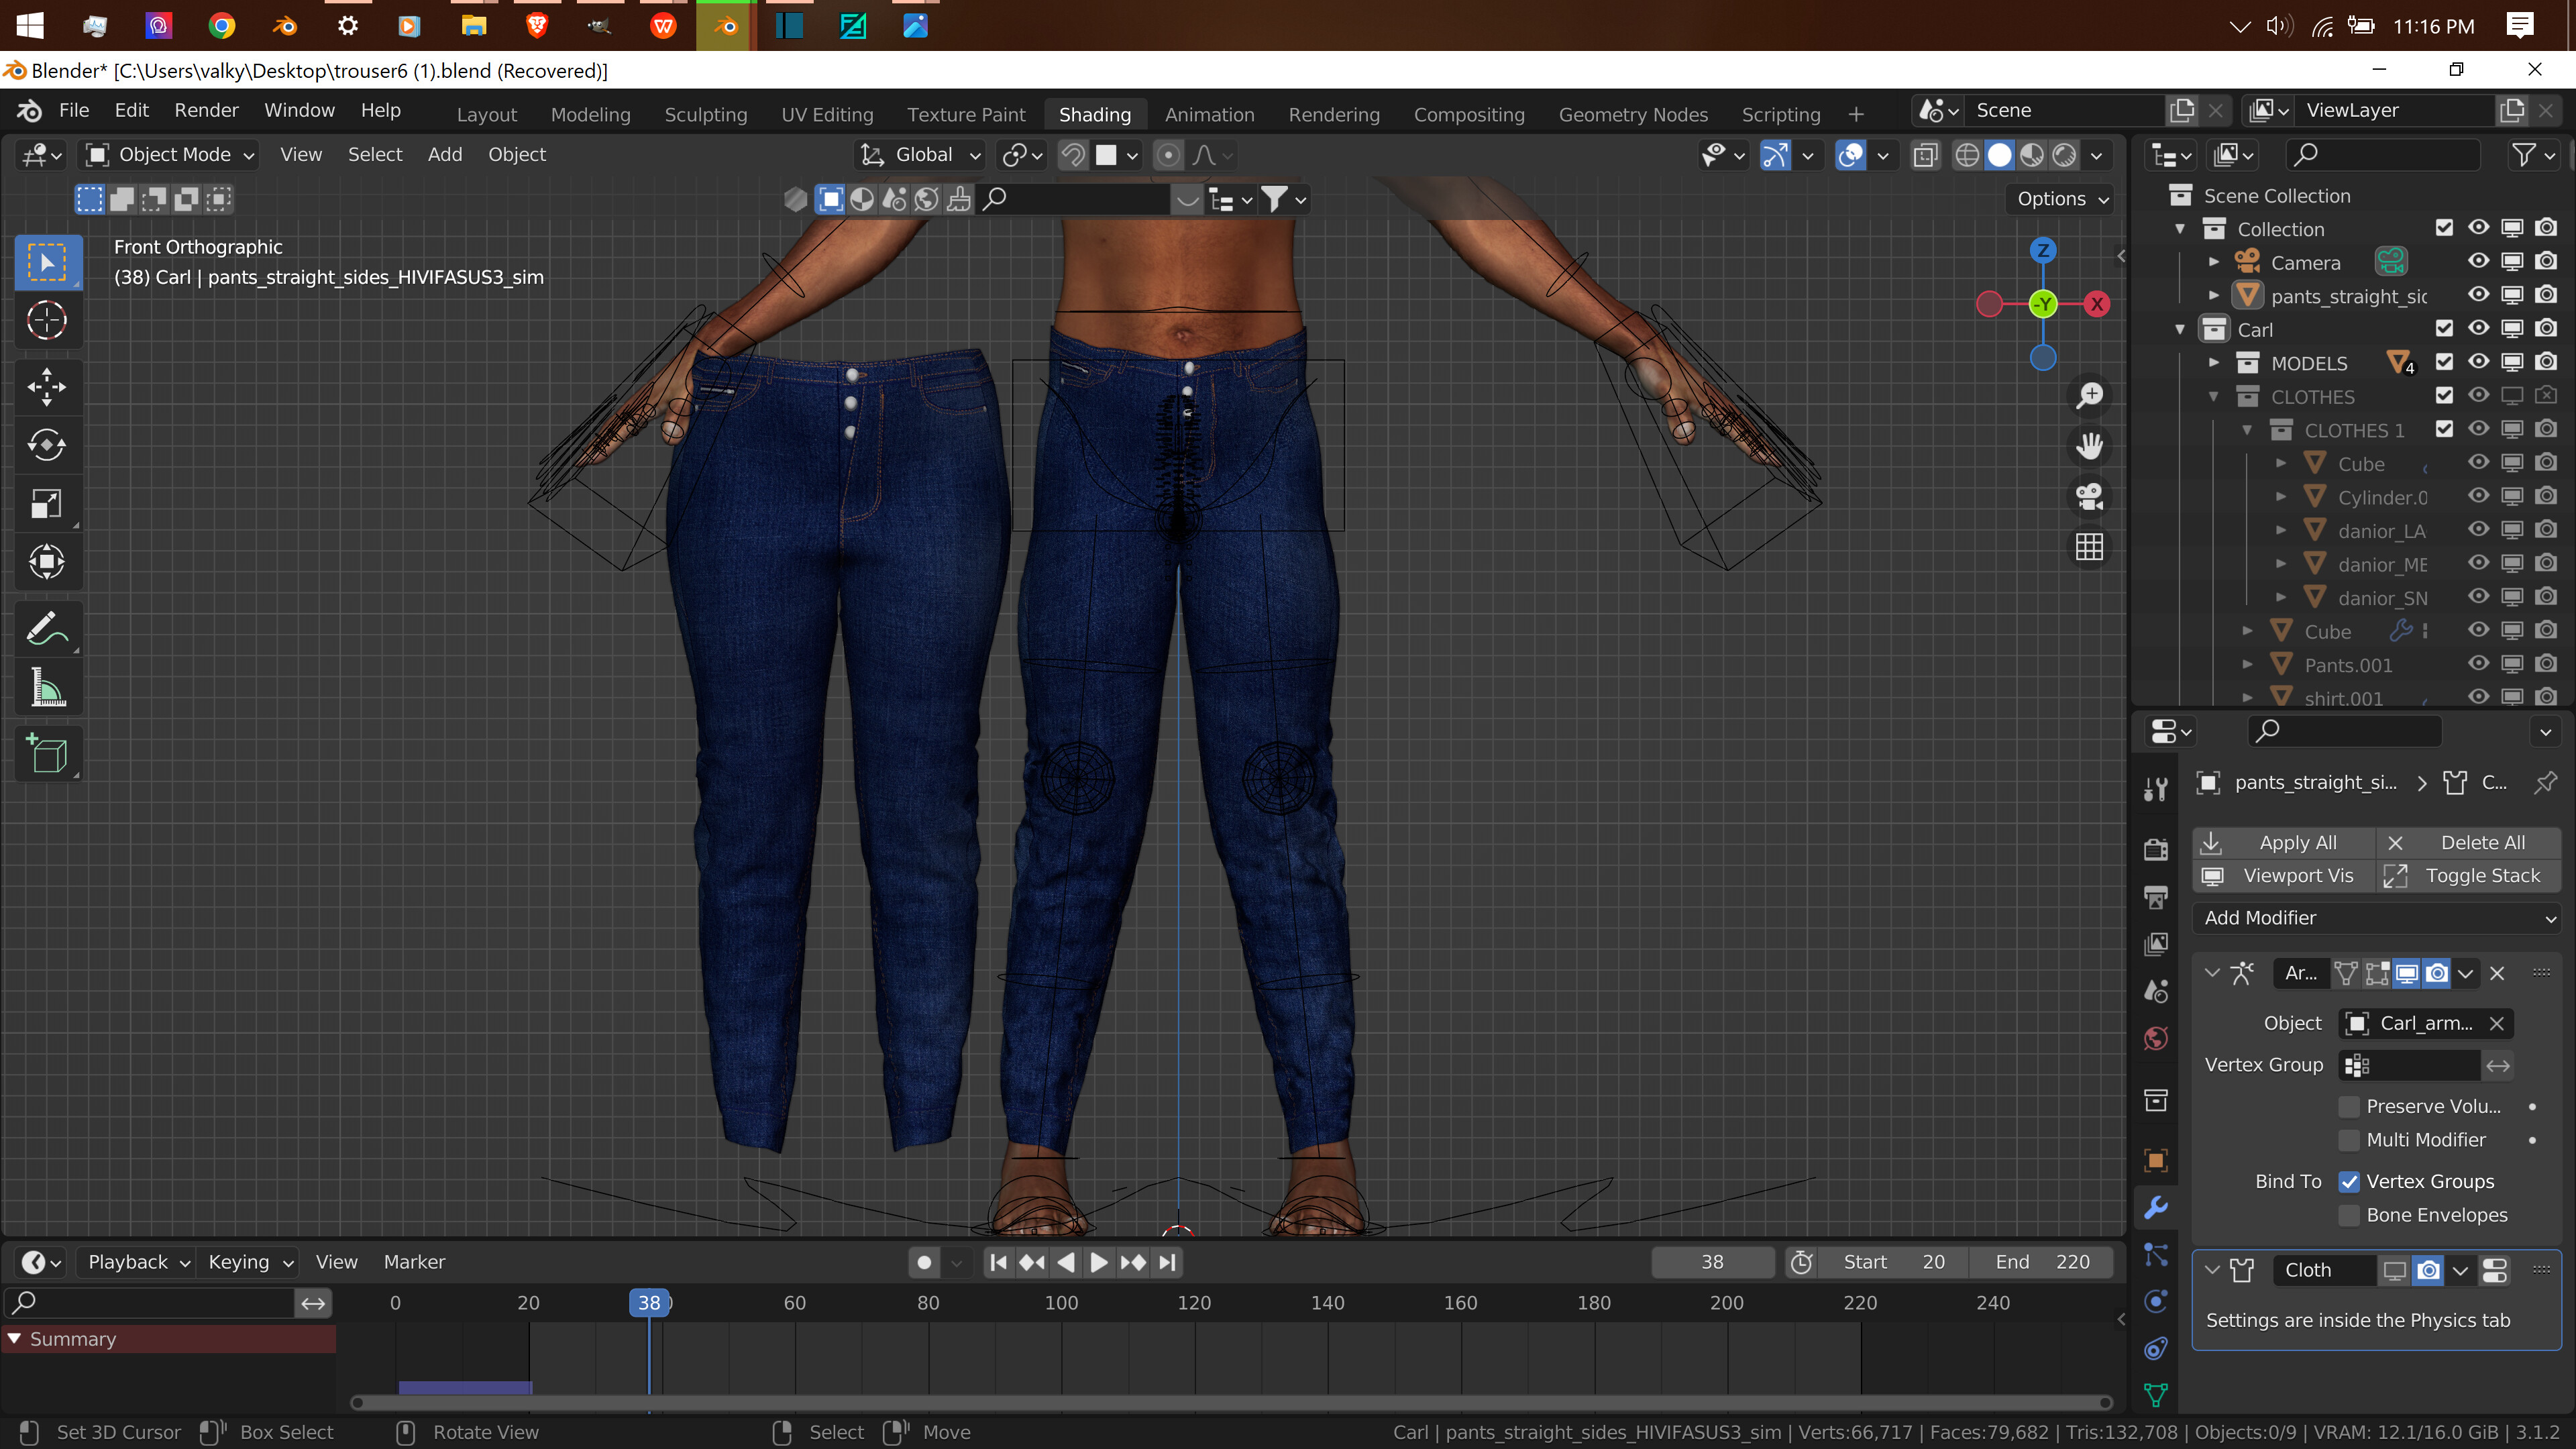
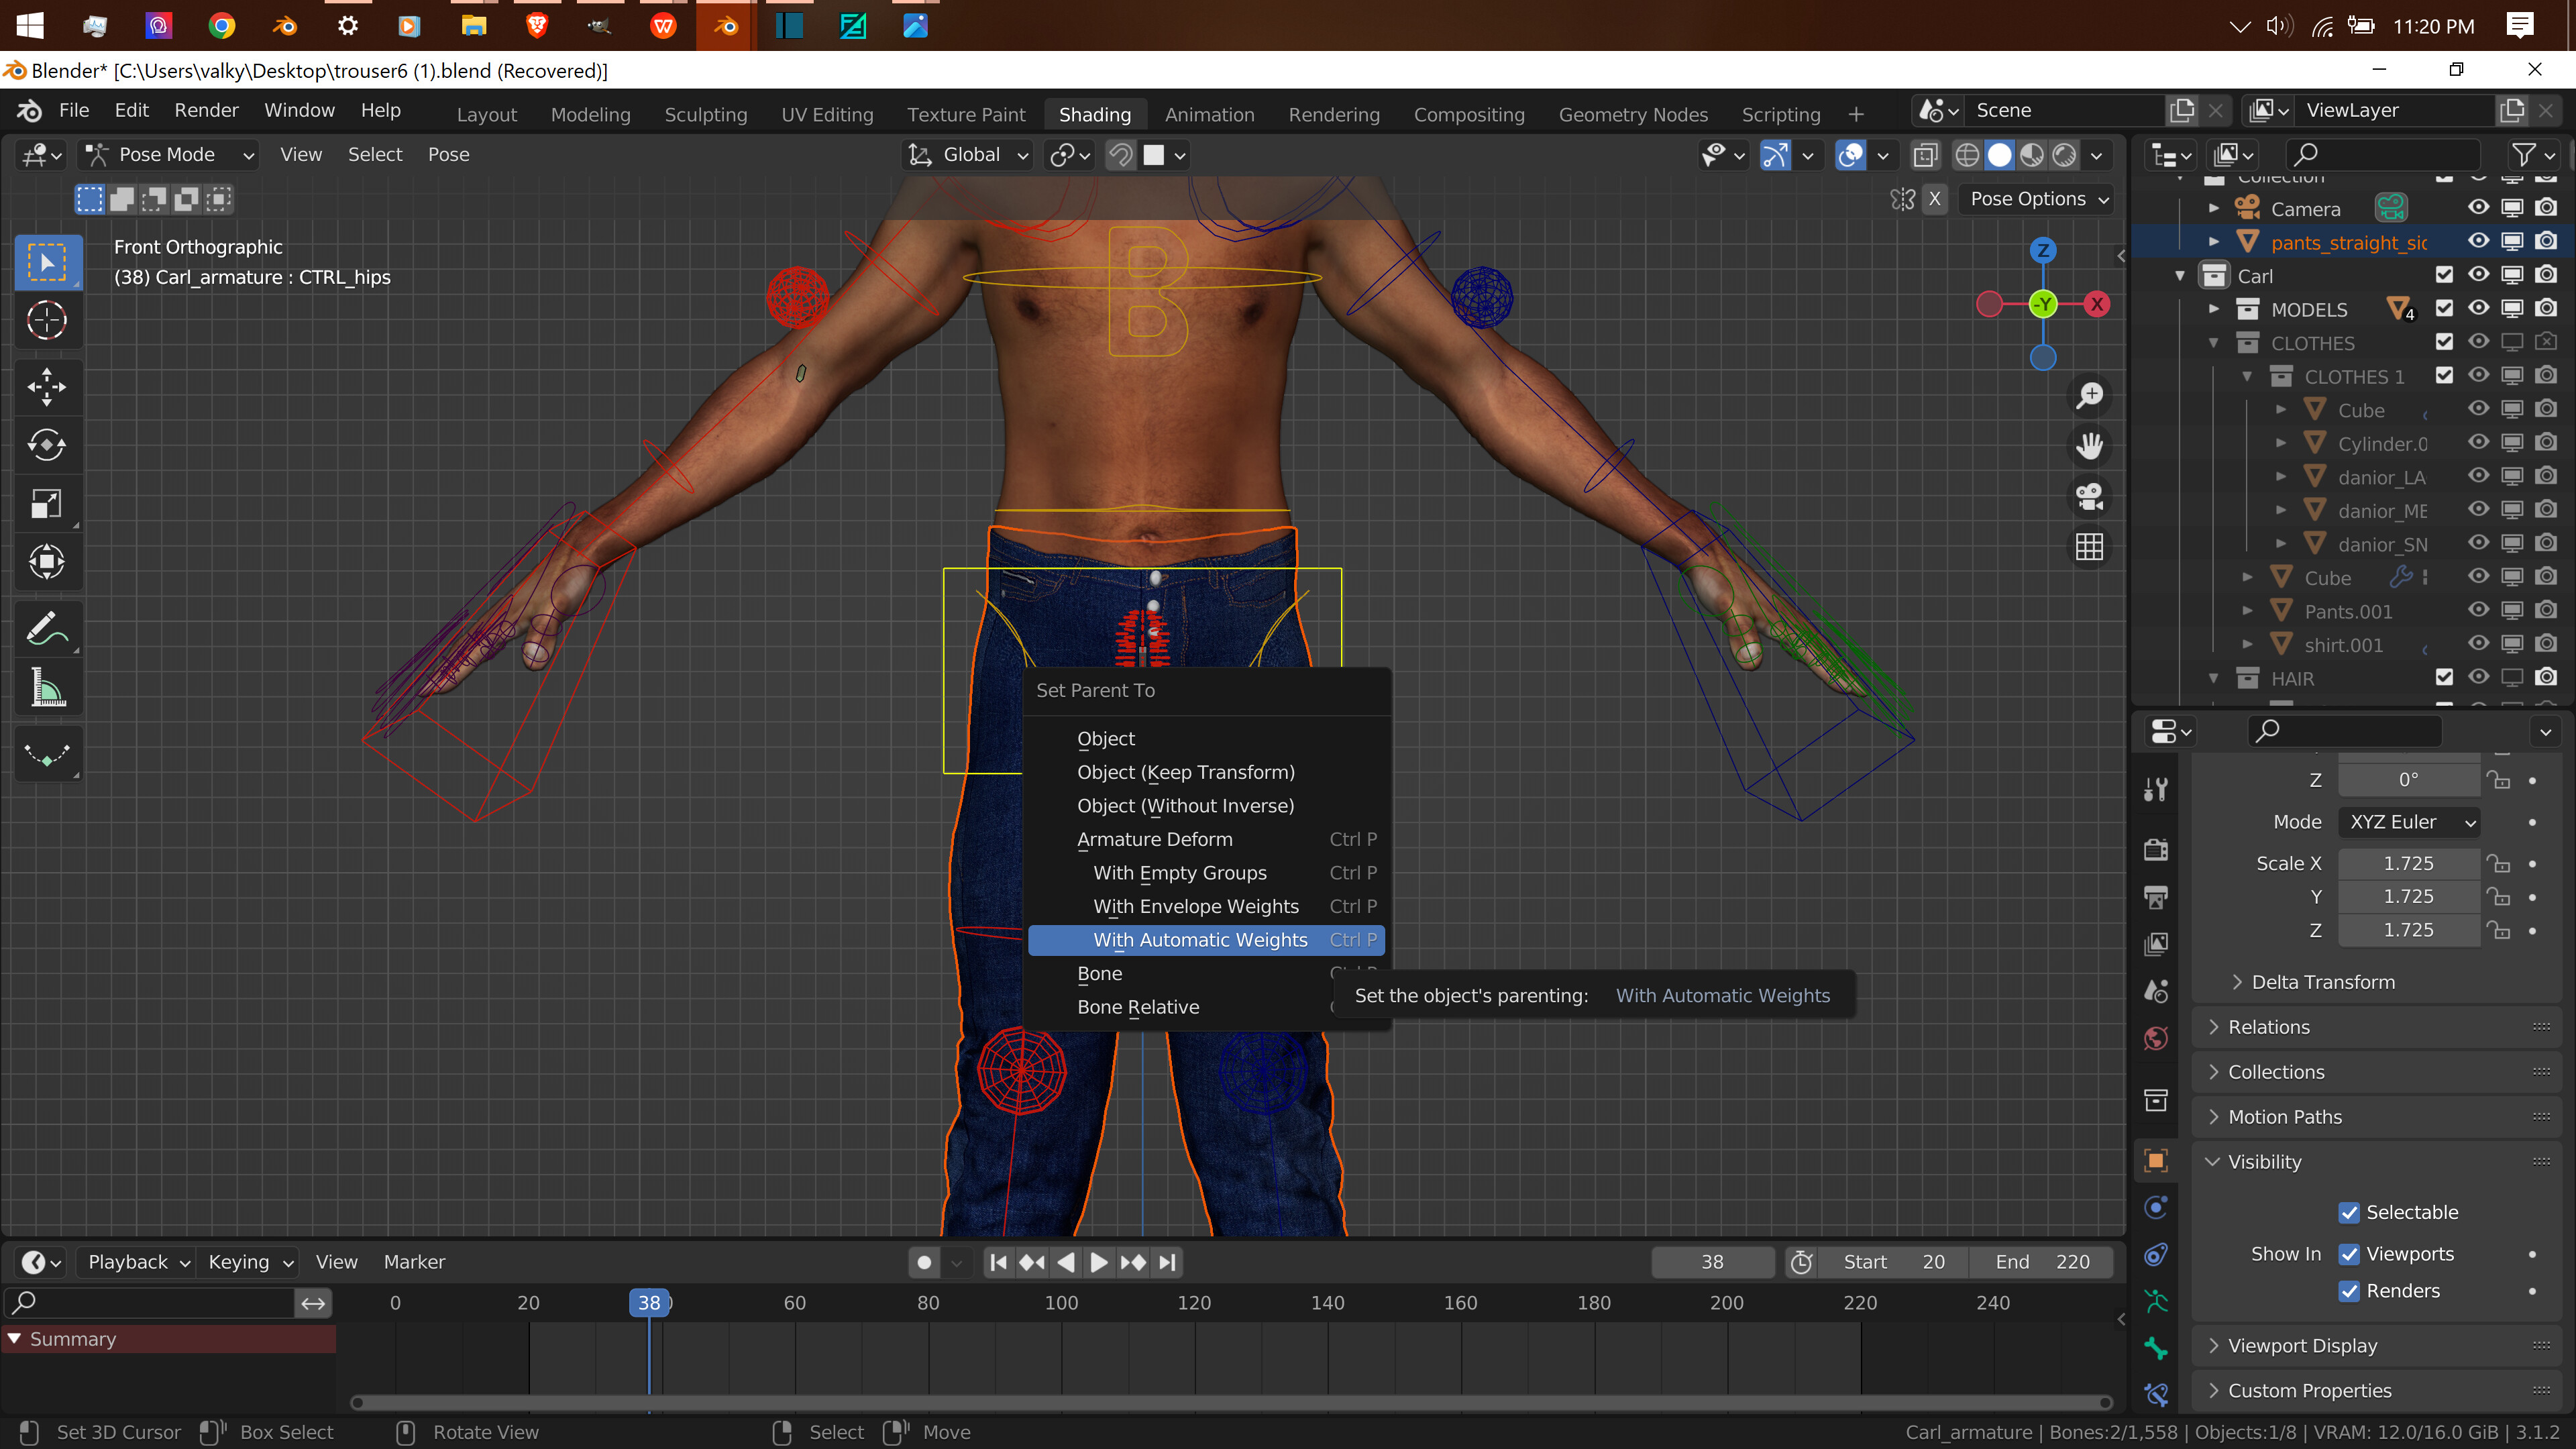
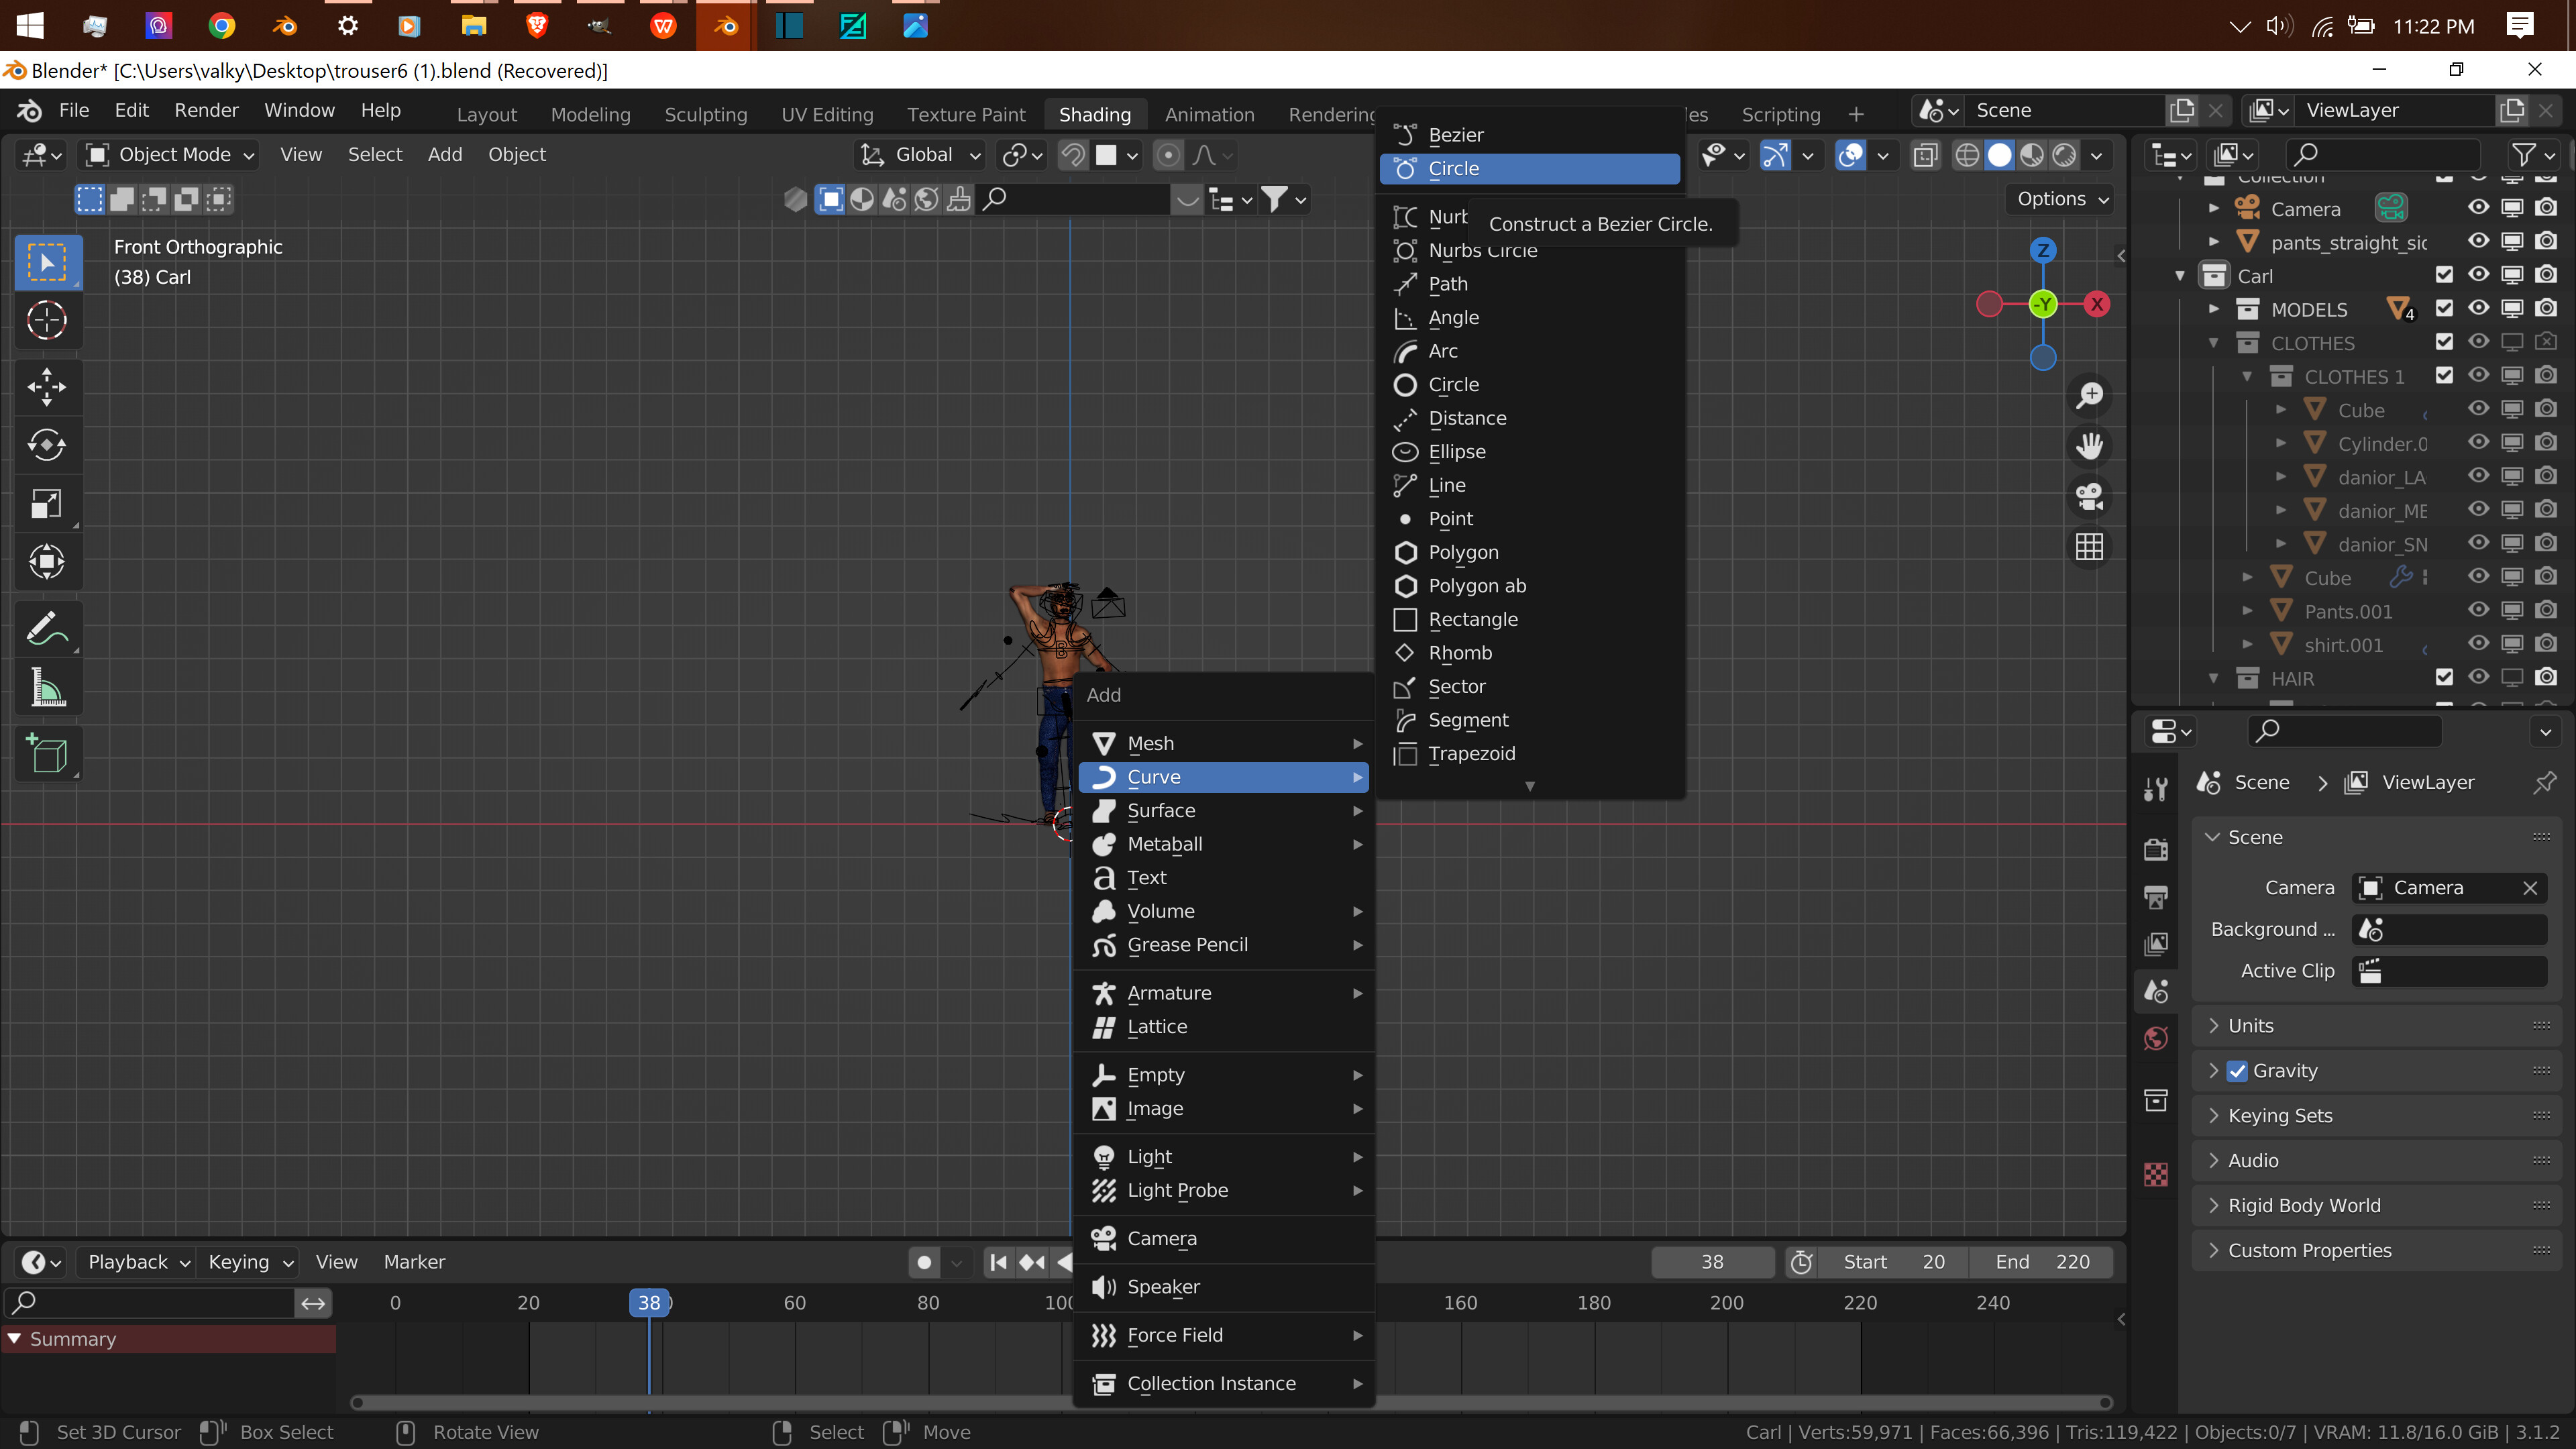
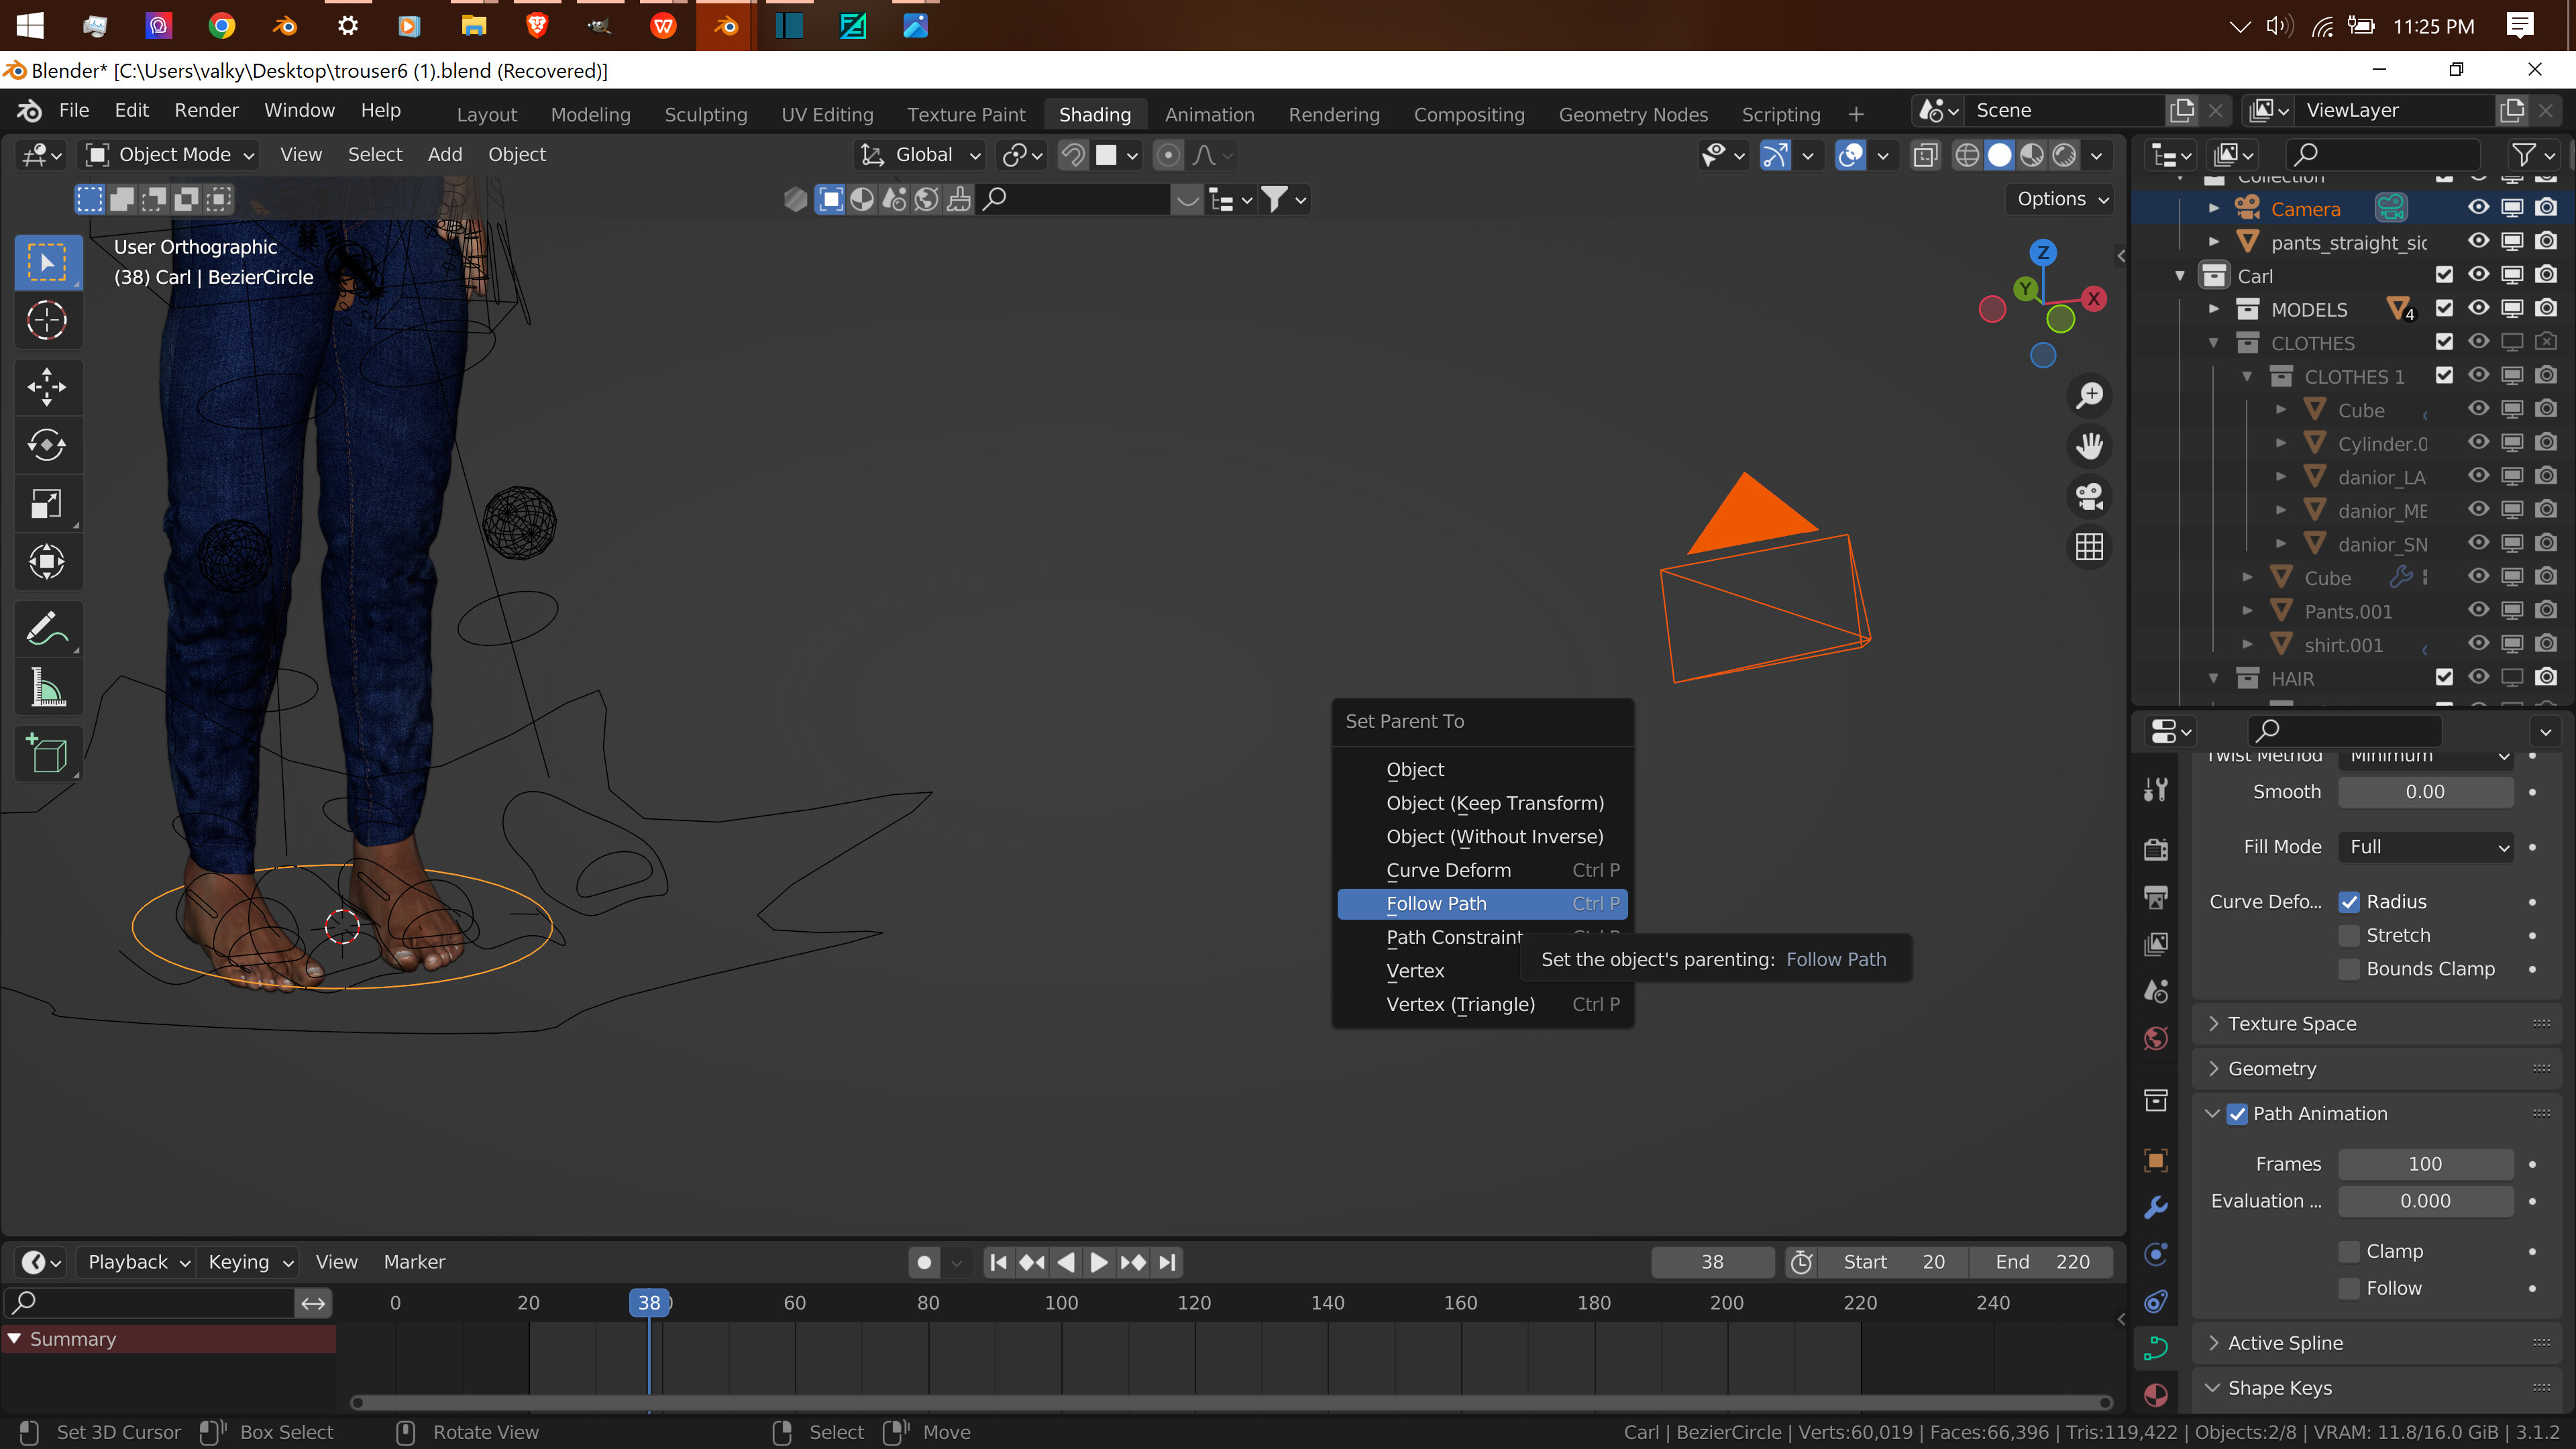
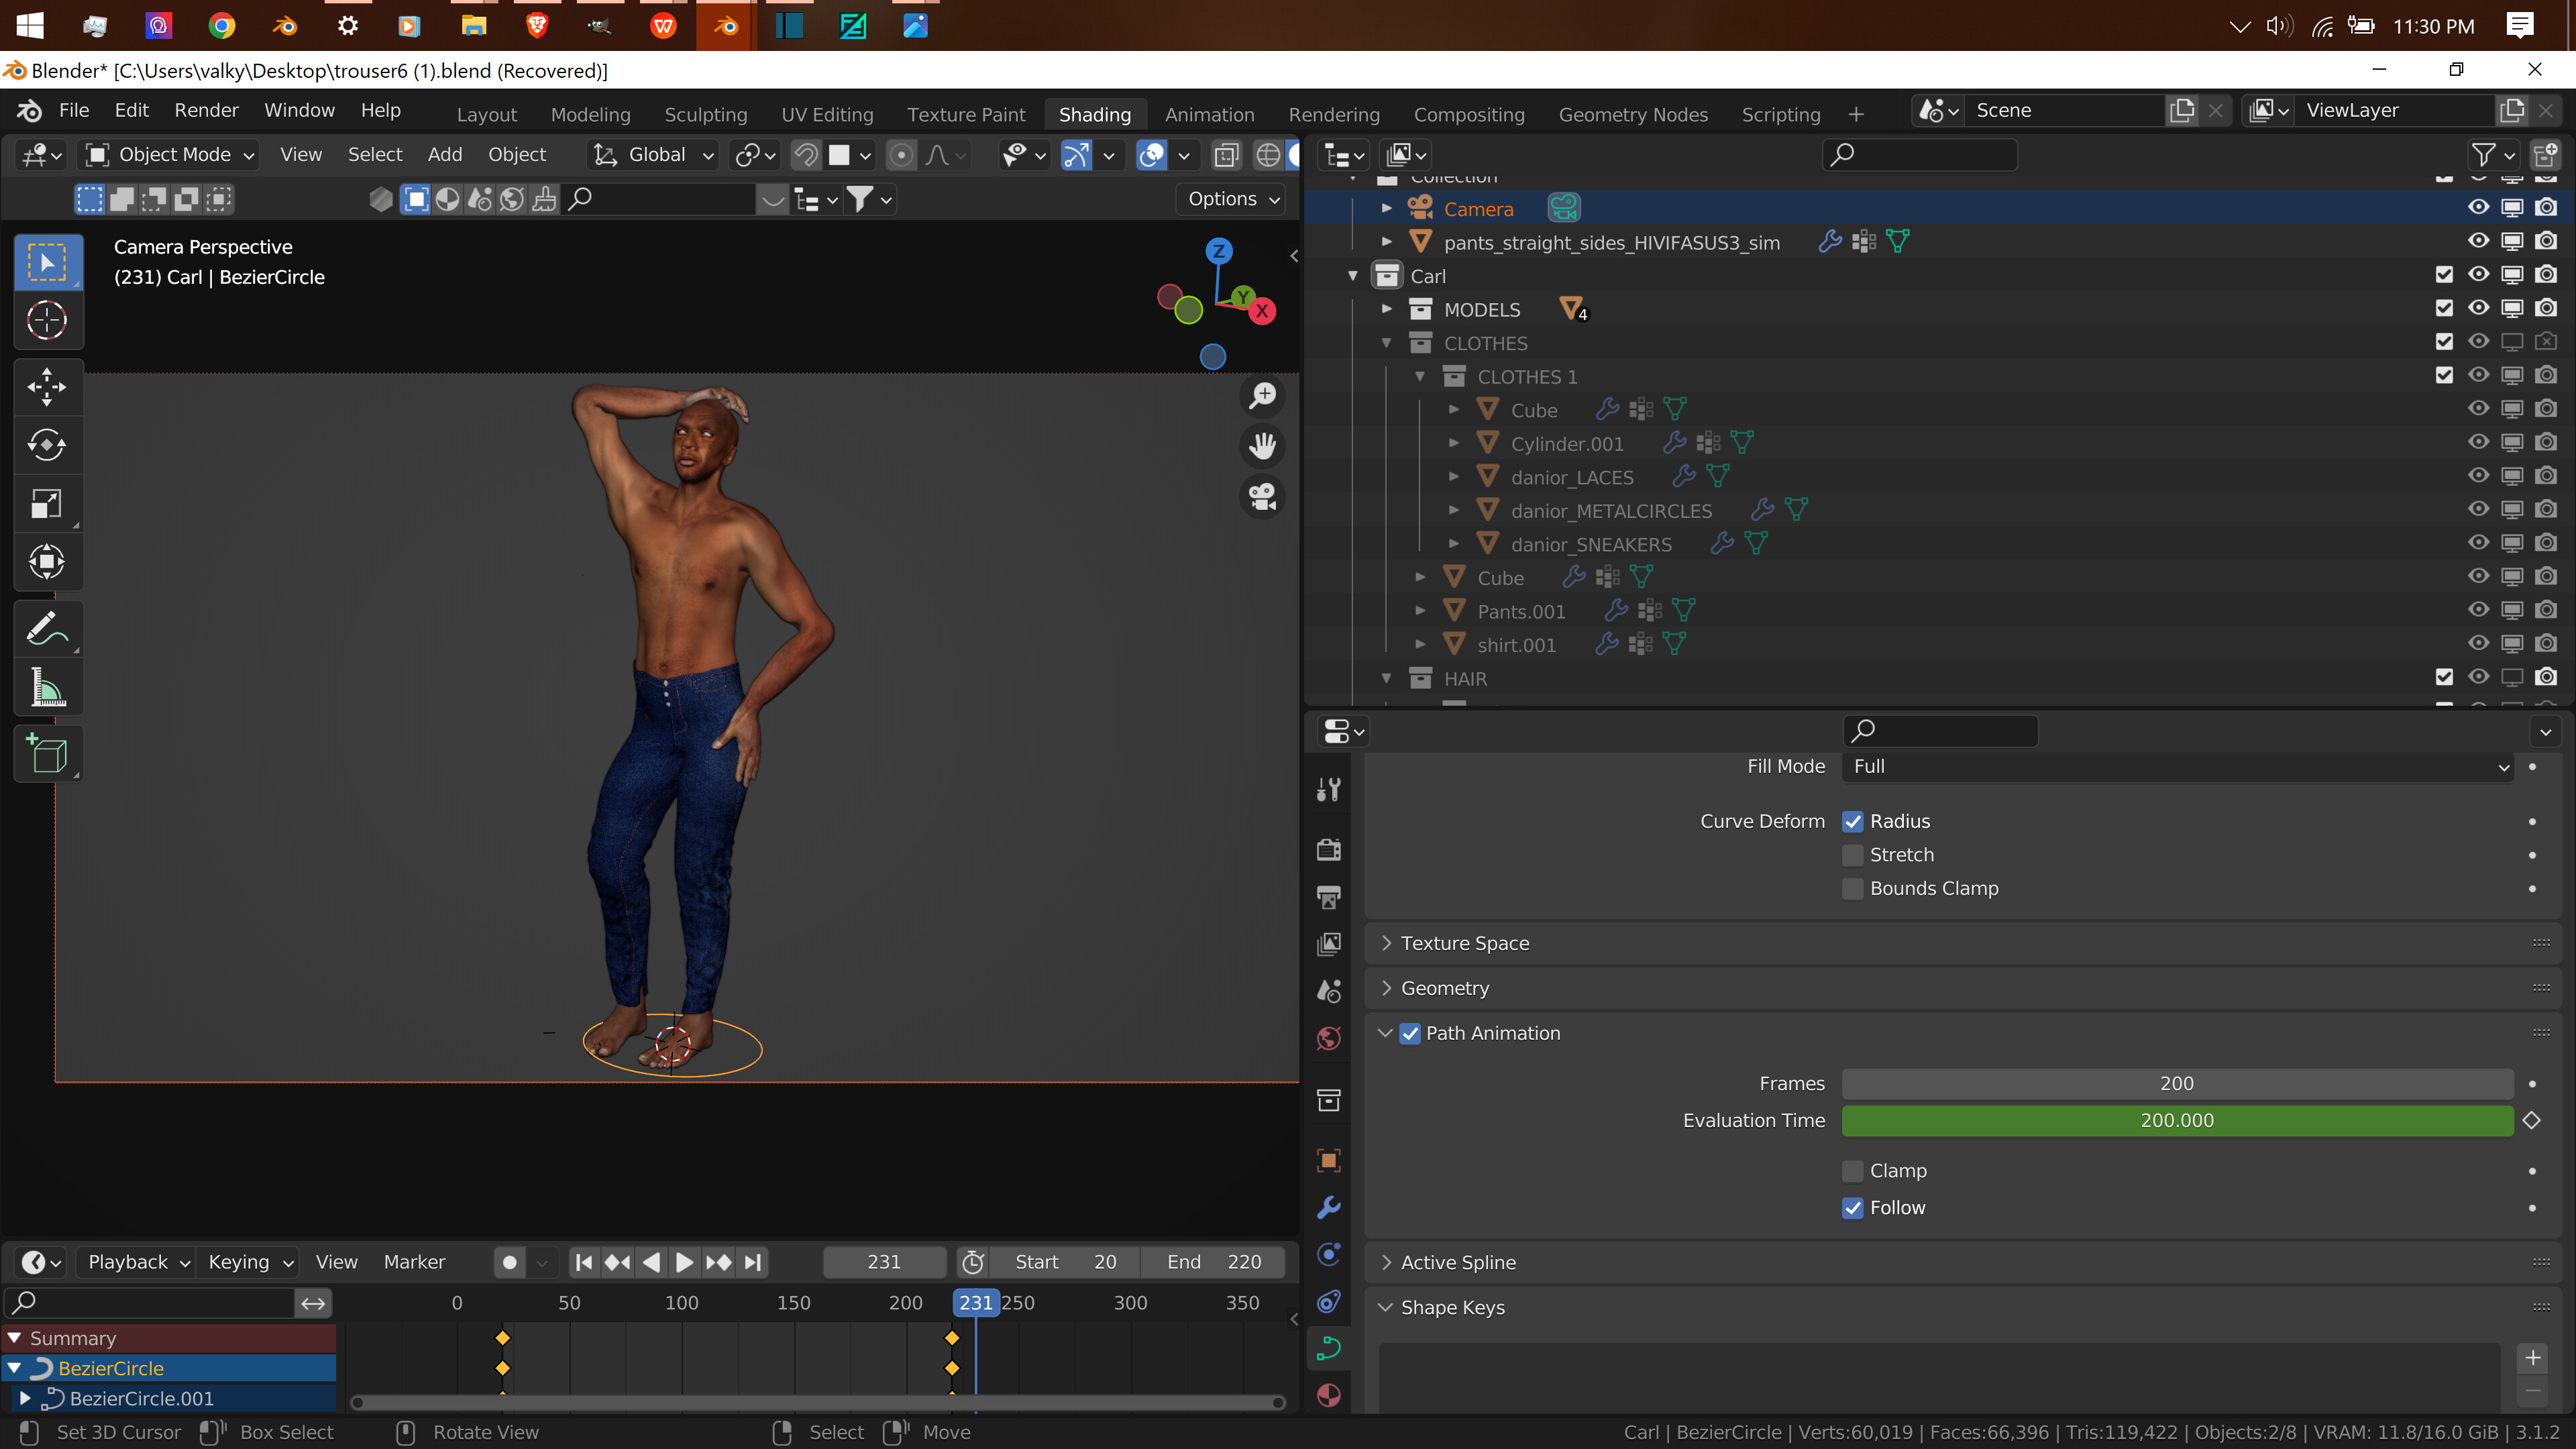
I would make a copy of the jeans (so you always have the original to go back to) adjust the copy to fit whatever mannequin you end up using, then auto weight it to the same rig as the mannequin, if you’re planning on using a rig to pose it. Then create a pose. Add a bezier circle. The origin of the rig and the origin of the circle should be in the same place. Set your camera to the view you want, then select the camera, Shift select the circle, CTRL P: Follow Path.
The camera should now travel around the circle, and thus your model in a circle. I find it easier than rotating the model.
The end result should be something like this:
If you are becoming the company expert on clothing, it might help to watch these two new tutorials…


Good luck with the learning.
Is there any way you could break down the steps with photos for me? ![]() I’ve never down this before. Your words all of the sound from another planet all together
I’ve never down this before. Your words all of the sound from another planet all together ![]()
![]()
![]()
Make a copy of your jeans so you have the original to go back to if something goes wrong.
select your mannequin (In my case a model I had handy) And adjust the jeans to fit.
Parent the jeans to the same rig as the mannequin (If you’re planning on posing it) I used autoweights. Select the Jeans, then shift select the rig: CTRL P: With automatic weights
Pose your model.
Add a bezier circle: Shift A: Curves: Bezier Circle
Set your camera to the view you want. I like to us "Lock Camera To View) for this step. Just remember to turn it off once you’re happy with the view.
Select your camera, then Shift select your circle. Parent the camera to the circle, using Follow Path
Set your animation length in the “Path Amination” section of the object data tab of the curve.
Go into camera view and play back your animation to make sure it works the way you want.
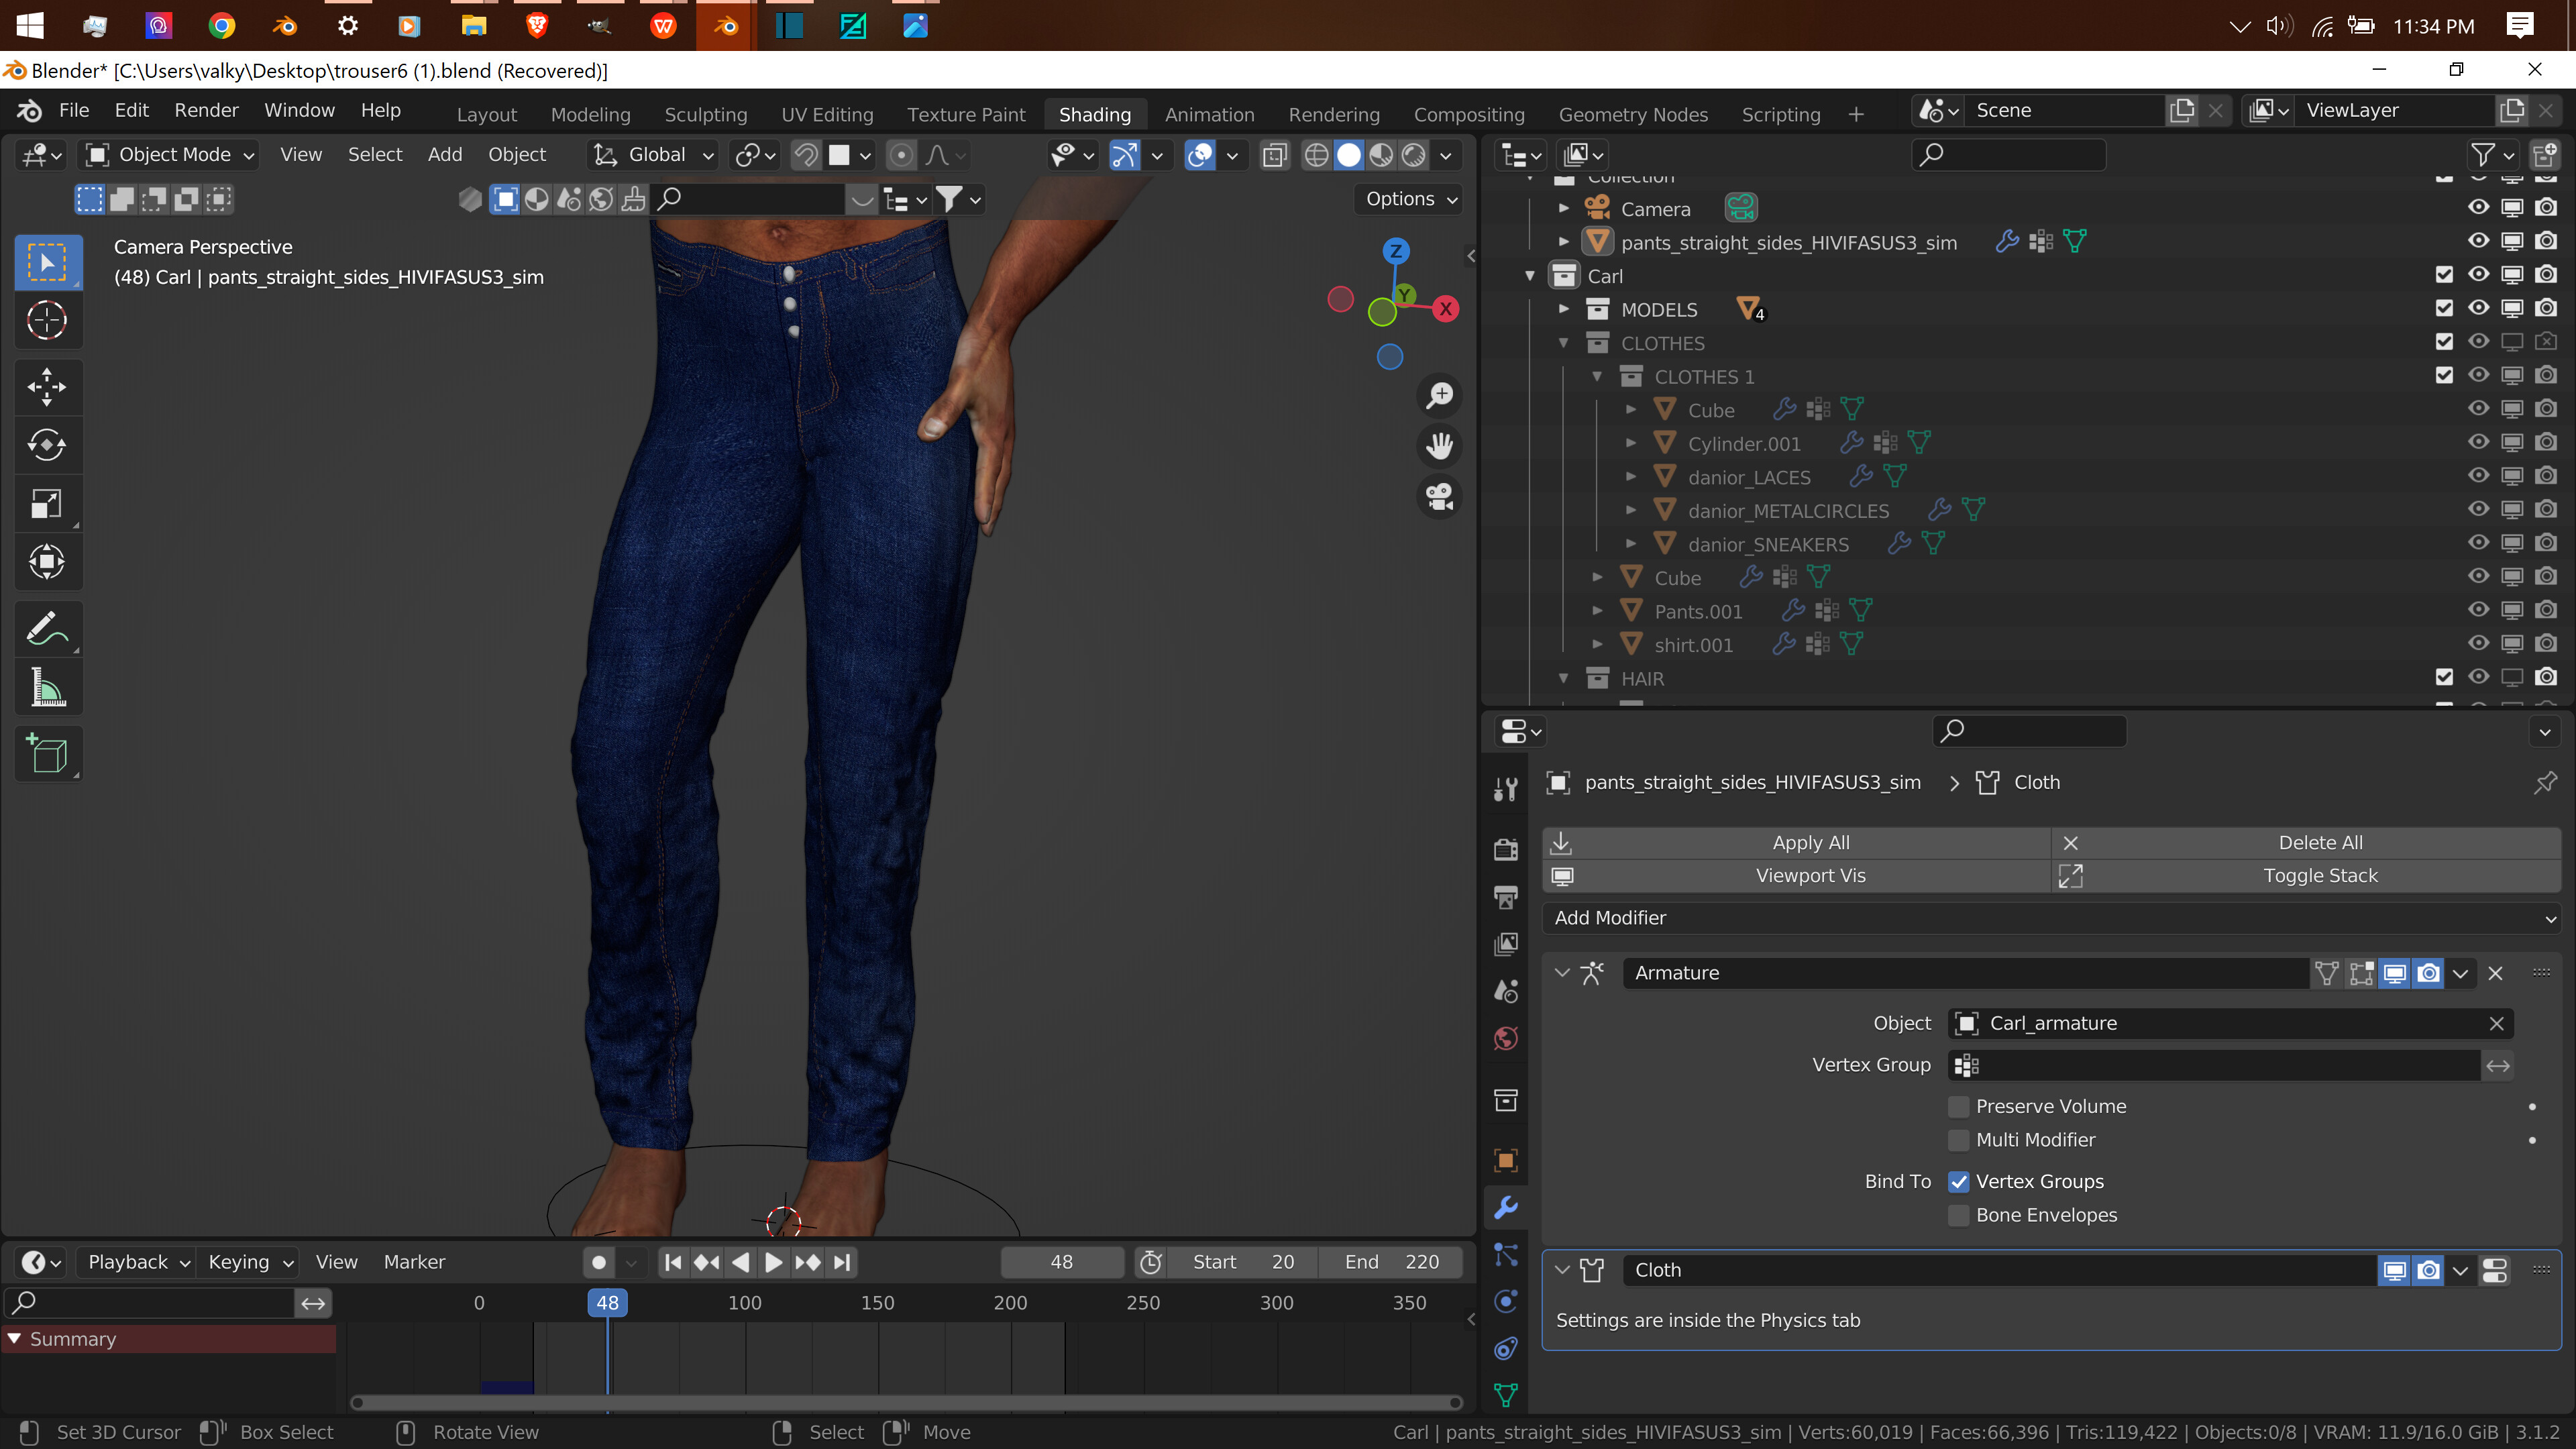
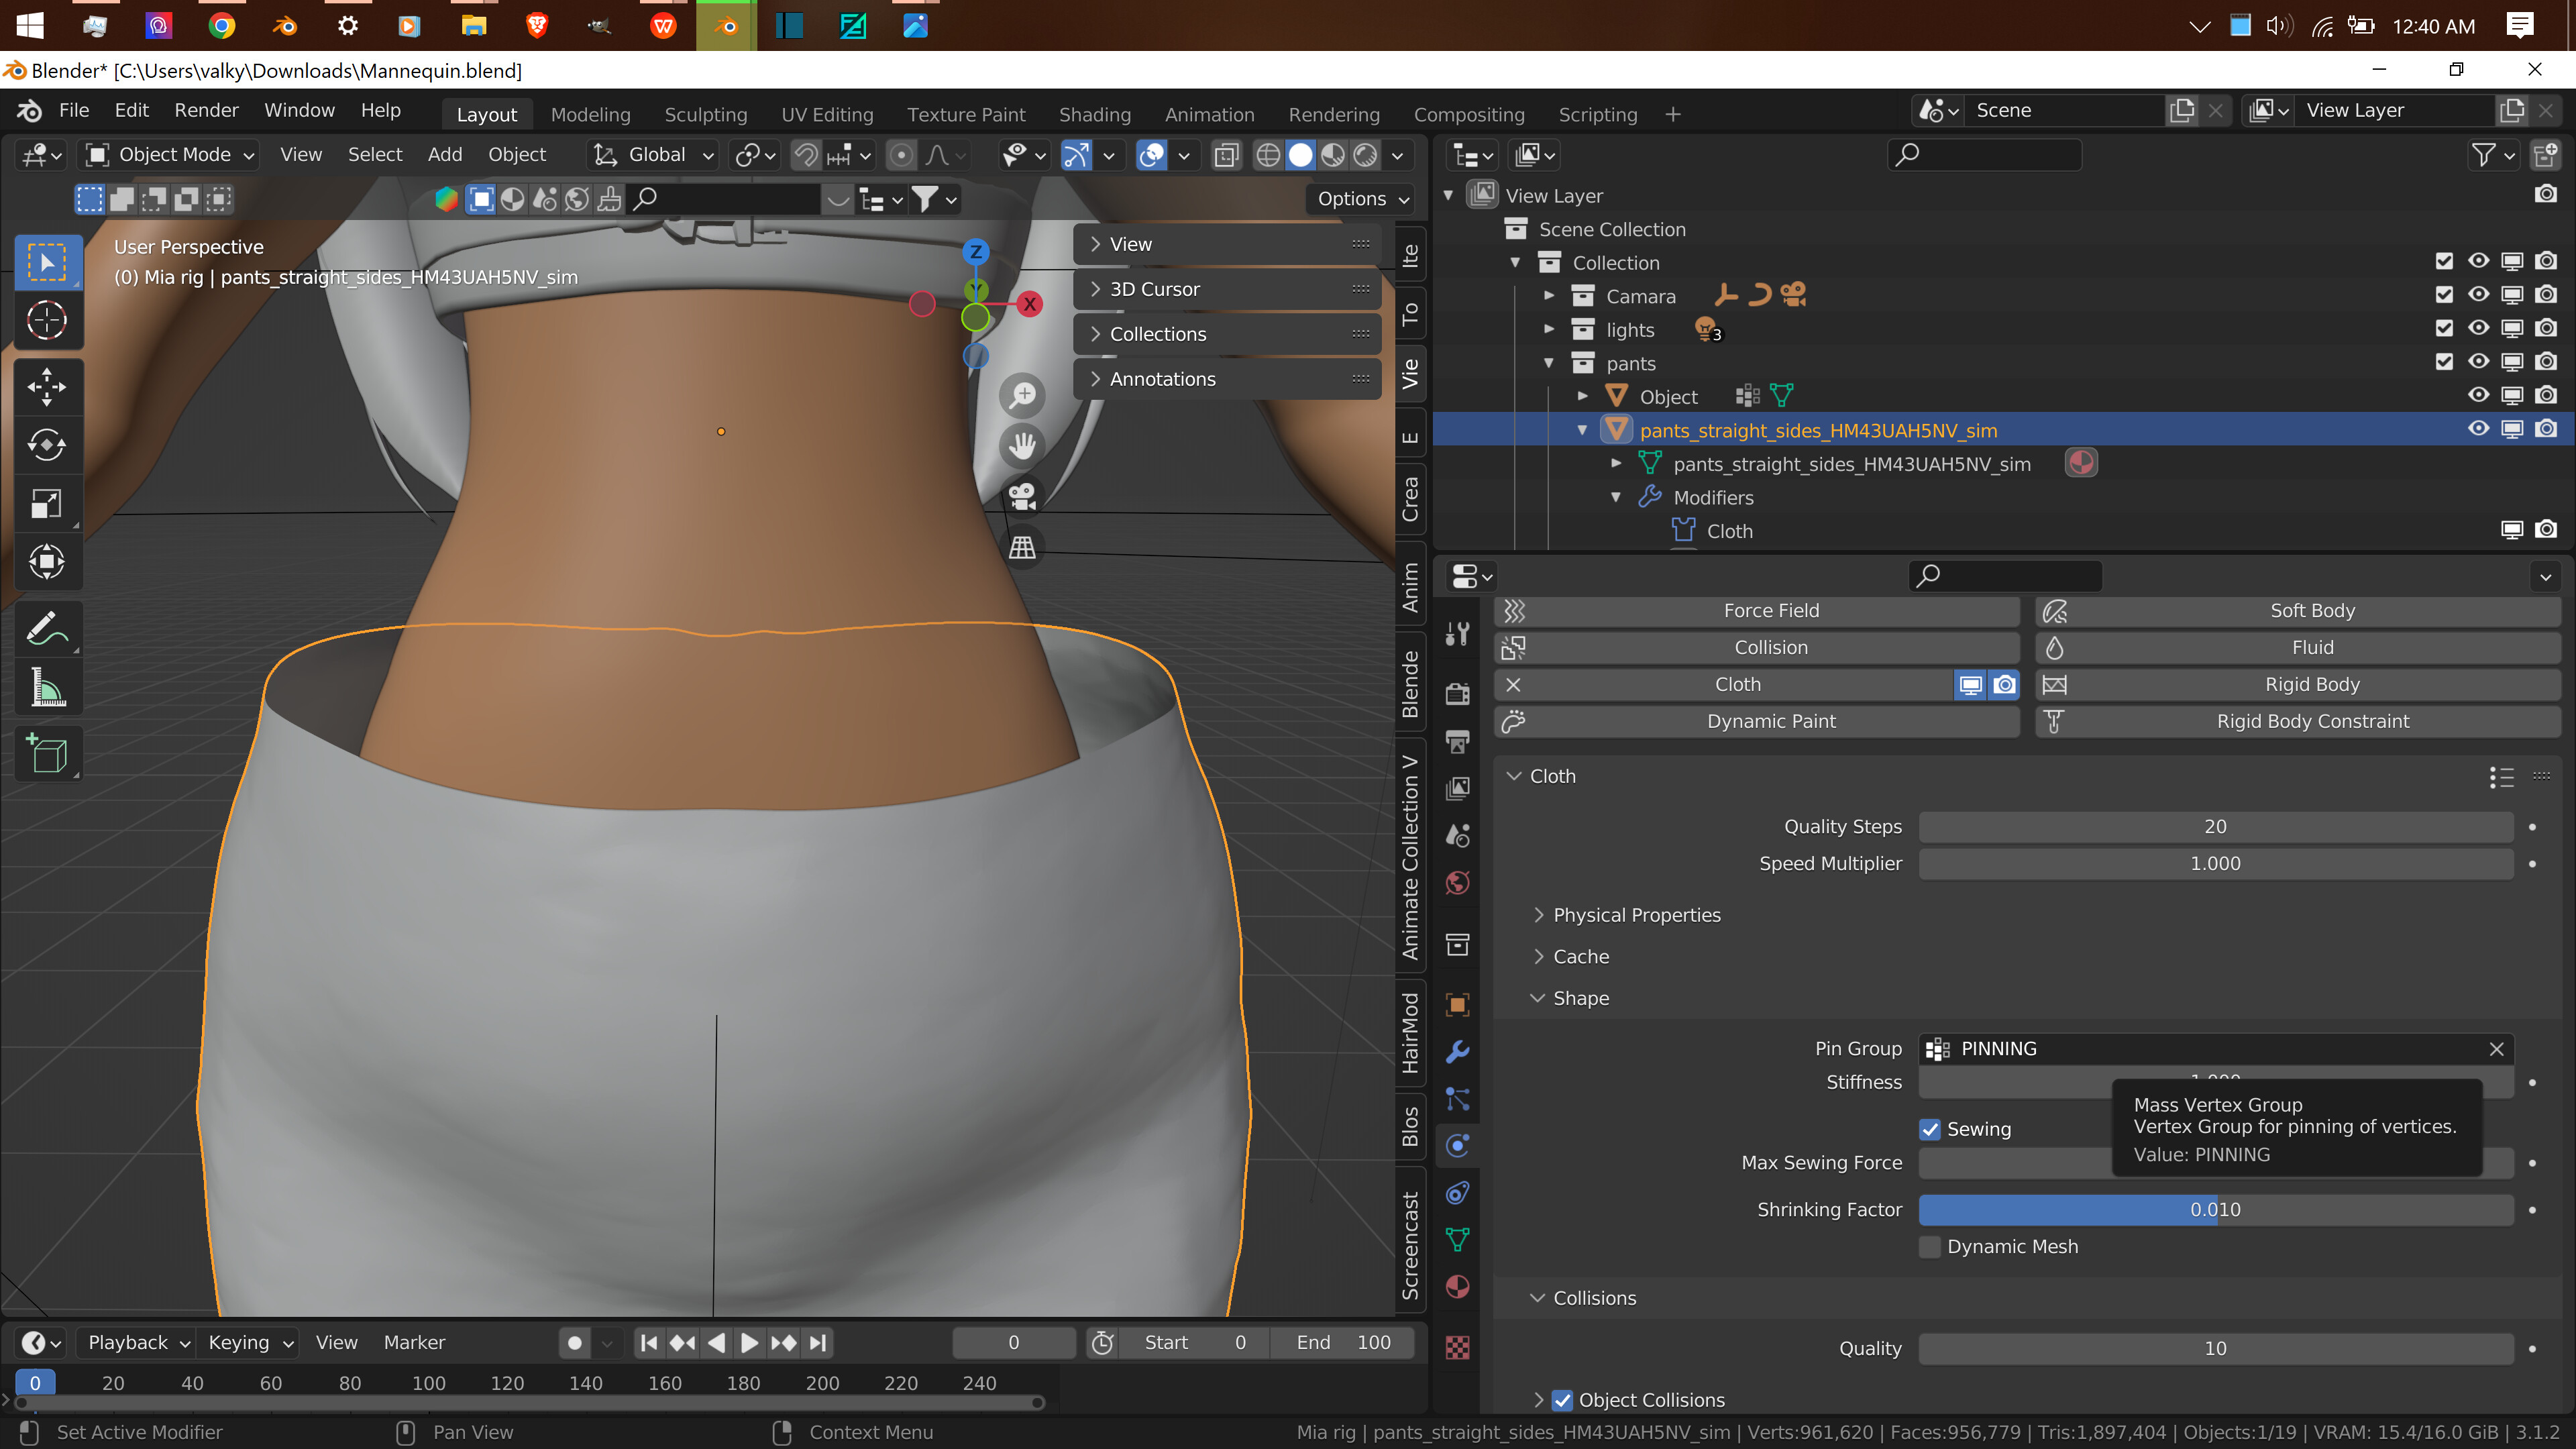
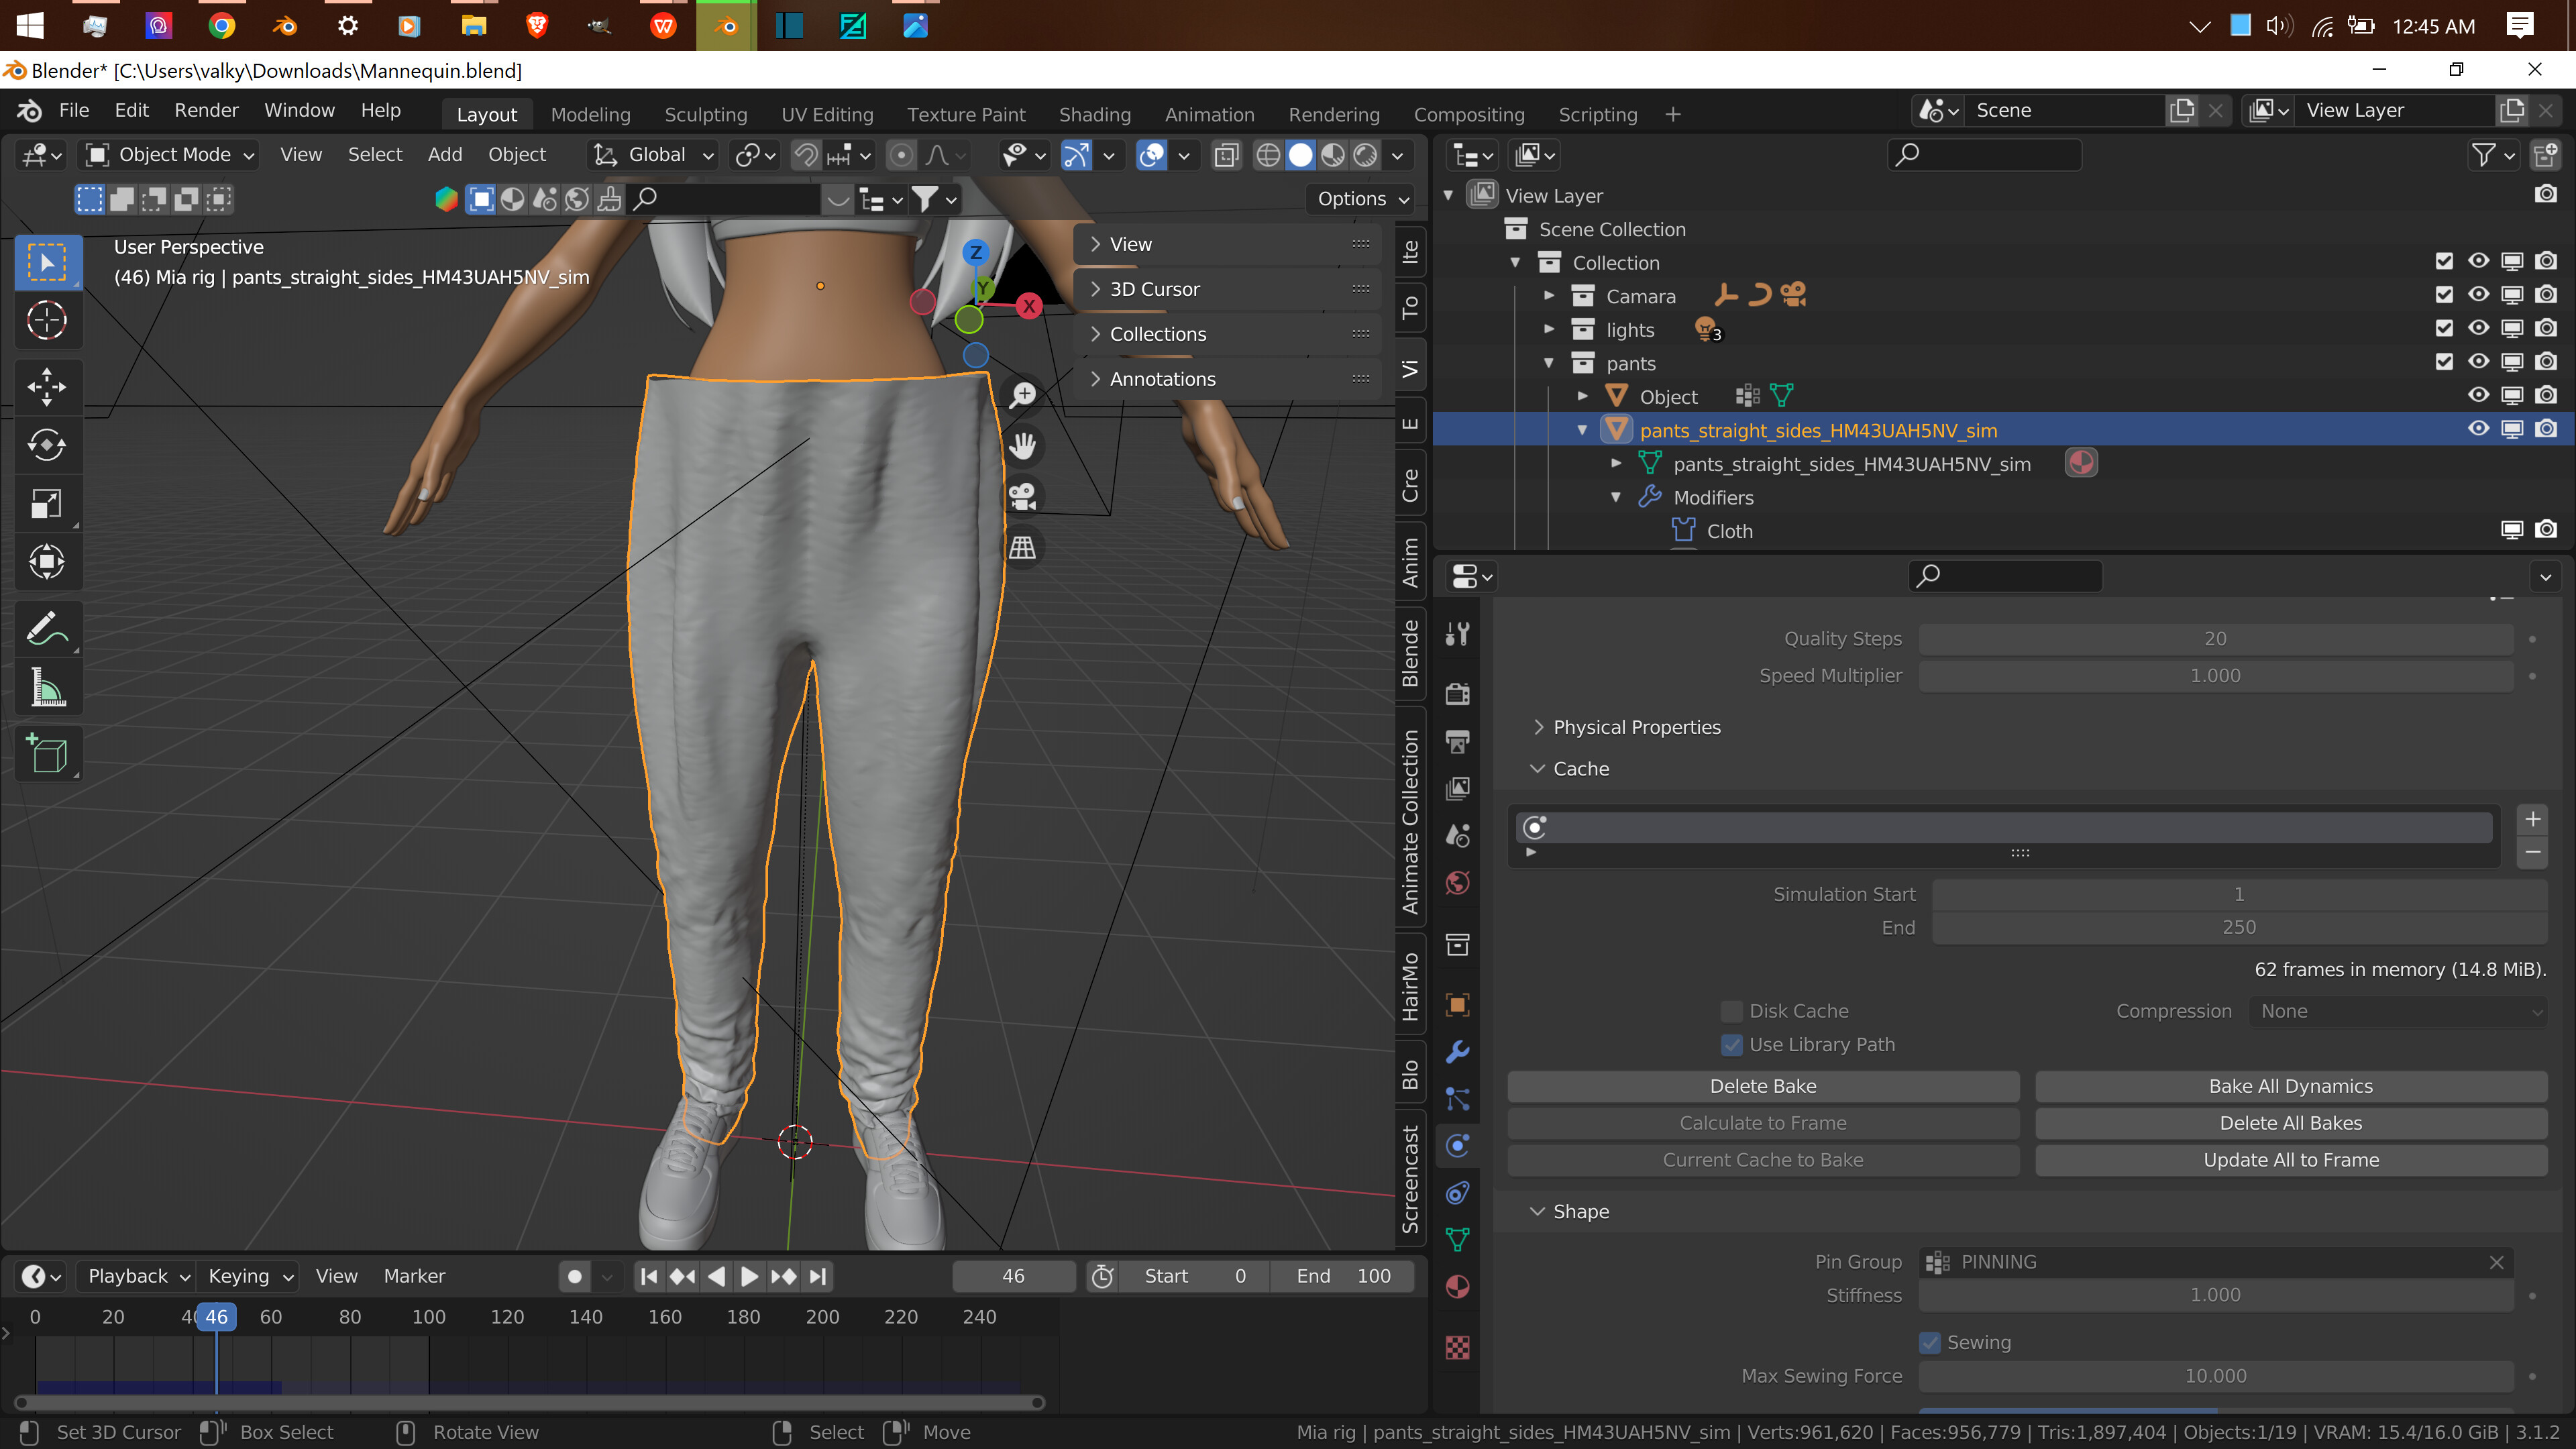
Optional: I ran a quick cloth sim on the pants, using the top row of verts in the waistband as a pin group. I think it looks better, but if it’s not what you need skipping this step shouldn’t hurt anything.
Set up your lighting. I used an HDRI in the world shader. If you use one, set Film to Transparent in the Render Properties, unless you want the HDRI to show in the background.
Render your animation (The video from my last post shows my results. I don’t want to double post it)
Thxxxxxxxxxxxxxxxxxxxxx ![]()
![]()
![]()
You’re welcome. ![]()
Helpppppppp. I was fine until step number 4. As soon as I added Cloth, my model started stripping down. No matter what value I change, jeans do not stick to the model.
Would you please take a look at it for me?
jeans with model
Select the top loop of vertices and assign them to a group. Name it whatever you want. I like Pin, or Pinning.
Put the group you just made in the Pin Group slot of the Shape section under cloth physics.
It should now bake as expected.
It may be easier to adjust the jeans to fit the model before adding cloth sim. Definitely do it before Baking the sim.
I only had the cloth sim modifier in the stack in step 4 because it was still there from when I went through it before taking the screenshots. It’s disabled. When I initially did it, I added the cloth sim at step 10. Sorry for the confusion.
Hiiii,
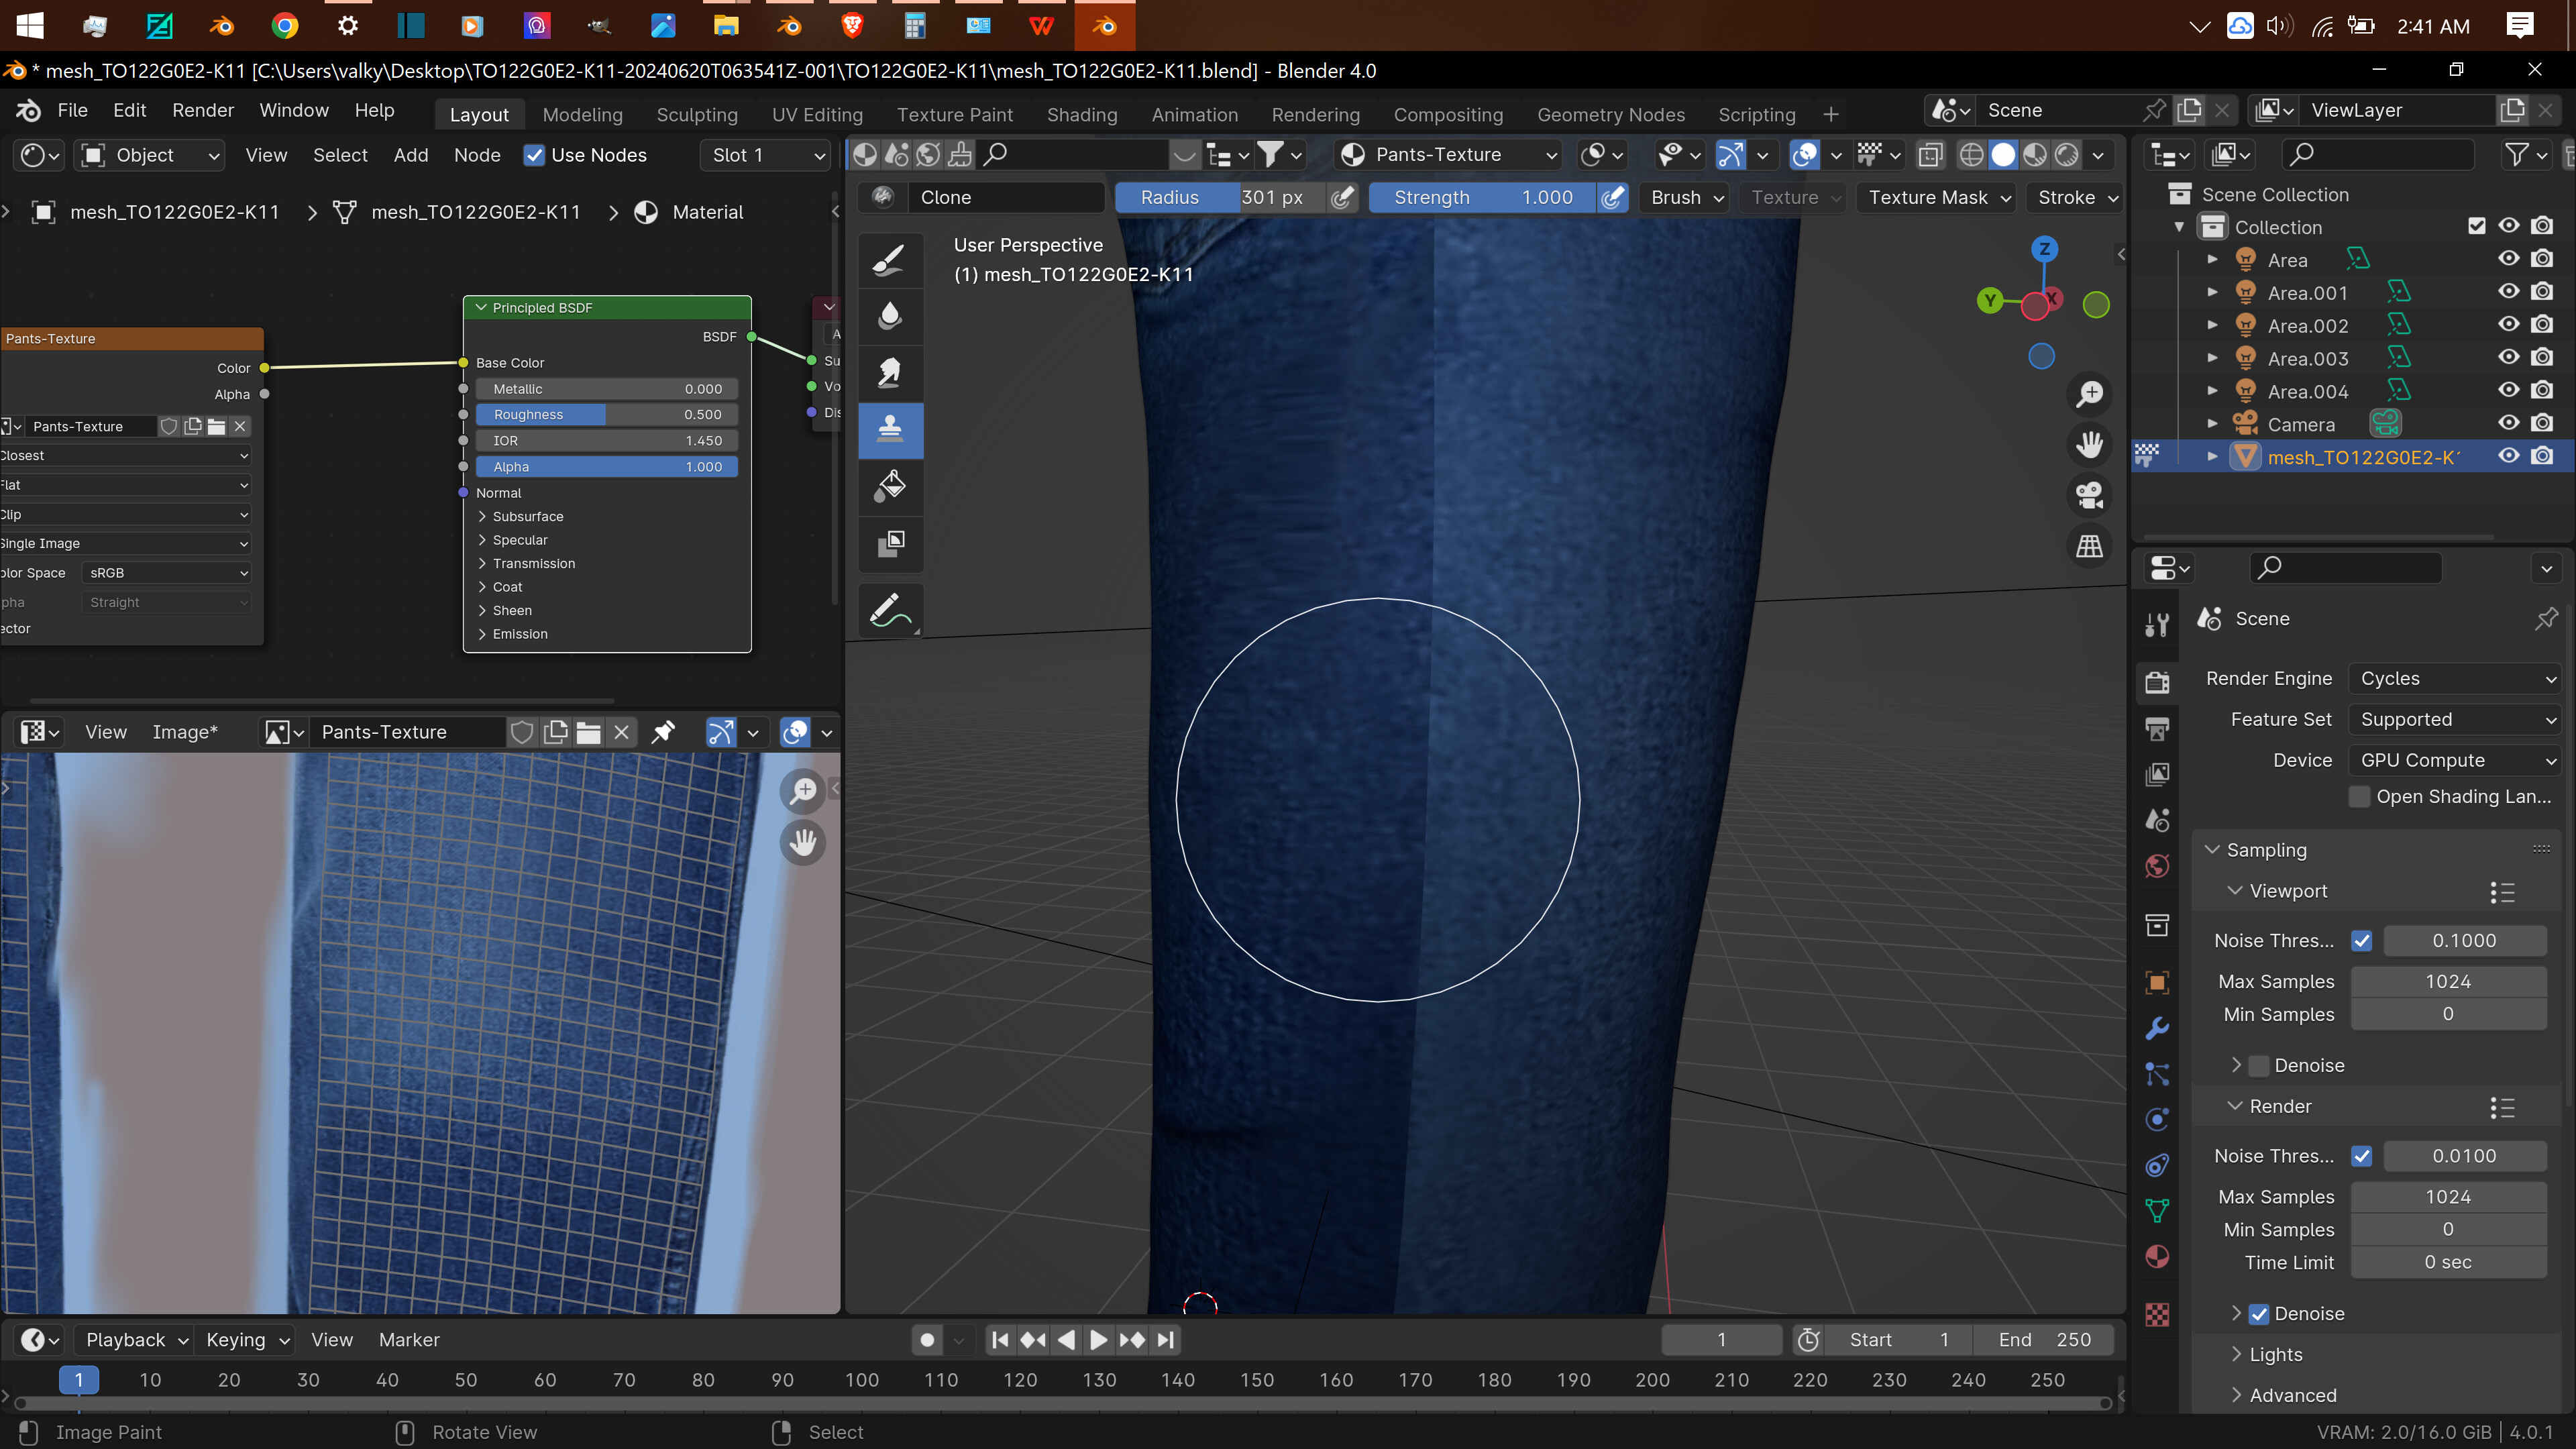
I’m back with another weird issue. I have to texter paint with the image of the jeans on the asset. And the issue is the inconsistent color (dark and light) between the front and back. I repeated the process a few times, using whatever setting I could change. However, the result is the same. Can you plz take a look at it for me? I’m open to any suggestions. ![]()
![]()
![]()
Asset
You mean this?
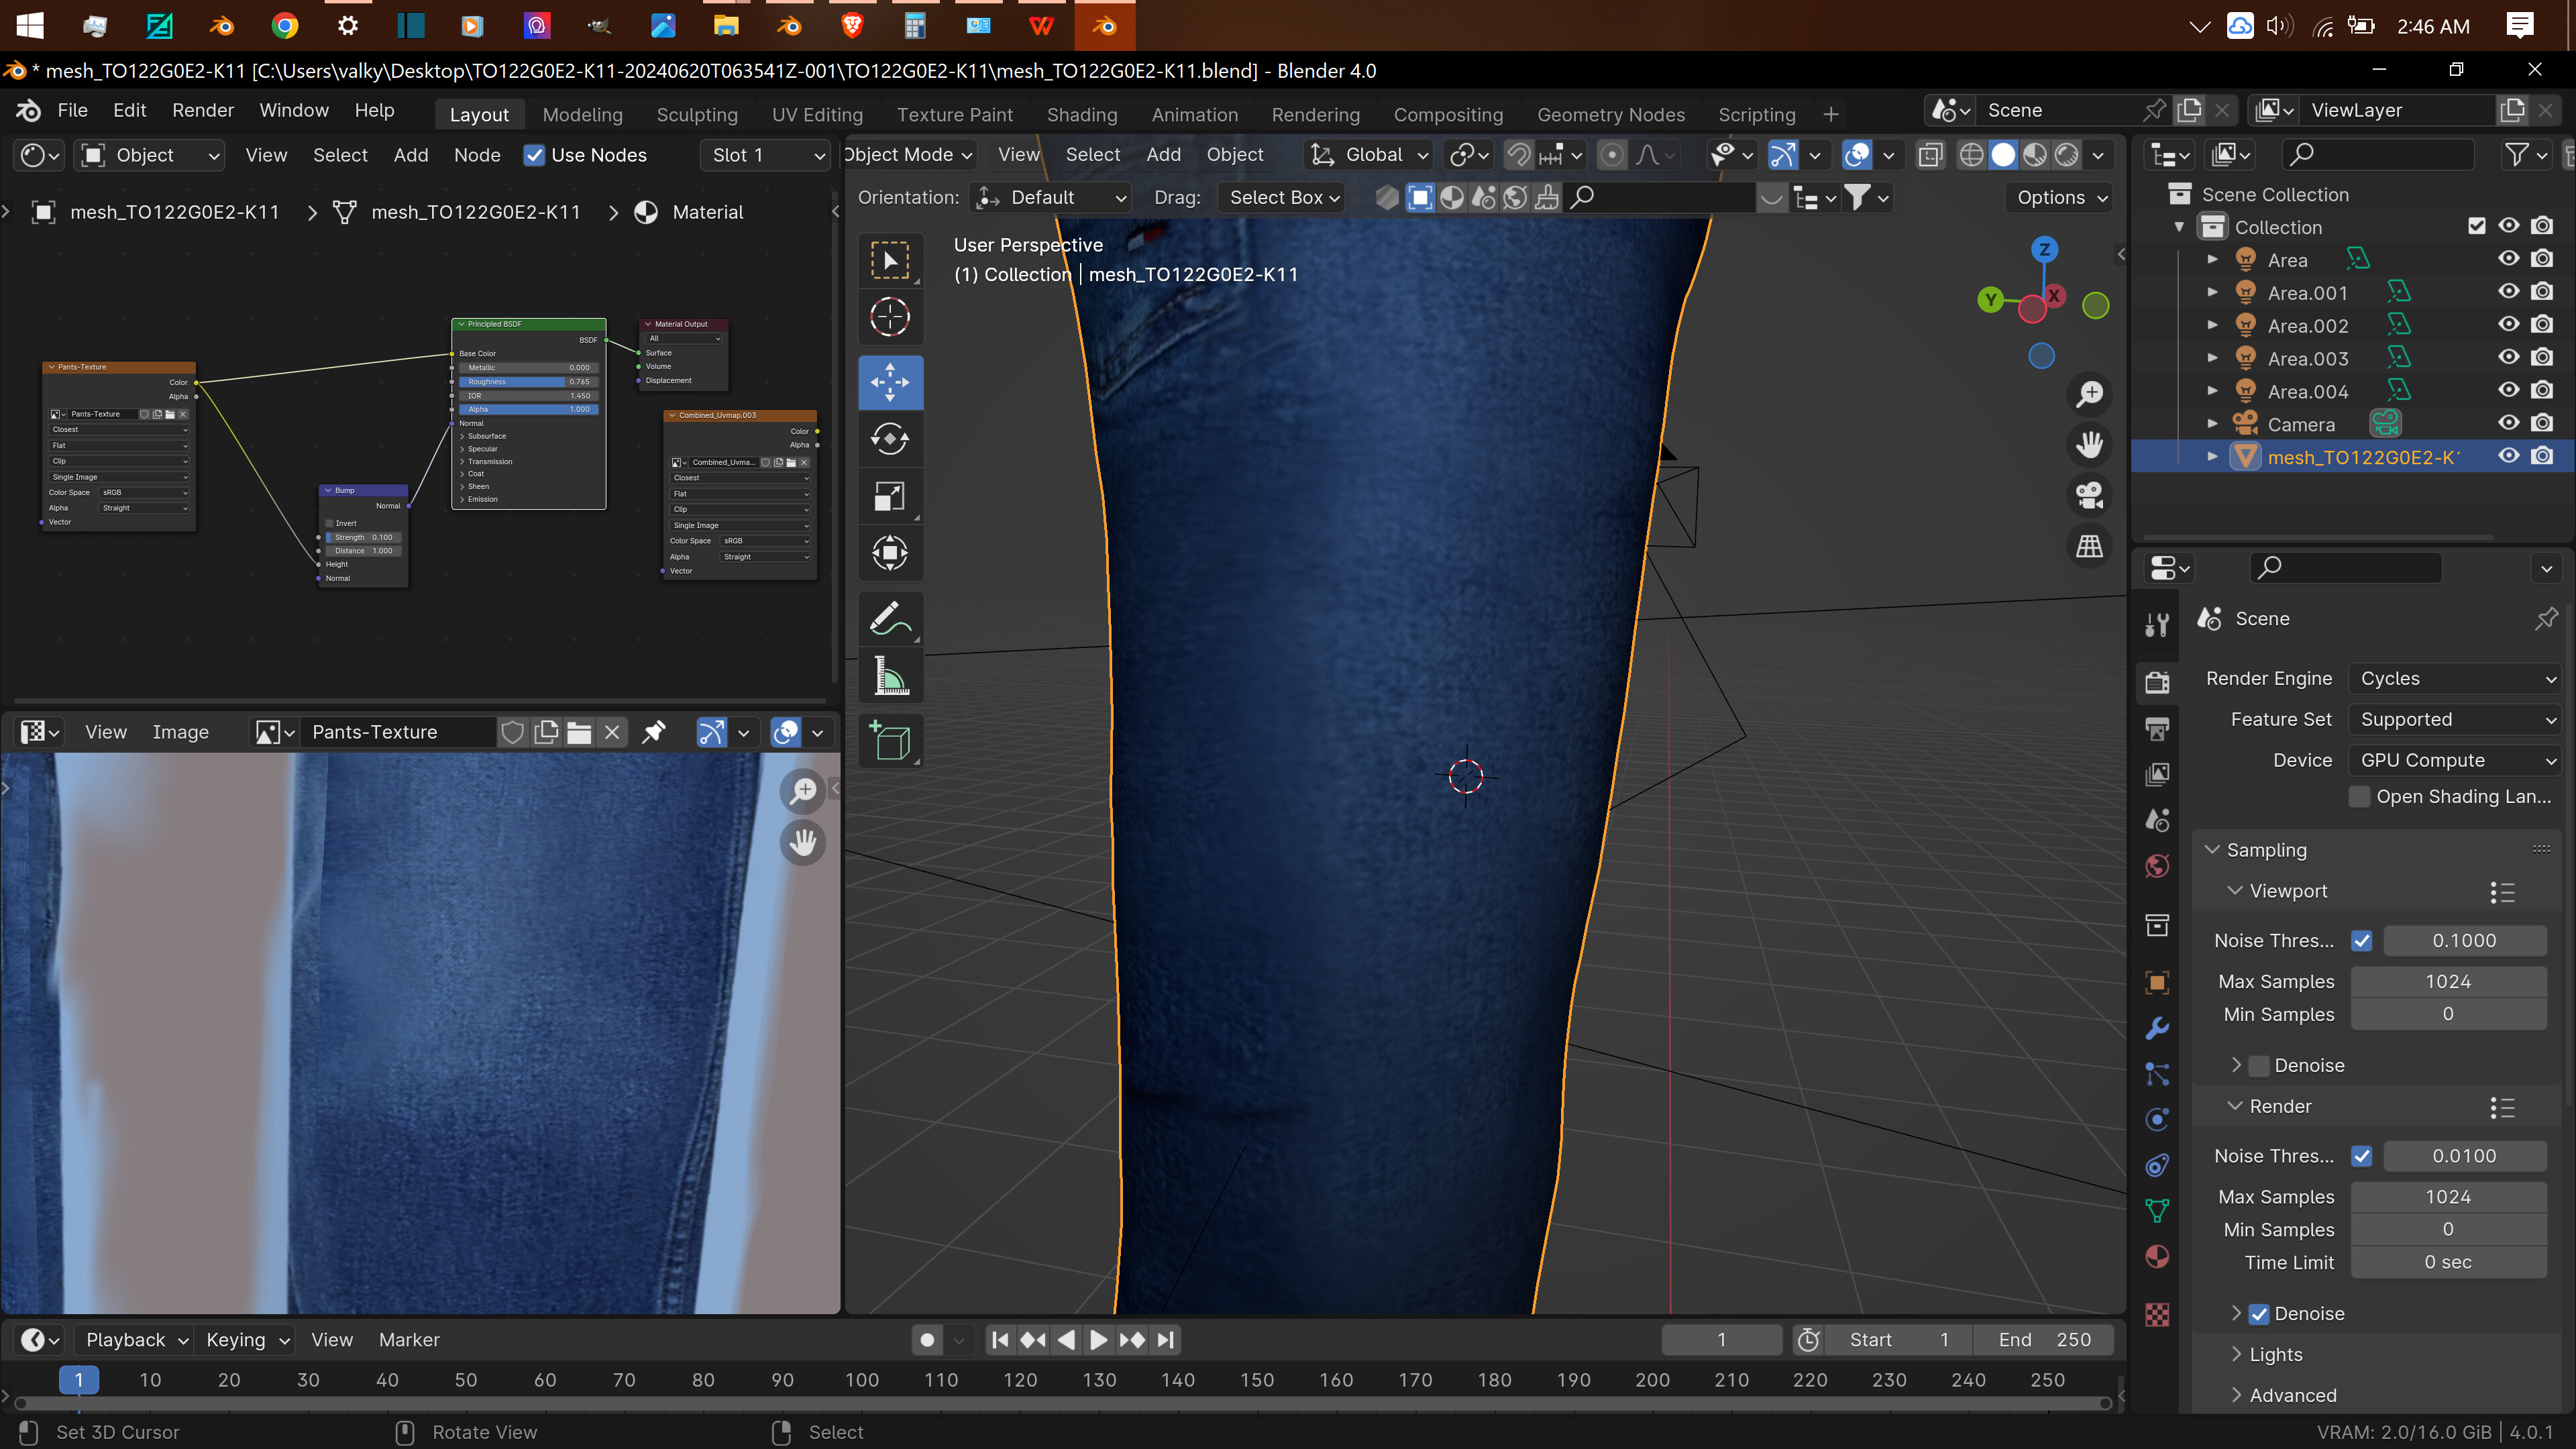
As near as I can tell, that’s just a difference in color between the images you’re using to texture the jeans. You should be able to manually paint it out, something like this. I used a clone brush with the Sharper Falloff, clicked on either side of the cut off line, and worked it back and forth until it looked decent.
Yes, this is what I wanted to happen. blend the edges, thxxxx. ![]()
Can you plz send me a bigger pic of the shader editor window? I can not see the details.
Another issue is that I have to paint several times in one spot to transfer the images of the jeans with 100 % opacity on the asset. Now I changed the setting on the cursor (Falloff. O: 100%, Mask texture. O: 100% & I have brush icon selected on both) + Falloff setting to constant. Why am I not getting the correct result?
I don’t know. In the file you linked, without changing any of your settings, I wasn’t able to duplicate the problem on my end, texture painting worked the way it should.
Ohhh great! As usual, the problem is my blender… It’s frustrating that whatever should work, does not work on my blender…
FYI, I don’t know your name, but I wanted to say, I’m sooOo grateful for all your help. I could not learn blender without your support.
Hi,
How are you?
Back with another weird problem. I’m trying to add the rig to the body. I did Parent ( I chose “With Automatic Weights” ). Then, I got this error"Bone Heat Weighting: failed to find solution for one or more bones".
Troubleshooting: I removed duplicate vertices and applied transformations.
Now the undies are moving with Arature but not the rest of the body… ![]()
![]()
![]()
What to do?
And how can I make the character move forward?
Here is the [link] (https://drive.google.com/drive/folders/1gXCGXWBA23E6hgEvgmQZT8Bkd3NwqSlo?usp=sharing)
Thank you so muchhhhhhhhhh for helping me.
Okay, so here’s what I did:
1: Set your transform orientation from NORMALS to GLOBAL
2: Unparent everything from the rig. Delete the armature modifier from the underwear and make sure that’s unparented as well.
2: Either set the rig to rest post or create a pose at frame 0 with all the bones in their default position.
2: Clear rotation and location from the rig (ATL R, ALT G) DON’T apply them at this step, just clear them.
3: Move the rig straight up in the Z axis until it’s realigned with the model
4: APPLY all transforms to the rig
5: Adjust the rig in edit mode until it’s more closely aligned with your model
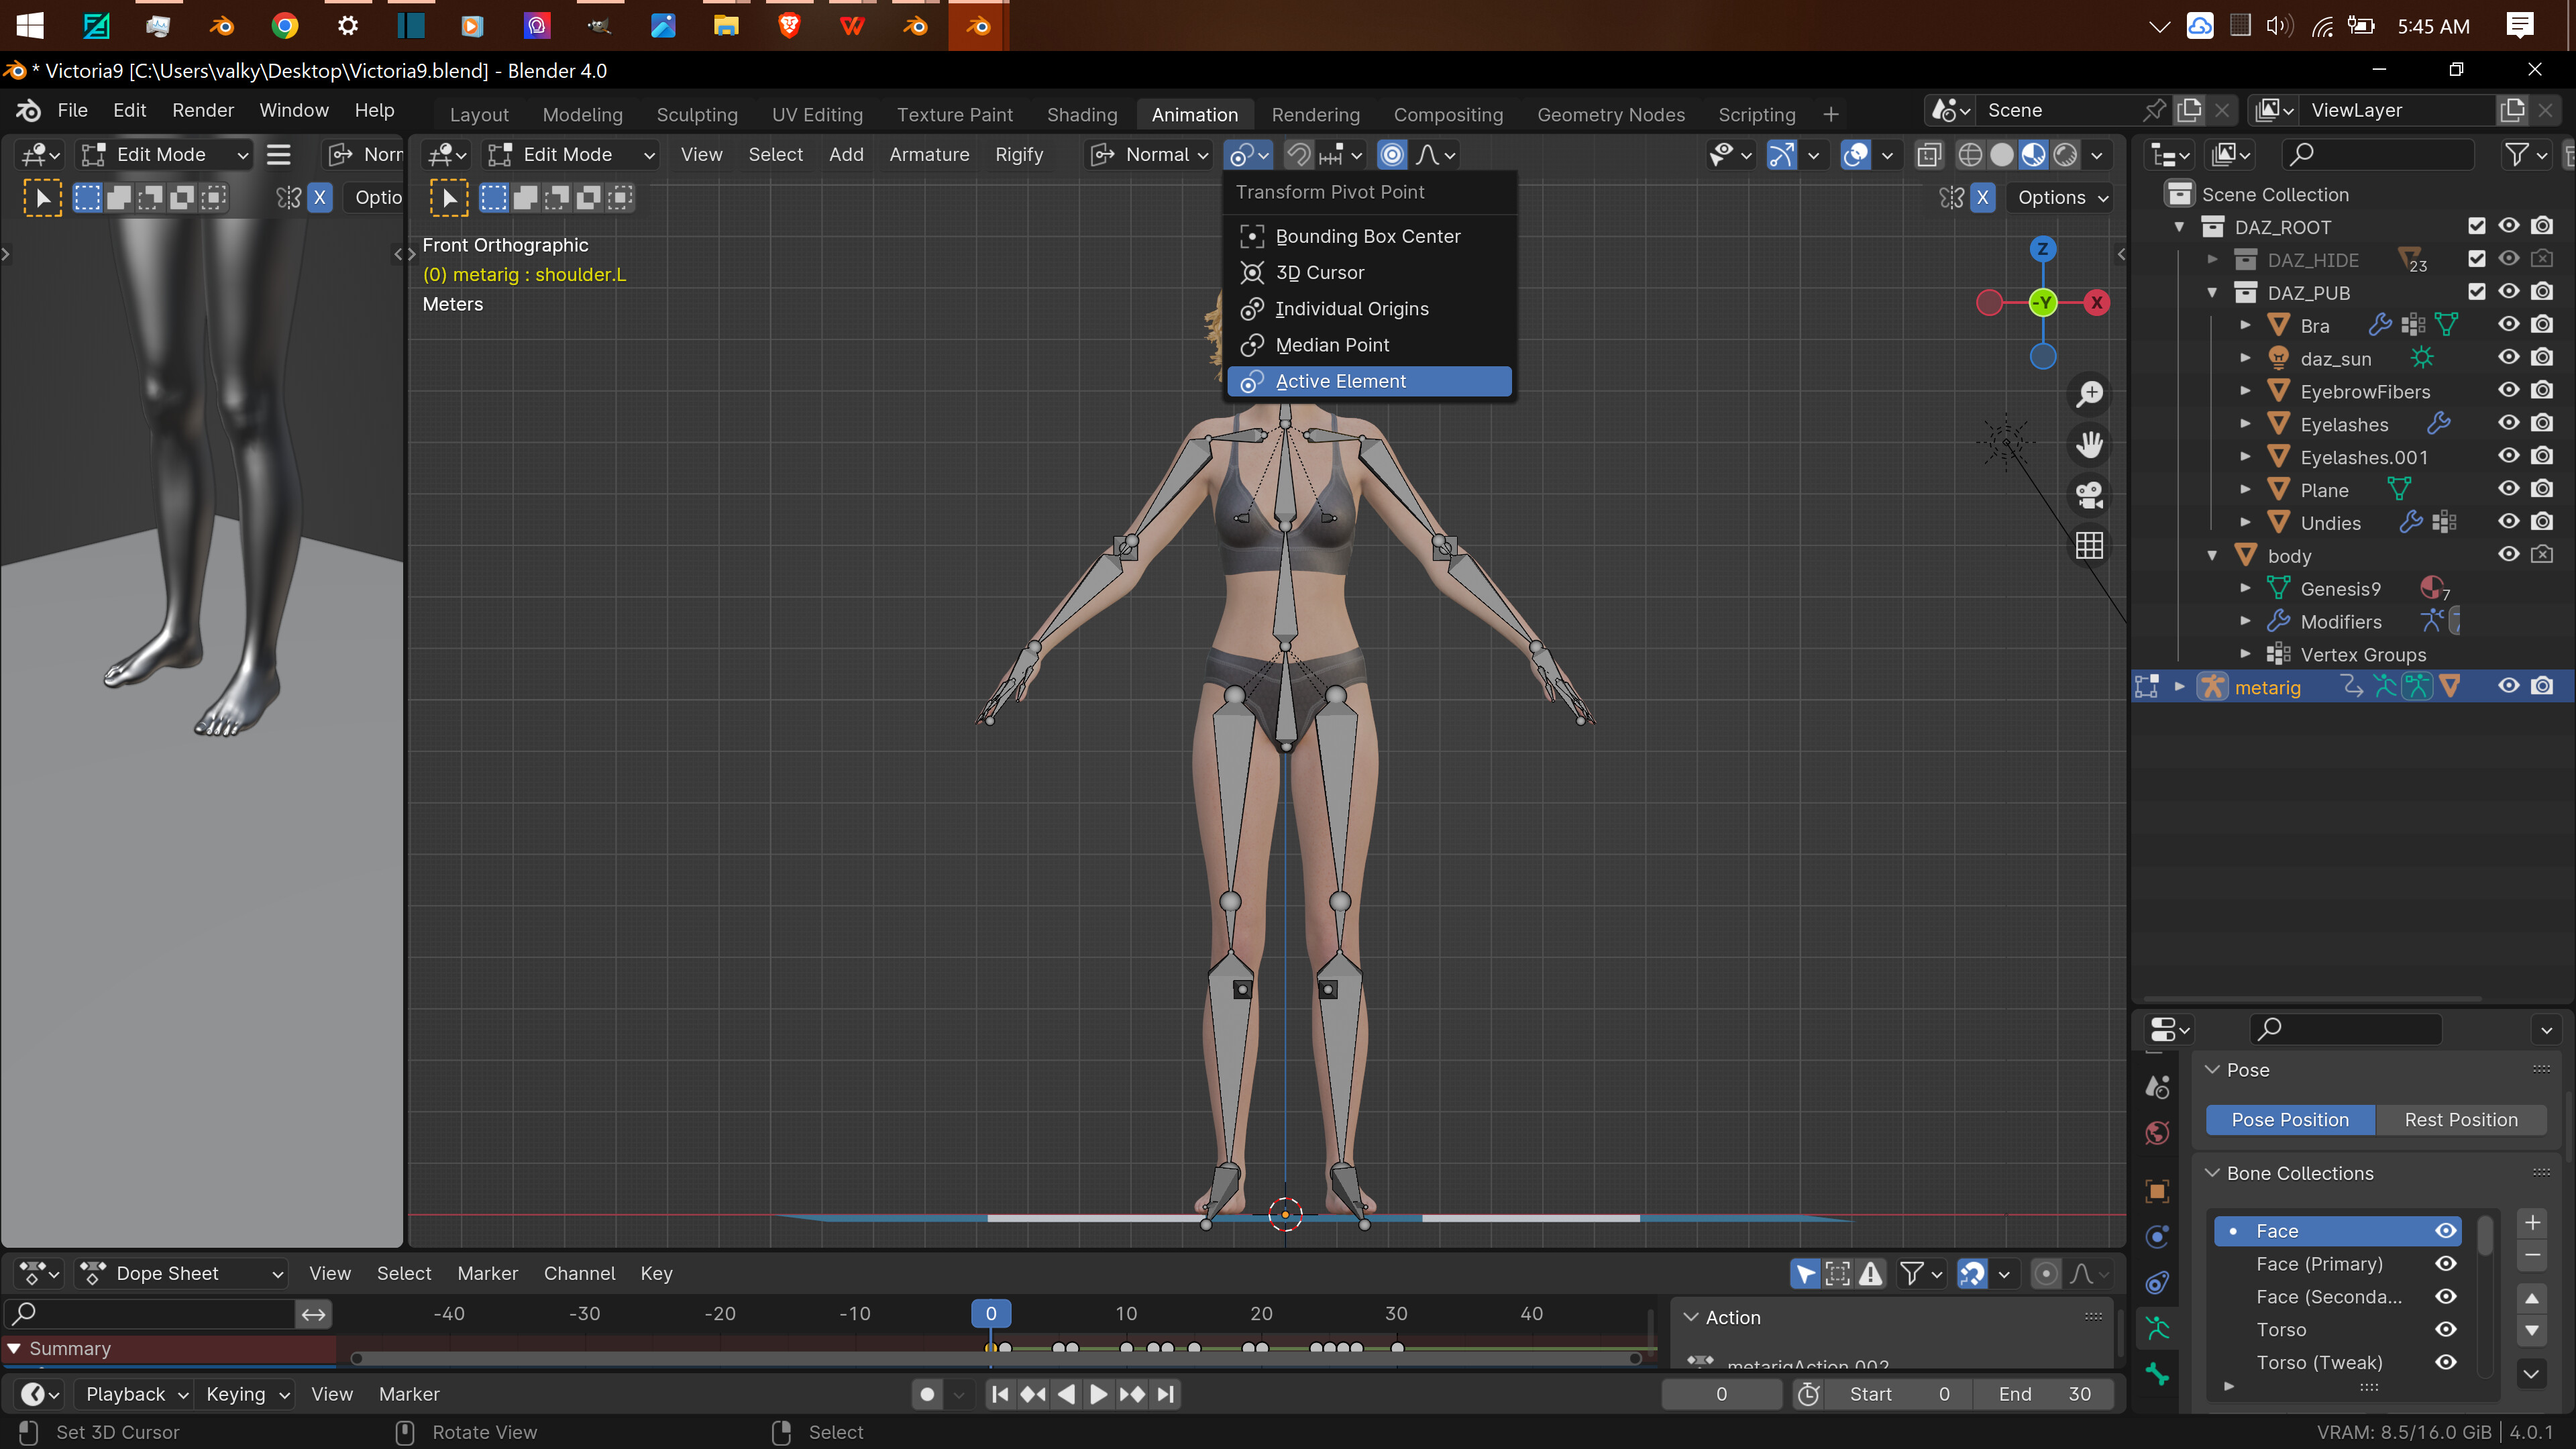
6: Put the rig in object mode and set the pivot point to “Active Element”
There are ways to do that with a walk cycle, but they’re not ones I’m especially familiar with/good at, so you’re probably better off looking that up as a separate thing. I prefer to animate walks that are supposed to move forward as moving forward in the first place.