Building a NAS server

So this is basically a project mostly for the fun of it. I just want to share the process and the story and to document it :smiley: Comments are welcome. The whole thing is by no means serious, because well… I don’t really need a NAS :smiley: Let it be a true off-topic thread.

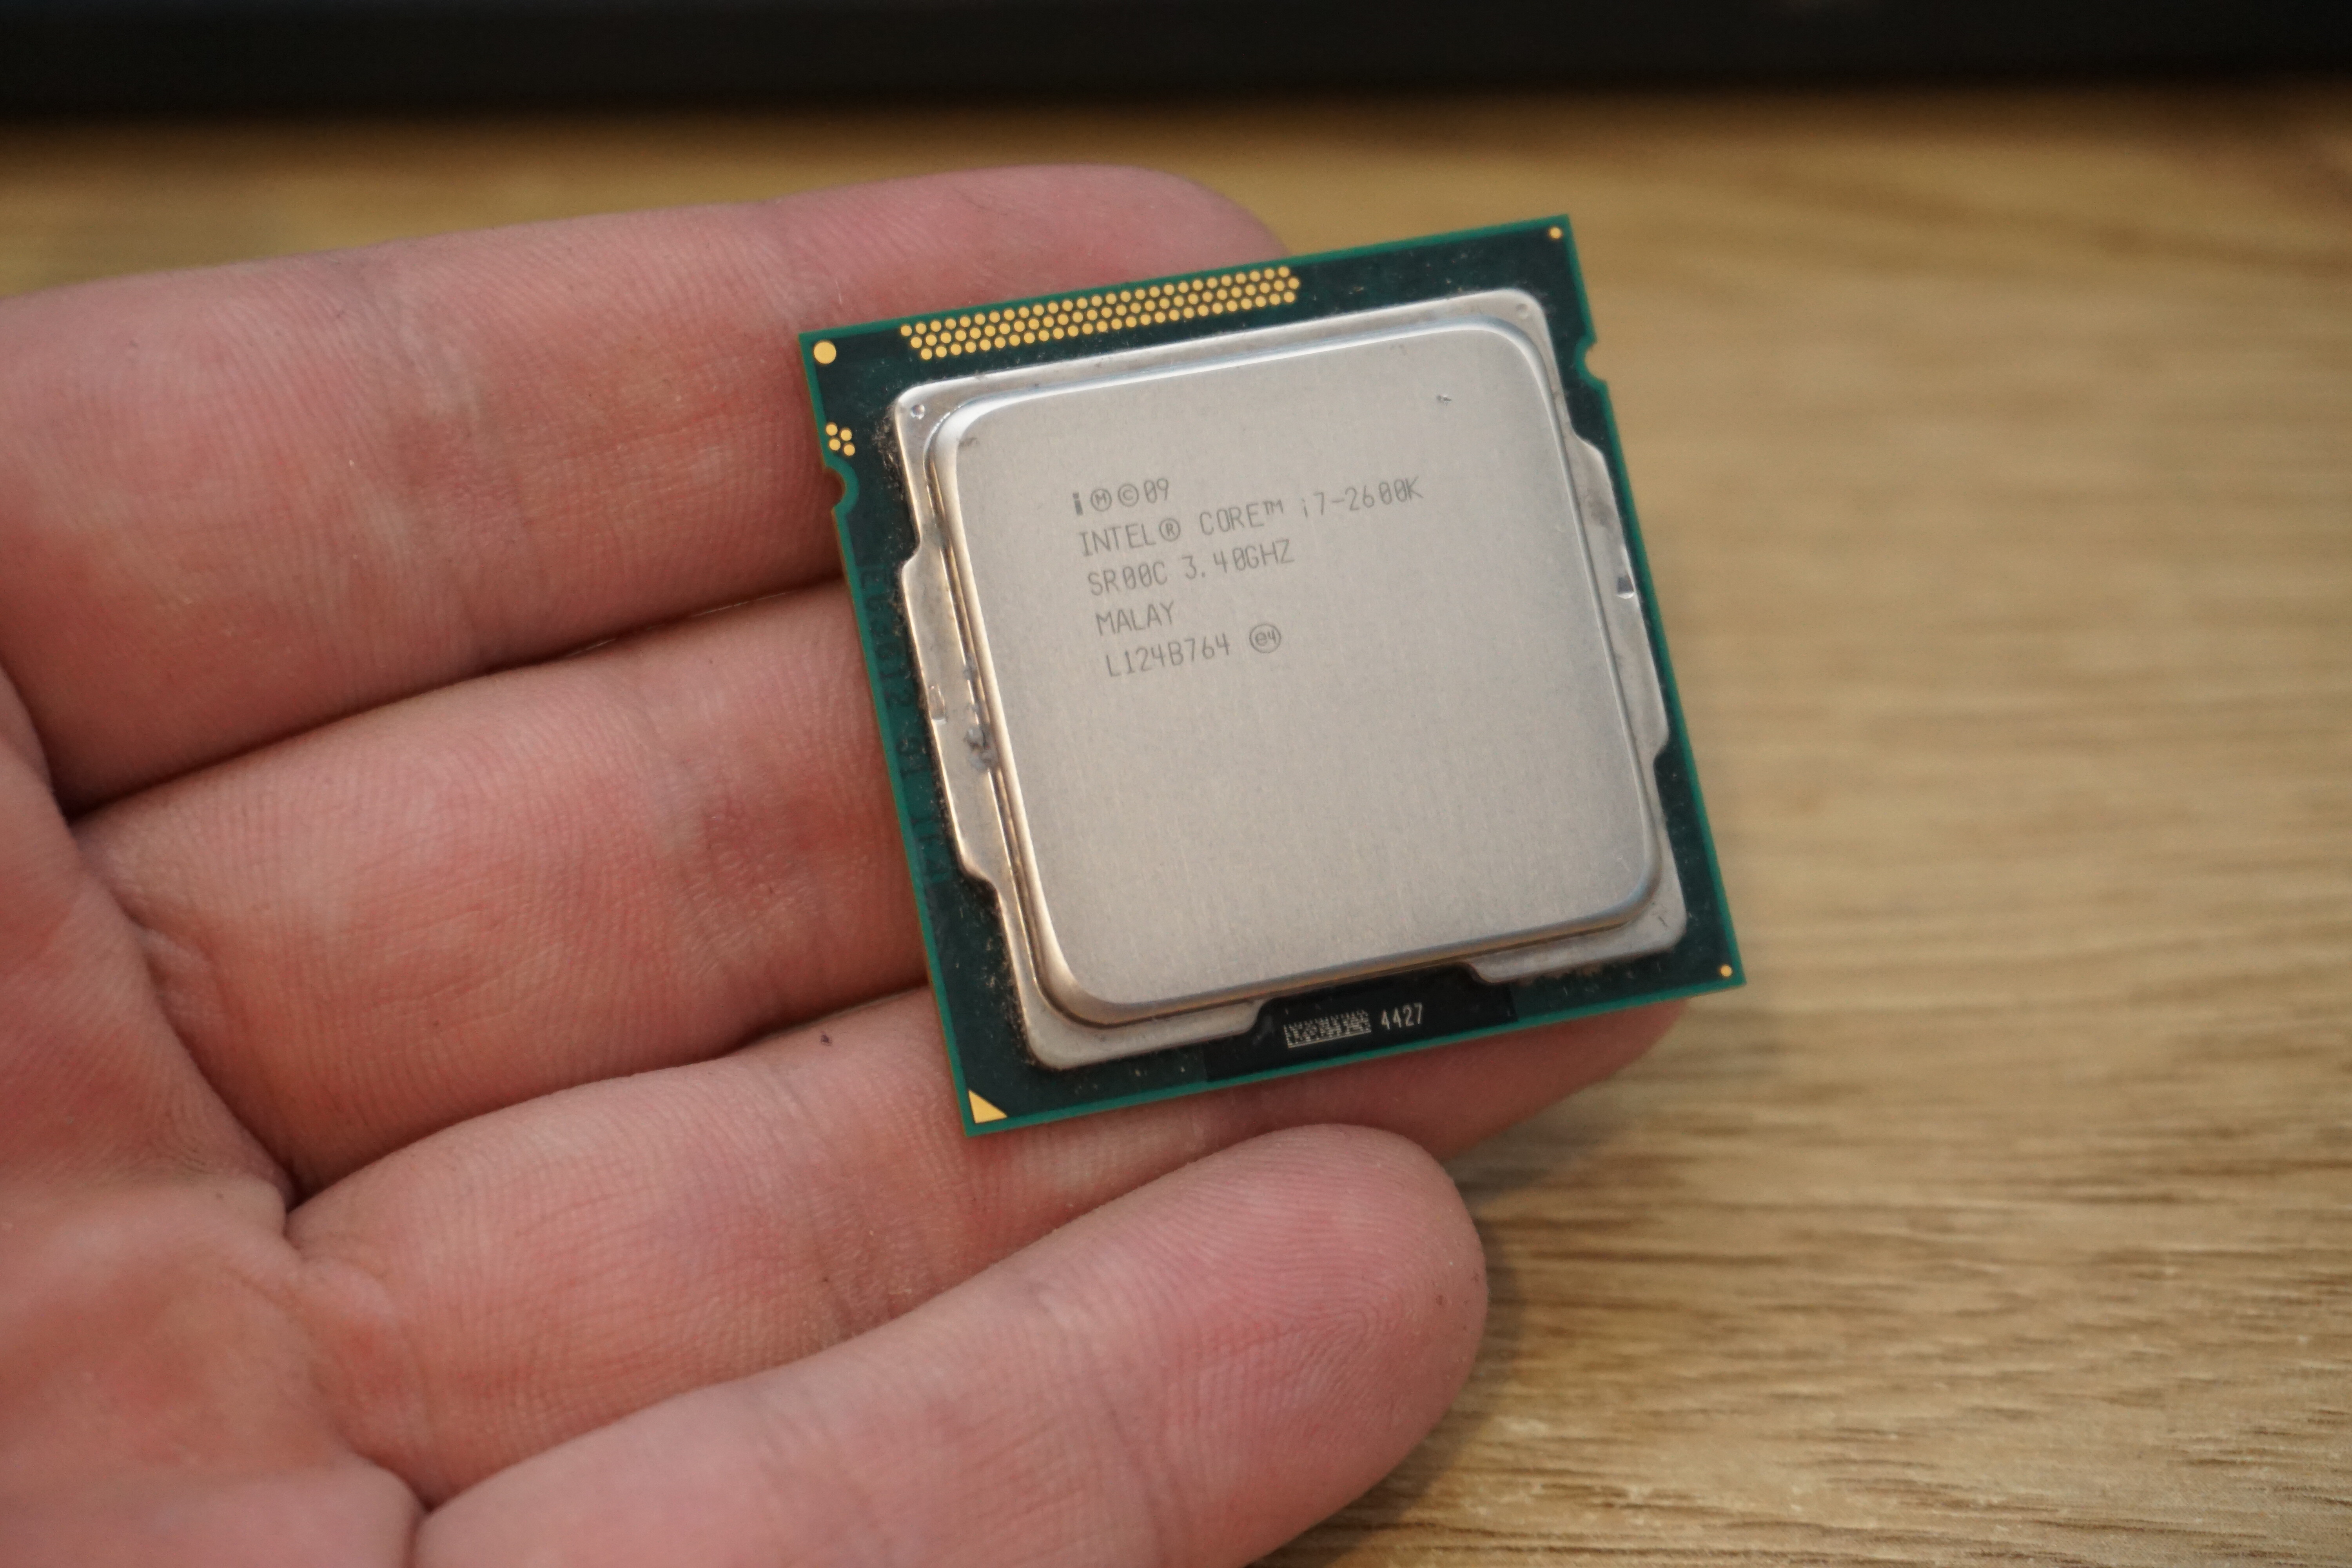
I was about to throw away my old PC and I did throw away most of the components, but then I was holding the CPU in my hand just about ready to throw it away… And… It served me 12 years! It was mostly on for all the time, often months between restarts, it was always overclocked and it often was used for rendering for the first half of its life and I showed no mercy to it later either and it still survived. And there is nothing wrong with it. So naturally, I just couldn’t do it. There is a connection. We spent 12 years together. I had to keep it.

So few days later I figured, maybe I would just have a look online if motherboards for that socket(LGA1155) still exist and how much they cost. It’s just interesting. Just having a look will not hurt anybody, right? I found this joke no name motherboard on Aliexpress for around 23 euros (including shipping!) with the old socket that fits my I7 2600K. I mean that’s 23 euros. I had no other choice. So it arrived surprisingly fast in 2 weeks and I tested it without a cooler(the risk was exciting) and it works. I got into BIOS. Who could have known?.. And it’s quite cute(I have never had a motherboard 17x17cm big):

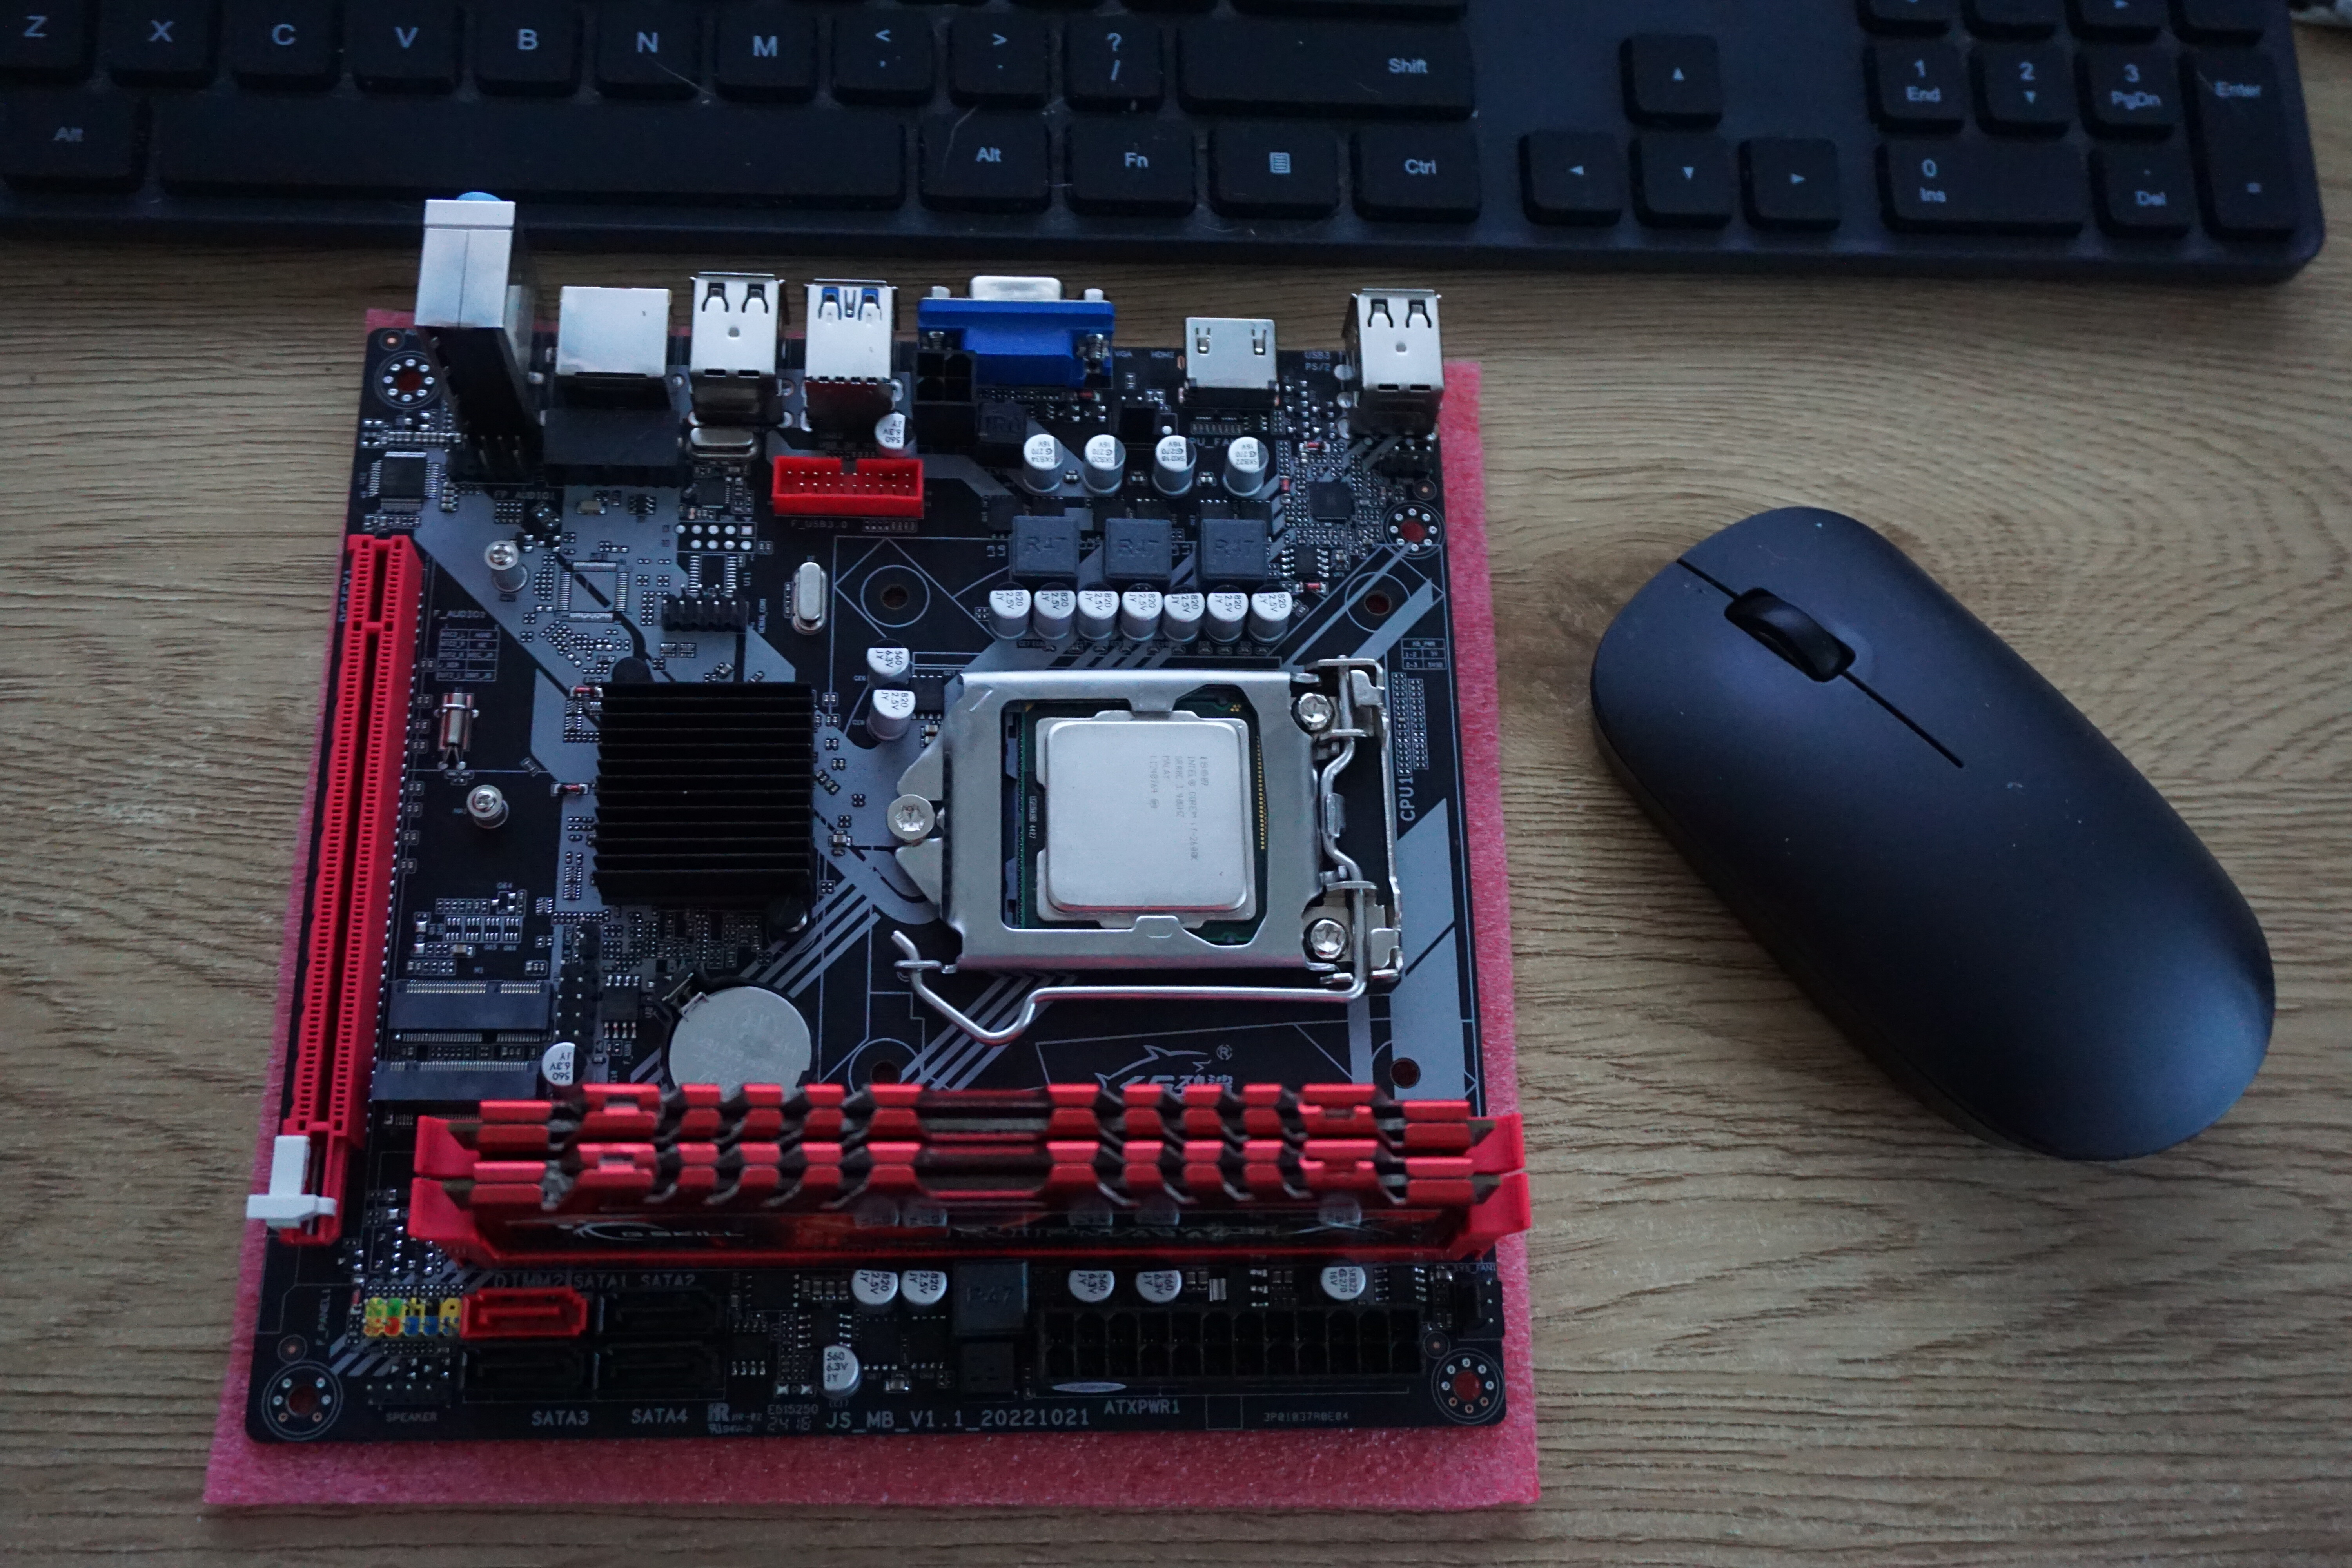
So now once again I was in a situation with absolutely no control whatsoever. I already had a motherboard at this point, and I had some old RAM and a PSU so I naturally have no choice and now I must build a NAS server. I mean I cannot use it as a PC because I have a PC already, NAS server is the only logical step, right? :smiley:

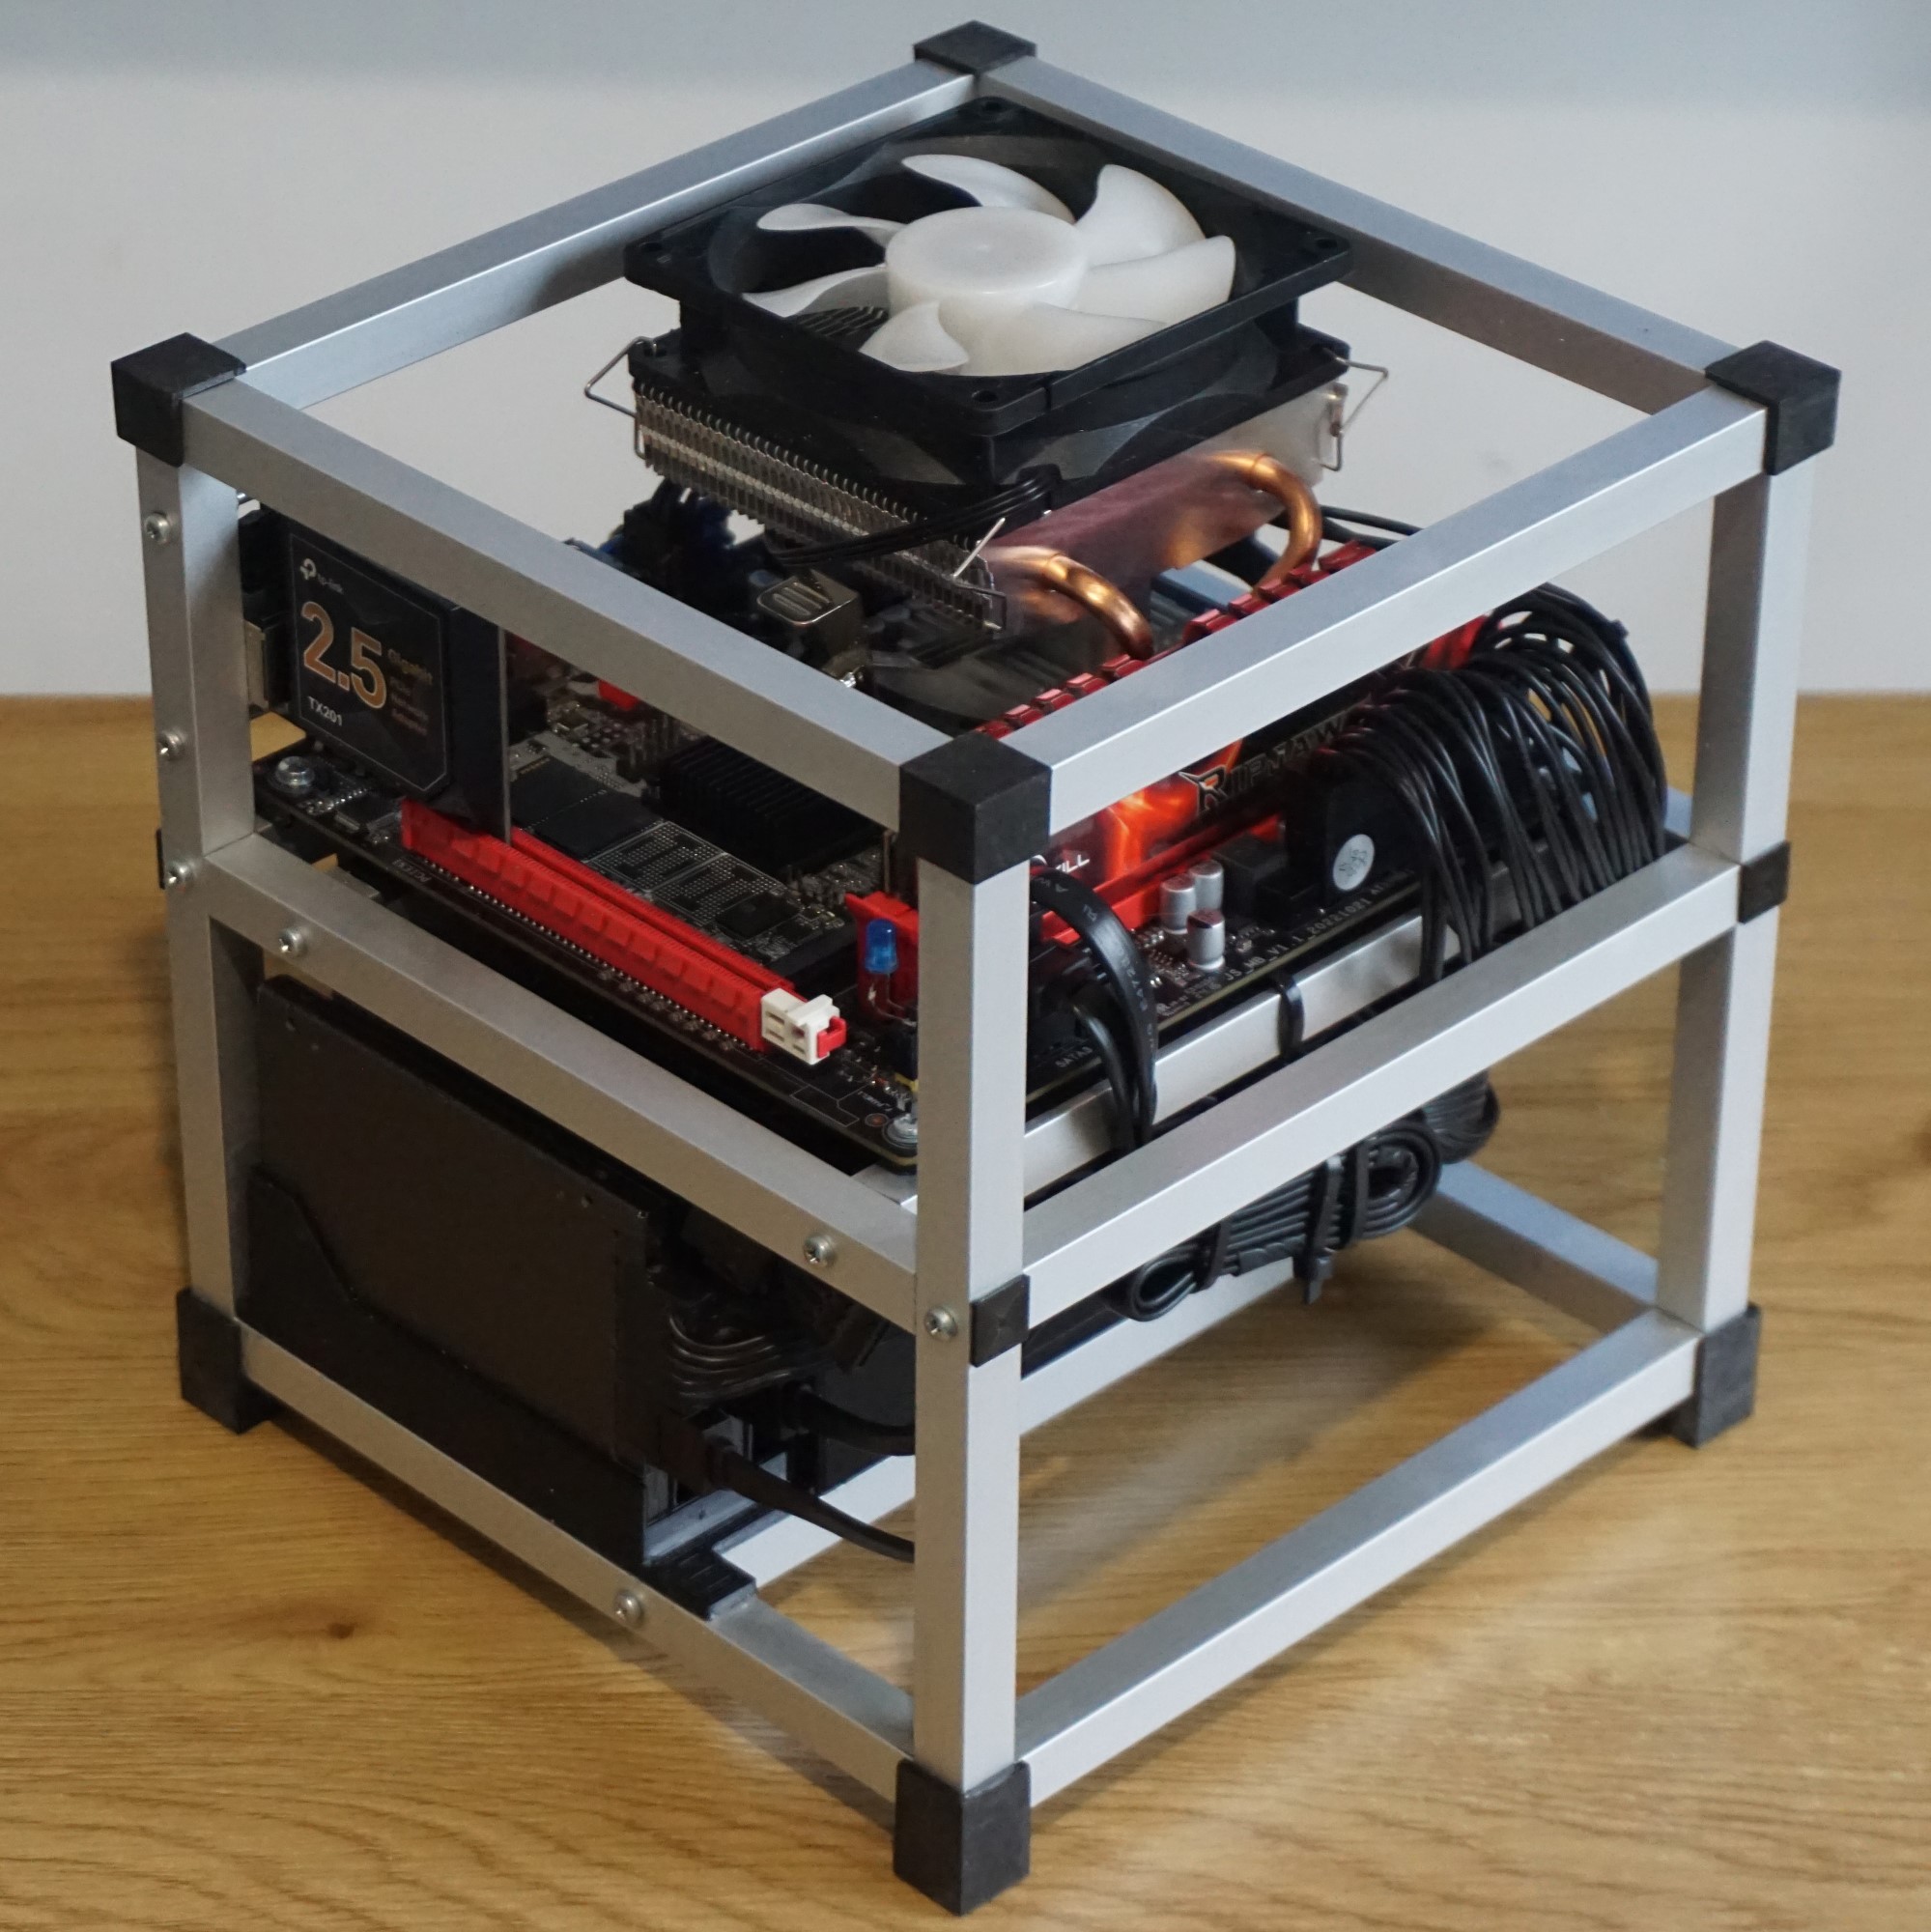
So I ordered a cheap m.2 128GB SSD, because that’s the smallest I could find. It happened to be PATRIOT P300 and it was 13.89 eur - so, I guess that’s OK. I had way more trouble with the cooler though. First of all, I could not find a decent crappy cooler for the right price for this project which in my mind was around 5 euros. They all just looked really bad and there was no info about what sort of processors they might work with so I had to waste some money. I got Aerocool Air Frost 2 in the end which was around 25 euros. Not sure about the brand but it has 2 heat pipes and it is the right size to just barely not touch the RAM and most importantly it looks nice to me(I am not even going to pretend that was not a factor). So that would be all nice and good, but unfortunately it came with a huge defect when I got it - it glowed in weird colors and there was no way to turn it off:

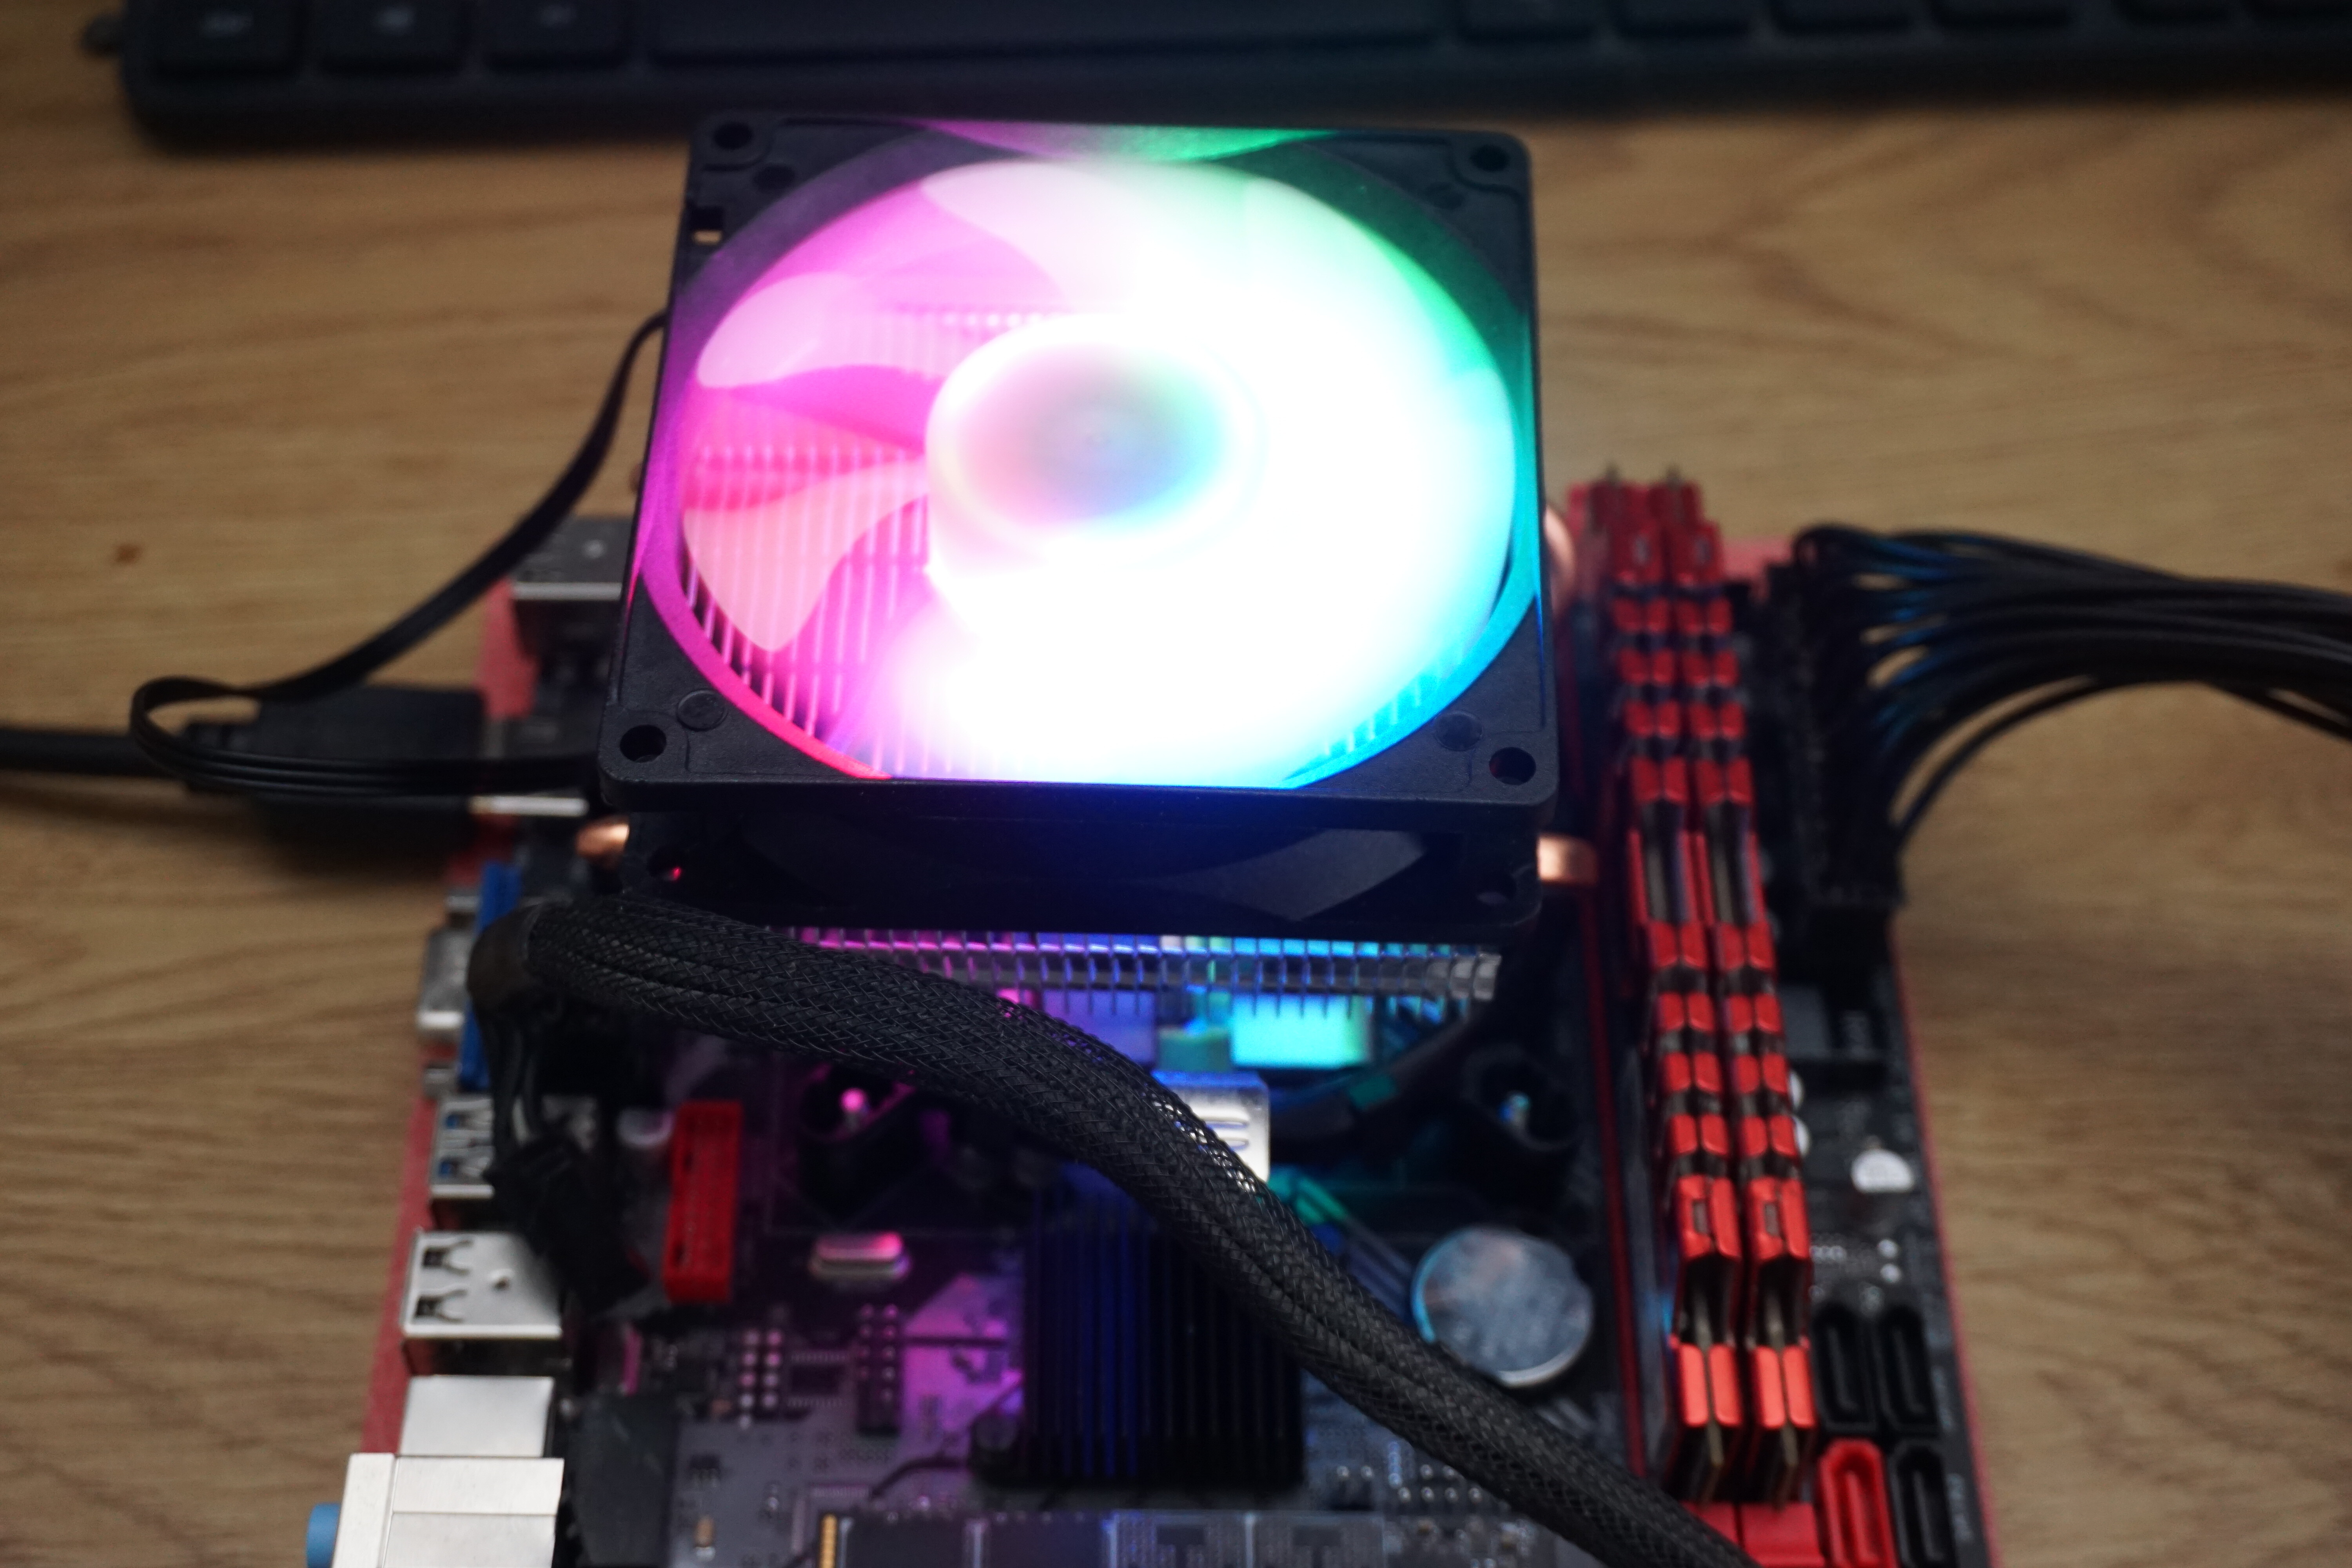
But luckily I managed to scrape off all the LEDs from the PCB behind the fan with a small screwdriver that fit through the fan blades and now it’s fine. The defect is fixed. It’s a NAS server, not a disco. :smiley: The cooler is even supposed to be good for taking 115W of heat(or whatever) and the CPU is only 95W, so that’s way way way more than enough.

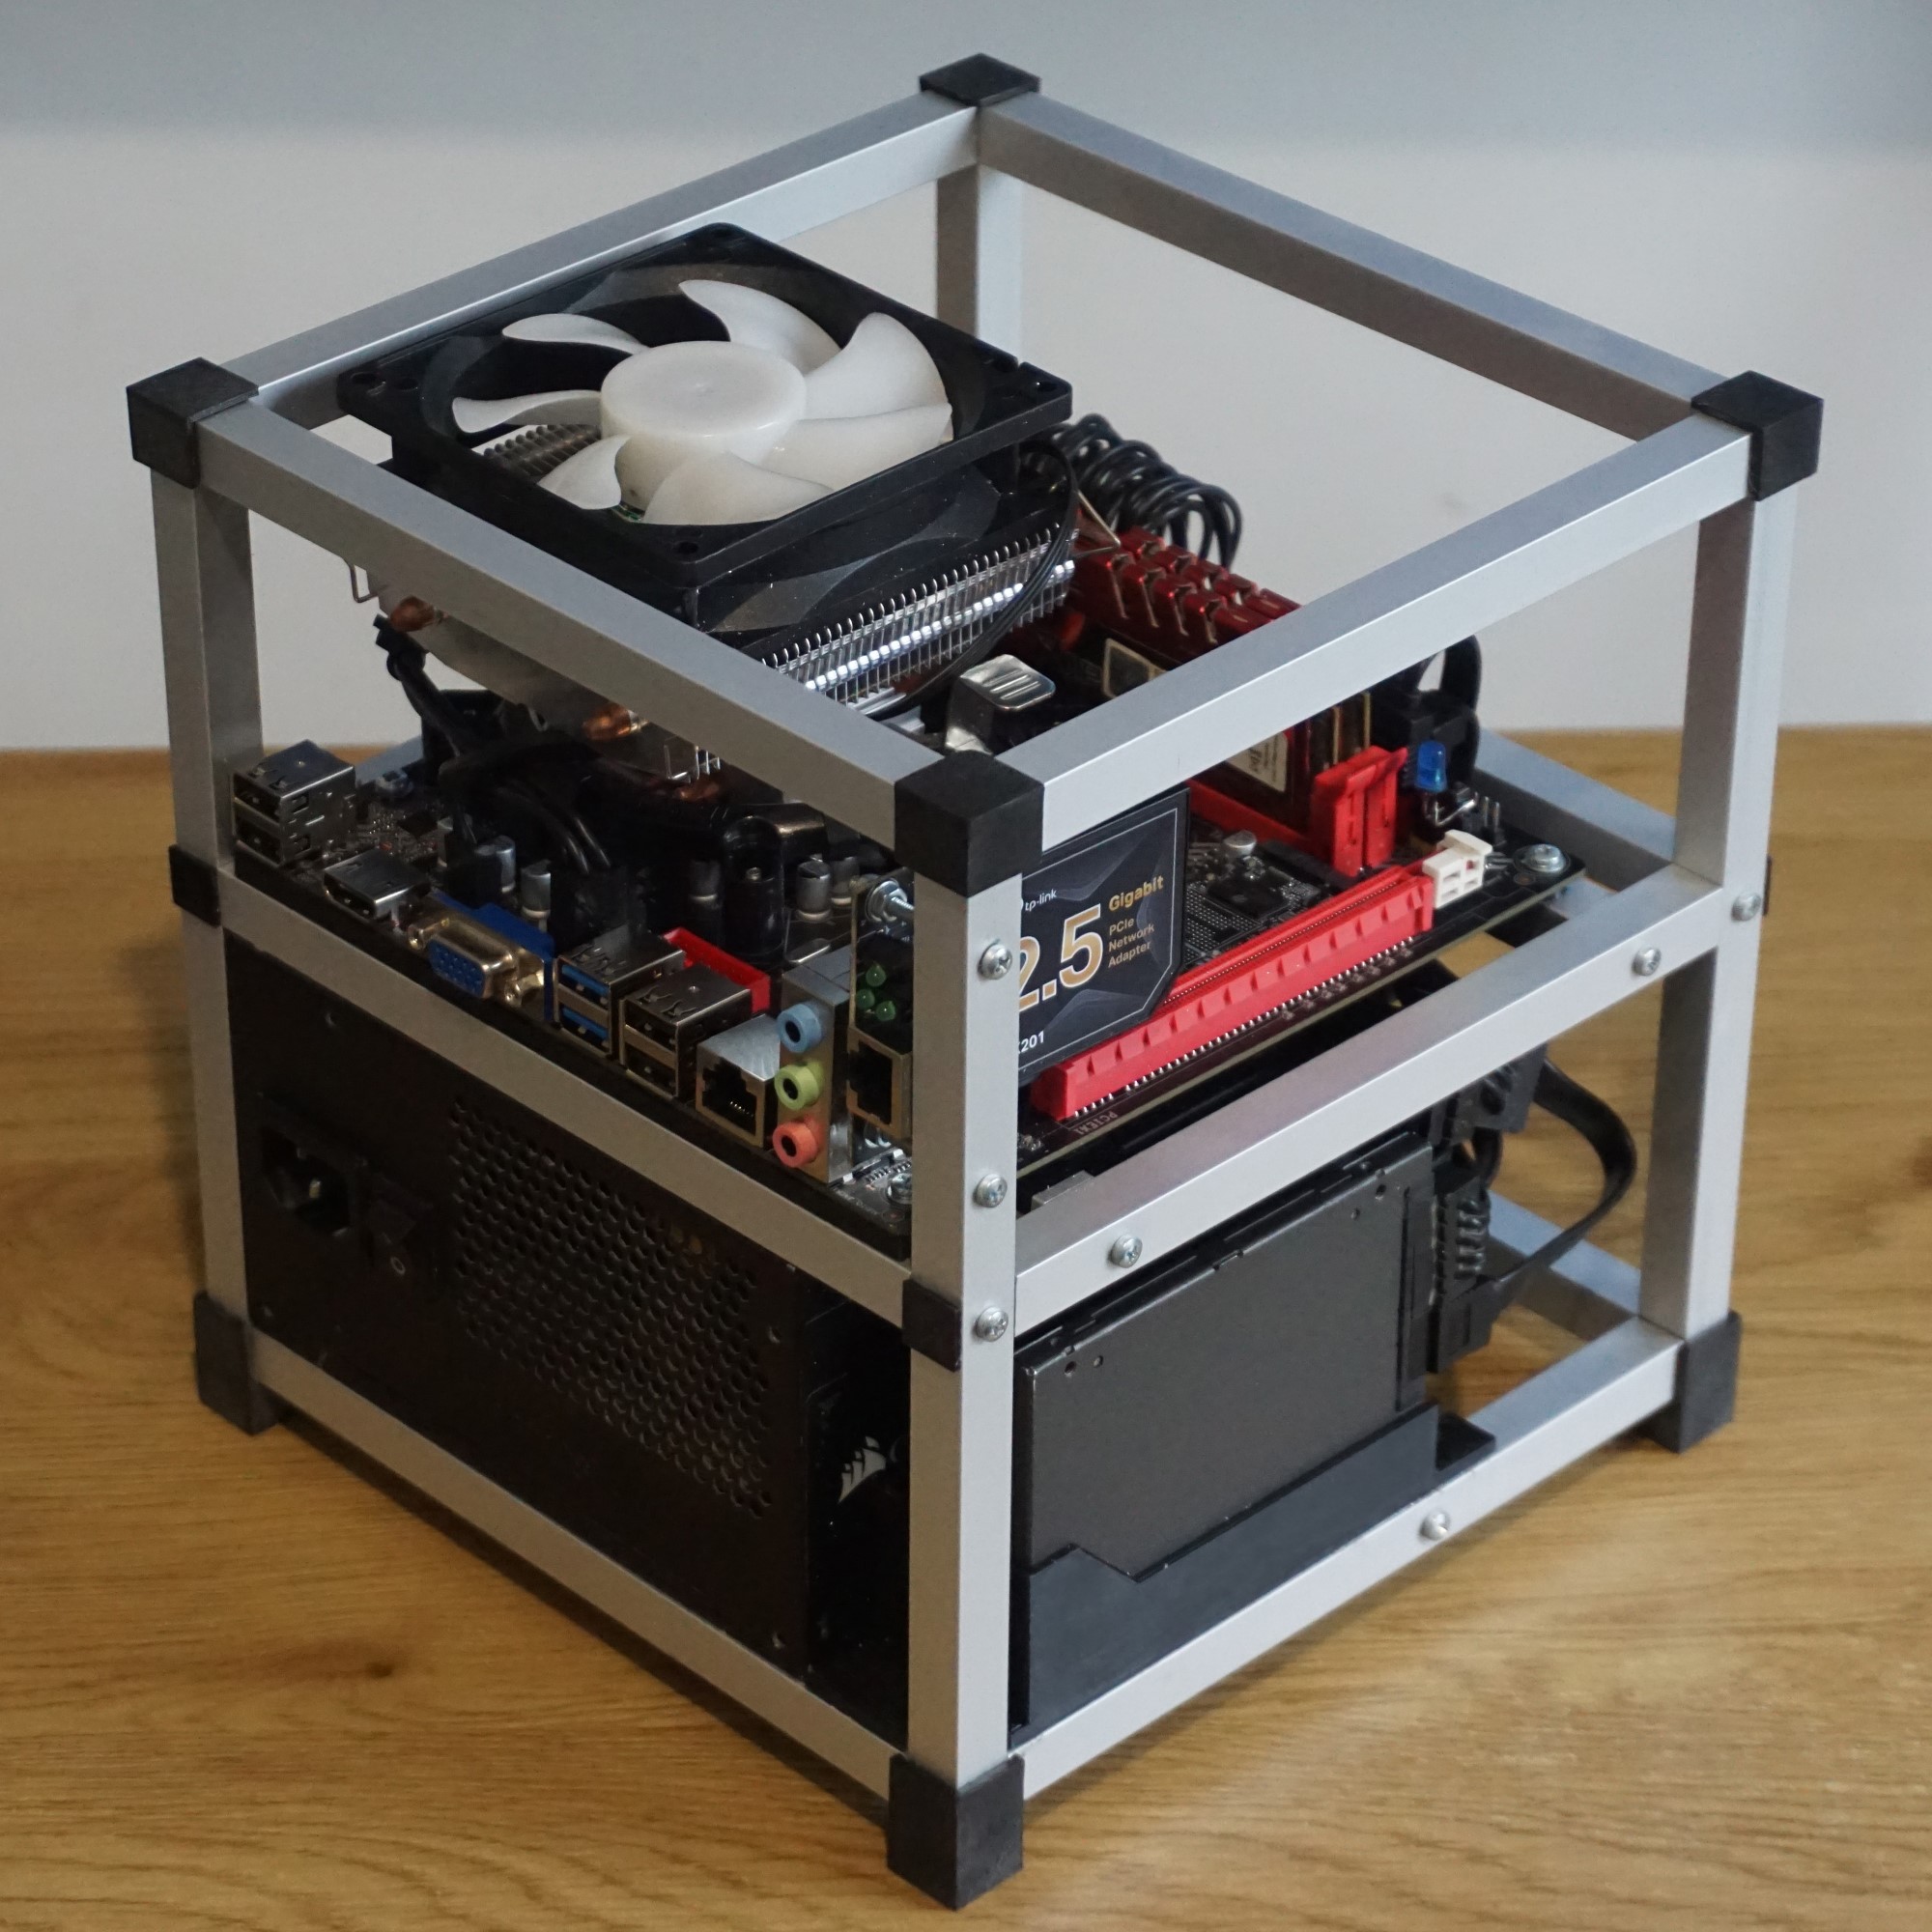
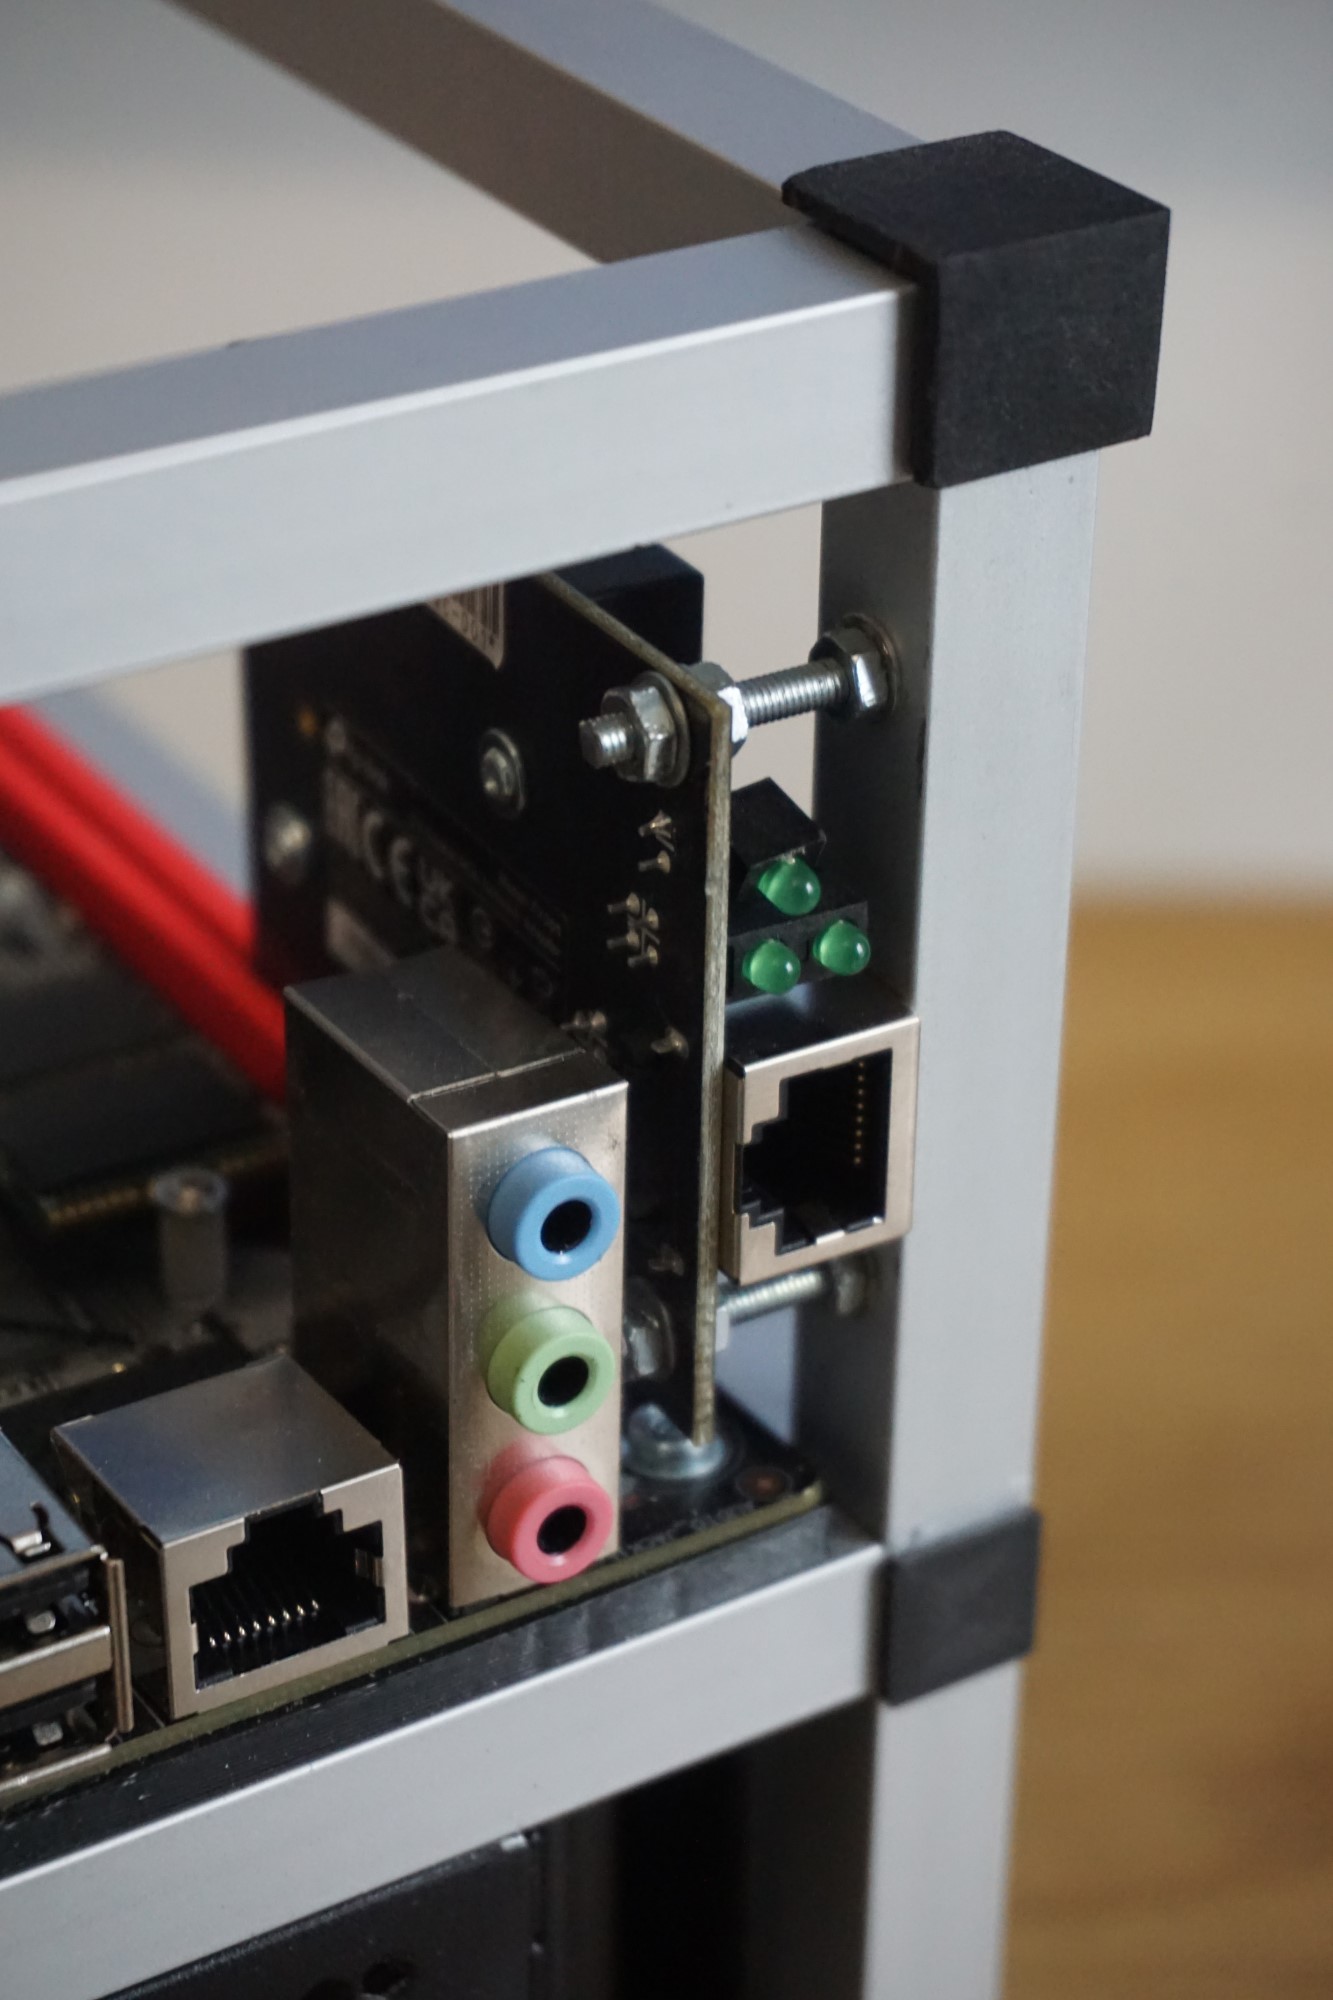
Unfortunately I did not do much thinking when buying the motherboard and it only has a network port for 100 megabits. That’s a fail… So I needed to find the cheapest network card that’s at least 2.5 gigabits and that still works with TrueNAS, which I already installed to the SSD. That turned out to be TP-Link TX201. It’s not great, nobody recommends them, but they seem to work and the Intel NICs everybody recommend cost too much for this. Still unfortunately it’s more money wasting, they are around 28 euros and even worse - my PC has only one ethernet port, so I need 2 network adapters… :confused: That sucks. I could get away with lower speed one since my internet is only 100 megabits, but the price difference is not that great, so I ordered 2 TP-link TX201 cards. That’s a waste of money. But what you gonna do?.. Other hobbies or fun activities cost money as well, right?..

So now I need hard drives… Well… It would be nice to eventually get 4 WD red 8TB drives… :smiley: But that’s a whole lot of money! That I cannot justify no matter how hard I try so for now since SSD drives collect like dust all around I just brushed a few old small SSDs out of my drawer and it will be good for “testing” and - what I am most excited about - Next Cloud thing where I can have my own personal poor man’s Google drive equivalent with a few hundred gigabytes. That sounds really awesome.

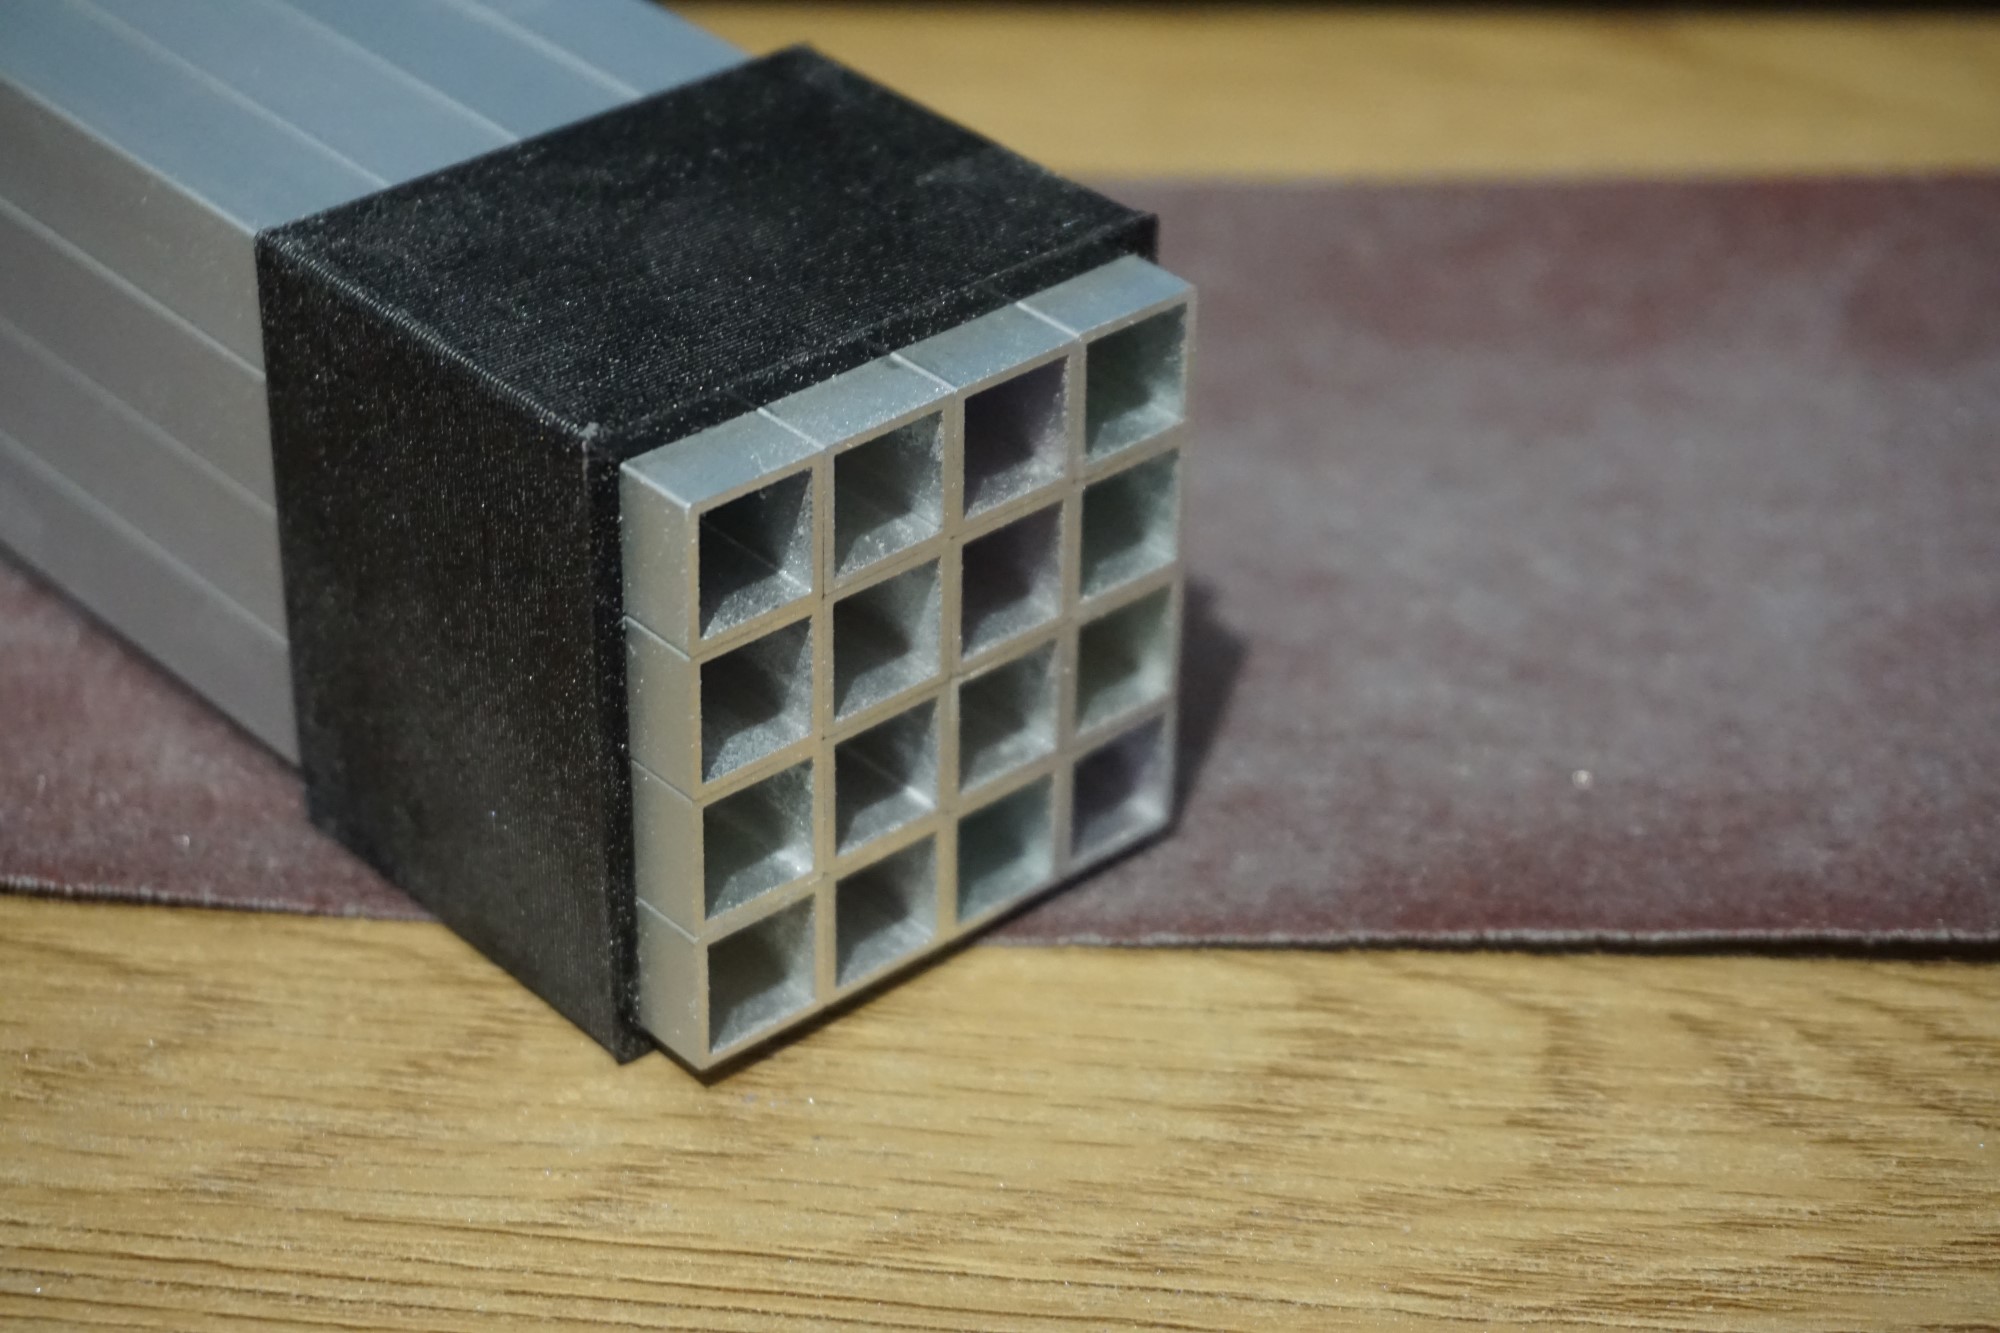
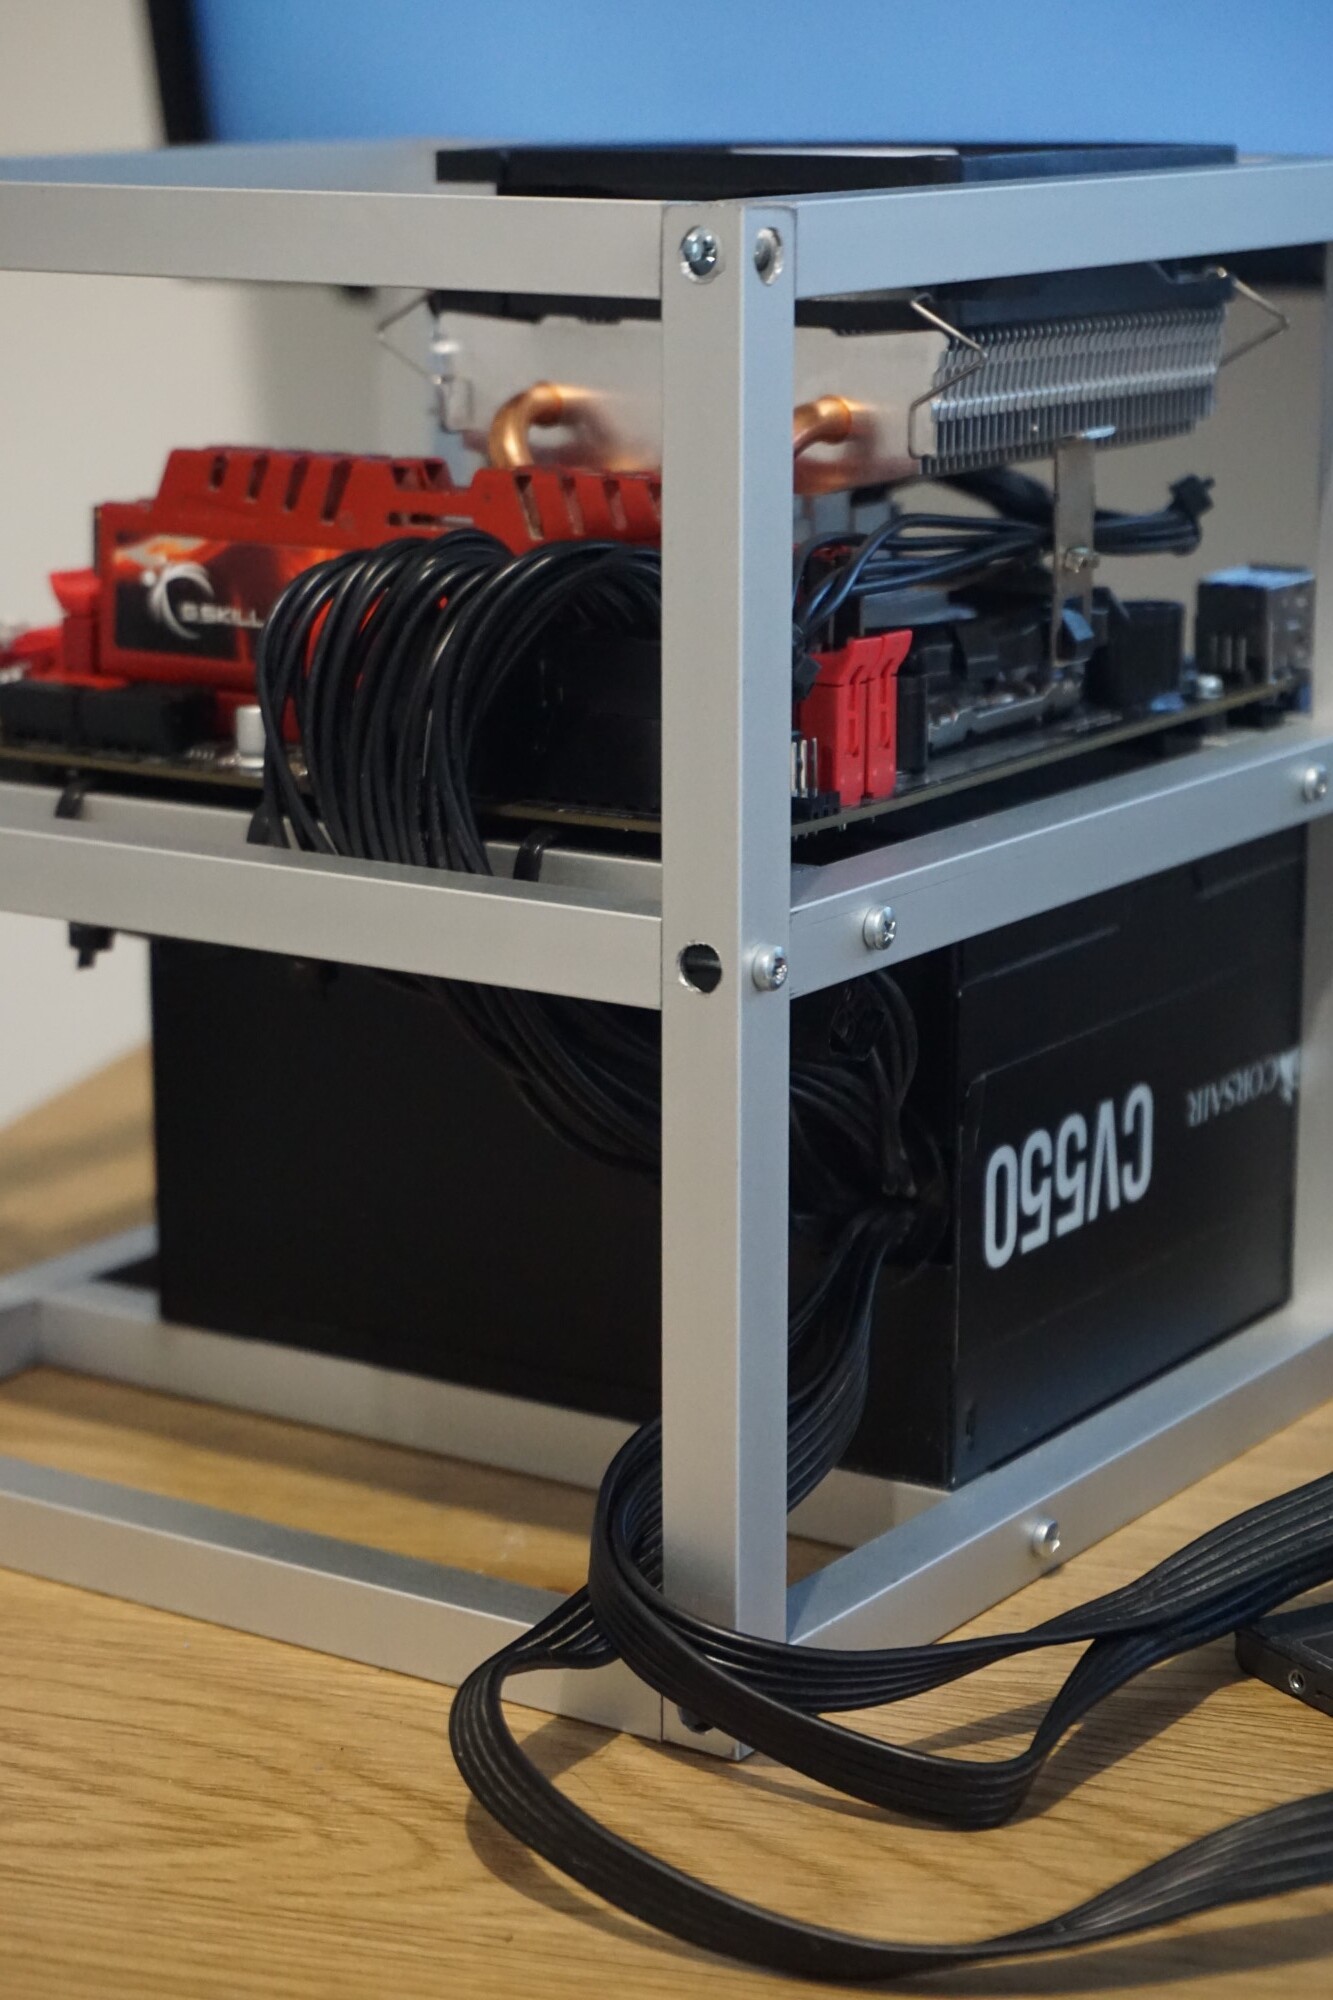
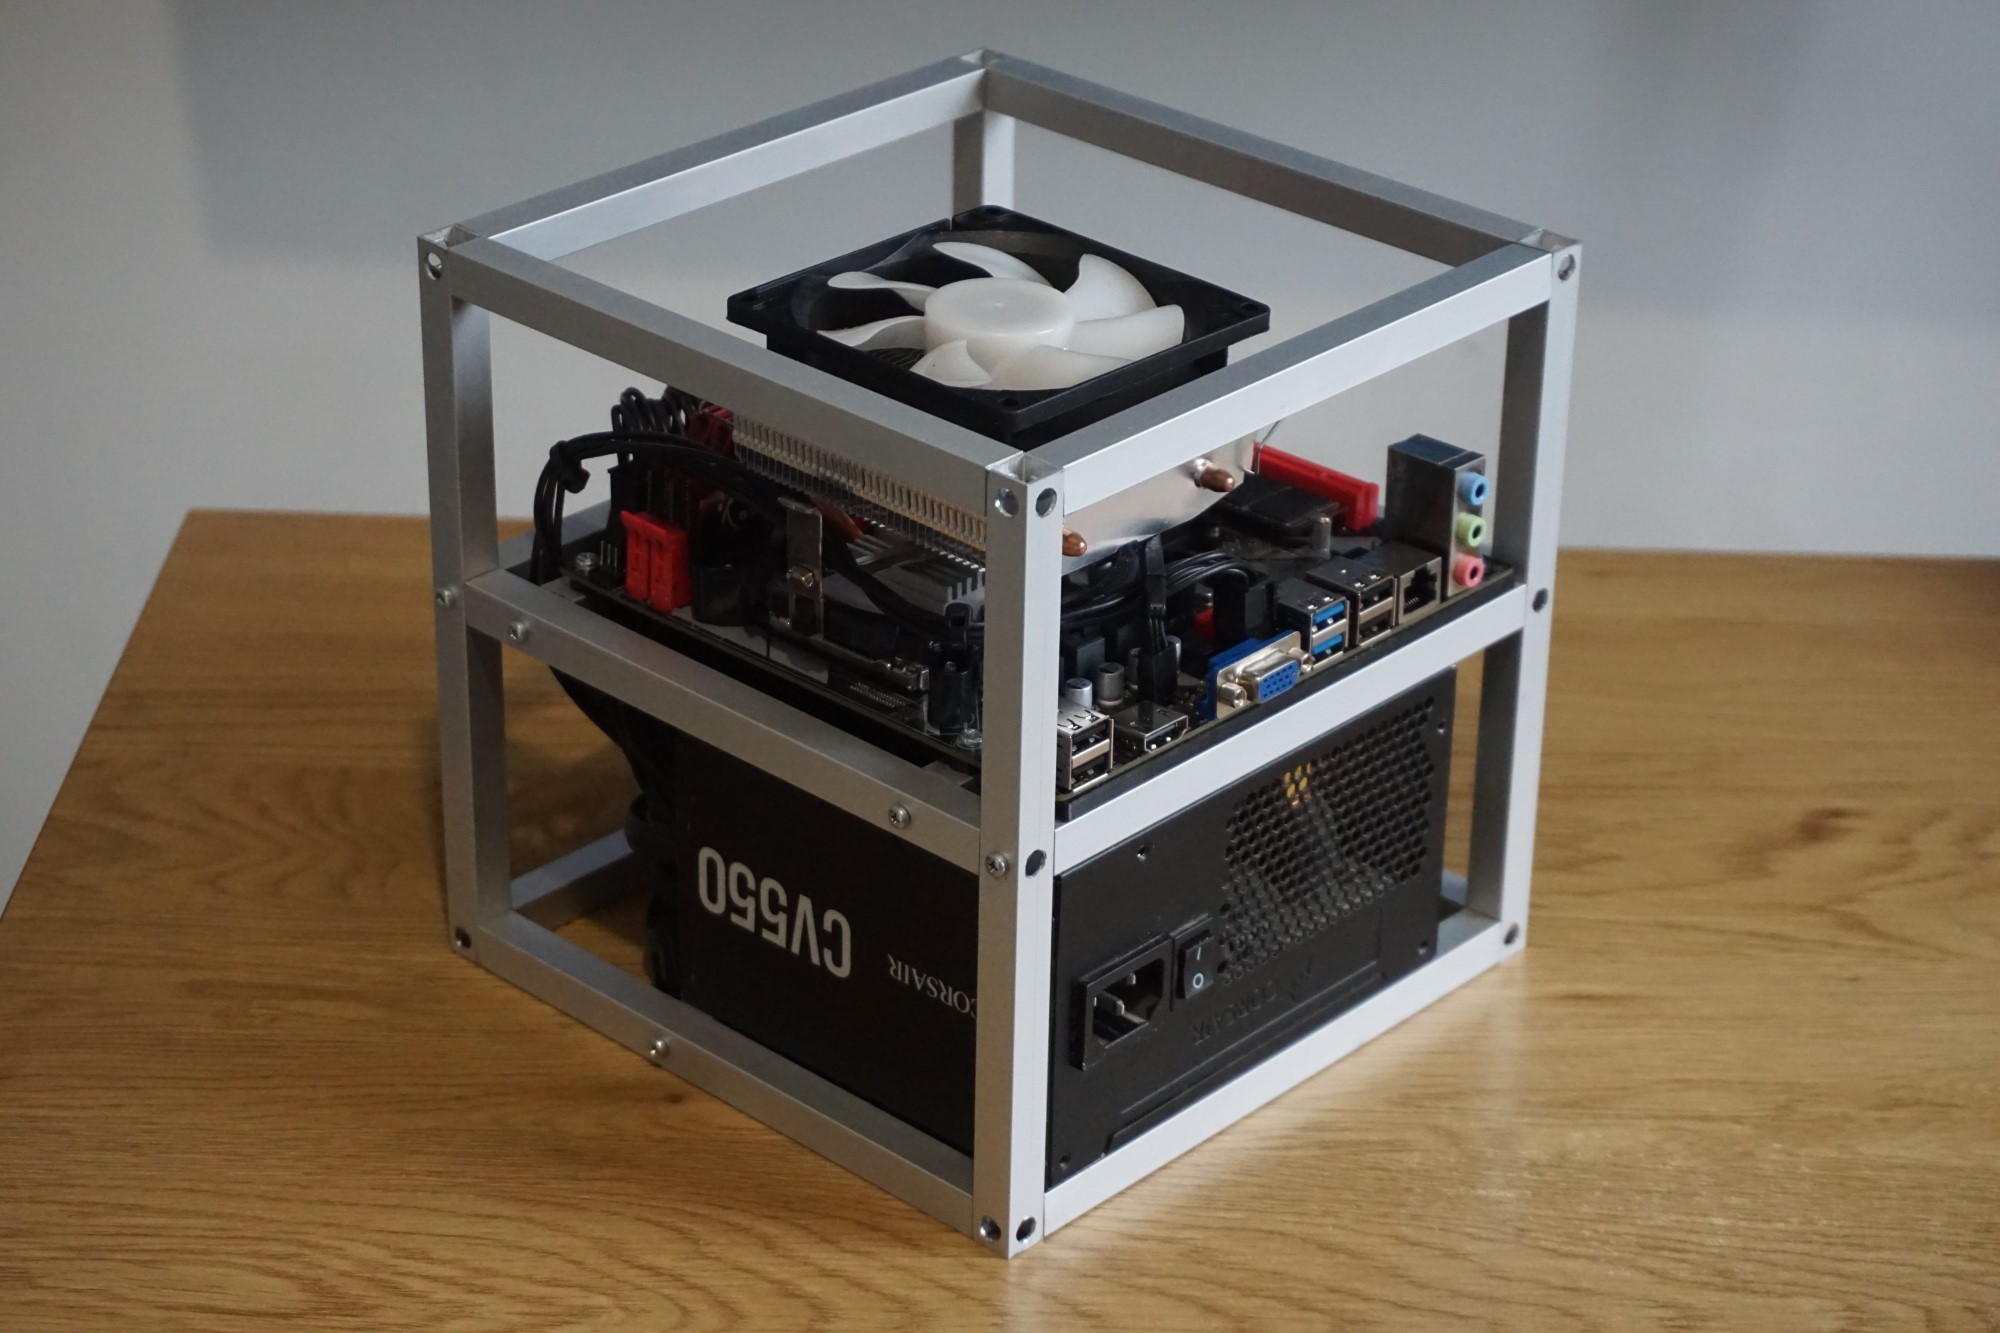
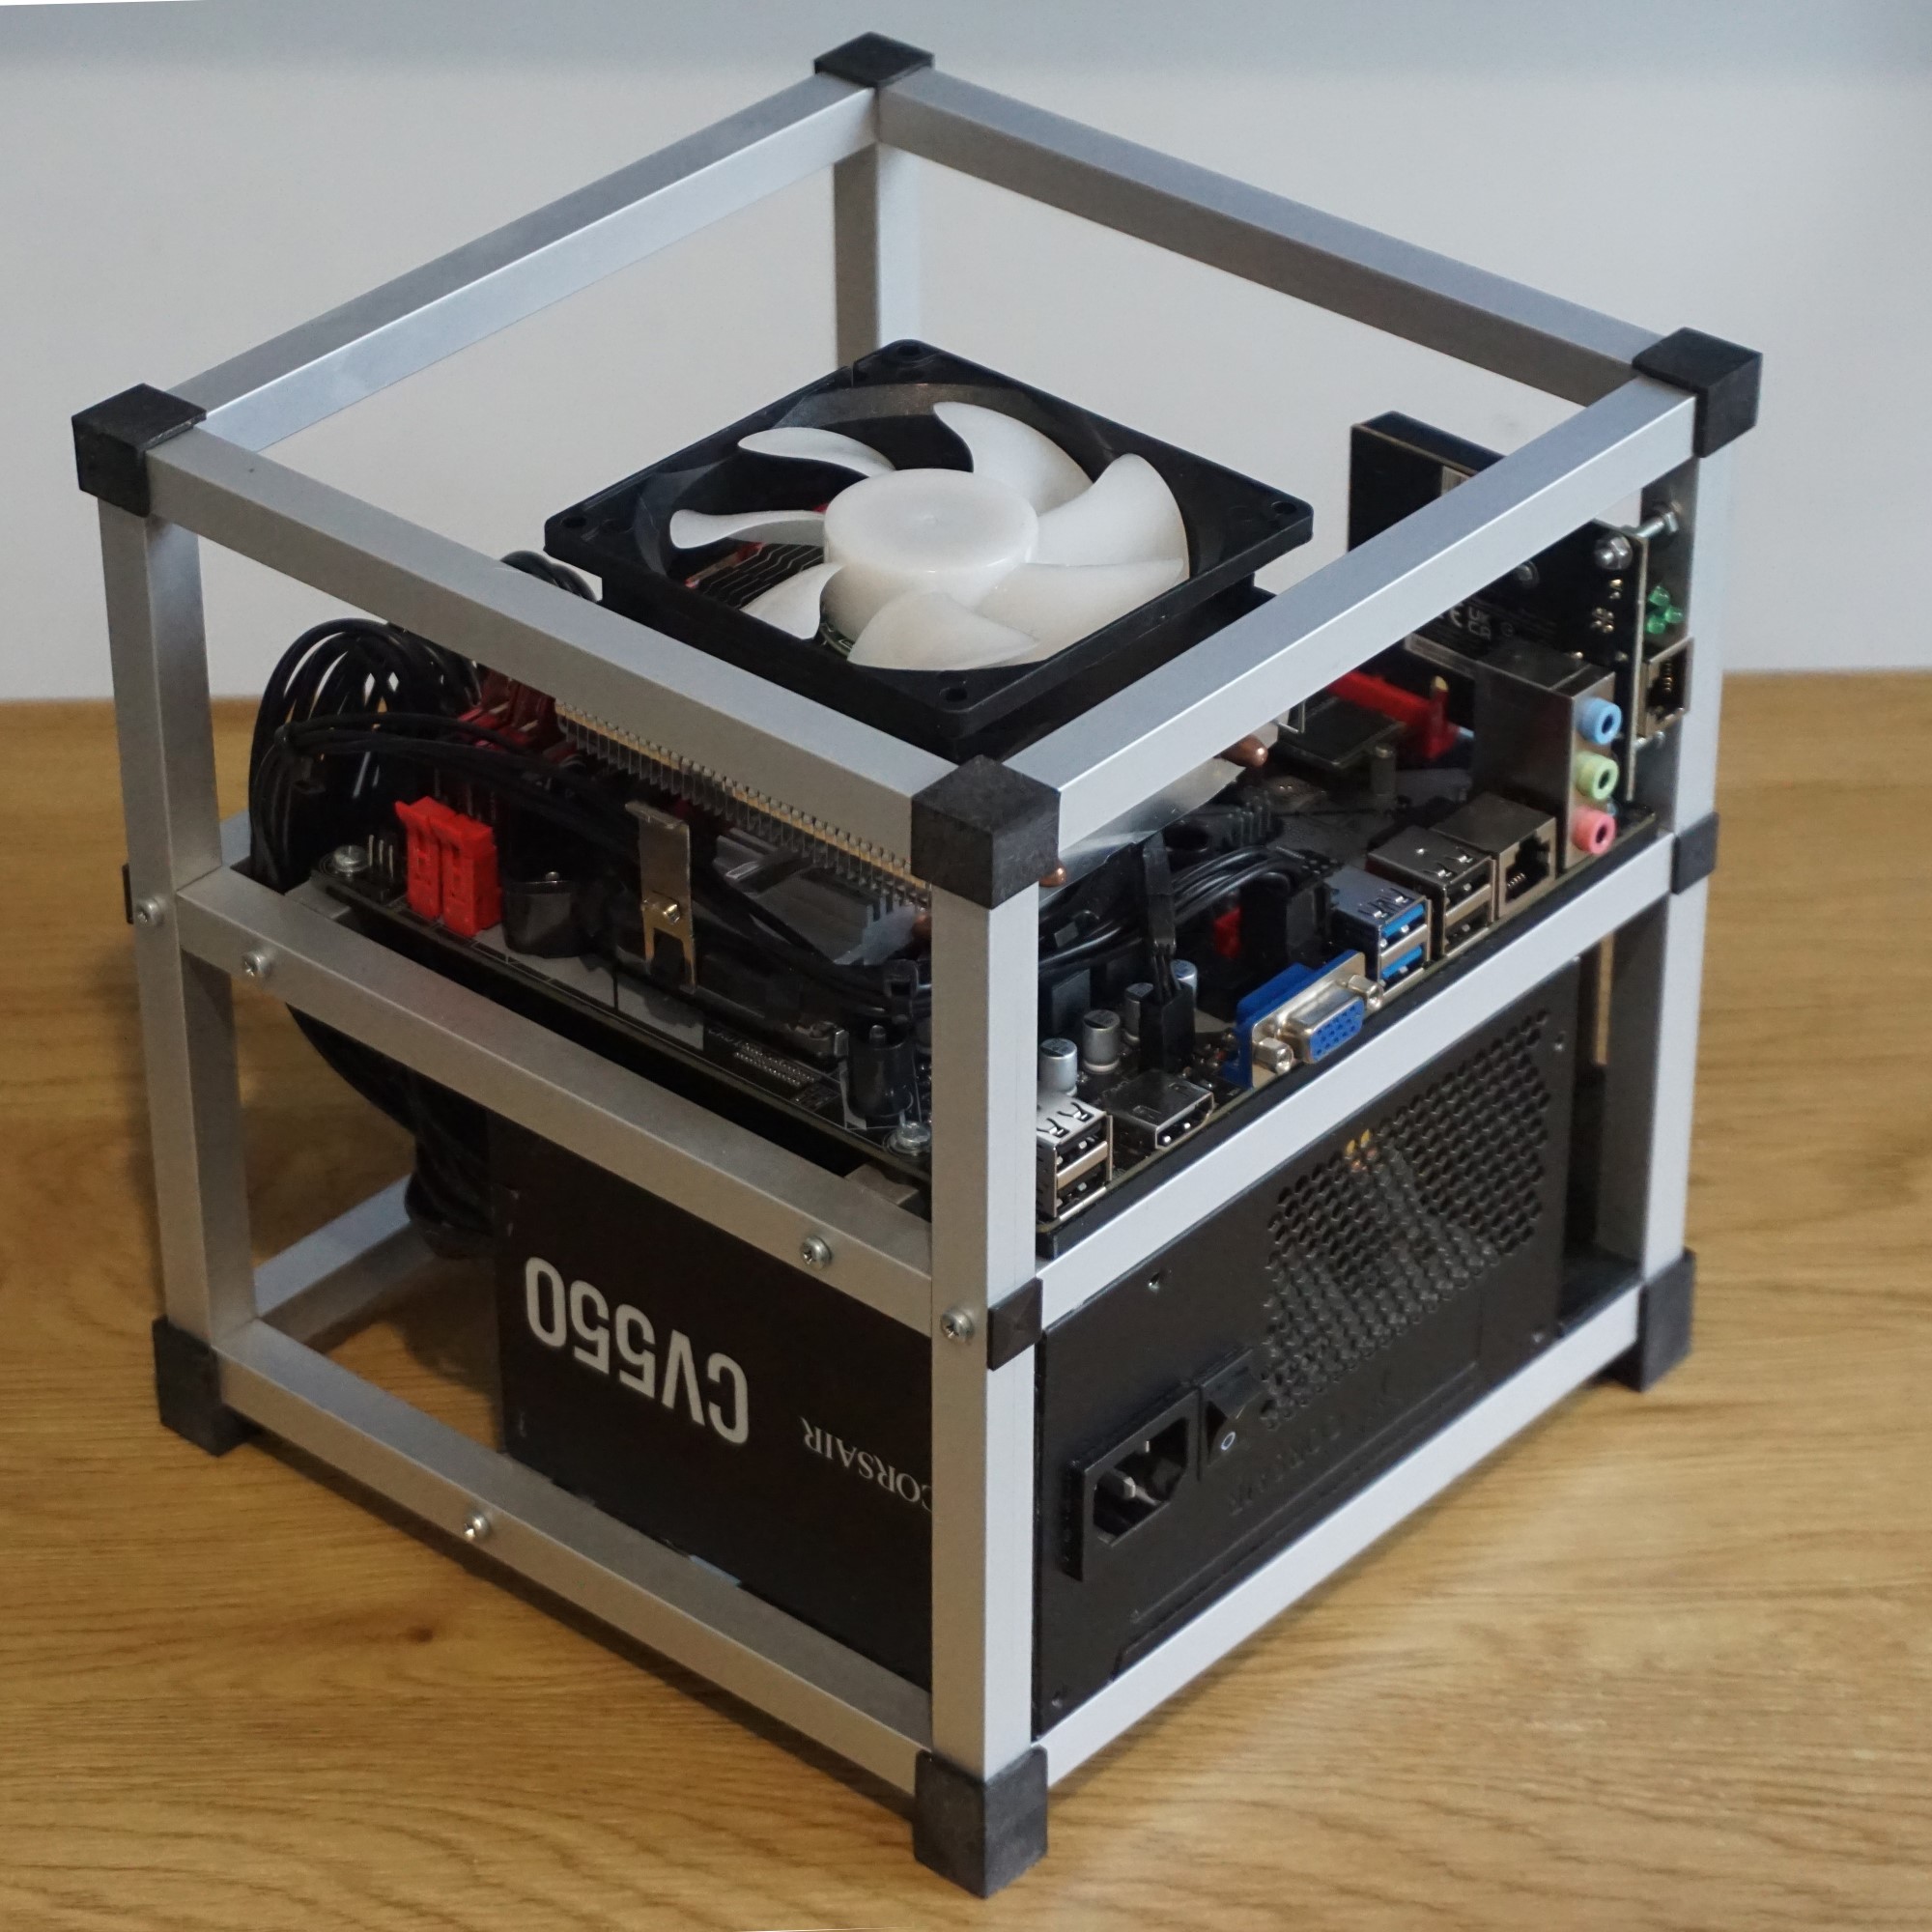
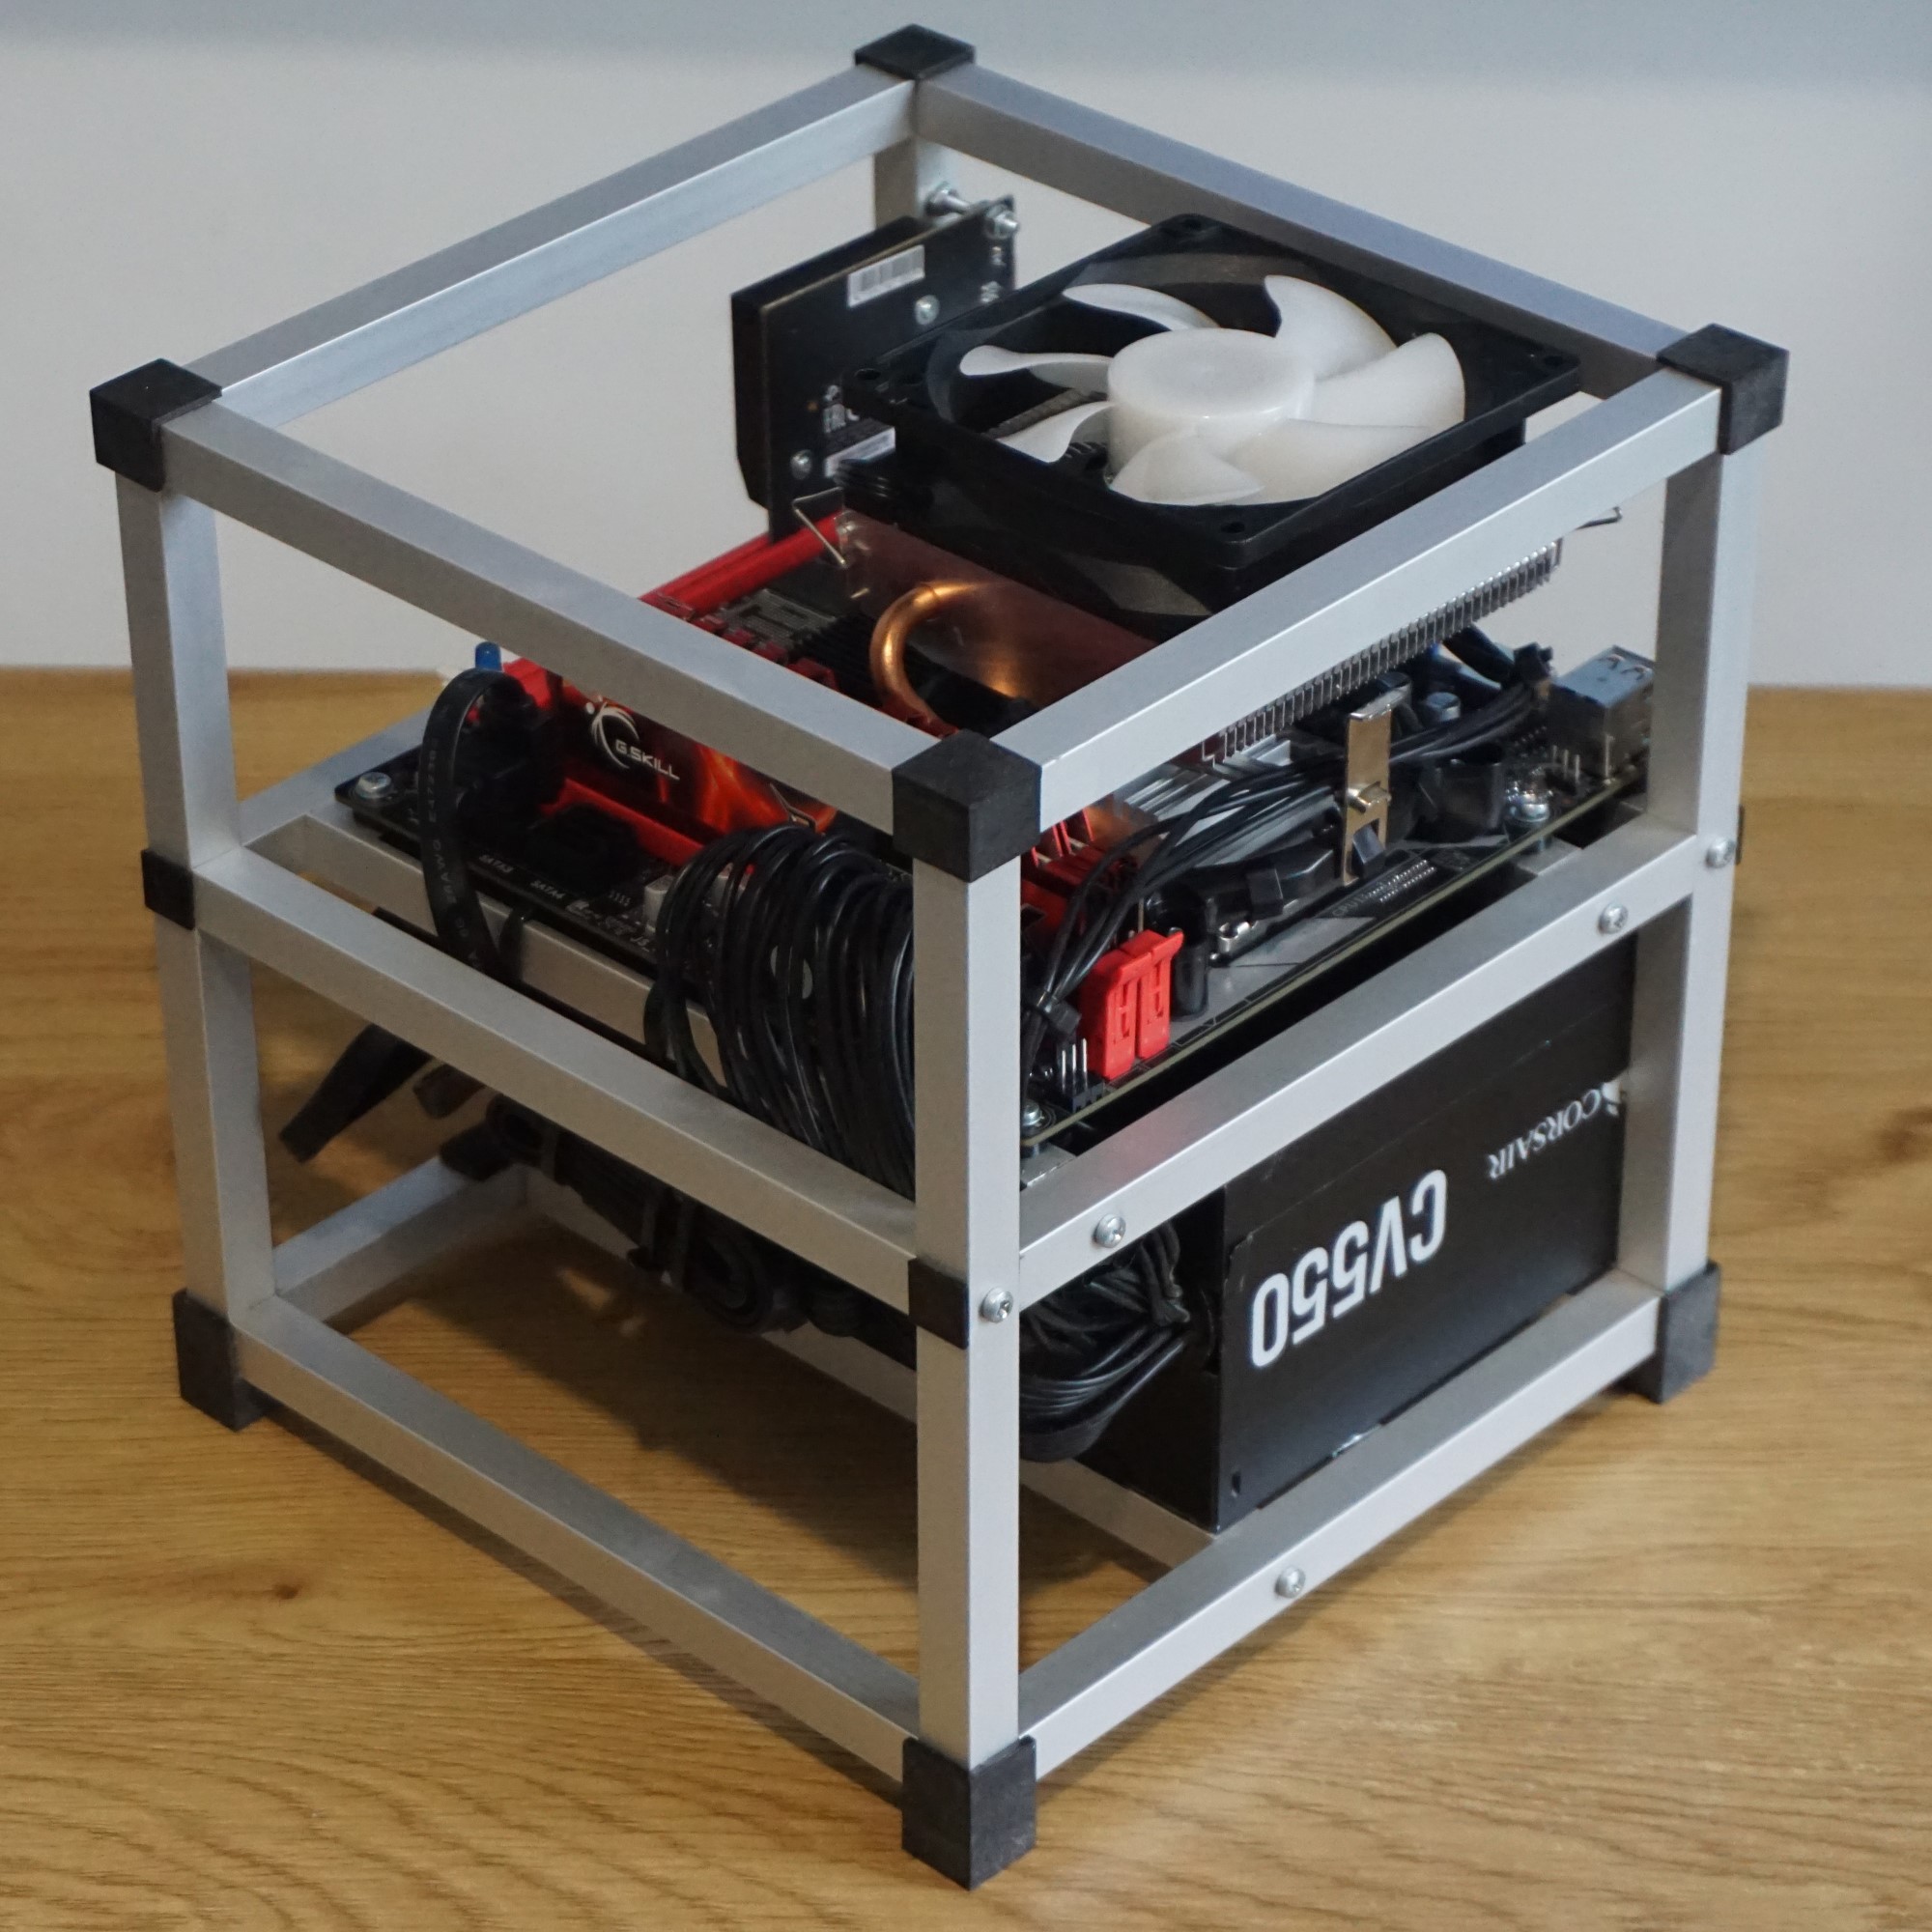
Of course I need a “case” as well. I have wasted enough of money, so that must cost me 5 euros now. I have built my PC case:

I really desperately want to rebuild it, because I am not happy with a lot of things(and I am very happy with a few as well, like the cooling and the fact that that GPU is not going to move. Ever. I mean that’s way better than any case I have ever bought in terms of GPU sagging), but the general idea seemed to work surprisingly well and it would be a great thing to practice a bit more before that project, so I am going to use exactly the same method here.

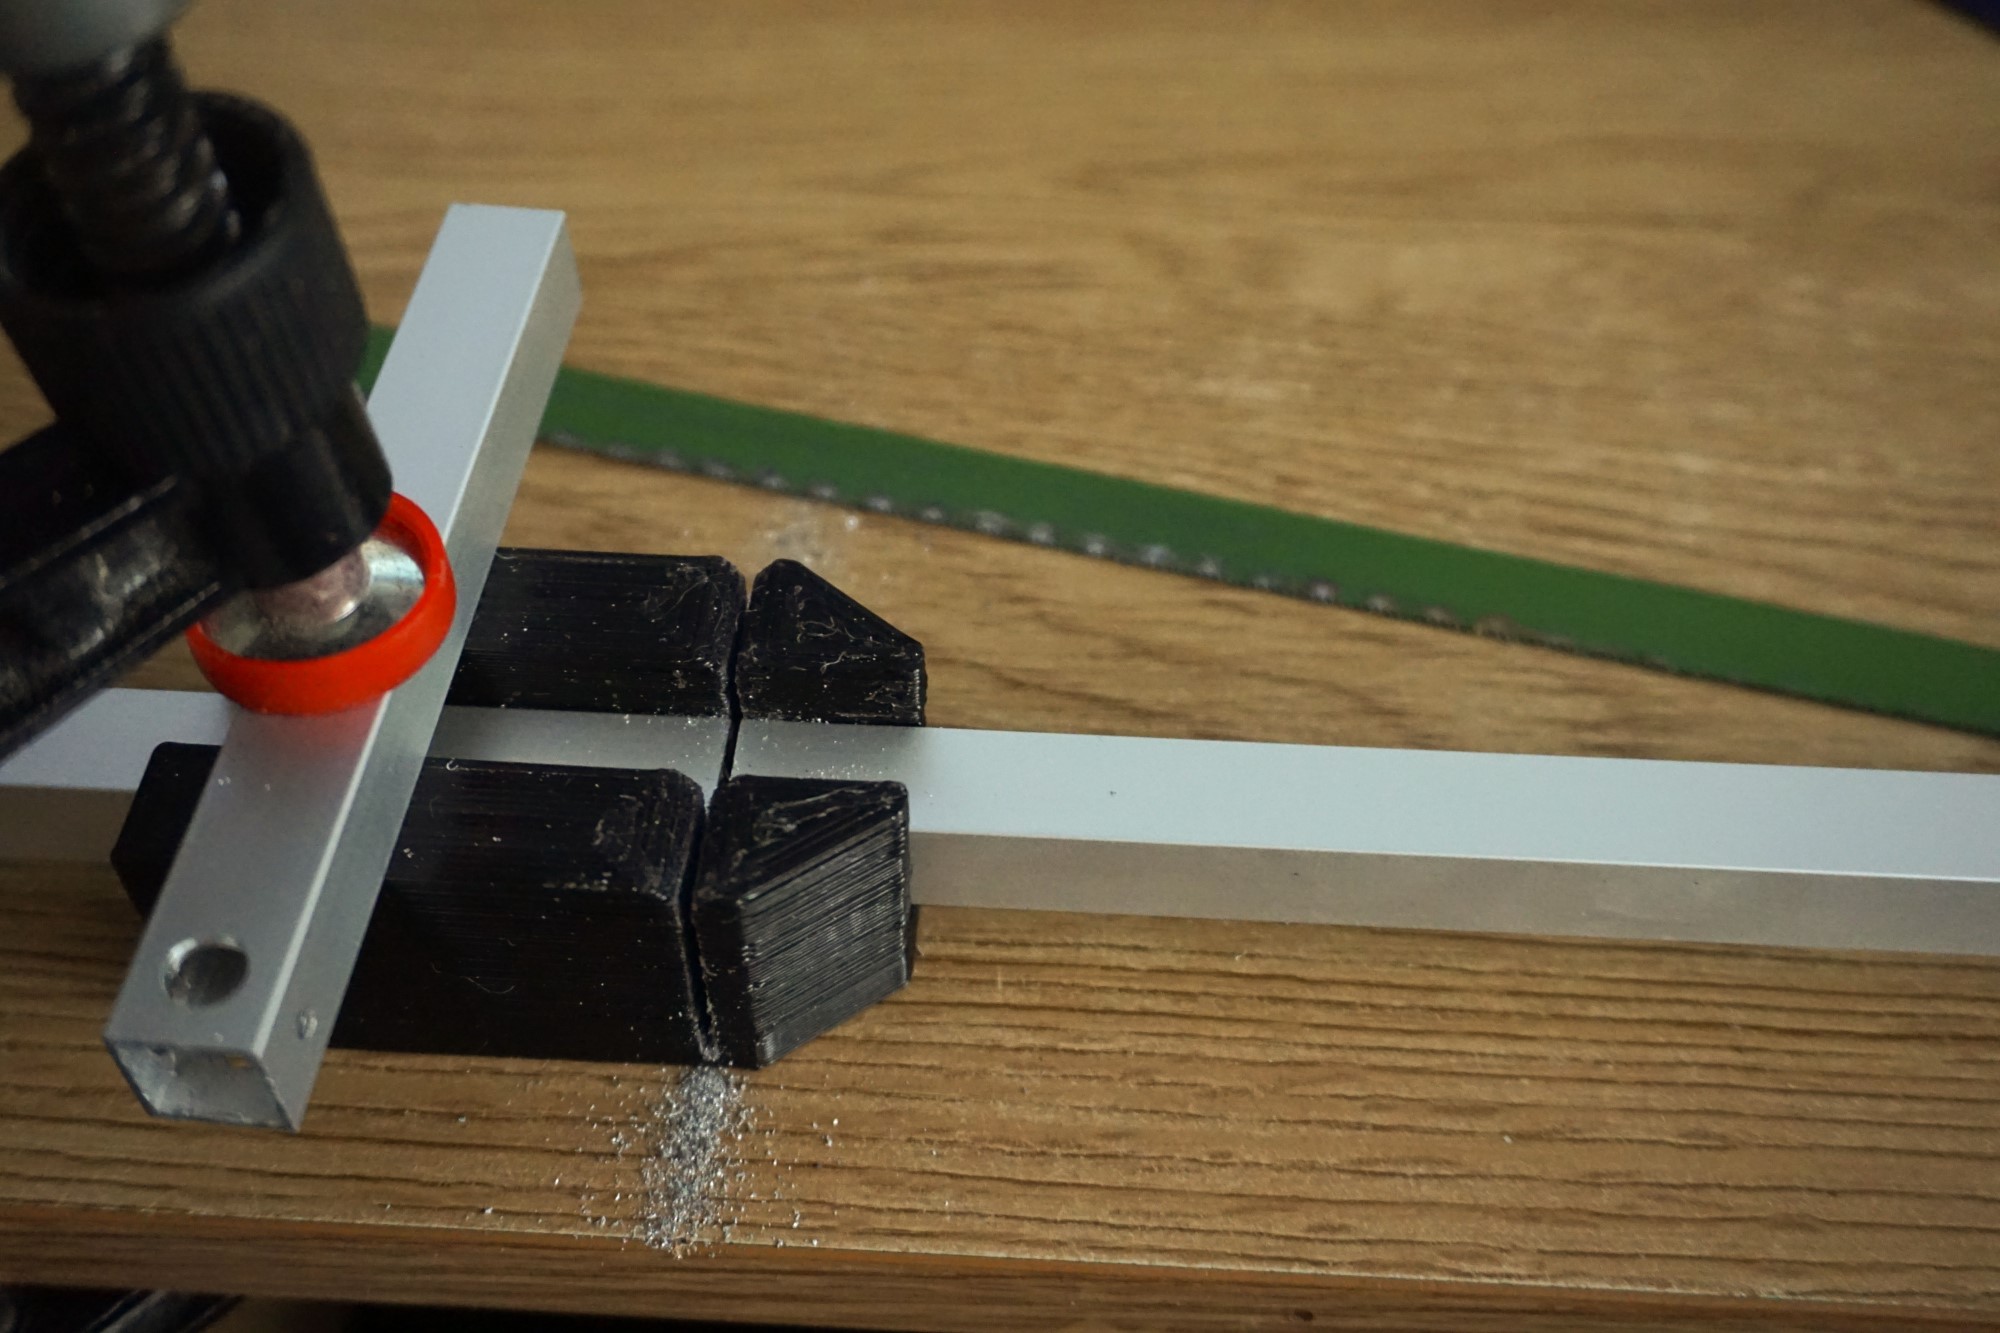
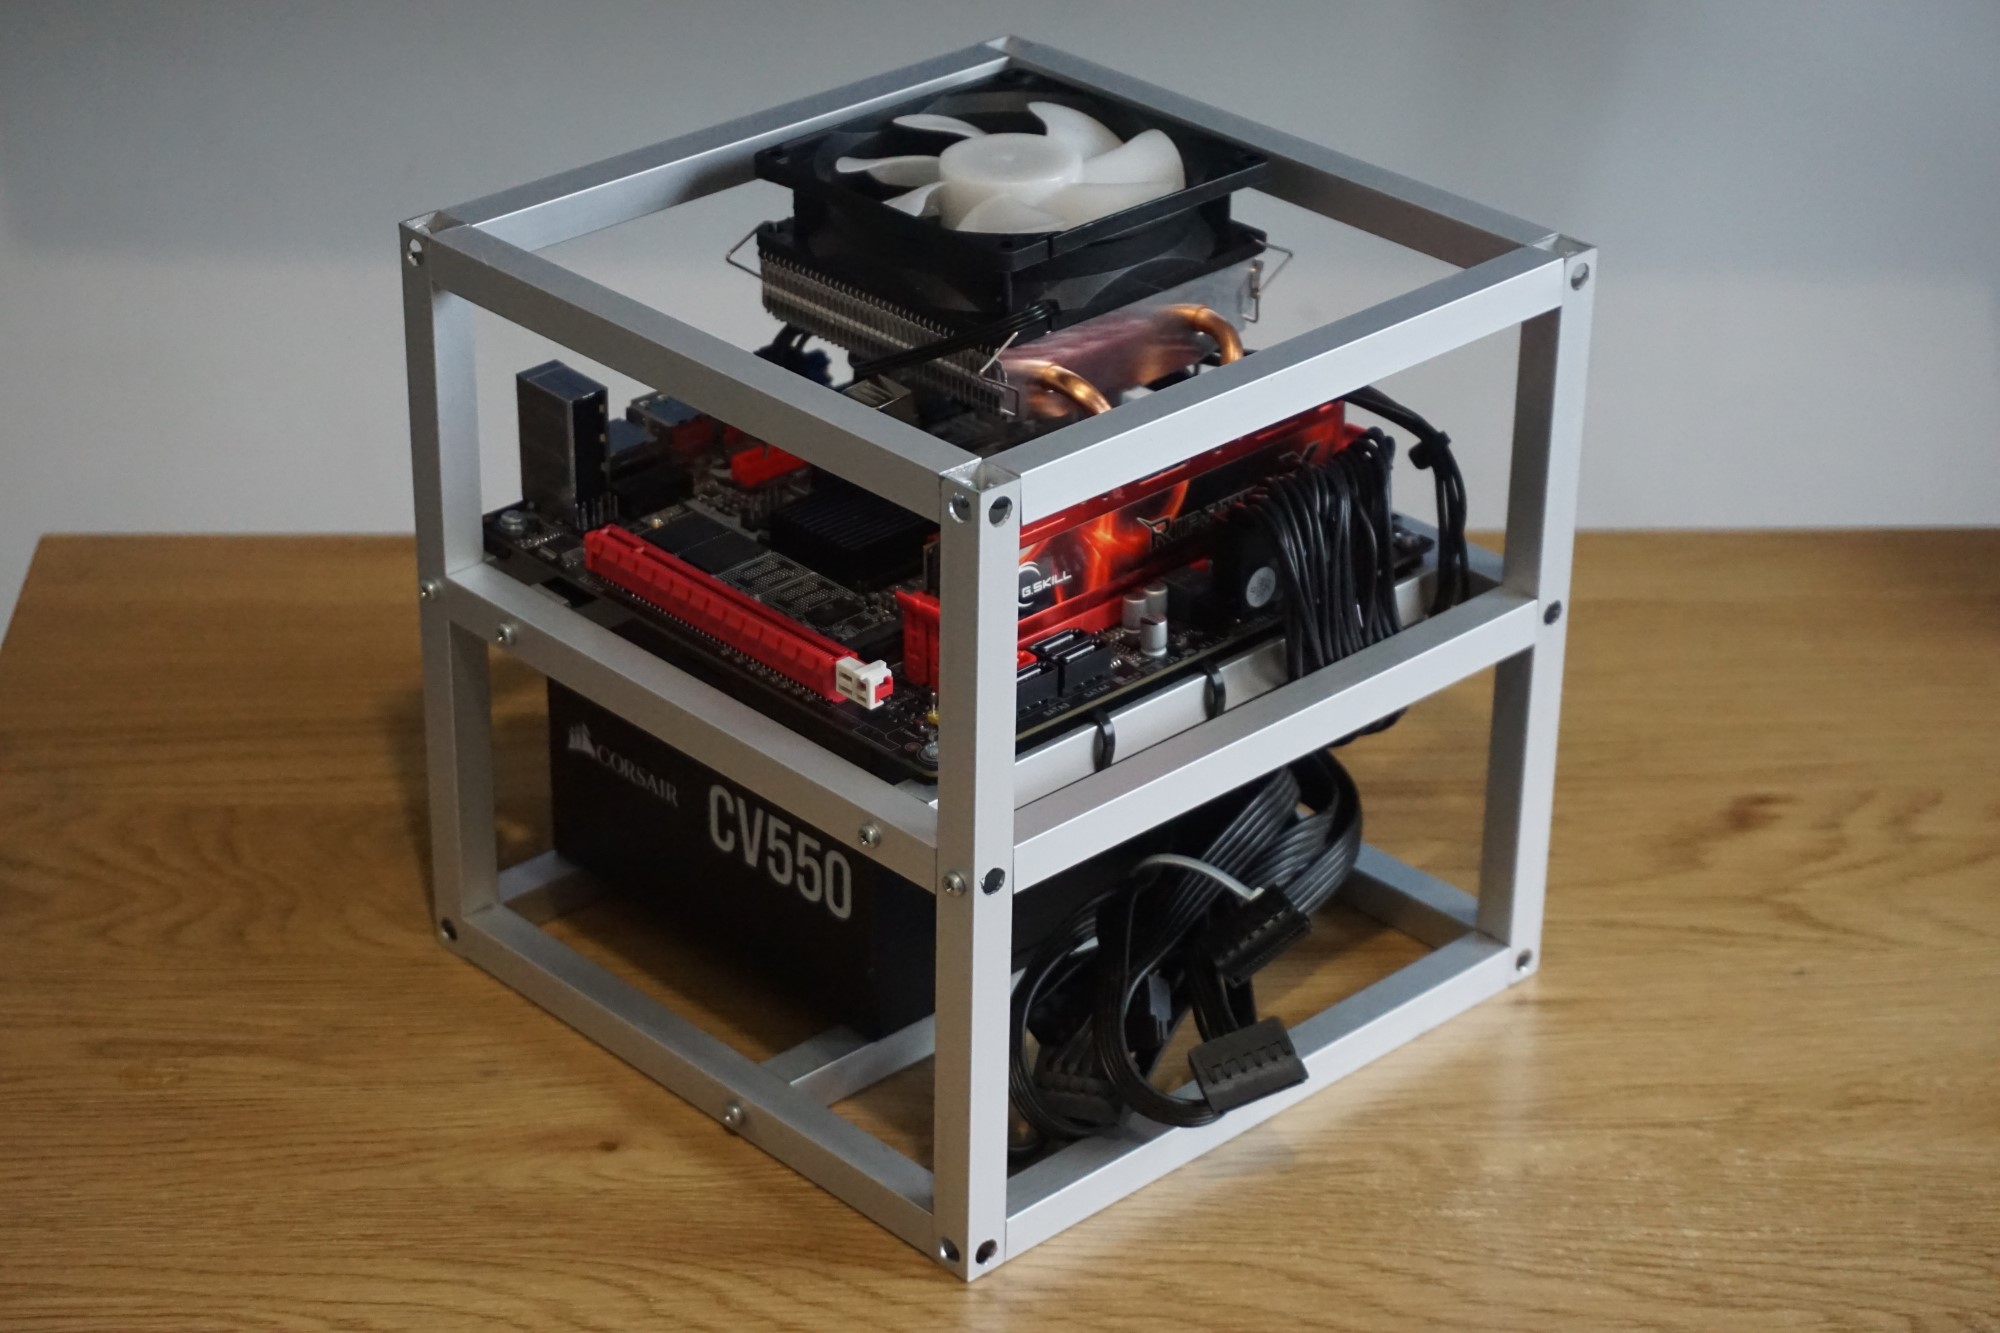
I already spent the 5 euros for 12x12mm aluminum rods and some screws and now it’s time to cut them. Which is a process that will require a bit of patience since I don’t have any tools to do that with any meaningful precision. :smiley:

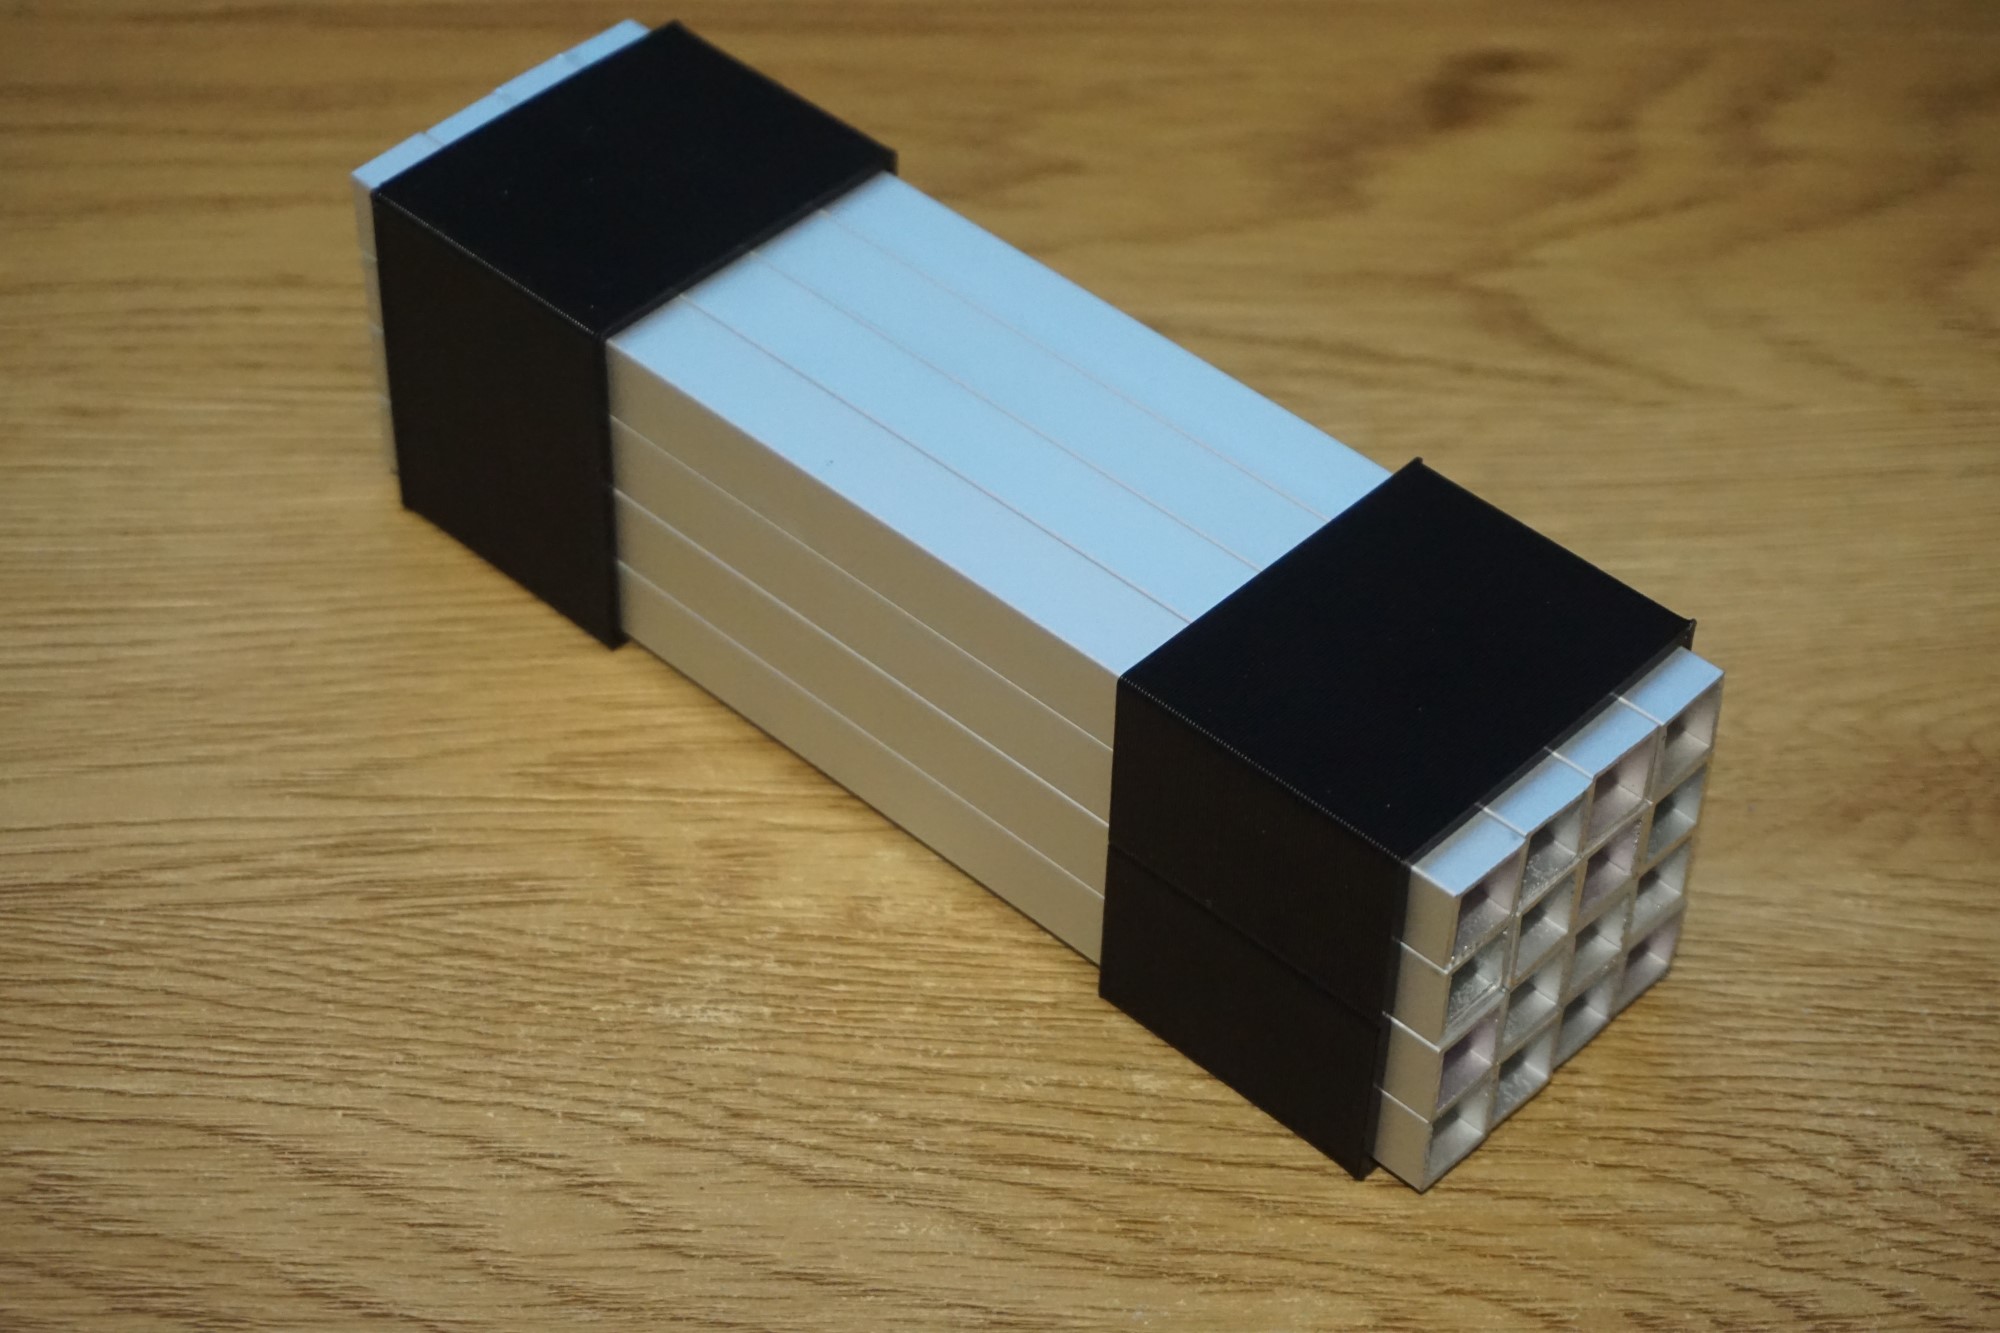
The rough plan now is:


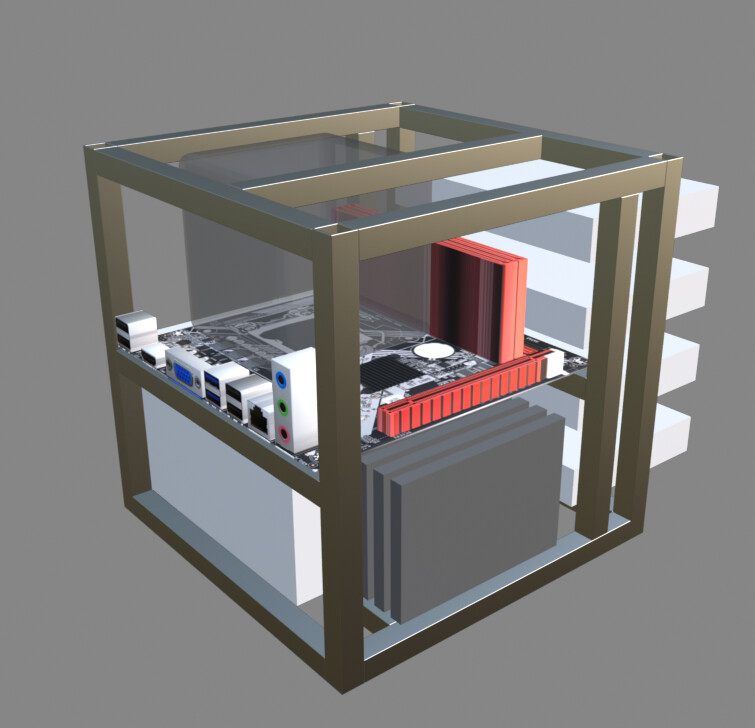
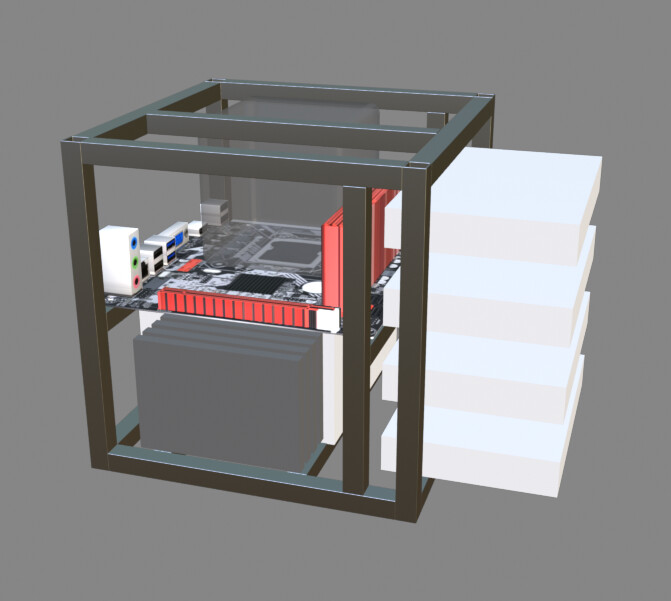
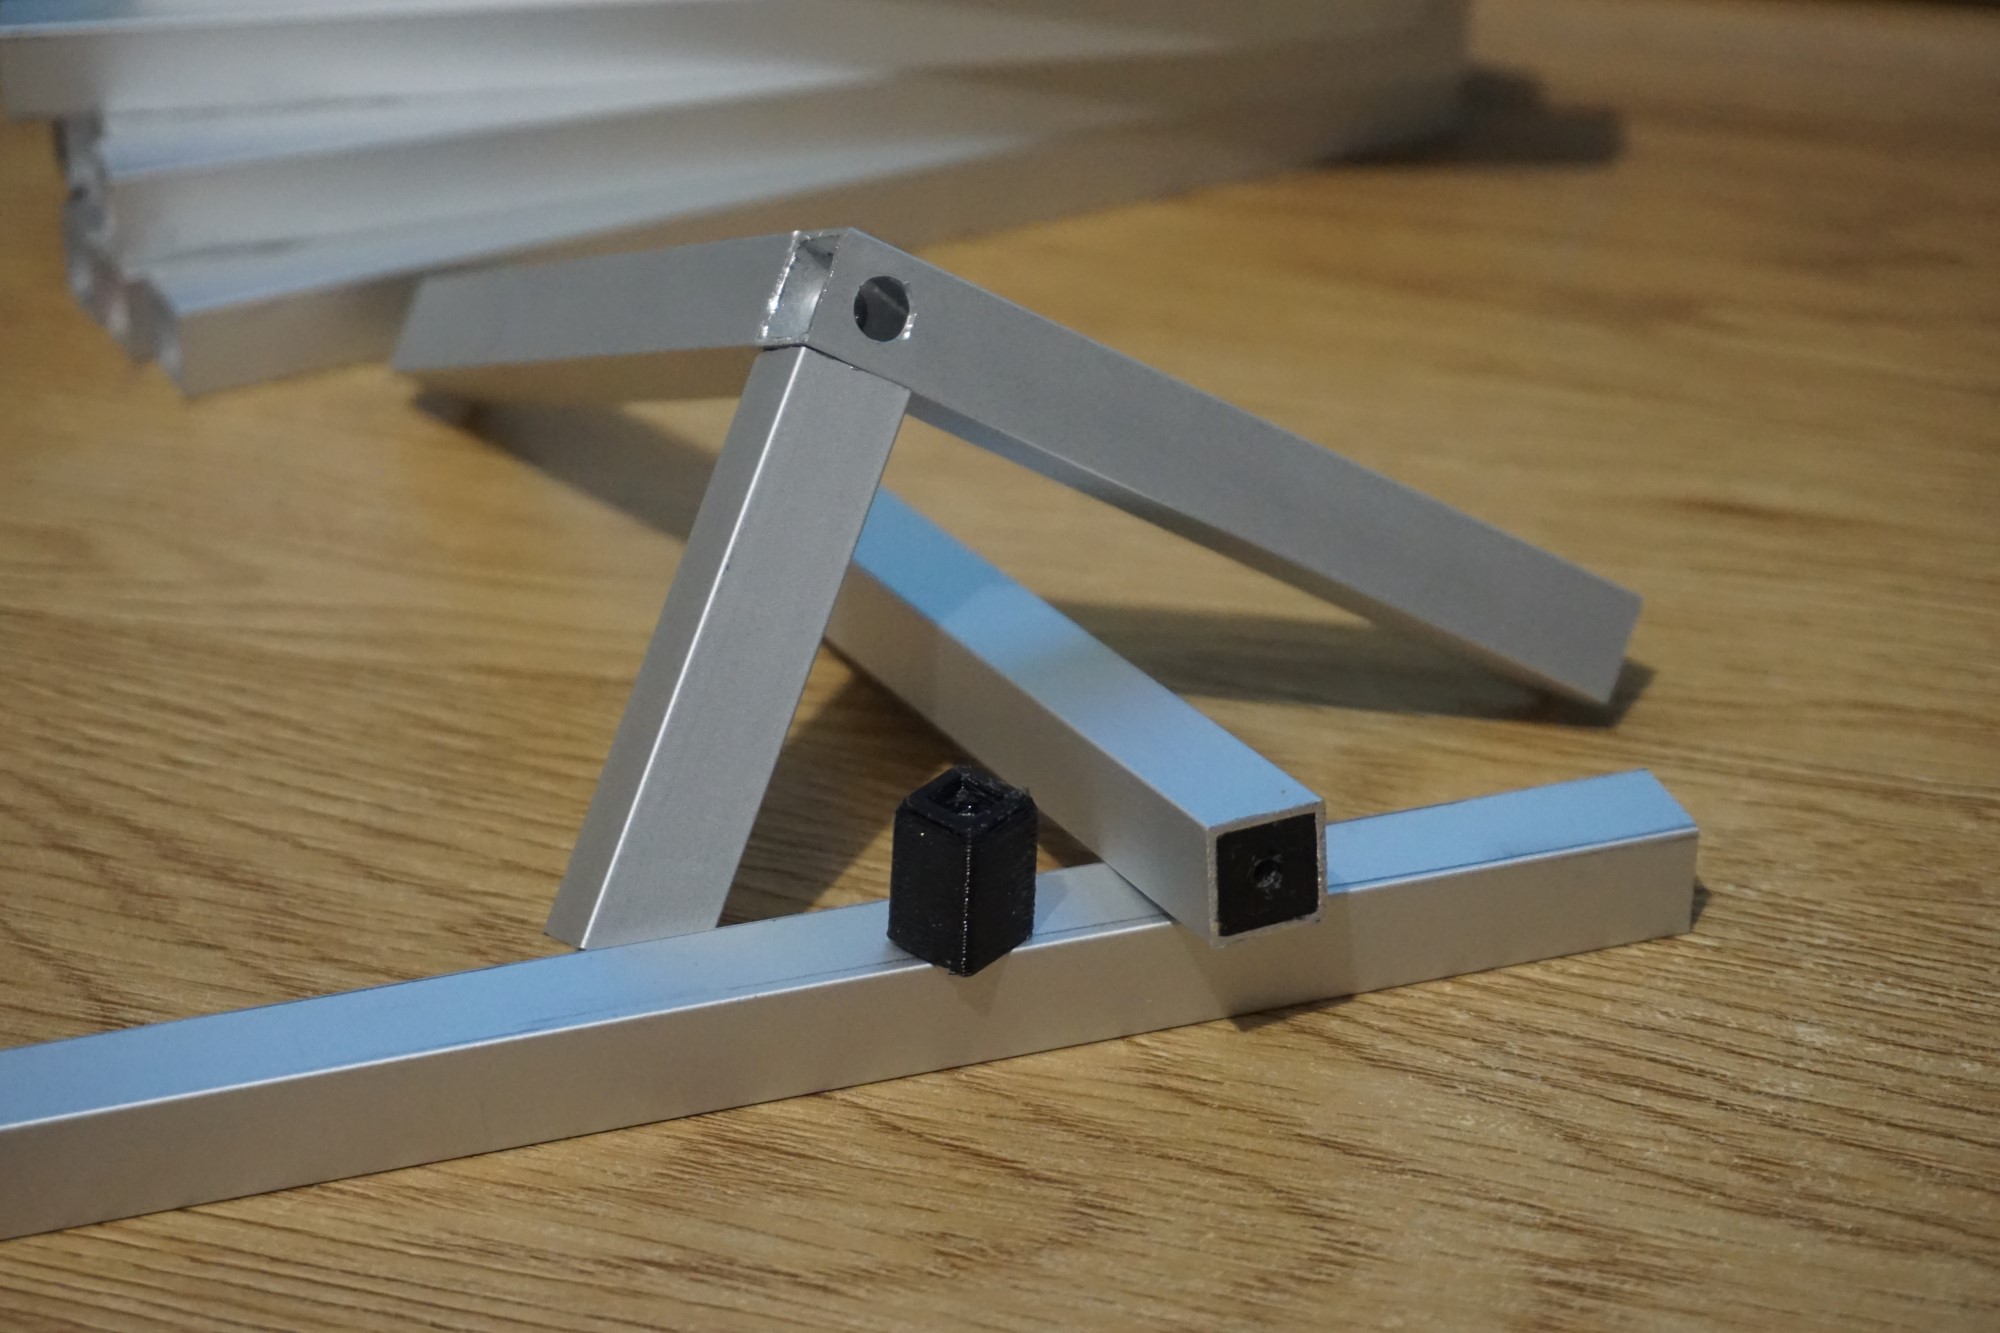
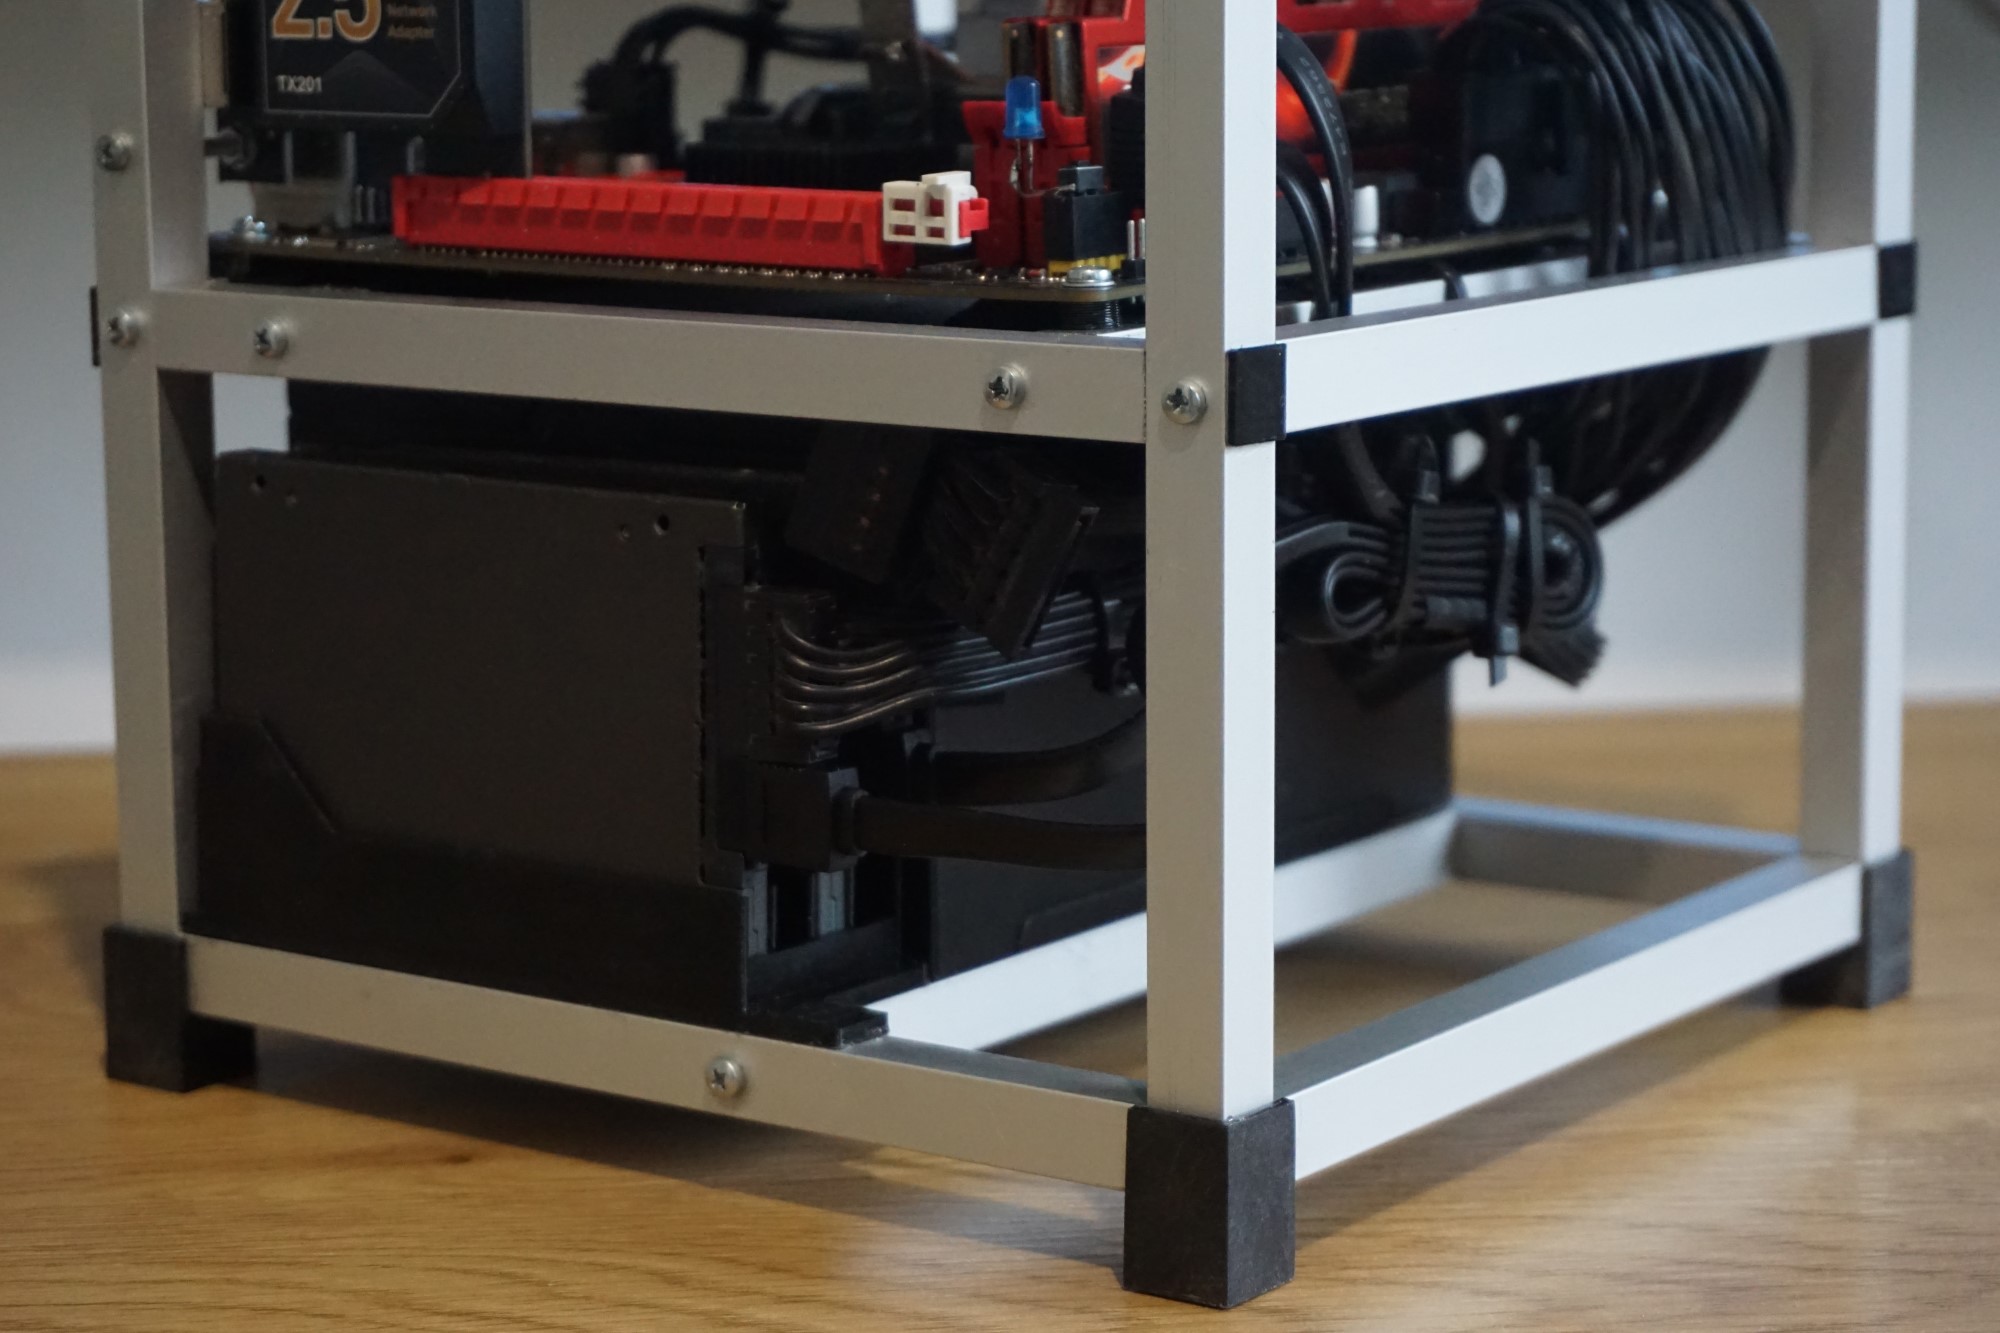
As you see, future me will probably have a little problem with 3.5 inch HDD drives(white) :smiley: But 2.5 inch SSDs will fit very well now. I am not using 3d printed corners this time. That turned out to be a bad idea. This is all I have as far. I’ll post updates later.

Oh and please tell me what you think. :smiley: I will not get offended if you point out the parts of this project that are completely stupid, because there might be a few :smiley: . What storage solutions do you guys use?

8 Likes

Everything is on my main PC (currently a 2TB SSD, 2TB NVMe and 2 * 4TB HDD’s), but I then somewhat did you what you did for my backup NAS.

I was using (and technically still have) an old Synology 4 bay unit, but it was getting old, was slow to do ANYTHING (really basic 2 core CPU) and I needed some more space.

I considered two options at the time, getting a new Synology or basically re-purposing my old backup PC that I had never needed and still haven’t, as a custom NAS system.

I took the cheaper option, which outside of getting some more drives (which would have cost the same anyway), I just bought a HBA SAS card to give me 8 SATA ports for the 6 HDD’s (the 3 * 4TB drives that I got new, and reused the 3 * 3TB drives that I had in the old Synology).

Apart from that, it’s basically my old PC, so a i7-6700K with 16GB RAM, not super power efficient but really powerful for what it does. I do reduce power usage a bit, by just running the CPU at stock, no overclock or anything, even the RAM is at stock, so no XMP and just use the iGPU, so there’s little else in the case other then the hard drives.

I also treat it more as an off-line backup, so most of the time it’s not powered on anyway.

I am using TrueNAS Scale however, which while not as super user friendly as the Synology setup, still does the job and has been getting better over time.

Of course, unlike the Synology, shouldn’t something fail, then its much easier to repair or replace, since it’s all just general PC parts.

2 Likes

Nice. That should be really powerful as for backup NAS. And of course no need to overclock. That’s what I am thinking at least. I expect even my i7 2600K should be really powerful for this. I’ll of course let it enjoy retirement without any overclocking as well or even lower frequency(we’ll see). :smiley:

Yeah I also have to use Scale. Core doesn’t fully support the cheap network adapters as far as I understand. There is some special dodgy/experimental driver that I would need to enable(or something like that) and it has problems from what I have read online.

I am not very experienced with TrueNAS, but as far I am really enjoying it. I really like it a lot. ZFS sounds like magic. I mean I would probably kill myself if I needed this and couldn’t do without it and had to learn everything and get results as soon as possible, but this situation right now… It’s just perfect for me - no pressure at all and maybe it will turn into something very useful in the future. :slight_smile:

I am actually good with only a few terabytes I have in my PC for now but I am more excited about Next Cloud integration. I have played around with it in the past and was very impressed. My hope is that I could even use it for my clients sharing files with me. That could potentially be convenient and awesome. I already sort of know how to set it up so it uses my web domain as well. Of course I’ll need to look into security in more depth, and reliability of a single PC running from my home is… well… an interesting question. :smiley: But maybe I don’t really need anything too fancy. It looks promising. And also just conveniently sharing files straight to my work folder from all my devices(or any device from anywhere really) sounds nice as well. I mean… sure that’s just like Google Drive. But, I don’t need to pay the subscription and it’s not limited by internet speed when I am at home. That’s something. Not sure how significant. But I am going with it for now :smiley:

Of course, I don’t really need this :smiley: :smiley: :smiley: But it’s interesting.

2 Likes

Awww so cute :smiling_face_with_three_hearts::pleading_face:

It reminds me of this:

3 Likes

Yeah, total overkill for what I’m using it for, but I already had it, so no point spending more money till it dies.

At this point in time, going with Scale is likely the better option anyway. I think it’s getting most of the development time now anyway and likely will be the only option in the future.

Yeah, I hadn’t used it before I did this, but used Synology/QNAP, etc for a number of years, along with general server setups, etc. So all the basics was fairly common and I wanted something more robust in a file system, which ZFS is.

Yup, your own ‘free’ cloud setup, that you know exactly what’s going on, who can access it, etc, etc. Just need to make sure your internet connection is up to the task, depending on how much it will get used.

If going to use it for clients, then may want to consider a UPS as well, just so it has clean/stable power and/or can cleaning shutdown if it has too.

2 Likes

Updates

The physical construction of the case is of course more difficult than it seems as always with these projects :smiley: . And of course because I often make it unnecessarily difficult.

I am using just

  • a metal saw blade(just the blade no actual saw :smiley: ),
  • a drill,
  • a dremel,
  • a screwdriver,
  • a hammer,
  • some sanding paper
  • and a single woodworking clamp.
    :smiley: That’s it. So even getting straight cuts is not really possible:

I compensated for that just by a lot of sanding:

I had to switch their positions and orientations many times in the 3d printed holder while sanding so they average to flat over time.

I am joining the corners like this:

The 3d printed inserts are hammered in(that’s why the hammer :smiley: ) and the screws expand them even further so the joints are very strong. The big holes in the aluminum profile are very ugly though and I’ll probably want to do something about them later.

For everything not to be too easy I also destroyed my PSU by shortening the wires. I would highly recommend to try this process to all my enemies and people I hate.

You can apparently shim the pins and pull them out and then it’s easy to shorten the wire and solder it there. Easy, but on the 24 pin connector, there are 23 pins… so… you have the pleasure of repeating the process quite a lot.

But other way, I don’t think I could have fitted the cables inside the cube:

The PSU is ruined anyway, because I drilled some additional holes to mount it. Even though they look a lot better than the big ones, because I can do that quite precisely with a small drill bit a dremel.

Like everything in this world, it looks OK from far enough as far:


It’s very sturdy and strong, I can stand on, I tried it for some reason :smiley: (without the components inside of course). :smiley: and I weigh 100kg. So, that’s good. :smiley: I hate how uneven the big holes turned out.

The only few things left is to 3d print some sort of a tray for SSDs, to hide the big holes somehow(suggestions are welcome!) and to install the network card which will need some sort of support. I am still waiting for the network card to arrive. I might also want to shorten the disk power cables in the future, but I cannot re-pin them like motherboard and CPU ones and would have to cut and join cables in the middle, which I can do safely, but it would be visible, so I am hesitating. Maybe they will fit nicely as they are somehow.

5 Likes

Aww, come on man, go hard core, next time use just the saw, but no blade :laughing:

Some little LED lights, but I have a feeling that RBG bling isn’t you.

On the other hand, if you can string a mostly hidden wire to some of the holes and mount a LED, then status lights maybe, like power on, network activity, drive activity (I’m still a little old school and miss the flashing light to let me know when the drive is being accessed).

Then of course you could also put the power on and reset buttons in there as well.

1 Like

That’s fair :smiley:

That’s also a fair assessment. As far, I think just cube corners look OK:

It would be cool if I could integrate the “on” button into one of them. But I think for now I’ll make some sort of thing that mounts directly on the motherboard pins. The fan is good enough indication it’s working for me, but drive and just “on” LED might be nice, it’s just that I am not a huge fan of LEDs and I cannot just buy something that I would like for this, so I would have to make it… I just don’t want to spend time on that. On the other had… Maybe an old school LED could be nice :smiley:

LTL-4234_pic1-300x300

It could still just mount directly on the motherboard… I 'll think about that. Thanks for leading me to this idea.

That was actually surprisingly easy:

Since it was too easy, I cut one of the legs and soldered a resistor in between to dim it. That was way better. :smiley:

3 Likes

I think you may have just invented a whole new range of ‘RBG’ options…

That’s it. Done. Never again :smiley:


I am happy how the big ugly holes got hidden. It remains extremely sturdy and I got lucky with how I managed to mount the network card. The stupid thing is that it’s supposed to be a reliable device easy to fix instantly if something goes wrong and changing the PSU would definitely not be instant. But to be fair, if it broke I would get a smaller one(so probably need to redo everything :smiley: ). And also why would it break?.. It’s a good PSU that will never ever work to even close to what it’s rated for. Now I probably need more and larger SSDs - it has 2 128GB SSDs at the moment as placeholders :smiley: I’ll at least be able to play with it and learn to set it all up the way I want to for now. Network card seems to work OK, I get 270 MB/s transfer speed at least with the size of files I would use it with and setting up Next Cloud seems to be easier with TrueNAS Scale than with Core, but of course I’ll be playing with it for a while until I figure everything out. I think it was a successful project for what it is.

2 Likes

Nice…but what about dust?

My solution is cleaning it. :smiley: I also use my PC like this. At least every once in 3-4 months I have to clean the CPU cooler. I don’t need to disassemble much for that though, so it’s no big deal and it’s also sort of nice because I always know if it needs cleaning as I can just see it. It works quite well for me. I would argue this is even better than with a regular case without some sort of really good filters(that also interfere with cooling). It’s really way less of a big deal than one might think. I mean at least for me.

It’s a way to do it and it’s not so bad at all…you’re right.
Actually it’s easier to see if cleaning it’s needed or not…and also, if you put it over a table, it will catch less dust than if you put on the floor, like often people do with their tower.

Anyway, you did a really good job.
How about dimensions of the cube?

Thank you. It’s 20.5x21x21.3cm. I had to add the feet so the PSU fan at the bottom would have some air, but it still looks like a cube which is what I wanted so I am quite happy.