Building blocks toy manual. with render workbench

Hello

I am drawing the building instructions for a vintage blocks game like Lego.
I have the different blocks grouped in different collections for each layer of the model, from bottom to top.
For each layer in the instructions, I need to draw all the previous layers, and the current layer with the new blocks highlighted in the top.
I have tested the renders in Cycles, eevee and workbench. Workbench render is great. This is like a drawing with each block border, and it is very very fast.

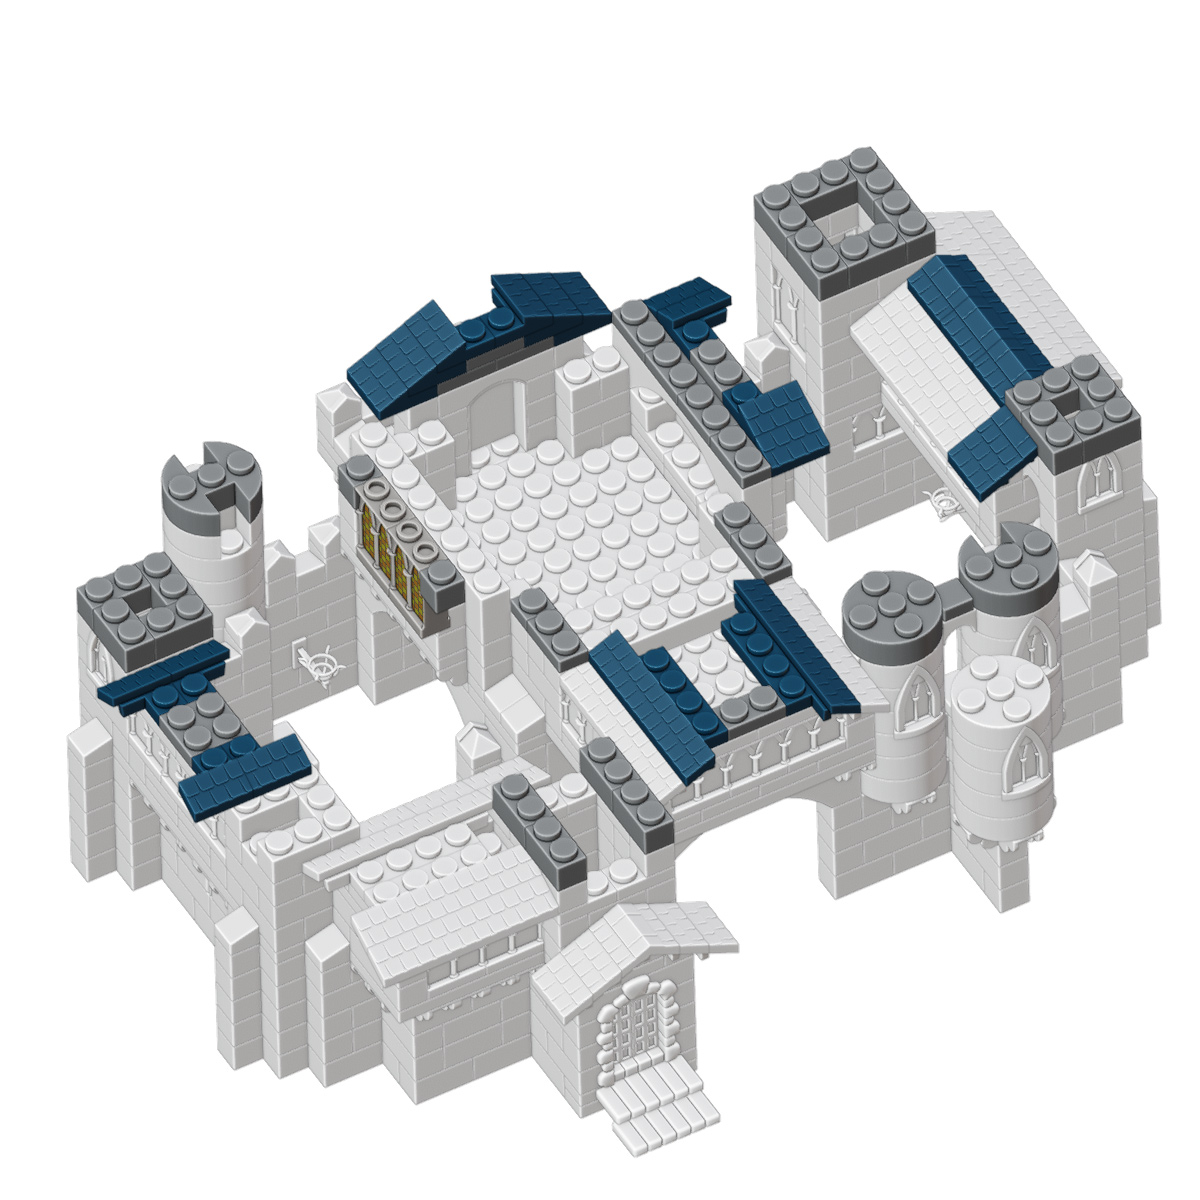
For example. I have done this render with the previous layers. All in white very easy using the setting Lighting, “single”. A white material is used for all, very easy. Looks great.

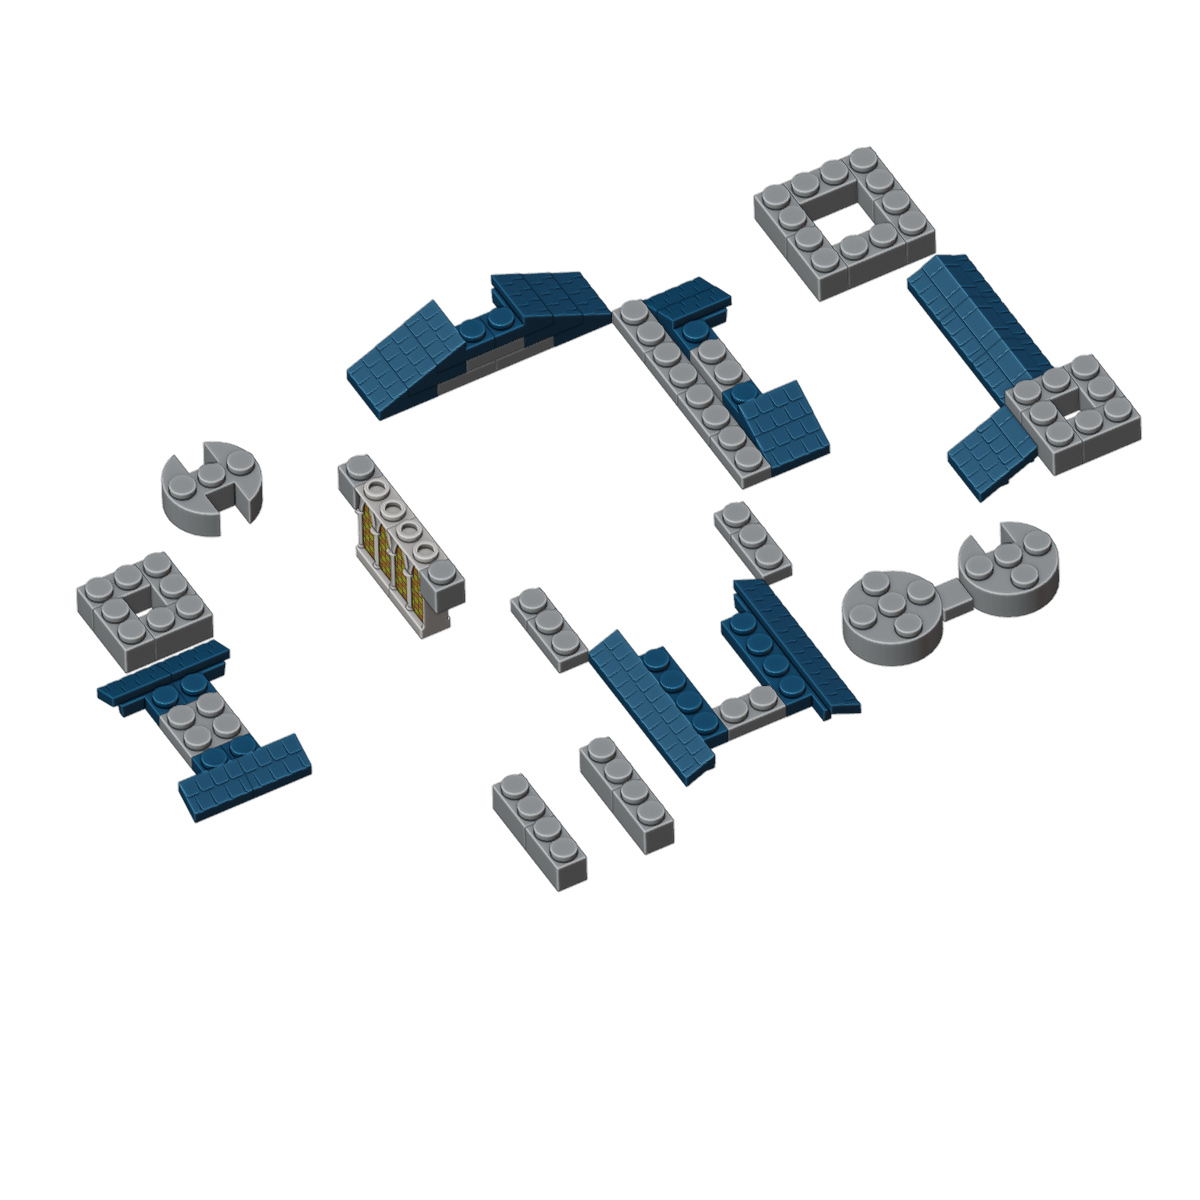
I have done this other render for the current layer to highlight the new blocks. With the setting Lighting, “material” to keep each block in his original color.

Finally, I needed to use photoshop to combine the two renders and get the final image. All PNG transparent. It looks great, but …

I do not want to use external software -photoshop-, because i need to repeat the operation a lot of times for each step in the instructions. Could it be made using render layers in Blender 4.1?

And there is perspective errors in some areas because white image blocks can overlap color blocks sometimes. The setting “Holdout” doesn’t seem to work for Workbench render. I would need to carefully clean up the edge of each image in photoshop. A poor workflow.

This is the problem. I like very much how the “workbench” render looks, and this is very fast. But i need to combine the white previous collections with the current collection in colors. And the overlapping problem.

Other alternatives. I have tested Light-linking, but only in Cycles, much very slow, poor overexposed colors. Eevee need to use “freestyle” lines to get the border of each block in a proper way, worse, slow… ugly drawing.

I am open to hearing other alternatives

Need to find a fast workflow, because i need to repeat the actions a lot of time for each layer with large models. Need to be fast render and generate big images. So “workbench” render would be great.

Thanks

Can I suggest you use “Object” color mode in workbench?

Properties > Object > Viewport_Display : Color ← this is where object-color is stored for each object.

With Properties > Rendeer > Render-Engine = Workbench :

In Viewport header, get the Shading dropdown (just to the right of the “viewport_shading = Rendered” button), and in the 6 buttons
[Material] [Object] [Attribute]
[Single] [Random] [Texture]
here select [Object]

For rendering to match the viewport display, you also need to go to
Properties > Render > Color : and click the [Object] button
…

in the scripting Console, Object-color of the current object is

C.active_object.color

it is a 4-tuple of floats, each in the range of 0.0 - 1.0, corresponding to RGBA.
To change the selected object to blue

C.active_object.color = (0,0,1,1)

Select all objects and change them all to white:

for o in C.selected_objects:
    o.color = (1,1,1,1)

Then select just the newest subset of blocks (objects just added), and turn these orange:

for o in C.selected_objects:
    o.color = (1,0.5,0,1)

If you are using a limited palette of colors, predefine them:

red = (1,0,0,1)
green = (0,1,0,1)
purple = (.5,0,1,1)

etc.
Then you can just

for o in C.selected_objects:
    o.color = purple
2 Likes

Hi shannonz
Thanks you very much for your answer. It seems that you understand very well how blender works inside.

I will do it for new models, coloring each block from the beginning before duplicating them. Because for finished models, with hundreds of blocks, it can be a Chinese job to apply the color to each existent block. Now all of them are black. I will try selecting by class, etc and writing your magical code

An additional issue is that some pieces such as the windows have several colors, and in this way they are left with a single color only. But this is not too serious

I’ll wait a while to see if anyone else can suggest me another way to highlight the current layer of blocks from the others. If not, I will mark your answer as solution, because the result is what I was looking for.

1 Like

I would need a picture of the "window"s to fully understand, but for the Object-Color approach, I would just break them down into sub-objects and parent them back to the largest (most easily clickable / selectable) of the ensemble. This way you can still color everything to a default color with a quick select-all, followed by the “for-loop” to set all o.color to (for instance) white.

If say the interior “glass” of a window needs to be a different color, you can cleverly name these sub-objects (glass panes) with some known name pattern, such as “specificName_glass”. Then after resetting all objects’ colors to white, you can use Viewport menu Select > Select_Pattern… and ask to select every ‘glass’ object as *_glass followed by another for-loop to set THESE selected objects o.color = lightBlue.

It’s an extra step, but still not too cumbersome.

1 Like

If you want to do this in workbench I agree with @shannonz that the best way is to use some code to support what you are doing here.

But instead of really changing the values for the different renders I’d go for a nondestructive way instead. I am not sure what that window coloring you mentioned is like, but for the time being I assume you are using “SINGLE” vs “OBJECT” for your two renders currently. Its also no problem id you are using “MATERIAL” mode instead.

What I did is to utilize the Attribute mode in combination with a script to make it nondestructively switch between the colors you gave it and the white fade mode.

Let me show what I mean in a simple example.

object colors

Lets say thats your final object with all colors in place. You now want a part to be just white and another part to be colored correct.

So to solve your depth render order and the coloring process it would be best IMO if you could simply select the ones that should have their coloring and the rest should be white like here, right?

That way you can change it to white or its org color by simply selecting and trigger an update.

As I said You have to switch to attribute mode

Here’s the code

import bpy 

for obj in bpy.data.objects:

    if (obj.type == 'MESH'):
        colattr=None
        found = False
        for ca in obj.data.color_attributes:
            if ca.name =="VPCOL":
                colattr=ca
                found = True
        if not found:
            colattr = obj.data.color_attributes.new(
            name="VPCOL",
            type='FLOAT_COLOR',
            domain='POINT',
            )
        for v_index in range(len(obj.data.vertices)):
            if obj in bpy.context.selected_objects:
                colattr.data[v_index].color =  obj.color 
            else:
                colattr.data[v_index].color = [1, 1 , 1, 1]

1 Like

Hi. Thanks for our answers
The windows are objects with multiple material slots. In this case the light grey body and a “stained glass” with black lattice and orange/yellow panels. Only the first material is affected.

But i have found in this forum another approach to solve the main problem
In this post from 2014… Copy 'Object level' Material to multiple objects - #3 by richardvdoost
… they explain how to copy a material to all the selected objects, but using the “object level” slot to avoid modifying the material of the other non-selected objects

import bpy

# Get the material and material index of the active object
active_obj = bpy.context.object
mat = active_obj.active_material
mat_i = active_obj.active_material_index


# Loop through the selection
for obj in bpy.context.selected_objects:
    
    # If the current object is not the active object
    if obj != active_obj:
    
        # Link the material to the object
        obj.material_slots[mat_i].link = 'OBJECT'
        obj.material_slots[mat_i].material = mat

So, i can select the “previous layers” objects, then select a object with a white material as active object, apply the magic code below, and only all these objects gets white.
The “actual layer” is not affected. Keeping his original color each block
I can make the render in material or texture colors, and all is OK without perspective problems etc.
Next, I can revert the changes easily, set a new actual layer, and repeat the process again. This is great workflow form me

I continue having the issue with the windows. the color stained glass continues, because the only color affected is the first slot, all others remain unchanged. but it can be a minor issue. If it can’t be solved in the code, it also works for me as is. They are special objects.

Hmm, does not sounds like you read or tried out anything I wrote above, that way I cant help you.

1 Like

Hello Debuk. Thanks again for your research and response. I’m very sorry for giving the impression that I haven’t read it. At the same time that I was doing other tests and experiments, I was, of course, trying what you suggest.
I understand that I had to choose the attribute mode, select the objects that I want to keep colored and execute the code.
I tried it. The code was slow to execute, it took quite a few seconds. I finally got all the objects in white and a few of them in black. Something I did wrong or it didn’t work for me. I revert, selected the previous layers objects instead, repeat the code, get black and white objects, …
At the same time, searching the forum I found this other mentioned possibility of copying a white material to the object mode of the selected objects, and this way of doing it seemed fast and effective to me. Nothing else.

A simpler way to approach a task like this is to use compositing [nodes].You effectively render two scenes, then combine them to produce the finished image. This is effectively what you have been doing in Photoshop.

There are several ways to approach “compositing” in Blender.

1 Like