I know, I know, I’ve got billions of projects that are running, but I’d really like to finish my WC entry. I’ve chosen for Buzz Lightyear, and it isn’t very easy. Can you guys give me some tips please? Well, here he is, well, the start of him:
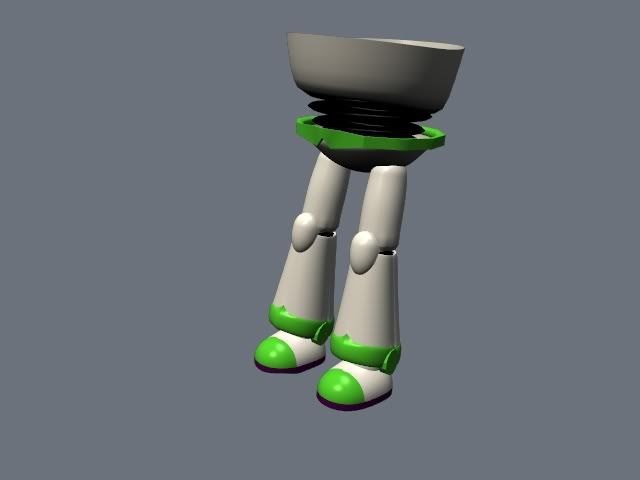
I know, I know, I’ve got billions of projects that are running, but I’d really like to finish my WC entry. I’ve chosen for Buzz Lightyear, and it isn’t very easy. Can you guys give me some tips please? Well, here he is, well, the start of him:
His nose is too big… 
“To infinity & beyond…”! I was gonna do that… really  I won’t have time for this one though.
Good start. Keep it up.
Hmm… looks like Buzz got caught by the little boy and locked in his bedroom (from Toy Story 1). 
Thanks guys for all the great replies!
His nose is too big…
lol! Well, nobody’s perfect…
“To infinity & beyond…”! I was gonna do that… really I won’t have time for this one though.
Good start. Keep it up.
Thanks, I’m surptized i’ve got this far actually. And I still have 2 hours left, i believe.
Hmm… looks like Buzz got caught by the little boy and locked in his bedroom (from Toy Story 1).
Yeah, bad Sid! ![]() He’ll get his limbs back soon enough.
He’ll get his limbs back soon enough.
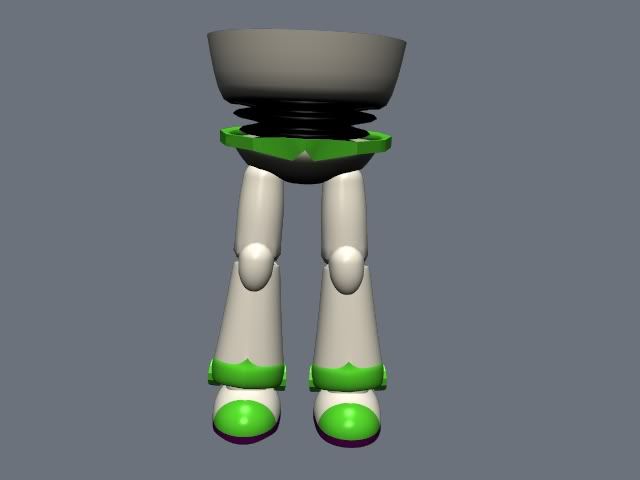
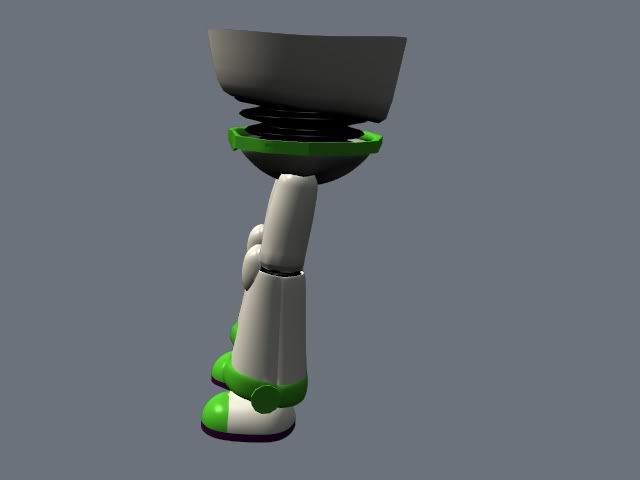
Well, here’s the next update.
And another update…

I don’t think the coloring was that sharp. Some of the objects need to look a little rounder (the green parts) and you don’t have the star command logo.
very nice start, i wouldnt worry about the detail too much for a weekend challange,
the hard part will be modeling the face, good luck i will countinue to watch,
by the way are you still working on smog dragon?
Well, I’ve posted it, and I don’t have any time left, since it is past bedtime for me 
And yes, I’m still working on Smaug. Thanks Wu!
Thanks for the tips Kansas_15, I’ll work on that.
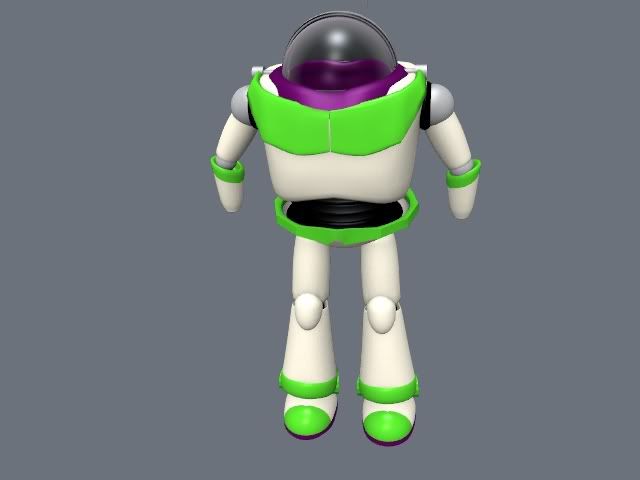
Here’s the version for the WC:
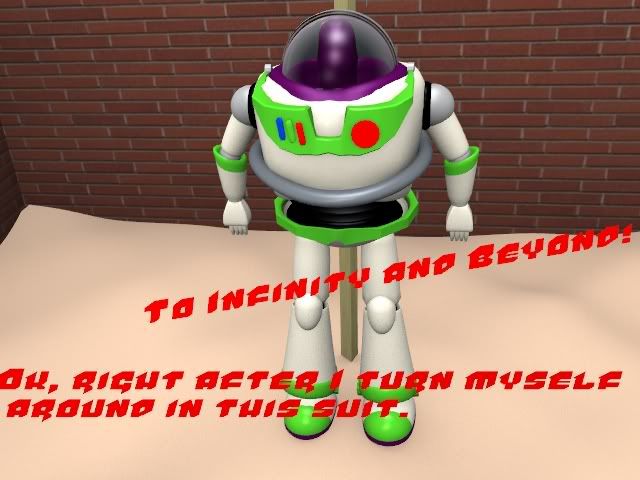
Forgive my lazyness not to show the face.
No comments? Well, I think I’ll go on on this a bit more, and make the face, and become as close as I can to the original Pixar model. Then I’ll probably continue with my dragon.
Keep the C&C coming! I need them very much! Thanks in advance.
His arms seem to be a little too small or his chest is to large. His waist seems a little short too. So far, its coming along very good. Keep it up.
-JM
Thanks for the tip, I’ll be right on it (after I finish my homework :x )
Homework done, update rendered!
I deleted the head and middle thingy and remade the middle thingy, and also shrunk the chest somewhat. Does it look better now?
EDIT: Oh and I also deleted the hands. They were just very fast made to make the WC deadline.
Yes. It looks alot better now. It looks like it will turn out nicely.
-JM
Raphael Betemps created an excellent model of Buzz Lightyear and also published a series of articles in the French magazine ‘Studio Multimedia’.
You can find his original articles and blend files at:
http://dwarf.free.fr/dwarf/04articles.htm
Here is the French-English translation of his modeling article (# 26):
***Note:
The following original tutorial by Raphael Betemps, in addition to
being translated from French to English, has also been slightly
modified in order to update it from the original Blender version 1.8
on which it was based to Blender version 2.34 .
After midnight, and beyond
In this series of four articles on Blender, we will build and
animate a character whose acquaintance you will not likely have
been able to escape. But before experiencing the joys of
space conquest, let’s explore the Blender toolkit…
[1] No matter what your preference, let’s start with the “king of
objects”. Add a “cube” primitive in your 3d view, and extrude it
so as to obtain a “Rubic’s cube”. The selection of the points to
extrude is done in edit mode (press “Tab”) and by using the “Border”
circular selection tool which you activate by pressing the “B” key
2 times. Pressing the right mouse button or the “Esc” key may be used
to exit selection mode. The “E” key is used to launch extrusion mode.
The points created react immediately to the movements of your mouse,
and you may force them to move in unit increments by holding down the
“Ctrl” key. It is then possible to scale or rotate the selected vertices
by pressing the “S” or “R” keys respectively. When you are satisfied,
confirm by pressing the left mouse button.
[2] Figure 2 illustrates the result of a joyous session of extrusions
applied to the primitive which was added in the previous step. By
combining the power and the simplicity of the extrusion tool with the
basic manipulation features like rotation or scaling, you may create
all kinds of organic forms quickly and in an interactive way.
All that remains for you to do is subdivide and smooth the result using
the “Subdivide” and “Smooth” buttons in the Edit buttons Window (“F9”).
You can also activate the “SubSurf” button there, and adjust the two
corresponding numeric buttons which allows you to set the SubSurf level
for modeling and rendering respectively.
R a p h a e l . B e t e m p s - [email protected] -
Appeared in Studio Multimedia n°26 - 1/4 Modeling 1
[3] The creation of the chest is a little more involved, since it
utilizes tools of modeling and animation. Initially, switch to the
front view, and add a “Surface>Circle” primitive. This profile will
correspond to the vertical cut profile of the chest. Modify it to a
suitable form in edit mode. Leave edit mode, and add an animation key
for the profile at “frame” 1: Press “I”, then select “LocRotSize”.
Now switch to the top view, and add a “Curve>Circle”, which will be
used as a path for duplication. Select the profile and then the curve,
and make the profile the “child” of the curve by pressing “Ctrl-p”.
After having selected the profile, go to the ‘Animation settings’
panel in the Object buttons window (“F7”) and press the “DupliFrame”
button. Also, decrease the “DupEnd” setting to 12. For the curve circle
path, choose the options “CurvePath” and “CurveFolow” with “PathLen”
set to 12, in order to create 12 copies.
[4] The animation curves (Shift-F6), visible in the preceding figure,
allows you to control the size, the orientation or the position of each
copy; “frame” 1 corresponds to the first copy and so on (it is
important to note that you will not be able to adjust the geometry
of the subsequent individual profile curves directly in the 3D Window,
instead these copies may only be modified indirectly by adjusting the
animation curves.). When you are satisfied, make the duplicates ‘real’
by pressing “Ctrt-Shift-a”, and copy the curves to another layer after
having selected them one by one. To obtain a “Nurbs” volume shown in the
following figure, it is necessary to join together all the curves by
“Ctrl-j” then to switch to edit mode. There, select all the points
using the key “a” and press “Ctrl-f”. An open volume is then created.
Choose the option “Curve>Cyclic>Cyclic U” from the Toolbox to close it,
or by selecting the ‘Cyclic U’ entry from the popup menu by using the
shortcut key “c”. Ouf!
[5] The operation thus consists of creating a profile of the chest which
will be duplicated in time according to the selected path. Using the
animation keys, it is then possible to control the size of each copy.
The interpolation between the various keys makes it possible
to harmoniously distribute the modifications made to the initial profile
curve over time. The copies can then be joined together to form a “Nurbs”
volume or later converted to a polygonal mesh which you may refine using
traditional modeling tools. The horizontal and vertical definitions of
the “Nurbs” model can be parameterized thanks to the “Resol U” and
“Resol V” buttons in the Edit buttons window. Conversion to a polygonal
model is possible by selecting: Object>convert-menu from the Toolbox, or
by using the shortcut key Alt-c. Then you can finish adding the chest
details using the tools mentioned at the beginning of the article.
R a p h a e l . B e t e m p S - [email protected] -
Appeared in Studio Multimedia n°26 - 1/4 Modeling 2
[6] Completing the remaining parts of the body utilize as a starting
point the same techniques already discussed. The hands and feet are
cubes or extruded planes which are then smoothed with the functions
“Subdivide” and “Smooth”. For the other components of the lower limbs
and upper body which are more complex, I re-used the curves which were
used to create the chest. Contrary to other software which include a
multitude of very often redundant functions, Blender has a compact toolkit,
and draws its extraordinary flexibility and its rich functionality from
its object oriented philosophy. Every thing that you create in Blender
is a “storage block” (polygon, nurbs, camera, lamp, animation curves,
etc.) which could be modified by the basic tools that the Toolbox
provides. It will undoubtedly take you a few sleepless nights before
overcoming its interface and incorporating its philosophy. But if
you persevere, you will find that you are unable to free yourself of
this “small” software and you will probably become a “Blendermaniac”.
By playing around with combining the functions and the sequences
of key presses, using Blender will quickly become a pleasure and will
make your working sessions at the same time more fluid and productive.
" Happy Blending ".
T h e O r y: “On line” documentation about Blender abounds, but it is
mainly intended for an English-speaking public. However, a small community
of French-speaking users have translated or created original tutorials.
Thus, if you do not have a command of the language of Shakespeare, know
that there are many sites and forums on Blender, that you will be able
to find with the following address: http://blender.free.fr.
Important things to remember: As you may have noticed, to comfortably
utilize Blender inevitably requires that you memorize some basic keyboard
short cuts. Their knowledge will save you alot of time, and even more if
you learn how to combine them. By way of example, here are some usefull key
combinations: “G-Ctrl” this forces an object to move while following
the grid in steps, “G-MiddleMouseButton click” produces a horizontal or
vertical constraint, (depending upon the initial displacement of the mouse),
“S-MiddleMouseButton click” scales on only one axis (which depends on the
initial direction the mouse is moved), “R-Ctrl” produces a rotation with
a step of 5 degrees, and finally, “S-X-1-’-’” mirrors the object about the
axis designated - Note: replace ‘X’ with ‘Y’ or ‘z’ as required. (useful for
making a symmetrical double). That provides you with a small sampling of the
most basic shortcut keys. There is, of course many more, that you should not
hesitate to test, Blender awaits only that!
R a p h a e l . B e t e m p s - [email protected] -
Appeared in Studio Multimedia n°26 - 1/4 Modeling 3