Camera-based normal material (Cycles)?

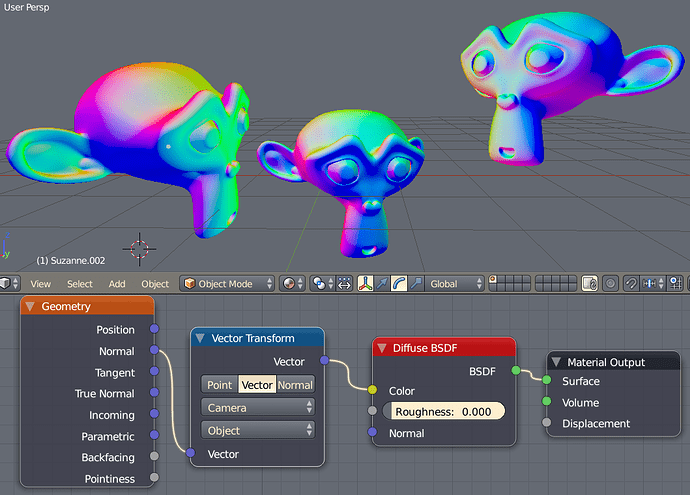
This is what I want to achieve :


You can see the colors change on the Suzanne head depending on its orientation relative to the camera.
Well actually you could do that by rotating the Suzanne head in the scene if you simply use the Normal output of the Geometry node (and normalize it with a couple of Mix RGB), but I want the normals to be camera-based, not world-based.

According to this page, you simply need to make a dot product between the world normal and the camera ray, but all my tests with dot product have returned black results. Does anyone know the proper node setup ?


no need for using dot productsā€¦ :wink:

1 Like

also, its visible in material mode in viewport:


1 Like

Almost there !
Thank you, you solved at least the ā€œcamera spaceā€ part. The normalizing part is not perfect yet though. Secropā€™s node setup is definitely closer but I could make some improvements to it.
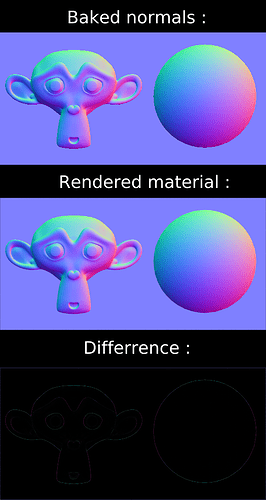
By baking the normals onto a plane (selected to active) and rendering the material from an orthographic camera (the same size as the plane) , we can make a perfect comparison by combining both results in Difference blending mode.

You can see the improvements Iā€™ve made by going back and forth between those 3 images :
Camera normal material improvements.zip (750 KB)
On the ā€œDifferenceā€ image, you can see some blue disappearing progressively, but otherwise there is no color change, which indicates that itā€™s only getting closer.

If the results were perfectly identical the difference would be black, so there are still improvements to do, but for now Iā€™m quite stuck.

Note that you need to disable display transform (set Display Device to ā€œNoneā€ in Color management) in order to get correct results, otherwise it will be way too bright.

1 Like

After seeing what youā€™re trying to doā€¦ hereā€™s a small correction in my setup for you to get what you want:
Change the first combine node to [ 0.5 , 0.5 , -0.5 ], and the second to [ 0.5 , 0.5 , 0.5 ].

Edit: So my ideia that Cycles used just the positive values for Z was wrong. After looking to the source code, realized that Cyclesā€™ NormalMap node decompresses positive and negative(!) values from the blue channel, just like it does for the Tg and Cotgā€¦ So the V*0.5+0.5 is the correct approach.

Thanks for the first tip, it simplifies the node tree. However Iā€™m not sure I understood your edited part. Did you figure out the perfect setup ?

In my first post, the formula I used was not correct and the fault was mine. Both setups are ā€˜perfectā€™, that reads the math is correct; though the first is not producing the result Cycles would like to recieve when you plug a texture to the NormalMap node.

There are two ways of making tangent normal maps. Some engines, use the formula I posted first, but Cycles uses the second formula (which was not really what I expected).

Normally, specially in games, normal textures are stored in an unsigned 8 bit per channel. But the original normal vector has a range from -1 to 1 in each component. The trick is to change the range from [-1,1] to the unsigned [0,255] range of the 8bits (or in normalized color components, to turn the [-1,1] into [0,1]).
In this case, we multiply the [-1,1] by 0.5, which results in a range scaled to [-0.5,0.5] and then add 0.5, to end up with the [0,1] that we need. Because the Zā€™ component is allways positive (it points to above the surface), most games engines just use that component unchanged because it lets us have more values for that axis (256 values). Note that the Vector transform uses a negative Z in camera space, where -1 points to the camera, and 1 points to the view direction, so we multiply this by -1 to get it inverted.

Cycles, and most render engines, they just simplify the code and they treat all components the same way. So the operation can be resumed into CameraNormal*[0.5,0.5,-0,5]+[0.5,0.5,0.5]. However in this case, there are 4bits of the blue channel that are not used (since 0-127 correspond to negative values which donā€™t apply to Normal vectors). Thatā€™s my second post.

If you now test the result from my last setup against the bake, youā€™ll only find differences in the aliased part of the baked result. Cyclesā€™ baking does just one sample per pixel when baking normals, and this produces an aliased effect. While rendering from the camera, you have an antialiased result (at least if you render it with more than 1 sample).
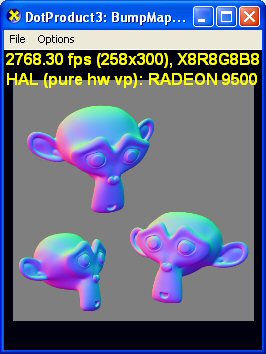
Iā€™m sorry if Iā€™m missing something but CameraNormal*[0.5,0.5,-0,5]+[0.5,0.5,0.5] gives the same result as the third image in the archive I uploaded earlier.
Could you show a screenshot of the node tree if thereā€™s more ?
Here is the ā€œready to bake and renderā€ file I used if you want too :
Camera normal material.blend (1.3 MB)

before baking, select your plane and apply the scale transformation. :wink:

(*ļ¾Ÿļ¾›ļ¾Ÿ)


I wonder why applying the scale fixed it but otherwise, problem solved !

I also donā€™t know why object transformations affect bakingā€¦ perhaps for animations or soā€¦ :confused:
But itā€™s almost rule of thumb to bake with transformations applied.

And to reduce even more the difference, change ā€˜Render Settings:Filter typeā€™ to ā€˜Boxā€™.
(but I really prefer the rendered normals with antialiasing :P)

Well I guess (but Iā€™m not sure) the absence of anti-aliasing when baking is there to add some bleeding to prevent slight lines along the UV islands boundaries when using the baked texture on a model (like what the margin does). However itā€™s not pretty when itā€™s inside the island itself (like the eyes of Suzanne).

I think itā€™s more simpler than thatā€¦ The normal baking routine would need much more code to deal with all possible situations (where should it sample just once, where should it sample more, whatā€™s the normal if only half of the pixel has geometry in it, etc). So to keep things simple, and because the idea was to bake from high poly, the code just takes one sample and moves on.

Hi all,
I was looking for a way to generate surface normals, and found this post.
I was wondering how to achieve this in a script?
I figured out how to connect all the nodes, but Iā€™m not sure how to save the baked result to file (specifically I want to output the rendered image, normals and depth).
Iā€™m unable to find information to put this all togetherā€¦