I have problem with one focal point image where x and z exactly parallel. This happens with lots of architectural images. I can not make this situation to work, tried all 3 method provided. Need help indeed, thanks guy.
You may be better off trying Blam! for this, or even do it “manually”. If you can figure out the dimensions of the doors and the height of the counter roughly, you can scale cube placers accordingly then alter the camera angle by hand.
In difficult cases I always use SketchUp and Sketchup (SKP) importer addon.
After importing scene, you need to adjust camera resolution the same as in the picture.


1 Like
Can you recommend a page showing that process in detail? Looks highly effective.
After adjusting camera to the image in the sketchup simply save the entire scene as *.skp file and import it to blender using Sketchup importer.
Examples:
Many Thanks, will look at that. 
I found out blam add on works perfectly on this situation, just use one focal point method. So I guess I will keep both add on for specific cases.
But thanks for your reply. Appreciate a lot. Kinda newcomer for blender but already fall in love it.
Oh definitely keep both, you’ll find one works well over another more often than not.
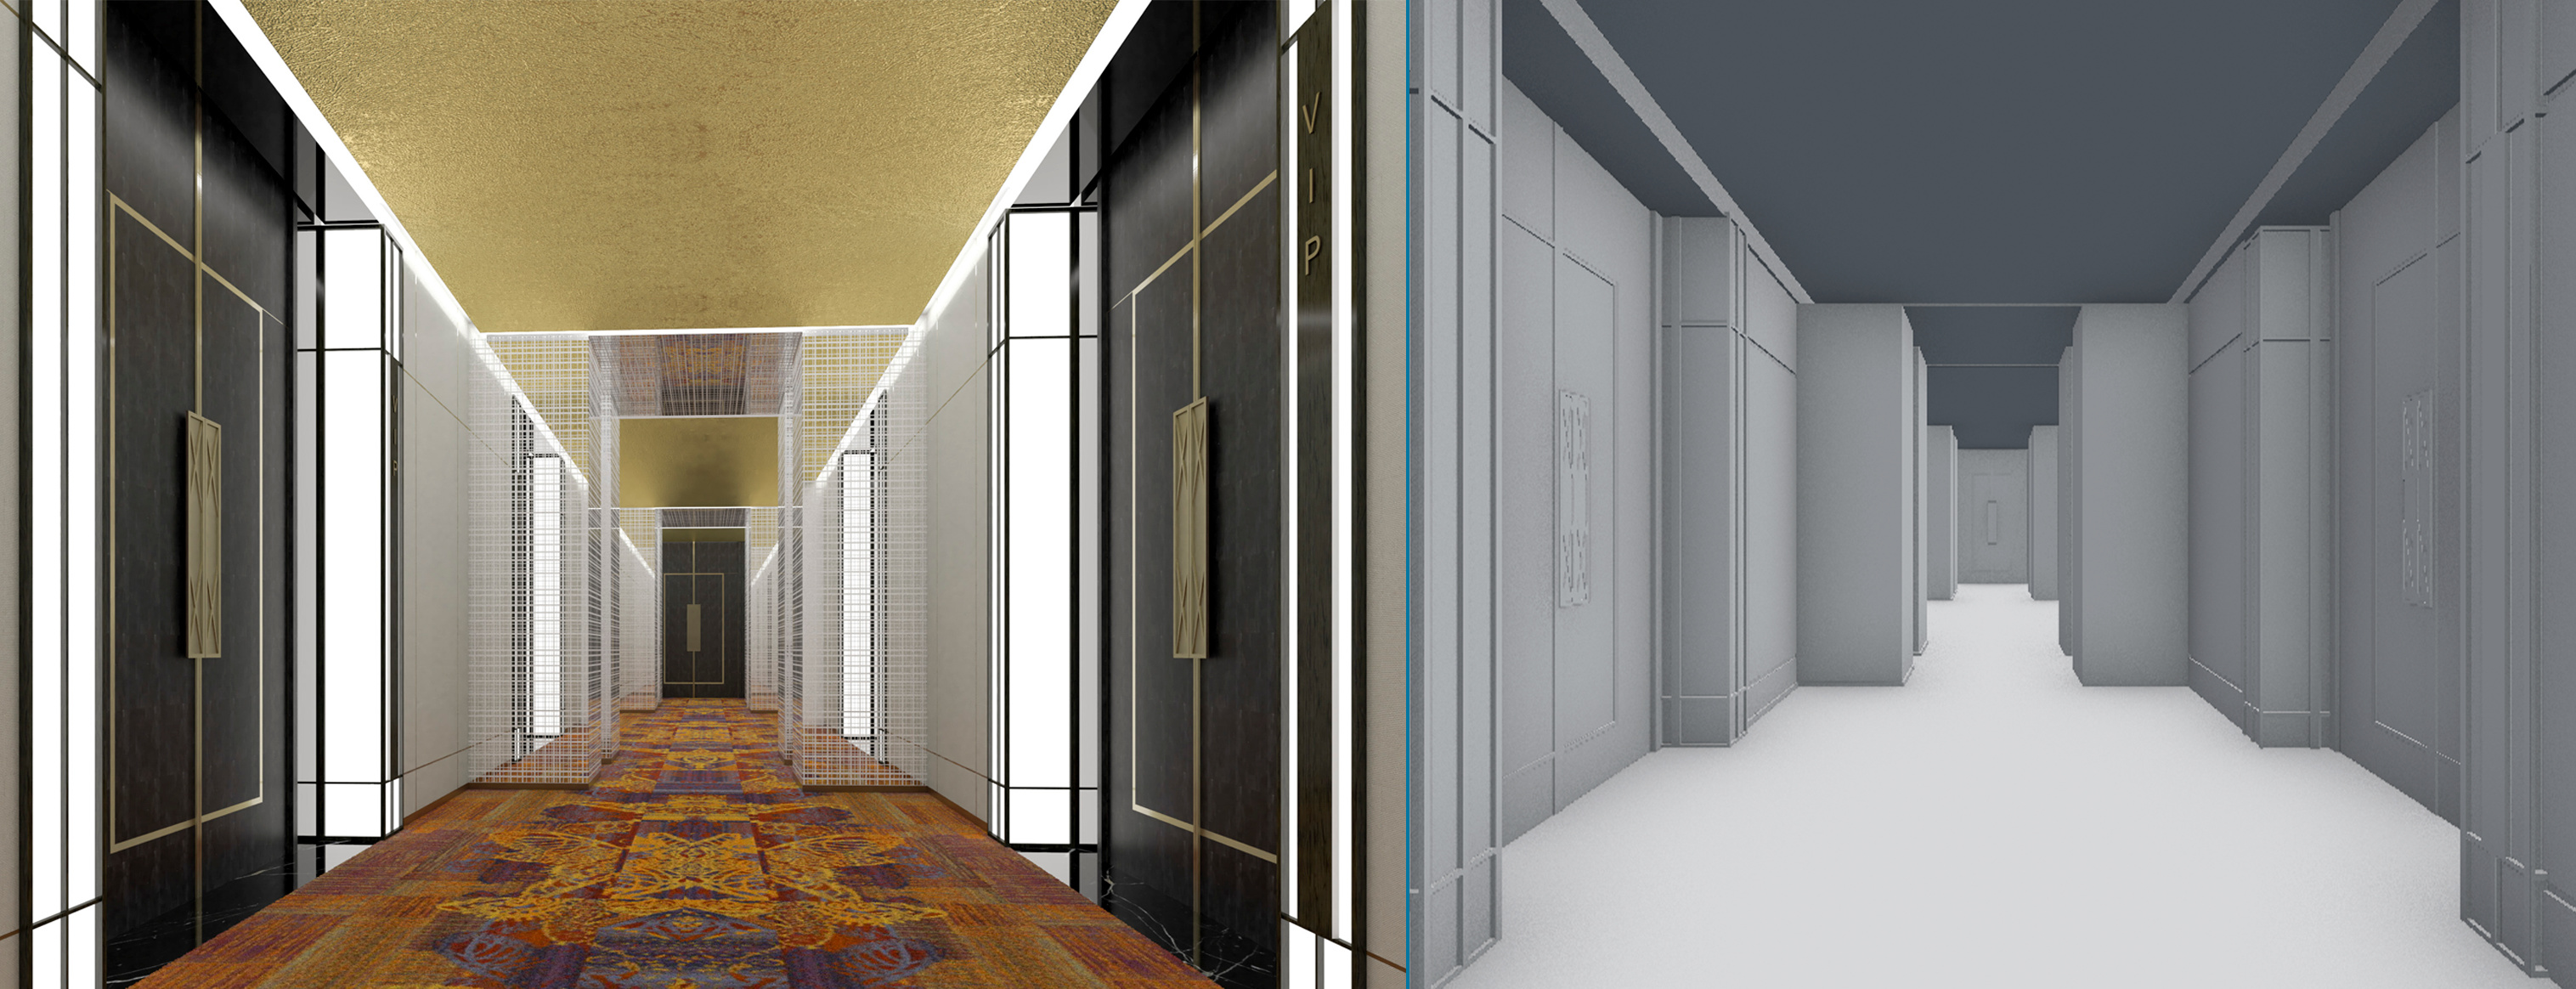
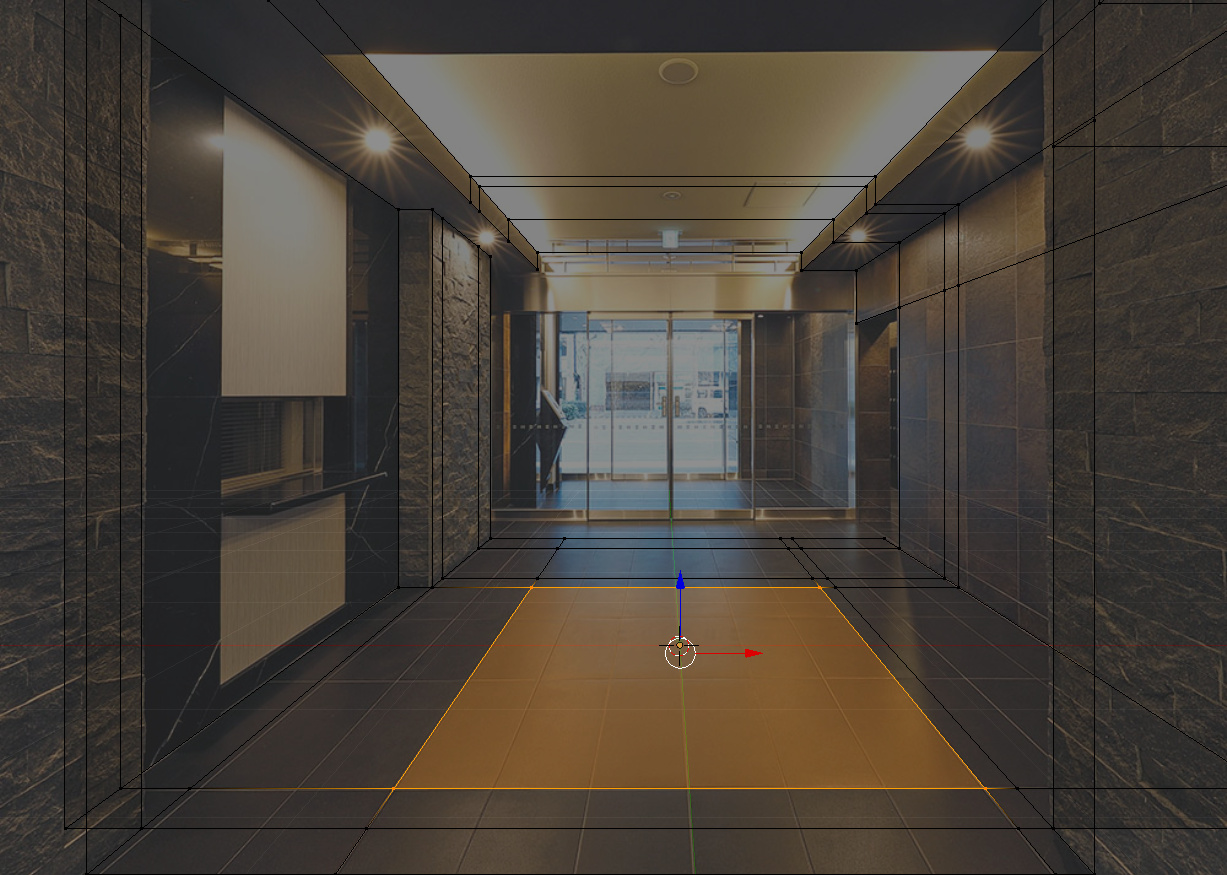
this is the result of this amazing add-on, at first it was hard all I did is trial and error and eventually decided to hit the Solve Focal+Y because the image is made from other software which has tilt shift camera to perfectly align the vertical and horizontal and the add-on didn’t allow you to have straighten if its Solve Focal so you need to choose Solve Focal+Y and from there you can model your architecture and later just adjust something that didn’t align.
ps. the ceiling and flooring of my interior hallway when have focal is not align so i adjusted it. here is the result without shader. all in all it was great experience and this is my first time to succeed doing this.
Hi Guys,
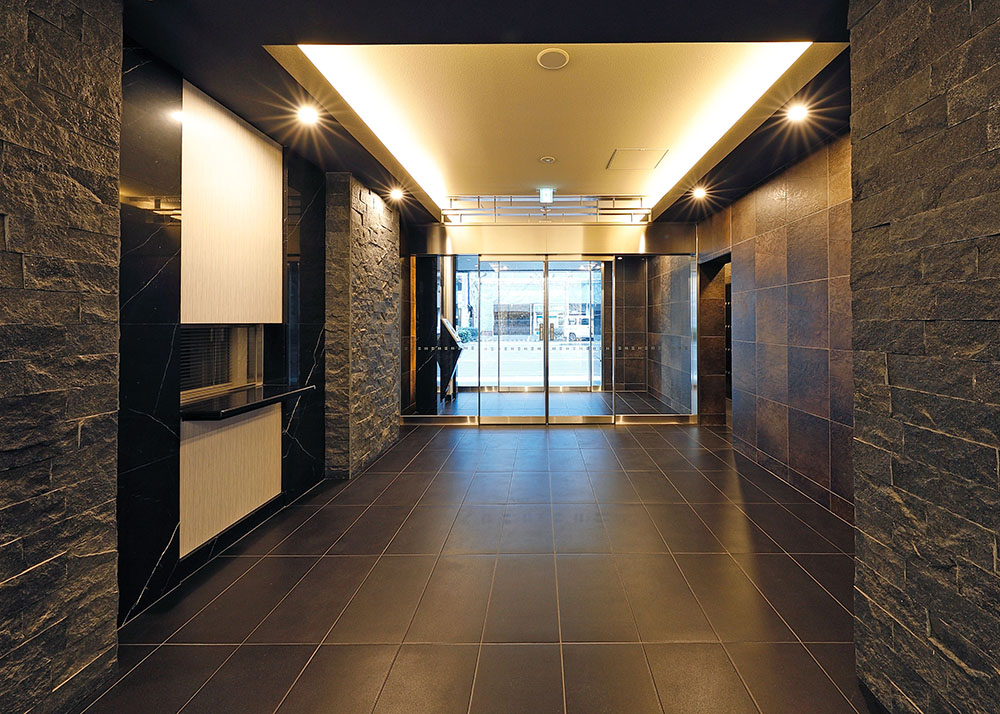
I think I need your advise. I’m trying to calibrate camera to below photo, but after many tries still with no success.
If I set manually camera as Full Frame prior to calibrating - it gets re-set to 32mm auto afterwards. Is there an option to preserve these settings? Are they included in calculations?
And the most important, I didn’t succeed to get proper focal length. 3dmax camera match (which seems to give reliable results in majority of cases) sets it to ~130mm, and PVR was each time setting it between 18 and 50mm.
Can you please share some hints? Is this one of those problematic photos which can not be calibrated correctly?
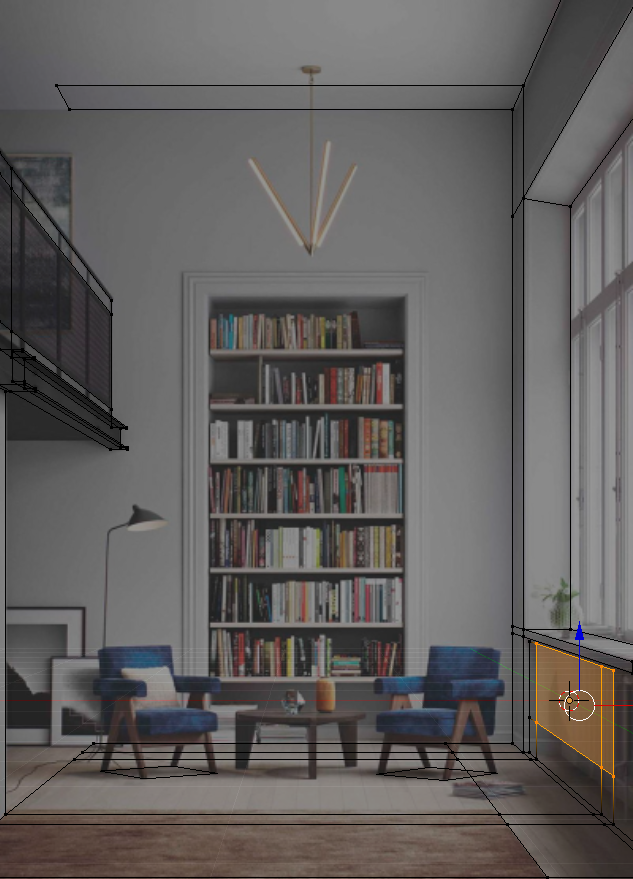
Hello blndusr, I played with your image:
With some descriptive geometry, I found the perspective. I made a help-image for you. Now you can use the red rectangles. Solve with: “Solve Focal+Y”.


interior.blend (437.5 KB)
I used the same method here:
I hope this is helpful.
1 Like
Thank you Iarga! It seems quite complex at the first glance, I need to read through it and practice to get some understanding.
Focal length 70mm, as you have set it, is too low for this interior. Objects made with this value are too flat. I already made the model, and 130mm seems to match perfectly.
Hi. Once 2.80 is out, why not?
And it is now! In beta anyway, but many are updating their add-ons. 
I just watched a tut from B-guru and he said somthing about the dev people behind BLAM, which got this addon started, made something new called fSpy. Holy shit does that look cool, sort of like the Sketchup method, with interactive adjustments
1 Like
Will this add-on be updated ? in some cases not having a match tools built in inside of blender is really problematic
Hello everyone
Sorry for being away for so long. I am happy to announce, that I have implemented 1-point perspective ! You can find it on GitHub on the devel branch.
Here is how to use it:
- Change the 3D view into Top Ortho mode (Top view in Orthographic View mode: press
Numpad 7, thenNumpad 5). - Load a background image for the 3D View by the 3D view properties (on the right side of the 3D view, after pressing
N). Ensure that the image is visible from top view by using either the option All Views or Top . - Optional: Go to wireframe mode (press
Z) - Create a new Plane (
Shift-A→ Mesh → Plane). - Enter Edit mode (
Tabkey) and move the plane vertices to the corners of a rectangle in the background image. - Leave Edit mode (
Tabkey). - Ensure that the plane is selected. In the 3D view tools (on the left side of the 3D view), select the Tools tab and find the Camera Calibration PVR menu. Press Solve 1-point .
- The camera is modified and the tool options will appear on the left side of the 3D view. Chose either the focal length of the camera with which the picture was taken or set the size of the rectangle. This is required in order to find the correct calibration.
Your camera should then be calibrated. Please report any problems that you find!
I am aware that the add-on is still not supporting Blender 2.8. I hope to switch over soon. The user interface will also improve once it’s done.
Enjoy!
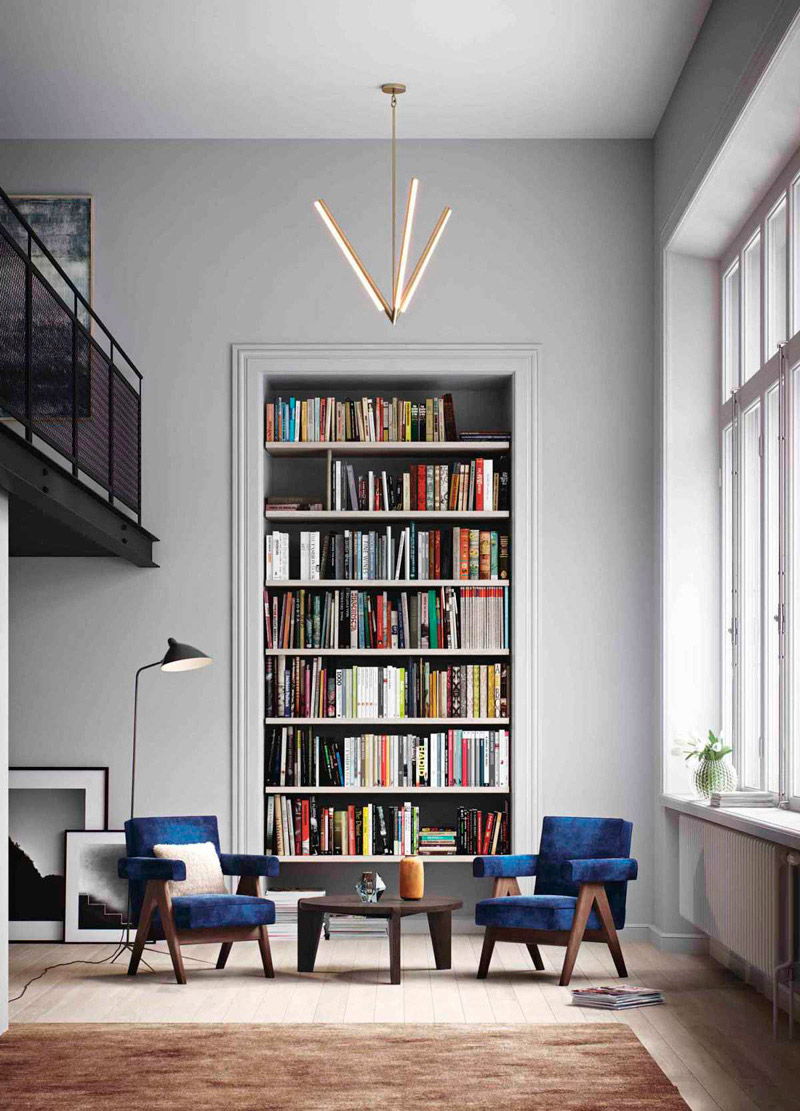
Edit: I tried this with an image that previously caused problems. It is no problem now. I used the highlighted rectangle to the left. Then you have to get the focal length right. If the setting is incorrect, the whole scene is squeezed when you observe it in 3d. In the camera view, everything appears ok. I had to fiddle a bit until I realized that the focal length is exactly 50 mm (probably because it’s a render).
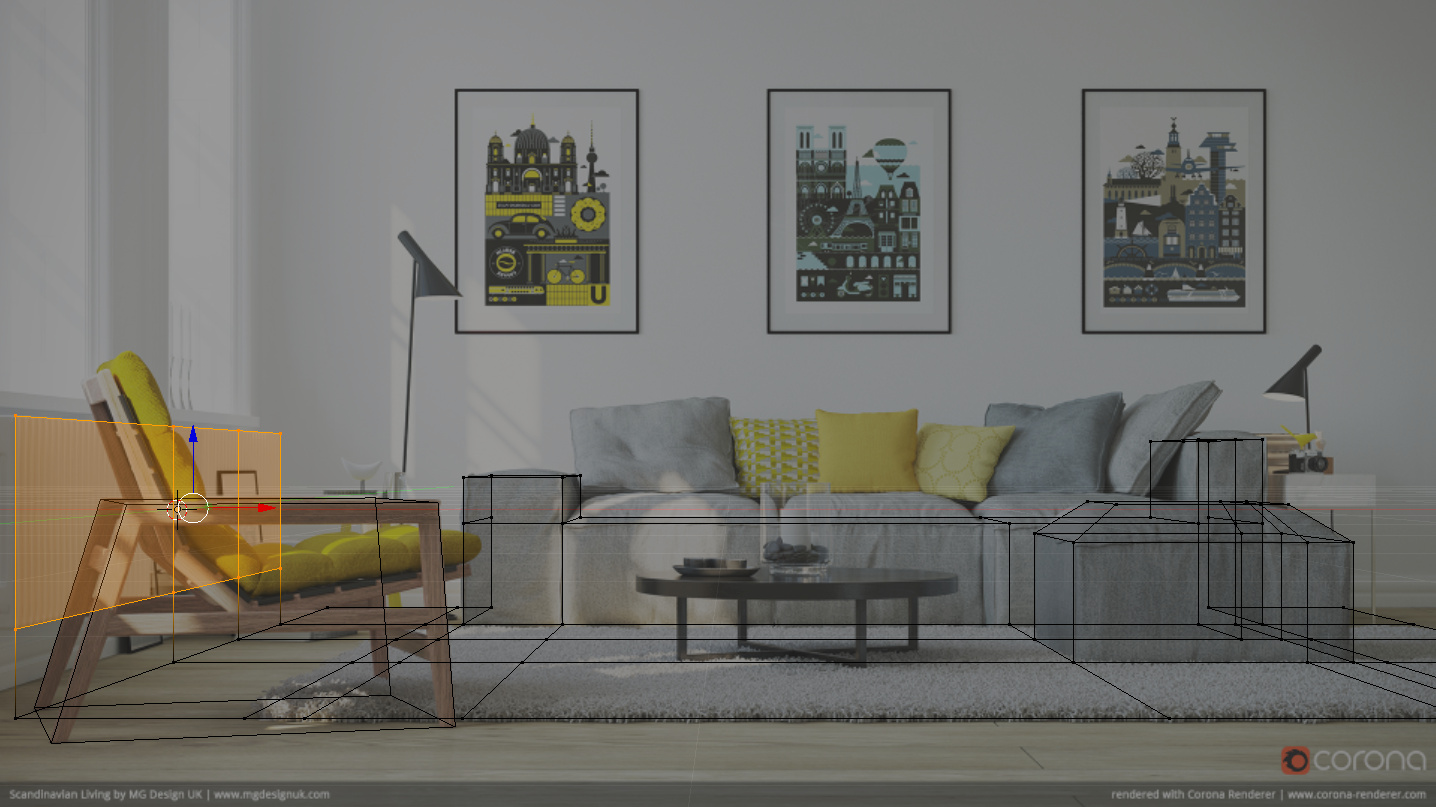
Another problem case (now solved):
And one more (it’s 70 mm!):
6 Likes
Its been a while since i used this. Im getting an error ive never seen. Im trying to solve an image which uses titl shift i guess. So used plane and used parallel edges with one dangling vert. Yet i get this error
Dangling edge: (0, 4)
Dangling vertex: 4
Attached vertex: 0
Polygon edges: [(0, 1), (1, 3), (2, 3), (0, 2)]
Vertices: <Vector (-0.9890, 1.0536)> <Vector (-0.7982, 0.9220)> <Vector (-0.7982, 0.8022)> <Vector (-0.9890, 0.9320)> <Vector (-0.9890, 1.0536)> <Vector (-1.1544, 1.0536)>
horizon <Vector (0.2415, 0.0000)>
vanish1 <Vector (11.9022, -7.8393)>
vanish2 None
shift 0.7839289665222168
Traceback (most recent call last):
  File "/Users/romboutversluijs/Library/Application Support/Blender/2.79/scripts/addons/camera-calibration-pvr.py", line 785, in execute
    calibration_data = calibrate_camera_FX_PR_V(pa, pb, pc, pd, pe, pf, scale)
  File "/Users/romboutversluijs/Library/Application Support/Blender/2.79/scripts/addons/camera-calibration-pvr.py", line 472, in calibrate_camera_FX_PR_V
    focal, optical_centre, shift = solve_FY_V(pa, pb, pc, pd, pe, pf, scale)
  File "/Users/romboutversluijs/Library/Application Support/Blender/2.79/scripts/addons/camera-calibration-pvr.py", line 285, in solve_FY_V
    dist = sqrt((vanish1 - optical_centre).length * (vanish2 - optical_centre).length)
AttributeError: Vector subtraction: (NoneType - Vector) invalid type for this operation
This is the image im trying to resolve
