I am unable to animate the colors from the arrow.
1 Like
MY NEXT REPLY HAS A BETTER WAY, PLEASE READ BOTH
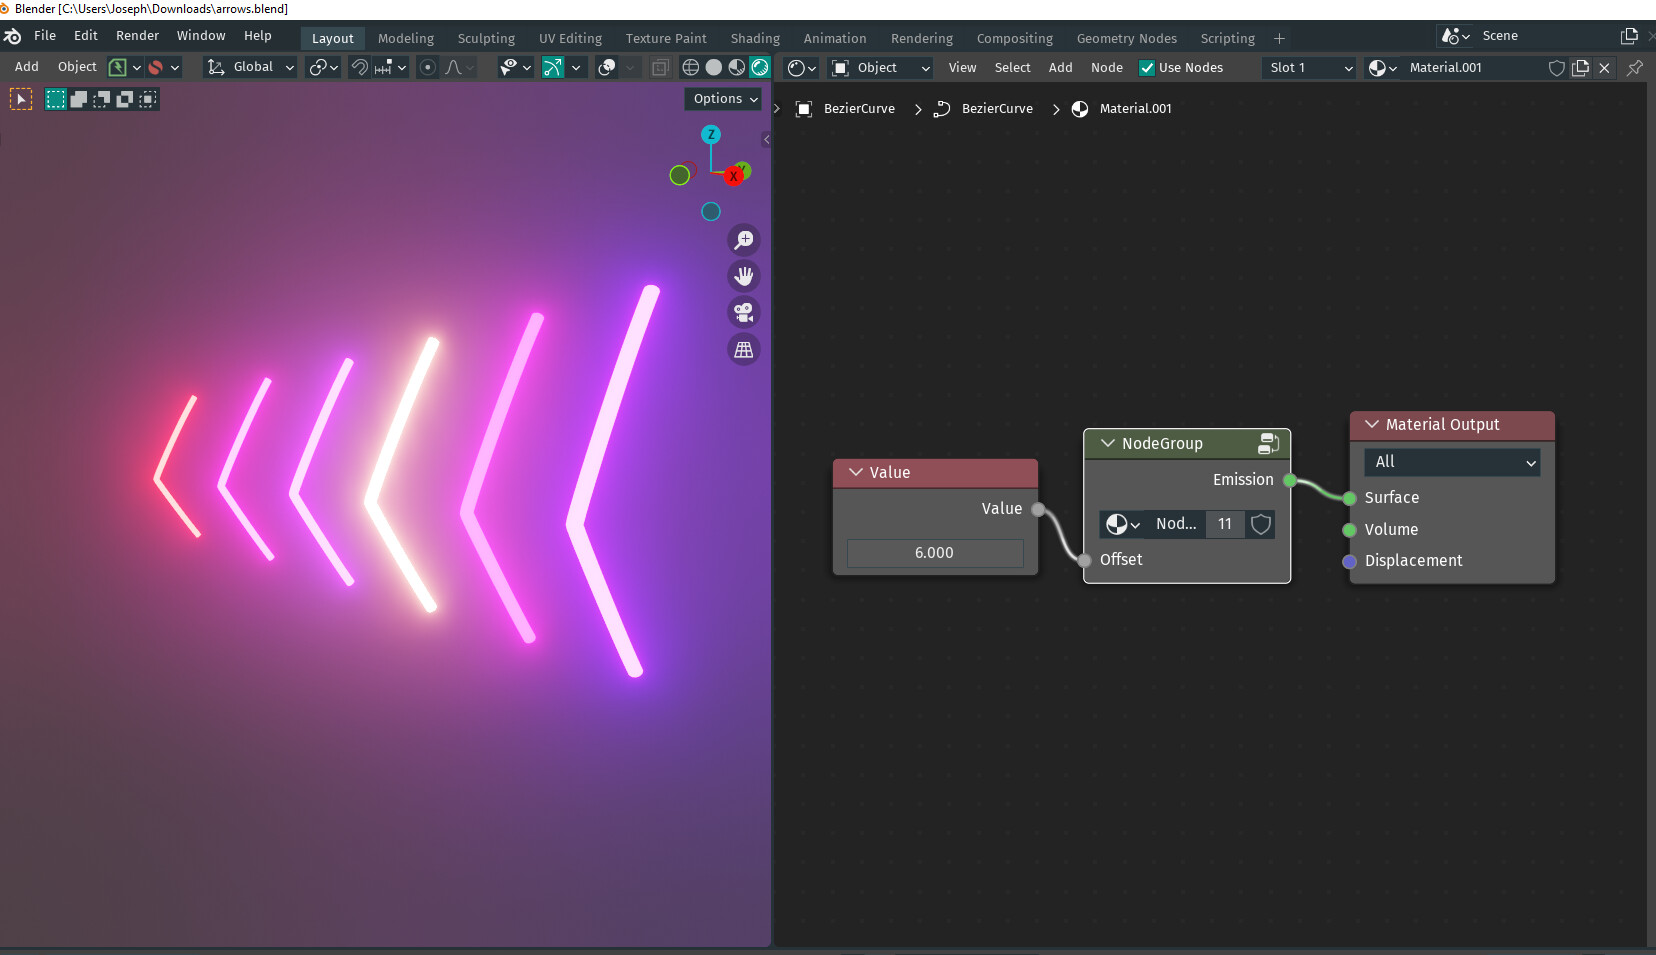
Ok here’s your final result, and a blend file:
arrows.blend (921.6 KB)
And here’s how you do it:
- Make a bezier curve and duplicate it a few times.
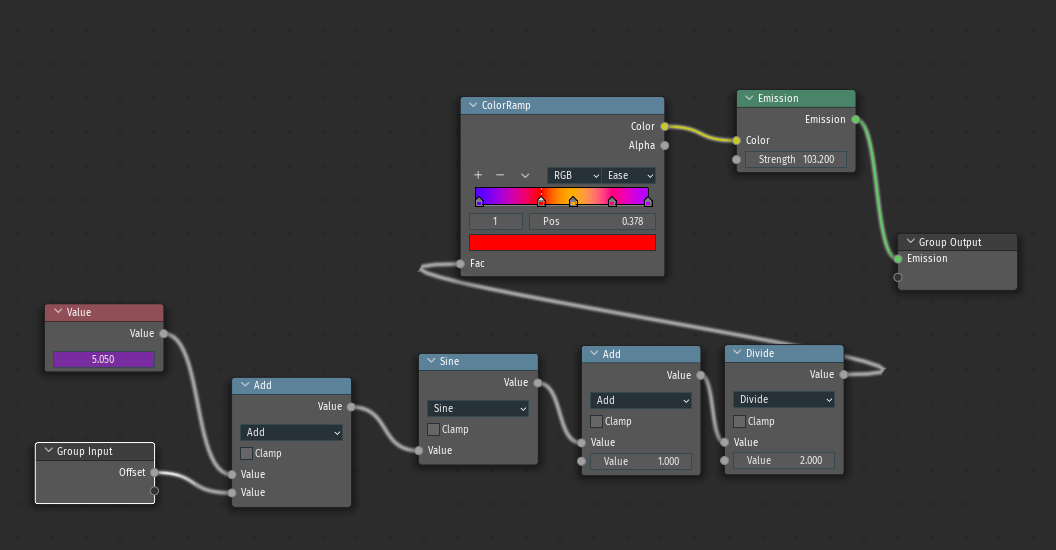
- Make a material. The main thing is a Color Ramp, and Emission. You also need a Sine wave to loop between the start and the end of the Color Ramp. The Sine wave will, out of the box, give you values between -1 and 1, so you need an Add node and a Divide node to get it to 0-1.
Ultimately, your material looks like this. The Value on the left is what drives the animation. Set the value to #frame/20, or something like that, and it’ll change when you press play. This Value is added with an Offset. This is why you’ve duplicated the curve, each curve needs a different offset:
The curve in the front has an offset value of 6.
The curve in the back has a value of 1.


That’s it, really. Any curves you want to have the same color, give the same offset. For your left/right symmetry, just make sure the offset is the same across left/right.
You can edit the color ramp to get the colors right- I didn’t really care for precision. Feel free to use my blend file as a starting point.
For a more subtle gradient, use .1, .2, etc for the Offset instead of 1,2 etc. That will give you a result like this:
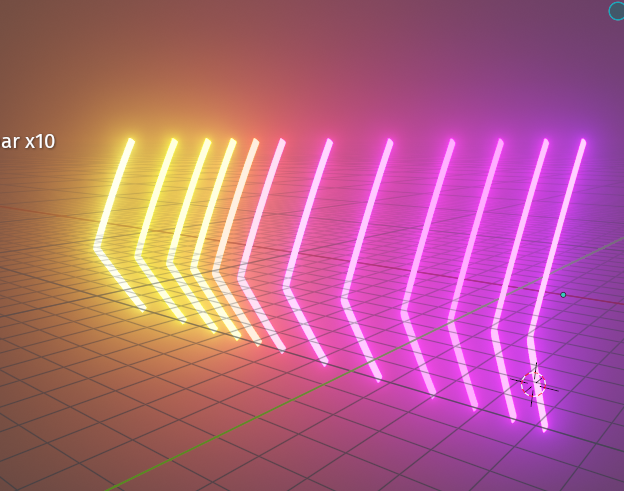
You could always set the Offset to be automatic based on position, but you’re a new user, and that’s getting into more complicated territory, so I won’t bother you with how to do that unless you want ![]()
Ok, I lied, I am going to show you the more complicated way, mainly because it’s a little faster overall.
arrows.blend (3.2 MB)
So here’s how you do it this way:
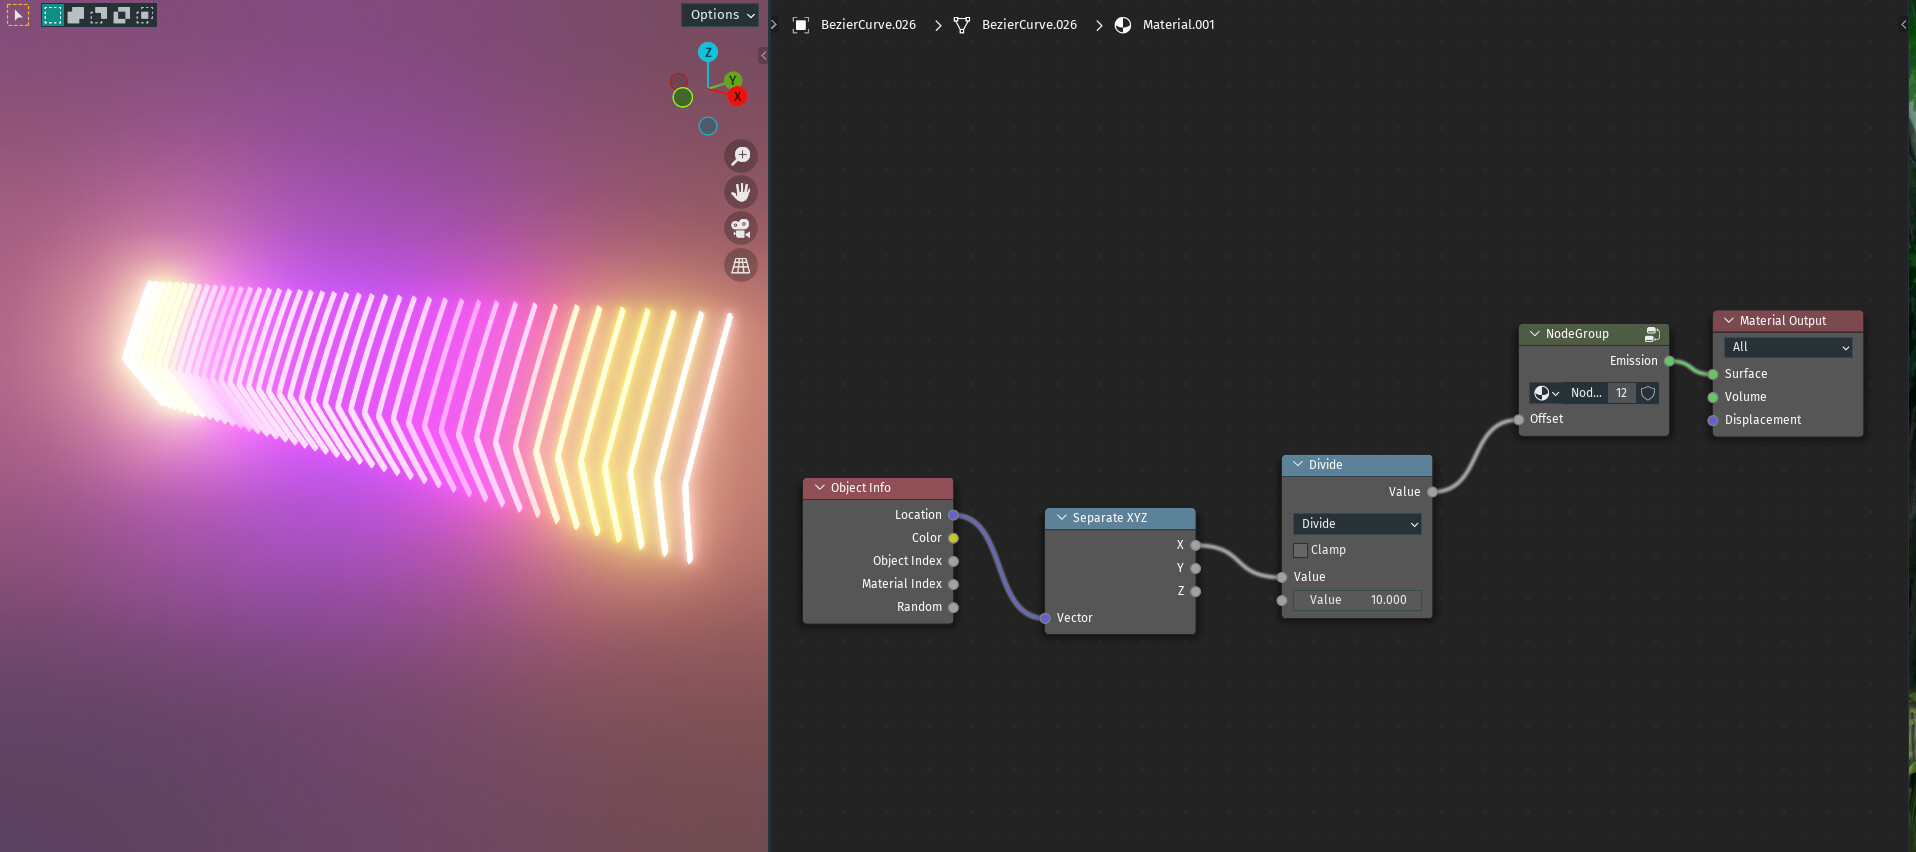
- Make one curve, add an Array modifier. Set the offset how you want, and crank up the count.
- Convert the Curve to Mesh (Object Menu > Convert > Mesh)
- In Edit Mode, separate the Mesh by loose parts by pressing P
- With all of them still selected, press F3 and type in Origin to Center of Mass (I have this in my Q menu, so I forget where it actually is)
- Set up the material (they can all share a material now) as shown in the screenshot or in the blend file- use an Object Info node, a Separate XYZ, and a Math node.
1 Like