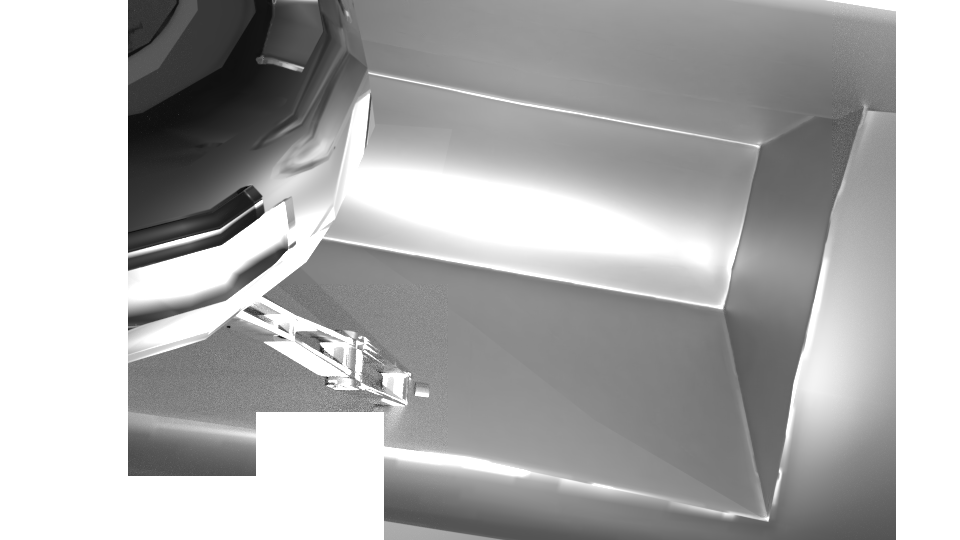
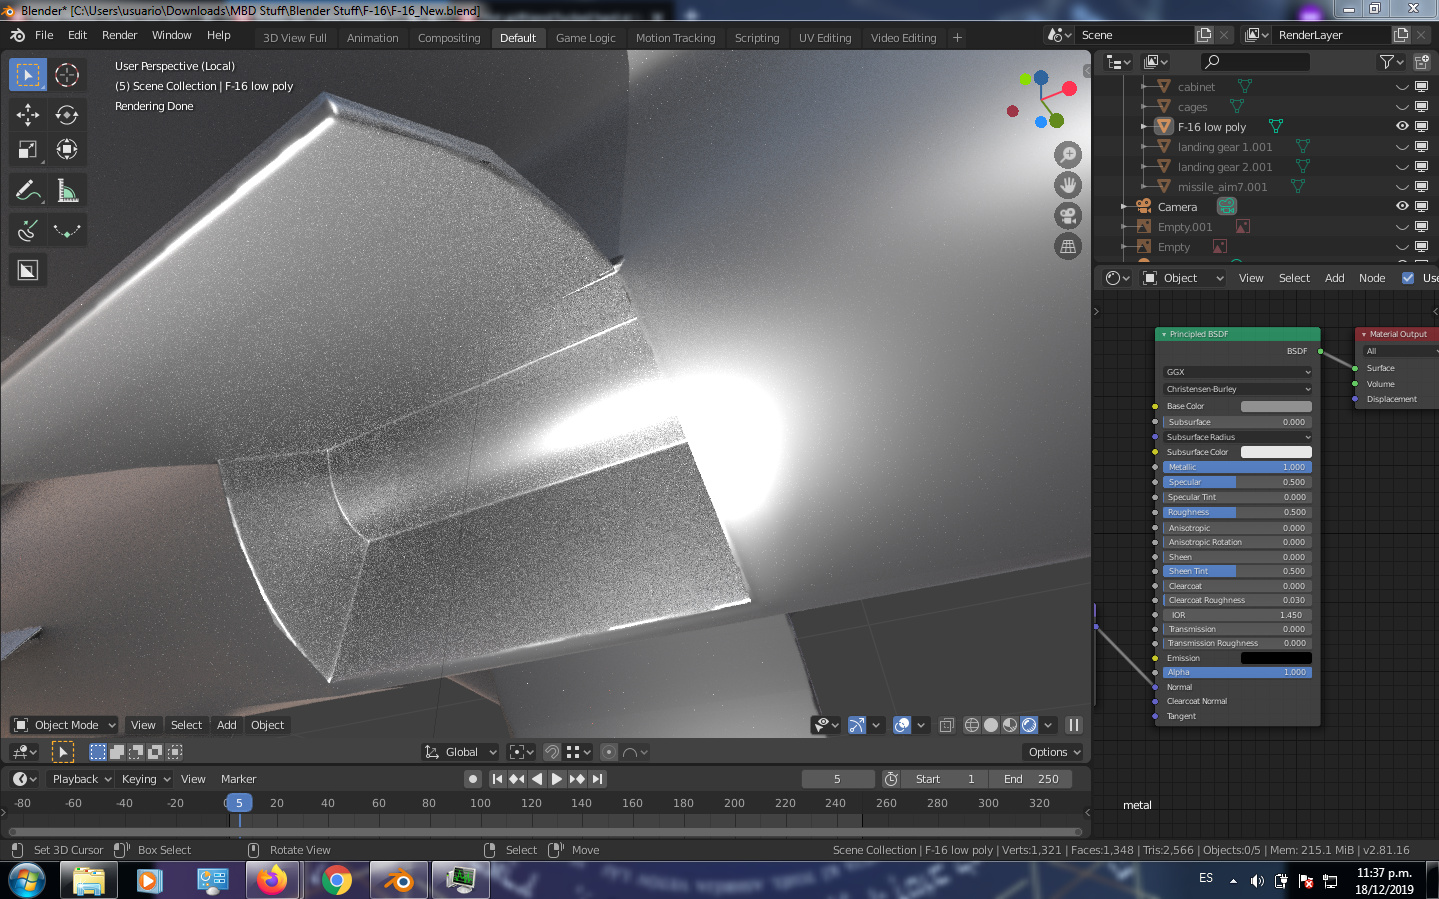
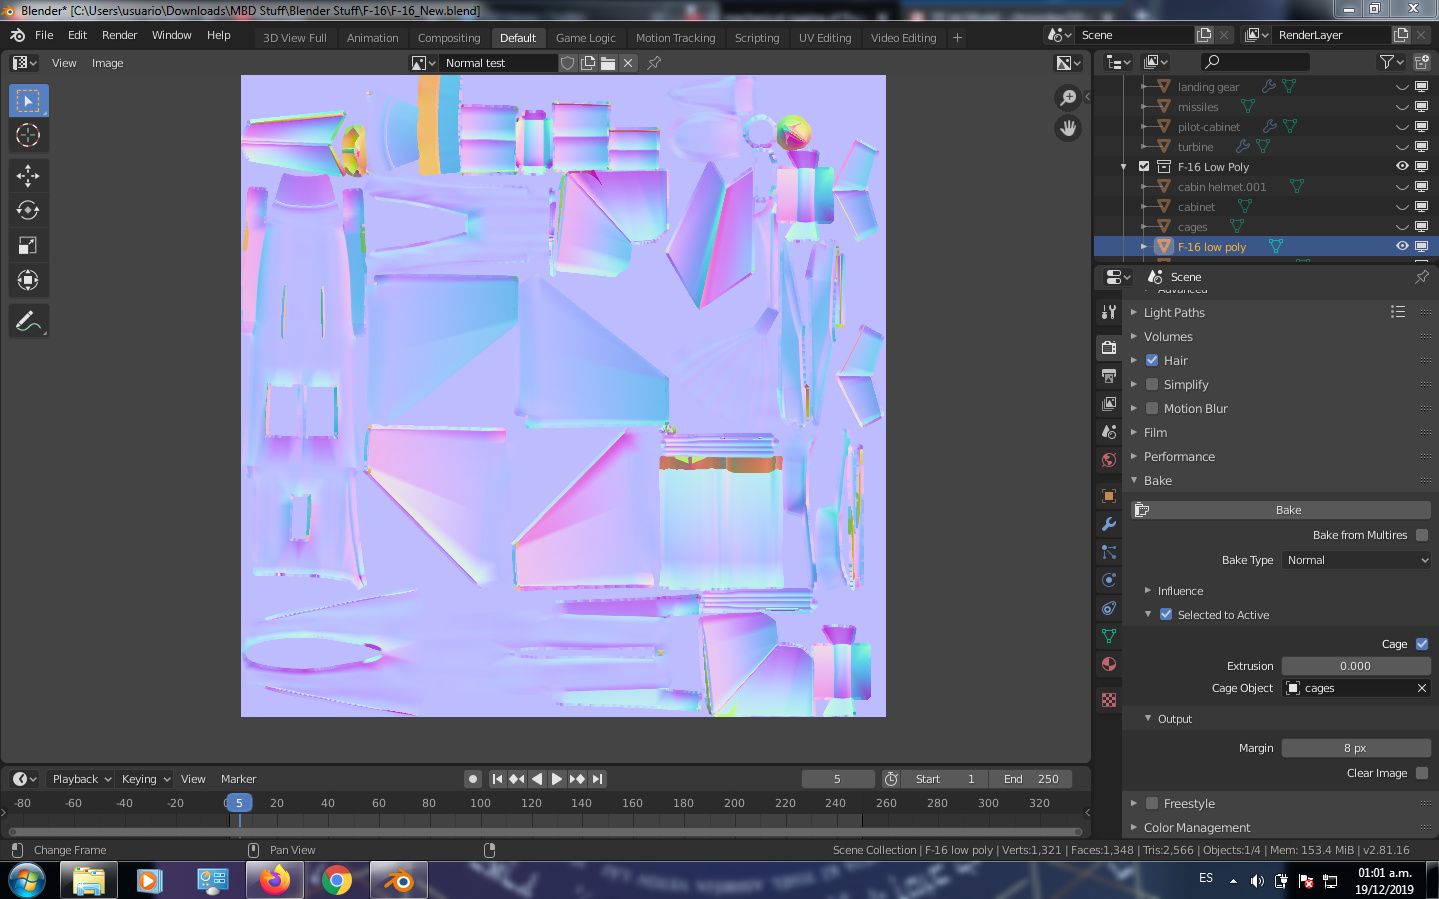
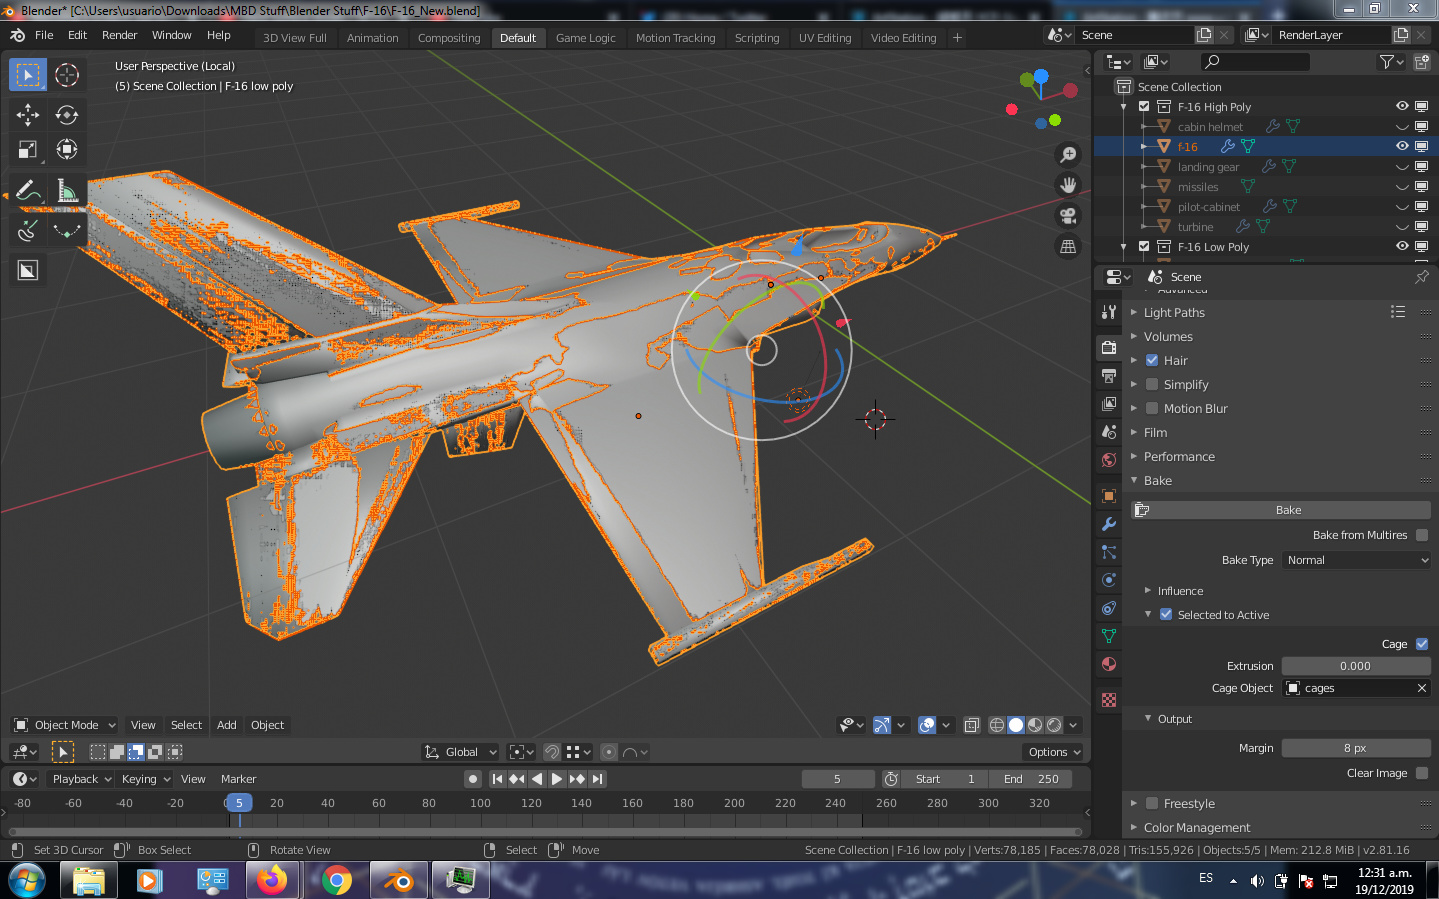
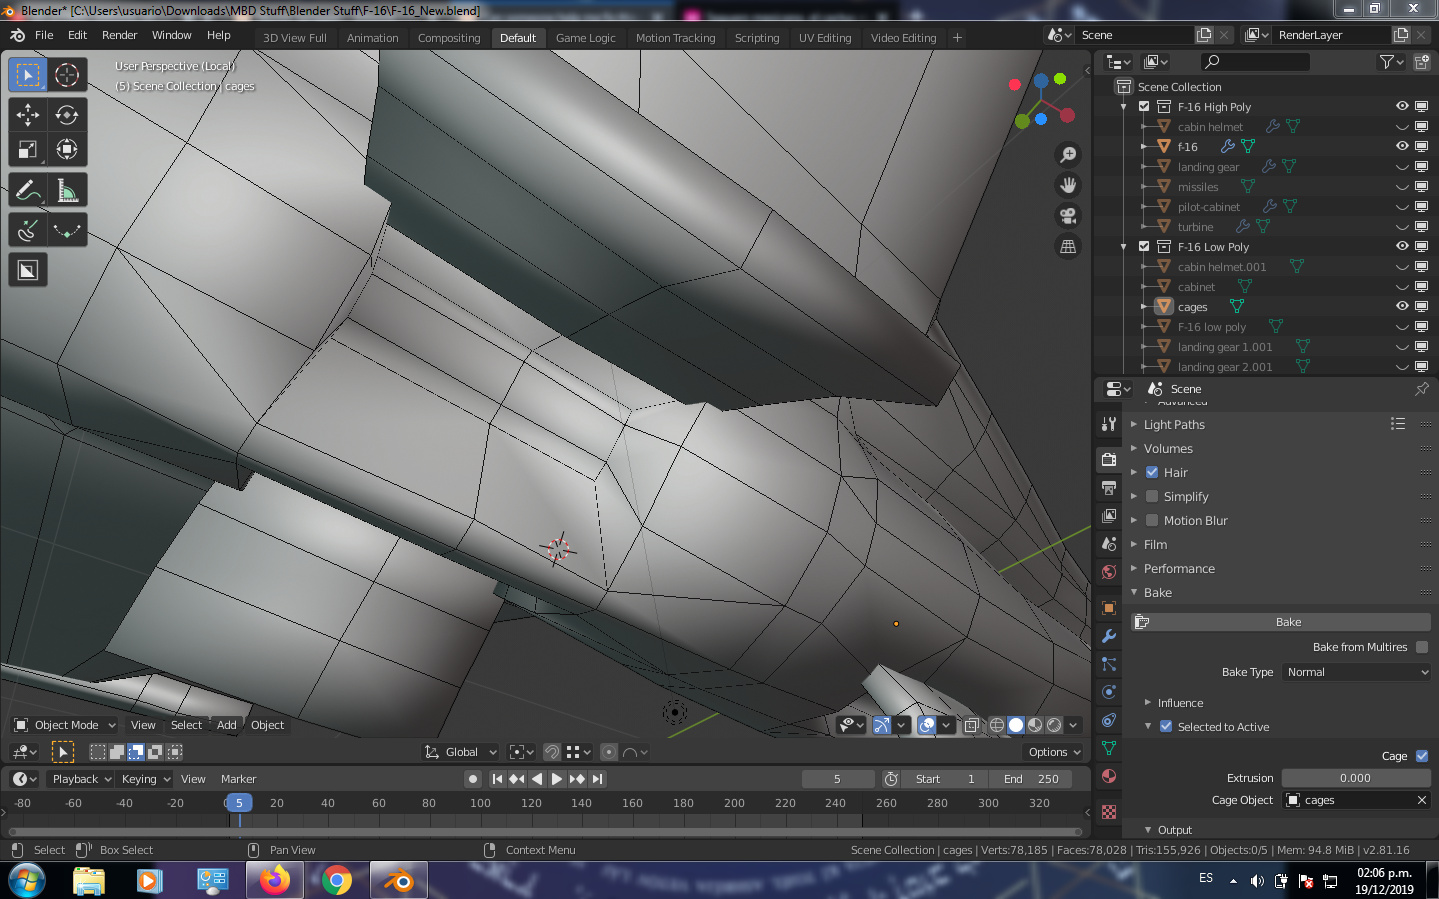
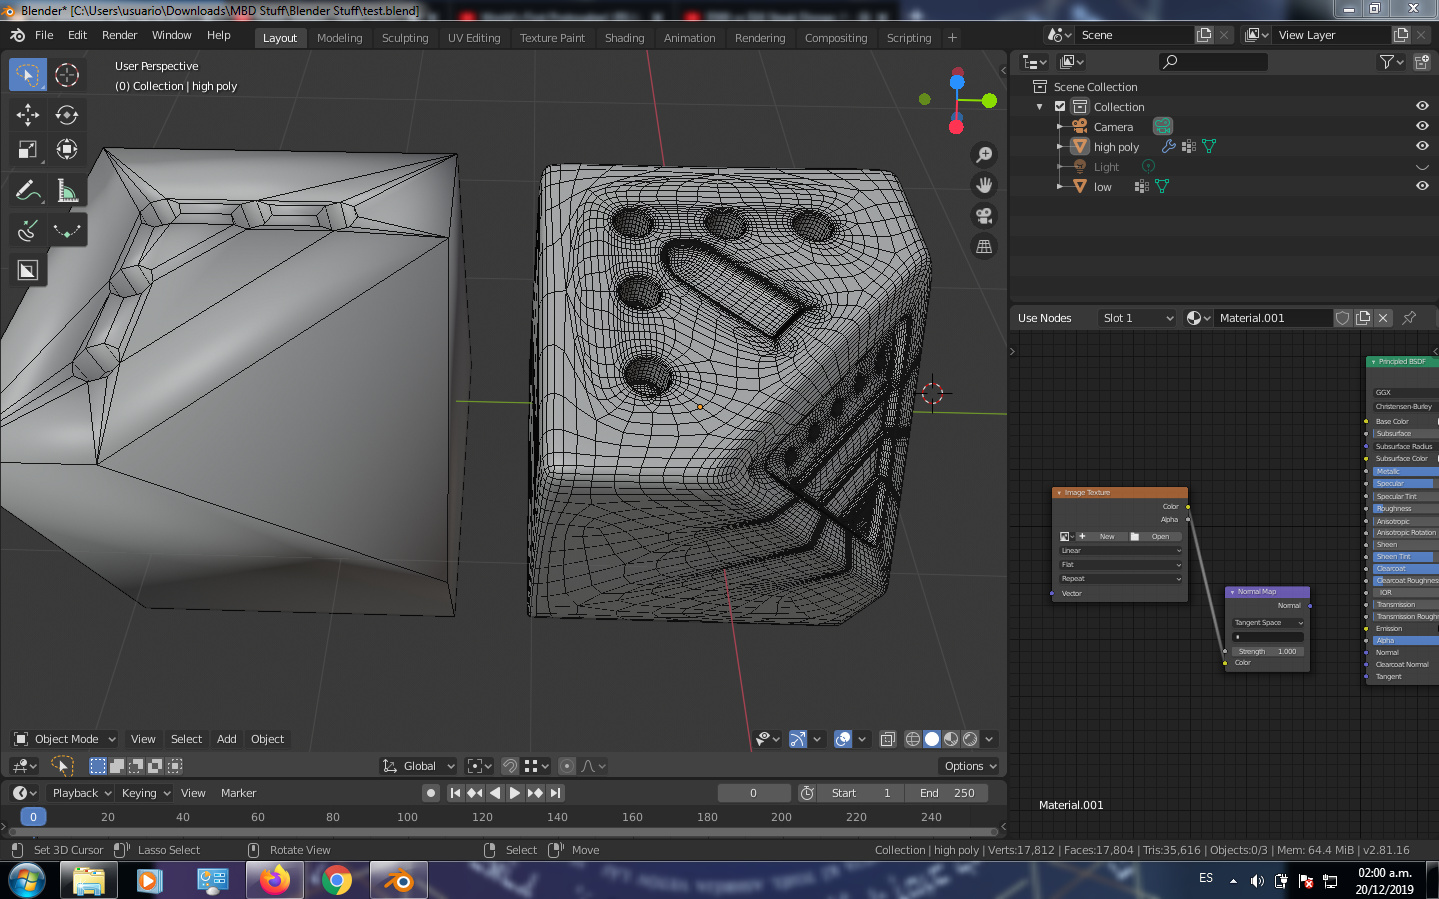
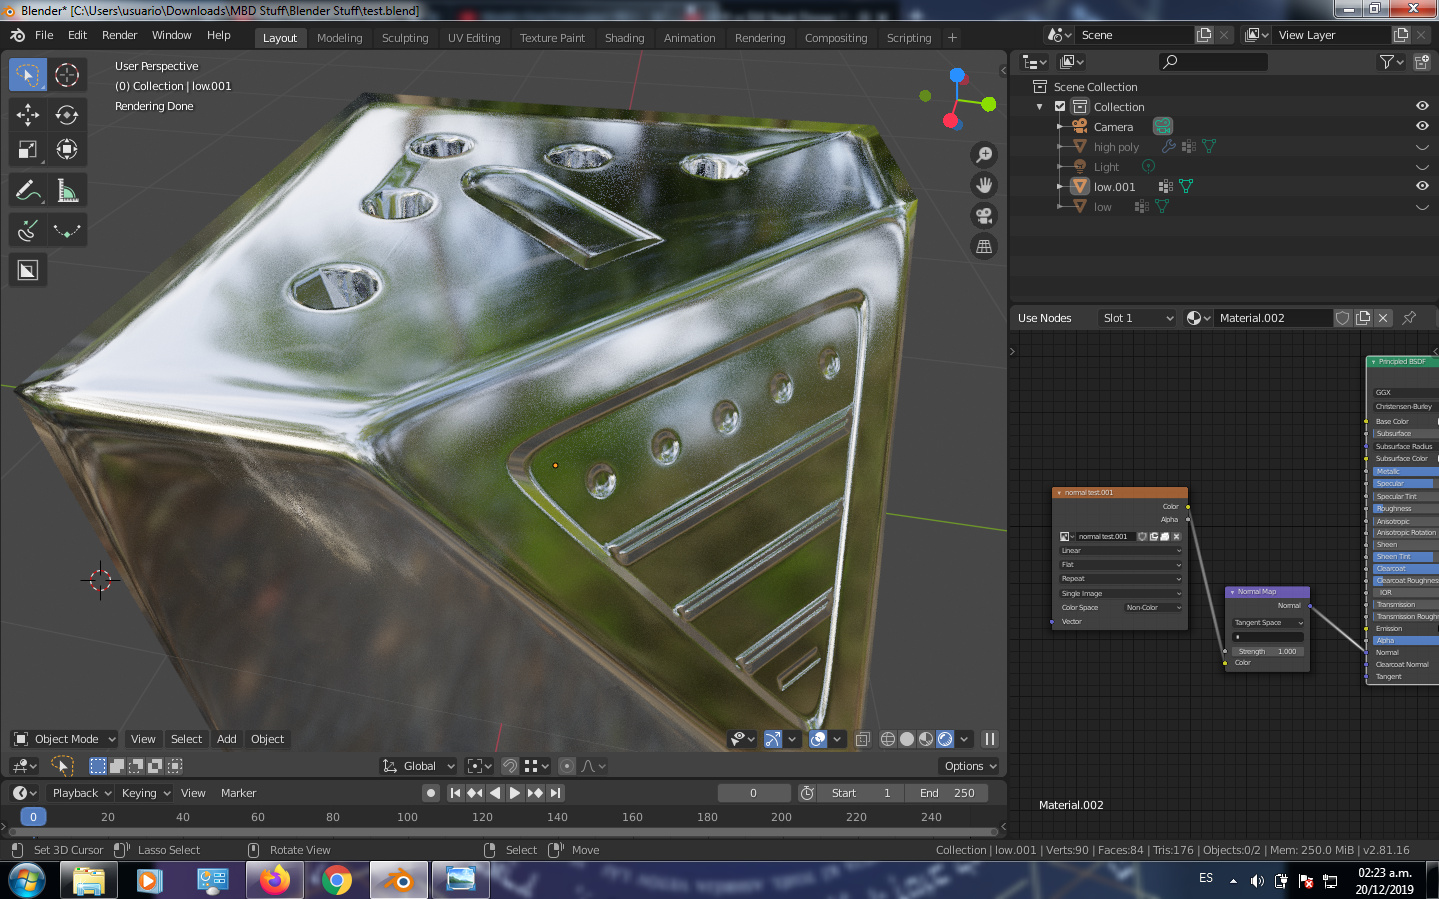
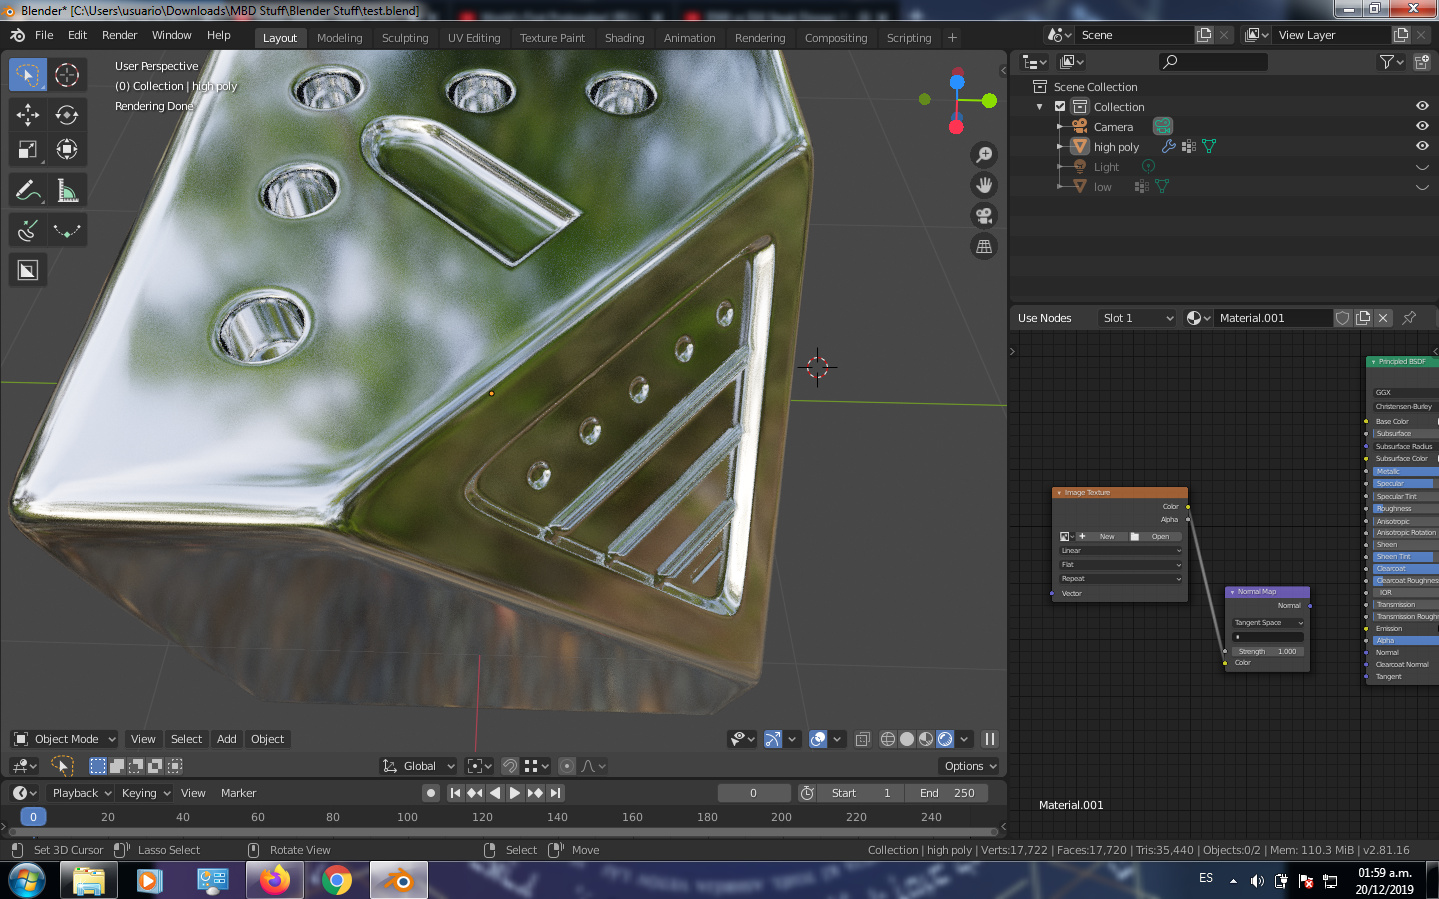
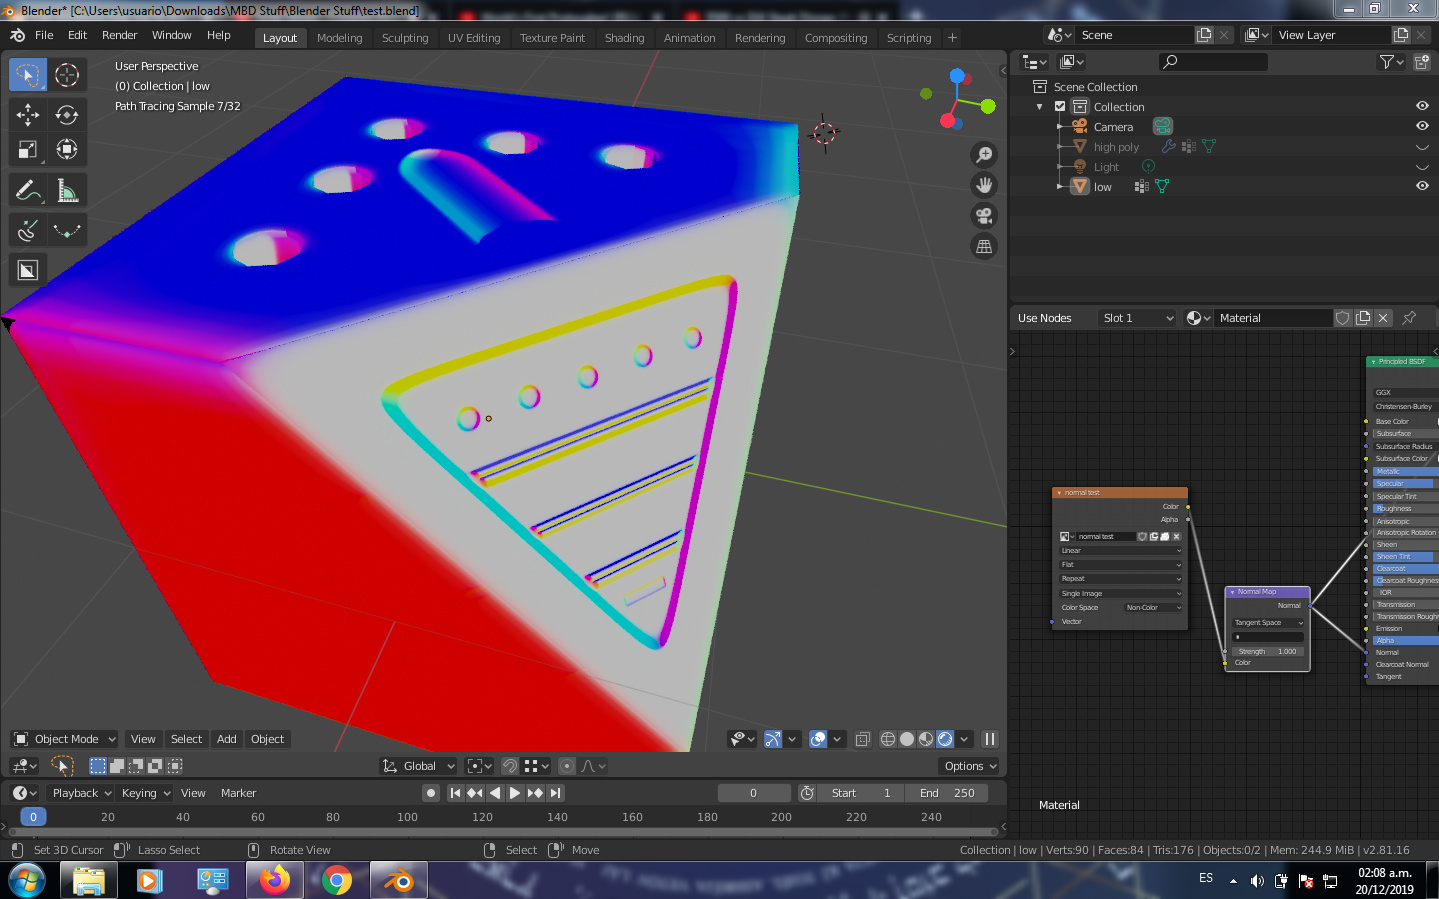
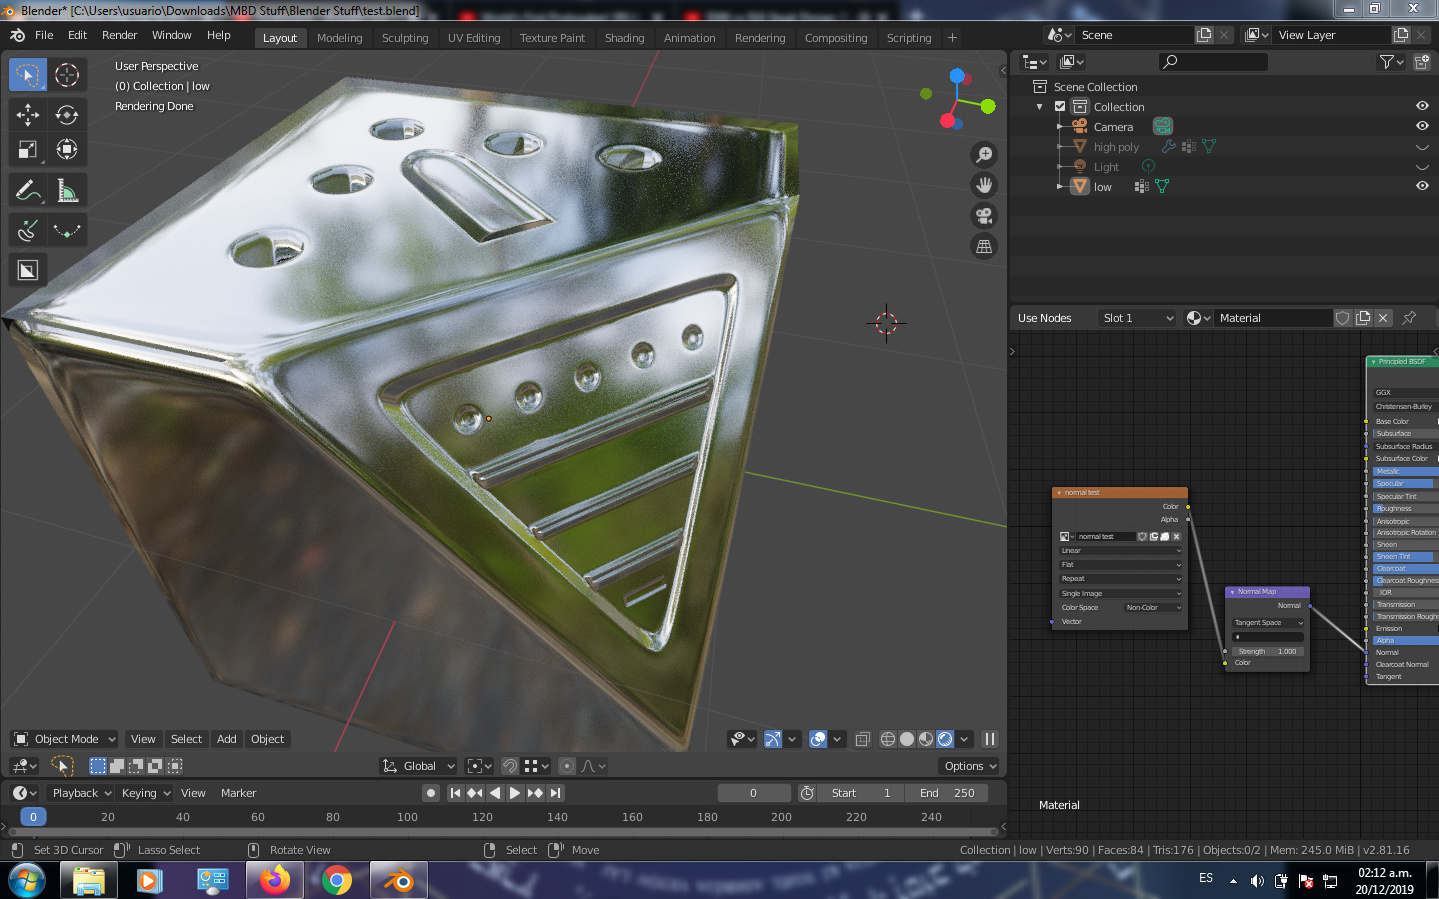
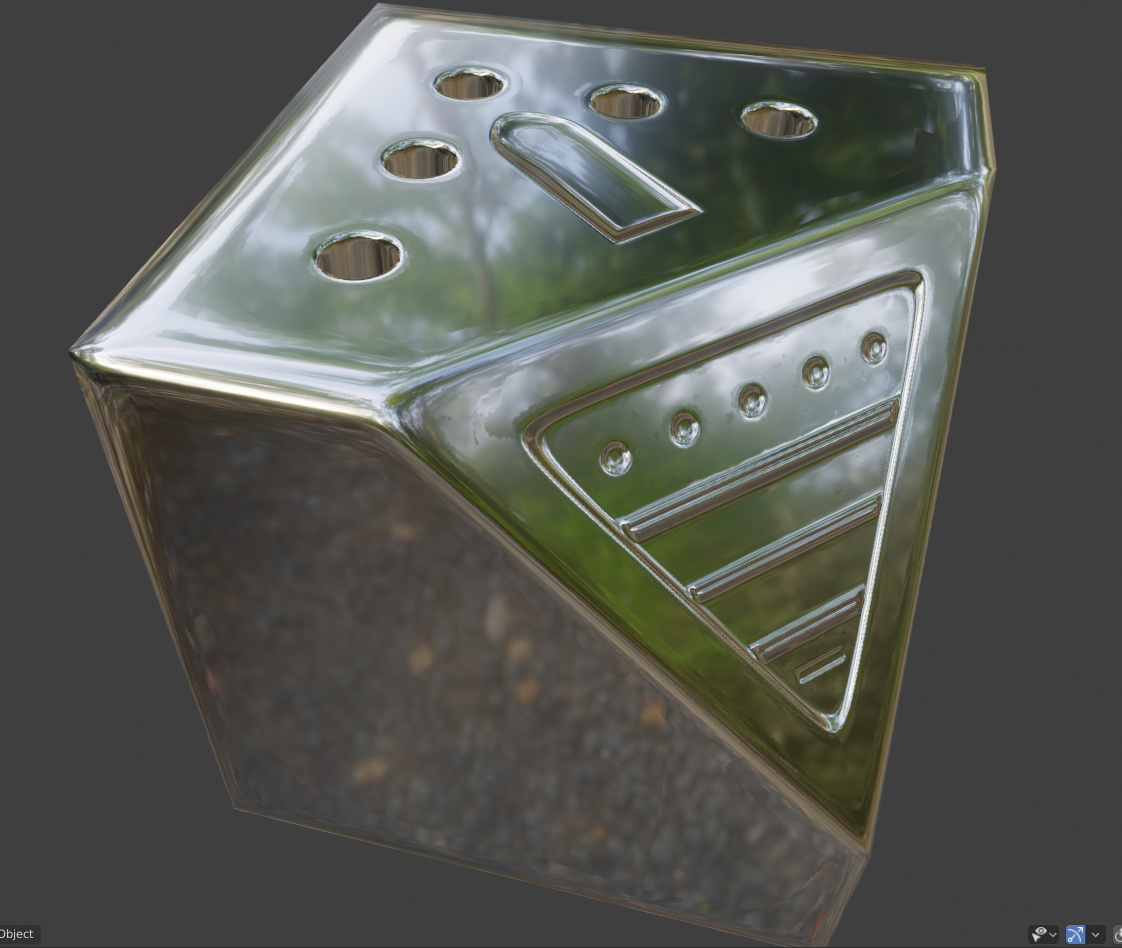
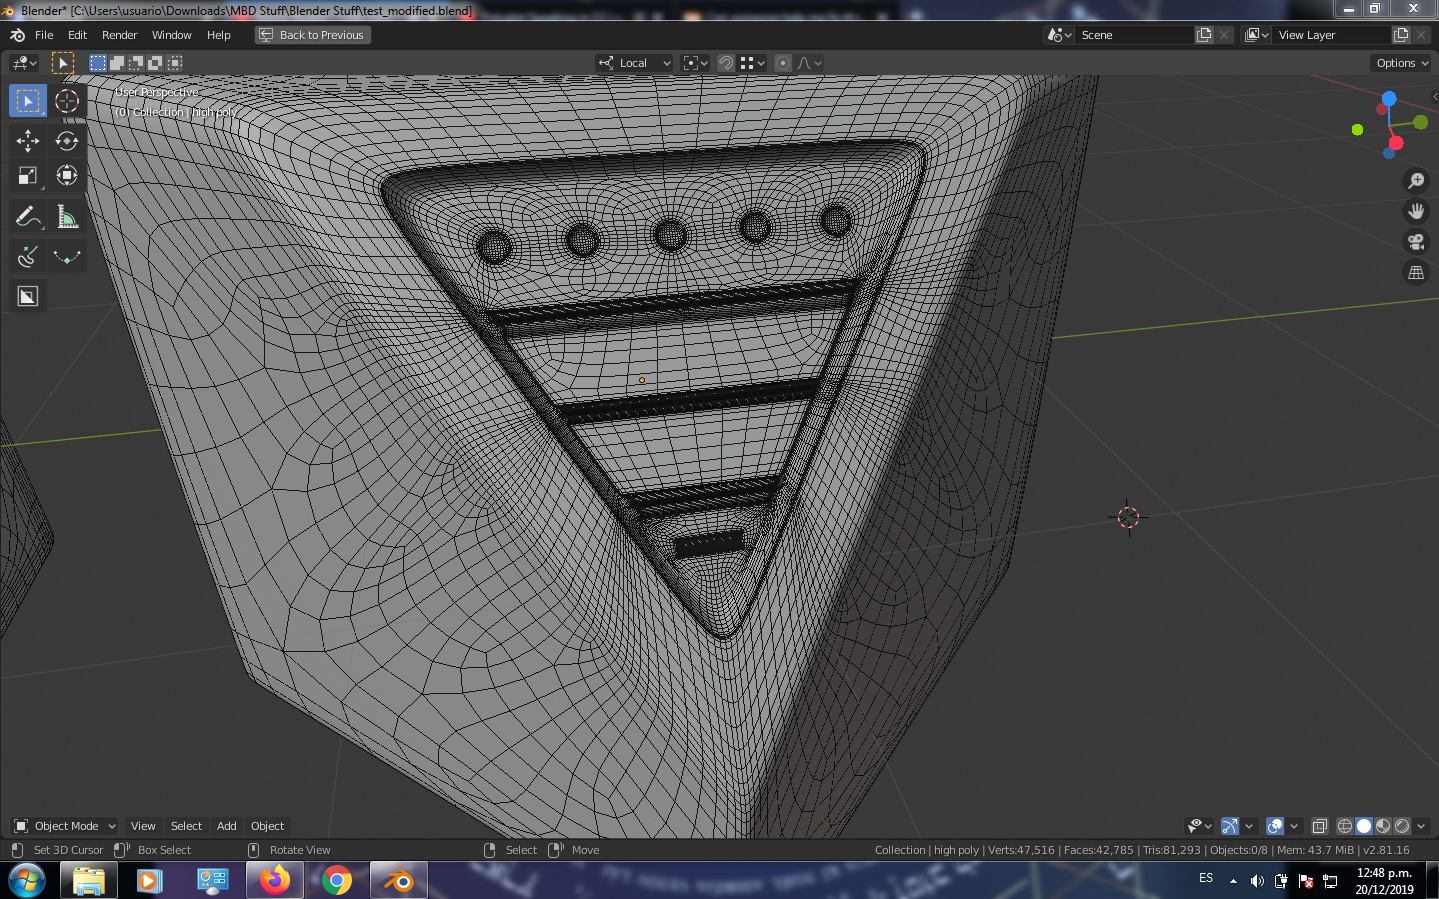
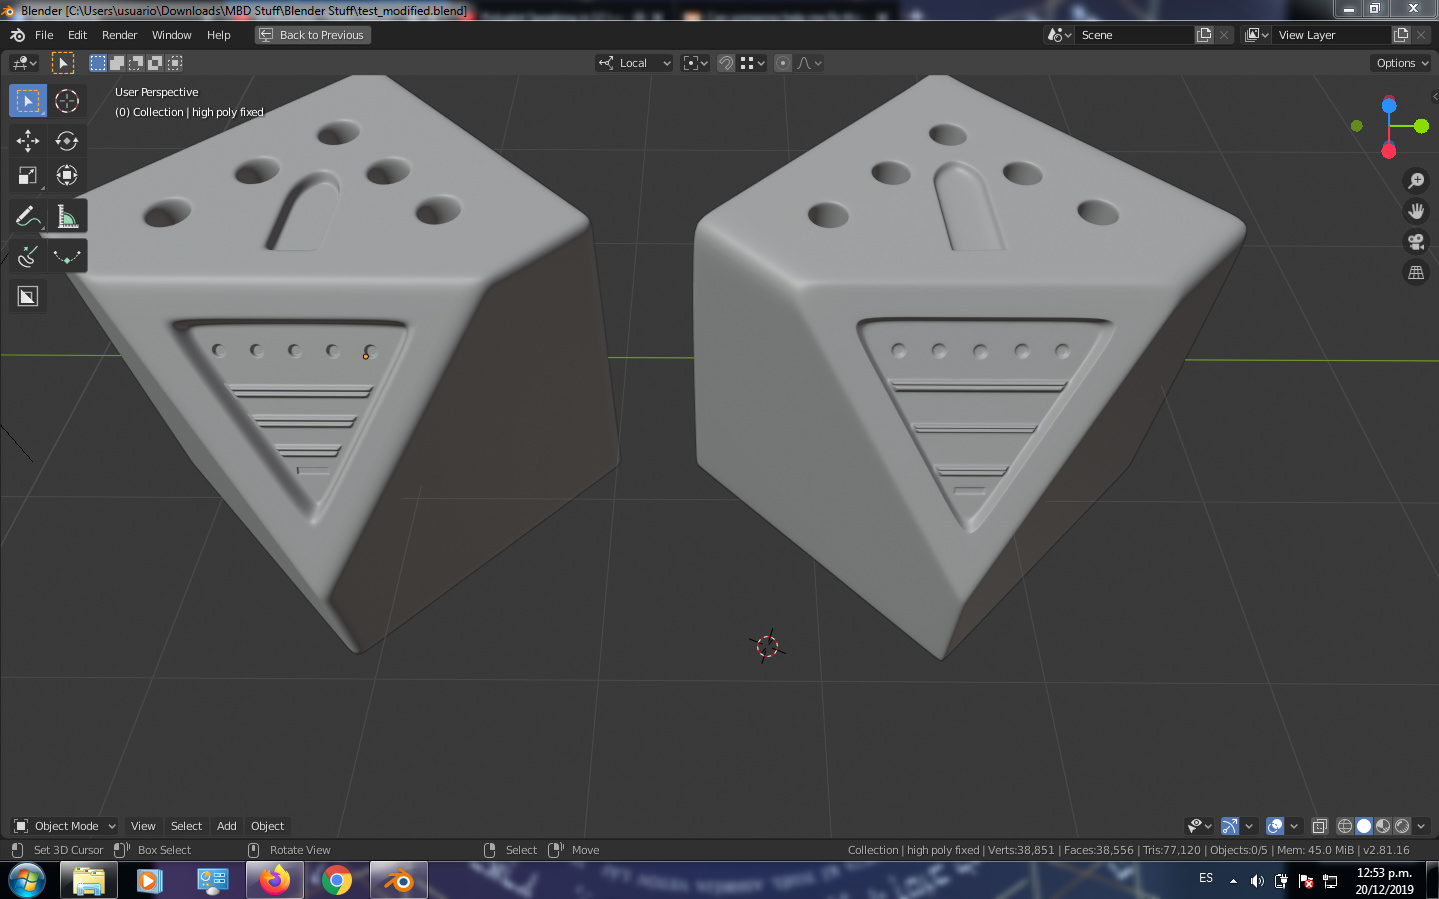
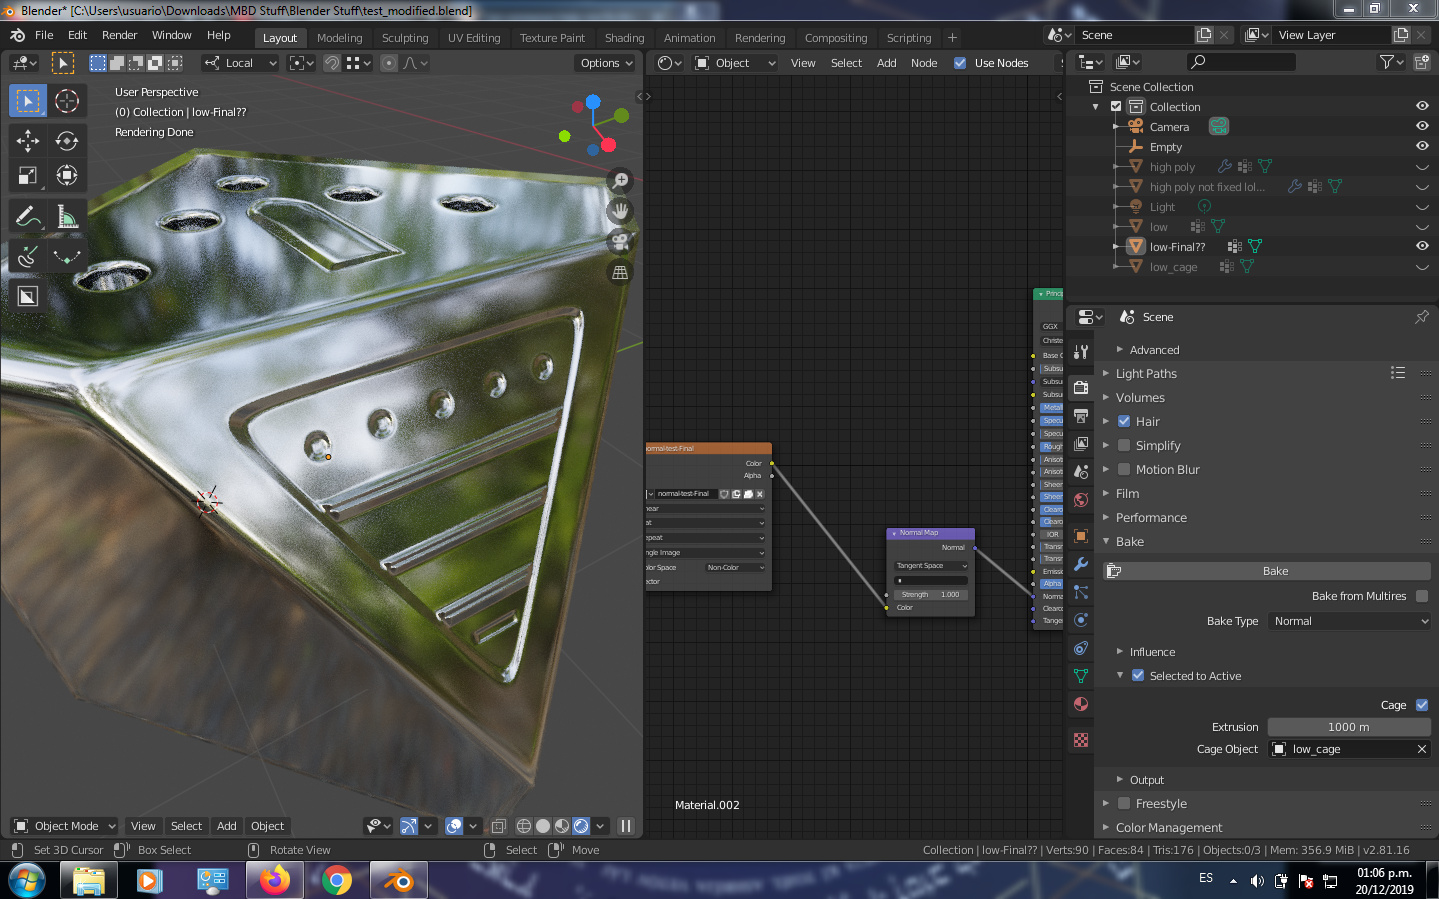
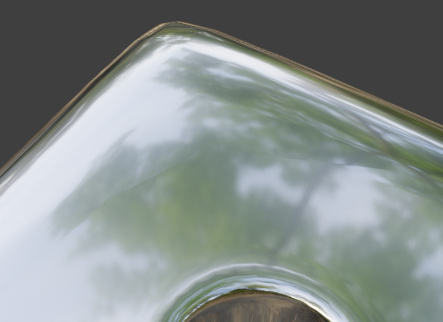
hello guys i have bake this normal from the high poly to very low poly mesh as shown bellow… so i am kinda getting the weird edges for some reason, to bake i used a duplicated low poly f-16 as a cage which i did an alt+s to grow it up a bit to use for that,and yeah i almost got perfect normal map with some issues, some parts where there are not splitted the uv map islands looks neat the normal map, except for i think most of edges do not very well…can some one tell me how probably i can fix this? thanks in advance!
It’s hard to tell, because it’s hard to tell by the pictures alone exactly what the problem is, and normal map baking is a goofy process at the best of times. I’m far from being an expert on the subject, but I’d take out any extra details that might intersect with your main mesh out before baking, and I’d probably go ahead and build a cage as well, just in case.
@3dcgfx @Renzatic
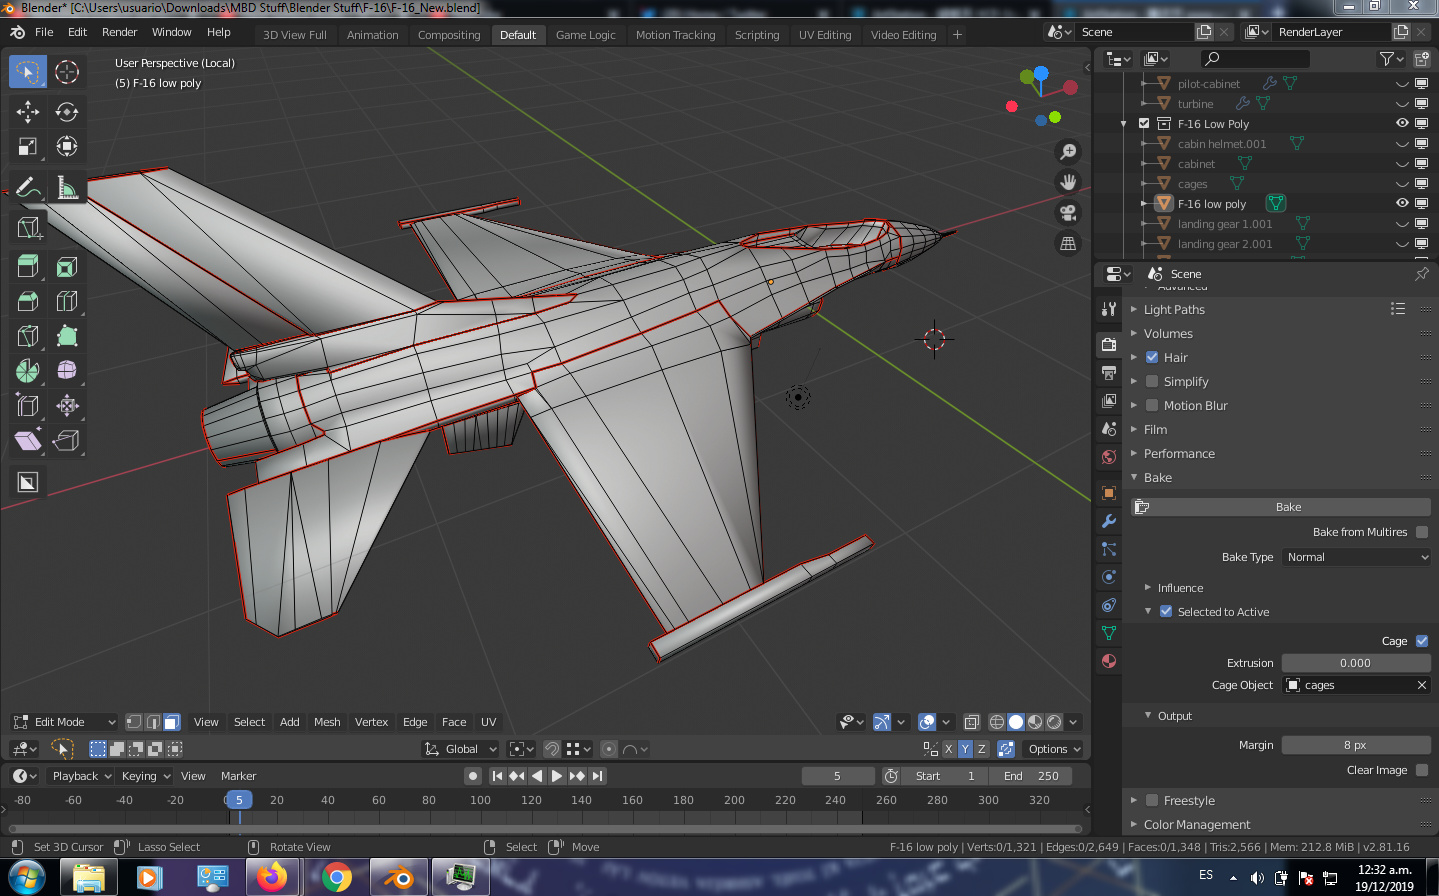
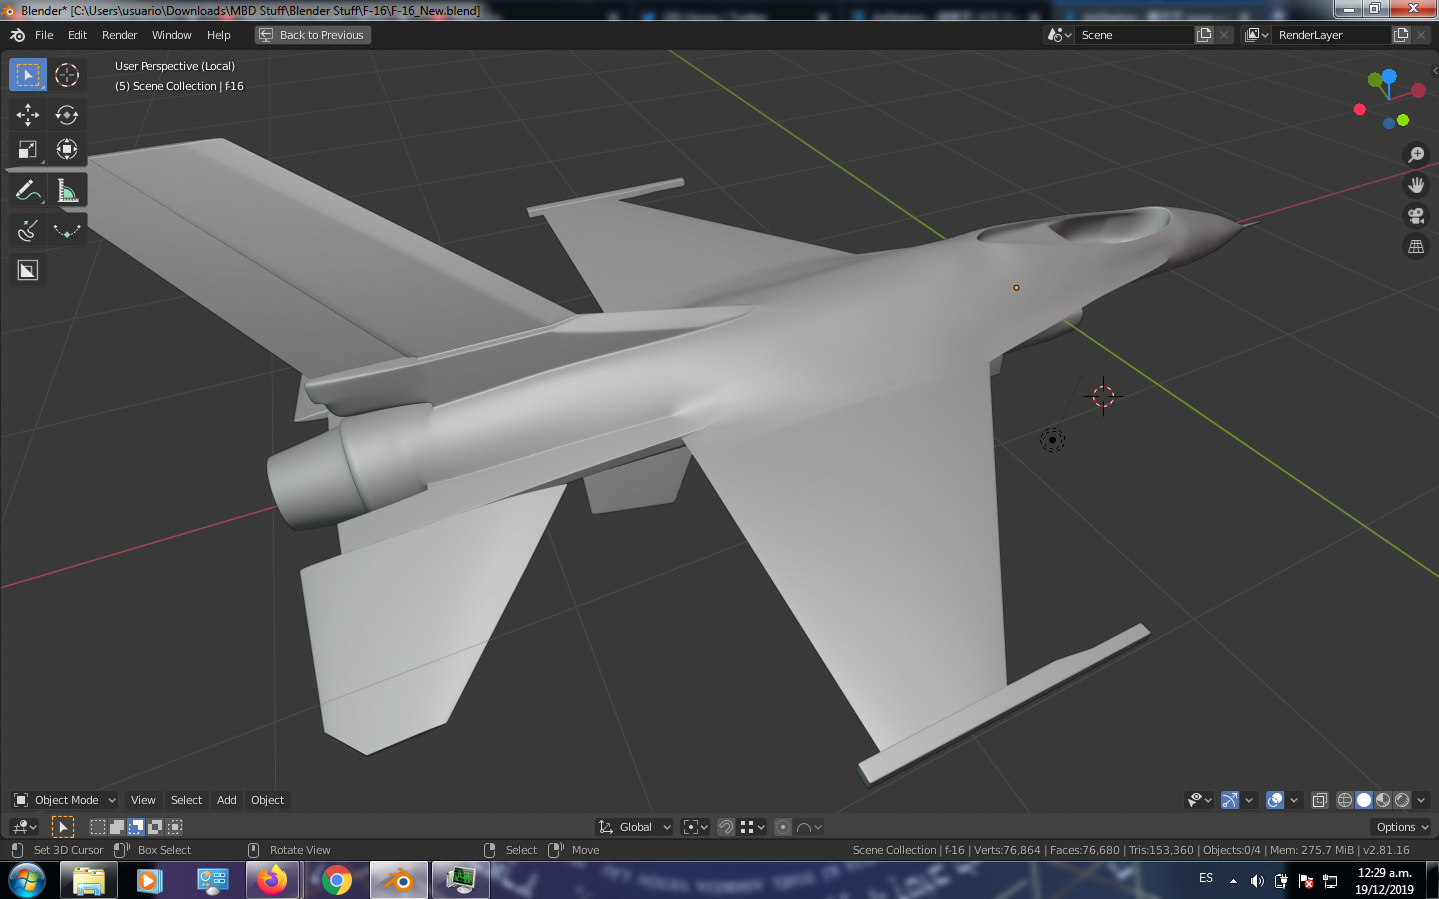
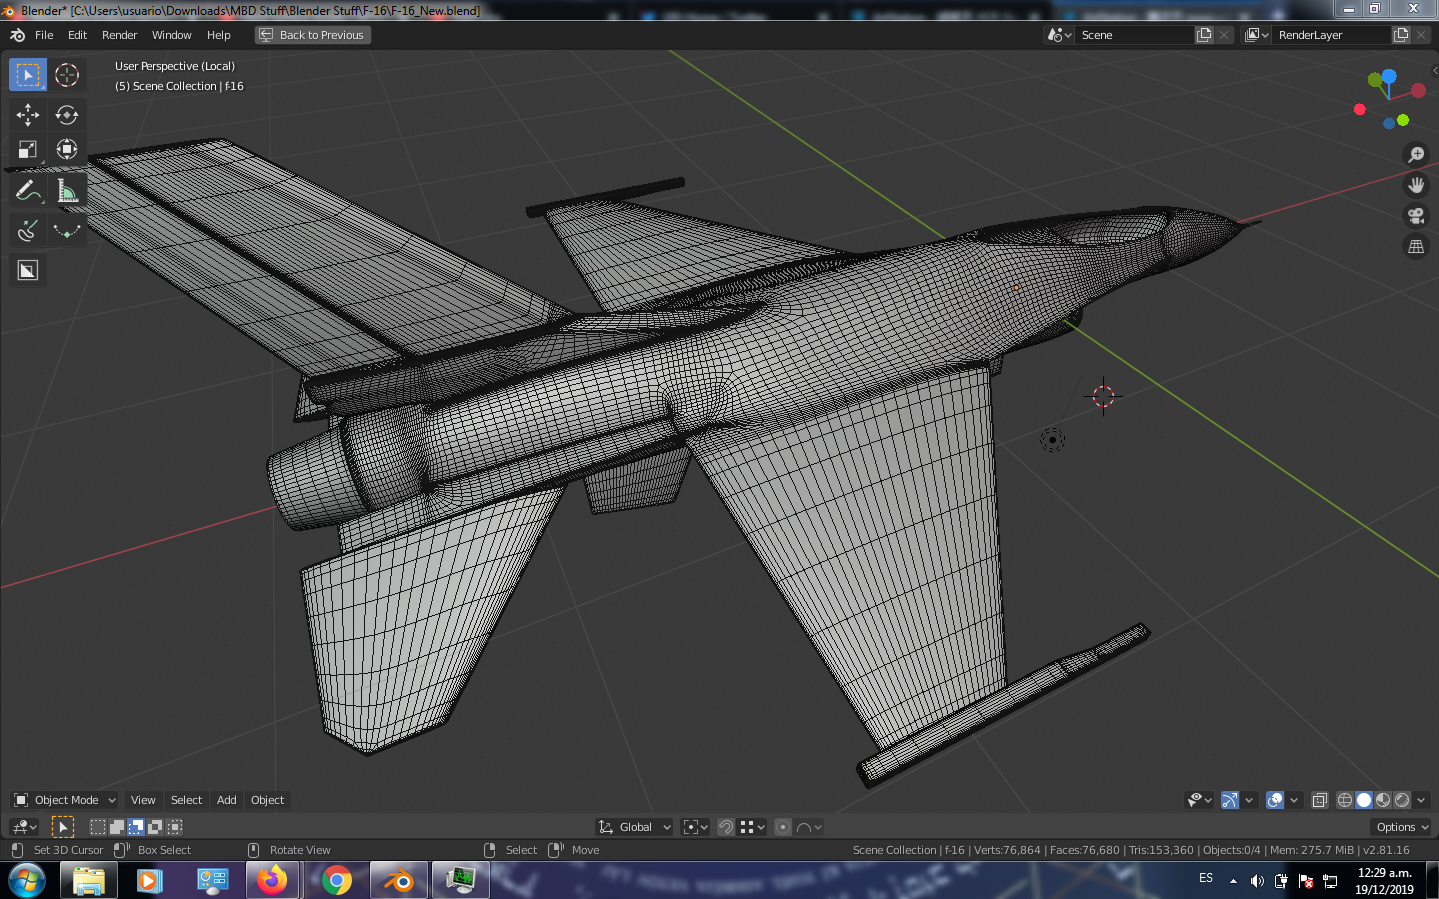
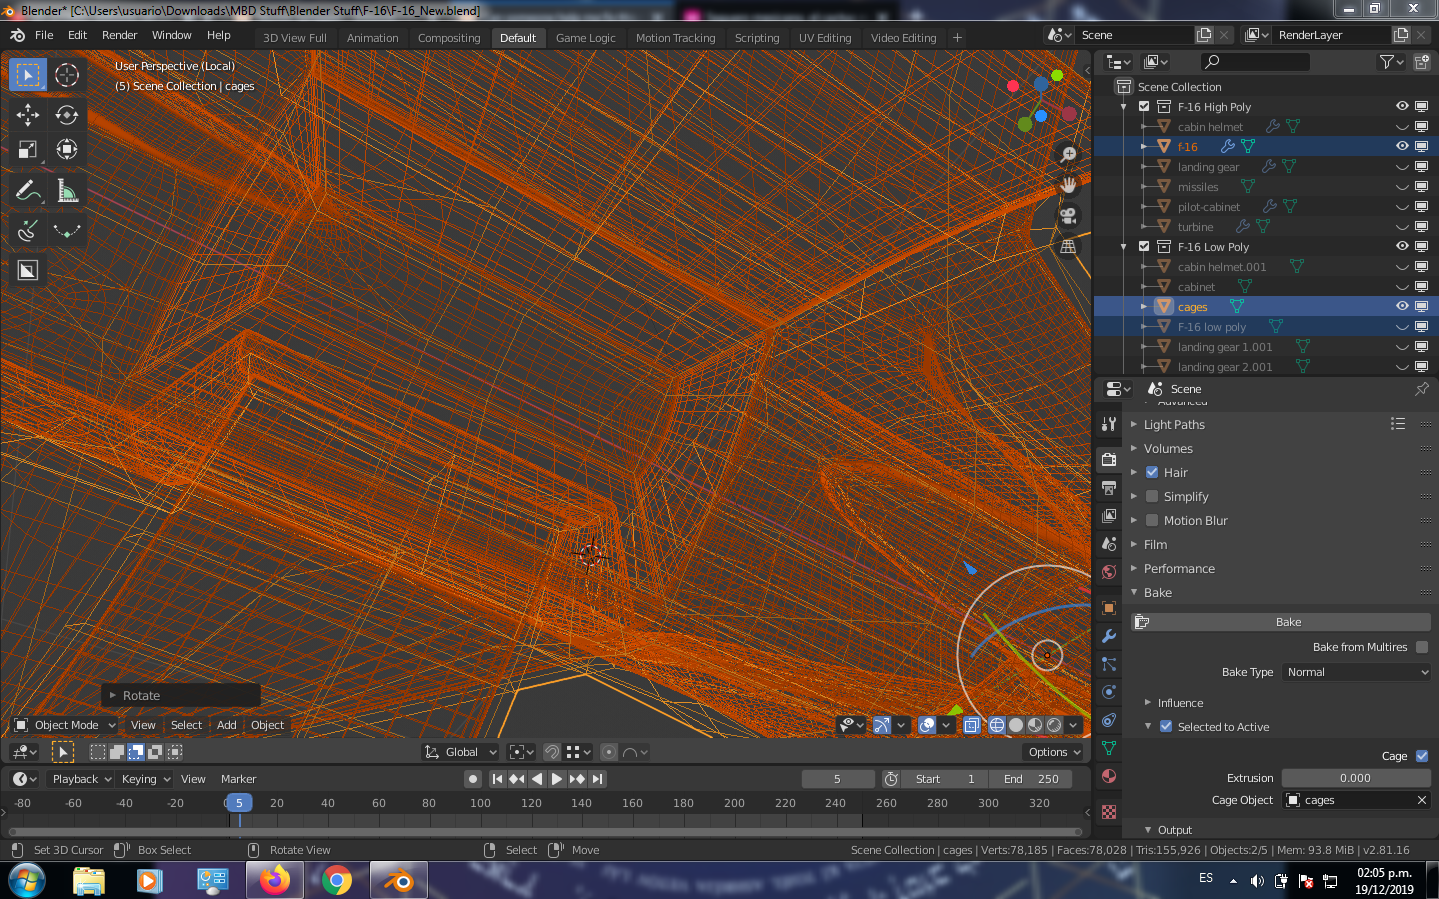
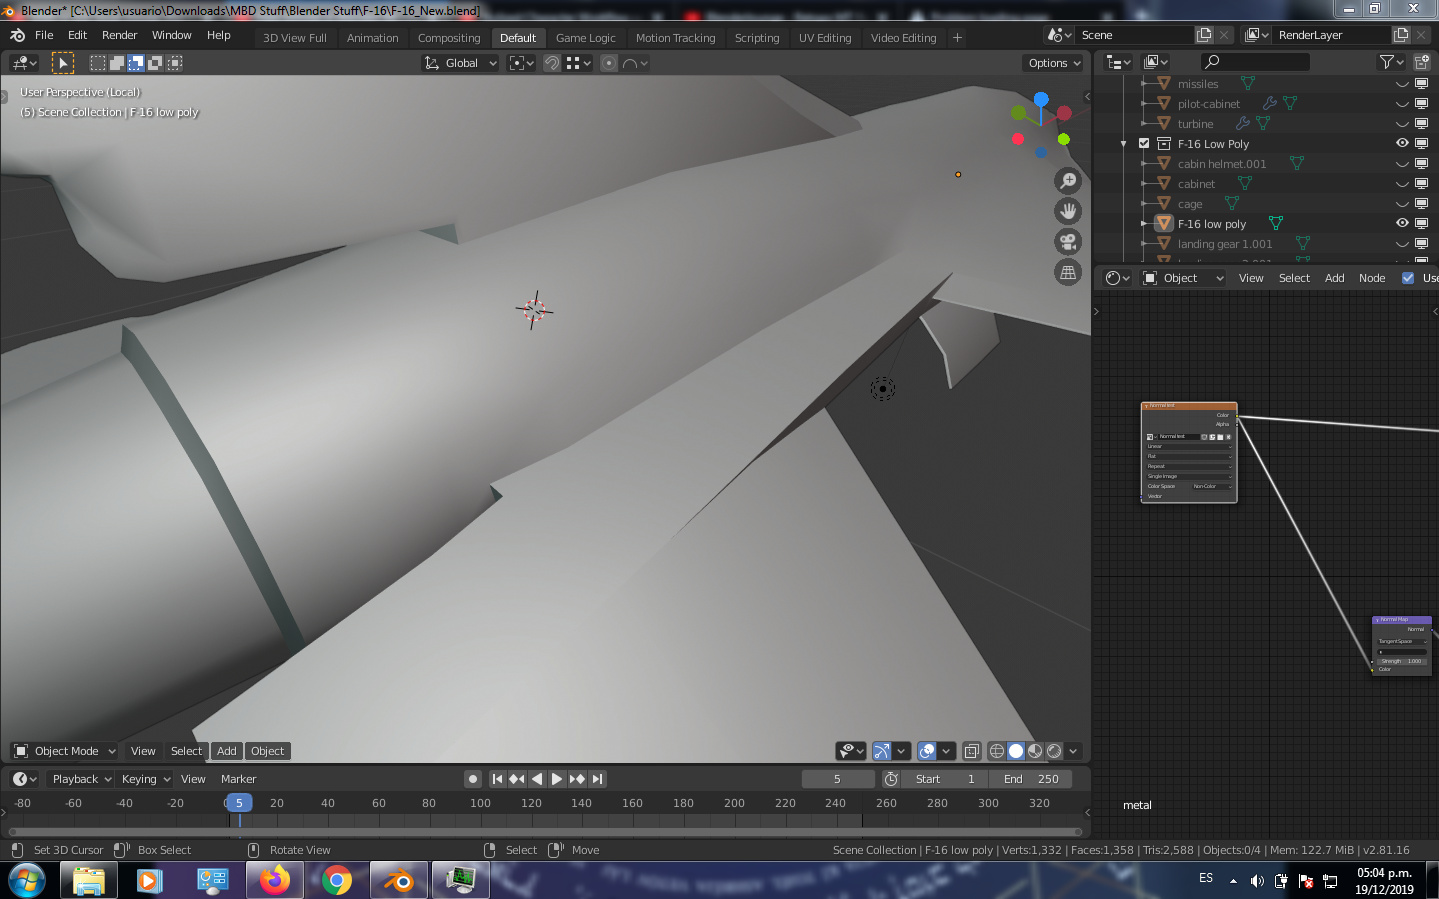
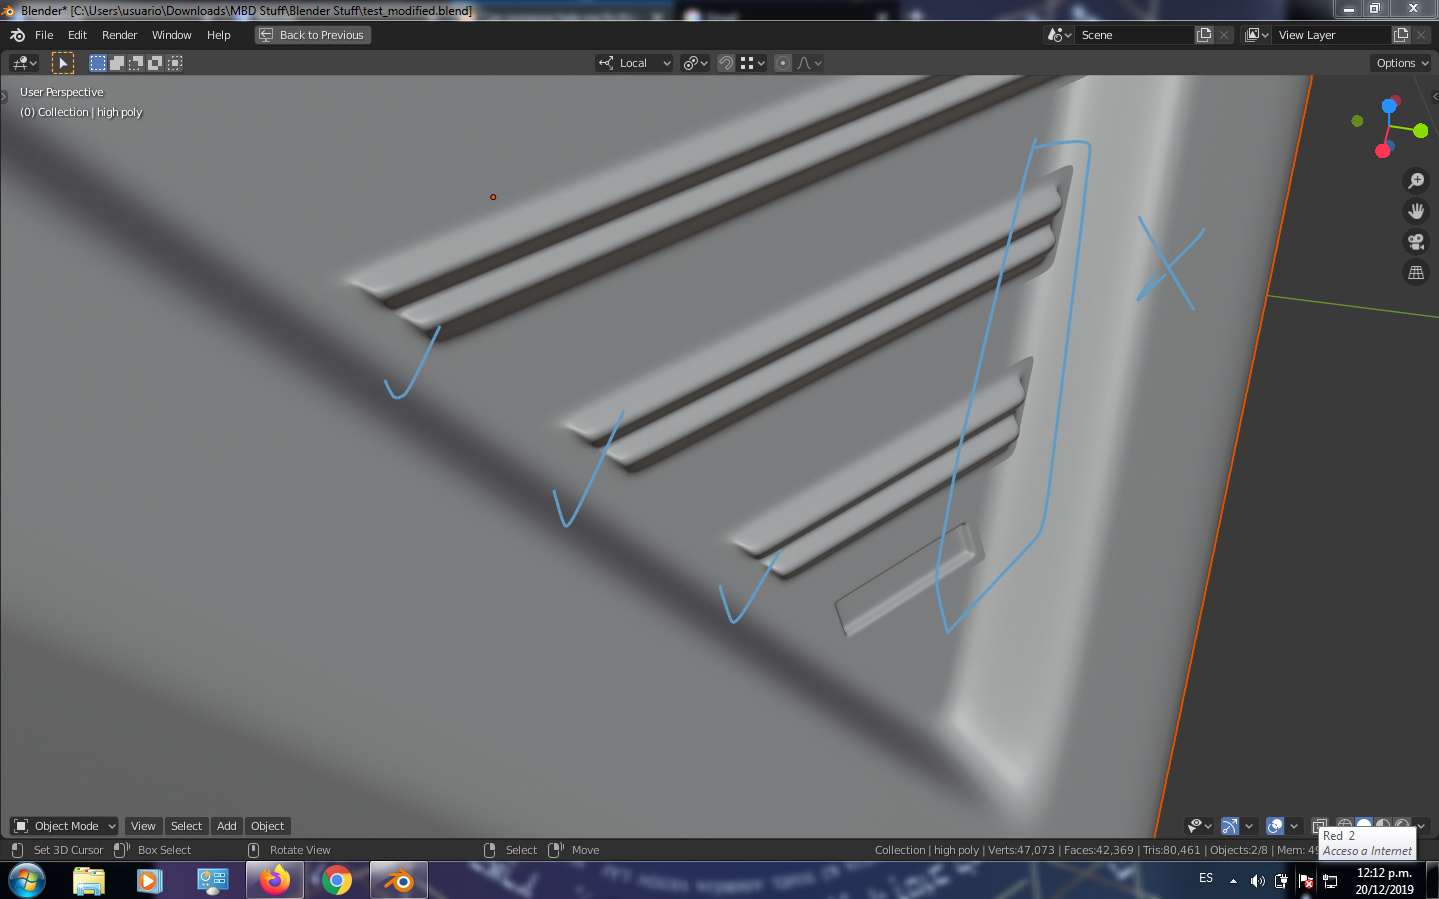
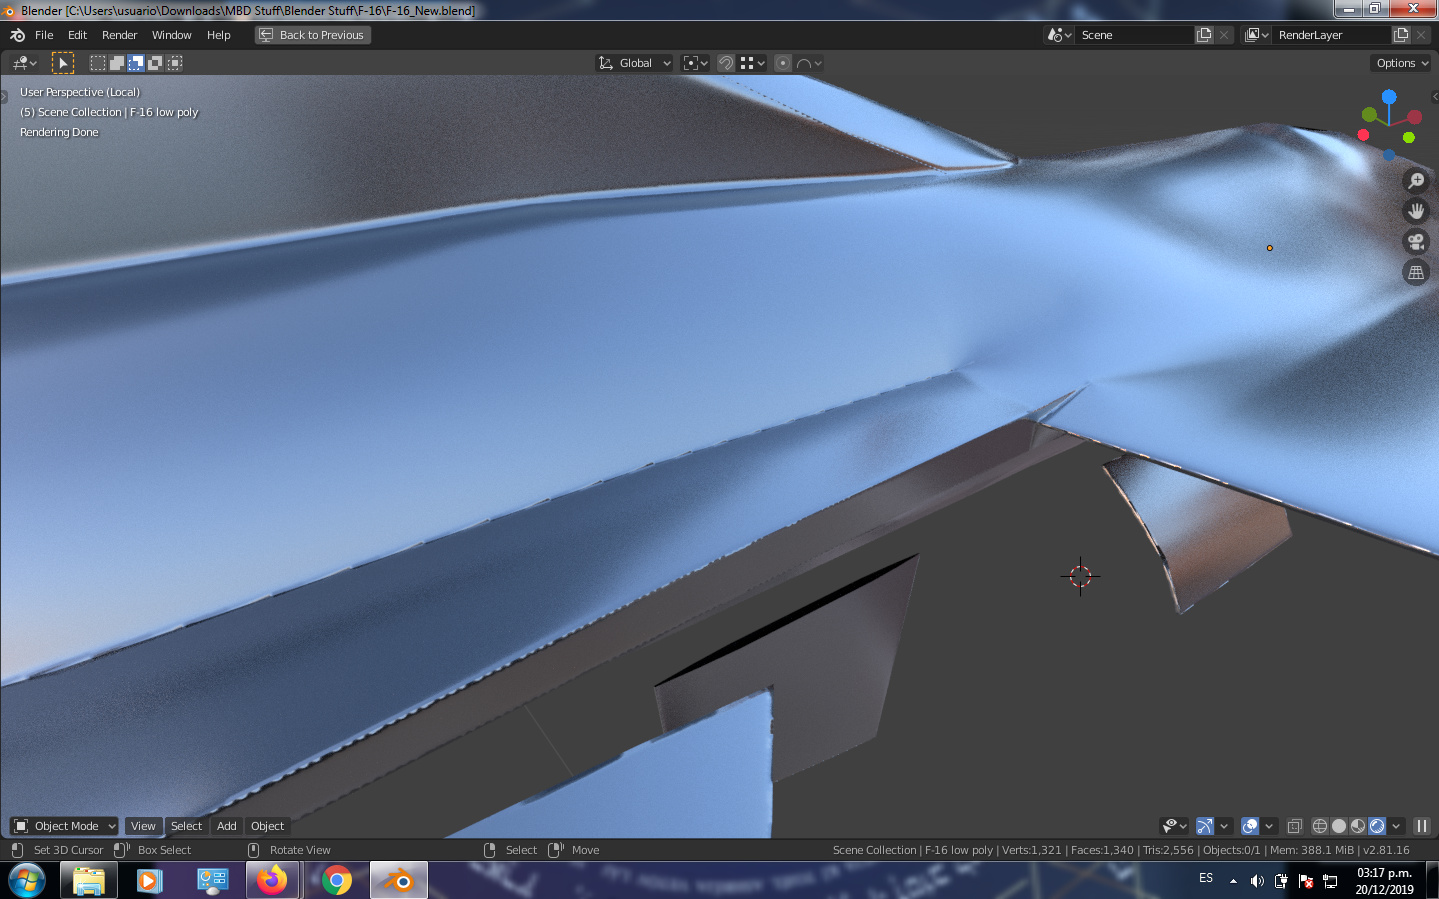
the low poly model smooth shading its applied, obviously the high one too. they look like this in intersection though that doesnt really matter (i think) if they are so close like that because i will be using a cage as ray distancer to get the things right when baking?..
I was thinking last night that it also looks like standard UV normal map seam, (if I miss it you can use multi UV and a mask to blend out seam) but if in editmode some of the edges are marked smooth, but the sharp area isn’t, maybe that’s it.
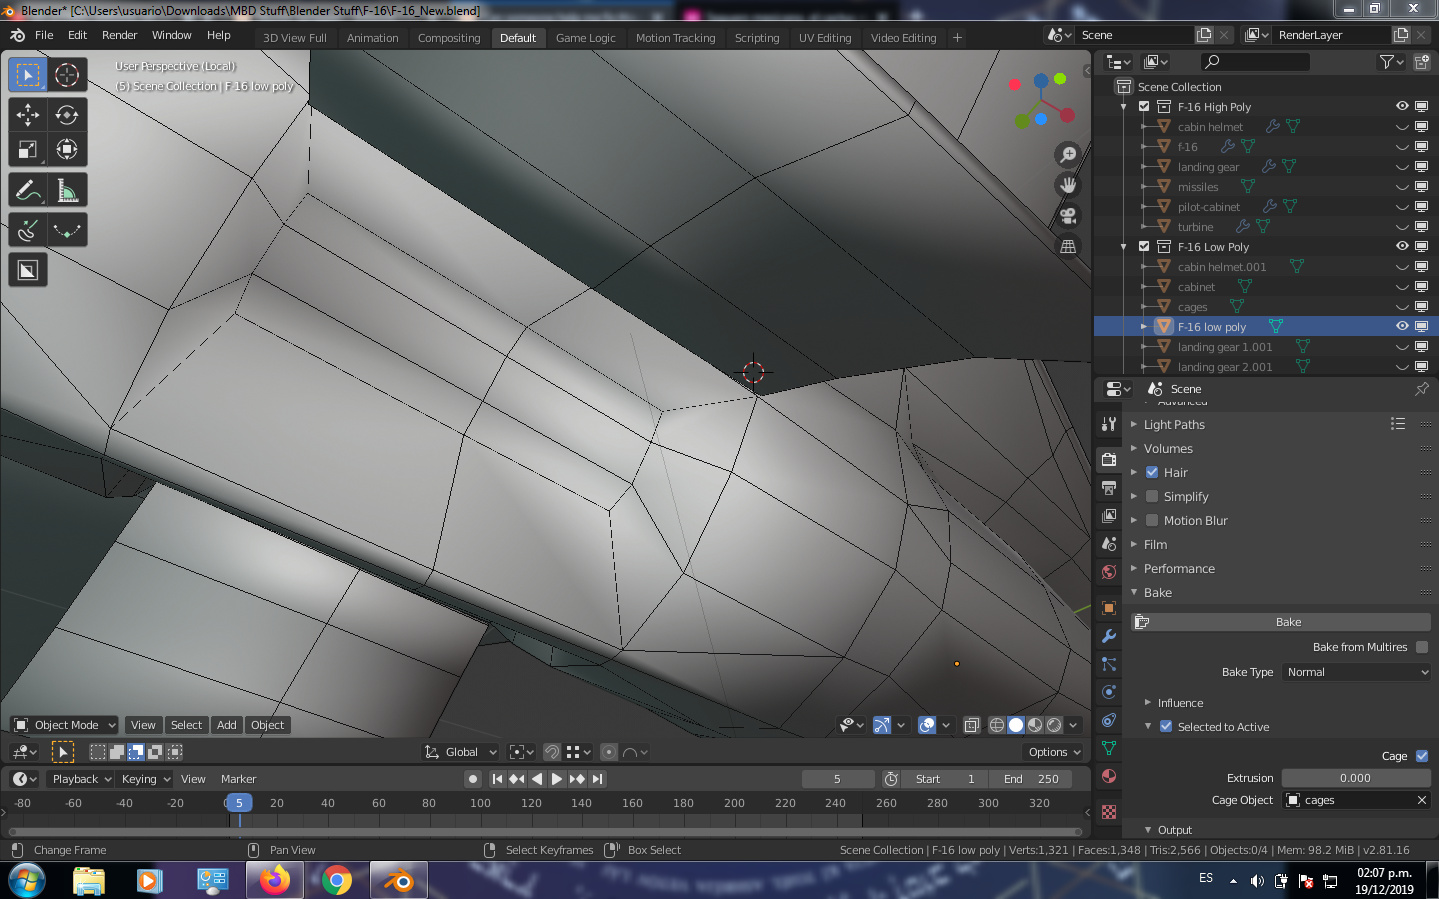
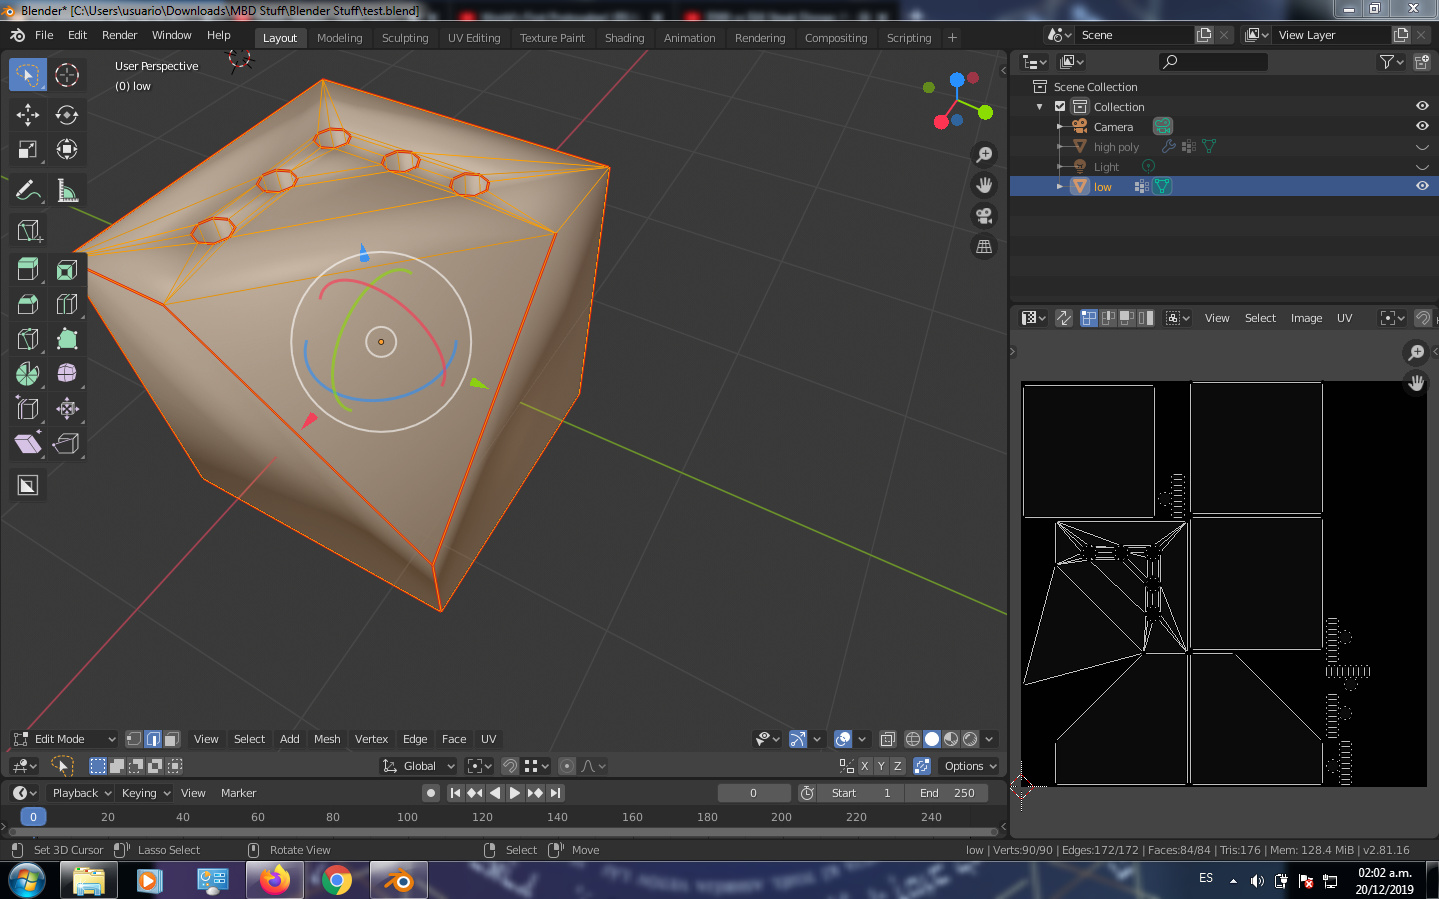
It looks to me like his low poly doesn’t have any sharp edges applied to it. Like it’s all just smooth shaded without any concern to anything besides the geometry. That will cause some underlying errors on a normalmap bake, since the process combines smoothing from both the low poly and the high.
I’d suggest going through, marking some edges sharp, and trying it again.
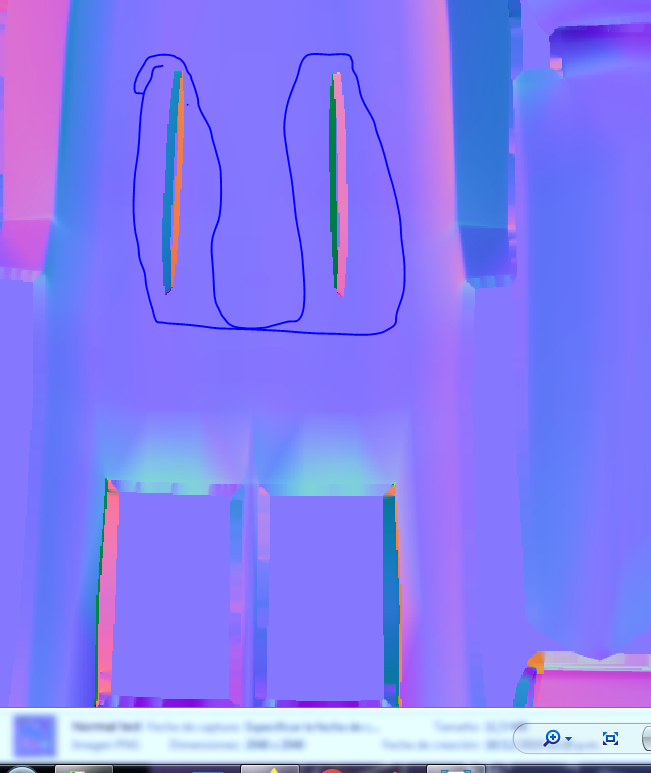
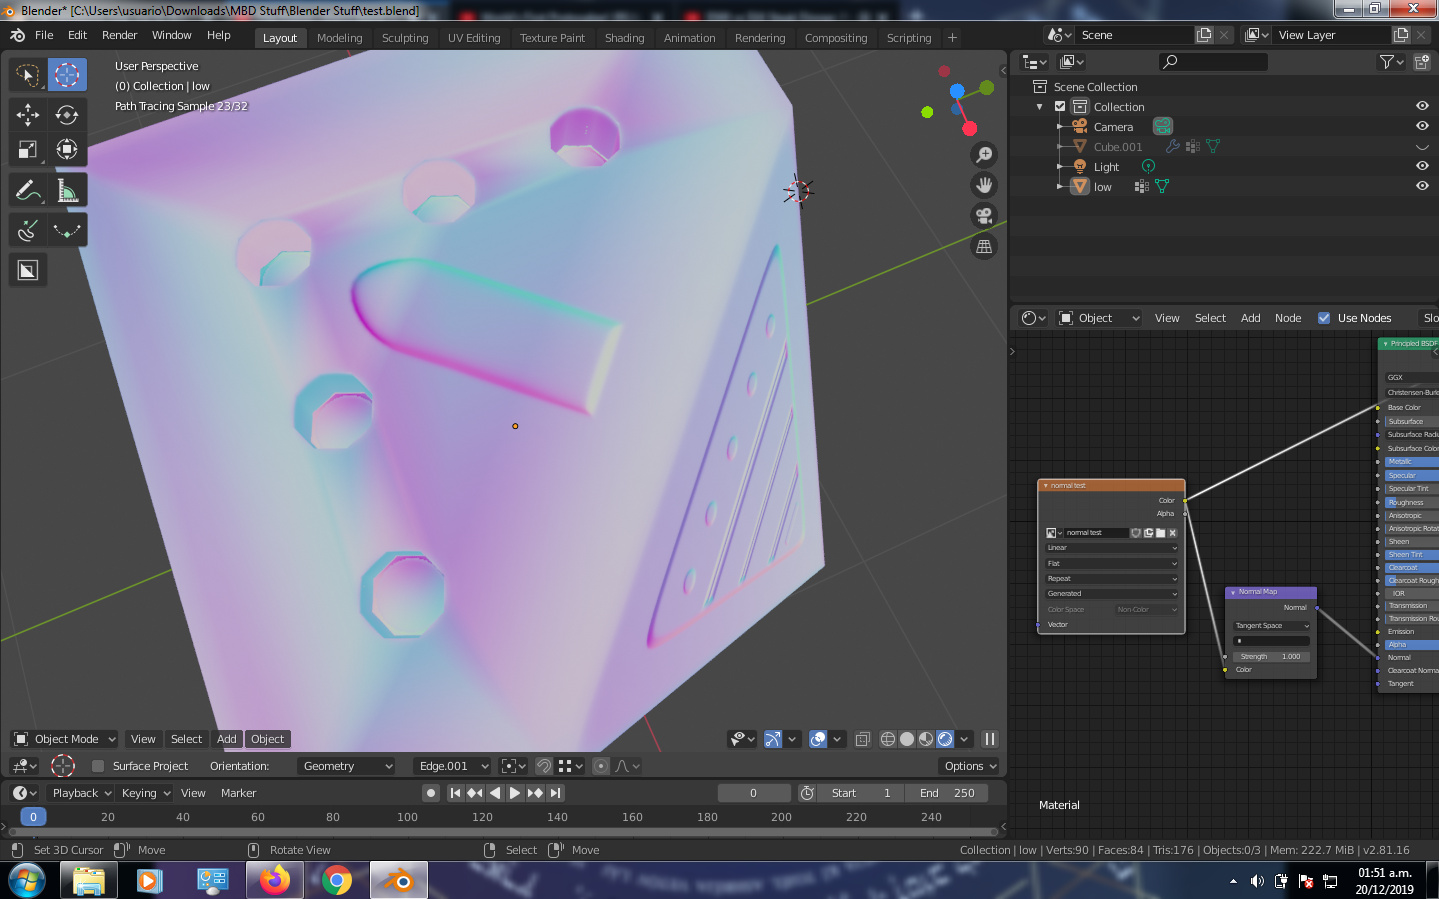
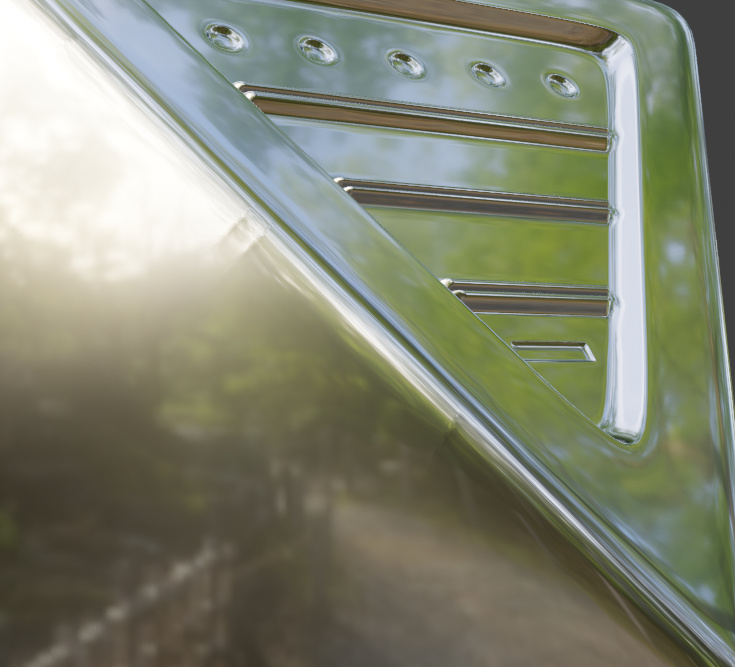
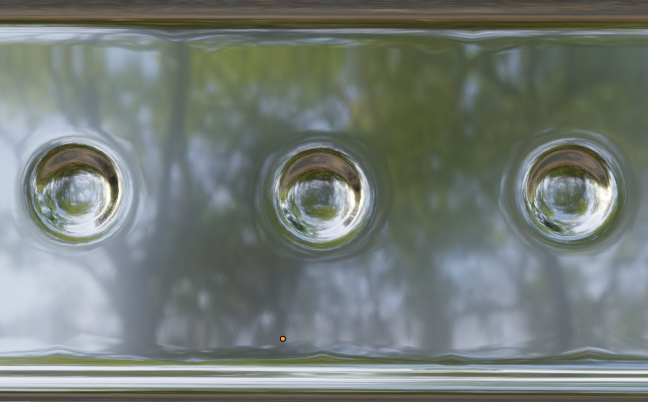
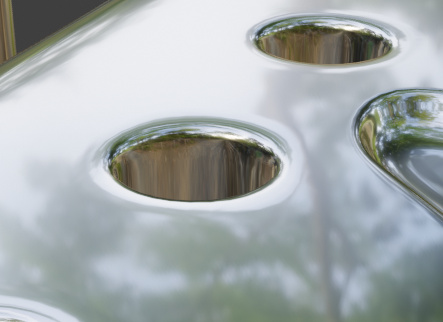
edit: looking at his normalmap above, I’m almost certain that’s the problem. It looks like it’s picking up the weird shading from the underlying low poly mesh, and baking it in, producing that creasing and edge bruising (for lack of a better word).
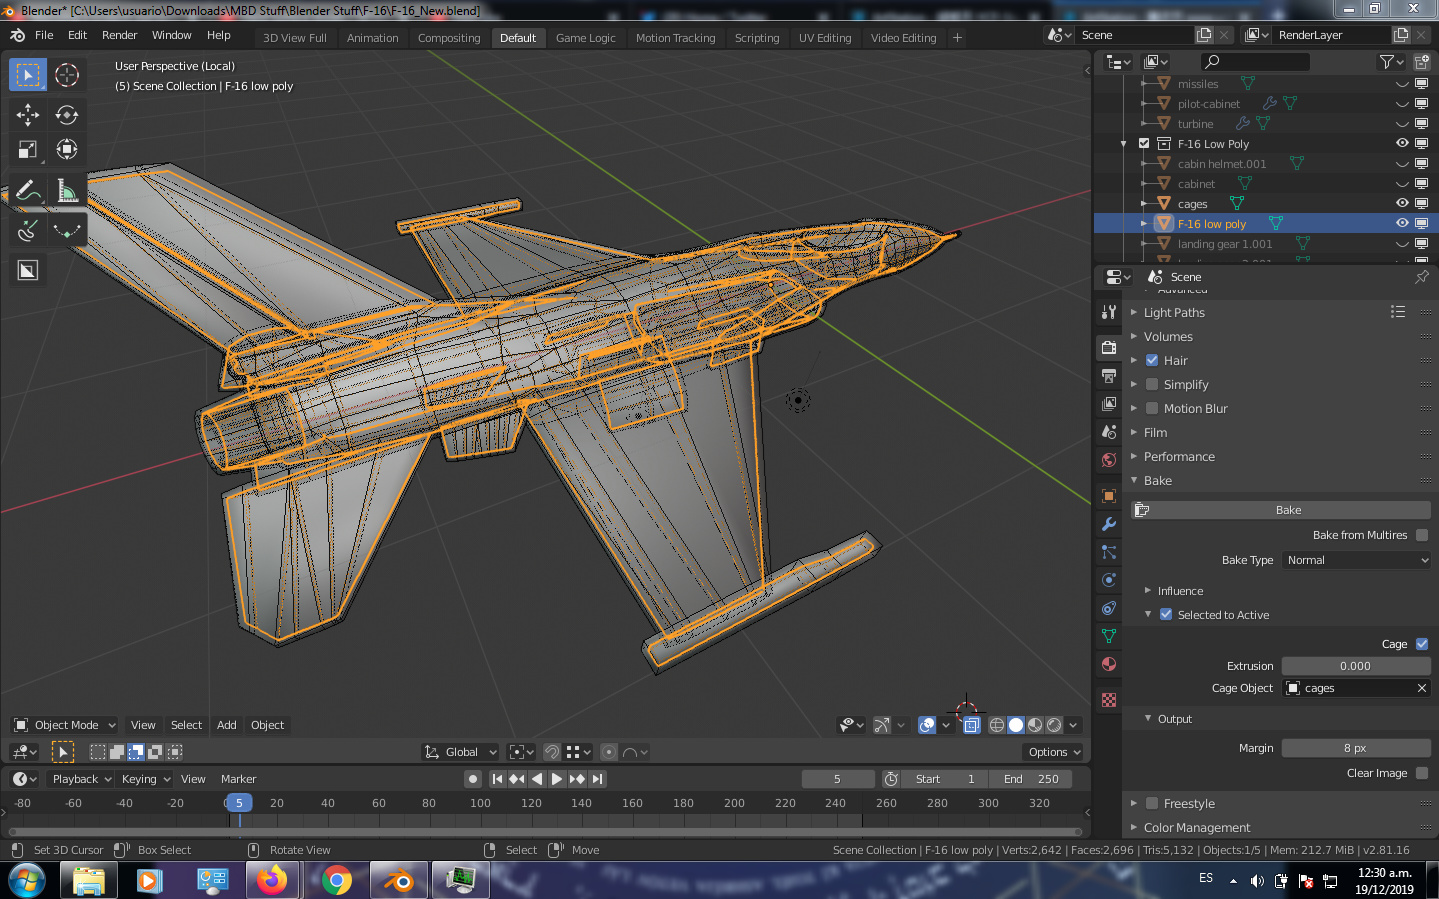
are you sure if i mark sharp edges to those sharp edges, that wont bake in the normal? also i have notice that there are elements that i have to bake individually in the same texture because it create clipping artifacts in the texture. in this case this “shadow” is from the little wings underneath the body
I ran into a problem sortakinda similar to this when trying to bake something a few months back.
Think of it like this: any edge that needs to be sharp on the high poly should be made sharp on the low. If it’s a flat surface on both, it should be shaded flat on both.
For the sake of experimentation, mark some edges sharp in a small area that’s giving you problems, bake it, and see how it turns out. If it fixes the issues there, then do it to the rest of the model. If it doesn’t, we’ll start troubleshooting again.
edit: In terms of baking, shading, and marking seams: a good way to look at it is if you were to start separating parts of your model, would it effect the way you think it should be smoothed. Like take your fuselage, if you break those wings off, make them their own objects, it’d disrupt the flow of your shading across the top of the plane, making it look weird. But if you were to separate a sharp edge, like that indentation you pictured above it, wouldn’t look weird at all.
That’s a good generalized way to approach the whole normalmap baking thing.
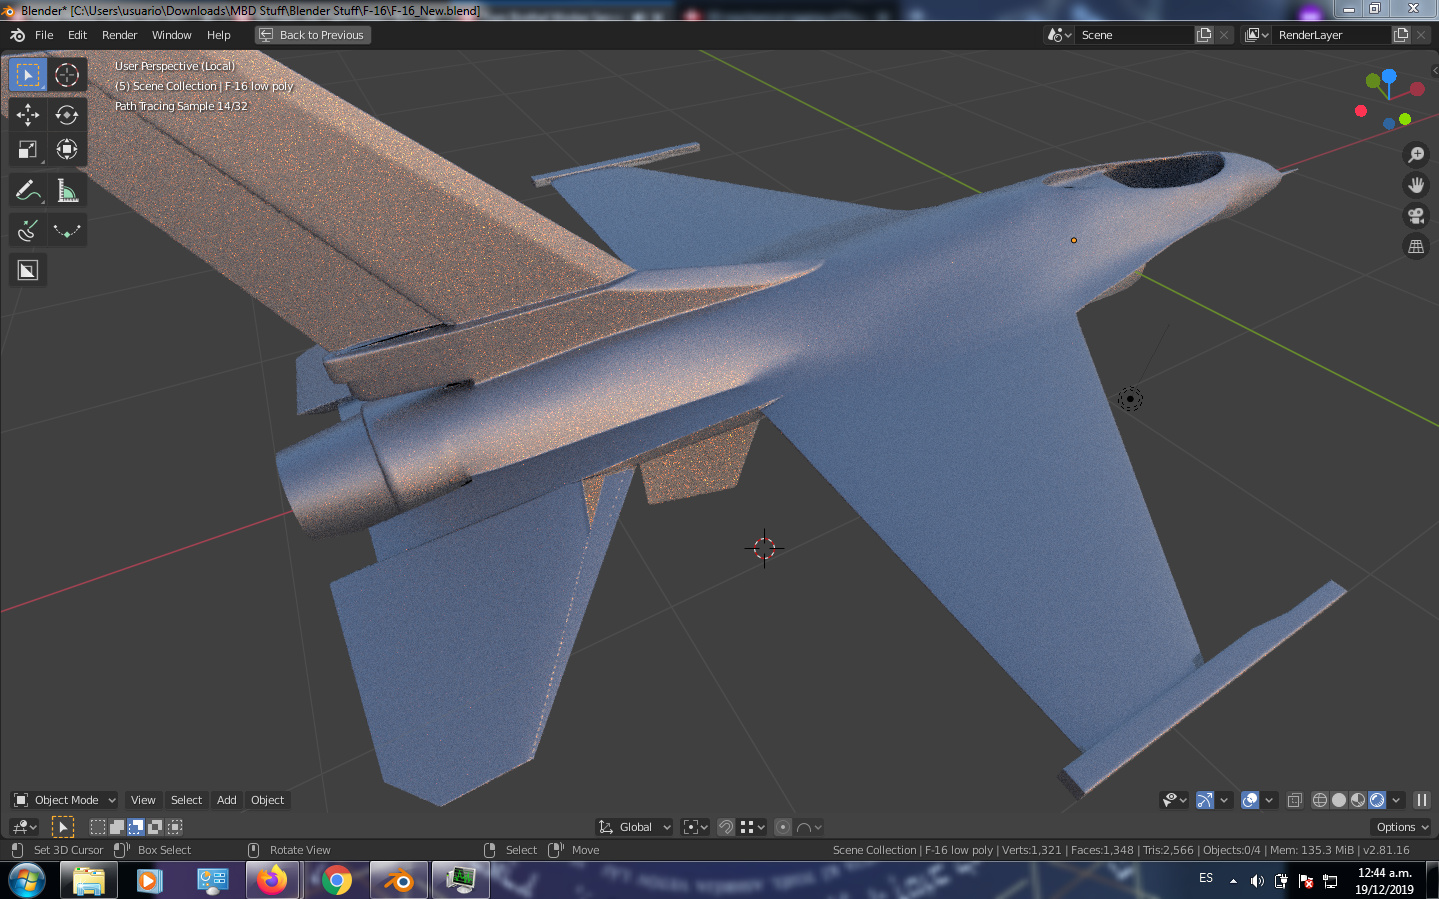
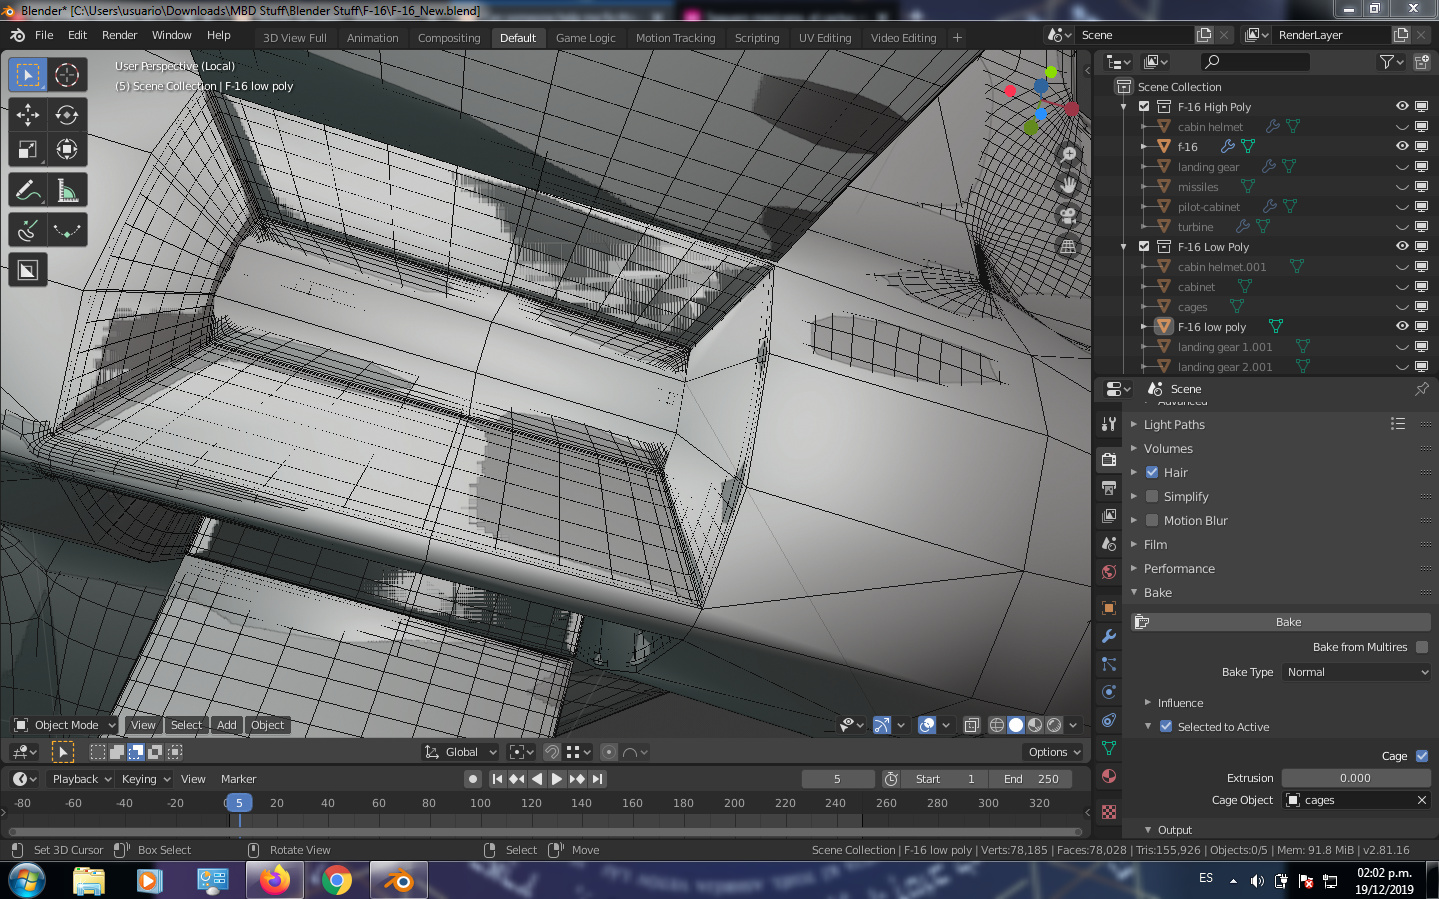
its just the wing clipping with the body, its not beveled or joined in the topology either which means its separate mesh within the body, also the baker takes into account any object surround, just like when you bake an ambient occlusion map you will get shadow from everything unless you move things out…but like i am testing first which its not a final normal bake yet because i have to include all uv maps and objects in this texture (notice i just beginning with the body because i already knew this bugs were coming…so like this i dont waste time making errors in the bake of all objects)
It’s hard to tell exactly what’s going on in that picture. It looks like you’ve got some sharp bruises along those creases in some places, a few that are marked sharp, but others look okay.
I agree with @Renzatic, it’s hard to tell what’s going on from these pictures. There are a few possible reasons for the errors that you’re getting.
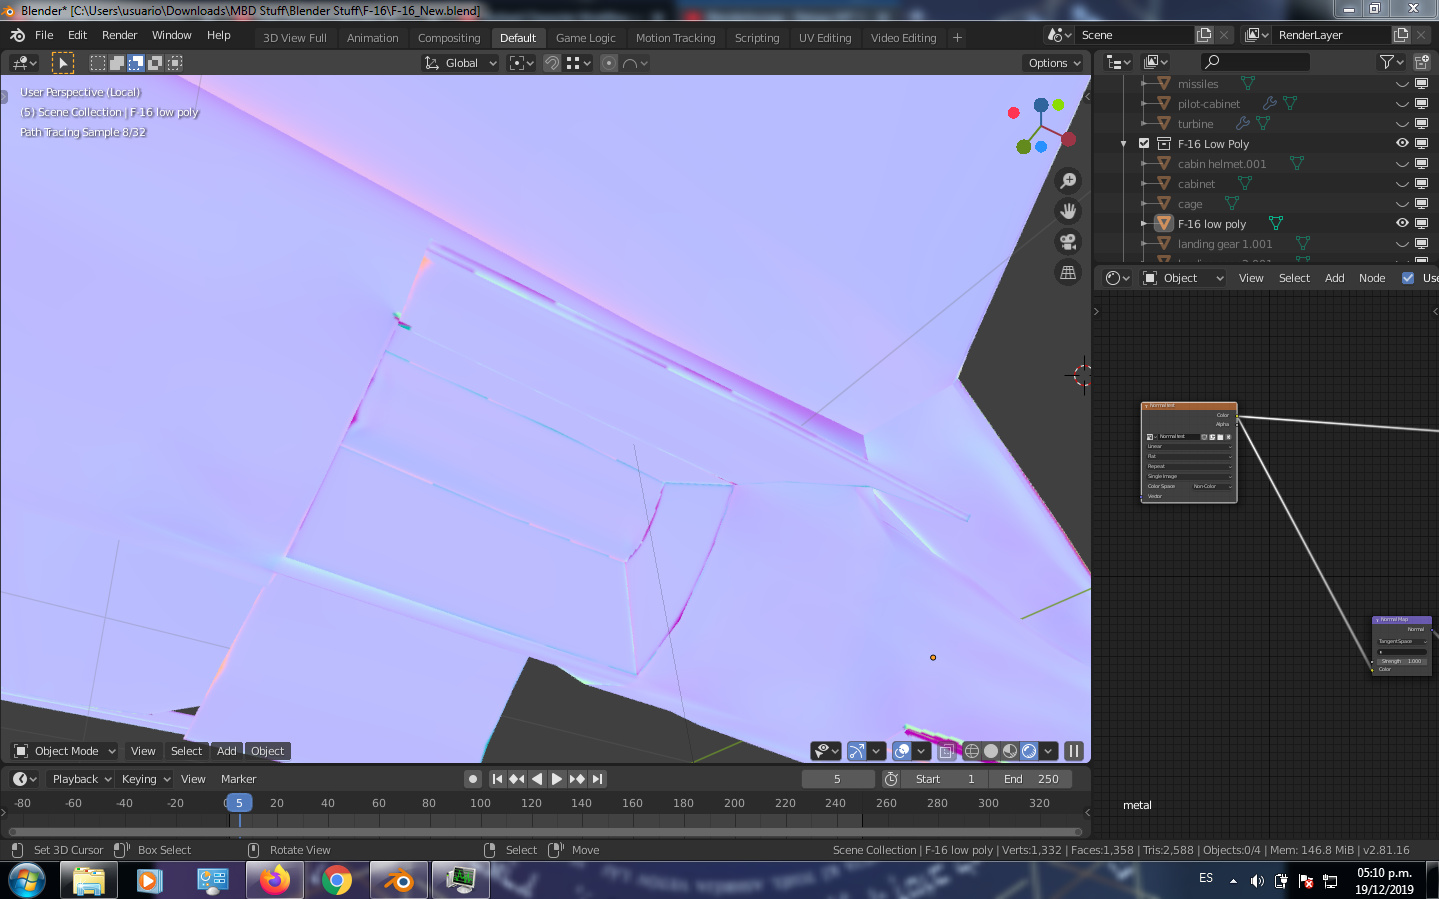
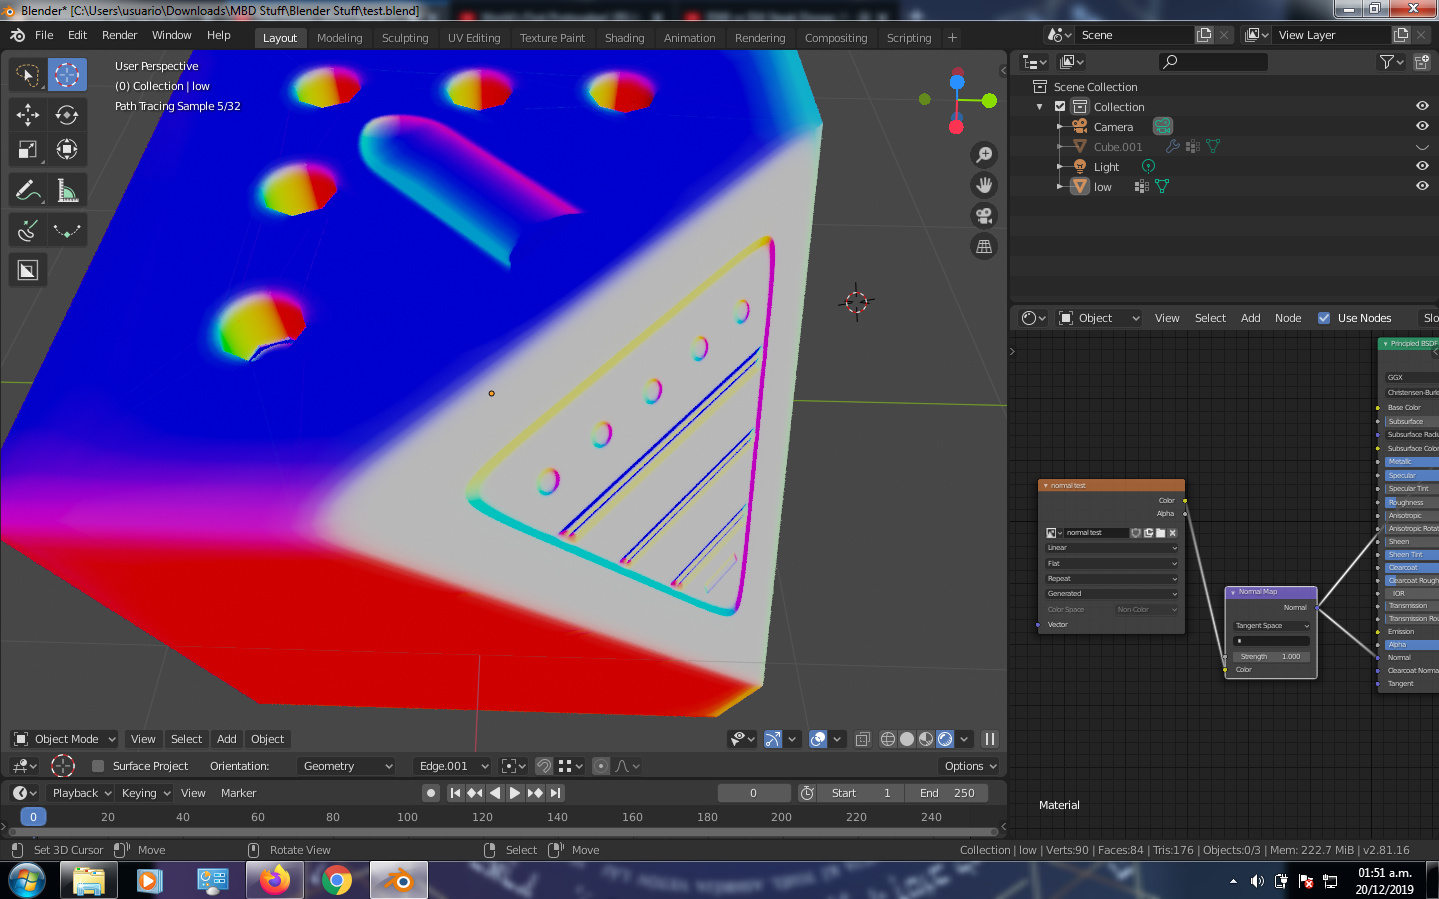
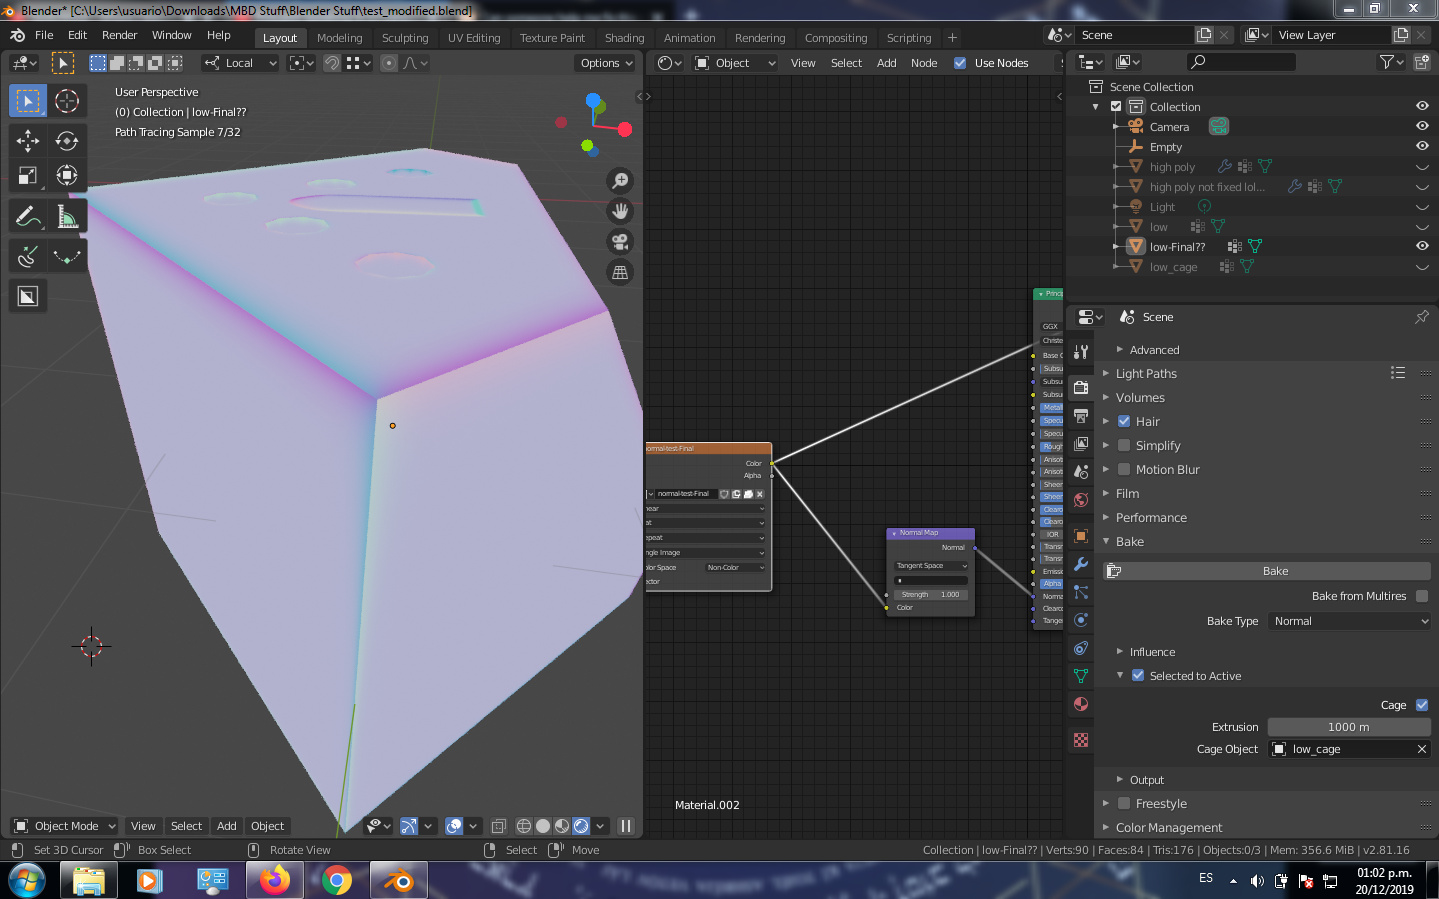
Sharp edges and seam placement are crucial for a good normal map bake. As well as UV edge orientation. For example, as can be seen on some of your screenshots, some straight edges are inclined in UV space, which produces aliasing - those weird stepped artifacts. This can’t always be avoided completely, of course, but if possible, it can be beneficial to make a sacrifice: introduce a little bit of stretching but straighten the UV edges.
Perhaps you could cut out one problematic piece from high and low poly meshes and upload them here so we could inspect more closely?
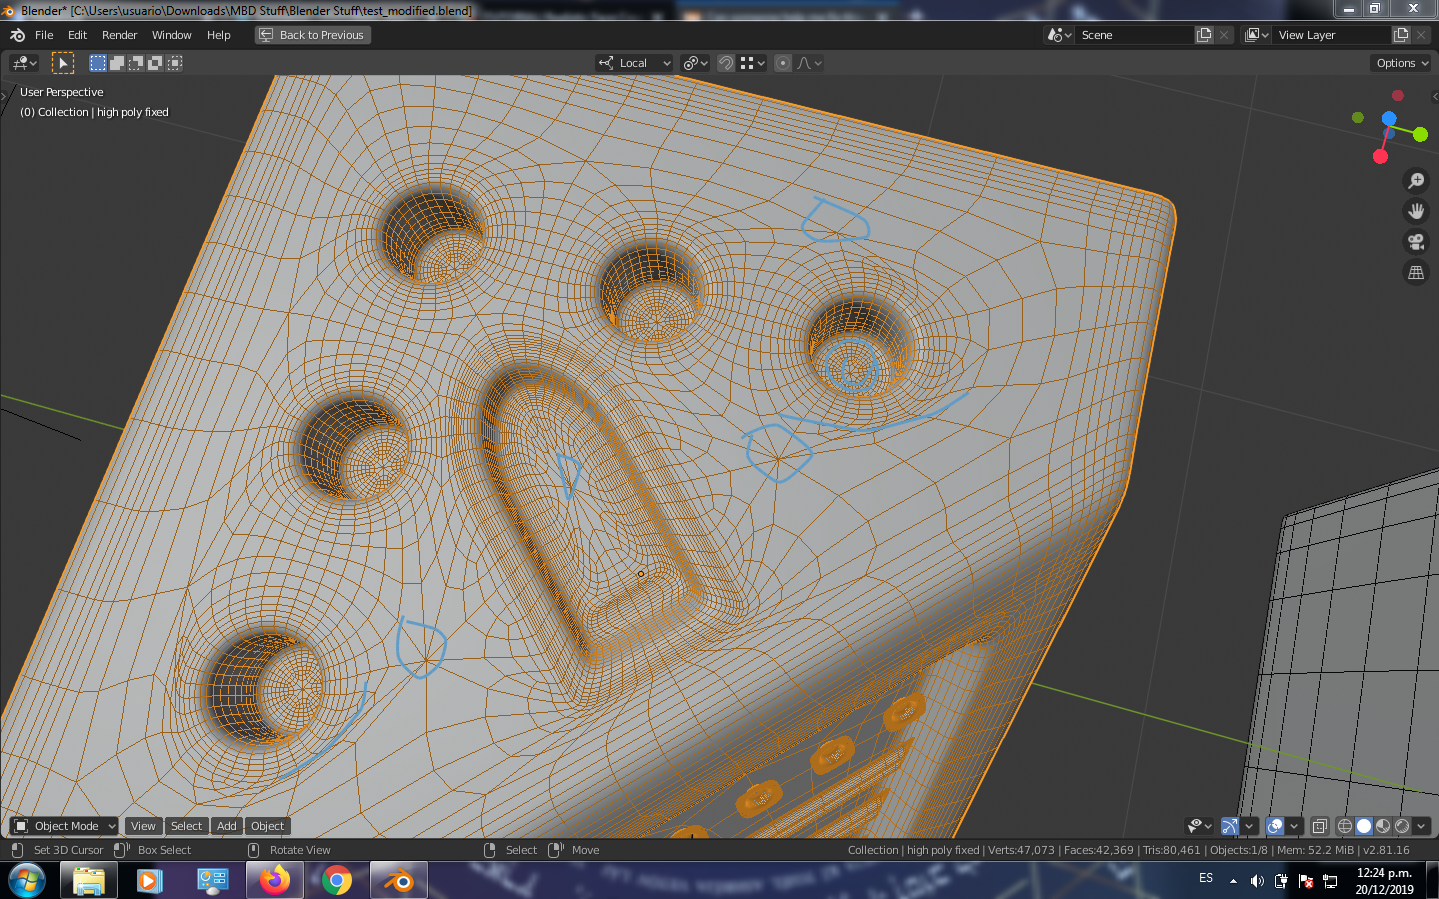
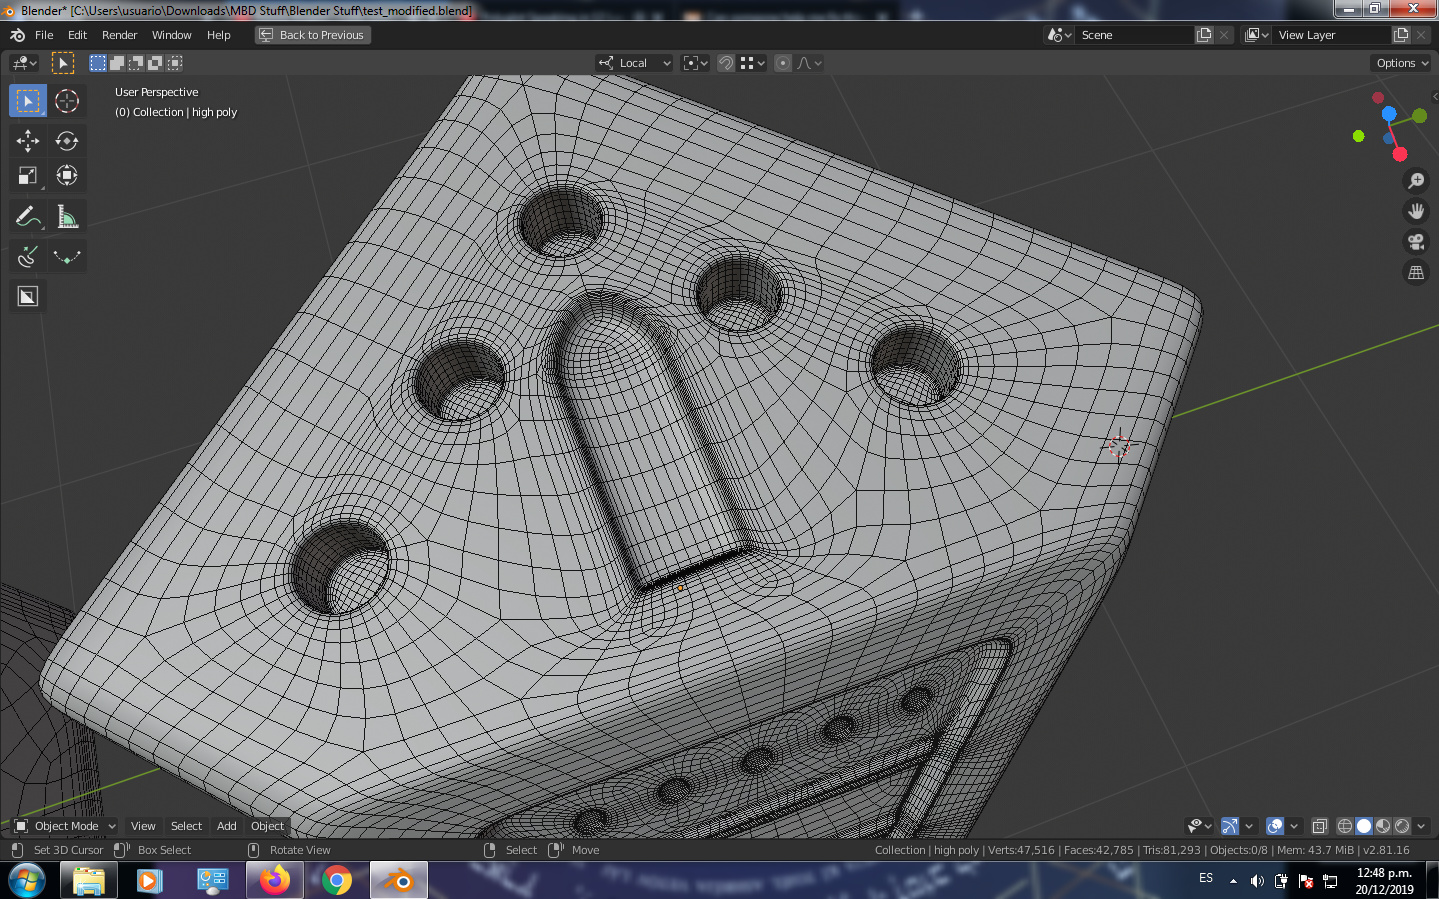
It’s as expected. Situation 2 is closer to what you should aim for with this kind of object. If you were to mark that last edge as sharp and UV seam it, it’d be even better. Those edges are good, you’re getting nice bevel gradient. But you’ll still get issues on corners, where baker misses the high poly. To avoid that, use a cage. But that would expose the quick and dirty pole-ridden nature of that particular high-poly mesh
“better” high poly not at all, you mess a bit the topology and also a bad idea to do that separation of the inserts…it creates faces intercepting in front of the face they are located, a bad technique tbh , this issue its noticed there depending the view perspective…as well you didnt really tweak the edge flow or topology in some parts, but mine topology is still better though , and you just added a bit more sharpness to some parts and a bit more of fuzziness to others which is not what i want to, i want to have the same details as my high poly…and the uv map you just separated island with sharp edges which probably can be a solution…though also adding a cage even in this case probably helped…
Conclusion of this test:
though sharp edges anyway helps get a normal map without shading artifacts because of fault of the low poly lol…it seems normal anyway that appears like this when previewing the texture…
I’m sorry to say this, but it seems you misunderstand something. Severely. Look at your high-poly in look-dev mode.
You have poles on edges, and uneven divisions along edges, which creates pinching:
You have sharp transitions from corners to flat surfaces:
All of that will transfer to a normal map. And you show what, a couple of poles on a completely flat surface on my mesh? Which have exactly no effect on shading and on normal bake? It wasn’t my intent to recreate your mesh exactly, but simply to show a way to avoid shading and baking issues on your “awesome” topology, which you’re not even aware of, apparently.
Indeed, the topology on my mesh does look messier. In places where it doesn’t matter. Because I couldn’t be bothered to waste time making it pretty, for a simple example. I made it to be functional. How OpenSubdiv mutilates some n-gon is of no consequence so long as it doesn’t impact the visual. You, on the other hand, put n-gons and poles all over the place where pinching and arbitrary subdivision will and does affect shading.
Floating geometry is a common method of adding detail for the normal bake without having to physically connect it to the high-poly mesh (and therefore, spend time on subdividing and adding edges without causing distortions). It’s used all the time, to save time. It absolutely doesn’t matter how it looks from some arbitrary angle, its purpose is not to be looked at at all, but to transfer onto normal map (from one specific angle) and begone. I used it because it was much faster than to actually cut and extrude those small details so that they don’t cause artifacts. Obviously if you need a proper connected high-poly mesh, feel free to spend time making it. I didn’t, so I didn’t. I did write “better” in quotes for a reason: it’s not a better high-poly mesh, it’s a better source of detail for the normal bake.
Softer edges on high poly are better for baking normal maps, as they provide a few pixels more of detail. Sharper transitions don’t translate to a texture very well, because they’ll get less texture space and suffer more aliasing.
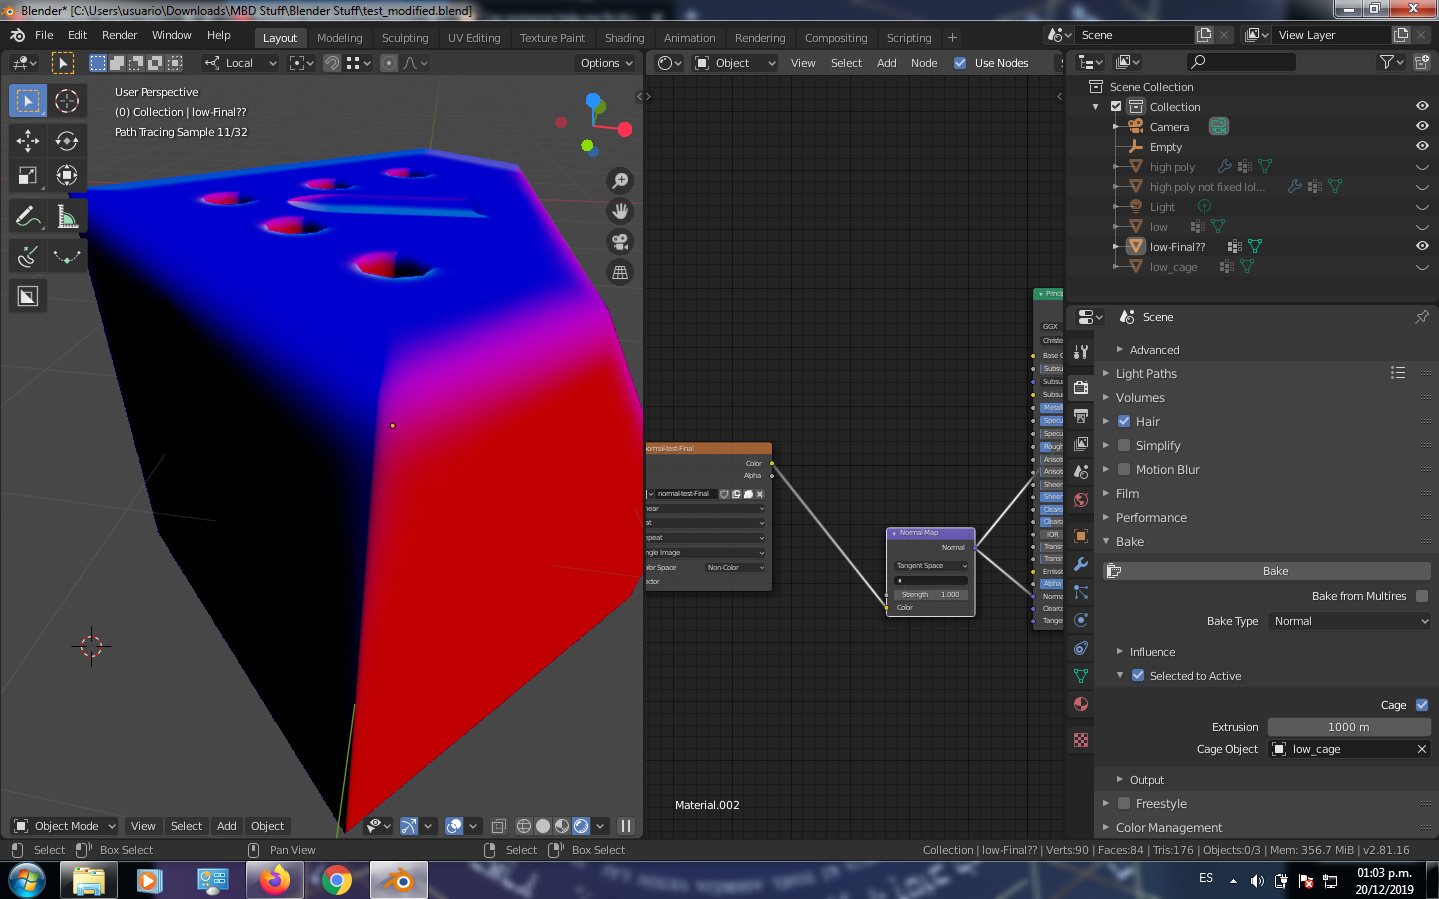
I’m sorry I didn’t spend 20 minutes recreating your mesh exactly, but after such response, I’m also sorry I bothered at all. You don’t even understand what you’re looking at. Those sharp transitions on the normal map are completely normal, because normal directions are represented with different colors, depending on tangent space (i.e. UV orientation). So yes, when one UV face is oriented horizontally, and another vertically, big surprise, one bevel will be magenta and another cyan. You don’t see glaring problems with your own geometry. You asked for advice, and when advice was given, instead of even attempting to understand it and see the difference in results, you chose to argue about something absolutely irrelevant, and even then without a leg to stand on. Good going.
yeah i realized that this test that the edges look “perfect” because i little bit more softer than my edges here which are damn thin to get bake properly yeah there is aliasing appearing …
though yeah in such cases floating geometry can be helpful, but though for self preferences i prefer to perform the every single detail in the destructive way, about edge flow with poles i do really care if its even a flat face because doesn’t look “professional” to have to those 6+ vert poles in the mesh, tho modellers has their preferences to leave them or not…no you didn’t bother me you helped me , and also good eye btw you saw those artfifacts which are barely seen ¯_(ツ)_/¯…also btw we dont to care too much about the test because its a test …
Like I said before, this aliasing is most likely due to those particular UVs having having edges inclined diagonally. That, and them occupying relatively small portions of UV space, thus having low texel density.
Hard to say exactly from just the pictures, that’s why I asked for a small piece of the actual model to make sure. But whatever, I’m sure you’ll figure it out.
Oh don’t worry, I’m not about to “fix” anything else for you, seeing as you presume to be such a “professional”. After examining your unwrap, it is indeed like I said initially: those UV edges are inclined diagonally. They’re also quite small in terms of UV space. Both of these factors contribute to the aliasing you get in your normal map. Since you’re unlikely to make them much bigger (unless you scale down some parts that don’t need as much UV space, which there are a few), then if you want nice smooth detail you’ll need to make those UV edges vertical or horizontal.
Good luck.


 …
…