I want to be able to change the perspective of a texture and animate it. I know you can put a 2d rig onto a 3d model, but in tutorials you have to import a 2d image of each frame (or in a face rig, “expressions” of a model) for that method. I want to use a texture as plane and use sort of a double exposure technique onto the main mesh, while changing the angle of the plane mesh acting as the texture for the main mesh in real time. The plane mesh should also not be affected by any environment light or scene lights, so in a way be unlit to maintain the original color of the texture as much as possible. If you look at 2d shows like monster high or ever after high, and focus on their clothing texture and how they act, that is the effect I want. https://m.youtube.com/watch?v=lV3QOFYUxiU&pp=ygUPRXZlciBhZnRlciBoaWdo Their clothing texture kinda follows the camera view, but it is also not completely static, and I haven’t seen any way to do this in blender. It is like a mix of window texture coordinates and the texture actually following the mesh. Also similar to normal editing for anime styles, but this time for textures instead. I also wanted a way to also apply this effect for meshes shrink-wrapped to the surface of the main mesh.
Can you animate or change perspective of textures in real time/have textures that follow camera view
Do you want to do that on a 3D model ?
It’s uncommon as a technique, I wonder how much of it is possible.
You have indeed to map the texture in screen space, and transfer only the local deformation of the mesh, that probably needs to be converted to screen space too also.
That’s quite complex to do, maybe try to see if you can make something simpler ![]()
Unless someone already managed to pull that stunt and will explain how to do that …
Good luck !
Yes, I want it on a 3d model. It is the effect I would get If i rendered a line and toon animation and place a flat texture on the clothes in a editing software, and warp it to the characters movements. I tried looking into how portals are made since they feature 2 different scenes, but most still use the compositor. Using uv project modifier with the camera as the projector could work, it is too static, as i need some movement.
This concept is pretty common in 2d, but why it seems so complex in 3d?

The flat look and how the clothes do not wrap around the volume of the clothes, yet still look lively/bouncy is something I am trying to achieve.
Well, historically 3D is about representing a “realistic” scene, nearly all the tools are build for realistic stuff and there is much less tools for mixing 2D and 3D. It doesn’t mean it’s impossible but it can take some time to figure things out.
If I had a few weeks to spend I could probably start prototyping something , but yeah since it’s mixing 3D /scene space and 2D /screen space mapping you need to come up with a custom solution and you are basically in uncharted territory. Some things are easy to test and explain, in that case it looks a bit more trickier…
Understandable. What would be the steps you would take to try to solve this? I can try to play around a bit even though im still not really good in blender (i’m more used to 2d). If been trying to find an answer for this online for a few years now. Usually I find something that’s close to what I want yet so far from what I want. Its pretty frustrating.
Hey !
What I have in mind seems quite technically involved, basically a first step would be to be able to get the bounding box of an object in screen space, which means it’s always facing the camera.
Then it’s just a matter of mapping the texture according to that, maybe by transferring the texture coordinate of that bounding box to the geometry.
Another thing to account for is how different the camera angles are, say if your object is always facing the camera the same way,it’s much simpler, but if you start to do up and down camera angles things get much more complex.
Sounds like a complex stunt an advanced artist would struggle to pull out, I’m not sure there is an easy road there for people with an average blender level.
Anyway, feel free to post your tests, that might sparks some ideas, and TBH I’m not the best at NPR so maybe someone else can advice you better !
Thank you so much for the tips. This will definitely take some time to figure out. If only there was a live double exposure masking tool then I think this would be less complicated.
When you mention getting the bounding box in screen space, it reminds me of another thing that I was trying to accomplish: creating shape keys based on camera view/angle. There is a addon made for that, thankfully (I was thinking of manually applying shape keys every time I changed the angles). The transferring of the texture coordinate would be instant or is it like every time I apply a different angle, I would have to retransfer it again? I also wonder if the shape of the bounding box being different from the main mesh cause warping issues of the texture…
Based on your ideas with the bounding box and texture coordinates, I searched it up and found a tutorial. It has the starting points of what I am trying to achieve.

It should be possible to automatically transfer the tex coord of the bounding box to the main mesh using geometry nodes.
And yeah that’s basically the general theory but in practice things can get more complicated, that’s why I foresee a few days of experimentation to come up with a solution.
Ok, thanks for the clarification.
This looks alot like Camera Mapping on a 2d object…it is used many times in different animation studios along with camera projection…
In this when the camera moves or the object moves then the texture moves also…
There are several times in that video you can see the textures rotate as the actor turns…
Take a look at this…My Favorite…

Ive actually been researching arcane for a while because of how close they are to the way I wanted to mix 2d and 3d seamlessly (apart from being a great show). I remember watching another video who mentioned that they used camera projection, then painted over some angles to mask out the 3d object, but I still had no idea how to do it. That cube seem similar to what I want. The only thing is how to control it while it is animated (to look like my previous gifs). This is great progress however🎉. By the way, you meant the character moves first, then the texture moves, as in they are not in sync right?
It’s all traditional key-frame, but they used some proprietary software for their Frame Painting…yep that’s right, they painted frame by frame ( their software probably helped to paint over a range of frames to make things a bit easier but they don’t talk about HOW so much of what we assume is educated speculation)…
This might be of interest to you…
")
Not necessarily, in some frames, you can see the clothing expand, but along the edges the texture repeats, but the camera doesn’t move, then it will slightly rotate, and all the texture tends to rotate with the movement. In other shots, it looks like a traditional animation painting…on 2D characters over a backdrop…
Its fine if the texture rotates, but the texture have to remain flat, and not wrap around the volume of the mesh, similar to the cube you showed. I actually want the lagging effect of the texture from the mesh movement to break the effect that they are in total sync, hence also breaking the 3d effect. Is it possible to reproject the texture from all angles in the way wanted via projecting from camera view/angle, similar to shape keys based on camera angle/view?
This was the video I remembered being similar to what you said:
")
But since the texture is still being wrapped around the mesh volume, this method doesn’t really work. It does give some insight on camera projection however.
For the complexity you’re describing, it would be much faster to do this in 2D
The problem with that, is that I will have to render multiple layers, and editing the texture becomes more extensive for each frame the longer the animation. I am trying to do the hard labor before animation, then it is easier to repeat the process with many projects… With 2d there is virtually no shortcut.
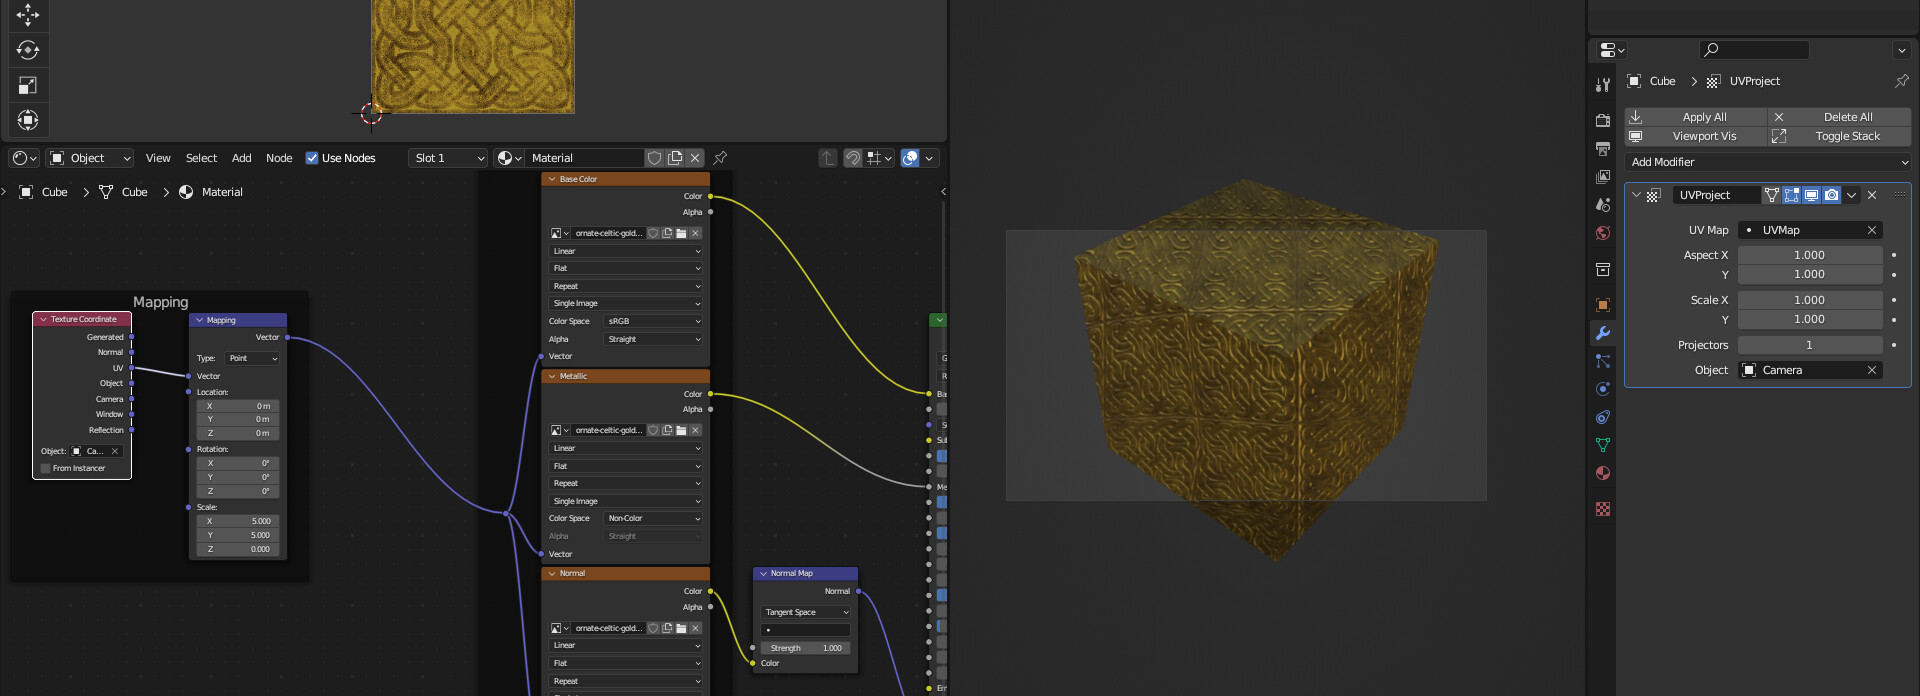
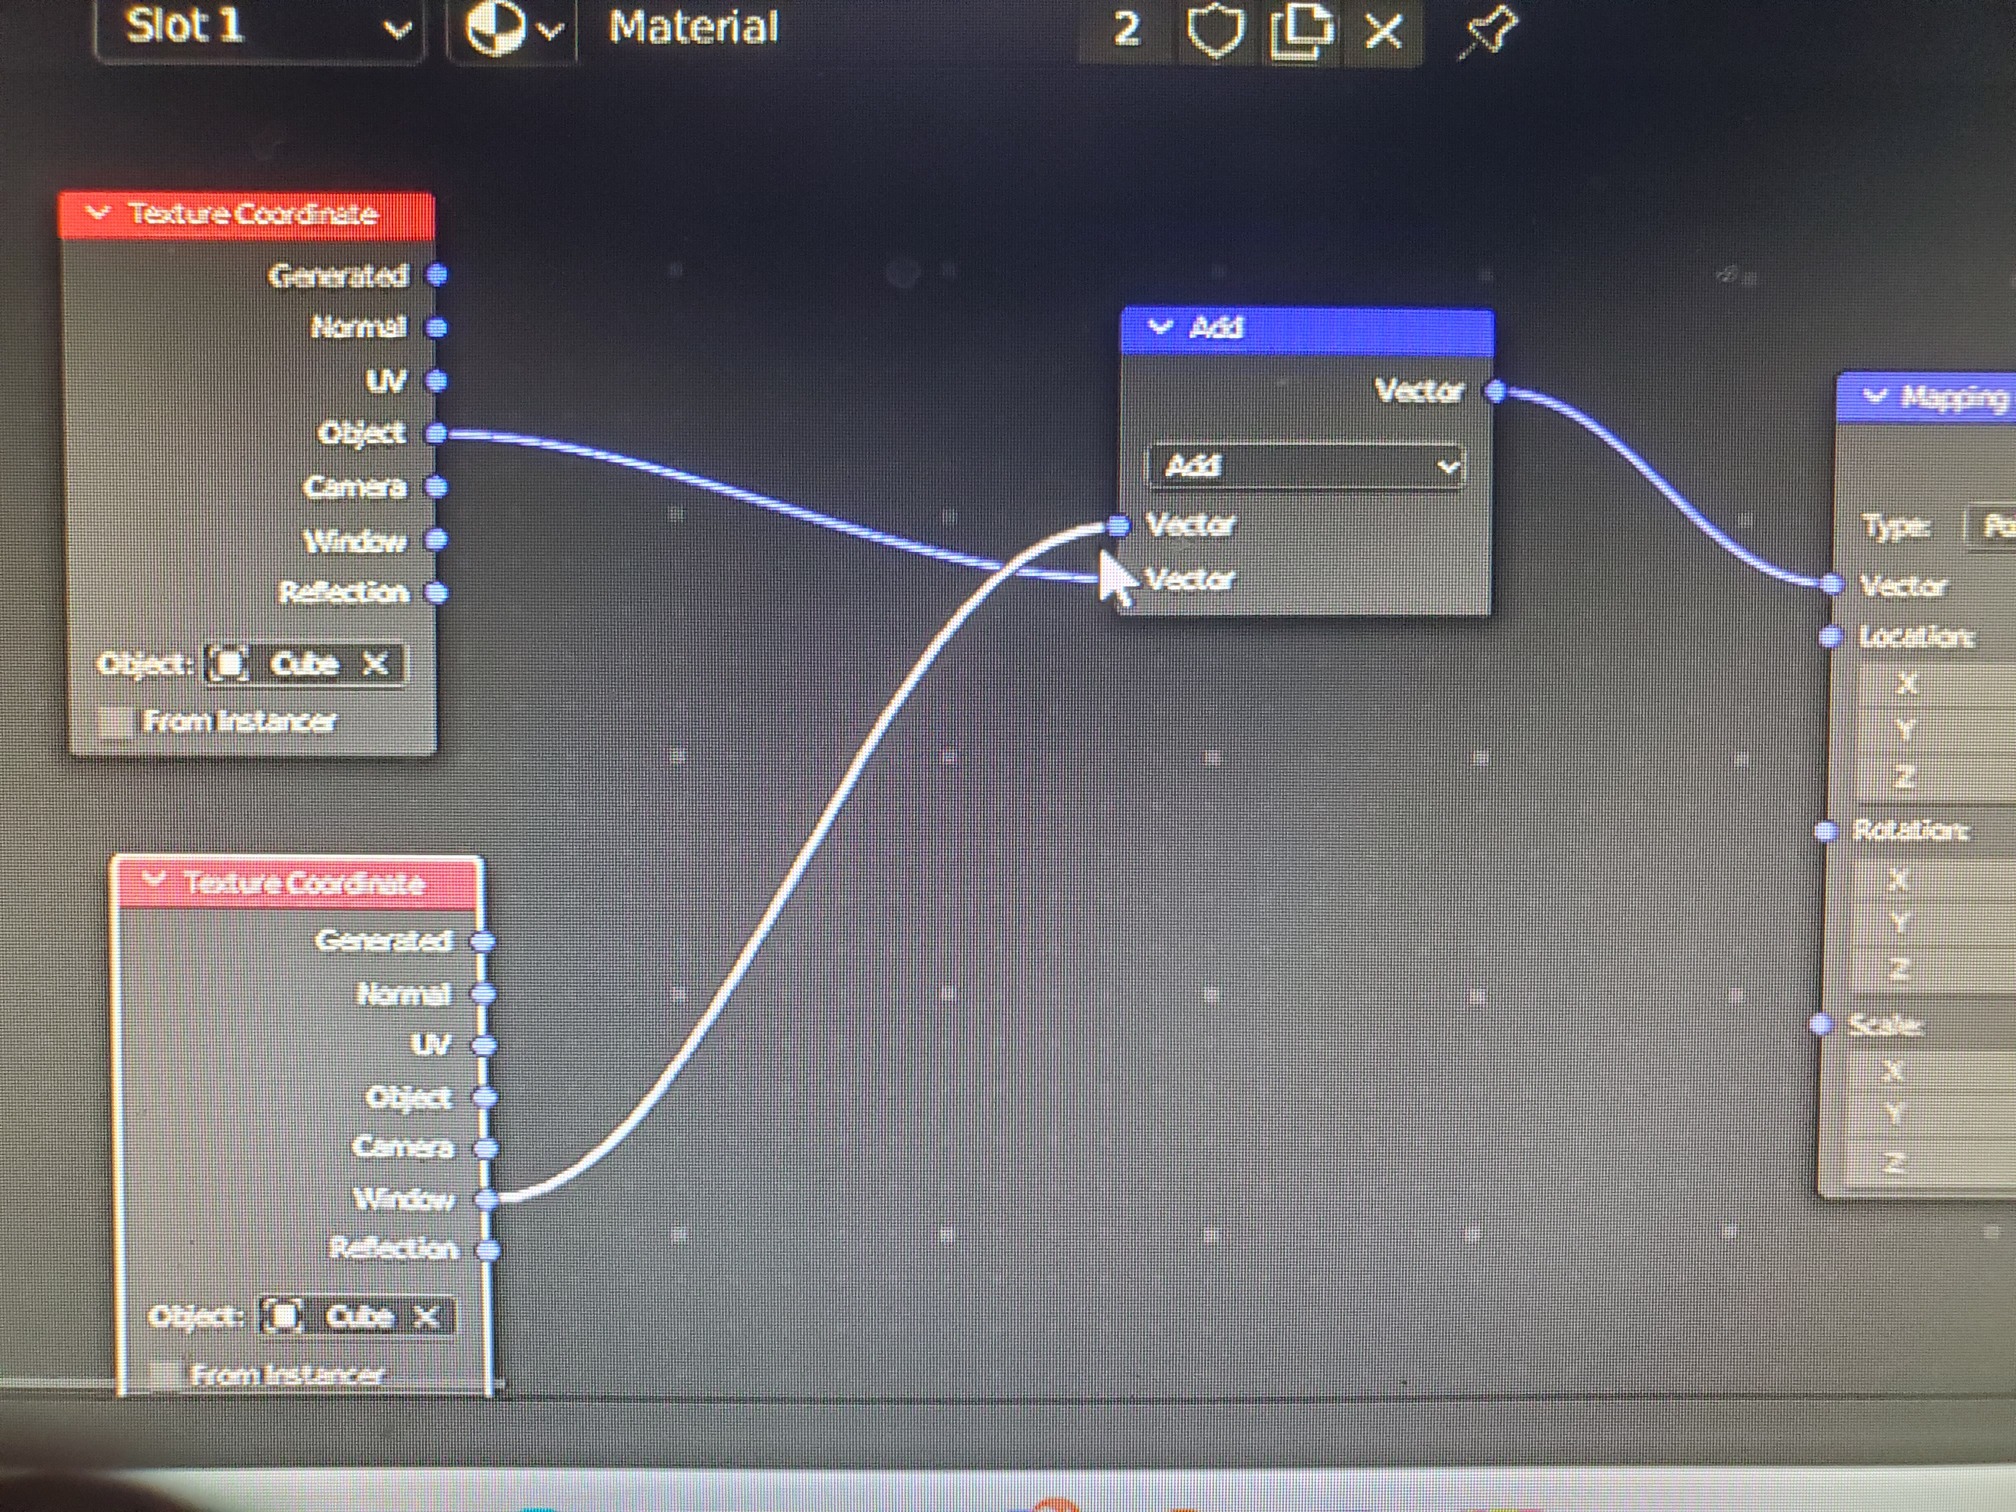
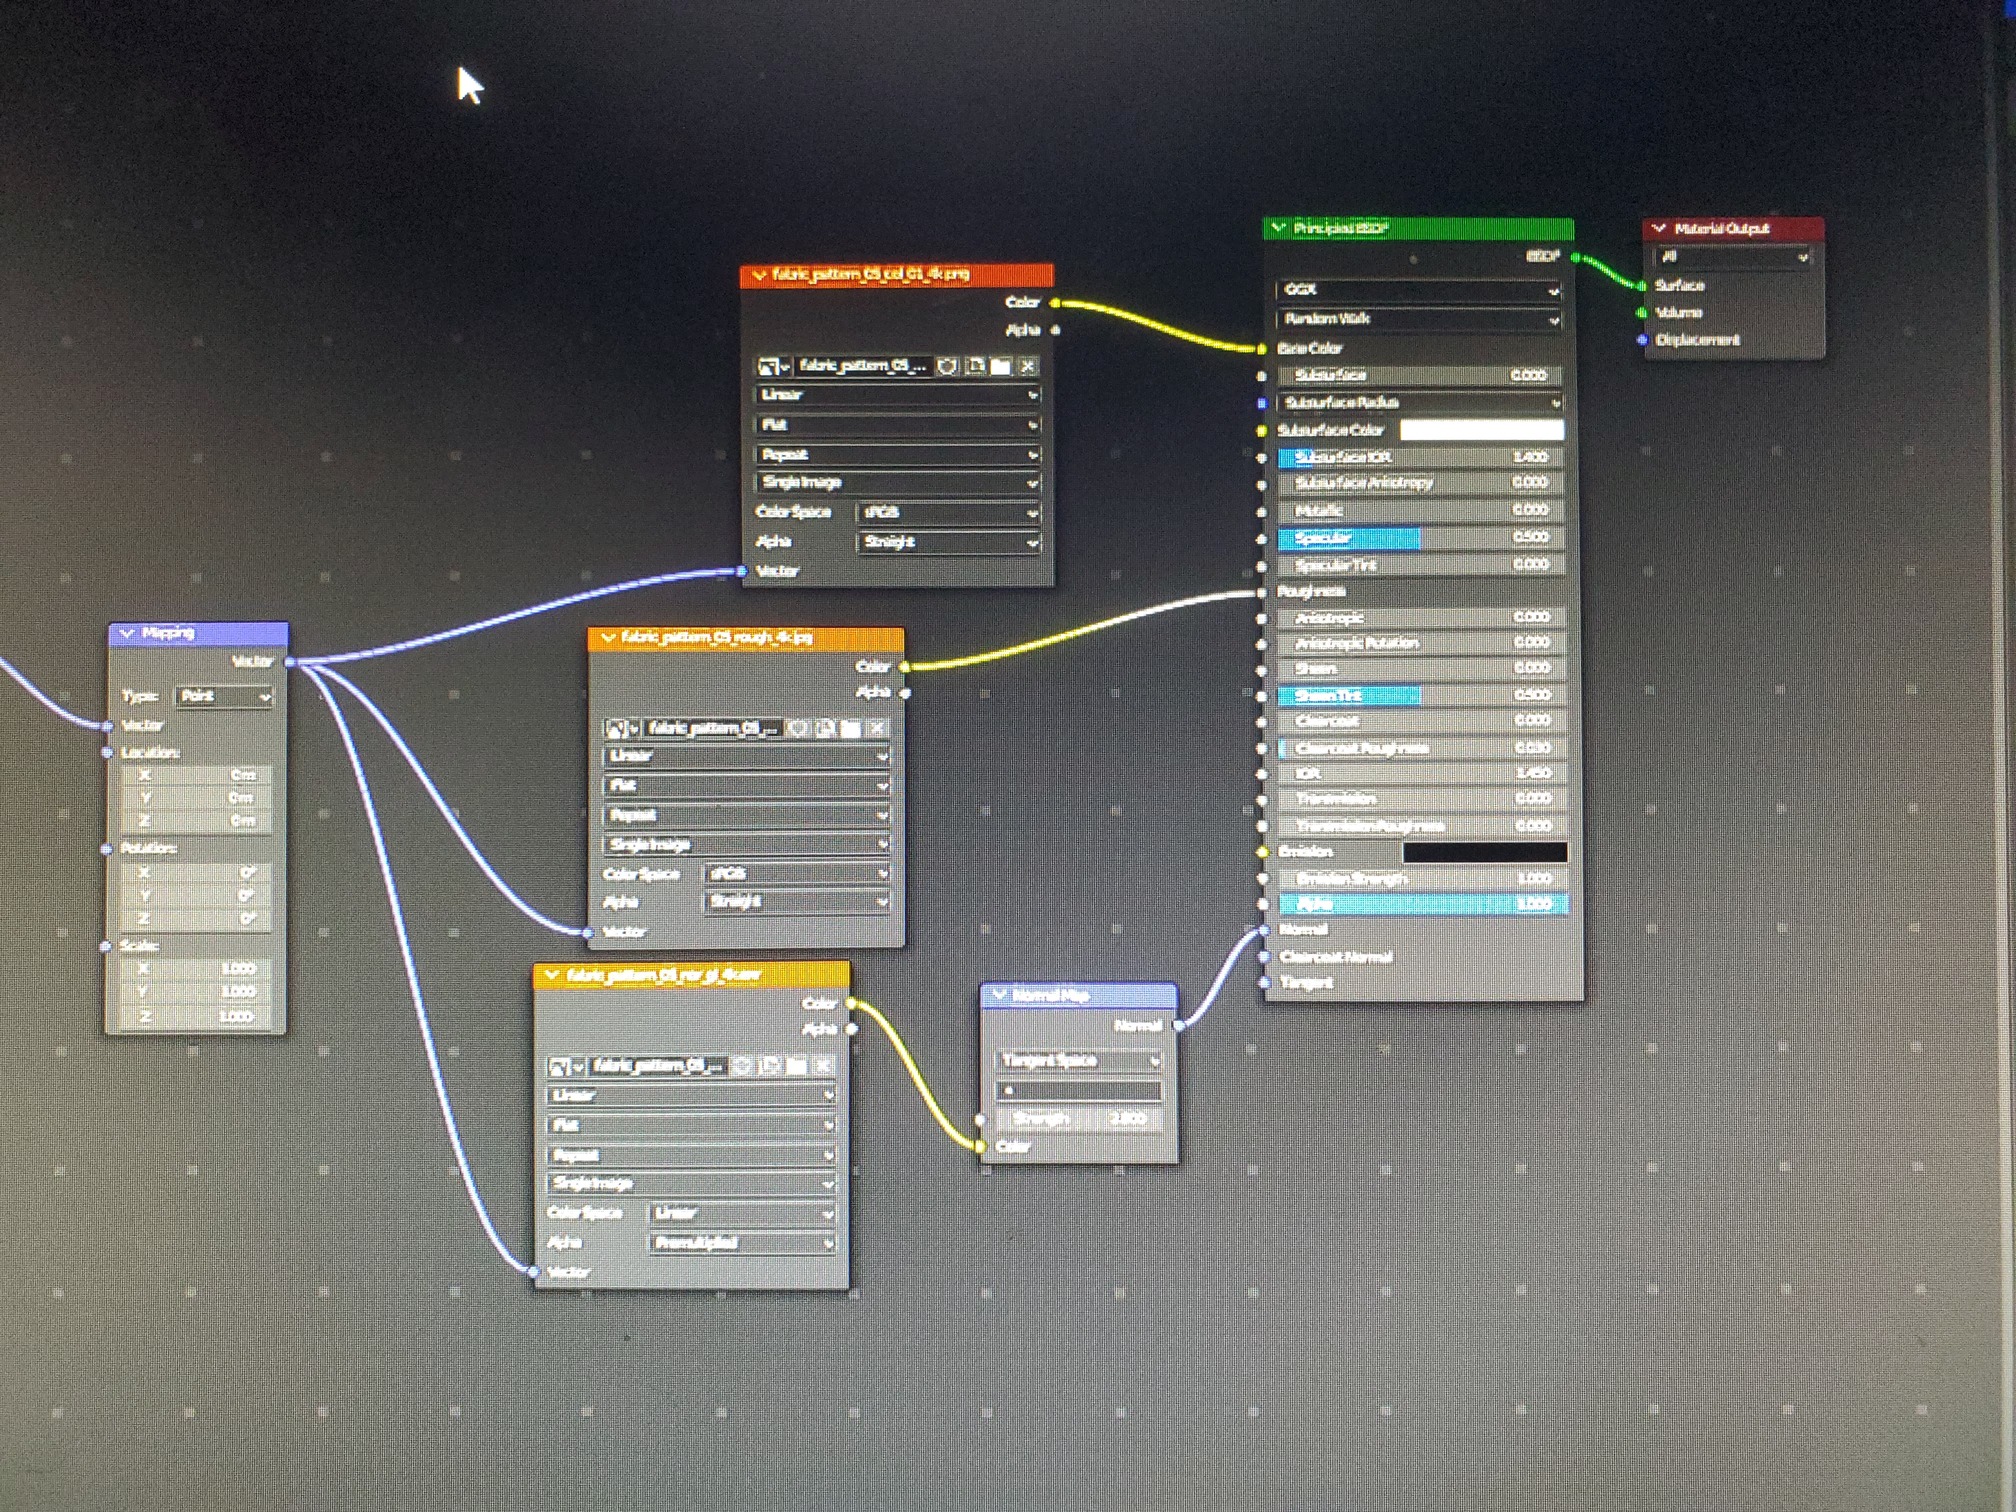
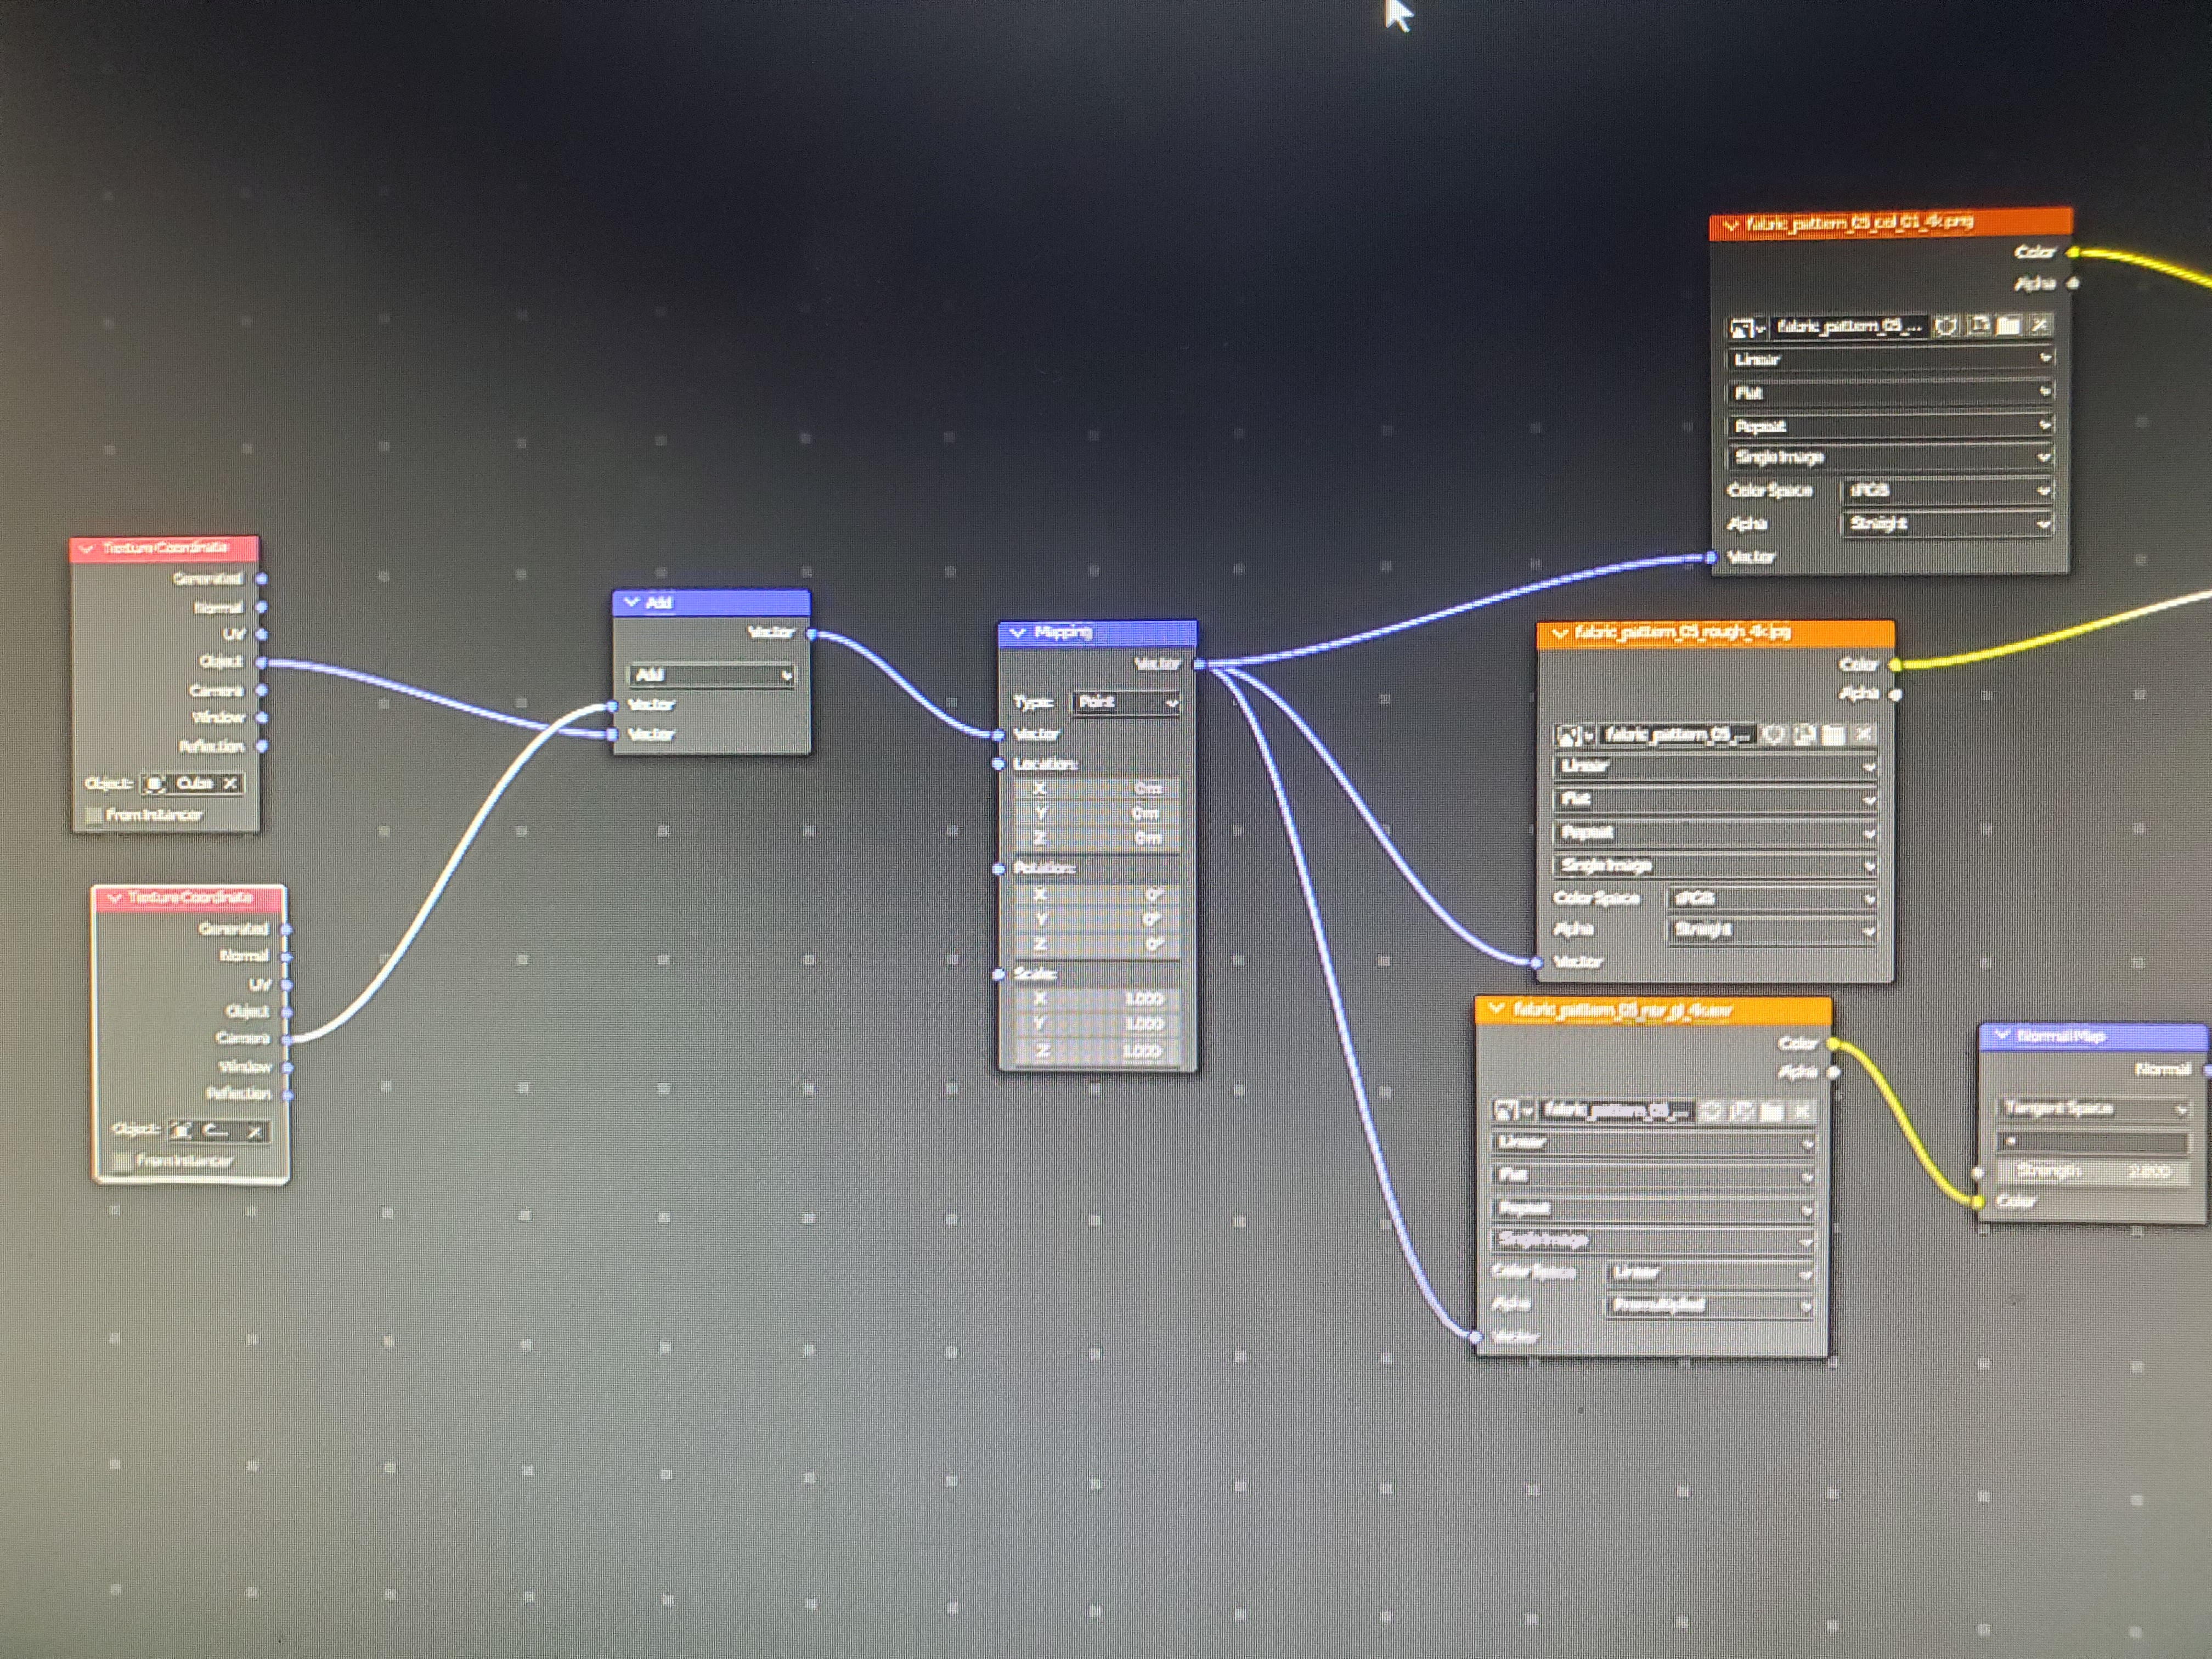
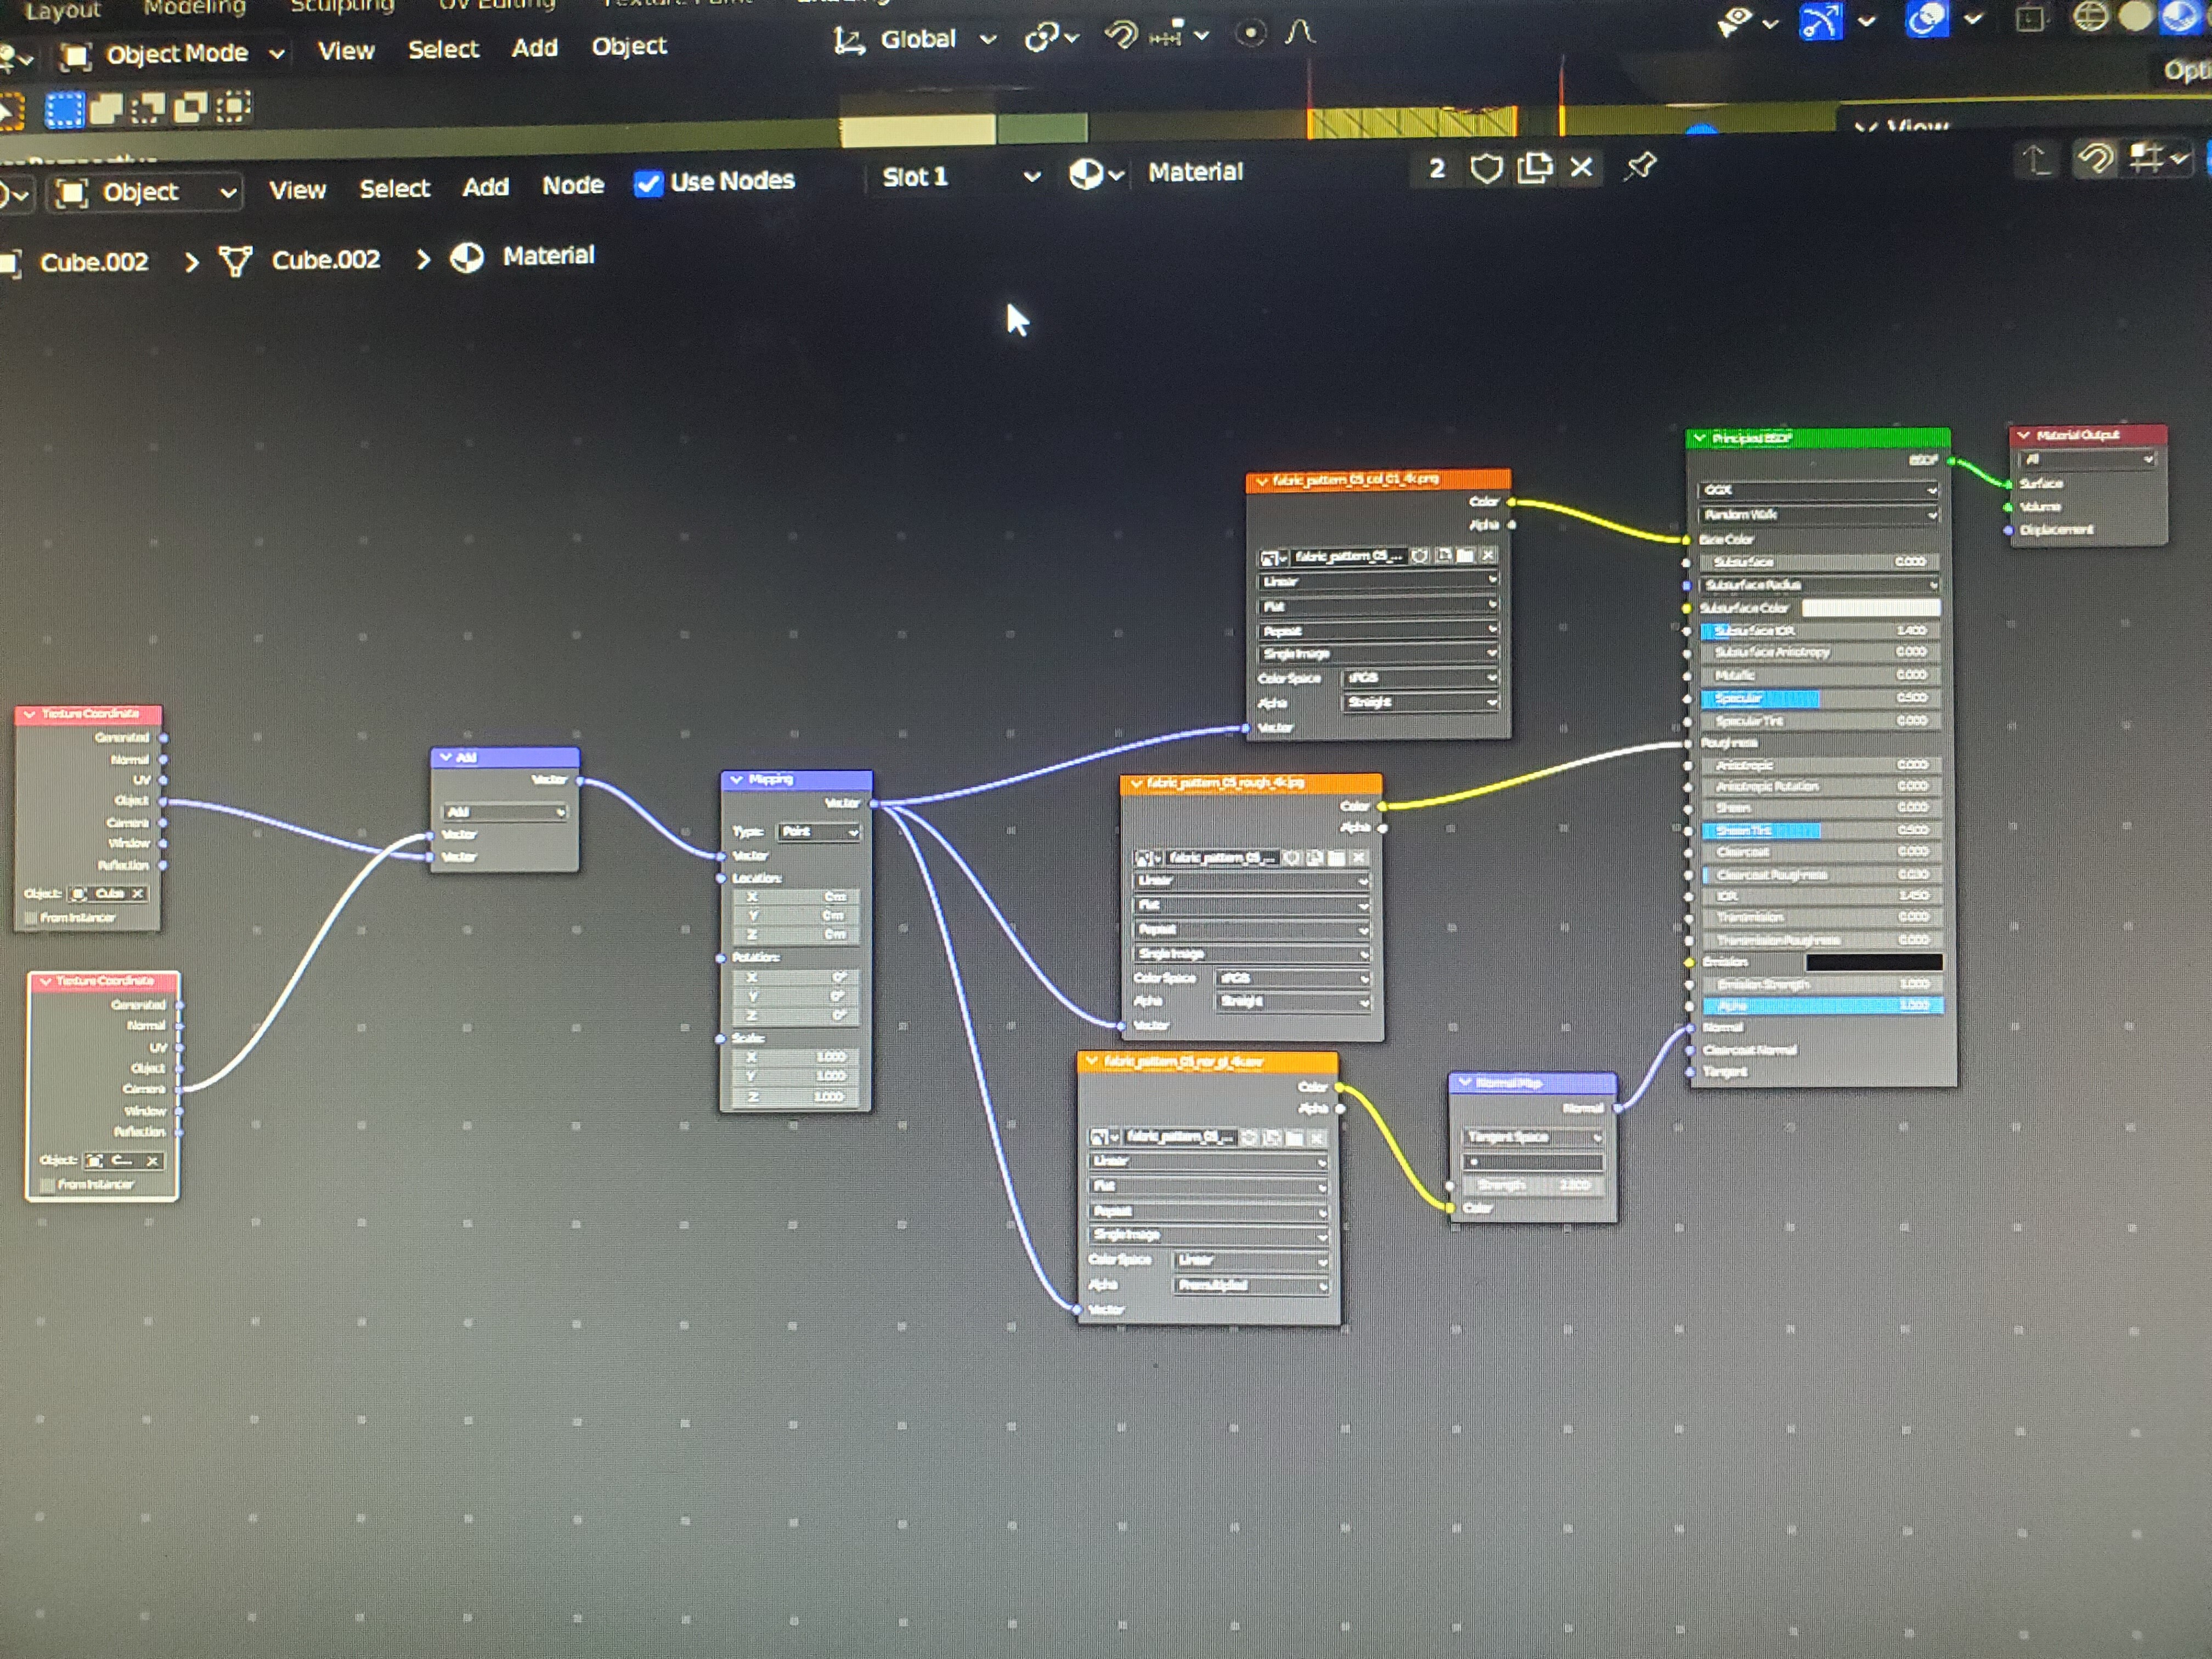
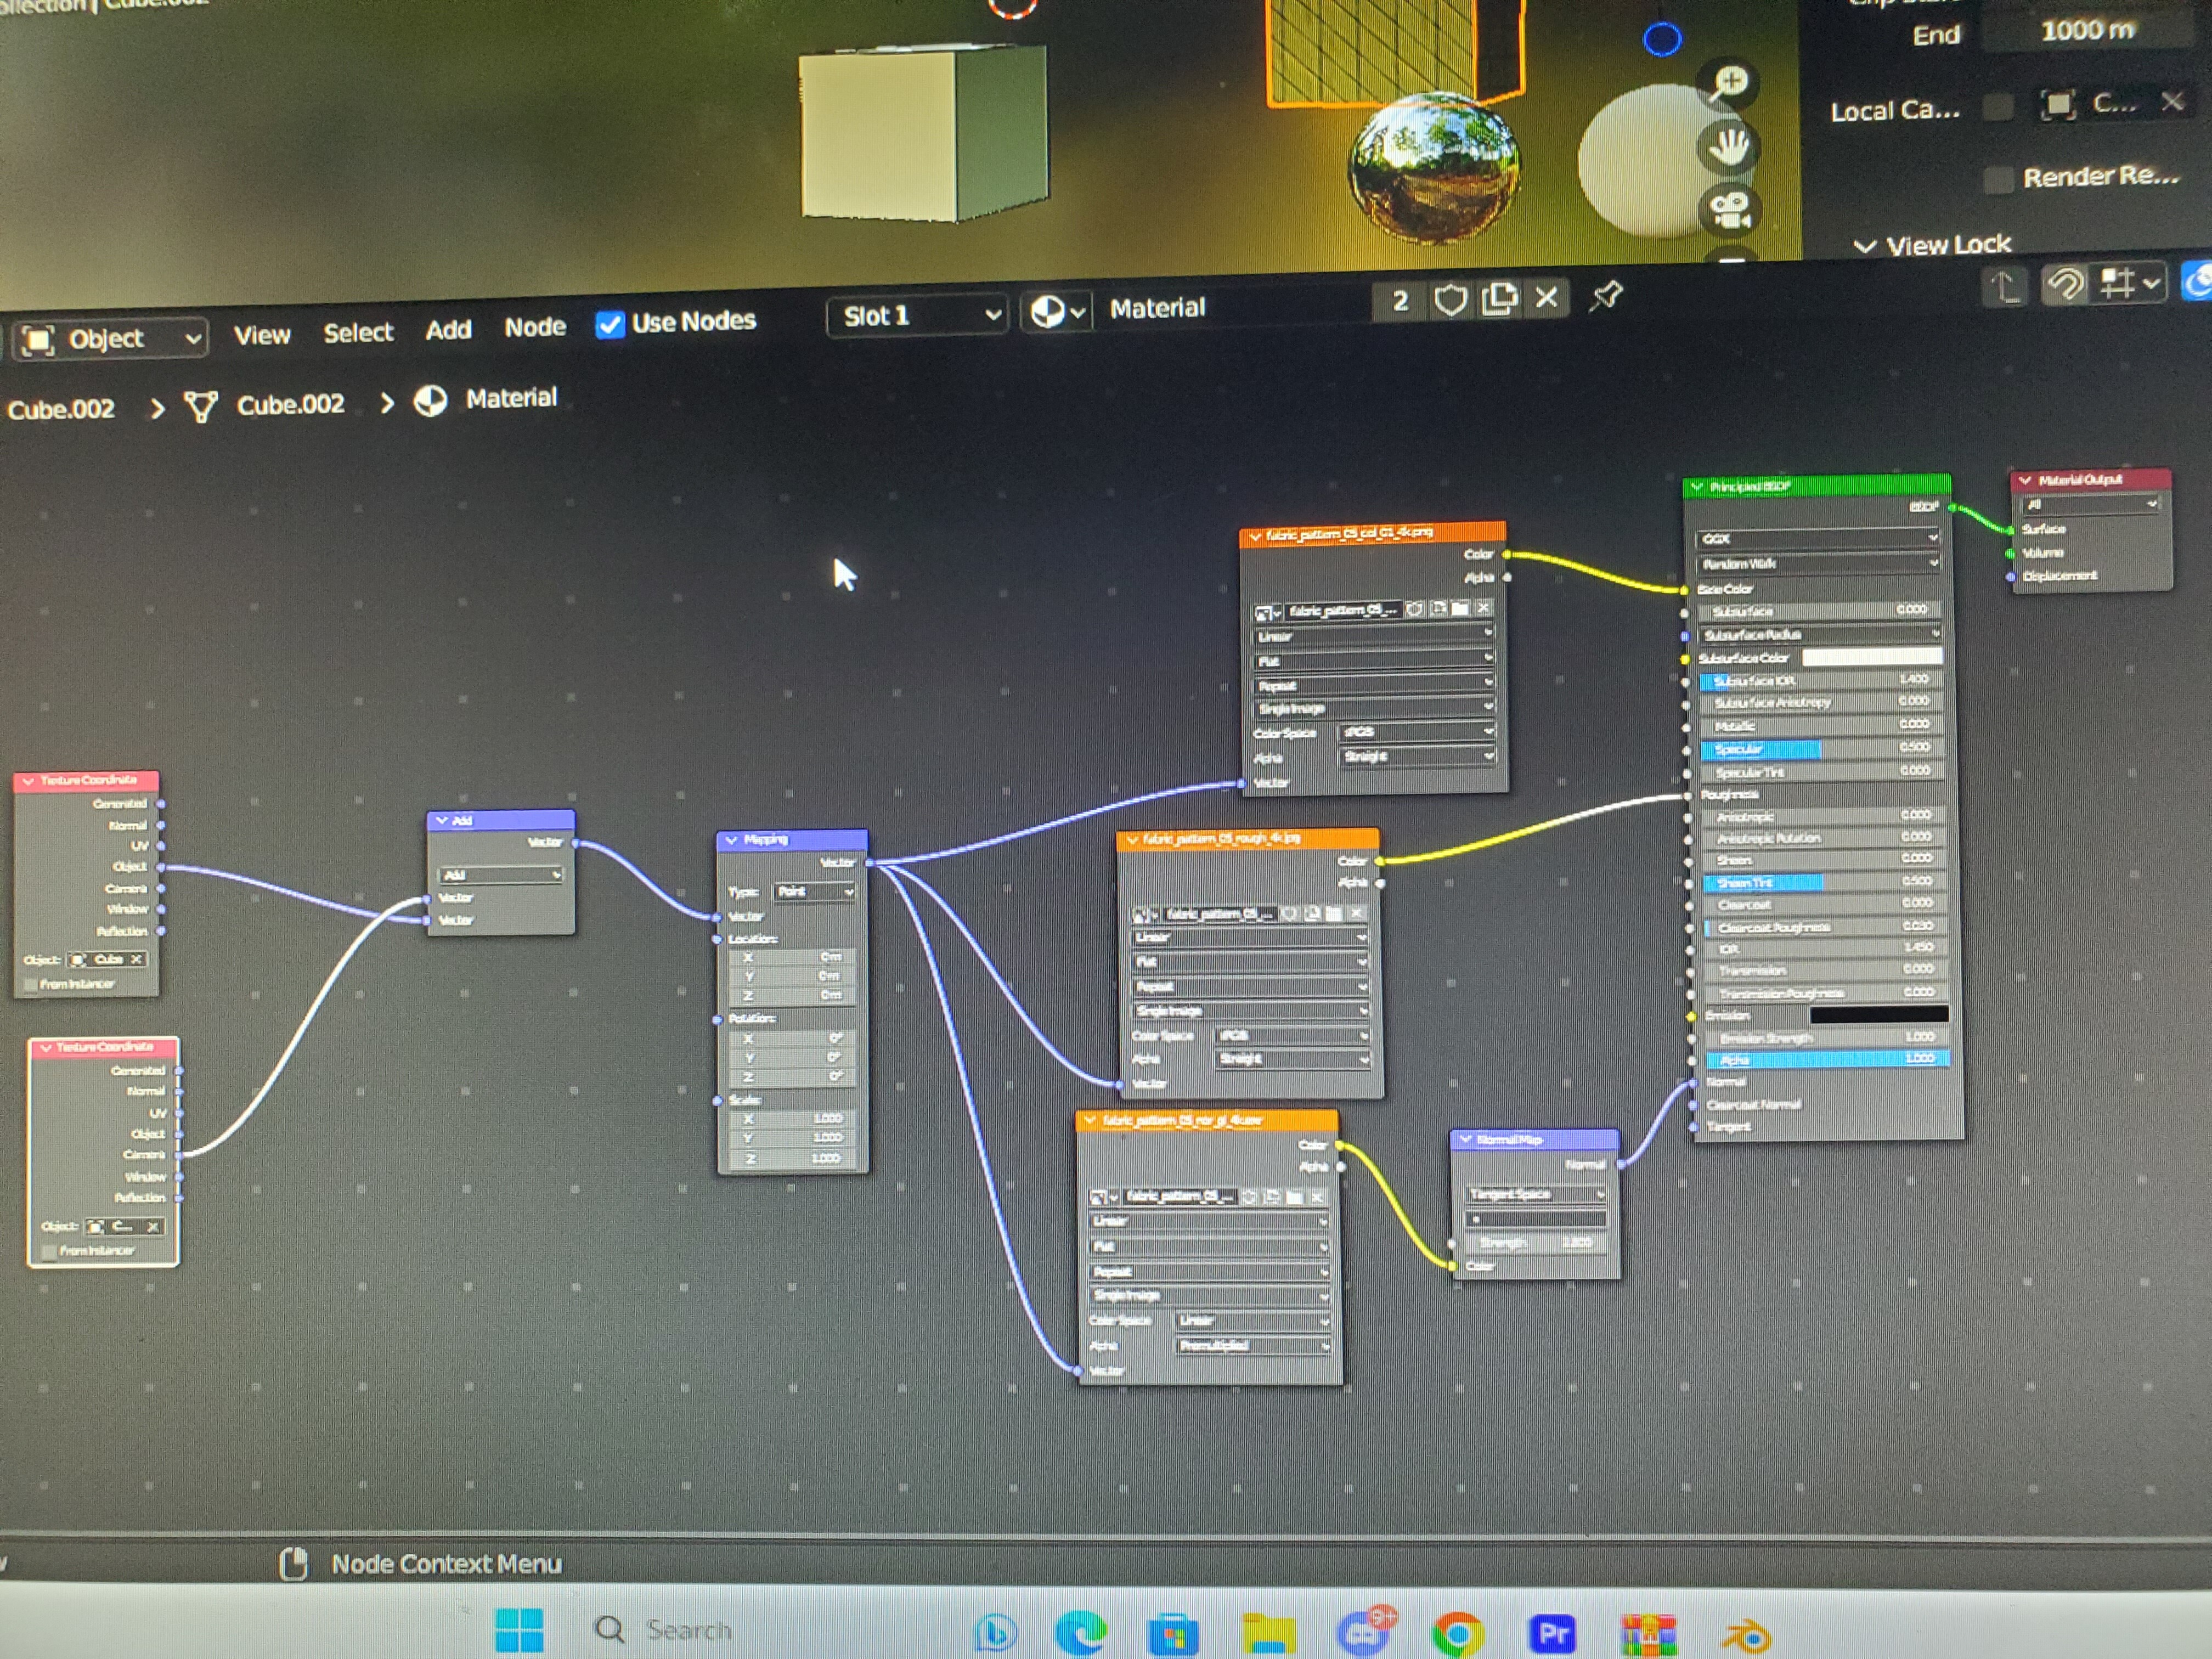
So I tried to combine what RSEhlers did with the node tree ( and tried to apply what sozap said as well). The results were kinda wonky. I like the look of using the camera for the texture coordinate, but I wanted to use another camera or empty as the driver for those coordinates instead of the main camera. Another thing is when using the camera for the texture coordinate, is when you rotate the cube, the movement of the texture moving is too fluid. Is there a way to make it so that it moves like every 2 to 4 frames in real time (if not possible, instead when animated)?
So basically:
-
Another driver instead on the main camera for texture coordinates. Maybe another camera or empty.
-
Using that driver to make the texture move every 2 to 4 frames in real time or when animated.
-
Is it also possible to use noise (like on greesepencil on the flat 2d texture image to make it move every 4 frames)?
-
The driver being able to stretch the texture. Its what I tried to do when choosing the object for the texture coordinate node so I can also stretch, rotate, move, and scale the texture. Its what the other idea (sozap’s) to use the cube’s bounding box or a bounding box as the driver to stretch the texture. I wonder If the cube’s bounding box is riggable.
Would a texture clip weirdly if I place it only on a certain part of the uv map of a model? Like a singular apple image texture applied to only the front uv of a shirt, and then using the camera on the texture coordinate node. If it happens, I was thinking of using reprojection to sort of fix it, but that might cause some other issues…
This is also based on the tutorial I posted earlier.
Sorry for the blurry photos, I couldn’t take a screenshot.
I tried using both an empty and a cube (since they have the same geometry) for the texture coordinate node, but in the pictures, I only took a screenshot with the cube.
Your reference videos do not look like they are using any camera mapping tricks for me. Just regular Flash or polygonal cutout puppets, with regular UVs. Body parts are flat and aligned to the camera; there are variants of them prepared for each possible viewing angle. Bouncing can be done with anything that moves vertices: shapekeys, bones, softbodies, or their analogs in vector program
Well, to be honest, I just know the effect I want, and its a pretty straightforward concept in 2d, but I just have no idea how to apply it to 3d, so I’m just trying different methods, I guess? I was thinking if its possible to just draw a texture from each angle possible and connect it to its respective camera angle, because I am also doing the same with applying shapekeys to different camera angles. That’s how the thought started.