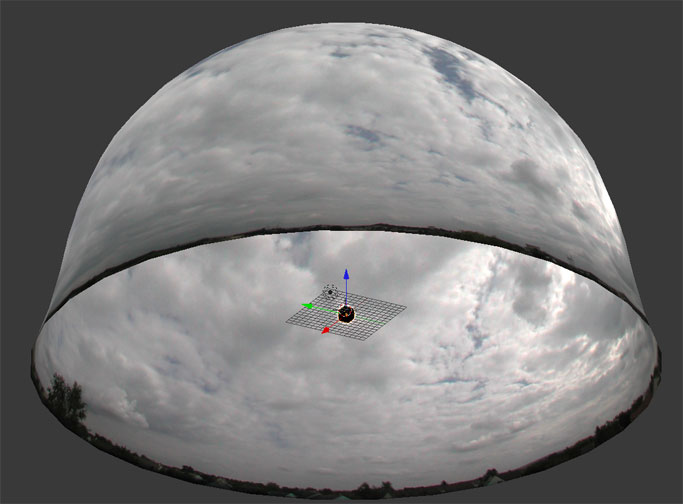
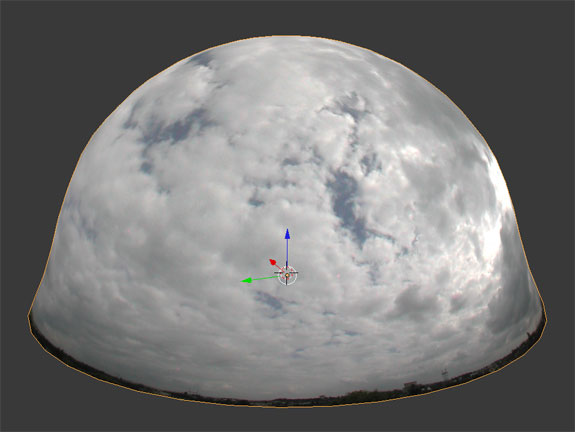
I created, UV unwrapped, then made a material and texture and loaded the image in for my sky dome and flipped the normals, and It looks great except for the fact that I can’t see into it like in everyone else’s tutorials on Skydomes on Youtube. It’s not like I used a solidify modifier; the dome is only one sided, so when the faces are all facing one way–pointing inside the dome–you’d think they’d be invisible from their opposite sides, i.e. the outside. there is a large black cube inside the sky dome which cannot be seen from above, as a way of testing visibility which hopefully helps to show the problem in the two images I attached to show this.
Any ideas what I’m doing wrong? There must be an option I forgot to check or uncheck…
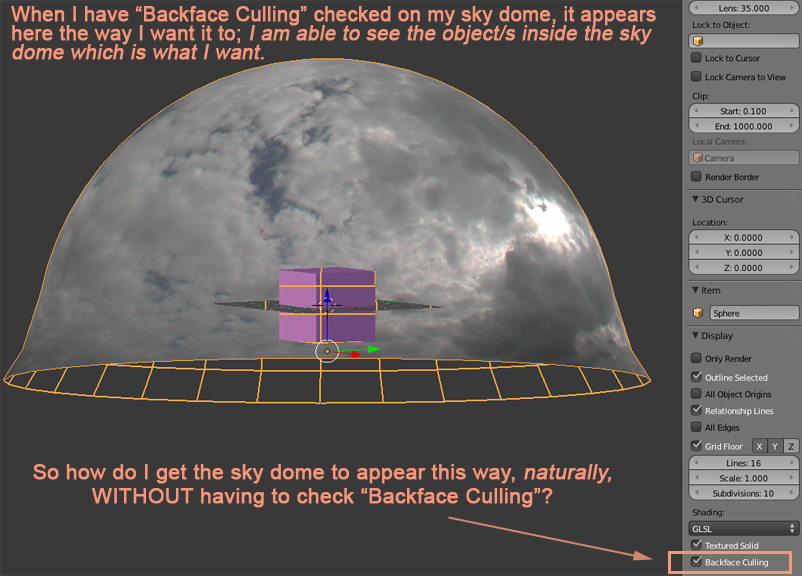
Meelis, thank you but I don’t want to hide the sky dome as I want to take renders or screen shots of my game level design with the sky dome pictured behind my game level. Maybe Backface culling is the answer, but I’m pretty sure I’ve been seeing people do skydomes without having backface culling checked on the sky dome. Let me explain with a better image:
I want to see other objects through the sky dome while keeping the skydome visible. Backface culling might be the only way… but I’ve seen people do this without backface culling… so how would I do that?
thanks for any more tips or help, I really appreciate all the help I’ve been getting here!
Did you try changing from Perspective to Ortho, the short cut for toggling these to views is NUMPAD 5. I’m not sure if that is the effect you are looking for, though it is the effect I use to do what I “think” you are looking for.
Ack! It’s only getting worse for me! It’s not easy being a beginner!
jkcinci, I still can’t set up my sky dome to work like every one else’s, and now the whole thing is blurred/white and shows no cloud details even though the UV/texture image is fine.
There appear to be many different combinations of alpha settings in my materials and textures, but I have no alpha mask on this cloud texture and didn’t specially set anything that I know of regarding that, though I’m open to suggestions of what I might have accidentally checked or un-checked, option wise. It’s all very confusing.
I don’t know how else to describe my problem… I just want to do what EVERYONE else does to make a sky dome backdrop for their 3d scenes. Maybe someone could lend me a working sky-dome object that I could apply my own cloudy texture to? Then I could at least compare the myriad set of options that have to be enabled just right to make this otherwise simple object function the way it should.
If anyone read all of my post here, thanks for at least looking! also… I really appreciate any thoughts on the matter!