Car photogrammetry + blender + carbon fiber parts

Hi everybody!!

My name is Julien, and I’m French, so first of all, sorry for my bad English (I’ll probably use Google Translate sometimes :grinning_face_with_smiling_eyes:).

I just signed up because I’m looking for a place where I can talk about 3D with other passionate people.
I’m posting here before creating a dedicated topic for my project because I’d like to know if it could be interesting for the community.

I have a big project: creating a 3D model of my car and designing additional parts in order to make them in carbon fiber.

To explain my process, I’m creating a 3D model of my car (Seat Leon Cupra 5F) using photogrammetry (COLMAP and CloudCompare). This will be my starting point for retopology and part modeling in Blender.

I would like to share the whole process here, show the progress of the project step by step, talk about Blender (I used it a few years ago), and share my passions: 3D and cars ^^

I hope it will be interesting for both you and me!

So, if you think this project could be interesting for the community, please let me know which section would be the best place to start my topic :blush:

I’m also attaching a screenshot of my current progress in CloudCompare:

6 Likes

Hello Julien,

Well cool projects, I’m not so much into car but it’s likely that what you’re doing is going to be inspiring anyway !

I think you can post in the artwork category probably work in progress. It’s more practical application of 3D than artwork but that sounds like a good fit anyway. I can move your post there if you want !

Anyway, for a start I’m quite impressed by how smooth your car model is, which from what I understand is a bit difficult to get right, so having hints of your workflow is likely to be very informative !

Have fun !

Very nice. Very nice quality for photogrammetric reconstruction. Did you spray the car before taking photos? It would be interesting to see a bit about photogrammetry process as well.

Bonjour, and welcome to the forum.

Yep, will be very interesting! :grinning:

Hi, welcome. Cool project ! your car model looks really clean. This is the raw output from Colmap?

Thank you for your replies :grinning_face_with_smiling_eyes:

Yes, please :slightly_smiling_face:
It will avoid creating another topic, thanks! I’ll also change the topic title afterward.

Let me tell you the story behind this project.

Last winter, as a New Year’s resolution, I decided to make some carbon fiber parts for my car because I don’t like doing the same things as everybody else, and I don’t want to have a car like everyone else.

I discovered photogrammetry with COLMAP and started doing some tests… a lot of tests actually :sweat_smile:
It took me many months to achieve this result, even if I think it can still be improved.

COLMAP can be used with both the GUI application and command-line commands. I chose the second option because it offers more fine-tuning possibilities.

Most people use the default parameters in the GUI application, but because I wanted the best possible 3D reconstruction with high geometric fidelity, I tested many parameters to find the best setup for my project.

I spent a long time finding the right settings.

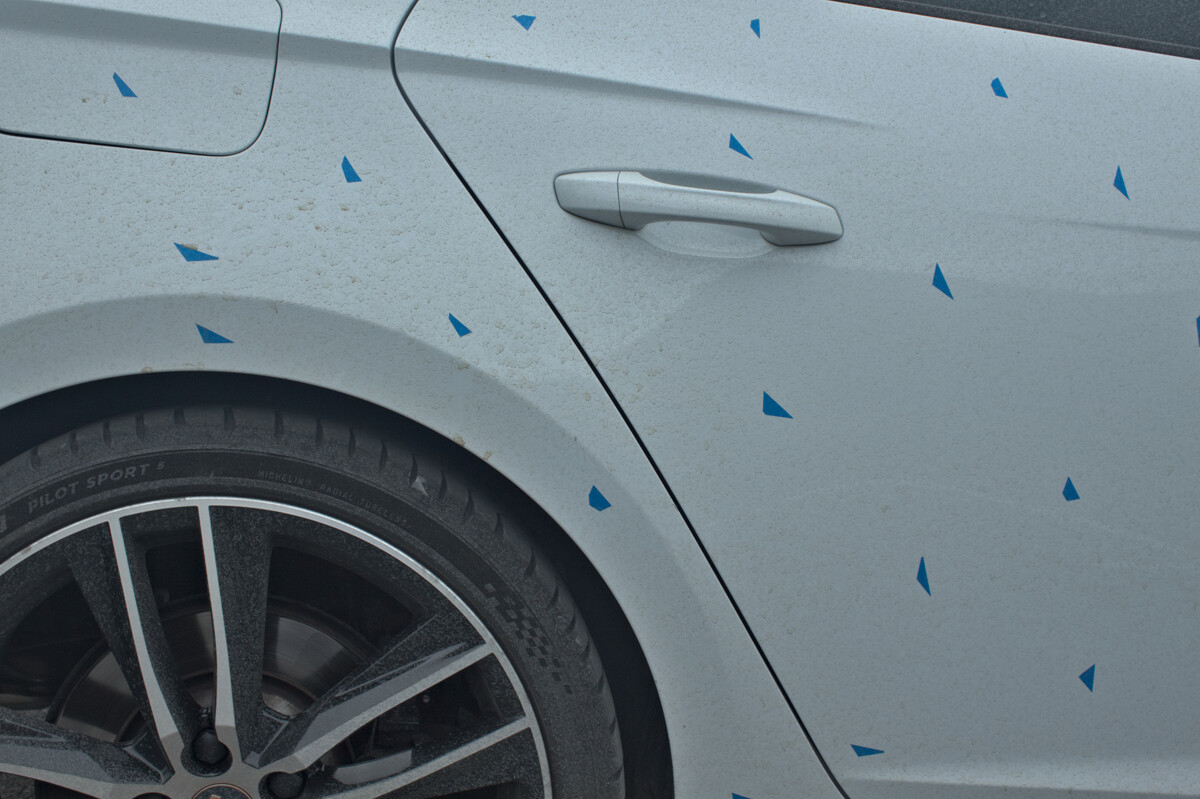
To help the solver, I had to “texture” the car using a DIY dirty water spray (mud mixed with filtered water) and place many markers (pieces of blue tape), because clean surfaces cannot be detected properly by the software.

I took around 1500 pictures like these two to achieve this result:


There are two main steps in photogrammetry: the sparse reconstruction and the dense reconstruction.

The sparse reconstruction consists of detecting features in the pictures and triangulating them to estimate the position of each point of view.

The dense reconstruction uses the camera positions to refine the detection and generate a dense point cloud.

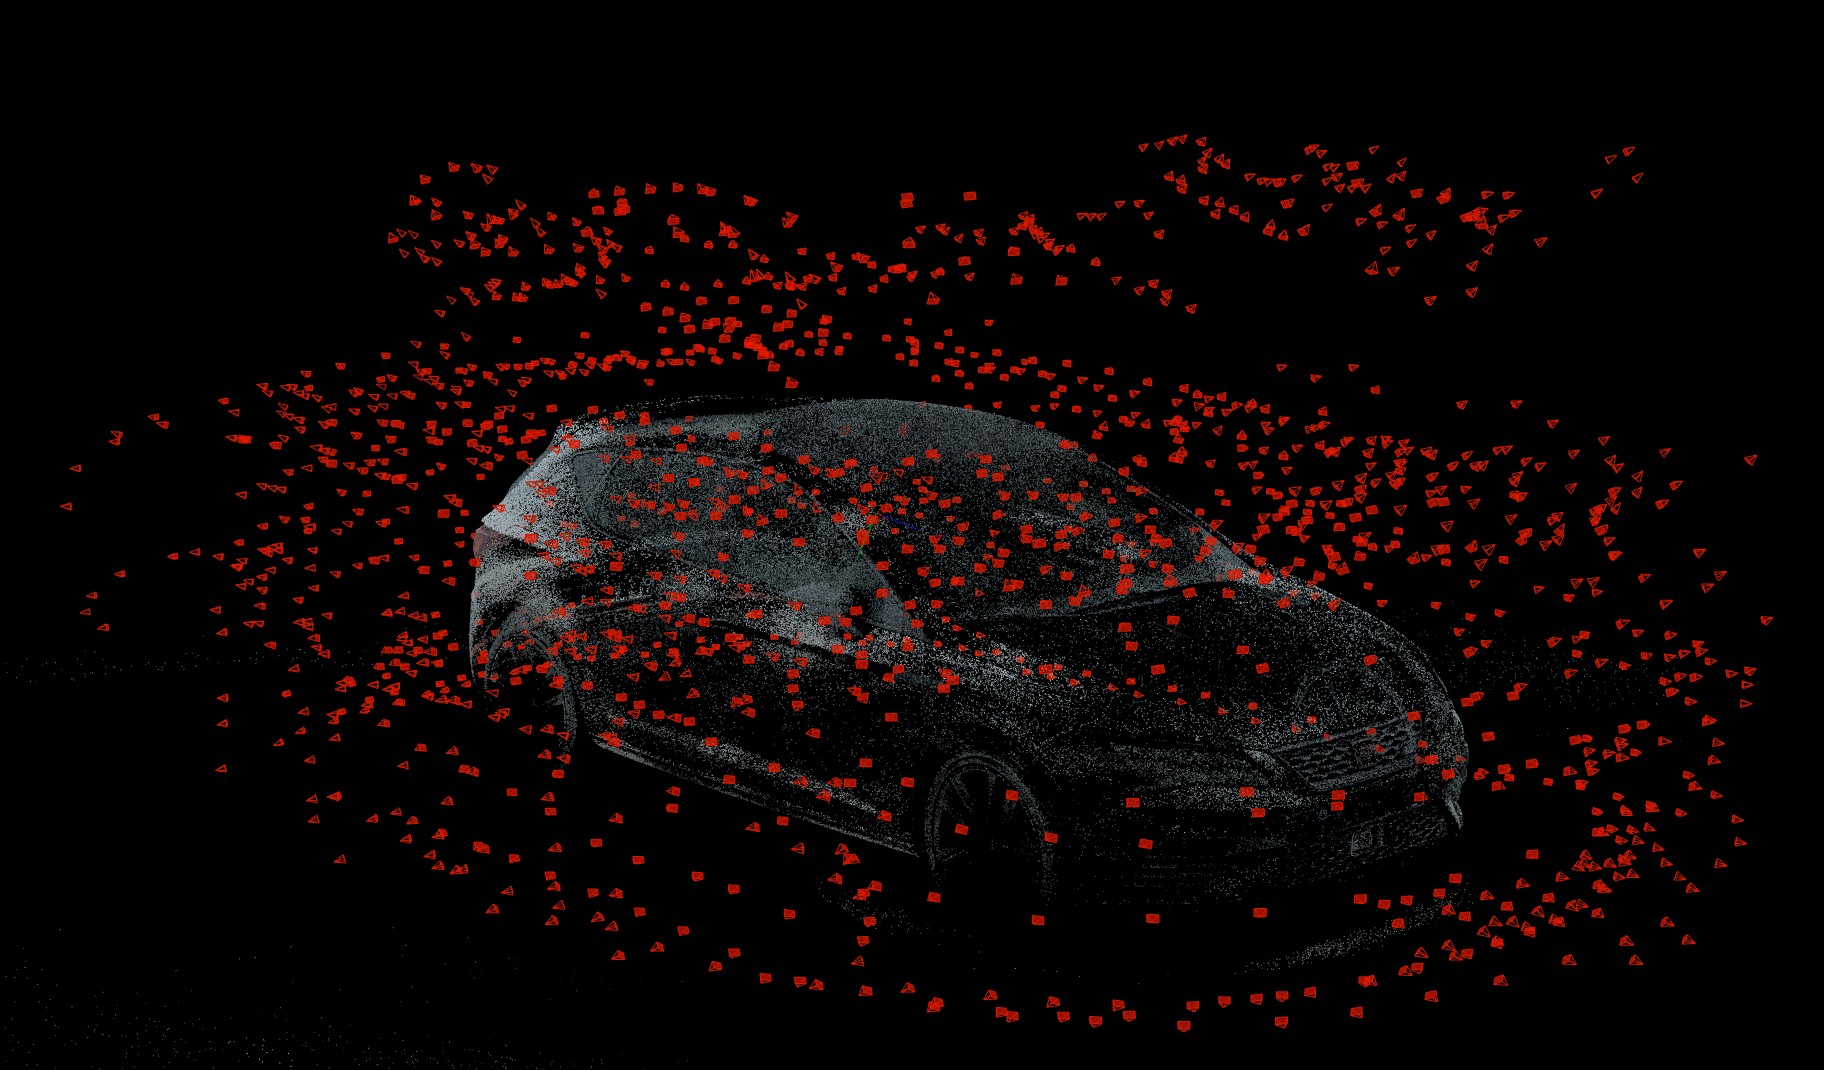
The first step took my PC about 13 hours to complete:

(with many points and each camera pose represented by red dots)

And the second one took about 37 hours. It generated a dense cloud of around 200 million points.

Yes, it’s only a 3D colored point cloud without any mesh yet :grinning_face_with_smiling_eyes:

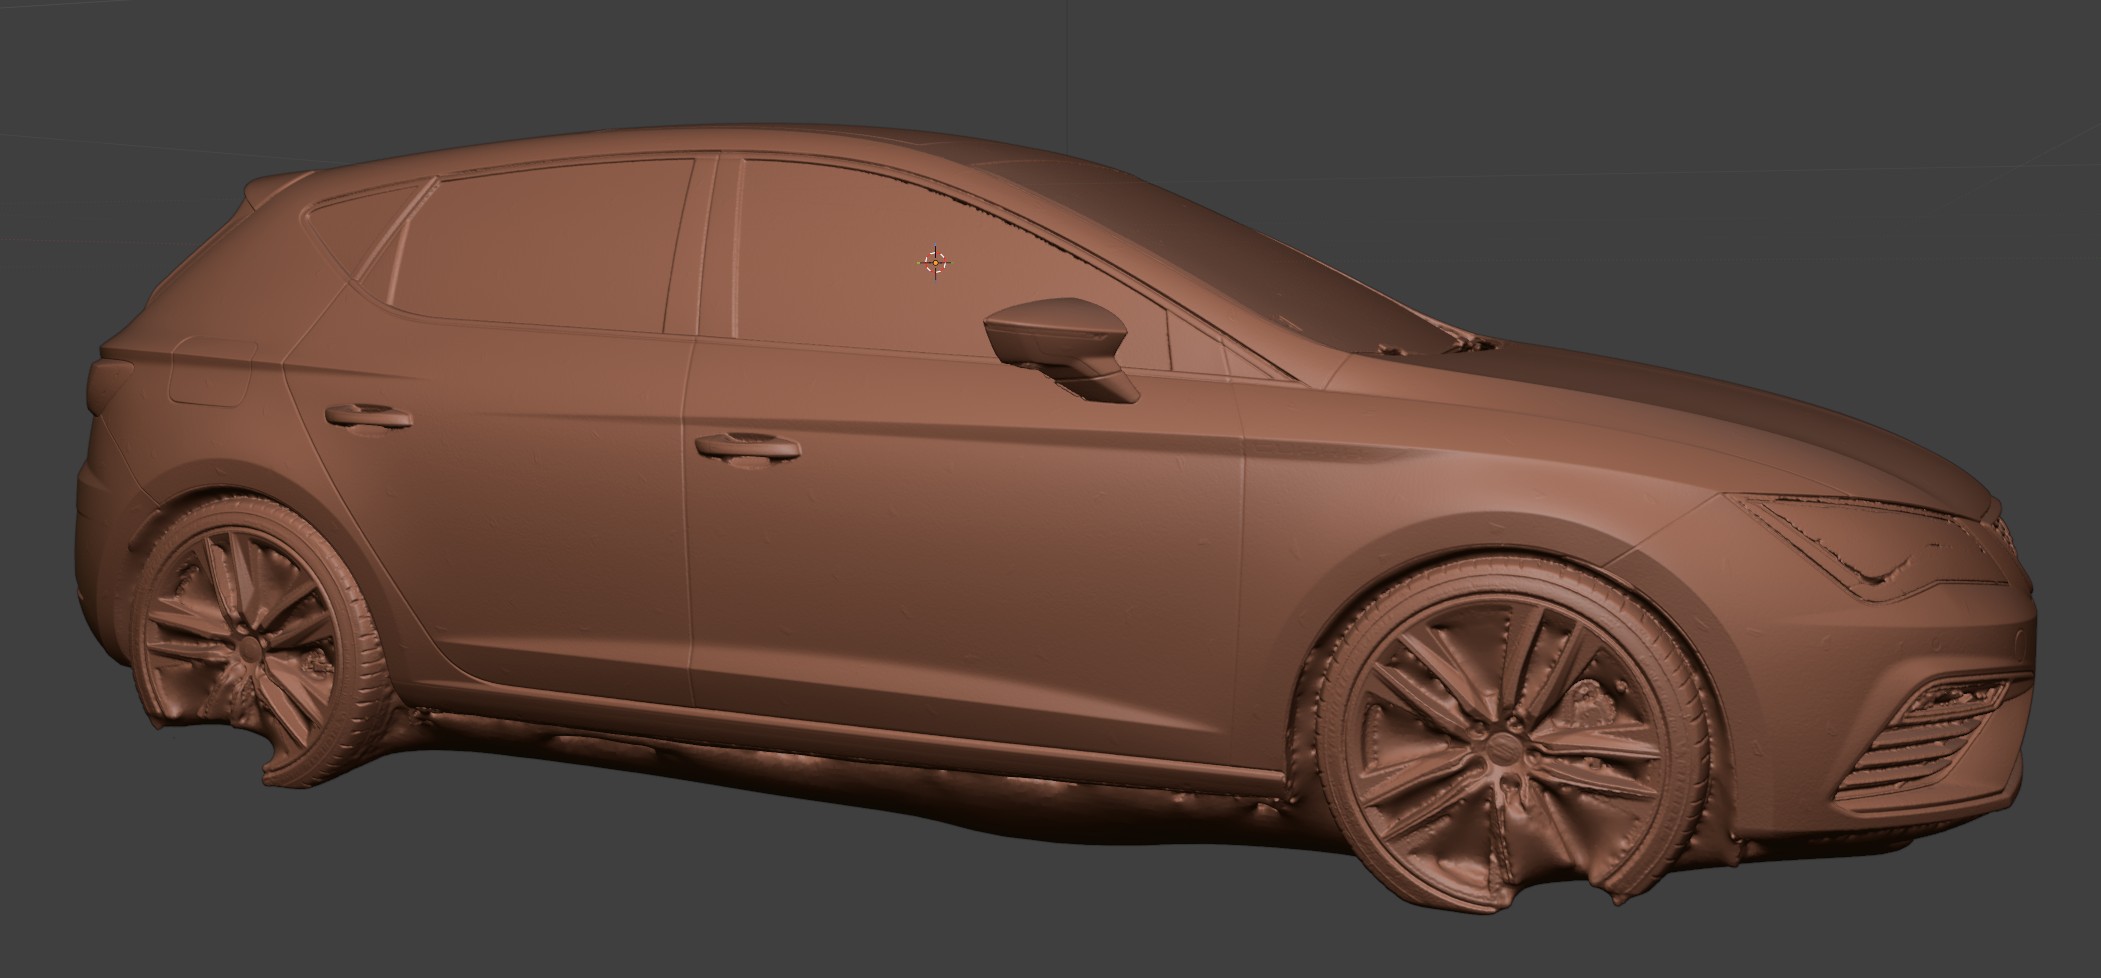
Then I used CloudCompare to clean the cloud and generate a mesh with Poisson reconstruction. It took about half an hour to generate a mesh with around 38 million faces.

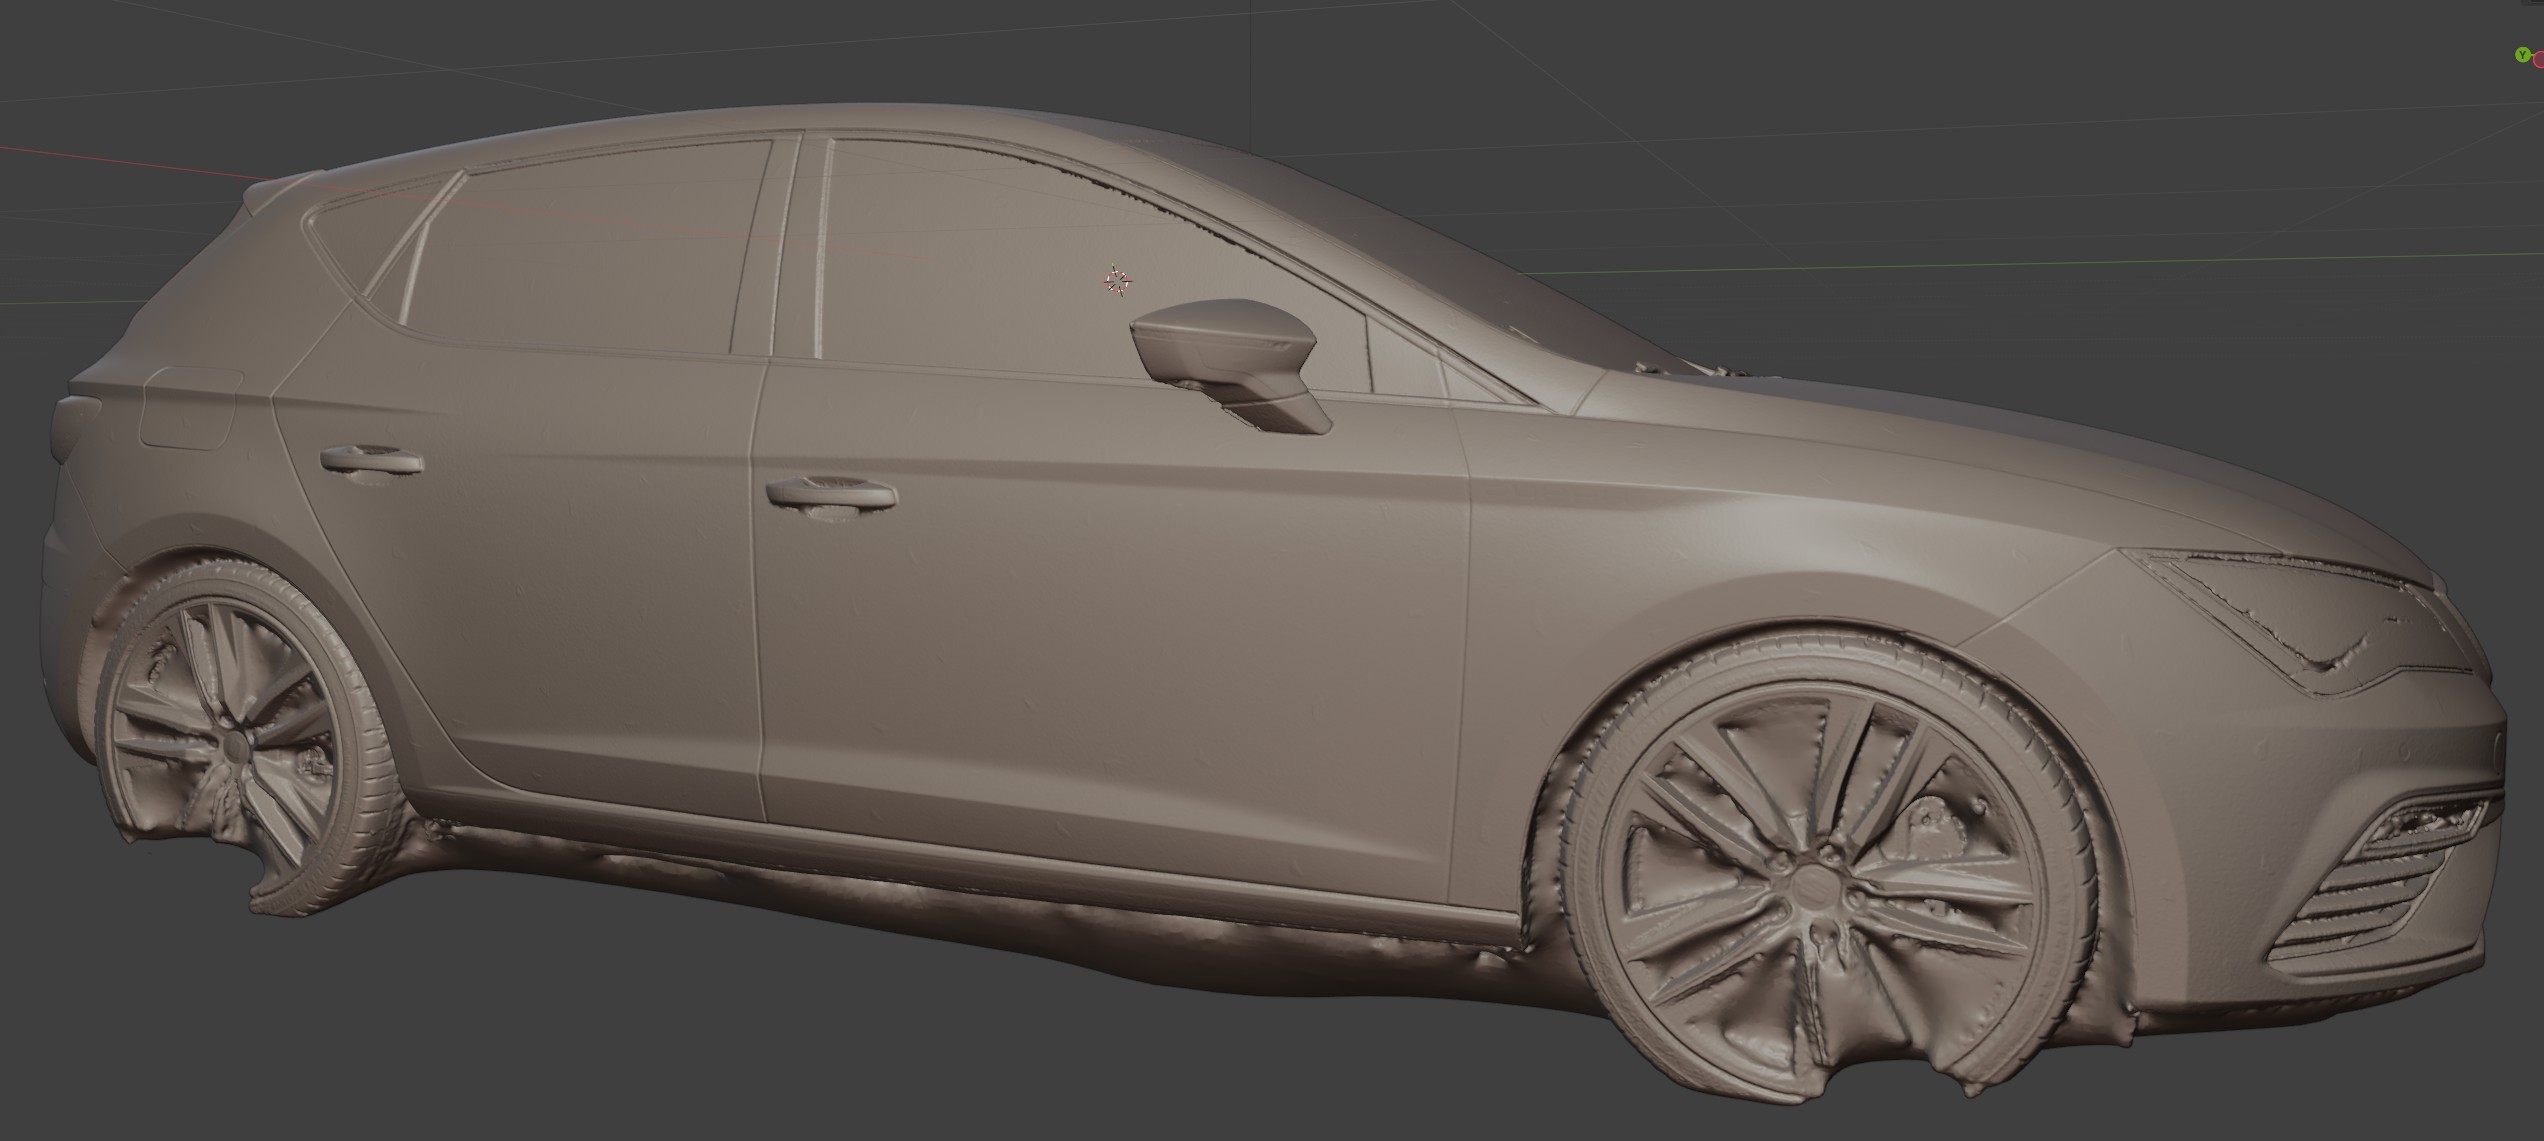
After that, I exported the mesh as an OBJ file and imported it into Blender:

At this point, I think I need to do another photo session to improve the result because some areas still contain too few points.

Next, I will manually retopologize the mesh in Blender using snapping on the CloudCompare mesh.

I hope this summary is interesting, and if you have any questions, I’ll be happy to answer them :blush:

5 Likes

Hi,

Today I would like to talk a bit more about photogrammetry because I found an analogy:

Photogrammetry is a bit like rendering in Blender.

The pictures are like the mesh, and all the parameters are like the render engine settings.
If the mesh is bad, even with perfect render settings, the render will still look bad.
And on the other side, even with a perfect mesh, if the render settings are low quality, the render will also look bad.

And just like rendering, using ultra-high settings does not automatically mean perfect quality. Sometimes it only increases the computation time without improving the result.

So, just like modeling is the first important step in Blender, the shooting session is the most important step in photogrammetry.

Because of this, I made a lot of tests to find the best process. Since photogrammetry is based on gradients and feature detection in pictures, the object you want to scan must be textured and should not contain too many clean or reflective surfaces.

That’s why I had the idea of using dirty water applied with a spray bottle, because my car is white. The spray creates random textures that can be recognized by COLMAP (the free software I use for photogrammetry).

I also had to add many markers (small pieces of blue tape) to help COLMAP maintain continuity between pictures.

So basically, I made a DIY version of a professional pipeline using only free tools :grinning_face_with_smiling_eyes:

To continue the analogy, you need to take many pictures just like you need many faces in a mesh to get details.
But more pictures are like more polygons: after a certain point, you mainly increase the computation time without gaining much more detail.

To summarize, I did what every Blender beginner does :sweat_smile:
I spent a lot of time improving my setup and optimization process, reducing the sparse reconstruction time from around 48 hours to 13 hours, with much better quality.

While waiting for better weather conditions to do another shooting session, I started trying some retopology work with the current reconstruction.

The mesh generated by CloudCompare (38M faces):

And my first attempt working in Blender:

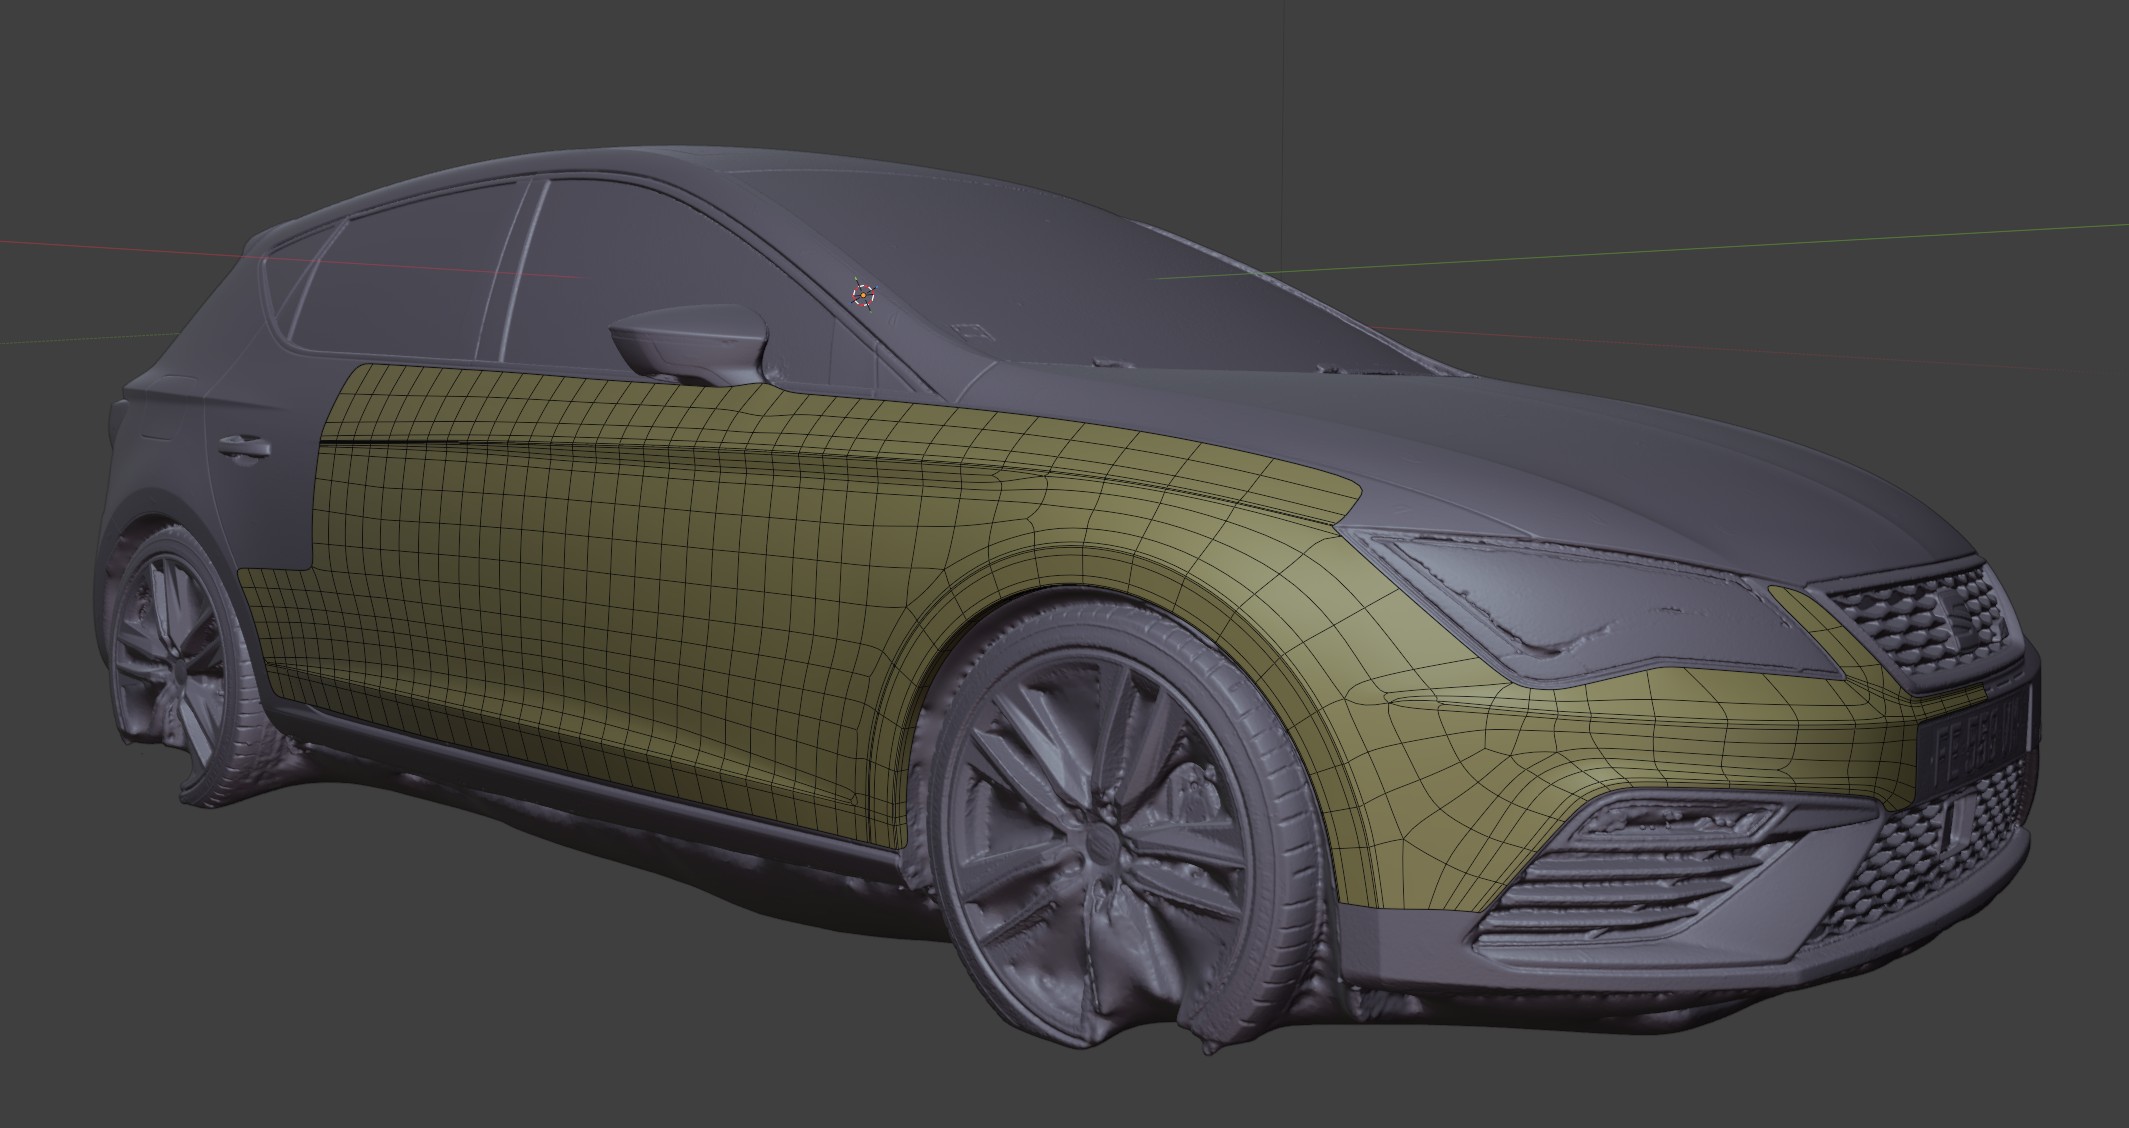
And with the wireframe:

I know some faces are not quads, but it’s only my first attempt :grinning_face_with_smiling_eyes:
I still have to find the best topology to connect hard edges with smooth surfaces.

(I’m sorry for this long post, but there are too many things to say :grinning_face_with_smiling_eyes:)

2 Likes

And just dirty water worked so well. :astonished: When I read the original post I thought I would spray the car with multiple colors of chalk or something for the texture to be clearly visible from any distance :smiley: And then that would involve a fun trip to the car wash. :smiley: That’s why I wanted to to see :laughing: But apparently just dirt and stickers worked really well. That’s really cool. And way less embarrassing than what I would have come up with. :laughing:
2 Likes

Yes, that’s what I thought at the beginning too, but actually the color is not the most important part. What really matters is the gradients and contrast, so the spray works very well.

I’m continuing to experiment with retopology on the mesh, but I’m realizing it’s not as simple as I thought to create a clean mesh based on an existing one…

Fortunately, Blender offers some useful tools to help with the process, and I hope that one day I can achieve a good result :grinning_face_with_smiling_eyes:

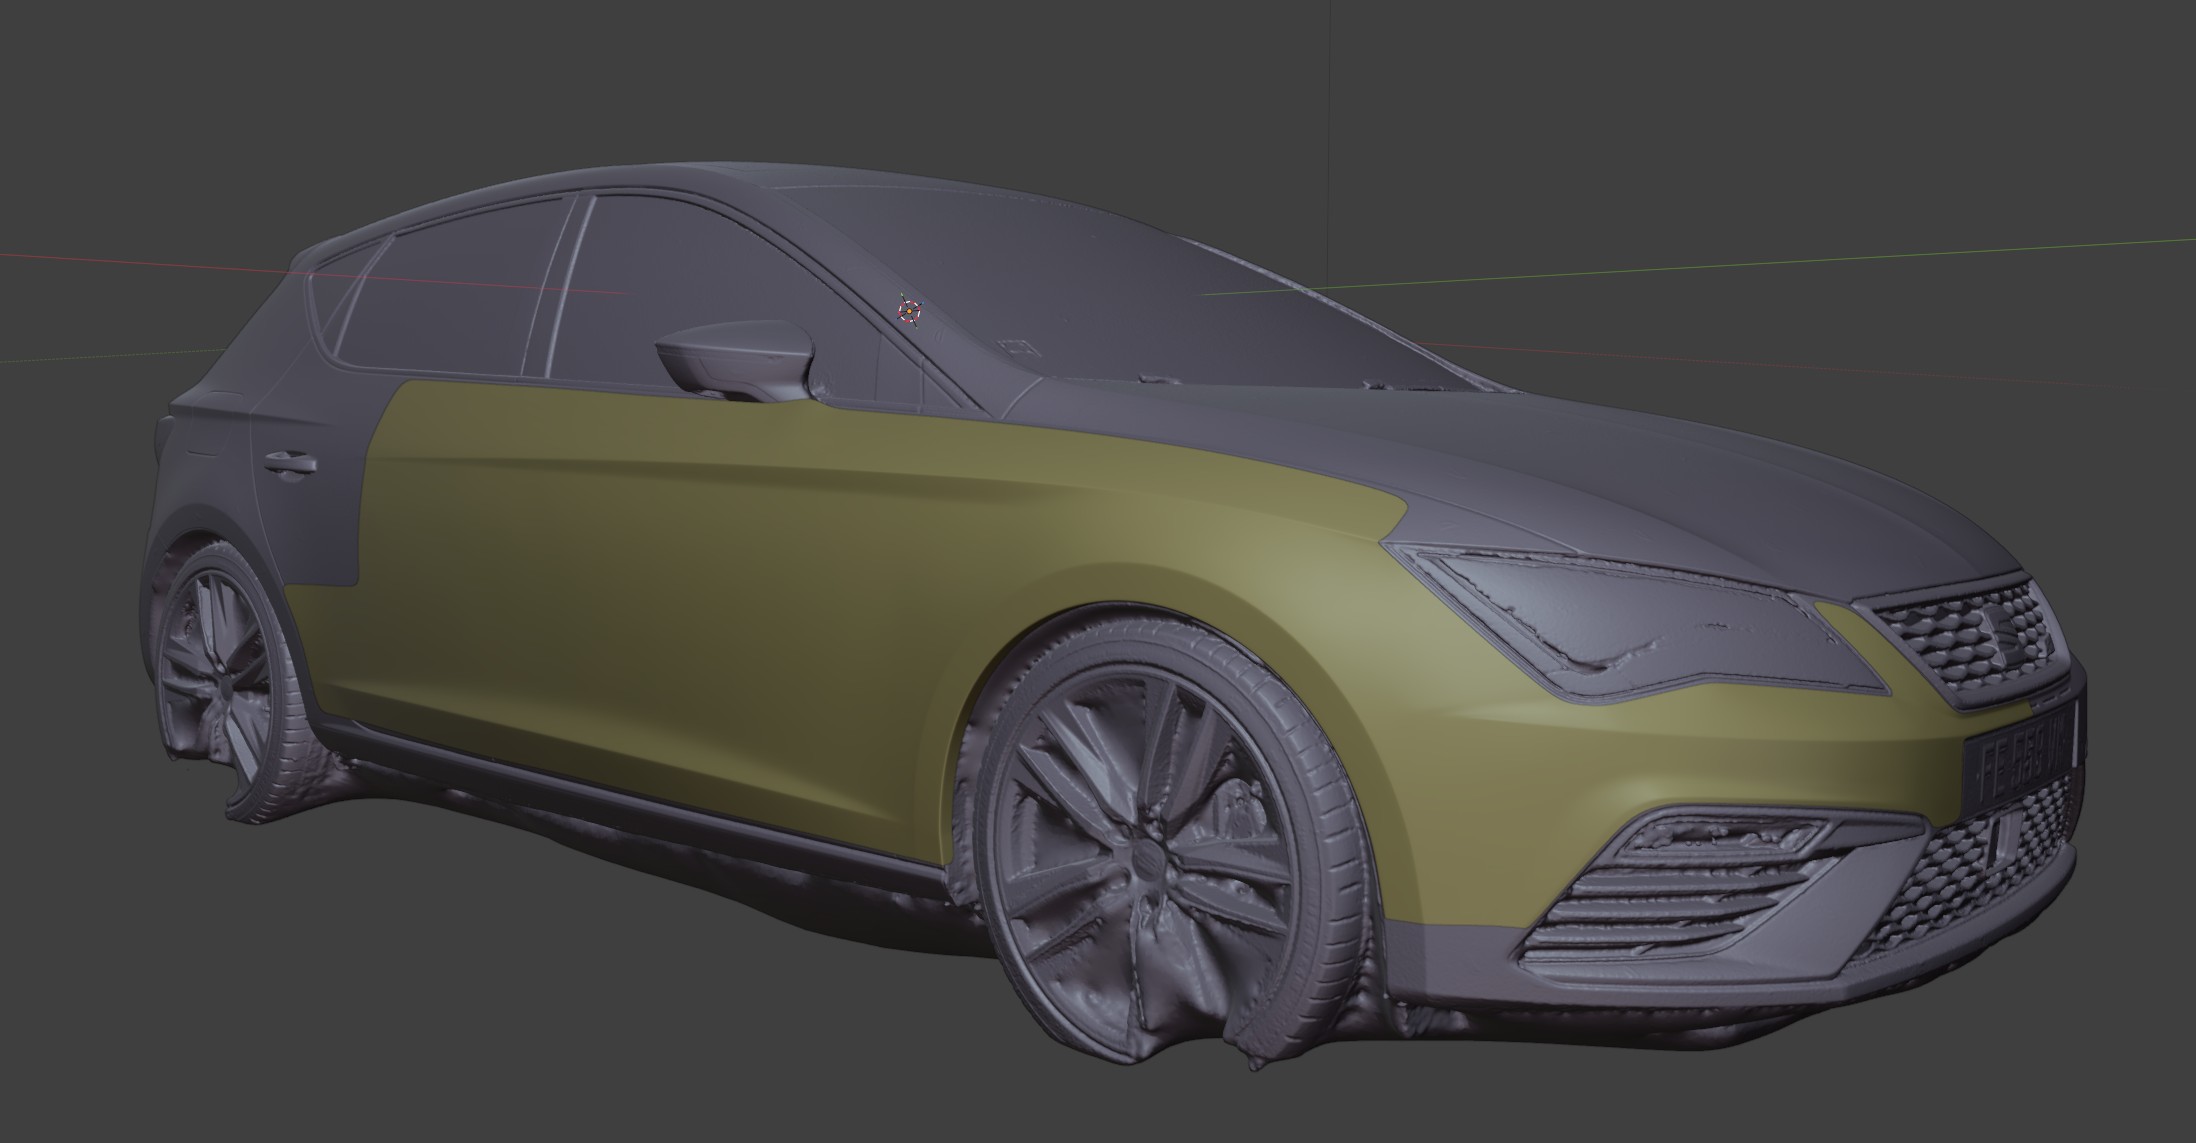
Here is my latest test:

I still have to reduce the number of faces where they are not necessary, and improve the topology in areas where the main curves change direction.

1 Like

interesting WIP thread.

The first reconstruction seems quite good. I’m not a topology master so my comment has relative value but, from my point of view, it’s clear that the good base mesh is helping you…I’m quite sure that if you had to model it just using 2d blueprints couldn’t be less difficult.

At the end of your project, I think that you could try with another car to see how efficient is your whole workflow.

1 Like

Thank you :grinning_face_with_smiling_eyes:

Yes, of course, the photogrammetry-based mesh helps me a lot, and it’s much easier than working only with 2D blueprints, but it’s still difficult for me :sweat_smile:

I’m an architectural draftsman, so I’m more used to flat surfaces ^^

As for trying another car, I’m not sure because it requires a lot of preparation for the shooting session, a lot of time taking pictures, editing the RAW images, and then a lot of computation time for the photogrammetry process, etc. :joy:

But for another project with smaller objects, why not :wink:

1 Like

So, I decided to keep my current photogrammetry mesh and work from it in Blender.

Also, instead of creating a high-poly mesh from the beginning, I decided to start with a low-poly mesh and add subdivisions and details later.

This way, I think it will be easier to find the best topology and avoid non-quad faces.

This is a quick test: :wink: