Cartoon Explosion Tutorial
Hi, thanks for reading,
I’ve have been teaching myself how to make cartoon explosions recently. I thought I’d share what I learned.
The key to creating a good explosion is in the timing, I’m still learning this, so I’m not going to be showing you how to time the explosion, this something you can only really learn yourself through experience and trial which I don’t have yet.
But that being said, I can show you how to easily create the main body of the explosion and material that I’ve made.
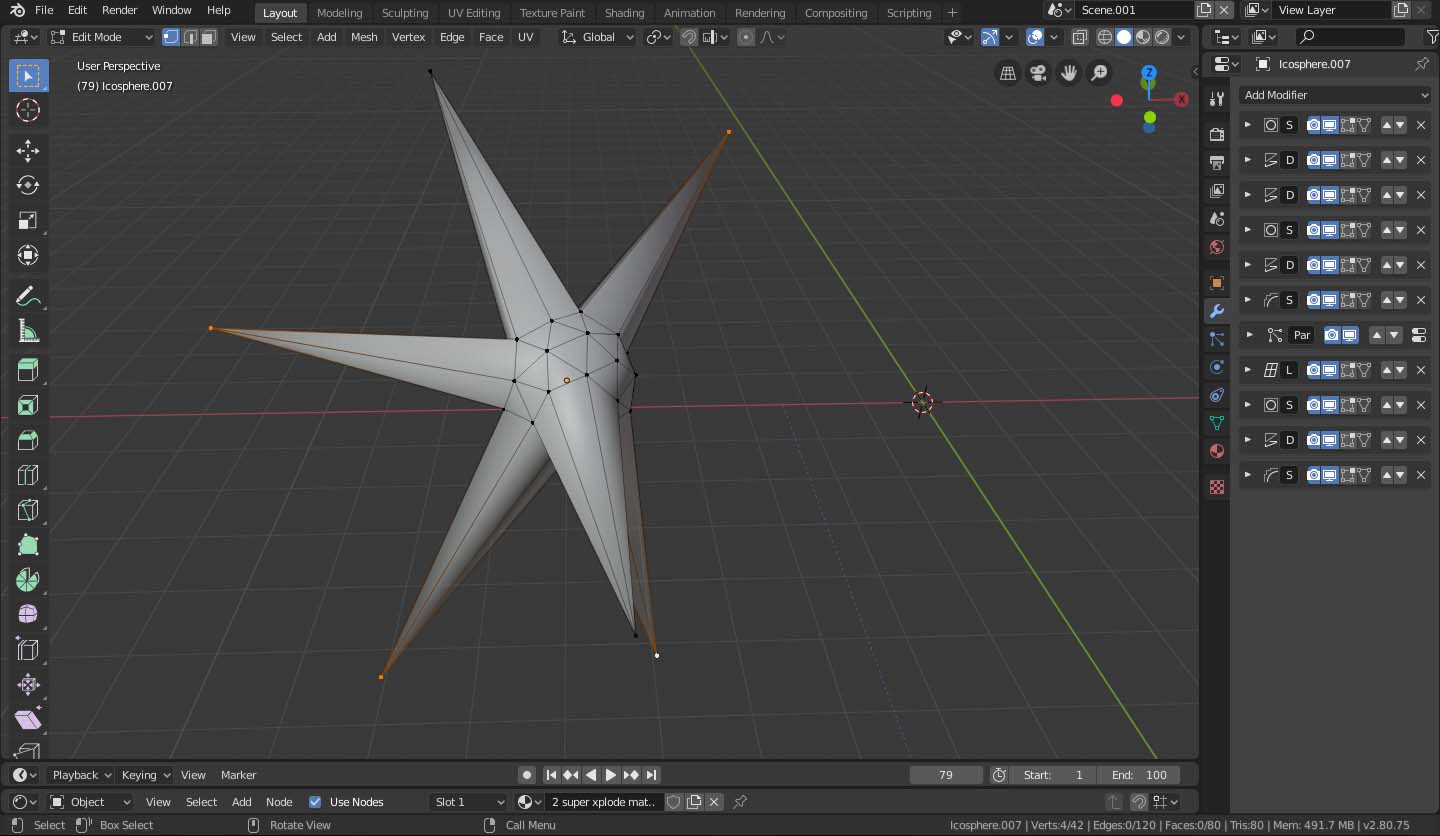
First we going to start with the core of the explosion. This is just an Icosphere. In one of my examples videos, I pulled a few of the vertices around into points, but you can leave it as a circle if you want.
So now we’ll add some modifiers. Make sure you have them in the same order as I write them.

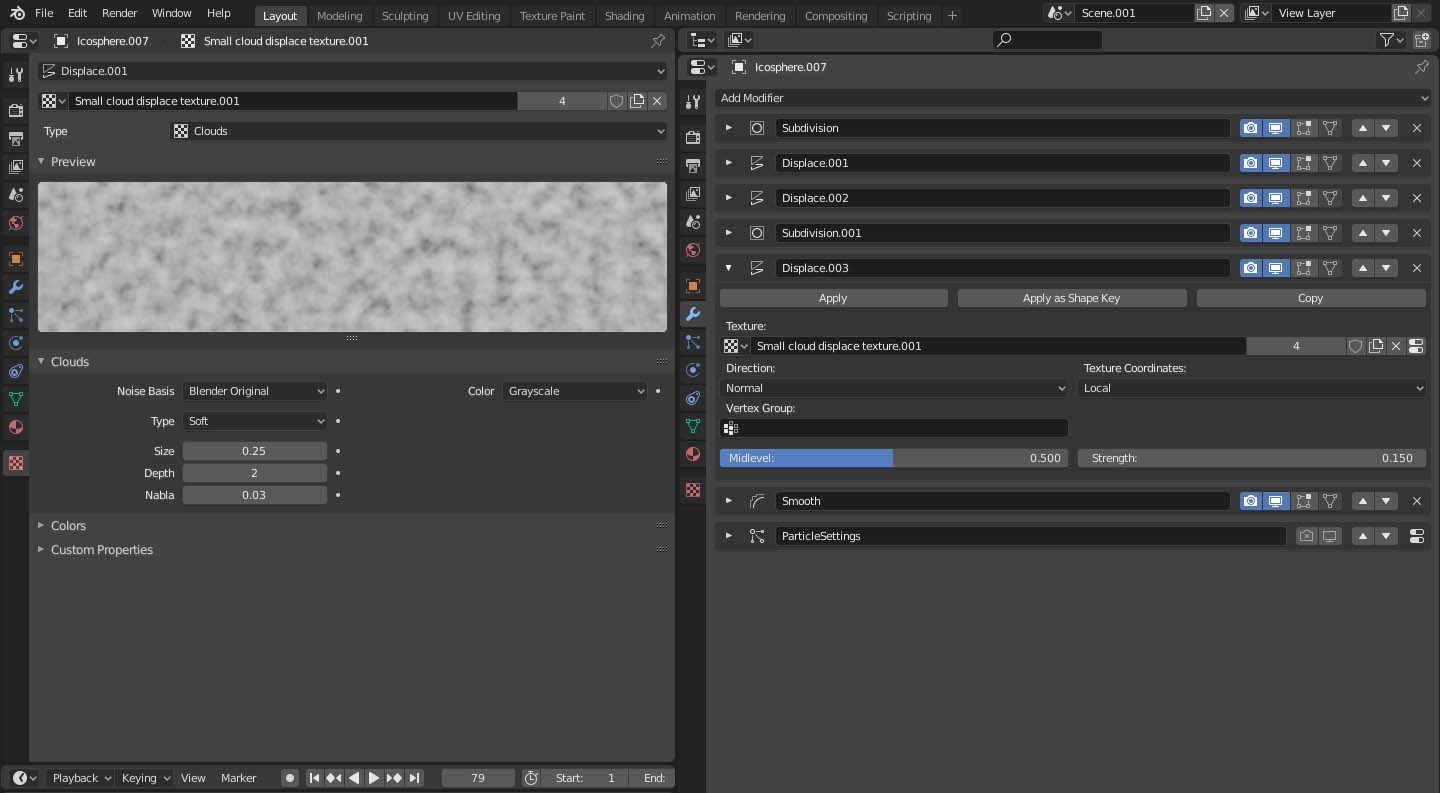
Subdivision. Render: 2 and Viewport: 2
First add a subdivision, we don’t want to add too much geometry yet as the more vertex you have at this point, the harder it is shape the explosion as we want.
Displace. The idea of this displace modifier, is to morph the sphere into a more interesting starting shape. Because there are only a few vertices in the icosphere and we want to push some but not others, we need to use a texture with hard edges and isolated patches of black, so we’ll use a texture like this. So once you have the texture set, set the texture coordinates to global, now when you move the sphere around, it will change shape. So move it around until your happy with the current shape and dont move it any more for now. We will move onto the next modifier.
Displace No texture. So adding this displace modifier with no texture will equally expand all vertex along their normals. We’re going to use this to bulk up the cloud/explosion a bit. You can use this exact work flow to make clouds too. I used a very low strength of 0.05.

Subdivision. Render: 2 and Viewport: 2
This will give us more geometry for our next modifier to work with.
Displace. Use a regular cloud texture, You can play with the texture and strength you get the effect you want but I used a regular cloud texture at size 0.25, and the displace was strength 0.15. If you want the surface of the explosion or cloud to undulate you can set the texture coordinates to an object and use an empty. Then whenever the empty if animated, the surface will undulate. Or if you set it to global, the core will morph in a fixed way as you move it. If you don’t want either effect, just set the texture coordinates to local.
Smooth Modifier
Set to 20 repetitions. Just to smooth the effect.
So If you duplicate your object at this point, you can now generate as many explosion cores/ clouds as you want in any shape you want just by moving the object around.
When you have a shape you want, just apply the modifiers up to the last displace, if you want to undulate the surface. But if you don’t want any further movement, you can apply all the modifiers or set all the texture coordinates in the displace modifiers to local.
So lets move onto the texture now. It pretty much all happens here.
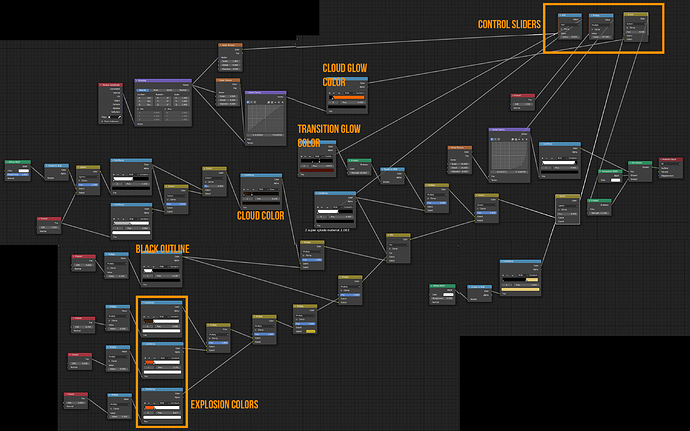
When your done we will have a material with 3 sliders for animating. The first slider will control the transition from Fire to smoke, the second will control the smoke alpha transition. And the third will control the glow appearing on the cloud.
The key feature to everything in this texture is specific Fresnel/IOR input, its mixed with noise maps and diffuse. Even the transitions are controlled in part by the IOR input.
This is the material. I’d highly advise that you experiment with this material when you get it, I think you’ll will be pleased with what you can create with a few tweaks here and there. I’d almost call this my universal FX shader.
So now if you want to make an interesting explosion, you’ll need to add some details, here’s a few I used.These are really easy to make, If you copy the modifiers from your core to any shape like a cone, you’ll get different shapes you can use. So I highly advise experiment. You can add particle effects for debris or embers, anything you can think of really.
The rest is in the animation and how you want to grow and morph the clouds and the timings on the sliders in the material. For the cloud movement and morphing, you can use Simple deform twist/taper/stretch/bend. You can use the displace modifiers you already have. But of all the things I tried I found using a lattice and making a manual shape key for it was the most precise to achieve the look I wanted in cloud dispersion.


