Hi,
Thanks for reading.
A basic overerview of what we are covering is using the Vertex Weight Edit to apply an animated texture as a weight map on our mesh. Then adding a mask modifier using that animated weight map to remove parts of our mesh.
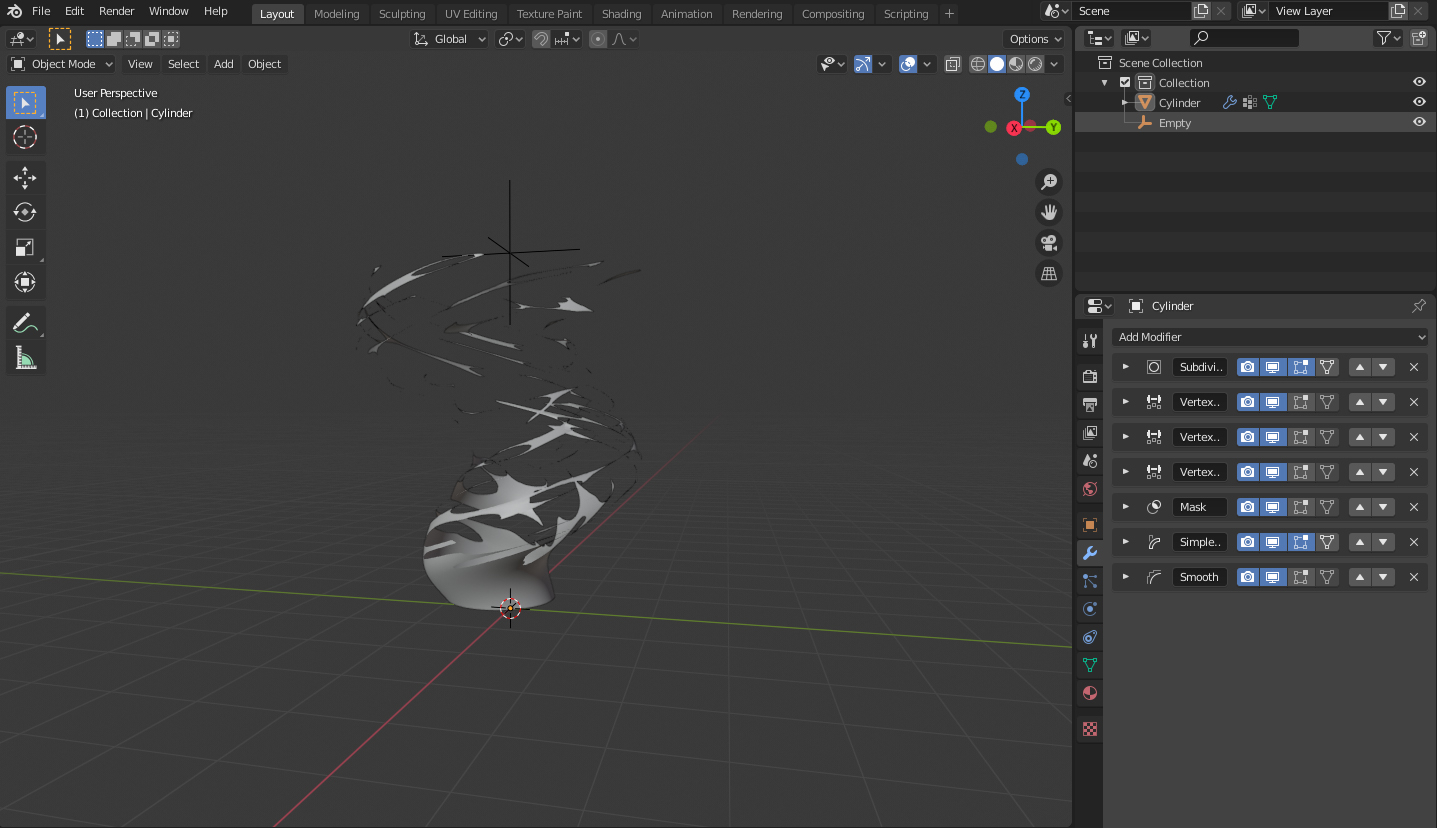
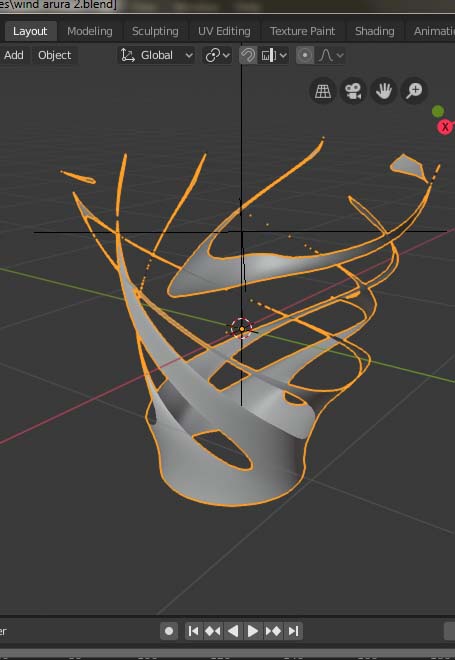
Here is the mesh I started with to create the wind aura effect.

I made this with a cylinder, with I then UV unwrapped. I removed the top and bottom faces, scaled it at the bottom, and added a little turbulance by moving some vertex. I also sub divided it a few times.
Starting with the Vertex Weight Edit modifier.
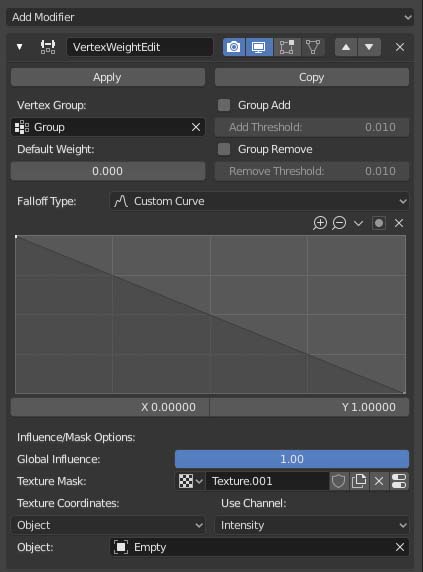
This modifier is great, because it allows you to change the weight paint of any Vertex group you like to whatever you want, whenever you want. A lot of effects and other modifiers can use a weight map to edit their effects on the mesh.
In order to use the Vertex Weight Edit modifier, first you need to assign your vertex to a group
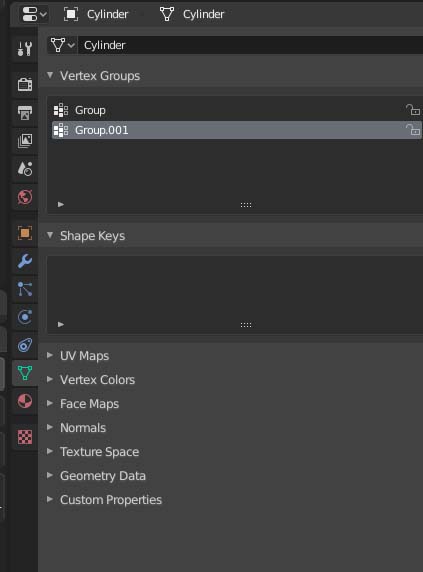
So add a vertex group and go into edit mode on your mesh and select all the vertices you want in the vertex group and hit assign.
Now you have a vertex group you can use with the Vertex Weight Edit modifier.

But we need to alter how the weights are mapped to their new values via the falloff type, by changing the graph to a custom curve and setting it to look like this.

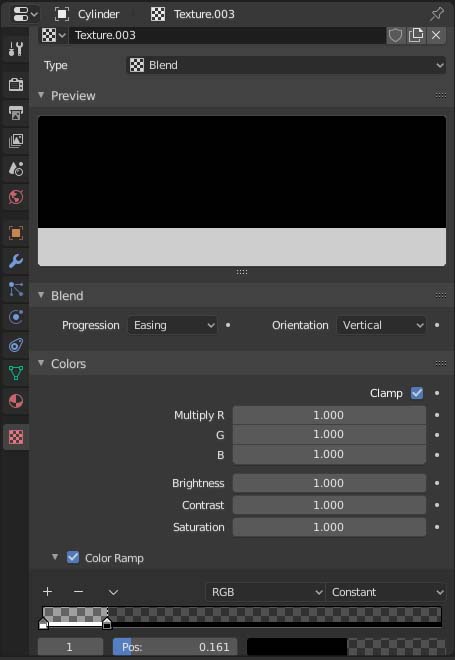
Now we need to set up out texture. This is the texture set up I used.

At this point unless you go into weight edit mode with that vertex group selected, you will currently see no change to our mesh.
So lets add the mask modifier and set the weight vertex group we created to the modifier, so we can see how the texuture has been applied.

If you play with the threshold, you will see that parts of your mesh will dissappear.
So right now it looks like blocky crap. So we need to sculpt it to our liking. We can use 2 modifiers to do this for us. Simple deform, set to twist and add the amount of angle you desire. And a smooth modifier, set quite high to a factor of 1.65 and with 100 repetitions. This will smooth it out quite nicely. 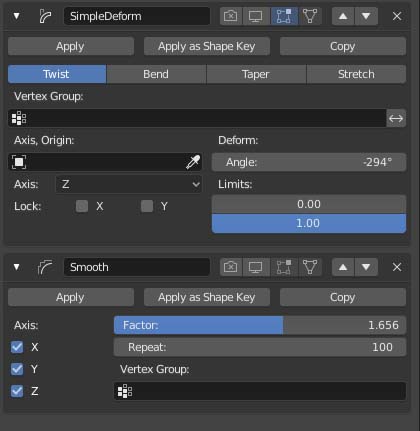
But now we have a problem, we need to see that wind effect gather at the base so the strands of wind look like they are coming from somewhere.
So we are going to need another Vertex Weight Edit modifier. And a Vertex weight mix to merge the 2 into 1 so the mask can use them both.
So what we are going to do is add a second Vertex weight modifier which will use the UV of the object to map a weight map that is a vertical gradient from top to bottom. So use UV project from view unwrapping while looking directly in a side on view at your mesh. Then we will need another vertex group adding to our mesh for the modifier to use. When you’ve done that add the second modifier and set it up so:

Now to create the texture we need to act as the second weight map. Set it up like this :
Now we have 2 modifiers setting the weight maps of 2 different vertex groups on the same object. So we have to mix them, using the Vertex Weight mix modifier. Add it and set the first group you made to A and the second to B, and select Add as the mixing type, like this:

Now the mask will take into account both vertex groups and your mesh should look like this.
But its not animated yet. So in order to animate it, we are going to use the texture from the 1st vertex weight edit modifier, and animate that. How we do this is to add an empty to the scene, inside the 1st vertex weight edit modifier we set the empty as the location of the texture like so:

Then when we animate the empty, the texture will animate too. Since we are creating a spinning air vortex or sorts, the best way to animate the empty is to spin it on the z axis and move it up. You can also add some rotation to the mesh itself if you like.
In order to animate the appearance and disappearance of the effect, I just used the threshold slider on the mask modifier.
The outer green layer of the effect it just a duplicate of the 1st, scaled down and out in size and colored green. And the grey dust layer the same, but with a different texture to get a different effect, I used just a cloud texture
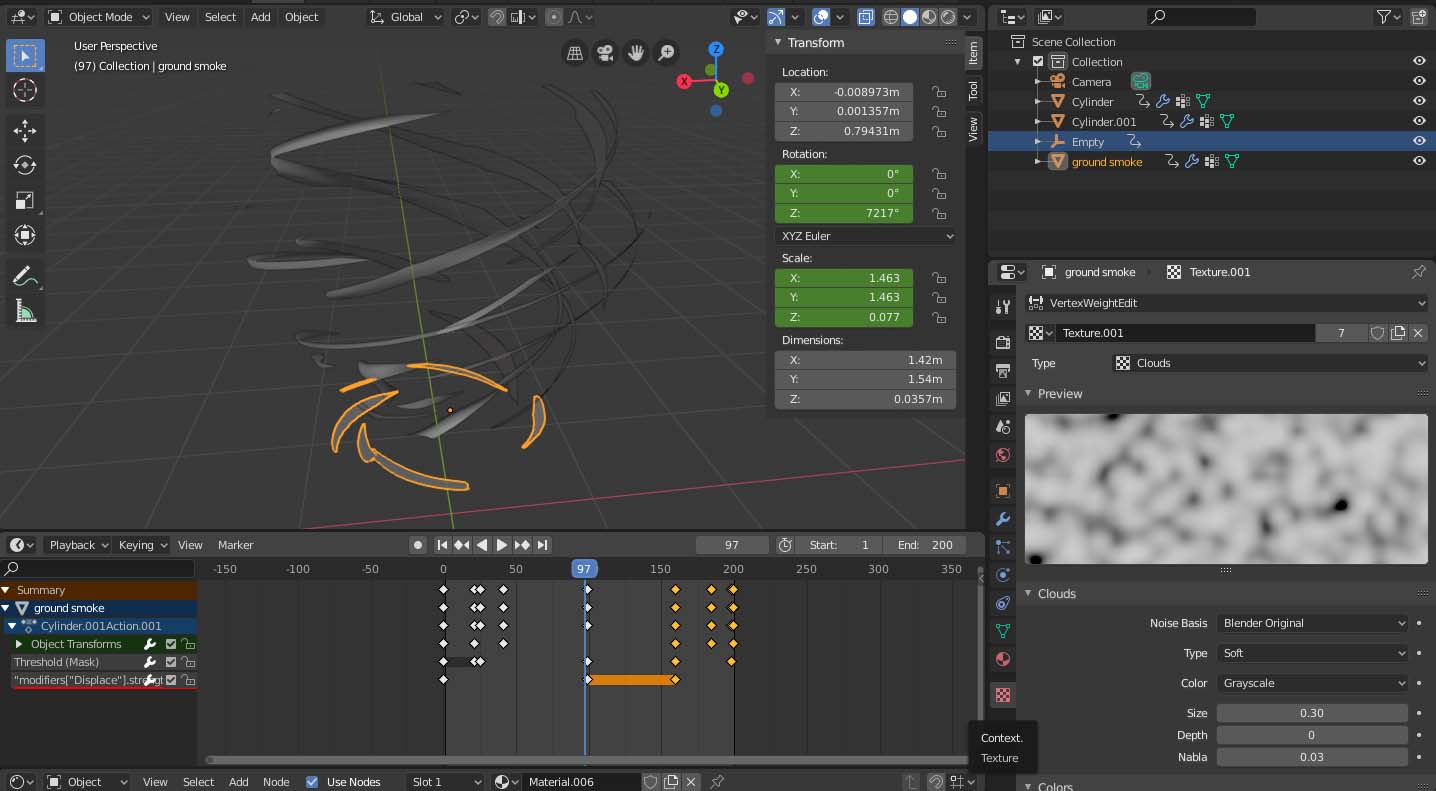
and again I scaled it down to size. I recommend experimentation with textures here to see what you can make, that’s how I made this.
Thanks for reading, have fun.