The Blender Color Grid square pattern renders at 128x128 pixels.
Is it possible to change that?
Example: for a project working at 1920x960 I would love to be able to change the Color Grid size to 192x192 which would give me an even 10x5 squares instead of the 15x7.5 I am currently getting.
Granted I could generate an image that is 1280x640 and that would give me and even 10x5 boxes but then I am scaling a 1280x640 image to a 1920x960 output.
If I could set the Color Grid to say the native panel pixels of of the LED walls I work with that would be insanely useful!
Short answert: Not directly.
Long answer: most grid generators like for example:
…produces 2n maps and so even using 2k and cutting out your wanted setting… this doesn not work because mostly the tiling is also an even number… for example 12 or 14 in 2K will give 170.66 or 146.28 pixels…
Anyway: The source to make th eblender grid is here ( ) :
…
or:
You use blender to just generate a 128x640 image and scale it by 150% (with box or linear or even none filter options) with wahtever image processing software you use.
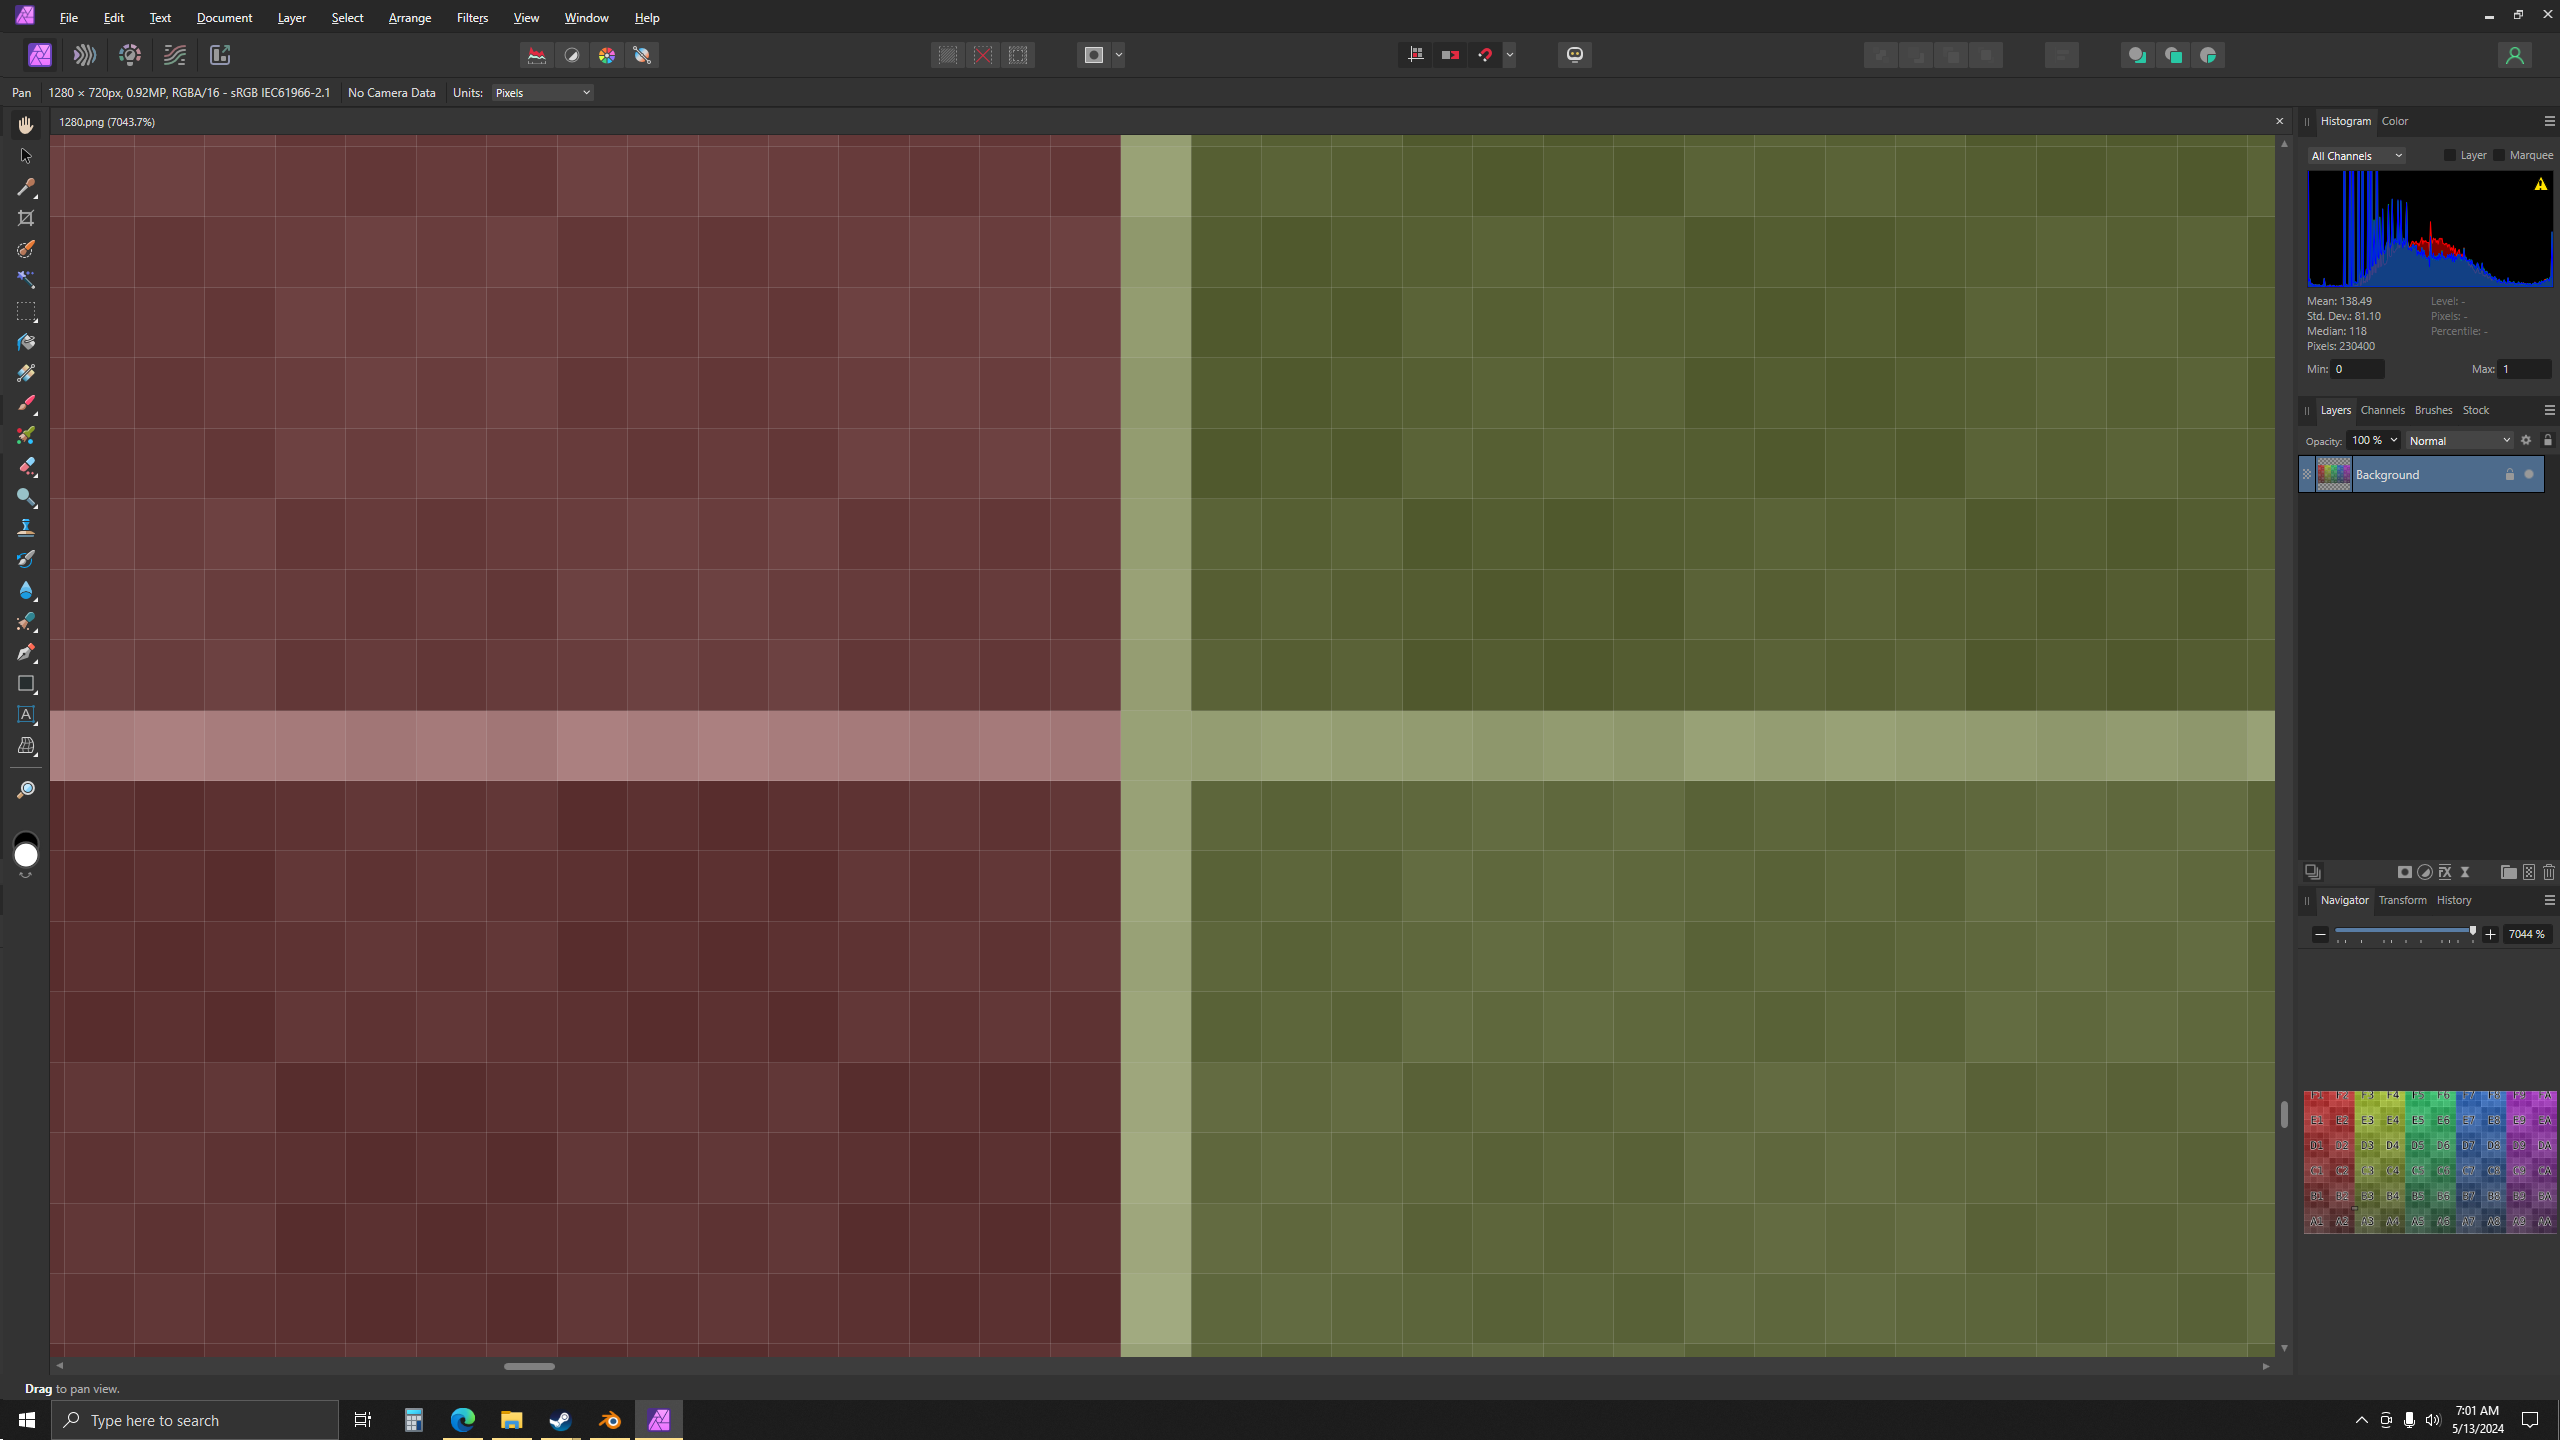
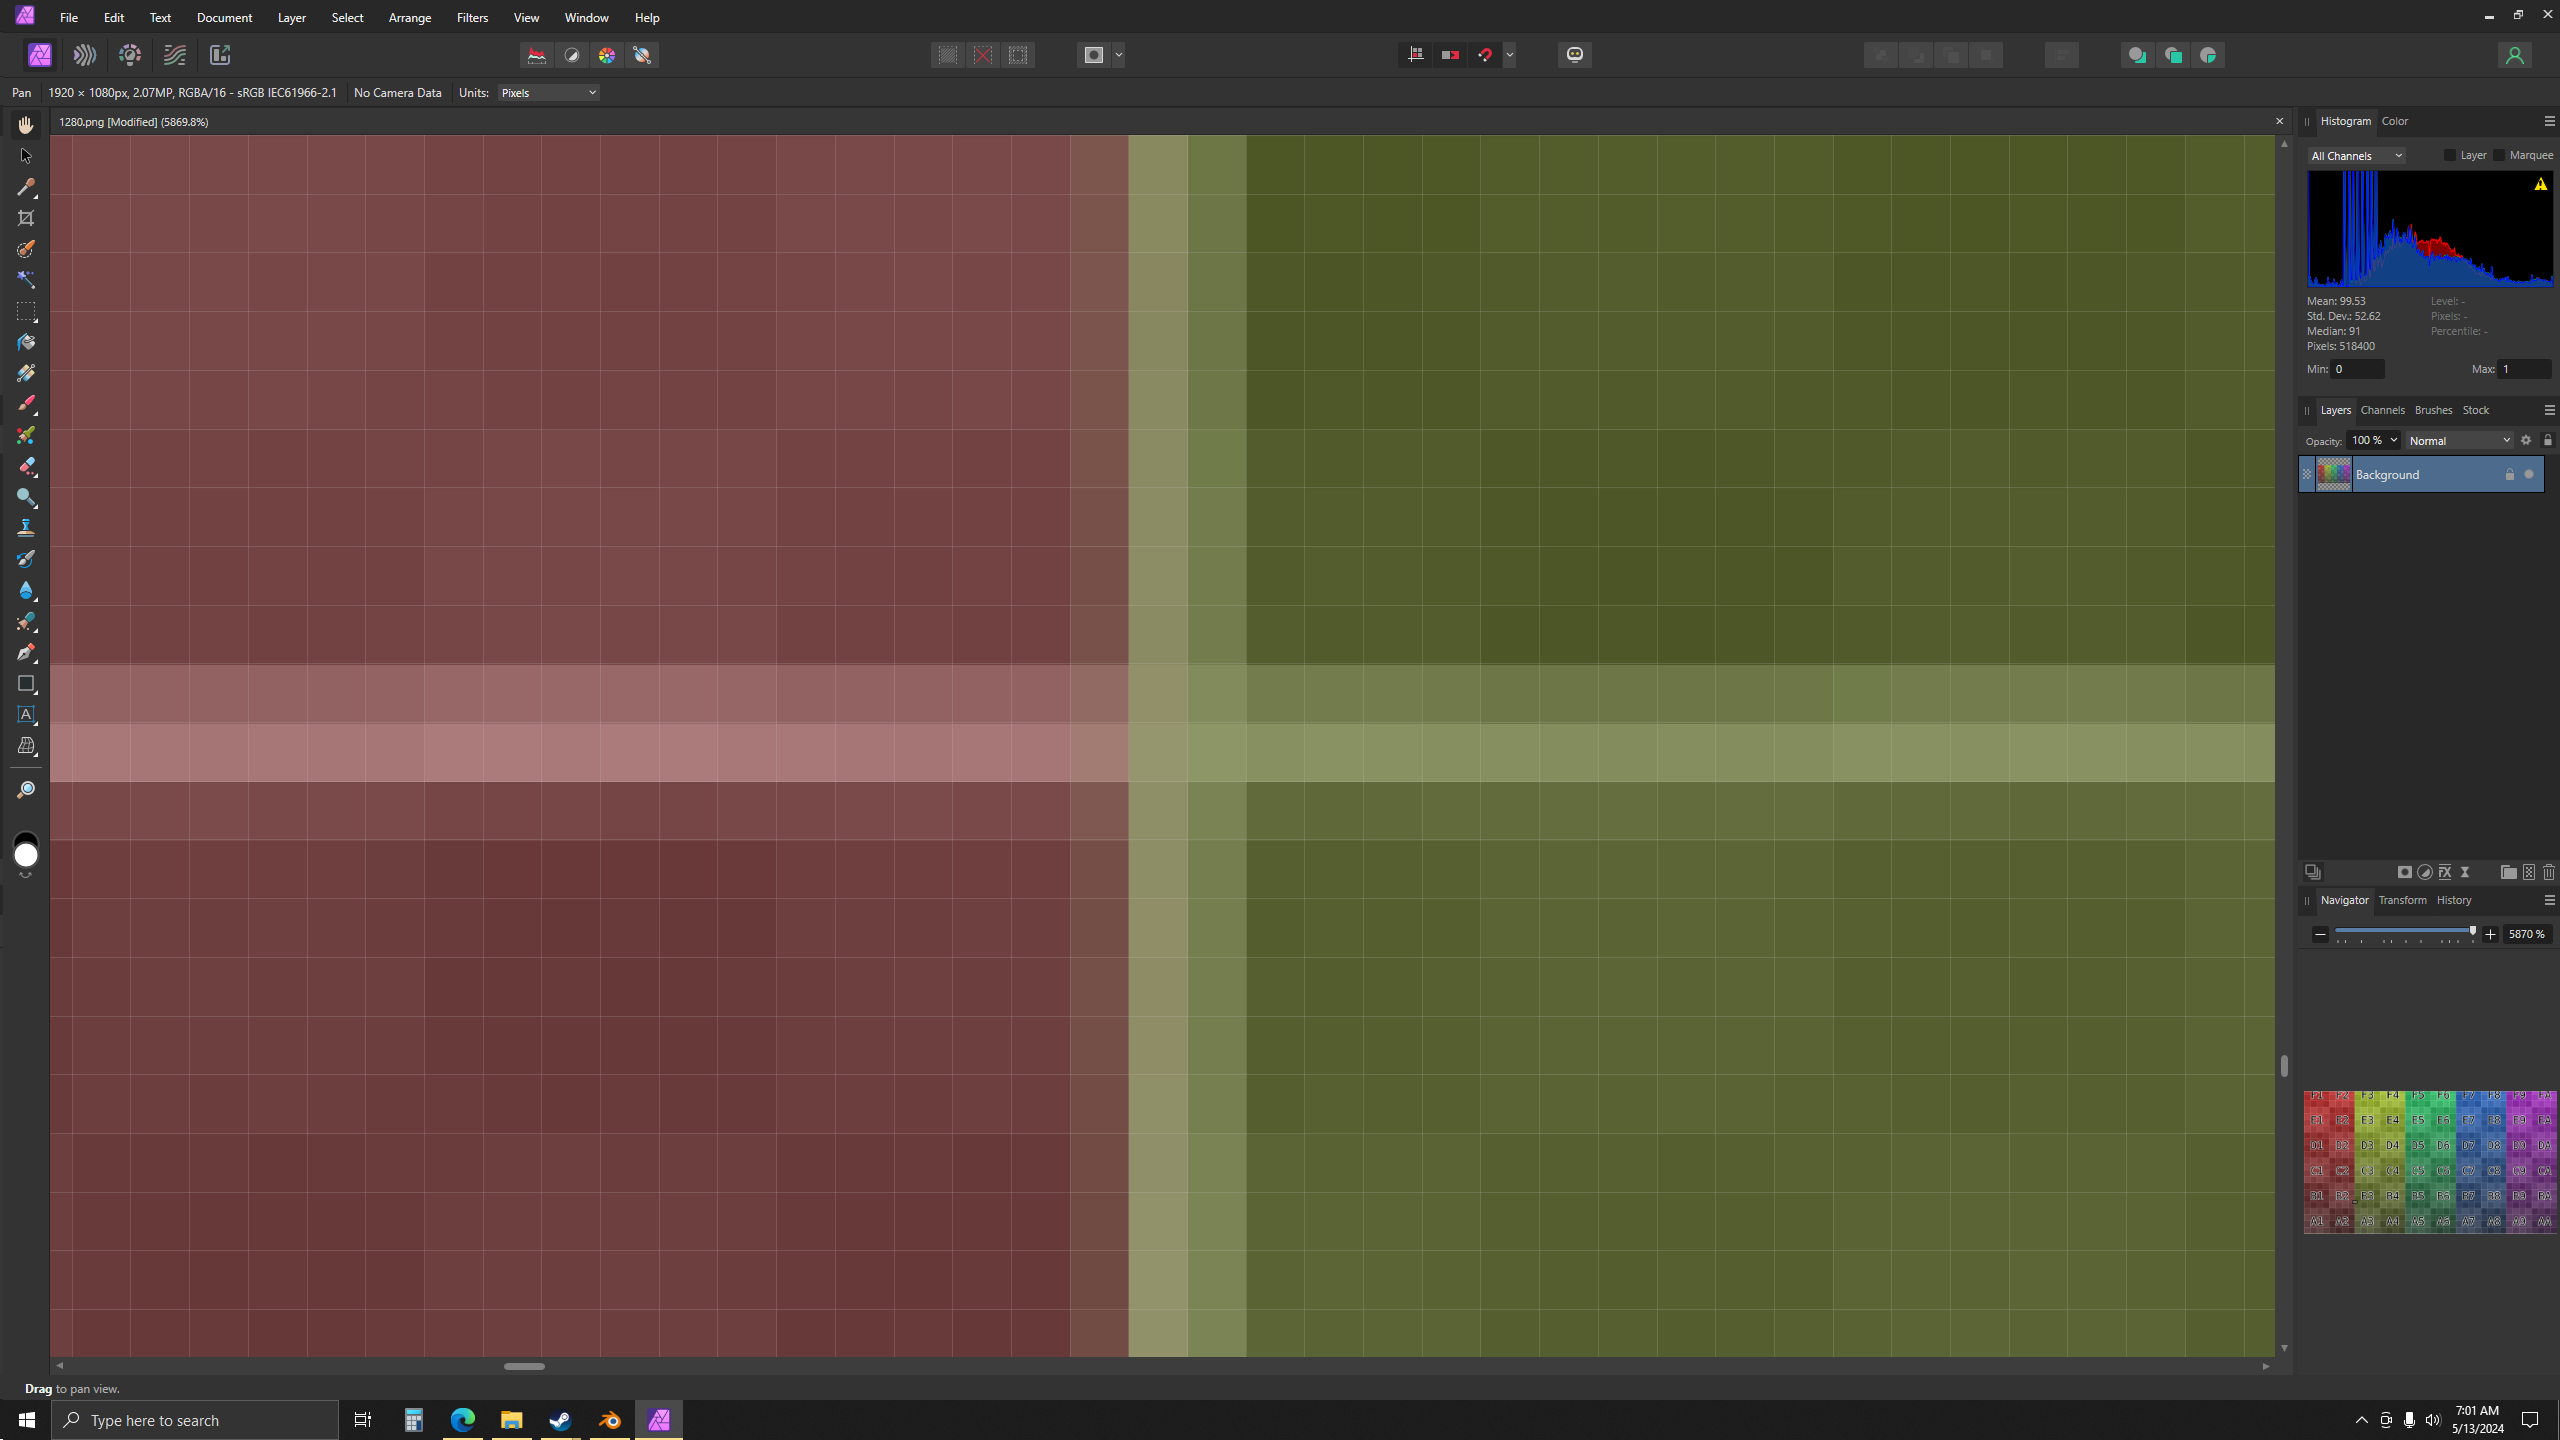
Scaling isn’t really an option because it doesn’t hold up. See images.
1280 native vs 1280 scaled up to 1920.
What makes the Blender Color Grid very nice is the subtle per-pixel color changes in the grid… Scaling up you will lose that.
I’m aware of scaling issues… that’s the reason for the
…but as i mentioned usually this numbers are based on 2x… so the sources may be of help about the actual color changes.
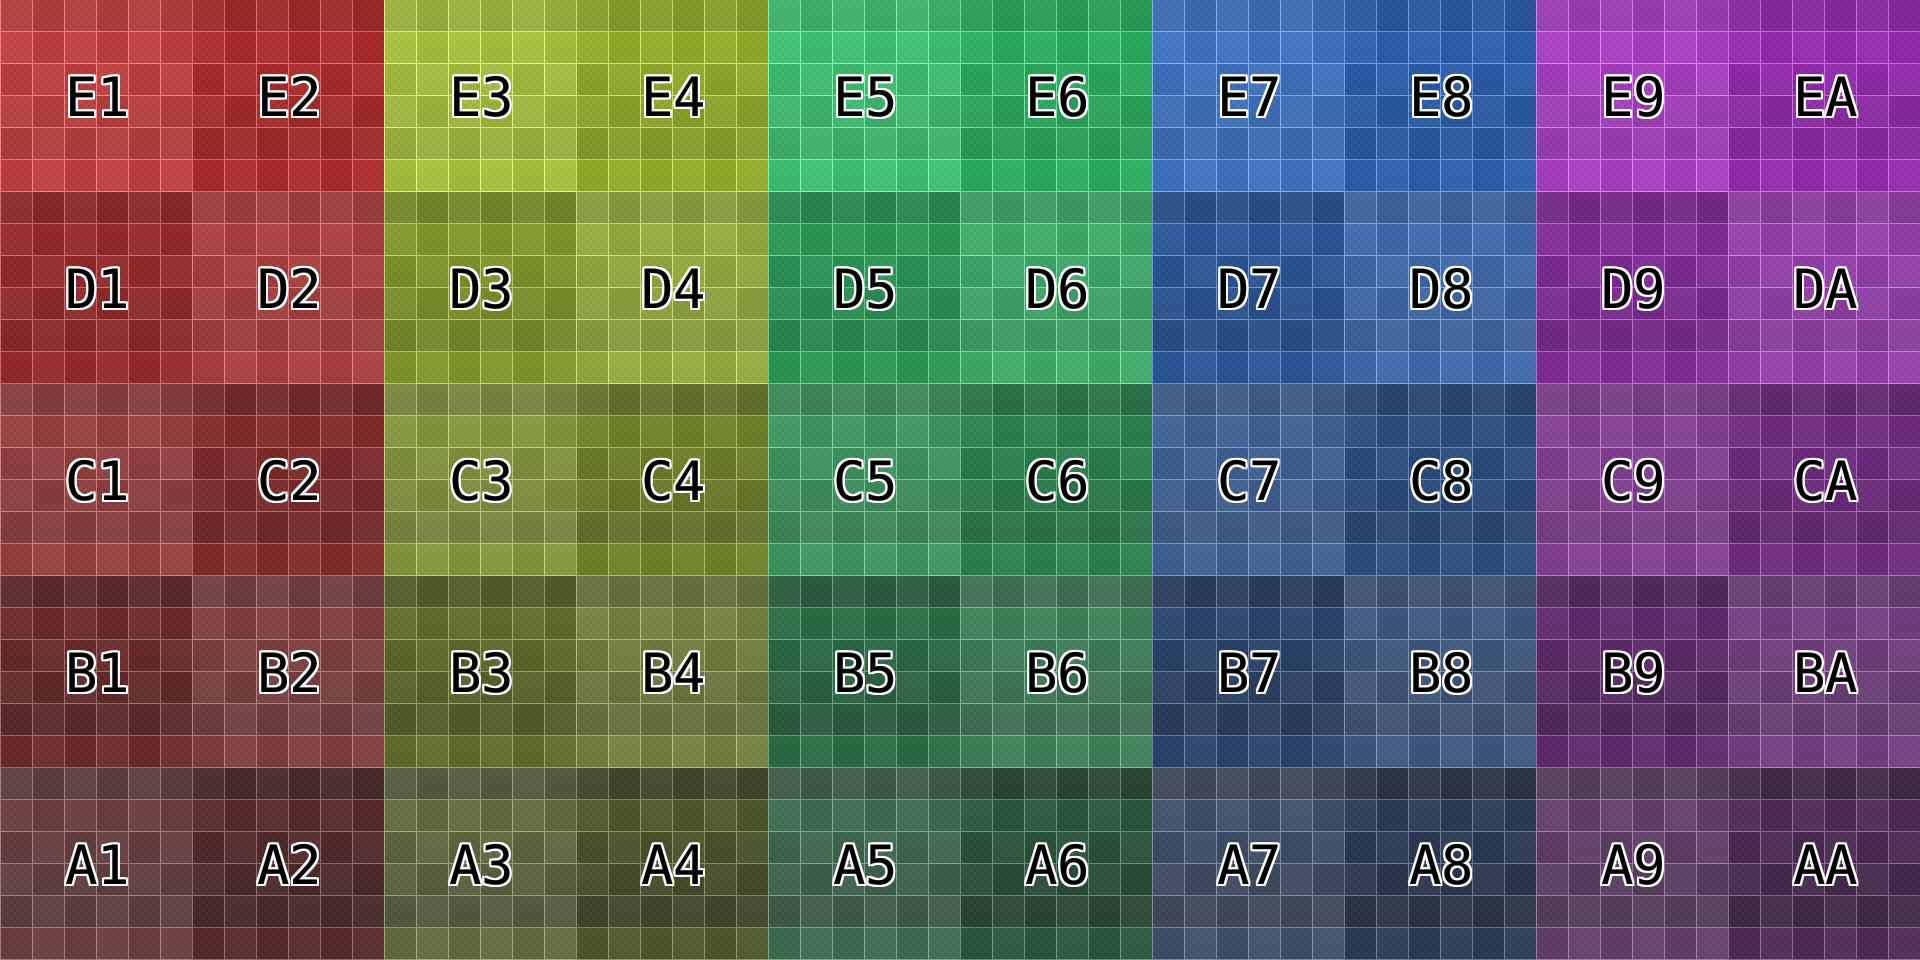
So i did a little “reshuffle” script with imagemagick… mainly because i wanted to learn about image stacks… ( which didn’t worked at all )…it’s not perfectly reassembling the original algorithm and also therr are proplems with some overlapping characters (in the example mainly 4 and A)… but for now here is the result for 1920x960 with 192x192 grid…
Edit: and instanlty ( 15min later ) i found a better solution:
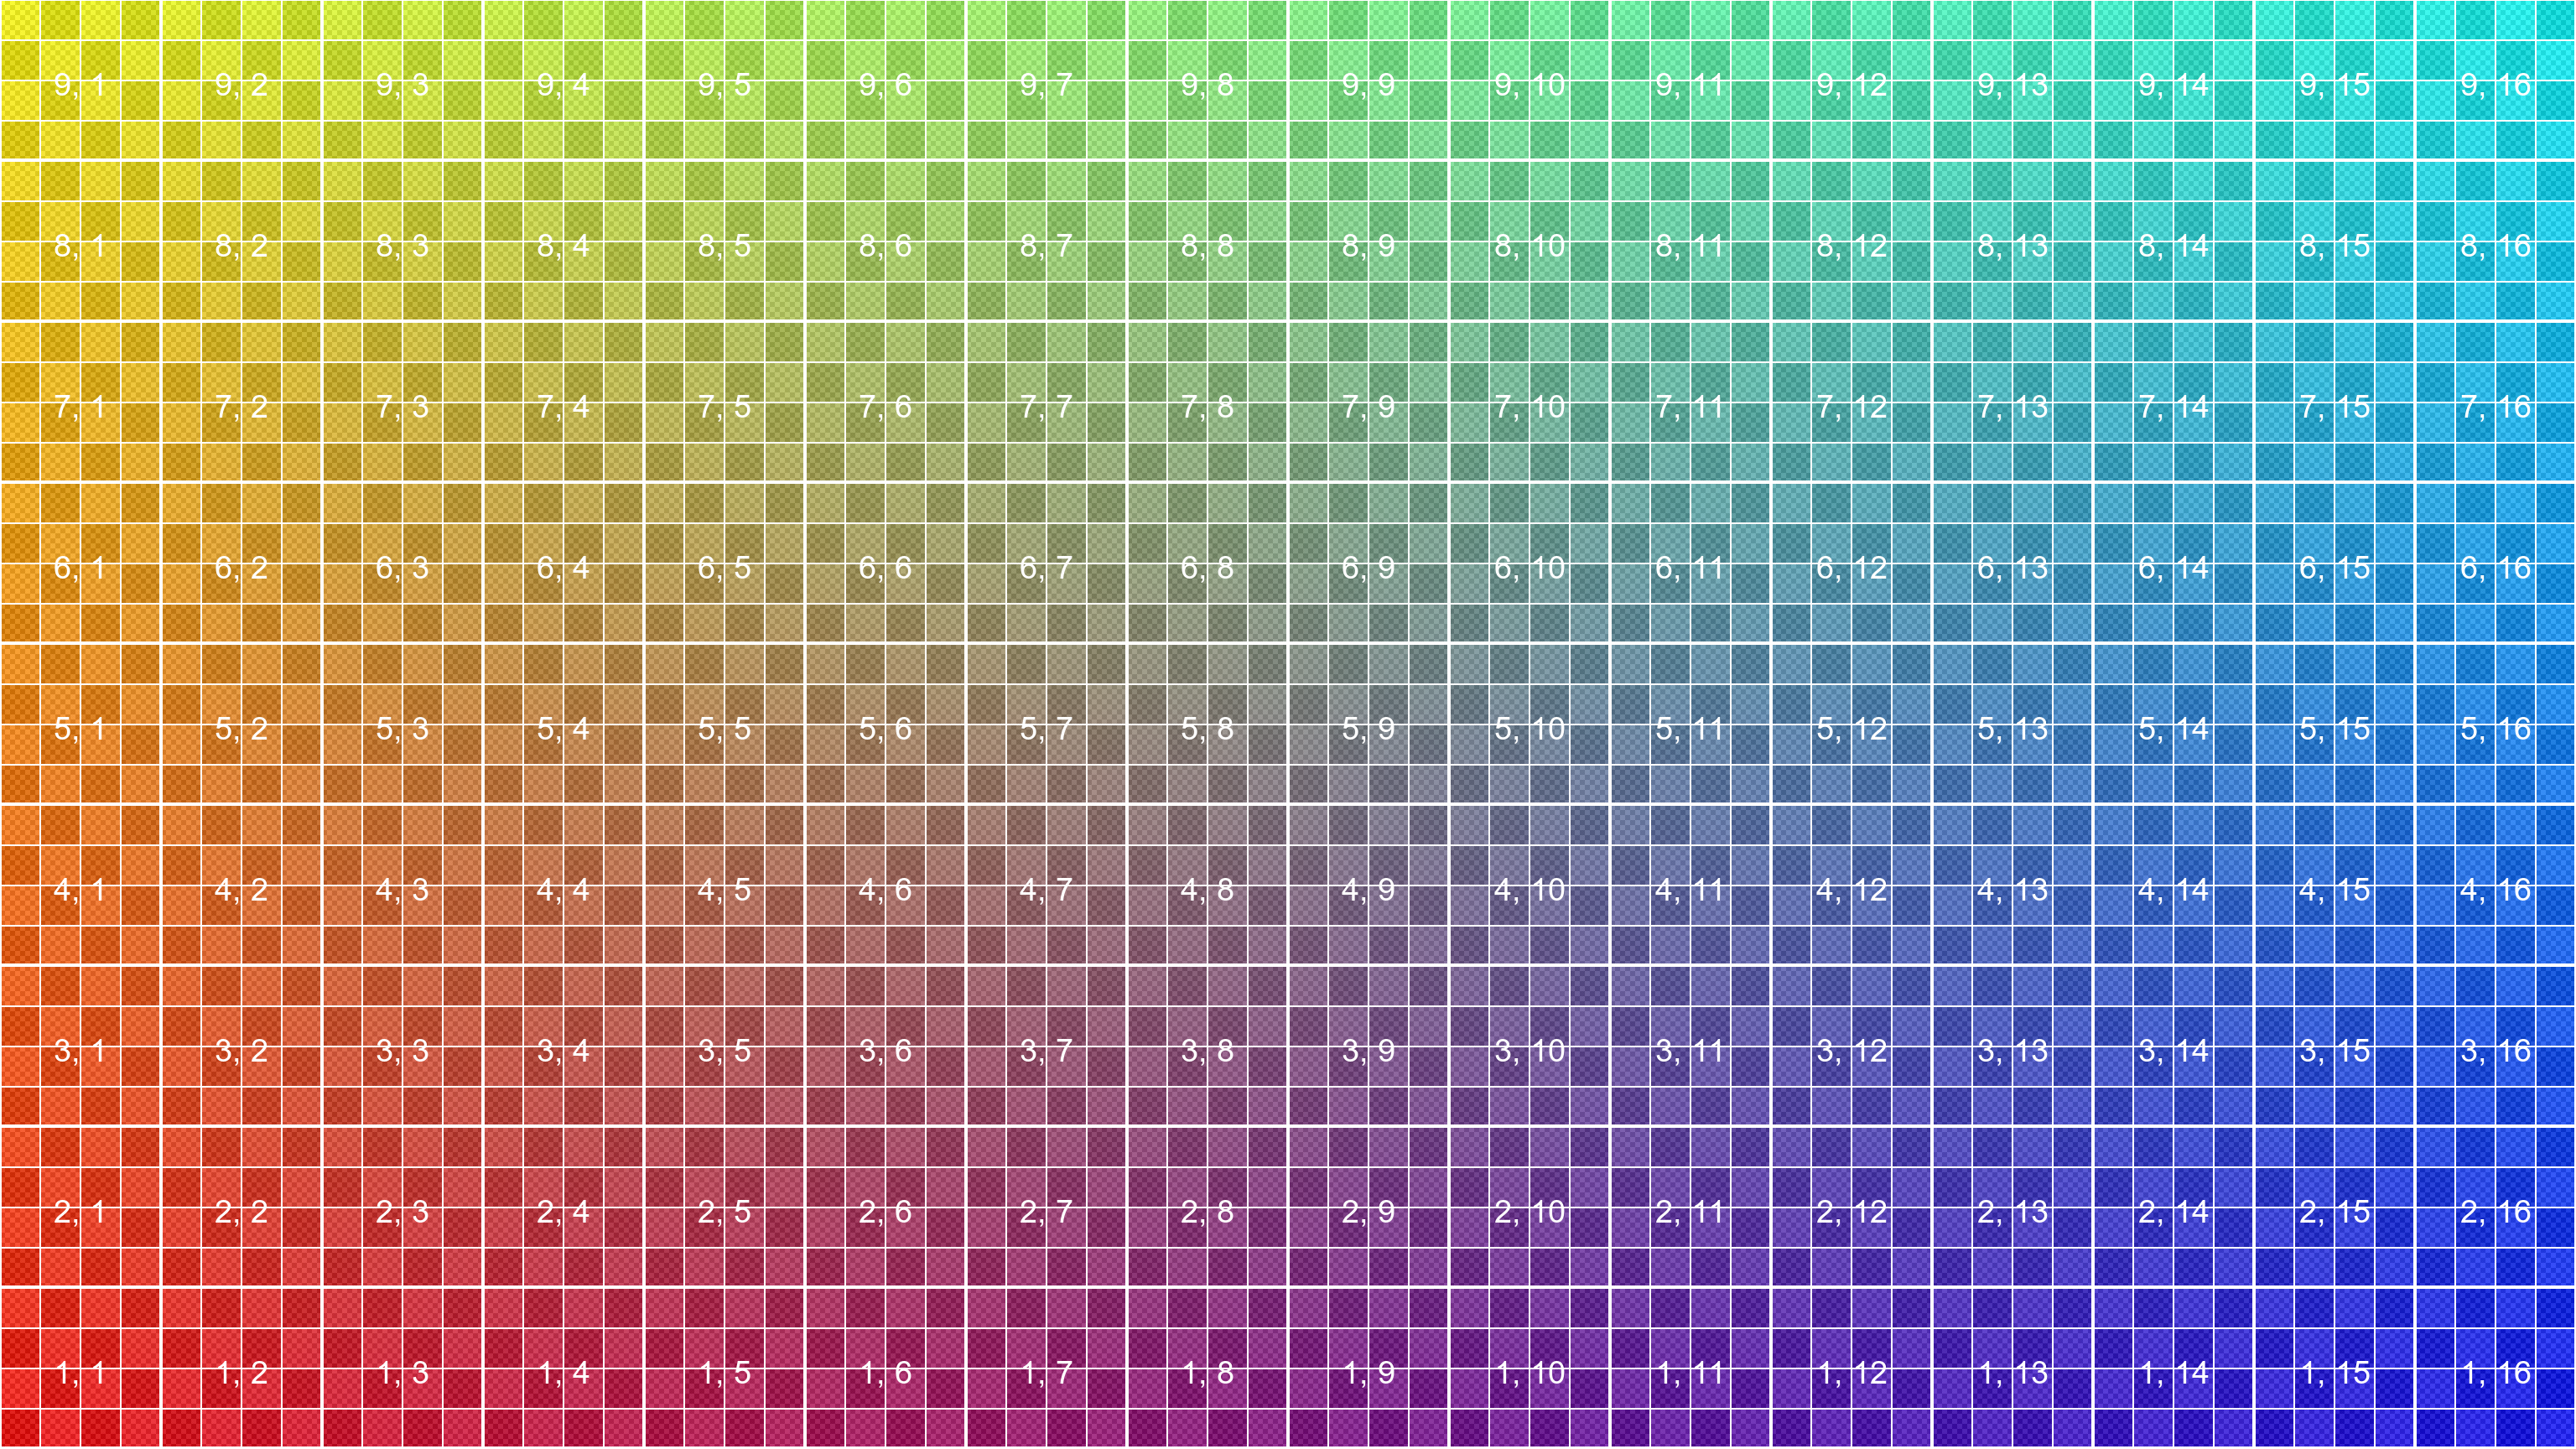
I looked through the code you sent me and I haven’t used it yet but I did see how it was all being put together. I like your colors better, but I’ve combined my own Python script output for the box labels and come up with something I like quite a bit.
Looking at yours I realized there was a missing part in mine… Stare at a problem long enough and the biggest parts can become invisible!
I looked through that code you shared and then I used a combination of Affinity Photo’s Procedural Texture to create the checkers (but could have used anything with easy controls for the pattern) and my Python text pattern script.
I made an image the pixel size of what I am working on. 192x192 in this case.
I made a 4x4 checker, a 32x32 checker and a pixel level checker which for this was 192x192.
I set the pixel level checker to 5%, and everything else to 10% opaque (90% transparent).
I then multiply my canvas dimensions by my full wall size: (16 wide, 9 high for this project), and tile my checkers across the image.
This is what I had forgot, and it brings it all together: Now I add one more checker layer at the wall size: 16 x 9 for this.
Grid lines are laid in on top of the checkers as a group and I can reduce their visiblity as desired. 1 pixel edge, 2 pixels line. This way when it tiles it is 2 pixels lines everywhere but the outside edge.
My Python script generates the text overlay and the thicker grid lines and I lay that over the top of it all.
I can now put any colors I want under all this, and it creates the color shifts for me. The current color scheme is a horizontal red to blue gradient overlayed with a vertical green to alpha 0 gradient with an Add transfer. Because the color shifts in two directions I can use the clean color image to help locate LED modules that are intstalled the wrong way. But the Blender-ized version is much more fun to look at.