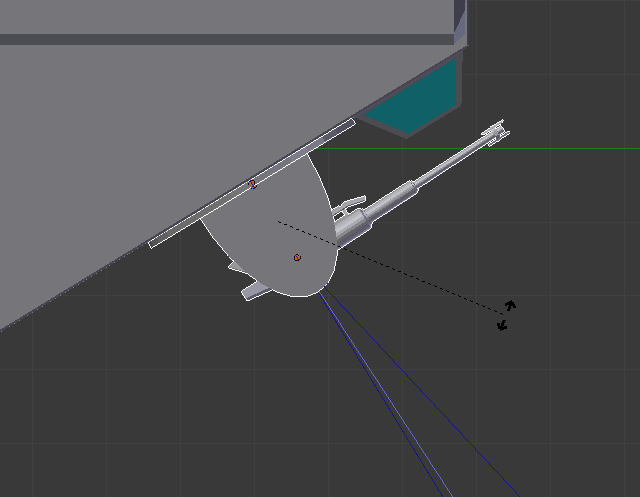
Hopefully I can explain myself properly here. I’m building a turret (pic below) that is mounted at an angle of about 33 degrees from parallel to the ground. Currently I have it split into 2 groups: the entire thing, and the guns.
I need to be able to set the Z axis for all the parts to the exact same spot, so that it rotates correctly; however i need the Z axis to not move when I rotate the guns around their X axis.
So in the above pic, we’re looking at it from along the X axis (obviously) and when I hit R>Z>Z to rotate around the objects Z axes, there’s 3 different axes.
Now, I know I can rotate some of the parts on their X axis to fix the Z axis, but that won’t solve the problem. I need to set a specific Z axis that won’t change no matter what I do with the X or Y axes.
Set Transformation Orientation to Normal and pivot point to Active element and select last gun base object.
or…
Set Transformation Orientation to Normal and pivot point to Cursor and put cursor to center of your gun base object.
If the above is too much hassle you could use an armature for this… have the ship’s body as 1 bone, then the turret base(s) as another bone, and the gun a child bone of the turret base bone to change its pitch.
Well, as I fiddle with it, that work about 50% or so.
If the guns are in their “rest” position (as in the picture above), all works well. However, once they are rotated around their X axis (for animation), they no longer keep the original Z axis of the turret base.
Look at the 3D manipulation widget, it shows the axis you have to rotate.
If you dont Apply the rotation then you can rotate it along normal no matter what is its XYZ rotations.
Are you talking about object mode, or did you try with an armature?
Here is an example I’ve created for you, using an armature:
In my opinion ^that’s the best way to do this. When you’re working with multiple objects it’s difficult to rotate them together without using 3d manipulator or active object as the pivot point, since the objects have different origins. Otherwise it will take an average of the origin locations and rotate based off of that.
I’m playing with that file (thank you!) and so far it looks like exactly what I need. However, I’m having trouble figuring out how to attach the armature to the object. I’m sure it’s some really simple thing I’m overlooking, but it’s jamming me up.
Well since you are using solid objects, its quite easy. You can just make vertex groups named after each bone, and assign the vertices to them.
For example, the main hull lets name that bone ‘Main’. You would go into edit mode on the ship’s hull, select all of the vertices, go to ‘object data’ tab, create a vertex group called ‘Main’. Then click the ‘assign button’. Then the object needs an armature modifier on it pointing to the armature you created. Then just repeat this step for everything else. http://oi60.tinypic.com/fd6n10.jpg
Just remember the center of rotation for objects is going to be where the bone’s base is located. So when you are adding the bone for the turret base (or anything), you would go into edit mode on the turret base, select the bottom vertices, shift+s and click ‘cursor to selection’. Then go into edit mode on the armature and add the new bone with shift+a. http://oi57.tinypic.com/121dapv.jpg
Well, that did the trick. I’m still getting used to it, but it’ll work.
Sadly, I did run into one small hitch. I don’t know how far to rotate the bones to match the turret base. Is there any way to find the exact angle a part is at relative to the Y axis?
That would depend on if you have applied rotation to the turret object. If you haven’t, then it’s easy. You would just look at the 3d view transform menu (hotkey N) and look at the rotation degrees for the axis you want on that object, go into edit mode on the bone and rotate it for that degree (eg. hotkeys R, X, 45). You might need to use the 3d cursor as your pivot point for this, on the bone’s base. And if you need to change the bone’s Z axis, you will want to change the bone’s roll.
If you have applied object rotation, then I’m not quite sure how you would figure that out (maybe somebody else knows… or maybe you have to mess around with the protractor tool). If that’s the case I hope you have an original duplicate of the turret !