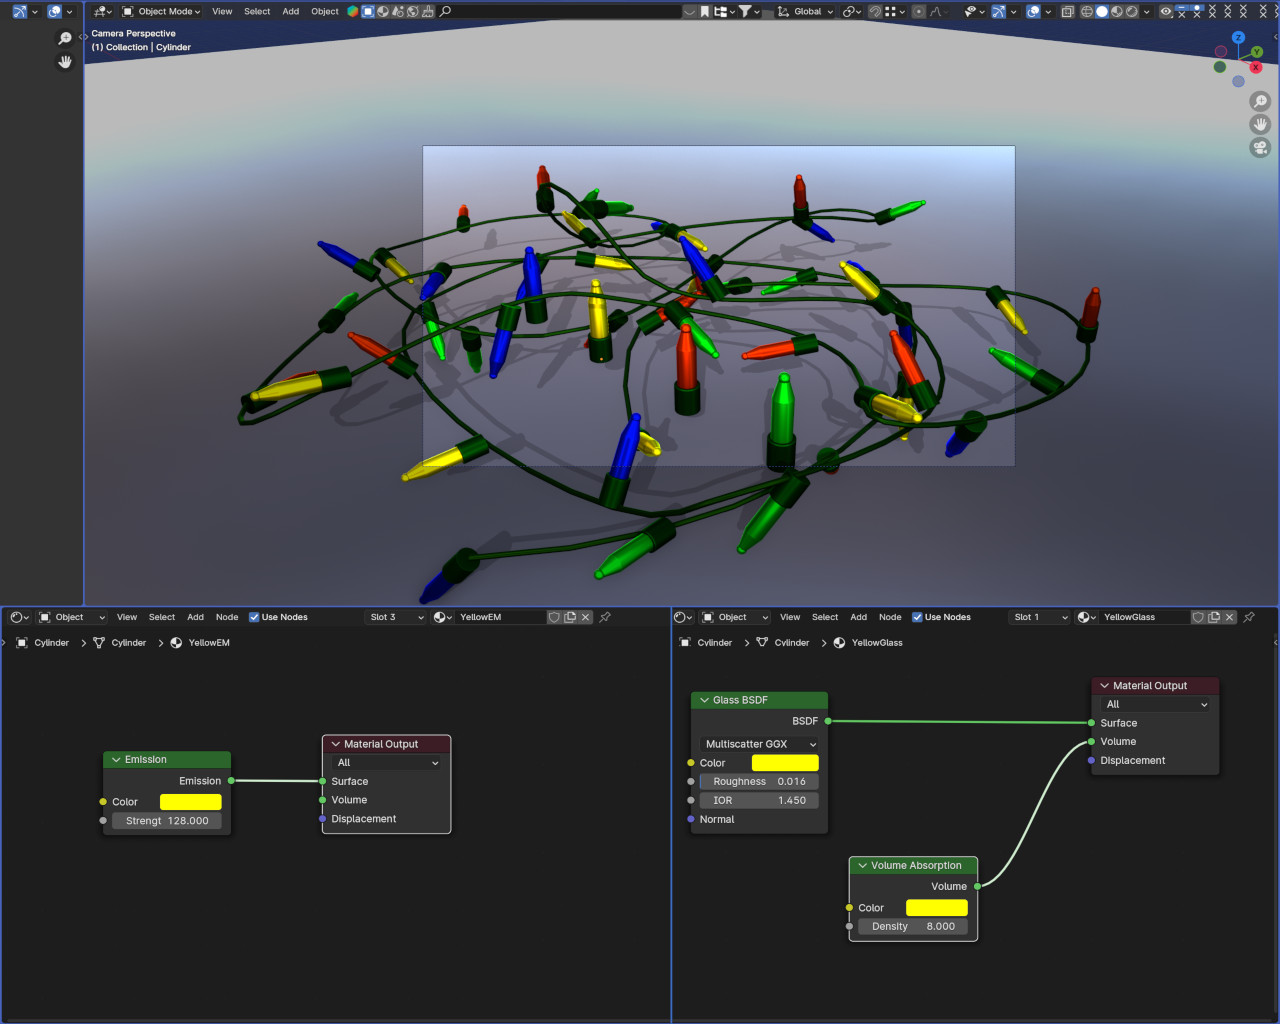
Hi guys I’m trying to replicate these lights and make them AS close to real as possible, but I’m having a lot of problems. i use Blender 4.0
bulb size is 5mm , and light intensity is 0.5w ( calculated value ) but im scaled it 10x ( light intensity and size also multiplied by 10 ) because its really hard to navigate .
1 - I can’t get any caustics at all, although all possible settings from samples to clamping checked to maximum .
2 - real lights use little wolfram string , which is not possible to replicate in blender , so i use point light here , and its looking pretty bad to me .
3 - the bulb itself gets no light , because it has thickness , so i guess Blender really struggling with all that . another thing i noticed , that in real life light bulbs are not affected by the environment at all , they look exactly the same on daylight as the night ( the difference is only visible on photos ) but in Blender … uhhh
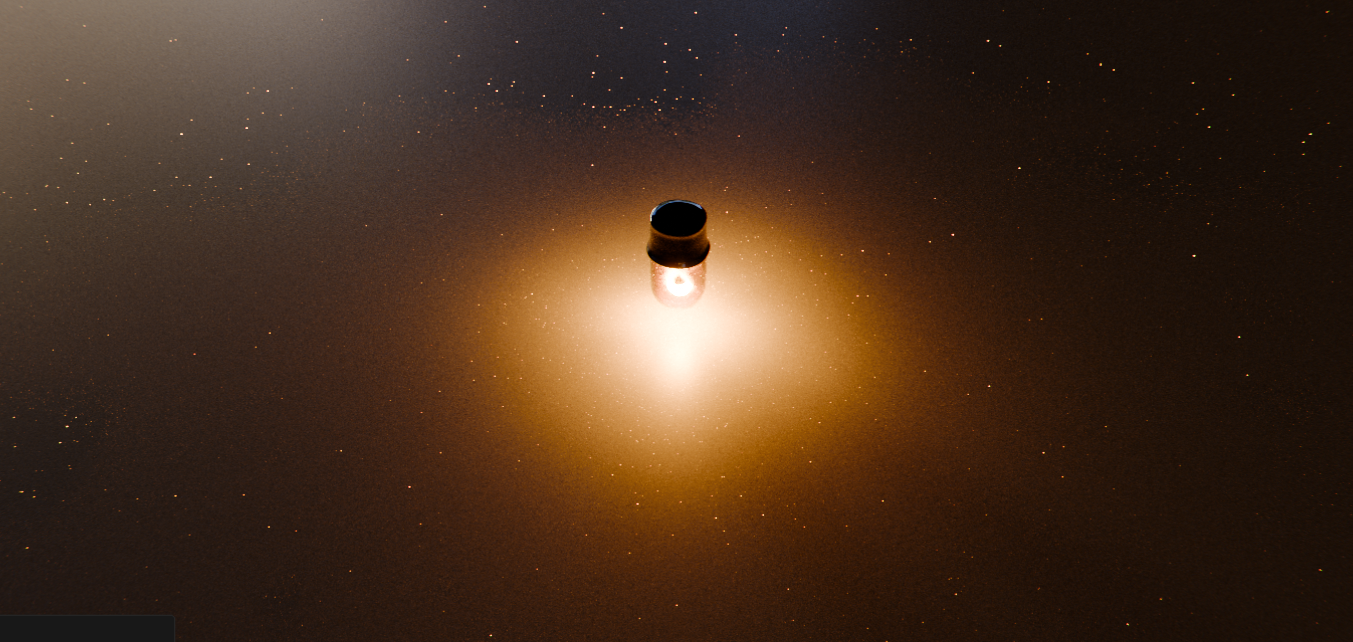
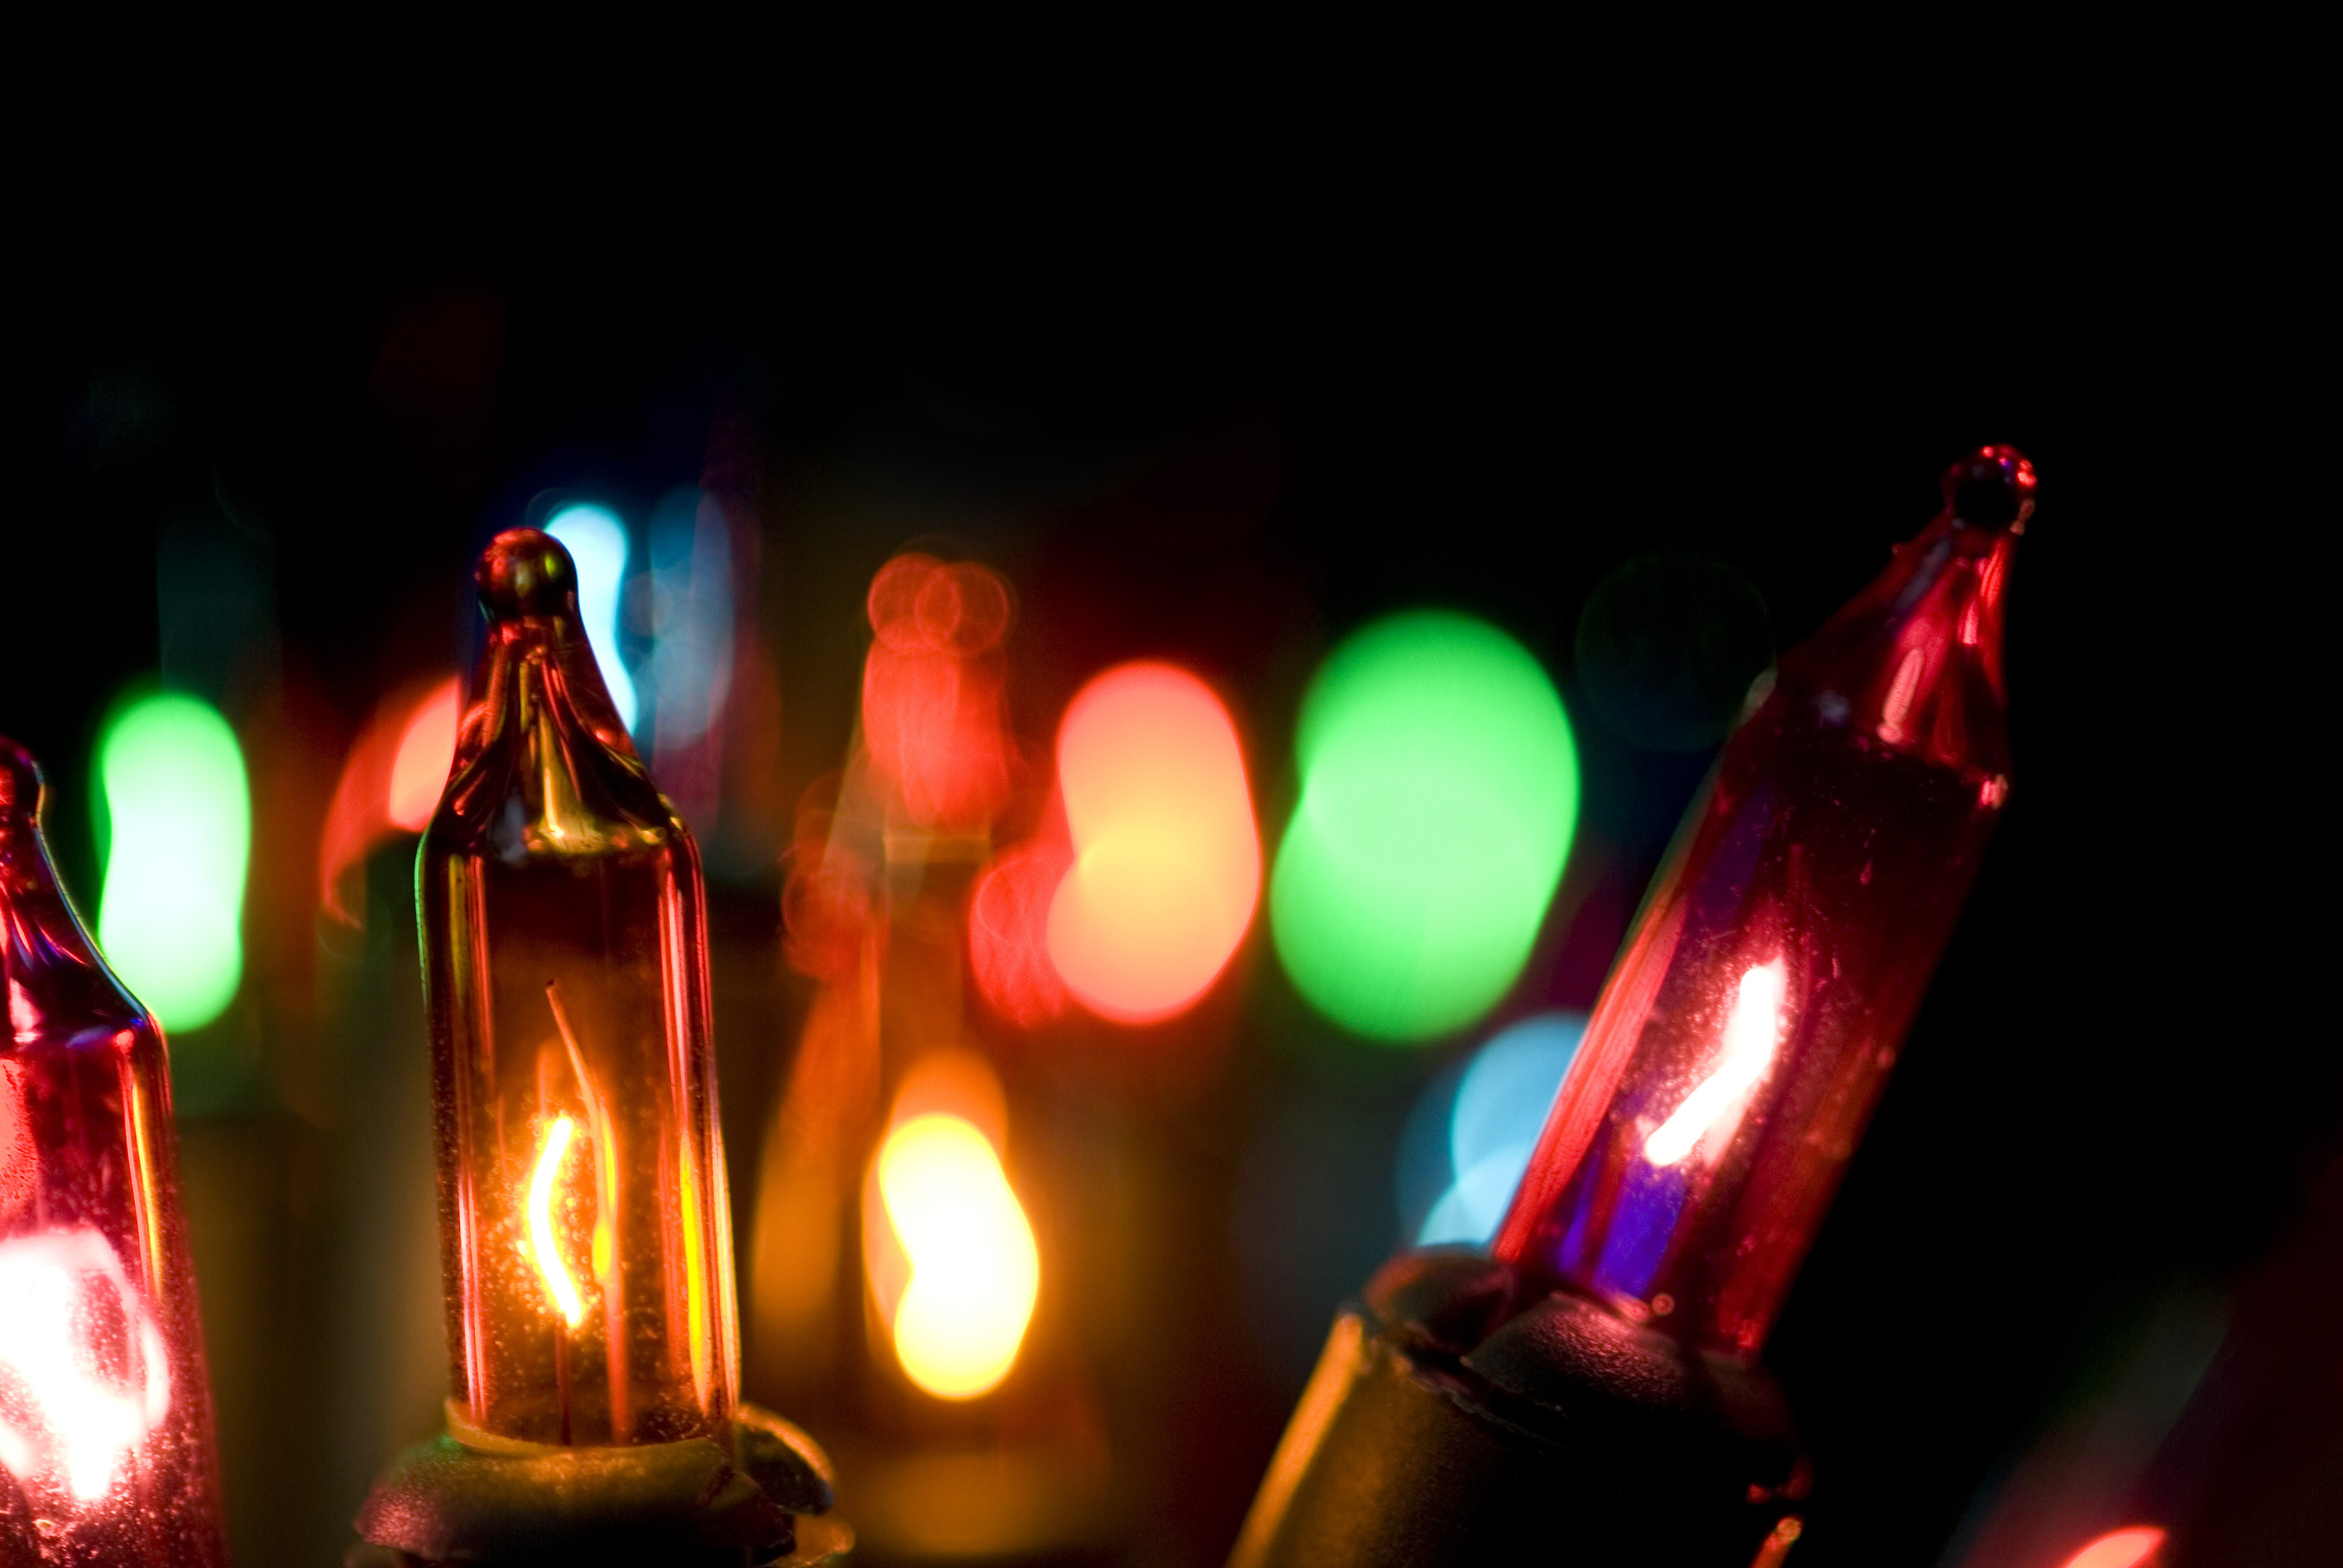
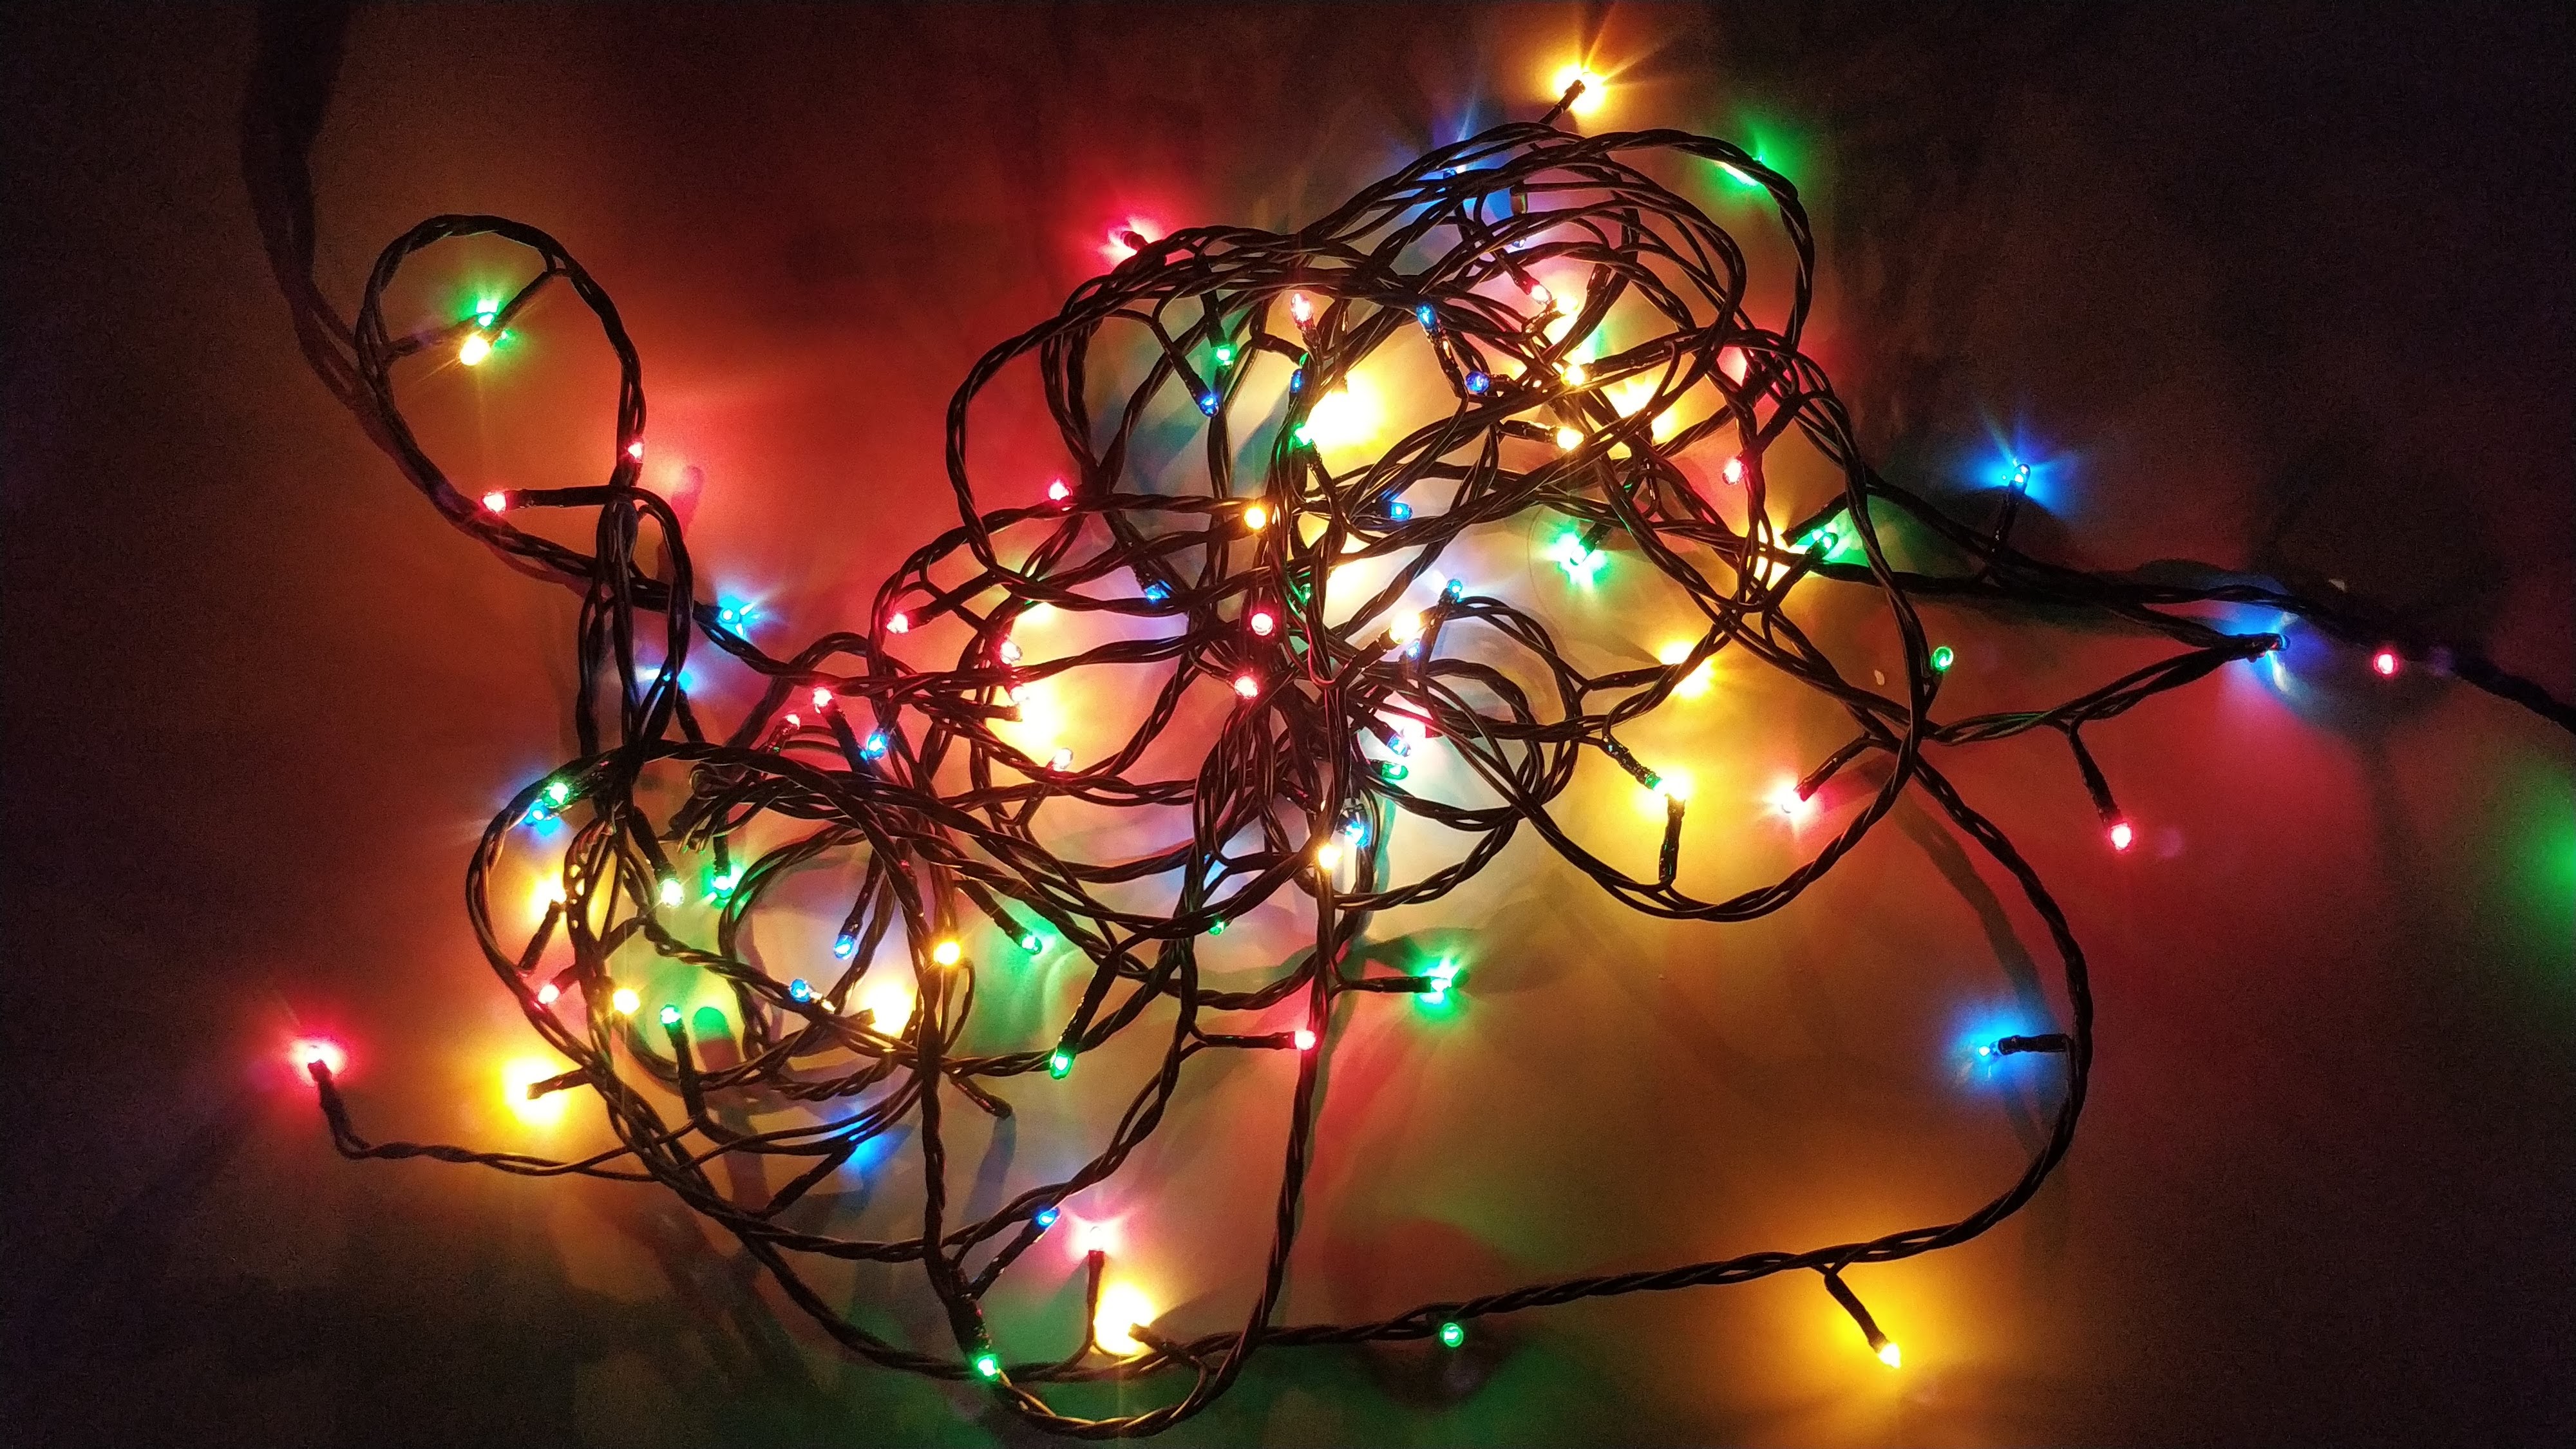
here`s some renders ( little bloom in viewport comp ) .and the references also here
I would use the compositor for glow and streaks, model the filament give it loads of coloured emission, give the glass thickness and coloured volume absorption.
12 light bounces in render pref and loads of samples (like 4000 min).
Side note AGX looks much closer to the reference than filmic for this one.
I haven’t tried it in a similar case, but you could probably also do it with path guiding. It’s going to be slow, but it might work if it’s just for 1 image.
Yep , I’m using path guiding , shadow caustics , Agx , and light point inside of glass already , I’ll check the volume absorption thou, thanks. And sure i will use compositor for all camera effects, i forgot to mention that
Path guiding and shadow caustics don’t currently work together - you have to use one or the other.
I have also found that shadow caustics/MNEE have significant issues when trying to render caustics from glass that is not solid (i.e. a glass shell - which is your use case here when trying to model a thin walled glass bulb). Take a look at the test images I made in this thread:
IMO - you’d be better sticking to just path guiding.
Yes I am afraid that my test did not address your main concerns, there are practically no caustics at all in it and the emission values were ridiculously high to get the light to shine through the glass.
The volume absorption helps with the look of the glass itself but also absorbs even more light so that is another reason to put the emission even higher.
Path guiding is probably the best option but on my CPU it is VERY slow.
I am trying to do a new version with the shadow caustics but find it tricky to get them to look good if I succeed I will post.
Yes it is Christmas soon and we all want lovely lights!
Make sure to set “filter glossy” to 0 (or a very small value). It’s usually used to blur fireflies, but path guiding can actually use those fireflies and complete the full caustics. If you set it at the more traditional values, caustics will be blurred.
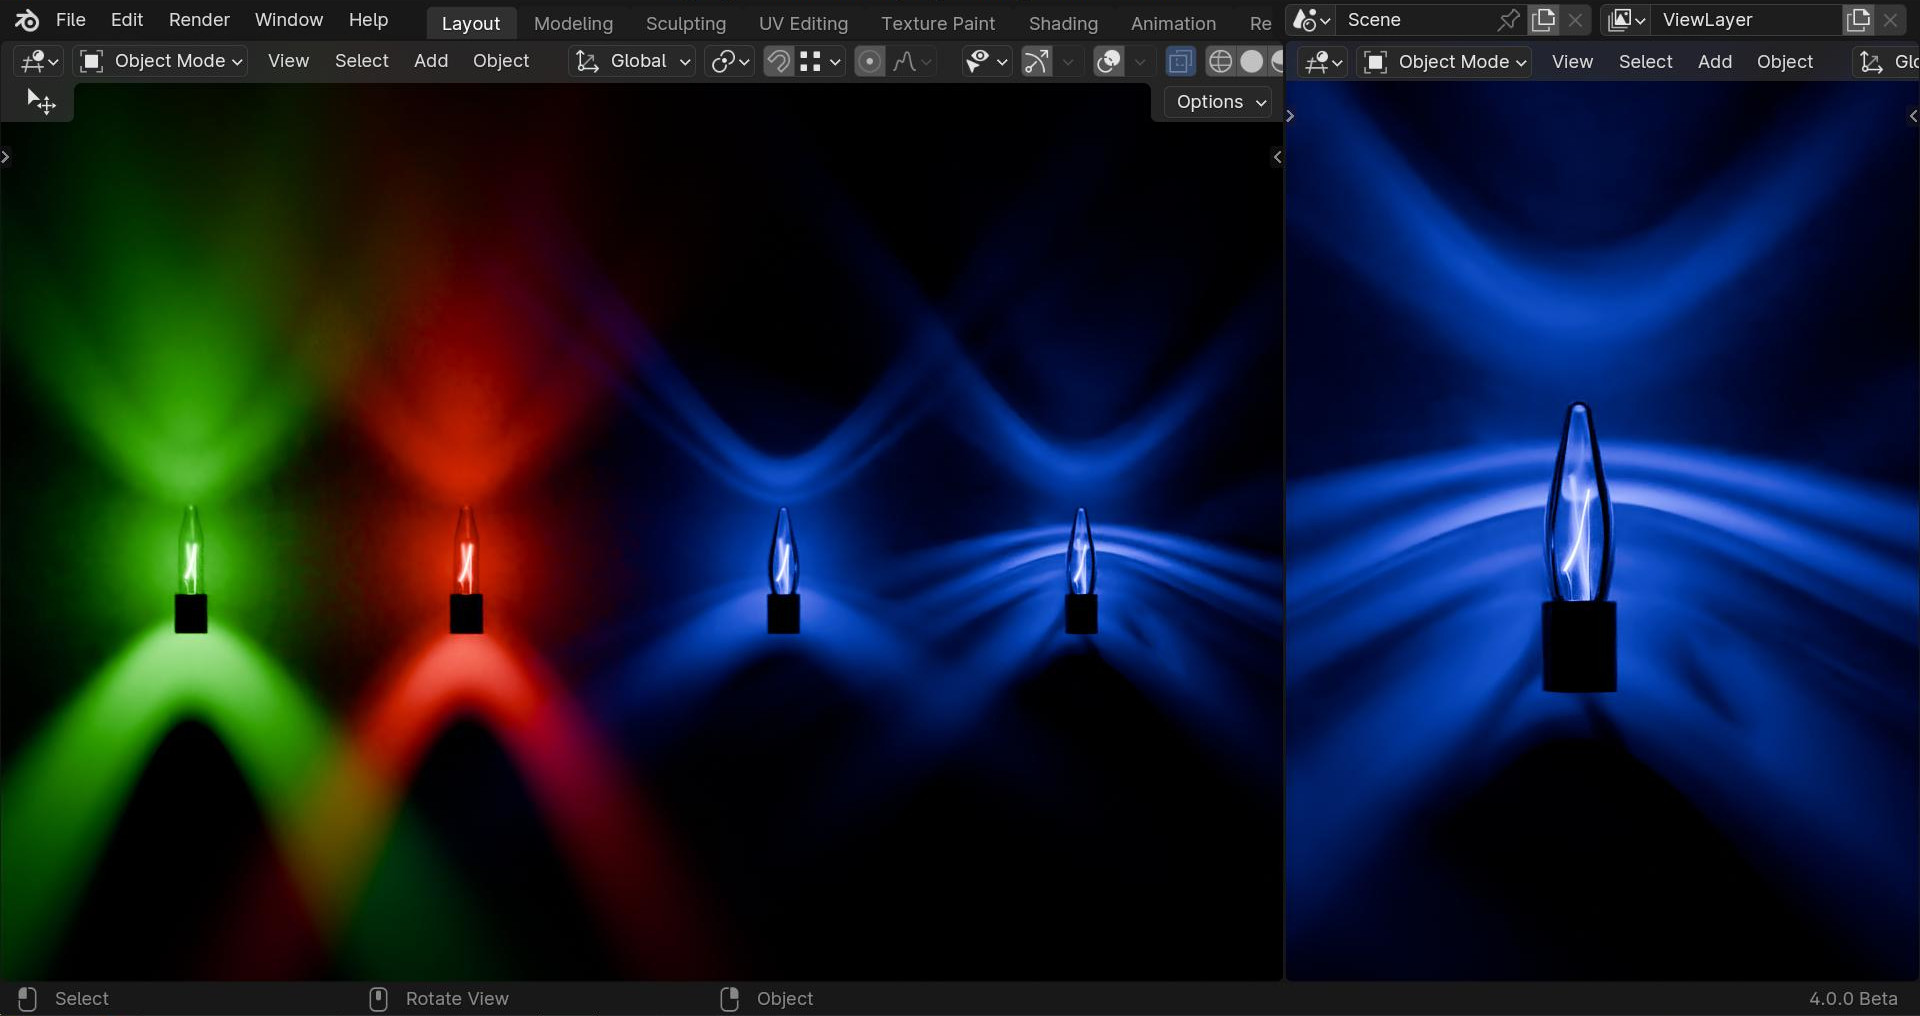
Here are my shadow caustics experiments, I put a coloured point lamp inside each lamp (the filament is also there.) I turned off multiple importance for the point lamps to get rid of the reflecting orb.
This is just the lamps with a plane behind them.
The caustics are not exactly what I was expecting but this is the result:
The green and red lamps are the same as before with caustics (I did correct the filament, the solidify modifier was turning them inside out!) I aslo gave the glass surface the lamp colour too like JaAlVir657 did.
The 2 blue ones I changed the geometry for a more bulb like shape (no sphere on top and rounded sides) the second blue one has displacement (yea a bit overkill).
There is no compositing on this one, also nothing else to reflect on the glass just what you see.
The “fake” Shadow caustics option is fiddly. you have to check various settings for them to work.
1 In the point light settings check the shadow caustics checkbox.
2 In the object with the glass “object settings - shading - cast shadow caustics”
3 in the object you want the caustics to show on "object settings - shading - receive shadow caustics.
4 the glass object has to have smooth shading set.
All 4 of those things are essential for it to work.
Also.
Use a small light radius (if not the caustics get blurred out and you will not notice them) I find zero too harsh so something like 0.02 to blur them a little.
Uncheck multiple importance so the point does not give a nasty orb in the glass reflections.
The last lamp has a little displacement (I think I left it too low to have much effect if you turn it up you will see it effects the caustics)
I forgot to mention that in the last lamp has 4 point lights inside that is what gives it more streaks.
The IES file makes it easy to give the caustics effect of lighting.
If you do not know how to create an IES file, you should use it among existing IES files.
IES files are readily available by Internet search and are also provided by lighting companies.
i already used ies , its tricky because of 0 size of the lamp , so its causing sharp shadows for everything that stands in front of it , also looks very fake
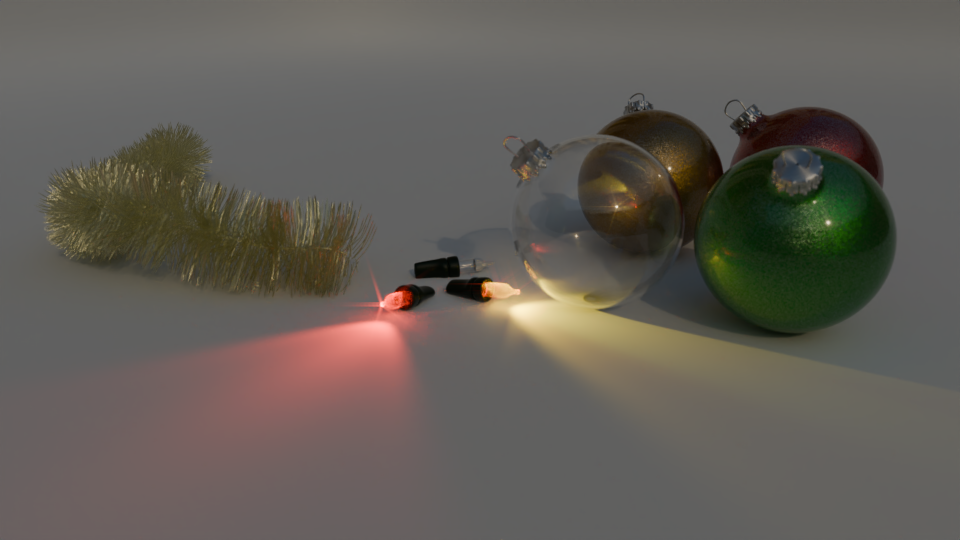
This is probably the best option. Perhaps overlay one or more IES profiles to give a nice caustic based on the shape of the bulb - then apply this to each light.
I tried it on a Christmas scene I have been working on and it looks pretty good (I just chose a IES profile at random - i’m sure there are more interesting ones out there)