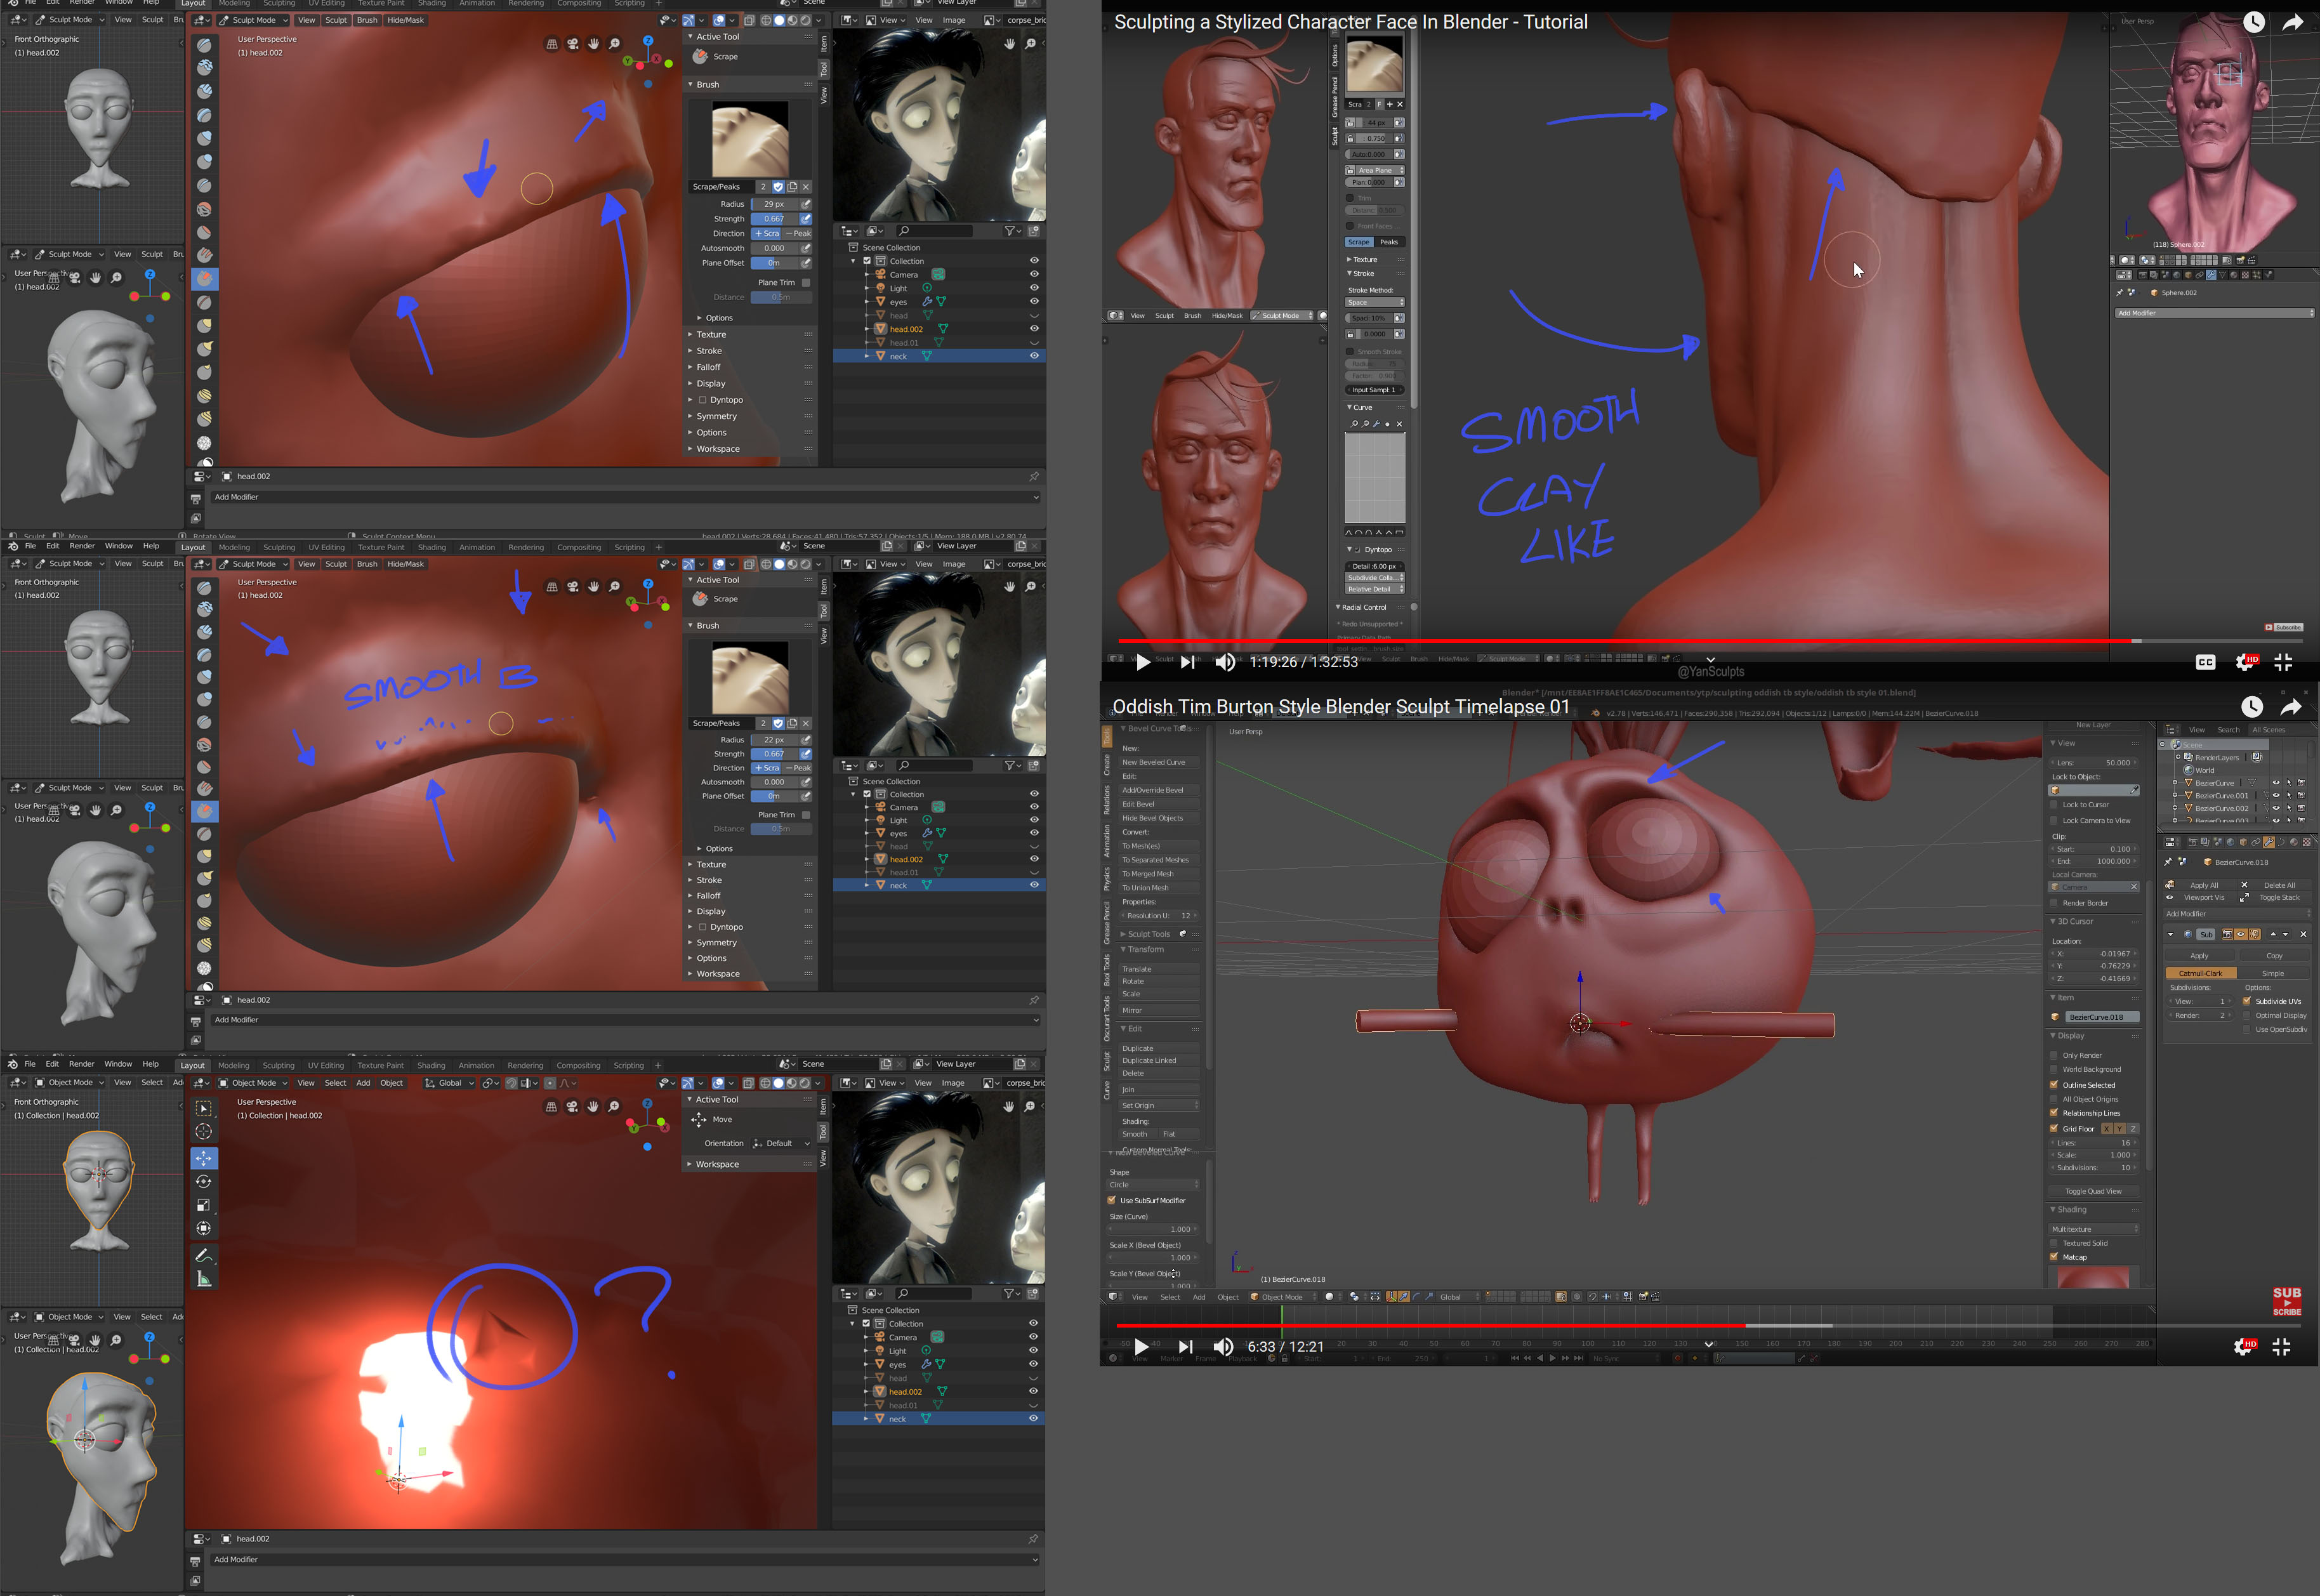
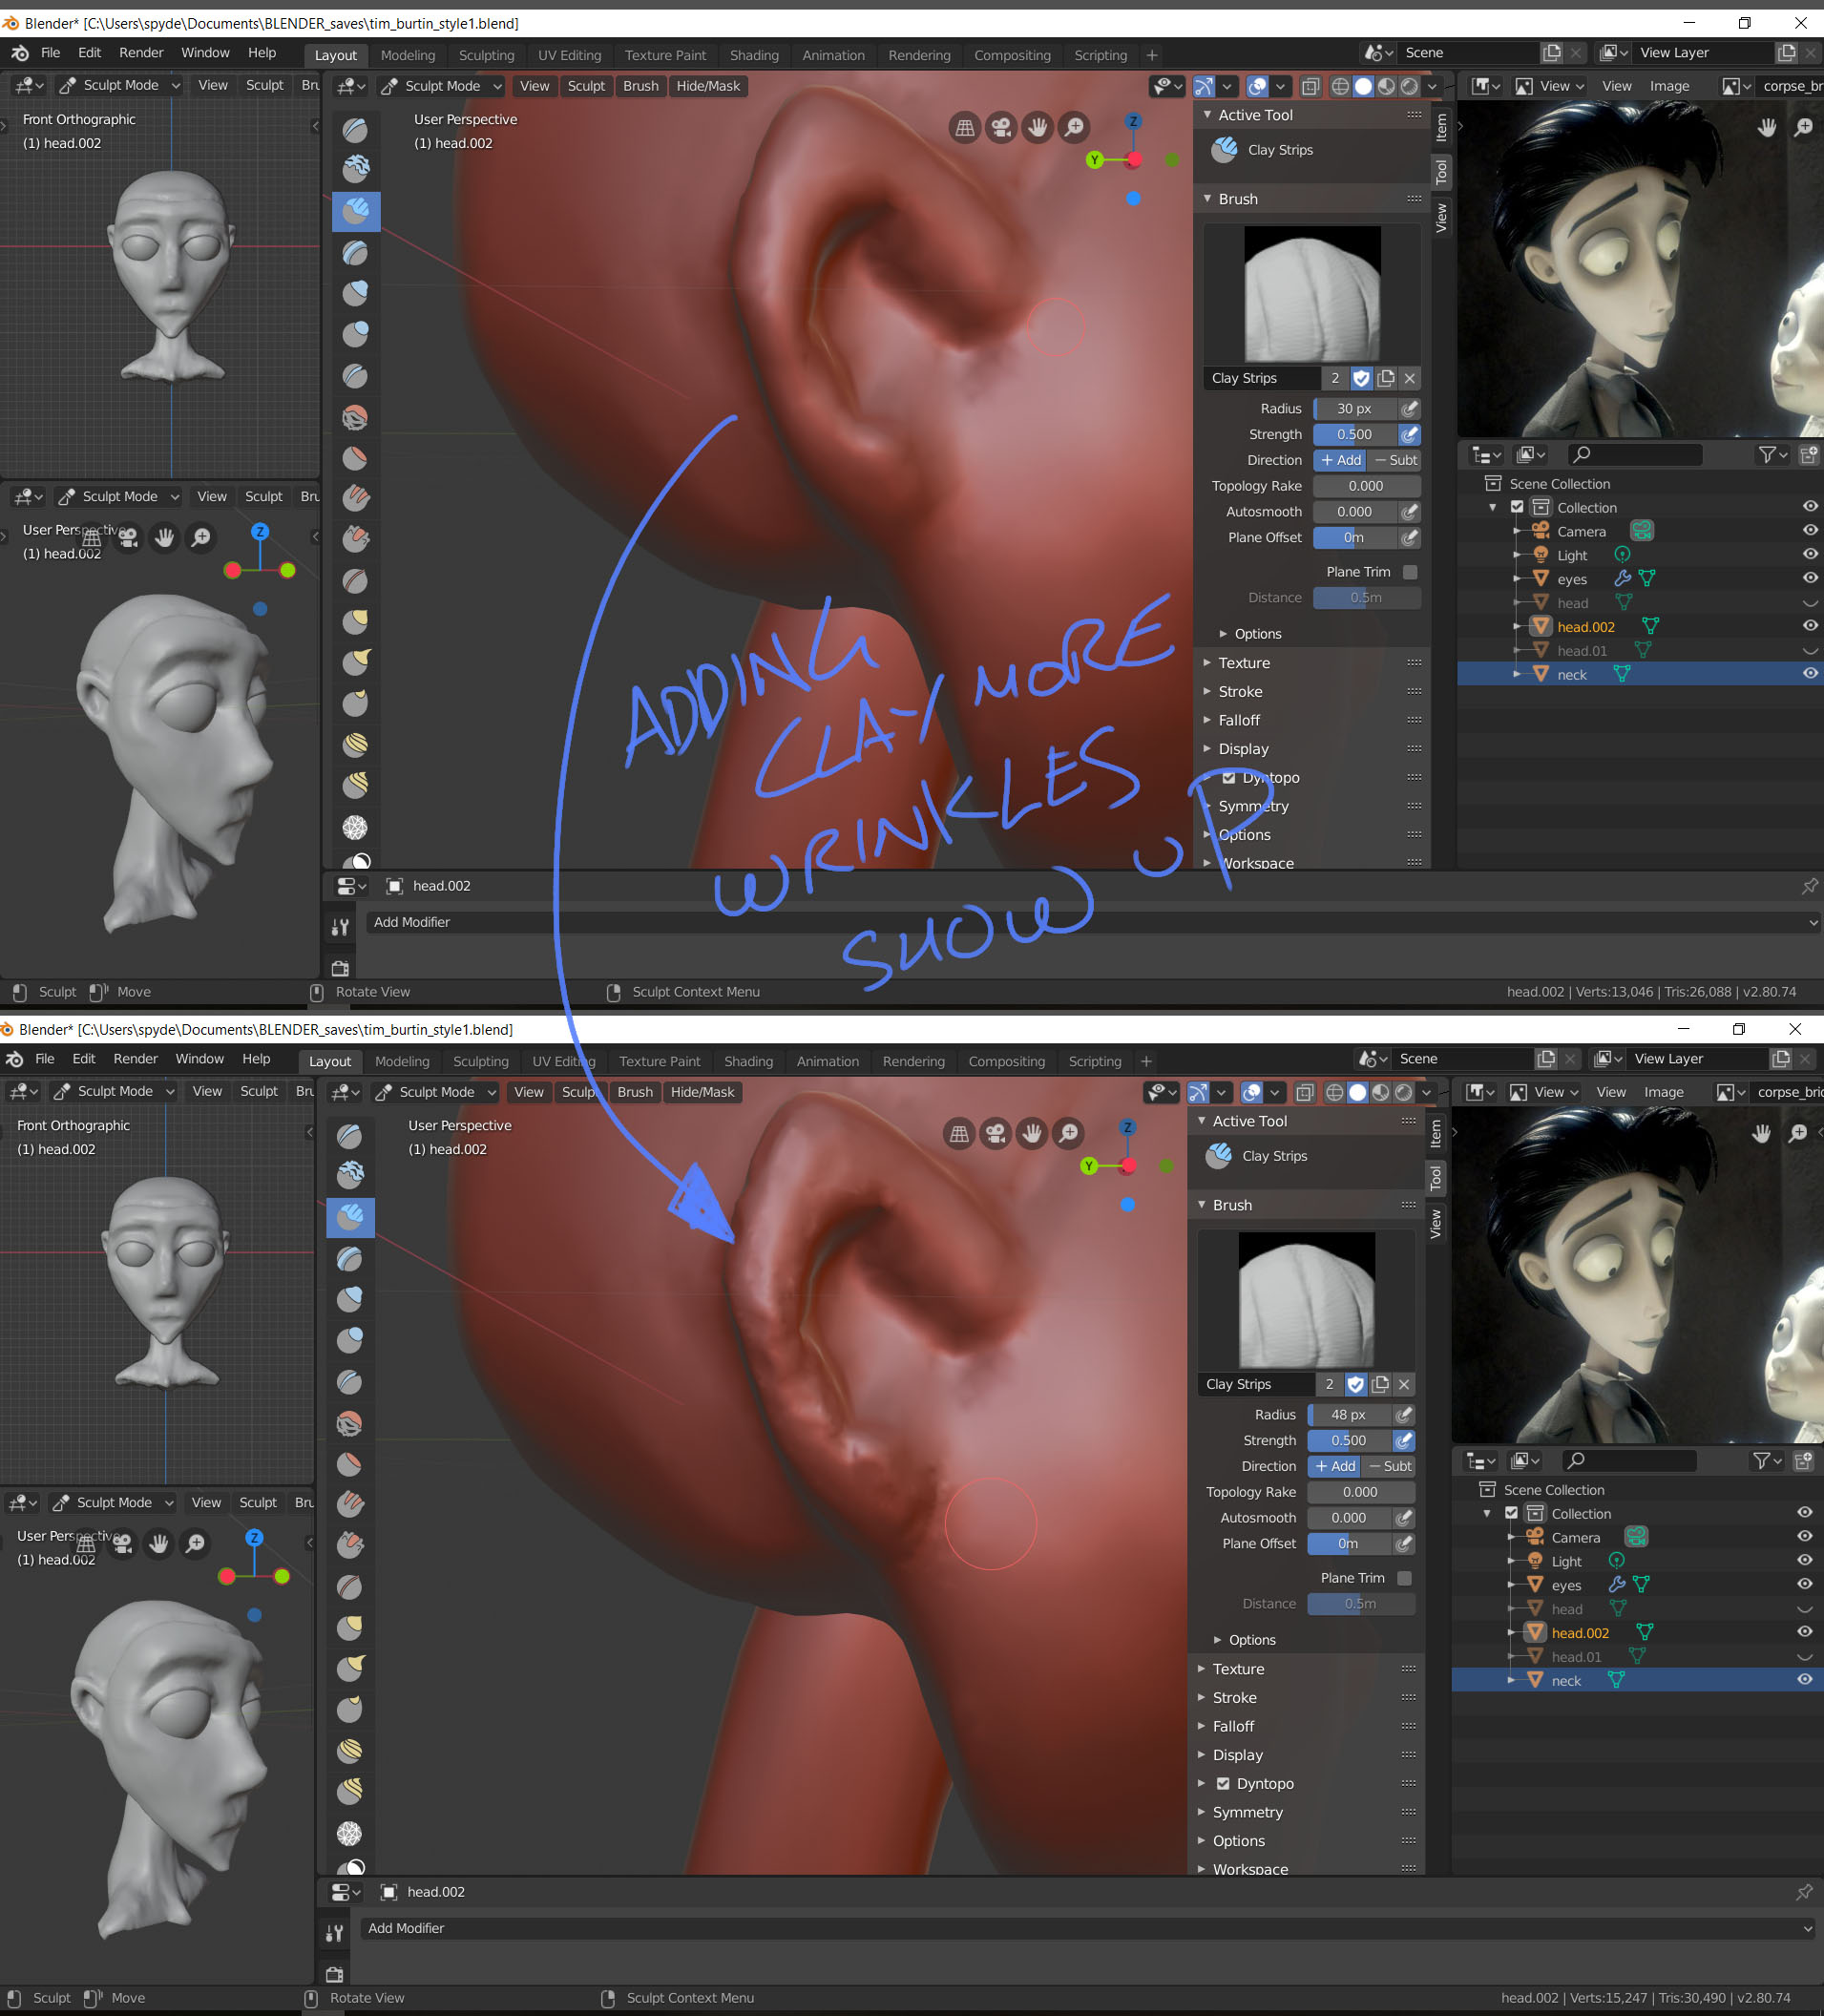
Hi, i have been trying to learn how to sclupt with blender for some time now and i cant seem to figure out how i keep getting a wierd shiny surface after while. This wierd surface would keep having wringkles show up on surfaces near the edge like ears or eye lids. I’ve tried using the smooth tool or clearing doubles,flat brush, but to no avail. I have some screen shots and some comparisons to other sculpts ive been seeing on youtube.When this issue happens i have to keep going back to try and redefine the shape but i will just end up back at the same wrinkle wired edged. X(
Triangles won’t provide correct smooth shading when they are moved out even more with sculpting brushes. Additionally there are not enough of them to give starting geometry for sculpting details.
There are two ways to add more details:
Continue sculpting with Dyntopo, set it to generate slightly more details (you can pick current level of details in Dyntopo settings if using Constant detail method, then adjust it).
Retopo the model with quads and add Multires modifier to continue sculpting by subdividing whole model at once and adding details gradually.
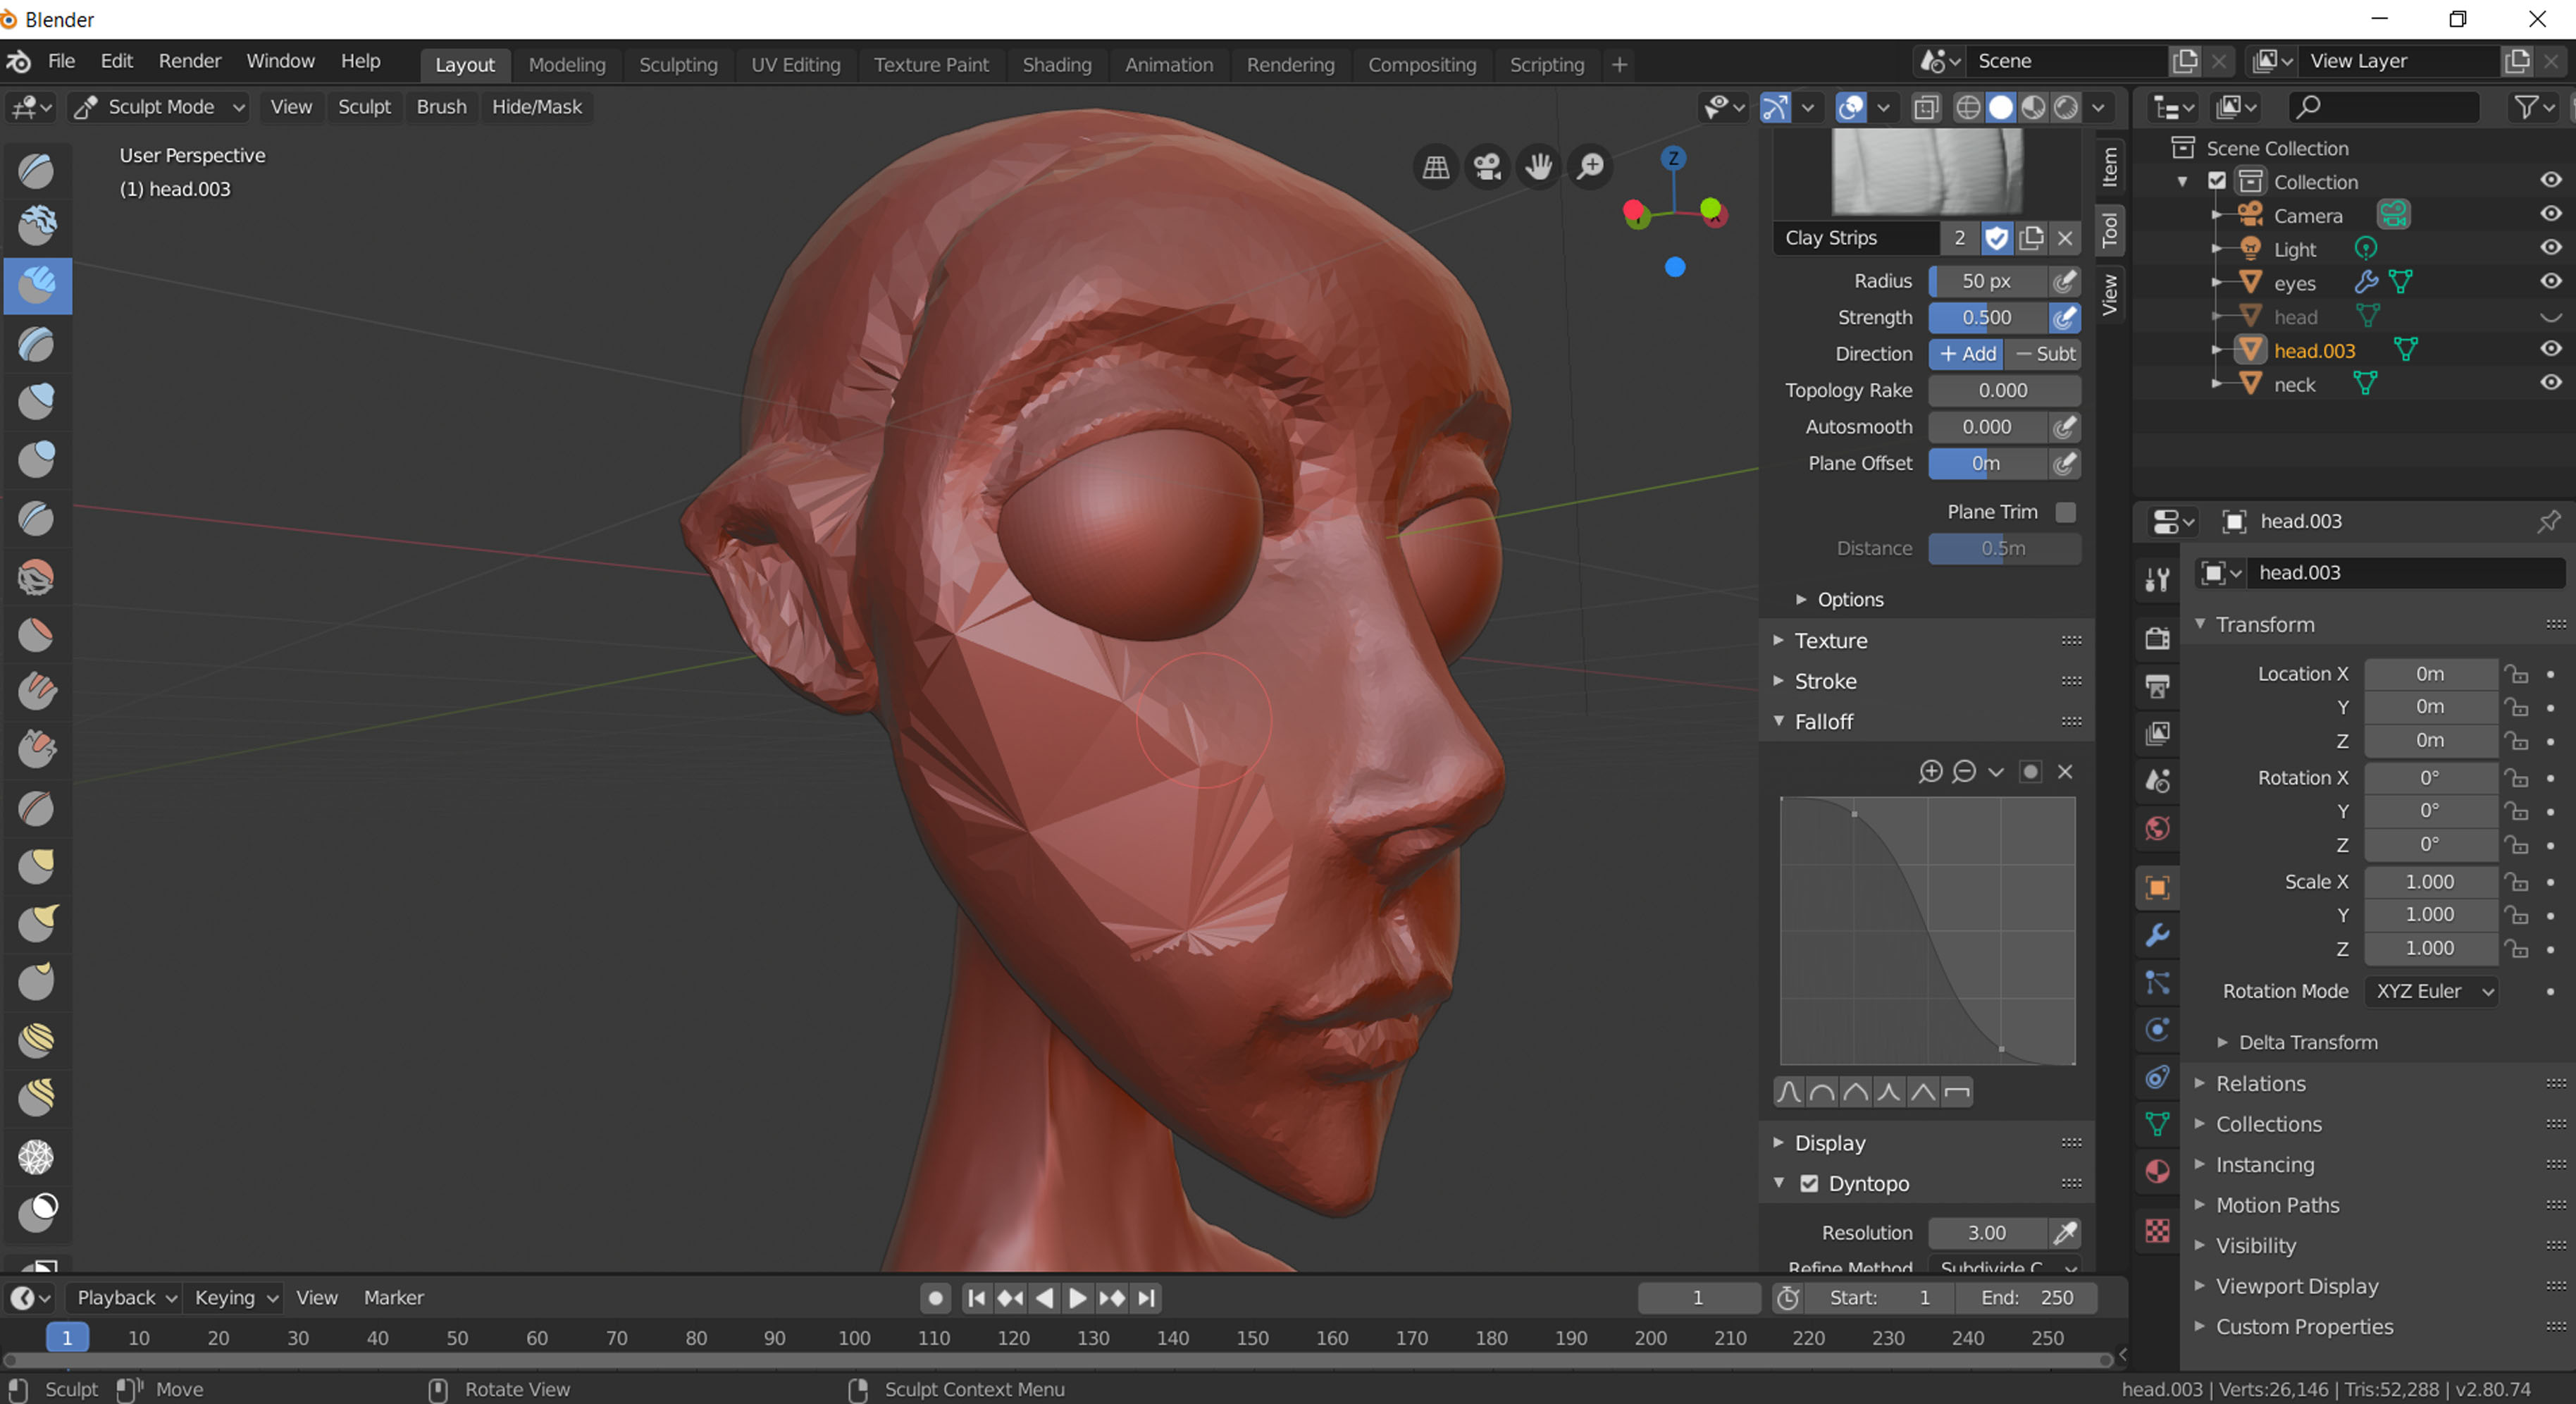
hmm i using same dynotopo settings as the tutorials ive been watching, but i just keep ending in the same shiny n wrinkle mesh,… the more clay i add the more wrinkles come along with the newly added clay even with a lower dynotopo level as shown in the ear screen shot. i tried sub dividing it a bit more and it does go back to looking a bit more clay like but it is also starting to lag, did i use dynotopo too early to get myself into this situation ?
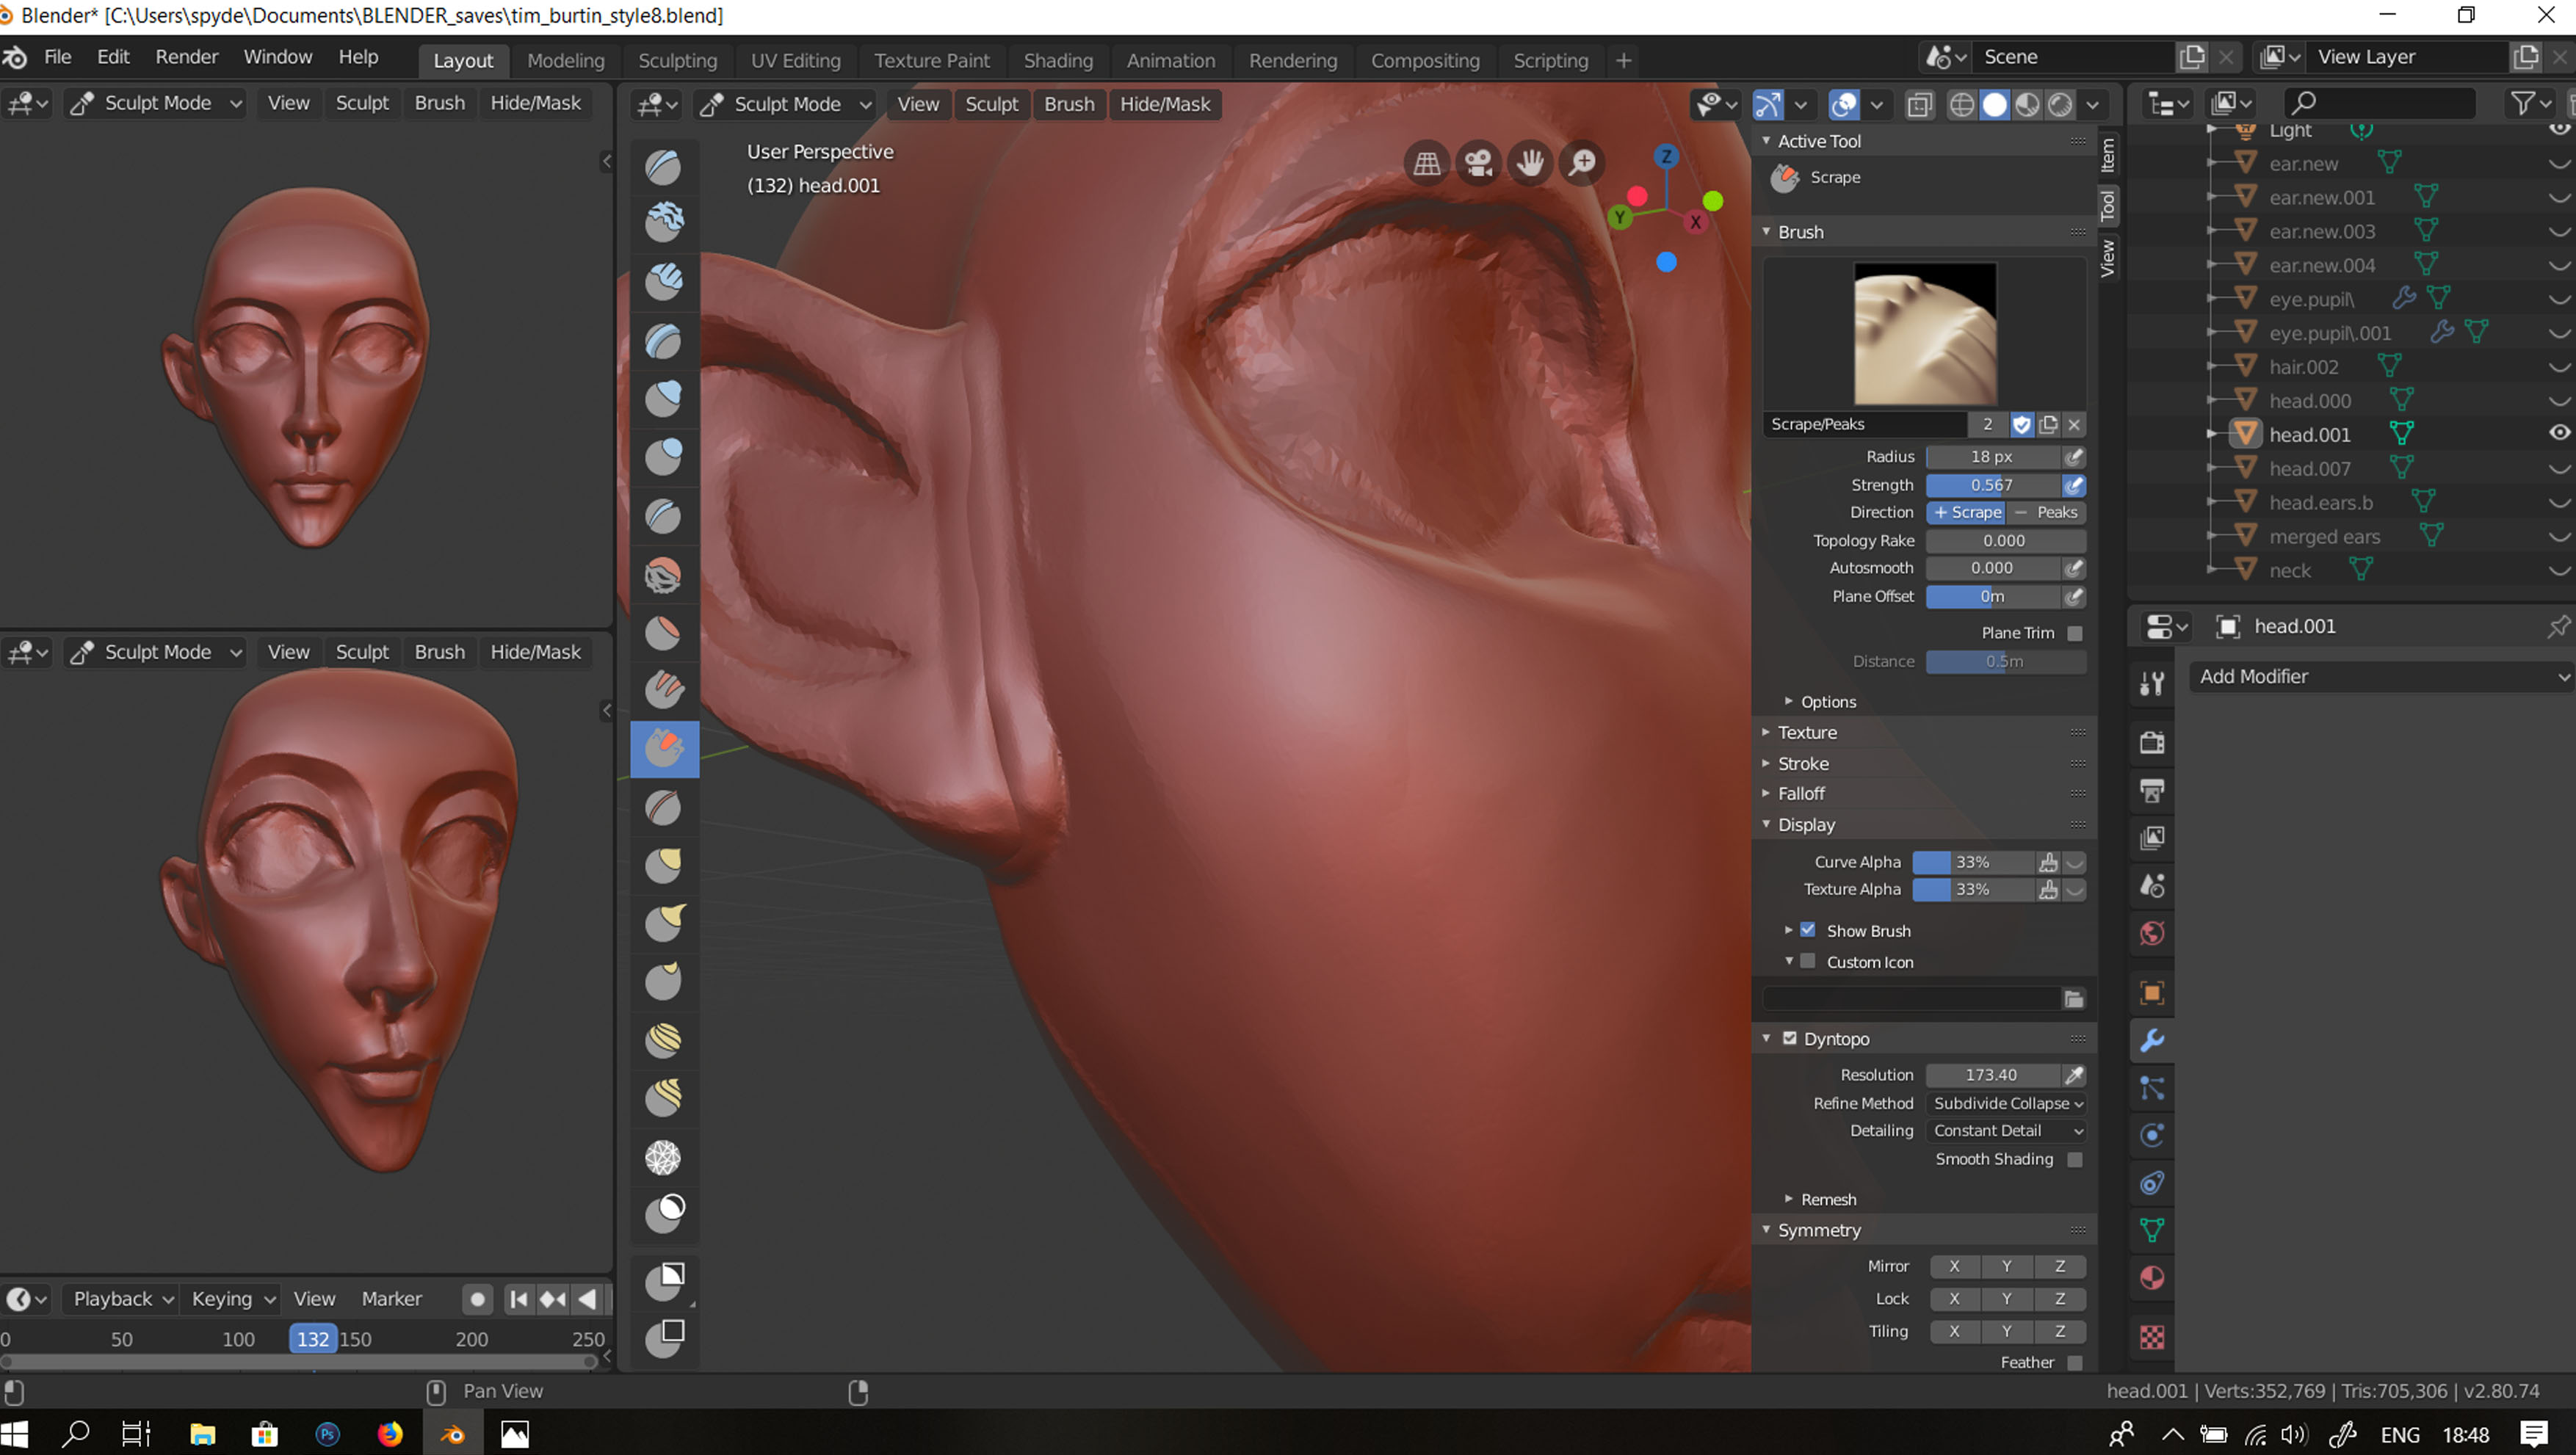
It looks like you set Resolution to lower amount and sculpted with Subdivide Collapse method active in the last screenshot.
Note that Constant and Relative methods of subdividing have opposite values for high and low details. Constant uses small values as small amount of details, higher values as higher amount of details. Relative assumes the opposite.
If taking the first file, enabling Constant method and using detail picker from subdivided areas you will get detalization value around 35. In that case you can increase it to e.g. 40 and sculpt.
Not sure what’s the problem there. It might be caused by too big amount of geometry but polycount isn’t high so far there. It could help if you define what “lag” means and how does mesh look like in that case.
it just froze and i had to restart blender, but it was ok after,… yea i see what u mean i will be using constant relative from now on. I clearly did not understand what the difference those 2 were and also as for detail should i be using subdivide edges instead of collapse ?.
Those differ in way of detecting details amount for each sculpting stroke. Relative works relatively to zoom of the viewport camera (how close you are to the mesh surface).
Constant as its name suggests is always constant and doesn’t depend on viewport camera zoom. It is often comfortable for working since with Relative e.g. you scrolled the mouse wheel and amount of detail after each brush stroke will change.
That entirely depends on your work preference and amount of details you are aiming to.
Subdivide Collapse can provide clearer result since it removes any extra geometry and generates new one based on details resolution. However it can remove too much of details and you will end up constantly defining details you already did before.
On the contrary Subdivide will always subdivide hence you can quickly get a mesh with huge amount of tris which don’t necessarily represent surface available for sculpting.
Both can be useful.
oh oh i see, alright thanks for this insightful information i will try to see if i can salvage what i have using this info. If not then i’l just restart as usual with the new settings which shouldn’t make it end up at with those wierd edge results. X)
theres a .blend file above if you want to see, so far i have subdivided the mesh more and if i sculpt without turning on auto smooth it seems to be not so smooth and wrinkly.
hi, after i booleaned the ears to my main head sculpt, the symetry seems wierd. it doesnt symertrize when i sculpt or just behaves wierd. Any one knows why this is happening ?
hmmm after i boolean 2 seperate sculpts i cant seem to sculpt them as 1 joints piece. its laggy everytime i do something and it reacts as 2 individual pieces. the file size also became too big to upload.
naahh doesnt work, i re booleaned it, went from 15 dynotopo to 160+ and its still reacting as individual pieces insead.if i use the scrape tool its just dig a huge hole in the mesh between the head and ear like 2 seperate pieces.