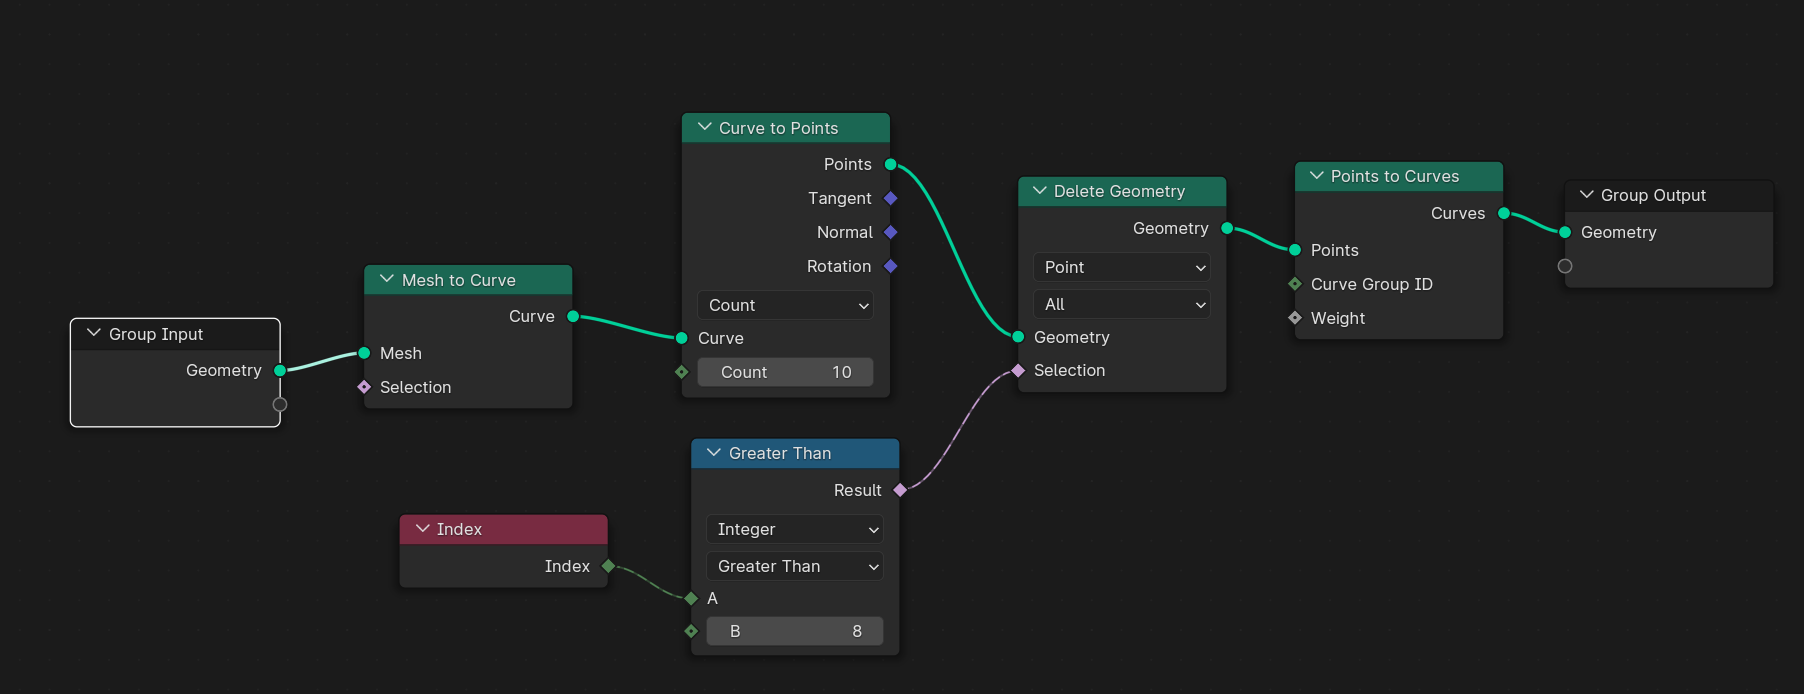
I’m trying to do something that I feel should be relatively straightforward, but I’ve had no success. I have a a curve in my scene, with a bevel and a Taper Object applied. I have used Geometry Nodes to turn the curve into points, and I want to delete any points above a certain value, but I’ve spent a long time fiddling with the node setup, and I can’t get it to work. However I configure the Compare values, I either get all the curve, or none of it.
I assume I’m doing something really stupid, so any help pointing out my deliberate error would be appreciated.
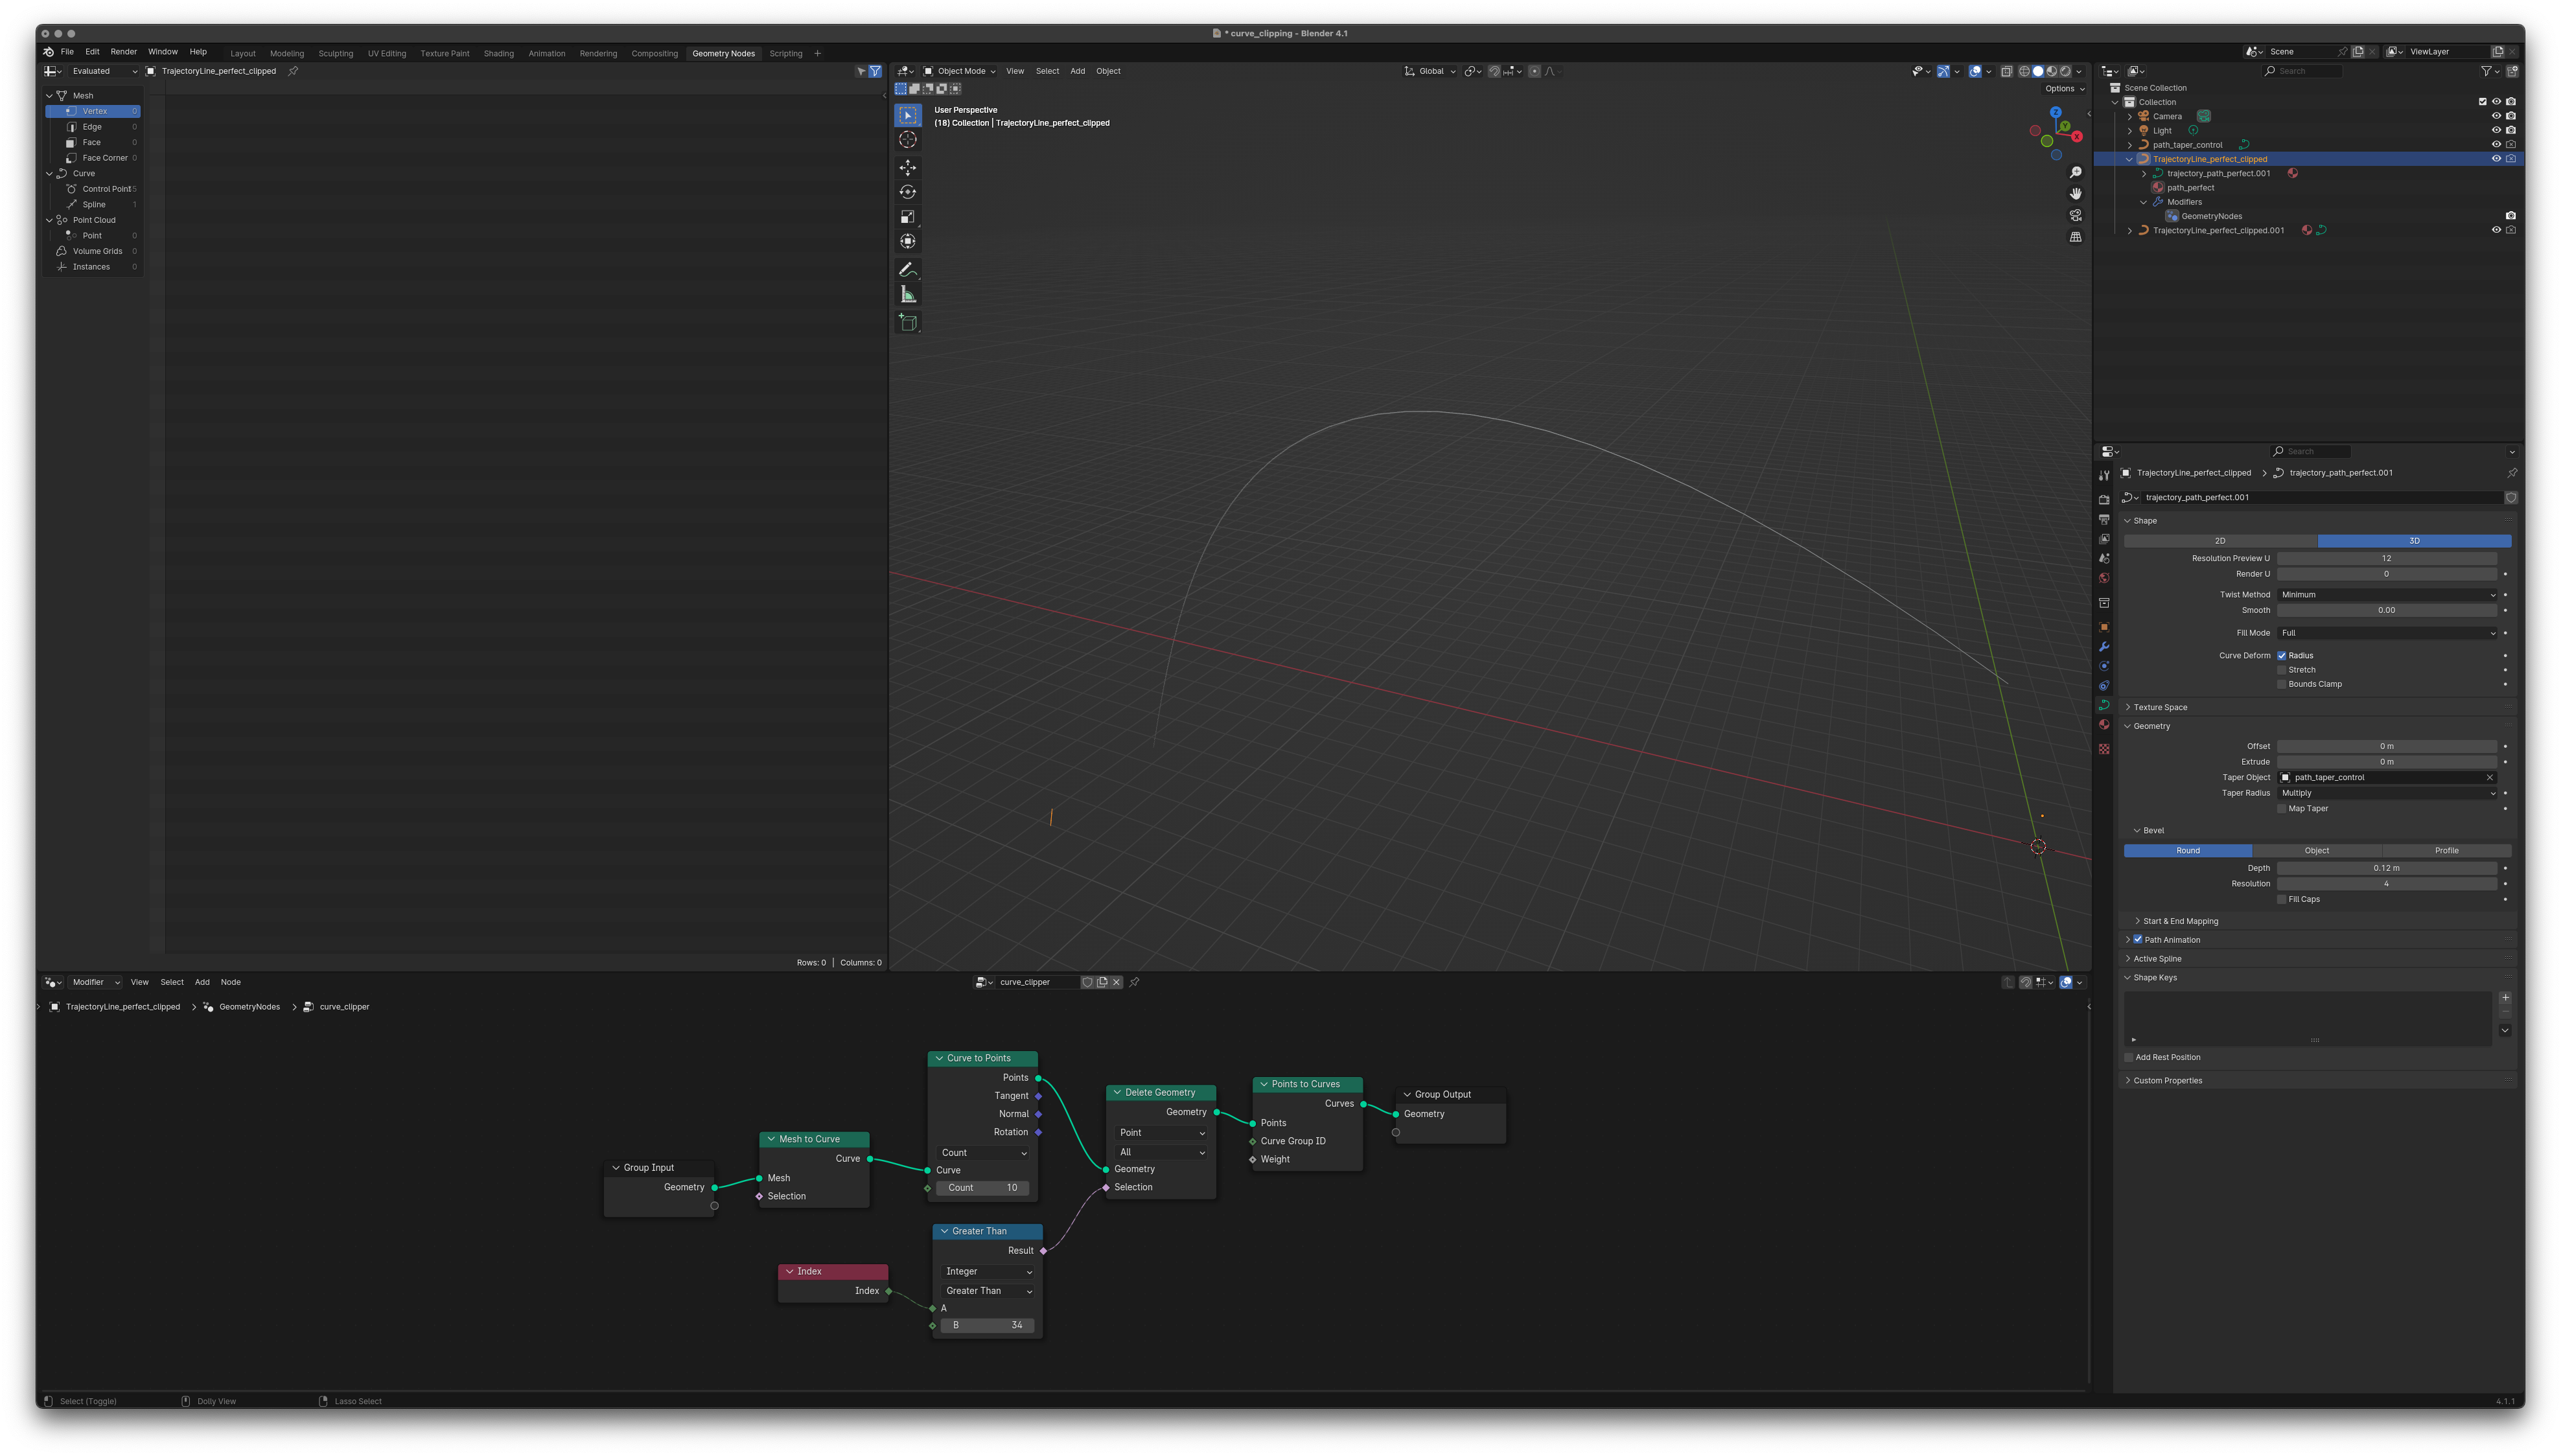
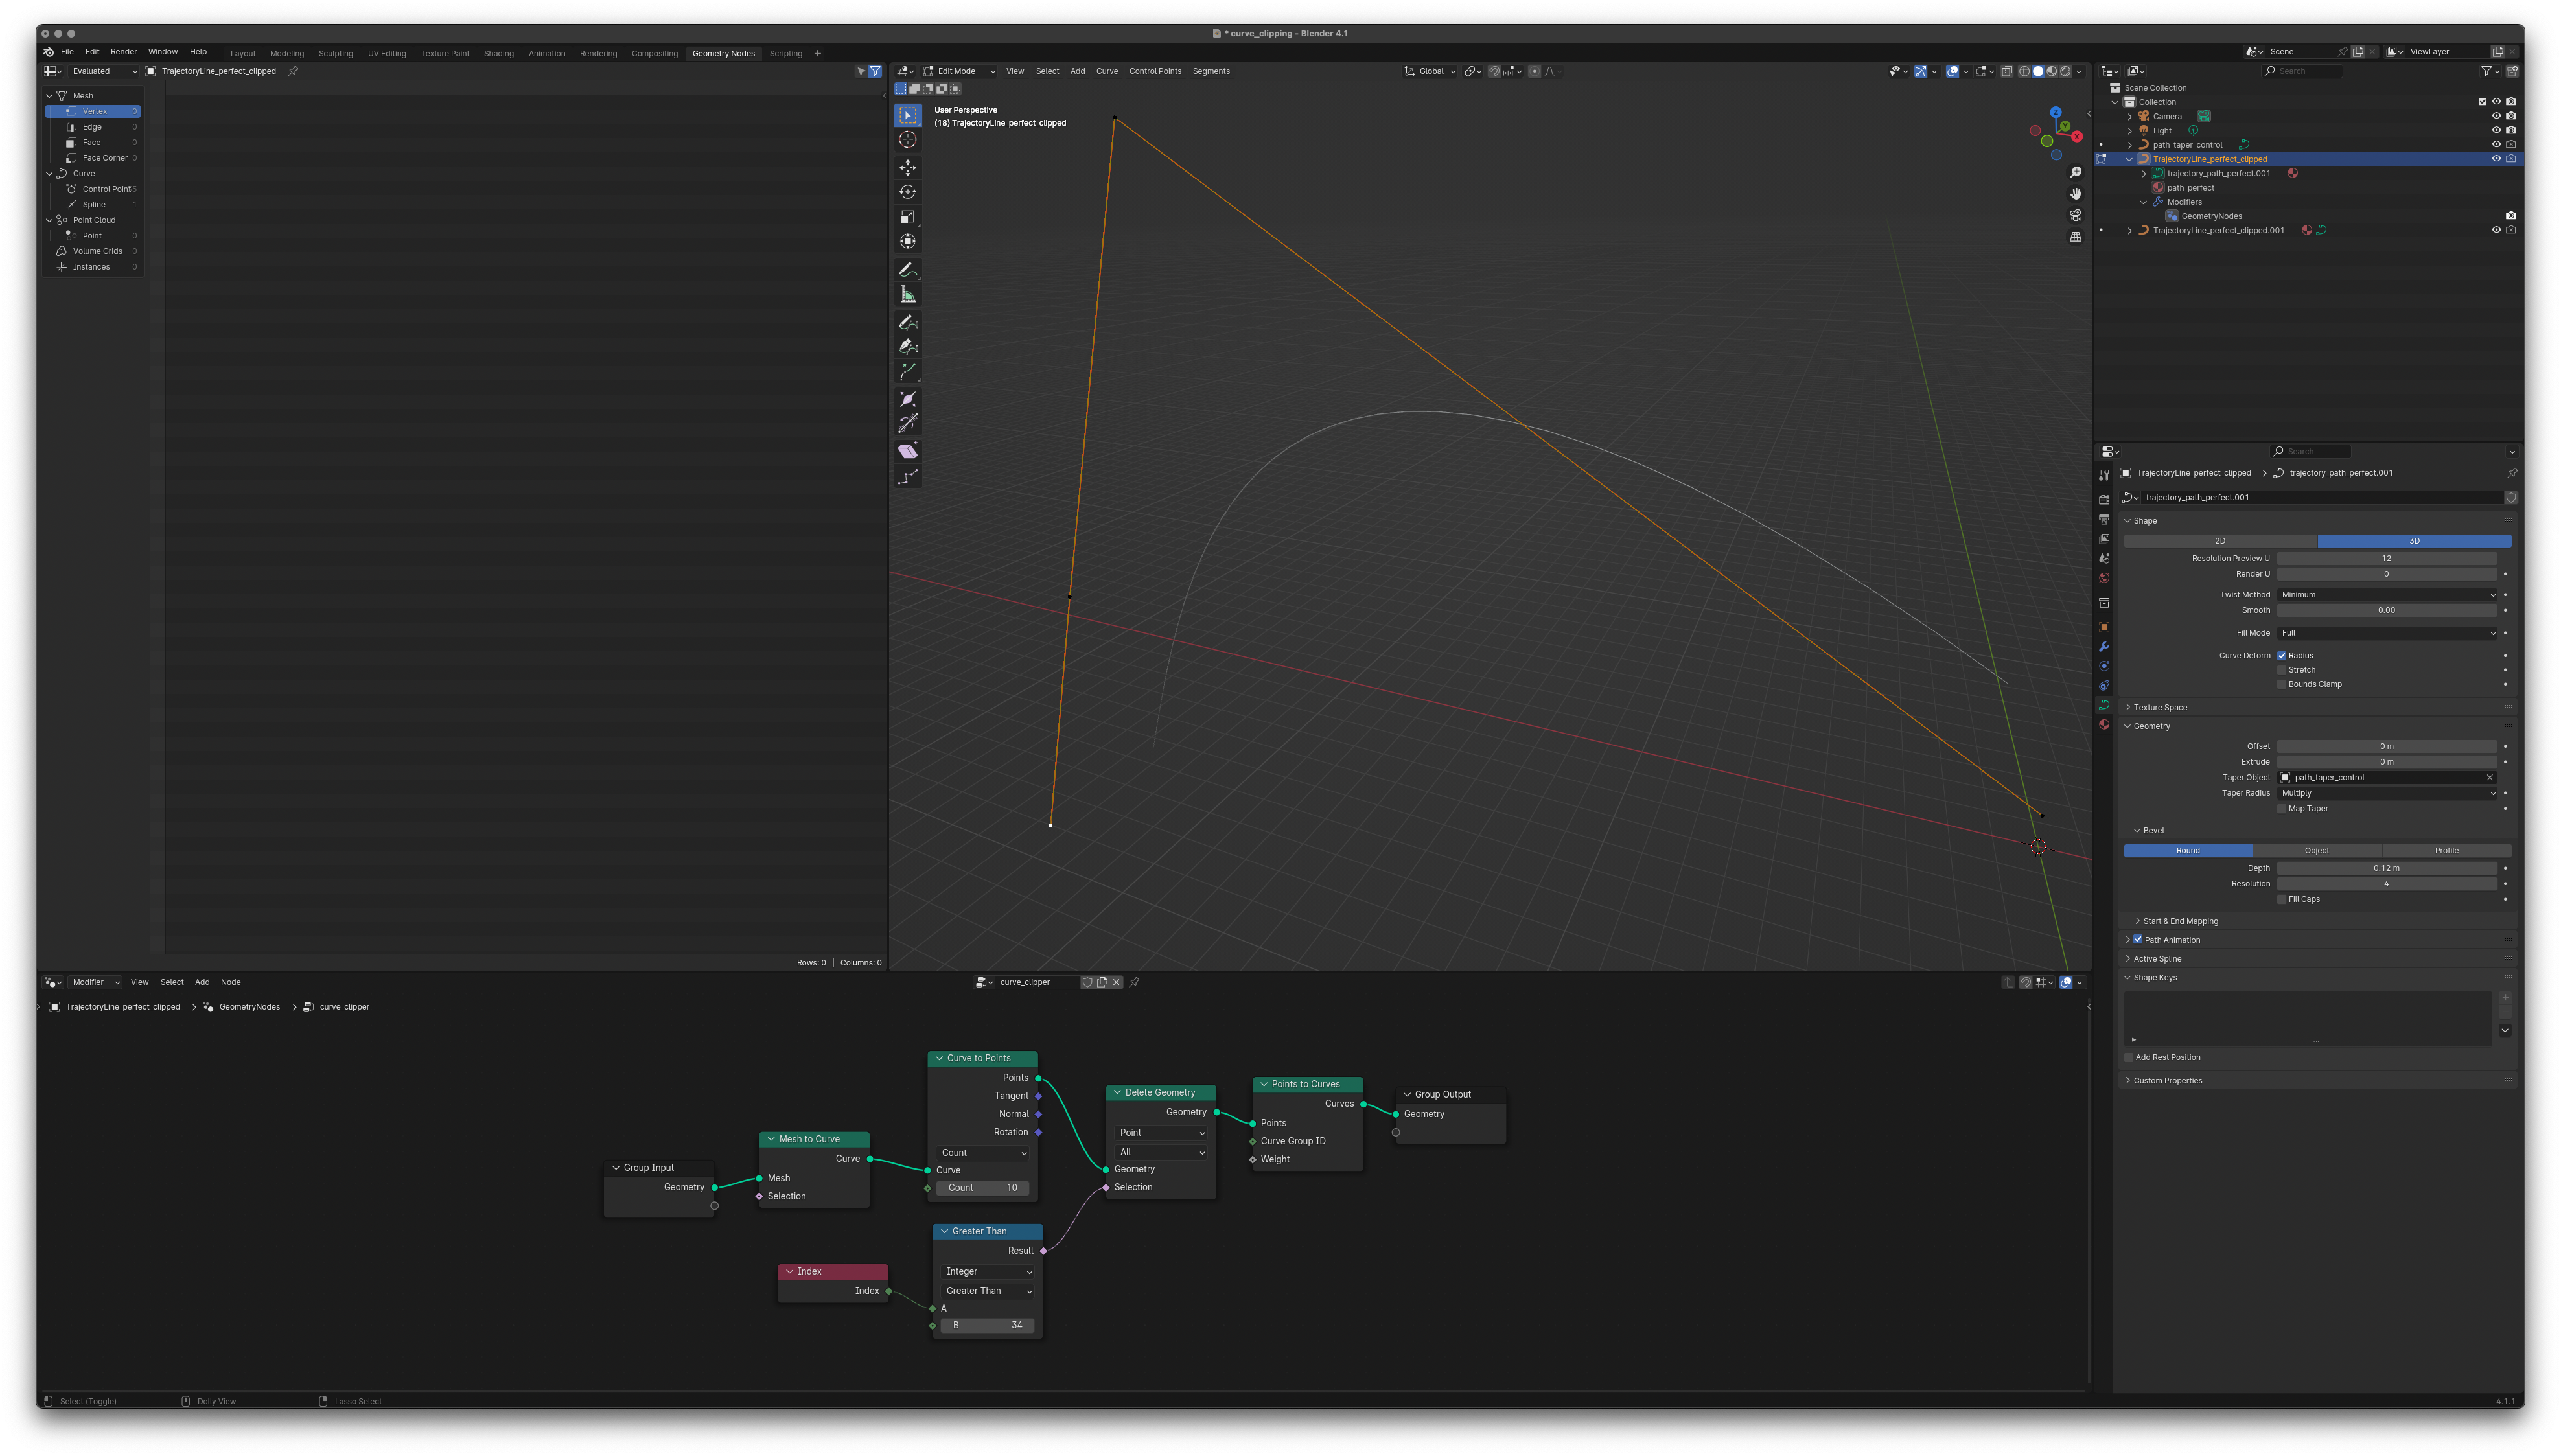
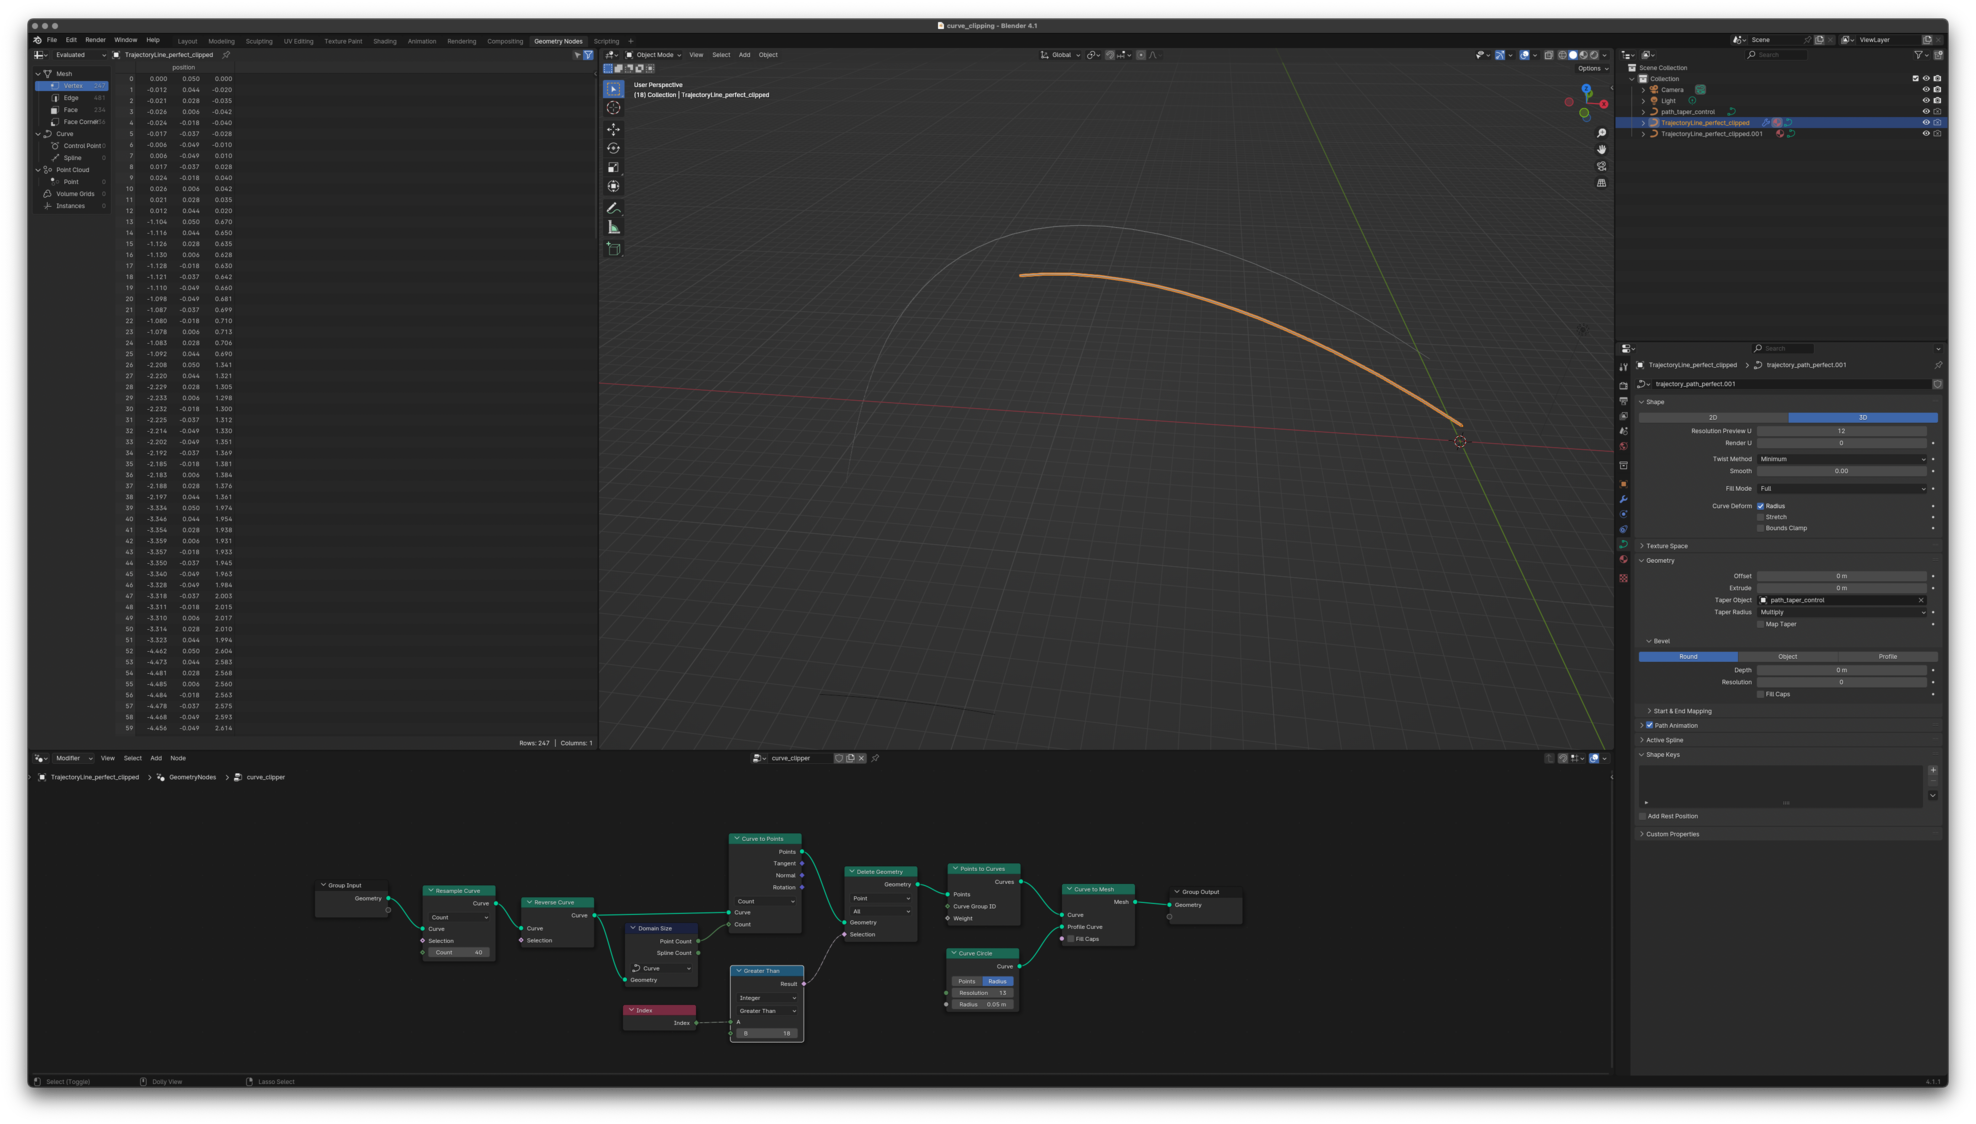
I can’t upload a sample Blender file (new user, so not allowed), so here’s a screenshot of the curve in Object mode, with a copy of the curve without the Geometry Node modifier attached, to show what it should look like. Basically, I want to truncate the curve back towards its origin, so I can animate it growing and shrinking.
I suspect I may be misunderstanding the nature of curves in Blender.
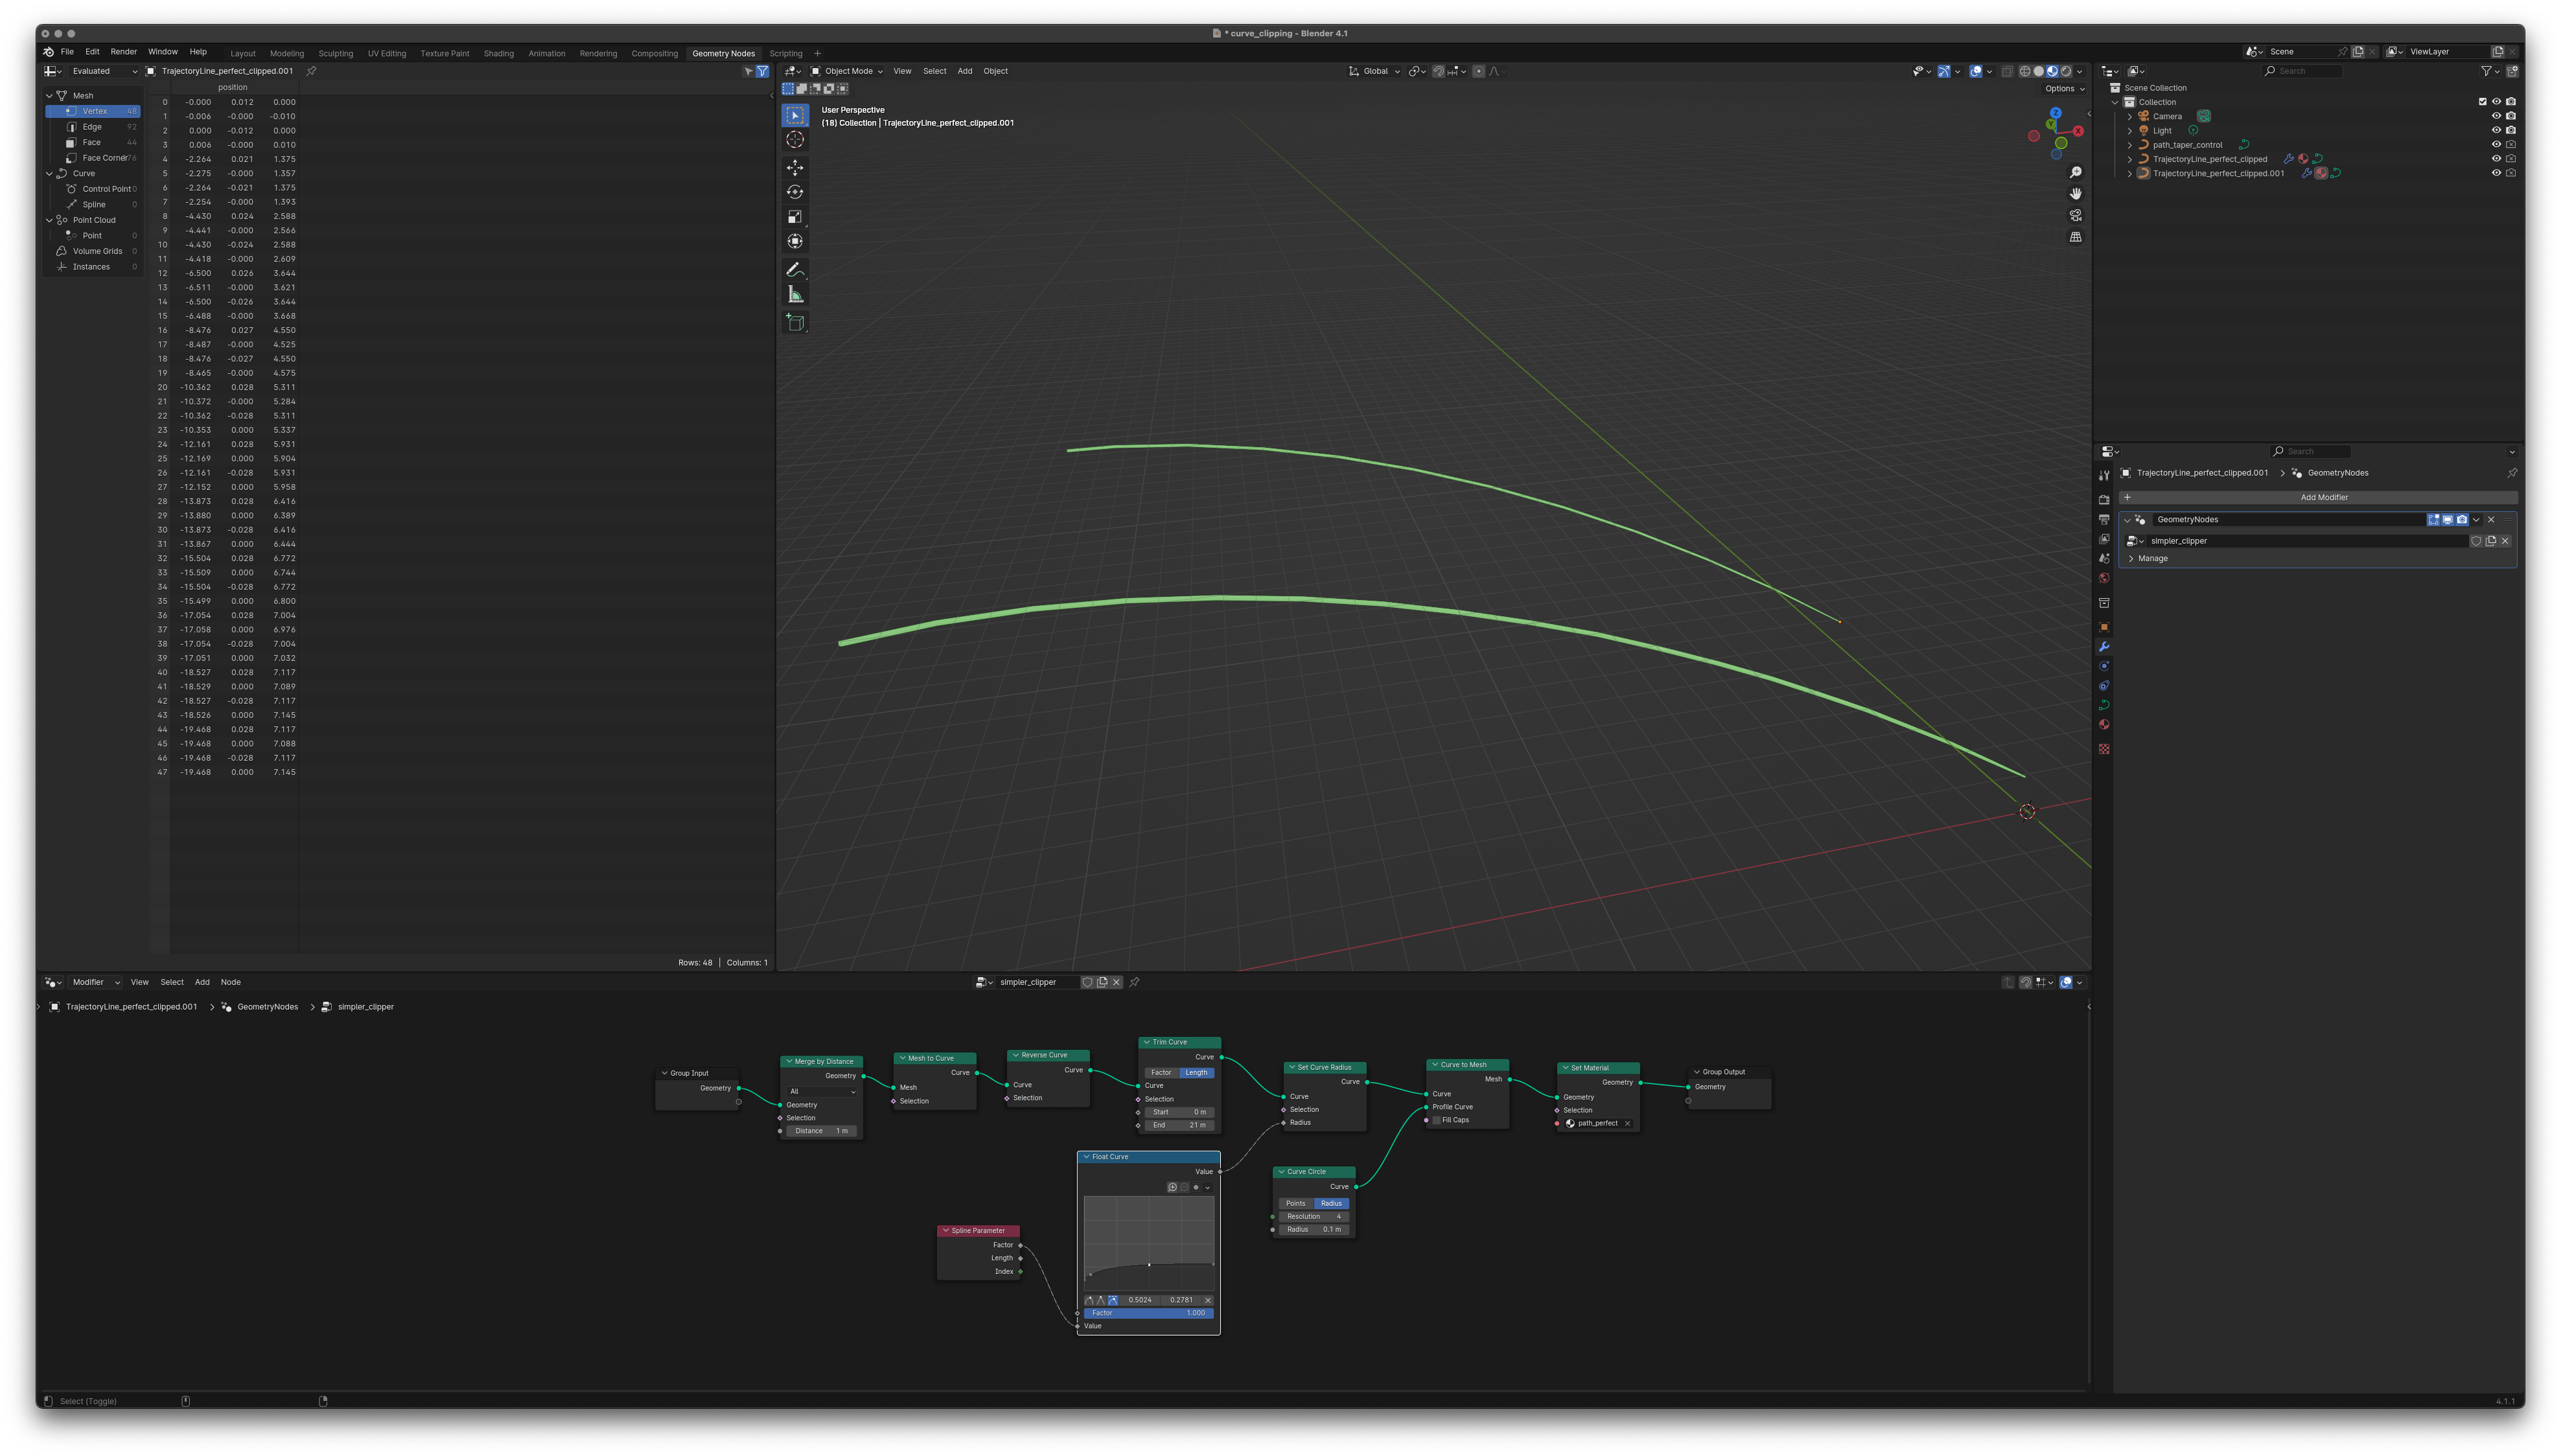
The segments of the mesh probably weren’t connected before you converted them to a curve resulting in multiple little curves instead.
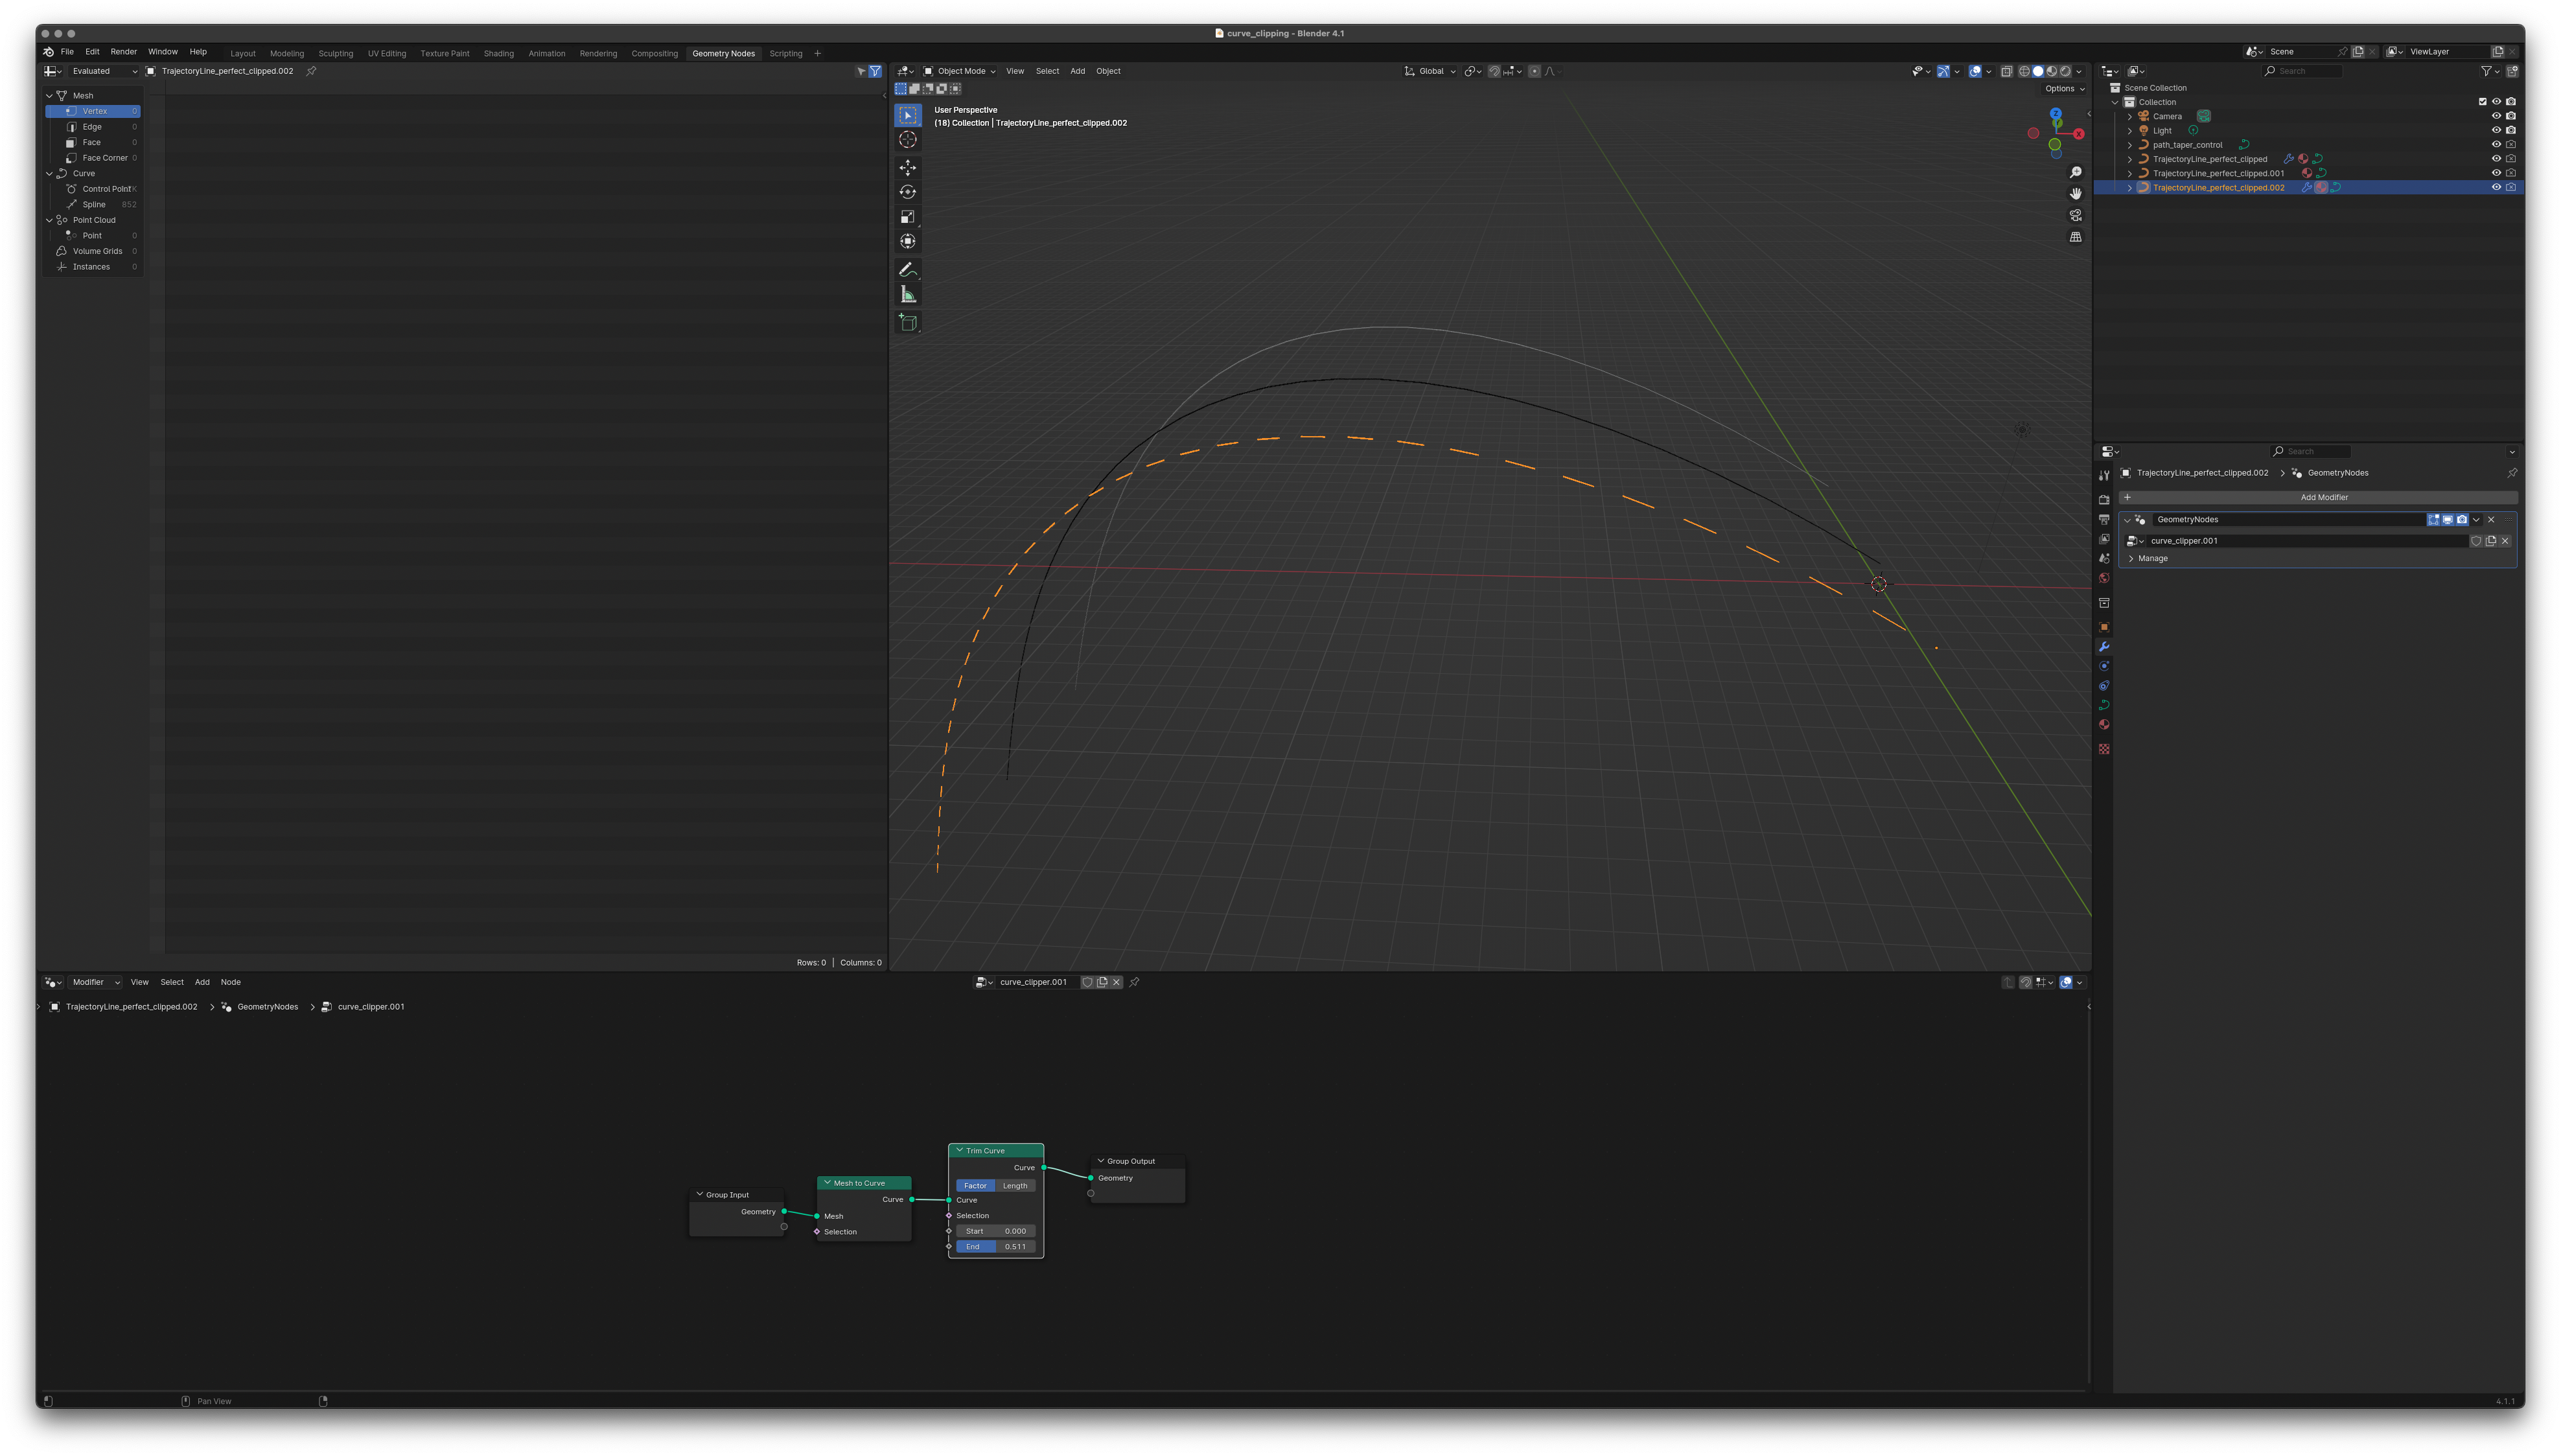
Use a Merge By Distance node to connect the loose vertices before the Mesh to Curve node:
You are correct, thank you. This helps with my understanding of the nodes, and makes it easier to control the length using ‘real’ numbers, since I can set it in metres.
Thanks to everyone who provided solutions. You’ve not only solved this specific problem for me, but also helped improve my overall understanding of Geometry Nodes and Curves (admittedly, that was a pretty low bar).