Hi! I can’t understand, what I am missing when I am simulating Clothes. What is the reason for sewing don’t want to do the thing it supposes to do!
Maybe someone can point out what I am doing wrong or not doing correctly? (Blender v2.91)

https://youtu.be/ywXILQnPWK4
00:00 - Intro
00:54 - Modeling base
03:15 - Sewing Lines
05:51 - Sewing the Garment
08:24 - Basic Cloth Setup
10:53 - Low Poly Cloth Setup
13:39 - Sewing the Waist Area
15:45 - High Poly Cloth Setup
Doesn’t help! I saw this tutorial before and did everything as he said and now, before writing again, I watch it again just because you recommend it. Who knows, maybe I miss something.
The tutorial doesn’t explain why sewing lines are not pooling together, but pule opposite directions.
The problem isn’t solved yet!
maybe upload a blend file so we can check it out?
I dont know why it is not working for you, but even if it, its not pulled together as wanted. I guess you have to do someting like internal springs if you want some stretching there afaik.

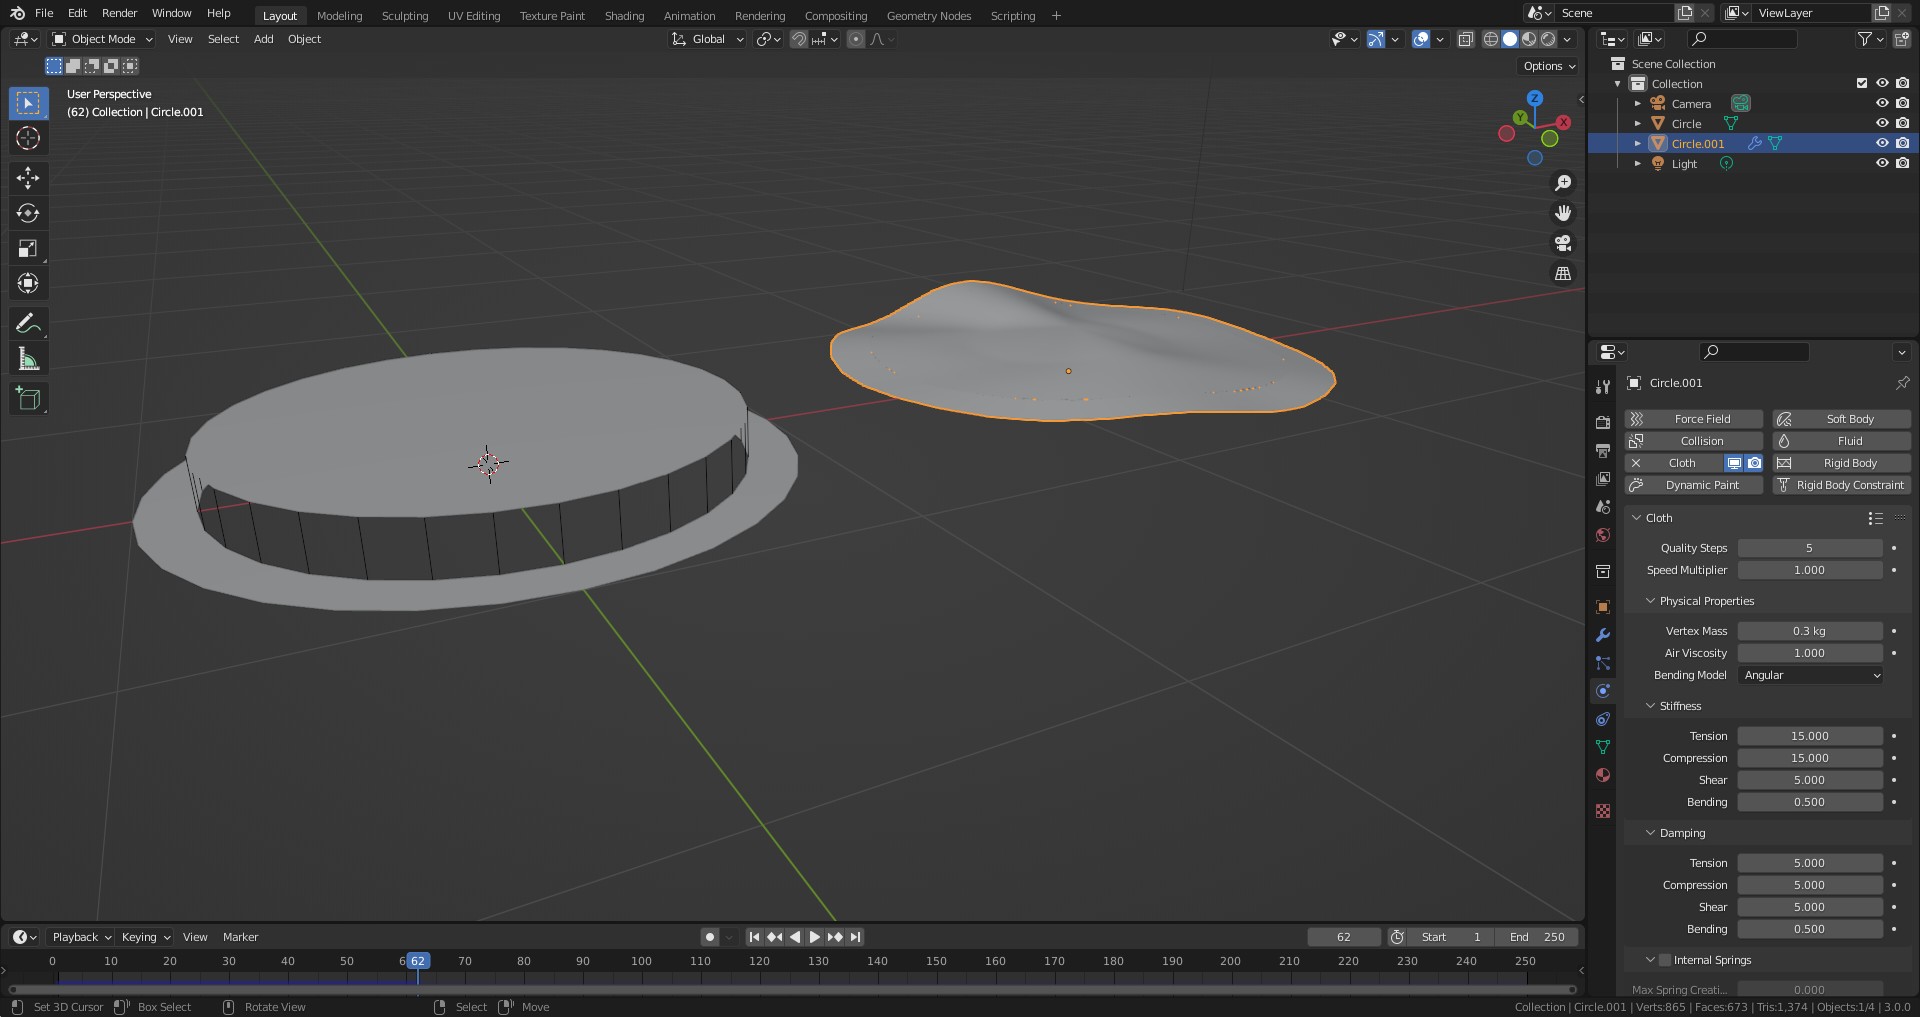
For cloth (sewing) you start with the basic settings.
Cant see the tab but self collision might be the missing setting you search for. Deactivate it and test it again to see if it is involved.
You can also increase the strength of the sewing but the best thing is to animate it and increase it over a 20 or so frames.
Even though the object collision is set to 0.005 the cloth has quite a distance to the mesh. Maybe check the scale of the scene. Is it super small?
And one more thing is the weld modifier which has special options for cloth sewing to merge the ends, but you are on 2.91 so thats not there yet.
it works when I am using Plane as starting mesh and simply do the stitching.
Stitching doesn’t work when the base mesh isn’t Plane. At least in my case.
For the first model, I started from a Cylinder base mesh.
The case may be solved, but it doesn’t seem logical to me. Kinda even is disappointing.
Or maybe, again, I am missing something.
Thank you for your valuable time.
I’m currently of the view that it is best to avoid sewing all together. Instead directly model the mesh you want to simulate (keep it all quads with no details) and then use it to deform a detailed mesh which is the actual rendered clothes.
I recently uploaded a video testing this type of technique and so far I think it will work well. Ideally update to the latest Blender version as well, tho I think 2.91 has the simulation update patches.

Upload a blendfile with the problem.
Ok! Here is a link to the blender file in google drive: https://drive.google.com/file/d/1MCFRYmQ34mEekOdP5eSQLnJkVP0qSLON/view?usp=sharing
Because I am a new user here, the forum doesn’t allow me to upload at the moment.
The collision distances are the problem, they prevent the sewing to close the gap.
Even with very low values there is a litte gap at the end.
Can you explain why you make the both pieces separate, maybe we can find another solution.
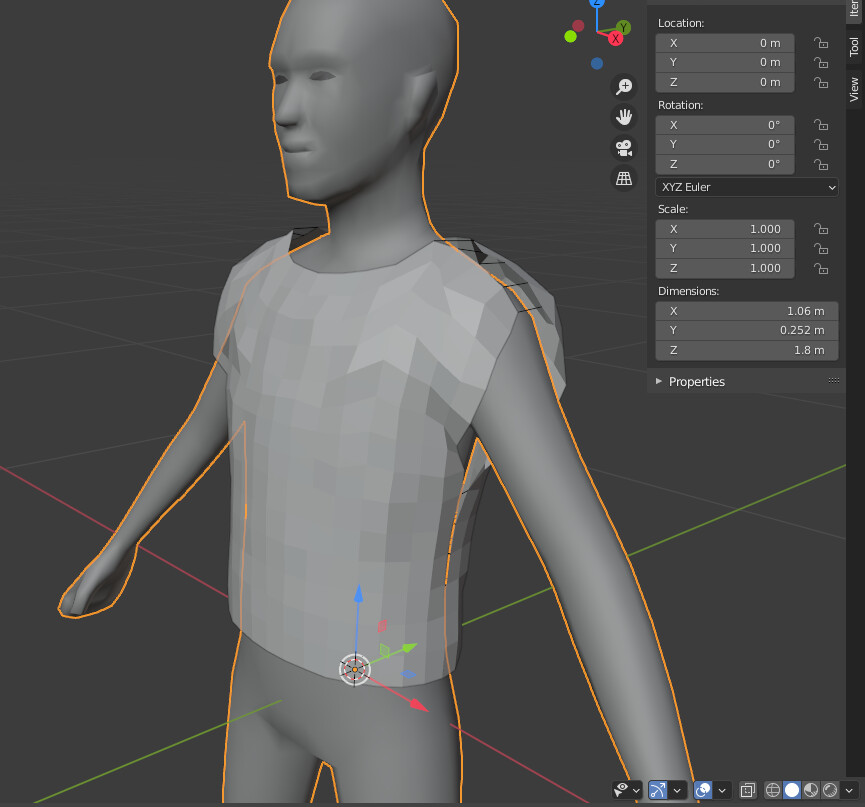
The T-Shirt in each opening has thicker ends - the edge of the clothes are folded and sewed. After creating sew lines on mesh I planned to play around with some modifiers and try to create some sort of sewed cloth illusion.
One of the things I covered in my video, the current precision in cloth sims don’t work all that well at real-world scales.
You’d do that either by texture maps or the technique I showed above or both really.
Hi all, I am a beginner blender user having a problem in making a hoodie using a blender. when I was running suddenly the texture of the shirt was like this, does anyone know how to solve it?

First step apply scale an see if it works,
otherwise upload your file so we can take a look at it.
Here is my project file, maybe it can help with the problem.
Here is the link to the blender file on google drive:
Because I am a new user here.
Always start a new thread of your own. People ignore things added to old posts.
Apply scale, apply rotation.
In edit mode press M > Merge by Distance to remove the 300+ extra vertices.
In this menu (Overlays dropdown)
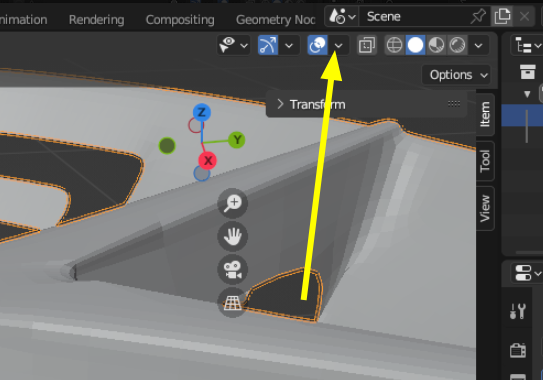
Select Face Orientation.
Blue is outside, Red is inside - when correct. These are the face normals.
In edit mode select all the areas that have red outward - the front, most of the ends of the sleeves and hem and as you select different areas press Alt-N > Flip (or Mesh Menu > Normals > Flip) to make them face the correct way.
When fixed it will look like this…

What are the extra faces where the yellow circle is? Front and back. Triangle areas.
See that one selected edge in the yellow circle? That is floating there. It needs to be fixed or removed. Use the knife tool to cut an edge into the face if you really need it.
Why do you have faces where the two red circles are? That is sewing area. it should only be edges. Having faces makes the sewing fail.
I think that is everything. It will now sew nicely.
If you want thicker hems on the bottom and the end of the sleeves then add that later. Is that what the extra parts are? To be thicker?
1 Like
but how come it’s still like this, even though it’s been turned over. and I’ve eliminated the triangle part, the stitching should be good. but there are still problems from cloth simulation?
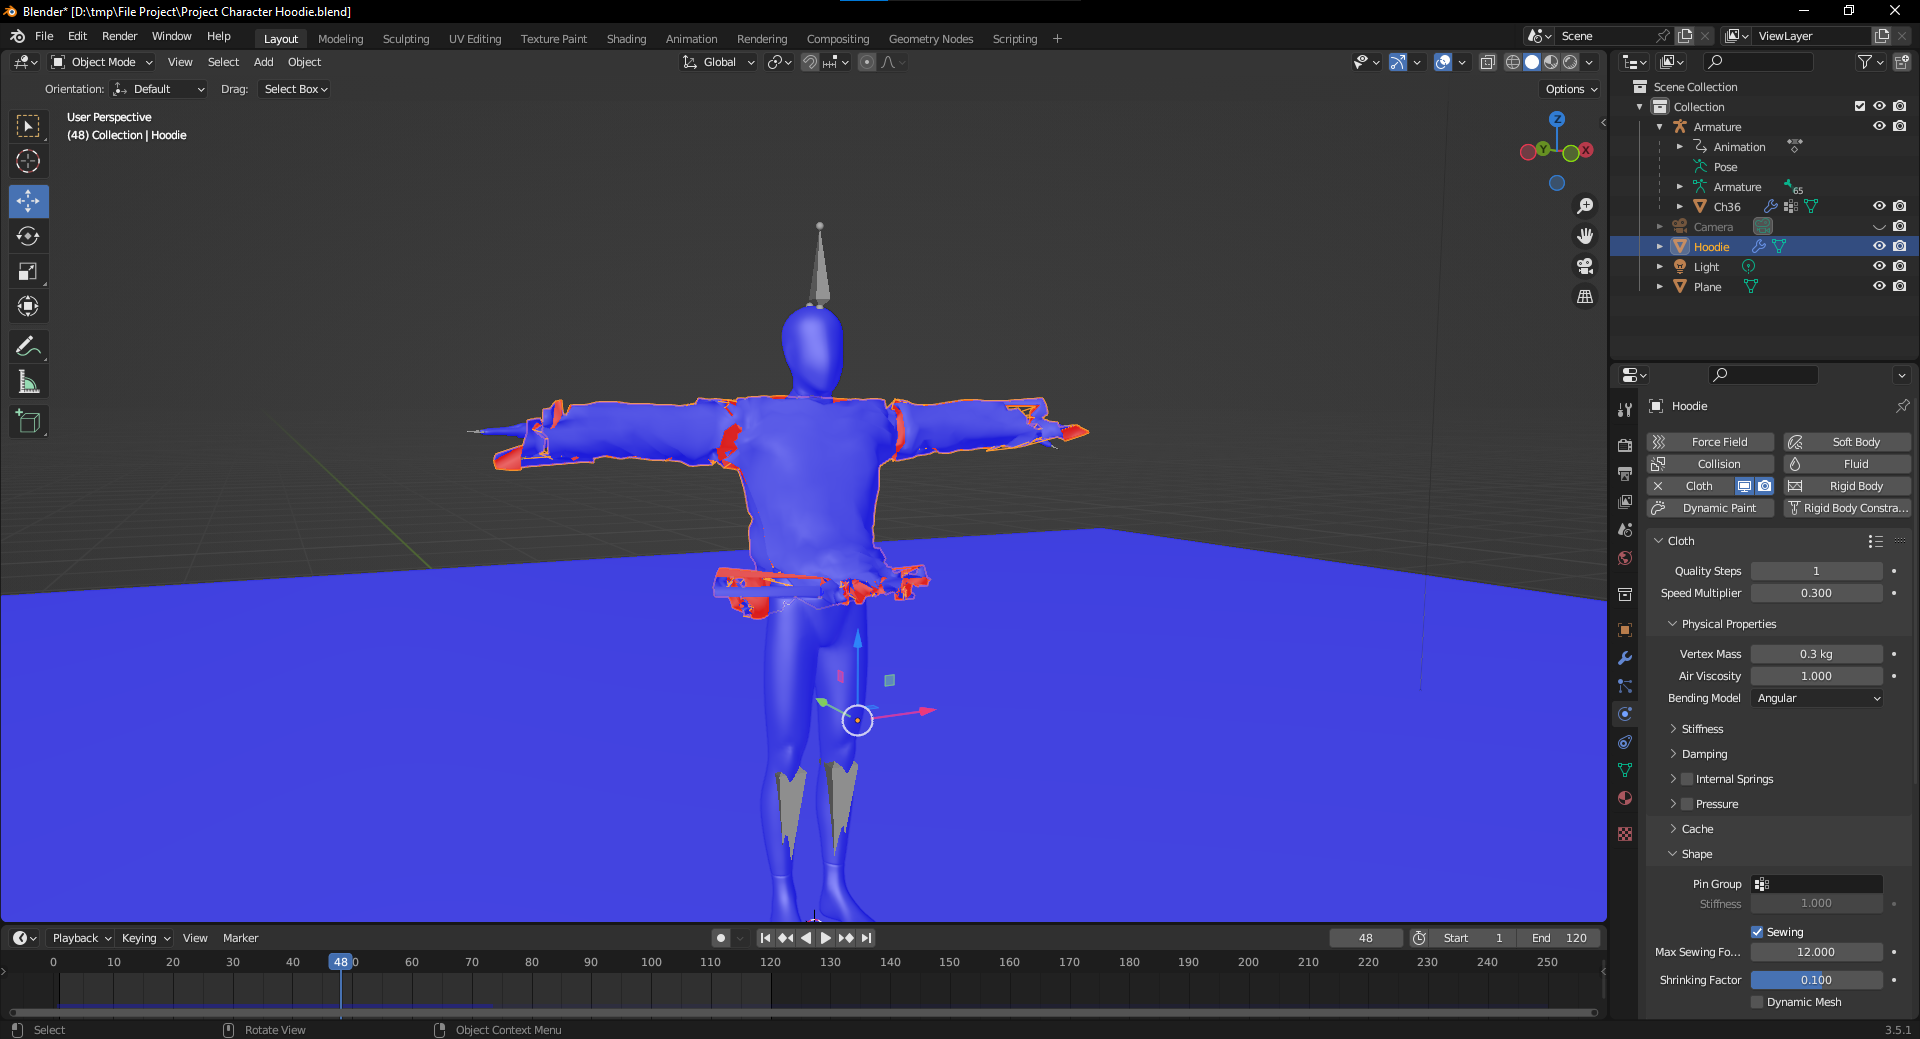
Most of that problem is those face loops going from the front to the back. You need to make them into sewing edges, or give them more faces so they can fold.
A single long face cannot fold - they need to be about 6 to 10 faces.
Something I forgot to mention earlier. Those seams near the shoulders have lots of triangles in the sewing edges. I think you need to remove the diagonal edges so it is all rectangles. That should fix the gaps there.
Yes it still looks ugly. But the sewing has mostly worked.
Fold the thumbs in. They are stopping the sewing from working.
Look from the side view. The sleeve looks far to big and is not placed with even space around the hand.