Colour substitution - is this possible in Blender?

This is possibly a slightly unusual question, and apologies if I am posting it in the wrong place; I was a little unclear on where best to put this particular topic.

I am a (hobbyist) developer for a non-commercial, open source computer game (Simutrans-Experimental, being a fork of Simutrans). Part of that development work involves creating graphics for the game. The graphics engine is rather old (late 1990s), and has no 3D rendering of any kind: instead, the graphics are sprites. Being a new user, I am not permitted to post any links, but a web search for “Simutrans” should make clear what the graphics look like. (They might well be so old as to be trendy now for being “retro”, but I digress).

There are different “paksets” for Simutrans (i.e. different sets of graphics and data for the game), and the graphics for each of these paksets is produced using different workflows. The pakset on which I work uses Blender as an integral part of its workflow: using a standardised lighting and camera setup, the basic Blender rendering engine and a script which rotates the camera a specific number of times (4 for buildings, 8 for vehicles), the correct 128x128 pixel images can be generated automatically from the Blender scene. Because the graphics are very low-fi, the Blender models are extremely simple and crude, but this has the advantage of allowing a very small number of people to produce a good number of them in a relatively short time. Speed of production and automation of workflow are therefore very important. A recent change to the Simutrans code, allowing alpha blending using an alpha transparency channel in a .png file, has made this process even quicker than it used to be: no post-processing of the graphics is required at all once they are rendered from Blender.

That is all by way of background. The real issue is this: Simutrans has a feature, similar to that found in other transport games of the era, in which players can choose a pair of colours as their transport company’s corporate colours (a primary and a secondary colour), and that colour will automatically be applied to objects in the world using a colour substitution system: any pixels with one of a range of about 12 different values (if I recall correctly, six shades of a specific hue of cyan and six shades of a specific hue of yellow) will be replaced by an equivalent shade of the player’s chosen colours.

However, this system was designed for hand-drawn graphics, not graphics produced by Blender. The pakset on which I work has only implemented this system in a very limited way (and, importantly, not at all for vehicles where it might be most useful) because making any use of it requires extremely labour-intensive pixel editing of the .png files after they have been rendered. Because of the very large number of vehicles, it is impractical to use the player colour system for vehicles in this particular pakset.

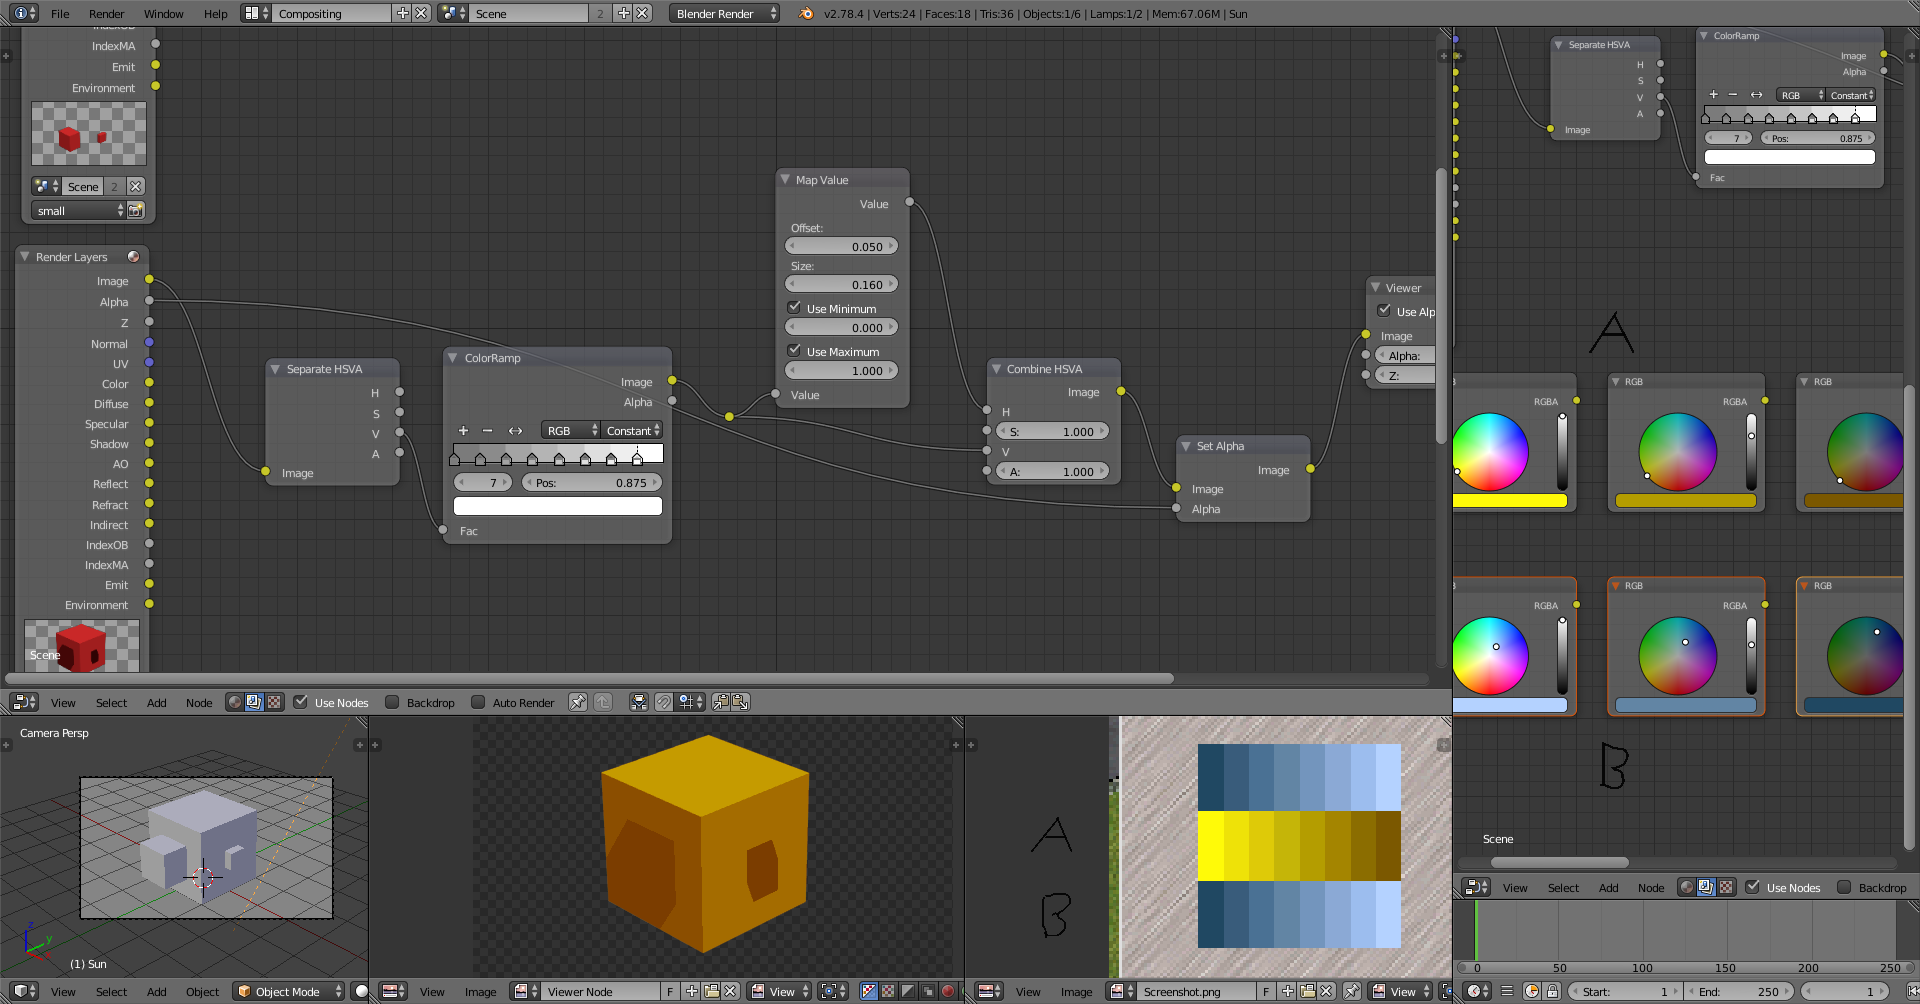
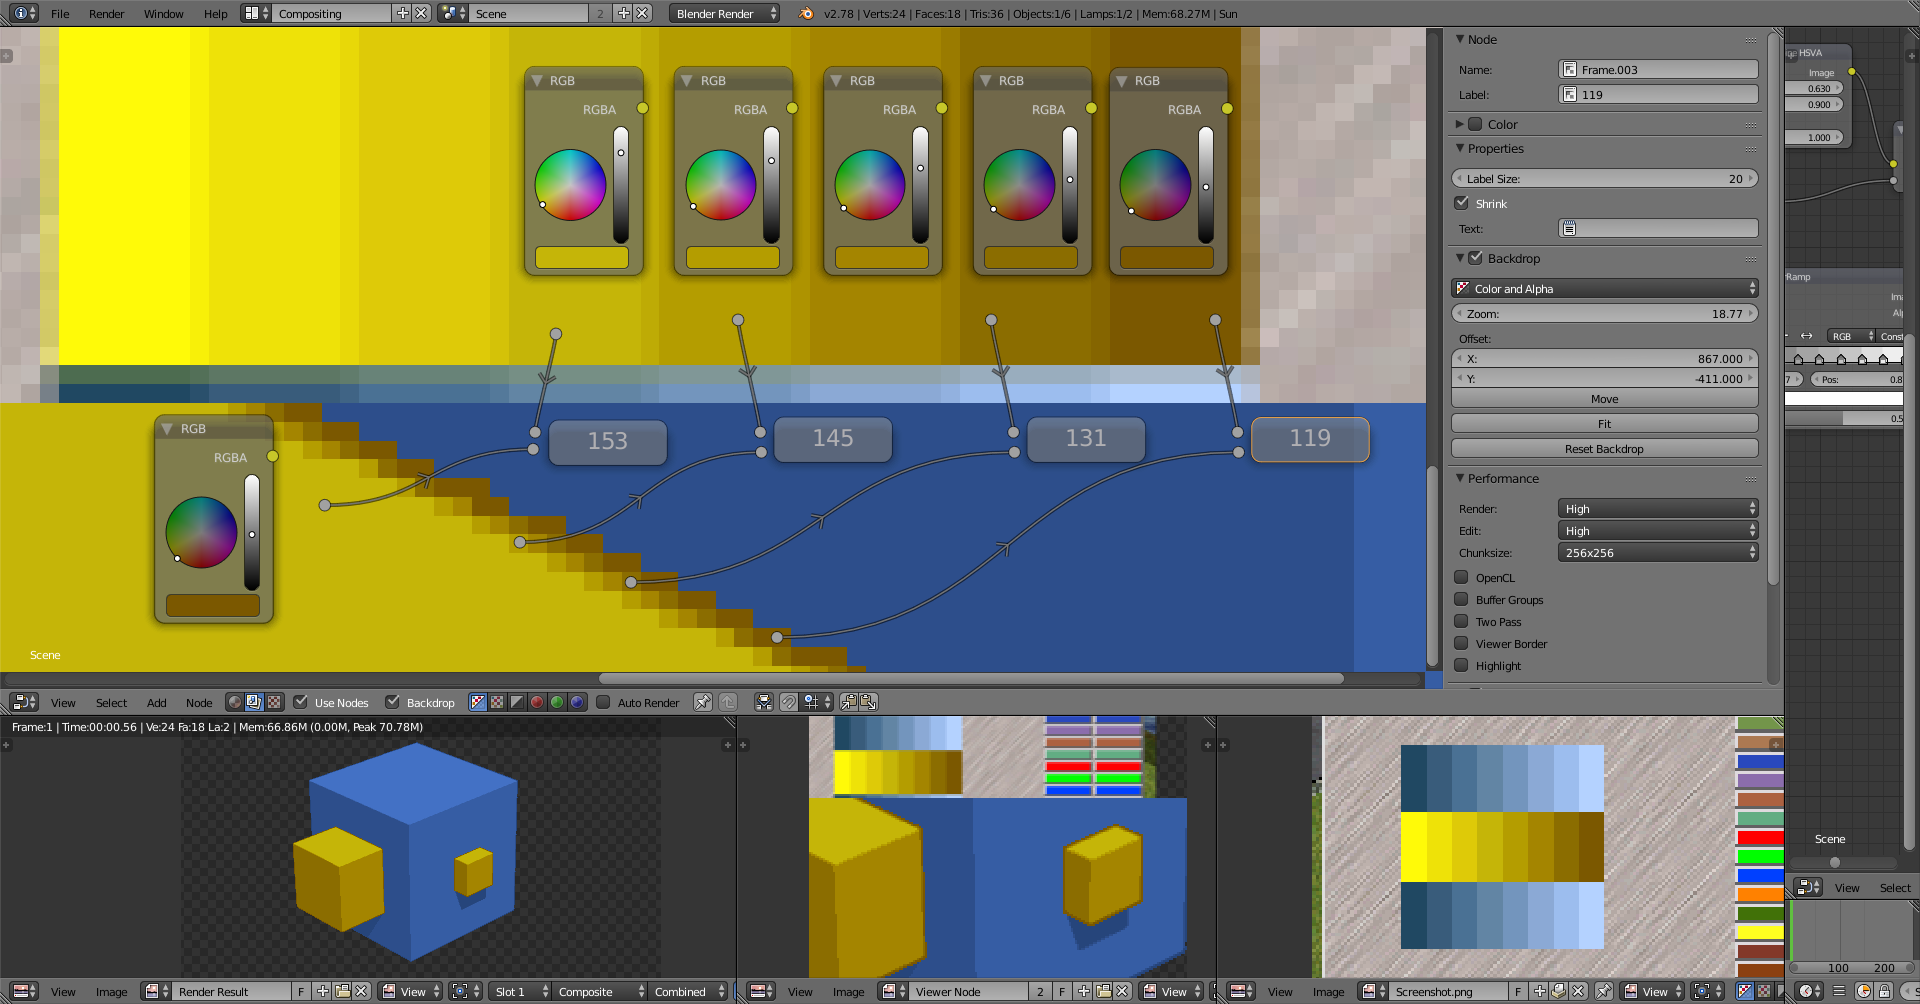
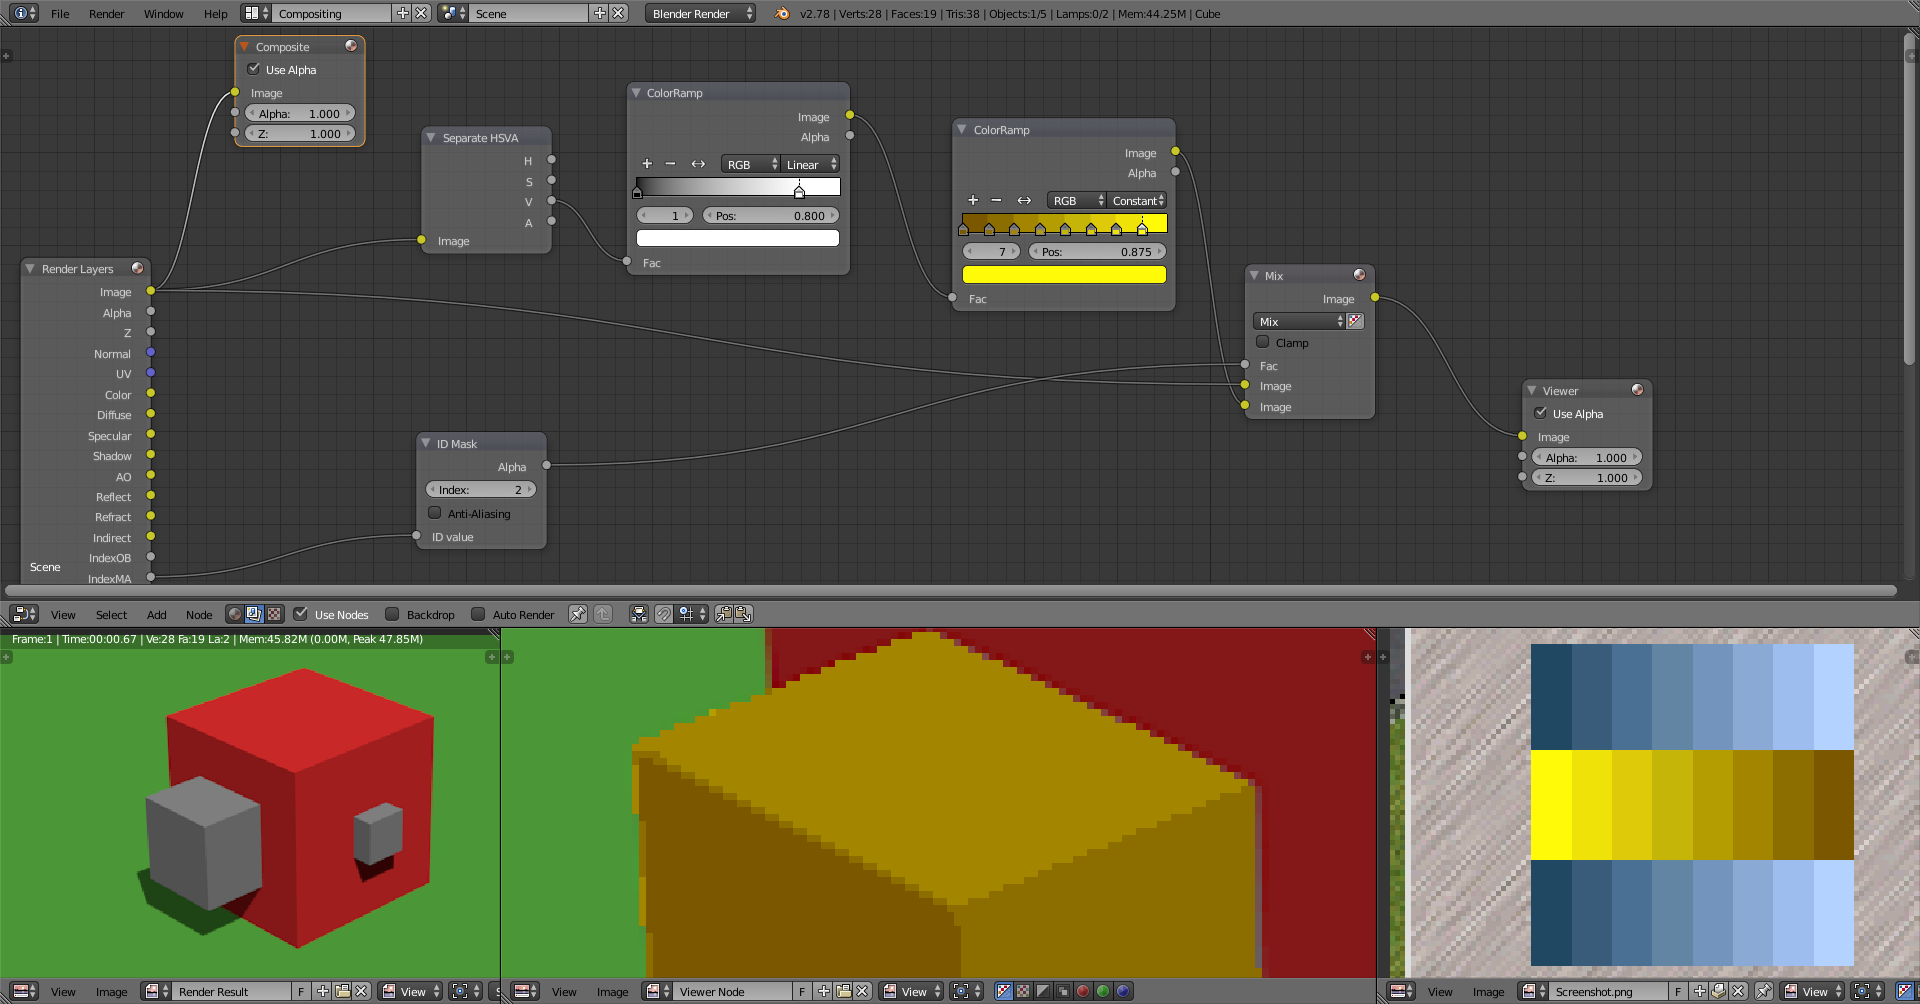
I was wondering whether there is any possible way of automating this process in Blender either with nodes or scripting, by having a special material used for the primary and secondary player colours which would ensure that the output colours are always in the range of the standard pixel values.

The real difficulty that I anticipate with this (and it is a difficulty which might well, I appreciate, not be surmountable, but I thought that it was worth a shot at asking the experts in case I am wrong about that) is that the graphics all make full use of anti-aliasing. Obviously, it would be no good if the special player colours were to blend in with other colours, as the blended colours would not be substituted by the game, leading to an unnatural transition between the substituted colour in the game and the blended pixels to a non-substituted colour. Is there any way of which anyone can think of circumventing this without disabling anti-aliasing (which would reduce the quality of the graphics so much as to be unacceptable)?

I should be grateful for anyone’s views on the point.

Pushing the renders through Blender compositor perhaps


Here I’ve separated the model rendering on two render layers and rendered with one material, colored the parts, combined the parts, and used file output node to save the colored versions on the disk automatically.

Could probably just use color -> mixrgb node to change the color on the parts and then combine the two, but I made it a bit more complicated way by making a clean diffuse pass without color which gives greater control for some uses.

Anti-aliasing is a bit of an issue, which is why I used separate render layers instead of using object or material indices to differentiate between model parts.

multicolor.blend (110 KB)

This looks very interesting - thank you very much. I am going to seem like rather a novice now, as I have only used a small subset of Blender’s features in all the years that I have been producing simple graphics for Simutrans; with your demonstration .blend, how am I able to render the orange/blue or pink/green versions of the cubes?

Also, the Simutrans player colours have a limited range of shades:

http://archive.forum.simutrans.com/topic/05377.0/15796/Screenshot.png

Anything outside that is not considered to be a player colour and is not substituted in the game. Perhaps I am missing something, but I cannot immediately see any mechanism for ensuring that the pixels of the various colours are all within the range of permissible shades no matter what the lighting/shadow, but that they vary within that range depending on the lighting/shadow. Is this something done by your splendidly sophisticated setup?

Thank you again very much for your help.

Check the file output node base path, change it if you want, and press render. That should produce two images in the path you specified.

Nope.

I don’t know the game or how it functions, only what you say and visualize. I still haven’t completely grasped what you have and what you want, and the requirements/limitations.

Is it limited only to the value component or is every component as important for each color, and do they change depending on the color?


It’s possible to separate the pixels to components and then affect and limit their ranges to specific ones. Above I used a setup that limits the value component, then took those to affect the hue component to produce the final colors because I didn’t want to set the hue and saturation range just for the sake of a screenshot. I also set the alpha, which could’ve been done in the combine node but did it separately.

But the color examples you provided change more than just by their value. Warm color (A) is hue-shifted towards colder hue as it goes in the shadow. Less direct and ambient light mixed in, but the saturation stays pretty much the same. Hue change in cold color (B) is very slight, but the saturation changes a lot.

On the right hand side of your image there are many hue/saturation/value variations. If the options are limited by specific amounts no matter the color, that should be doable. If it changes the shades based on hue for example, which it might because different hues look more/less saturated or brighter/darker even though the saturation and value stay the same, may need to use specific values for each.

If you must use exact values for each (rgb/hsv), this might help https://www.blendernation.com/2016/12/16/colorramppicker-add-on/

If you try color ramp node and adjust it manually, ctrl+clicking on the upper slider adds a stop. Hovering mouse cursor over a field and pressing “e” allows to pick a value/color for the field. Faster to use it with those.

Thank you for your detailed reply: that is very kind. I have found the images, which are in C: mp - that is most helpful.

I see how you have the nodes set up from the render layers there, but I am not quite sure what you have going off to the right, which seems different from the right-most nodes (File Output and Composite) on the .blend file that you kindly supplied with your initial post. Can you elaborate on what should be to the right? Apologies if this ought to be obvious - I am afraid that I have very limited experience with nodes, not being part of the usual Simutrans workflow.

Apologies for being unclear as to how the colour system works. The actual colours that need to be in the .png files for the game are those that you have marked A and B. The ranges of colours on the right of the image that I posted were the ranges of colours that the game will substitute for those colours in-game. We do not need to worry about those in Blender. Thus, Blender needs only to produce one set of colours, but they need to be confined within that exact range for those materials/render layers that are designated as player colours (i.e., ranges A and B). Moreover, there need to be lots of other colours in the image that are not player colours, which will not be substituted in the game (in this example, imagine that the small cube needed to be dark grey using a colour selected by its material) that represent things like a vehicle’s wheels, undercarriage, etc… The challenge is then how to stop anti-aliasing between these objects and the player colour objects from producing artefacts when the player colours are substituted in-game.

Another complexity is this: there are already many hundreds of .blend files with scenes already set up for the very large number of vehicles, buildings, etc. in the game that make no use at all of render layers or nodes, and it is those that will need to be adapted if this system is to work. Normally, changing a vehicle’s livery involves simply taking the existing .blend, saving it as a new file, altering the colour of materials (perhaps splitting objects into different faces or moving the joins between faces) and re-rendering it.

Is there any way of importing/exporting sets of nodes so that I can apply this system to a very large number of vehicles in the game without having to set up the nodes manually for each one, which, owing to the number of objects in the game, would not be practical? Also, and apologies if this is another novice question, but is there a way of applying separate blender layers to different materials on the same object? I ask because many vehicles are coloured by the application of different materials to different faces of the same objects. (I would give you a link to some example .blend files, as they are almost all online, but I do not think that I have accumulated enough posts to be permitted to post links).

Thank you again very much for your help - it is much appreciated.

If the plan is to somehow give it images with various colors and they contain anti-aliasing, I don’t think it’s possible to get error free color substitution in the game if it doesn’t have means to take care of that already. Even if you can carefully keep the colors you place in the image in specific ranges, the anti-aliasing will produce other colors/tones you didn’t choose.

It’s a problem in Blender and in any other program. In Blender one way to get a clear result is to have the elements separate and combine them based on alpha like in the example, not by substituting the colors in an already combined image. The game will have that problem and you could try the same by dragging an image in the compositor and then trying to isolate and change one color, which will have problems on anti-aliased edges.


I may have the control over the solid colors and solid shades it produces (example yellow h:0.158 and green h:0.295), but when the two elements get combined with anti-aliased edges, those produce other hsv values. I took few hue samples to show that the value changes on anti-aliased edges, but also the saturation and value change.

More explanation on that https://www.youtube.com/watch?v=8Pn6C4ZDjd8

If that is the case, there’s no point going through the exercise of making sure you give it specific colors if the result will never be what you wanted. If it’s the anti-aliasing that is the most problematic, it might be possible to somehow fade the edges with suitable shades of solid colors without actual anti-aliasing, but with ones that the game can replace. Not sure how to do that on top of my head though, or if it would look even half decent.

You can but it will go through the moderation.

Edit:
and this was what I meant with replacing those colors that the anti-aliasing produces with the ones in the available colors. Might work.


multicolor3.blend (114 KB)

Again, the reason that setup was so easy is because the objects are separated and rendered separately. If they were rendered in one and trying to use material index as a mask for example, that won’t work very well.


I used material index to get a mask for the grey cubes, then replaced those values with allowed colors and combined. Bad results because of anti-aliasing.

The way the material and object indices work is that it puts the index value on a pixel. But since the edges are anti-aliased, the index mask is not perfect. The anti-aliasing mixes the colors so the edges fade out, but an index can’t fade. The material/object is either one or the other, not a mix.

So that setup would need a clean alpha, which gets it back to rendering items separately, which some intensive scripting session might do to get objects imported in a scene from another .blend (easy-ish), split by their materials (easy), and then rendered and composited separately (hard).

Thank you very much indeed for your detailed replies: that really is very kind. The problem that you so clearly illustrated with the anti-aliasing was precisely what concerned me at the outset: the setup that you have in multicolor3.blend seems quite ingenious, but I note the problems that you describe when you make the cubes grey.

Given that I can post links, albeit after moderator approval, here is an example of a .blend file for one of the graphics used in the game. As you will see, it is a very basic object, and most of the different colours are produced by different materials on the same object.

I am getting the distinct impression that adapting such .blends to work with a system that will produce the right sort of output is likely to be tremendously difficult - is that correct? I do not mind investing some time in initial set-up, but I do not have the time to spend a long time manually adapting each of many hundreds of .blend files, so there is not a great deal of use in continuing if it is not likely to be possible to make this work without radically altering all of the .blend files.

Thank you again very much for your help - it is greatly appreciated.

One way could be to have a .blend that is used for rendering and compositing, and having a script that

  • imports objects from an existing .blend file
  • goes through the different objects and materials
  • moves wanted parts on an assigned scene layer which then gets rendered on a separate render layer
  • which the compositor would combine and produce final rendered result
  • then would delete the unneeded objects, and
  • repeat

That could automate the process if the files are consistent in that they can be rendered with the setup they have in the file, or with same setup for all of them, and you can identify the objects that need to be rendered separately to get the color treatment.

Thank you for that suggestion. Would this work for an object which has its livery colours distinguished by different materials?

What I mean by object are the ones in a blender scene. A camera is an object, so is a lamp, and all mesh type objects a model consist of are also objects and manipulated in object mode. Materials get assigned to mesh faces (in edit mode) so one object could have multiple materials, which also could be separated to their own objects if needed.

So if it can separate and identify right ones, that’s a yes. Once it can render them separately, then a potential problem is combining them, which it might do with z combine node instead of masking them with render layers.