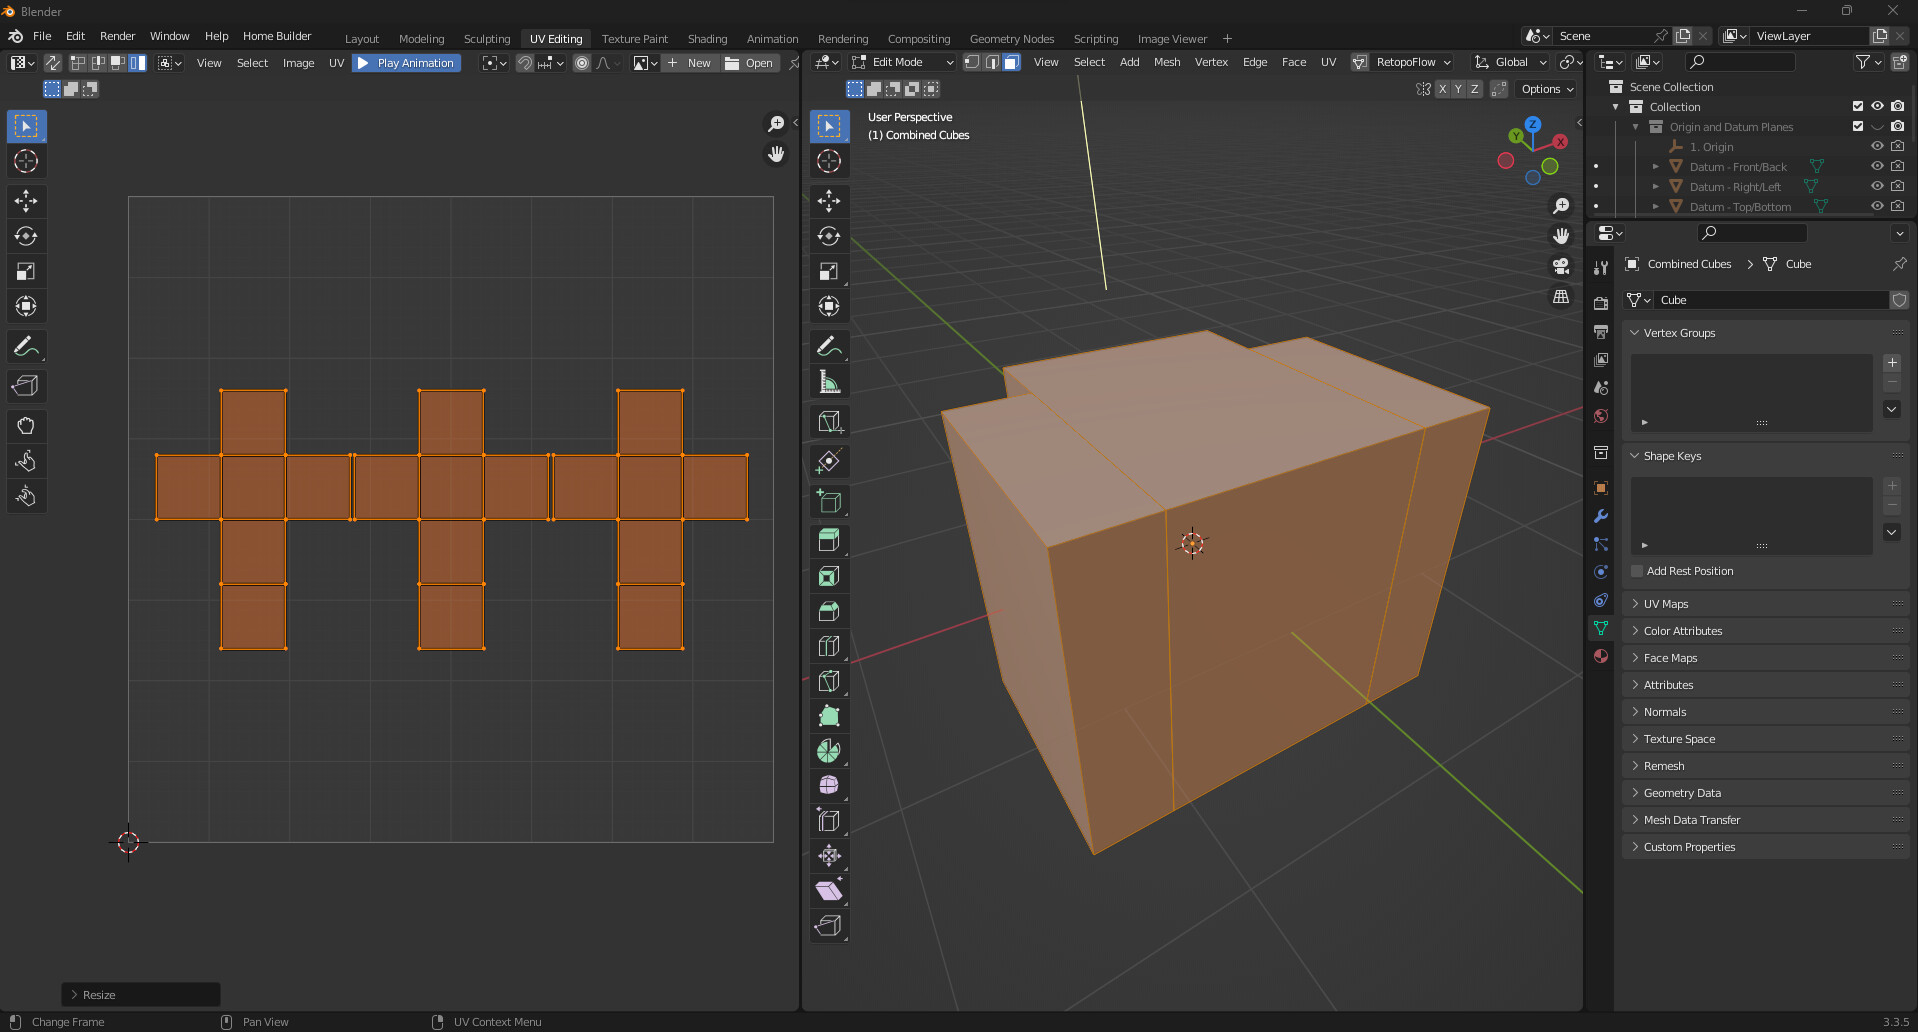
hello guys im new to blender, im still practicing.
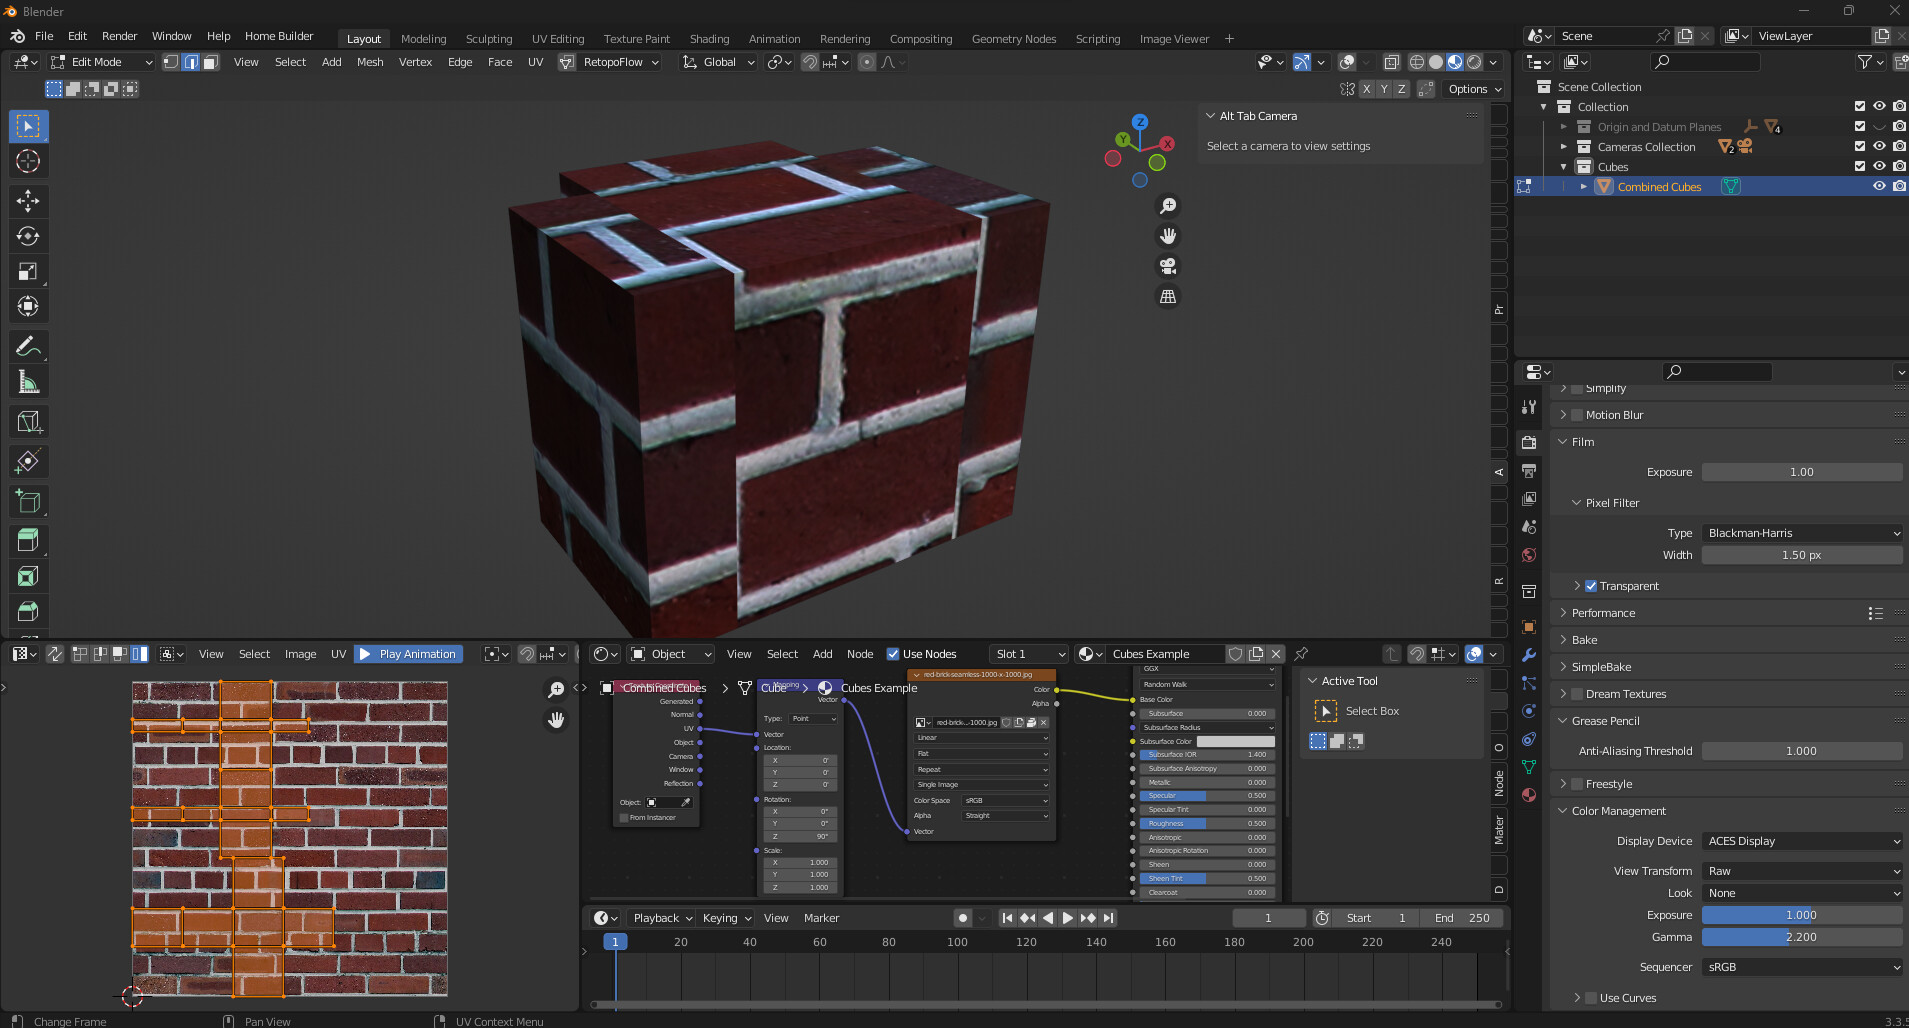
in the image i used 3 cubes and combine them using ctrl j, now i want to add texture but i ends up applying to 3 cubes and separated.
i wanted to combine them including the texture maps, i dont know how you call them. i just want to make pixelated dog.
sorry for my english
My assumption is that the three cubes are using their default UV maps, and they are all in the same place on the tile. Try unwrapping the cubes and placing the UVs in the way you want them, or just edit the existing map to be spread out and share one tile?
yes i think the three cubes are using default uv map.
and how can you edit map and spread out in one tile? will it stretch the texture?
- 1. To edit the existing UV’s:
In the UV Editing workspace, with your combined object in Edit Mode, choose “Island” UV Select Mode in the upper left.

Click onto a UV island, and move it to the left or right along the X axis. You can do this with the G and then X hotkeys.
Select all the islands and scale the UV’s until they fit on the layout. I scaled them to .4 of the original size. Now you have non-overlapping UV’s.
You may need to rotate the islands or otherwise adjust them further.
Additionally, you can arrange these islands on your layout however you’d like.
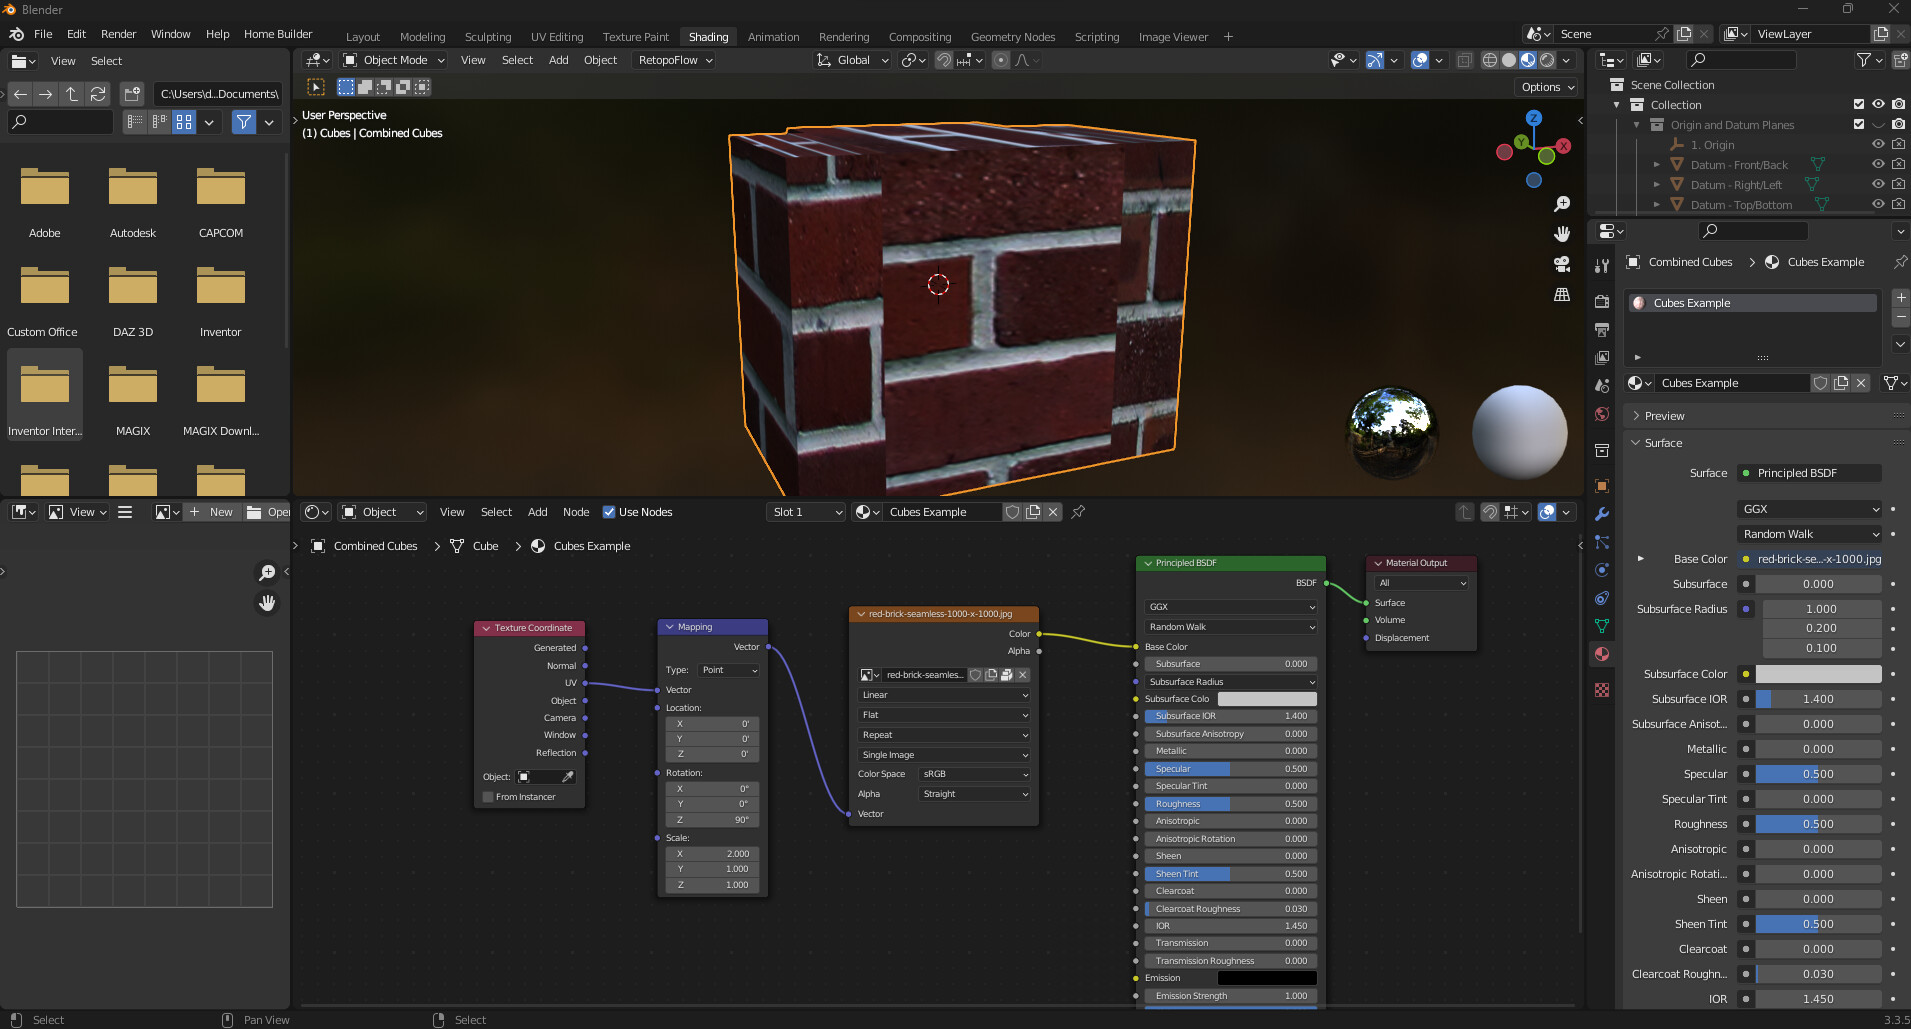
To get your texture mapped onto the layout, a good starting point is to use a Texture Coordinate and Mapping node combination:
-
- To unwrap the object from scratch:
In the viewport in Object Mode, use the hotkeys control+A and Apply the Scale of the object. Then, enter Edit Mode, and select edges that make sense for the object.
Right click or use the Edge menu at the top of the screen to “Mark Seam”.
You may need to “Toggle X-Ray” and enter X-Ray mode to select adequate edges.
Then, select everything with A or the Select dropdown menu, and then use the U key to “Unwrap”.
You will now have a UV layout that better matches the changed geometry. There are cases where one or the other of these methods may be better.
I hope this was helpful! 
2 Likes
thanks for replying, maybe ill stick to unwrapping, and adjust them manually so i can move on
i just thought that if you combine objects their uvmap will do aswell but it doesnt?
It did combine the UV’s, just right on top of each other, and therein lies the problem!  Please let me know if I can do anything else to help. I remember starting to use Blender; every single thing I wanted to do was confusing and often frustrating! Hang in there – you’re doing great!
2 Likes
i got it, thank you very much.
1 Like