I have tryed with xyz nodes,the same result.Lower the strength make it less visible but the bug is still there.Maybe it is not a bug,since these are vectors they might need different math.
Yes,in my build the flakes has seperate glossy shader.
In my search for a solution i have found this BA thread
I think i give it a try,if such simple mixing does not work.
@Secrop ,is this normal solution from the thread still valid or have you found a better math ?
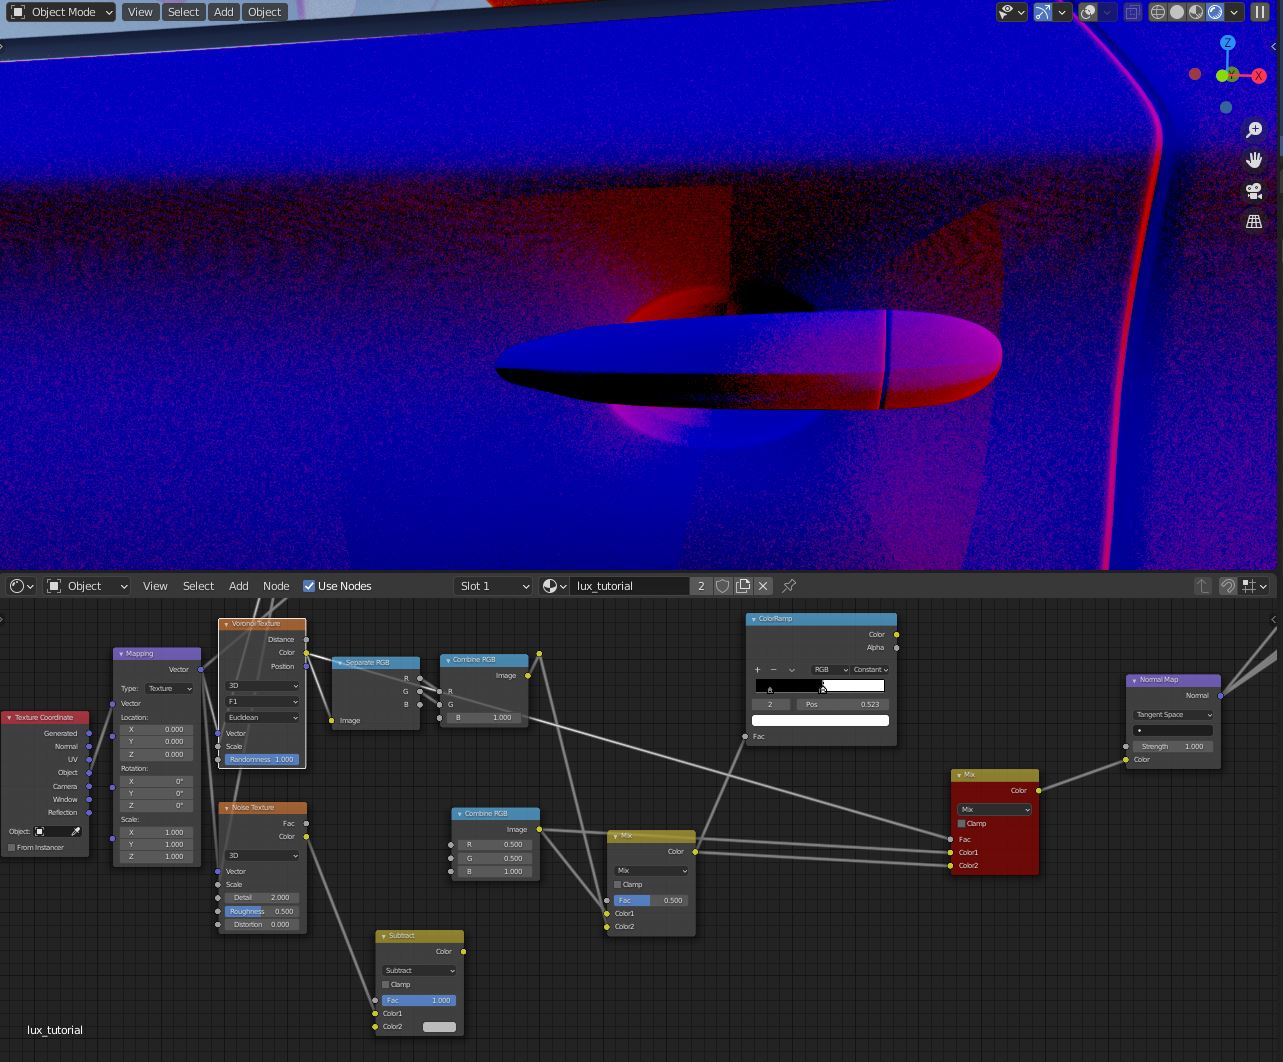
edit,i think i know whats happend with the constant color ramp mix.
Since the linear scale of the colorramp represents the vector angles,i have cut off the lower angles in my posted example.
But how can we make a constant distribution seperation with vectors? If this should result in a even distribution this would need to be fragmentet somehow.
Edit,tested again.Even the direct voronoi output as mix fac gives this strange normals.What is that?
Most of the methods described in that SelfShadow page are ok, so it’s a matter of preference. I still use the RNM method when working in Tangent space.
I have found a temporary setup to get the normal artifacts with a constant mix minimized.
I used the normal blend math from the selfshadow page fwiw in the setup.
here a render with settings from substance material library feed into the shadergroup,and the tmp artifact solution.
green teal metallic,without denoising
Finally i could find a method to mix voronoi texture density with math.This works very well,that no mirror seam or artifacts like in previous post are produced anymore.
Additional i tested further to understand the settings of substance source.
here a test render with 3% flakes in a iridescent nacre pearl material
I revisited the Lux Car paint again,since its absorption was not the same as mine result.So i changed the edge influence math again.
Now i think its close enough.
Omg I cant wait to see this. That looks awesome. Im gonna need that car paint shader when you are done. Don’t mind the irrational arnold fanboy in the corner lol.
If you have a favorite car shader,then feel free to post the settings with preview render, i can try to rebuild it then.Btw i have build around 40 presets atm,but i have to re adjust them slightly again,since i changed some math and added features with the time building the presets.
Not generally. I usually just build what I have to as I go in blender but the arnold car paint shader has never failed me for day to day use. It’s just nice looking. It really is one of those things I just miss from using maya more. I would love to just have a copy cat of that shader sitting around in my blender library.
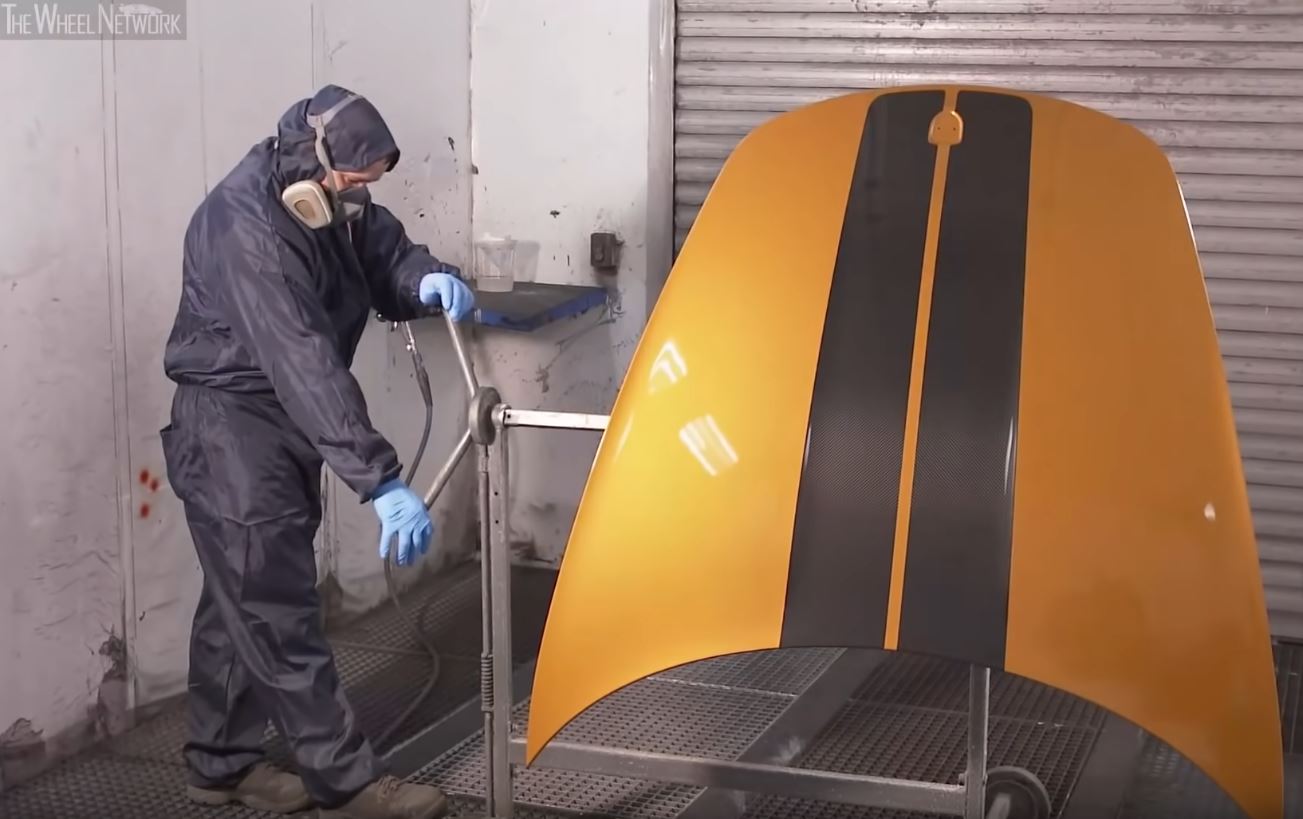
I added a pearl control,here some lighting tests.For comparsion,on the left pic a screenshot from a yt video,where someone sprayed white pearls, over a partly black and white base colored hood.
Notice these are no metallic flakes,these are transparent flakes.
I was not happy with the increasing IOR for metallic/conductor materials,like seen in some renderengines up too 100.For this reason i added the correct trichromatic calculation for metal flakes with n and k values.
This way someone can put in values like aluminum,gold, titanium ect from refractive index site ie,to get physical correct reflections as result.Additional i made the scale from the flake to realworld micrometer input,and max flake angle with degree.
Here a Testrender no denoise or postpro.20 micrometer alumium flakes,with 5 degree flake angle.
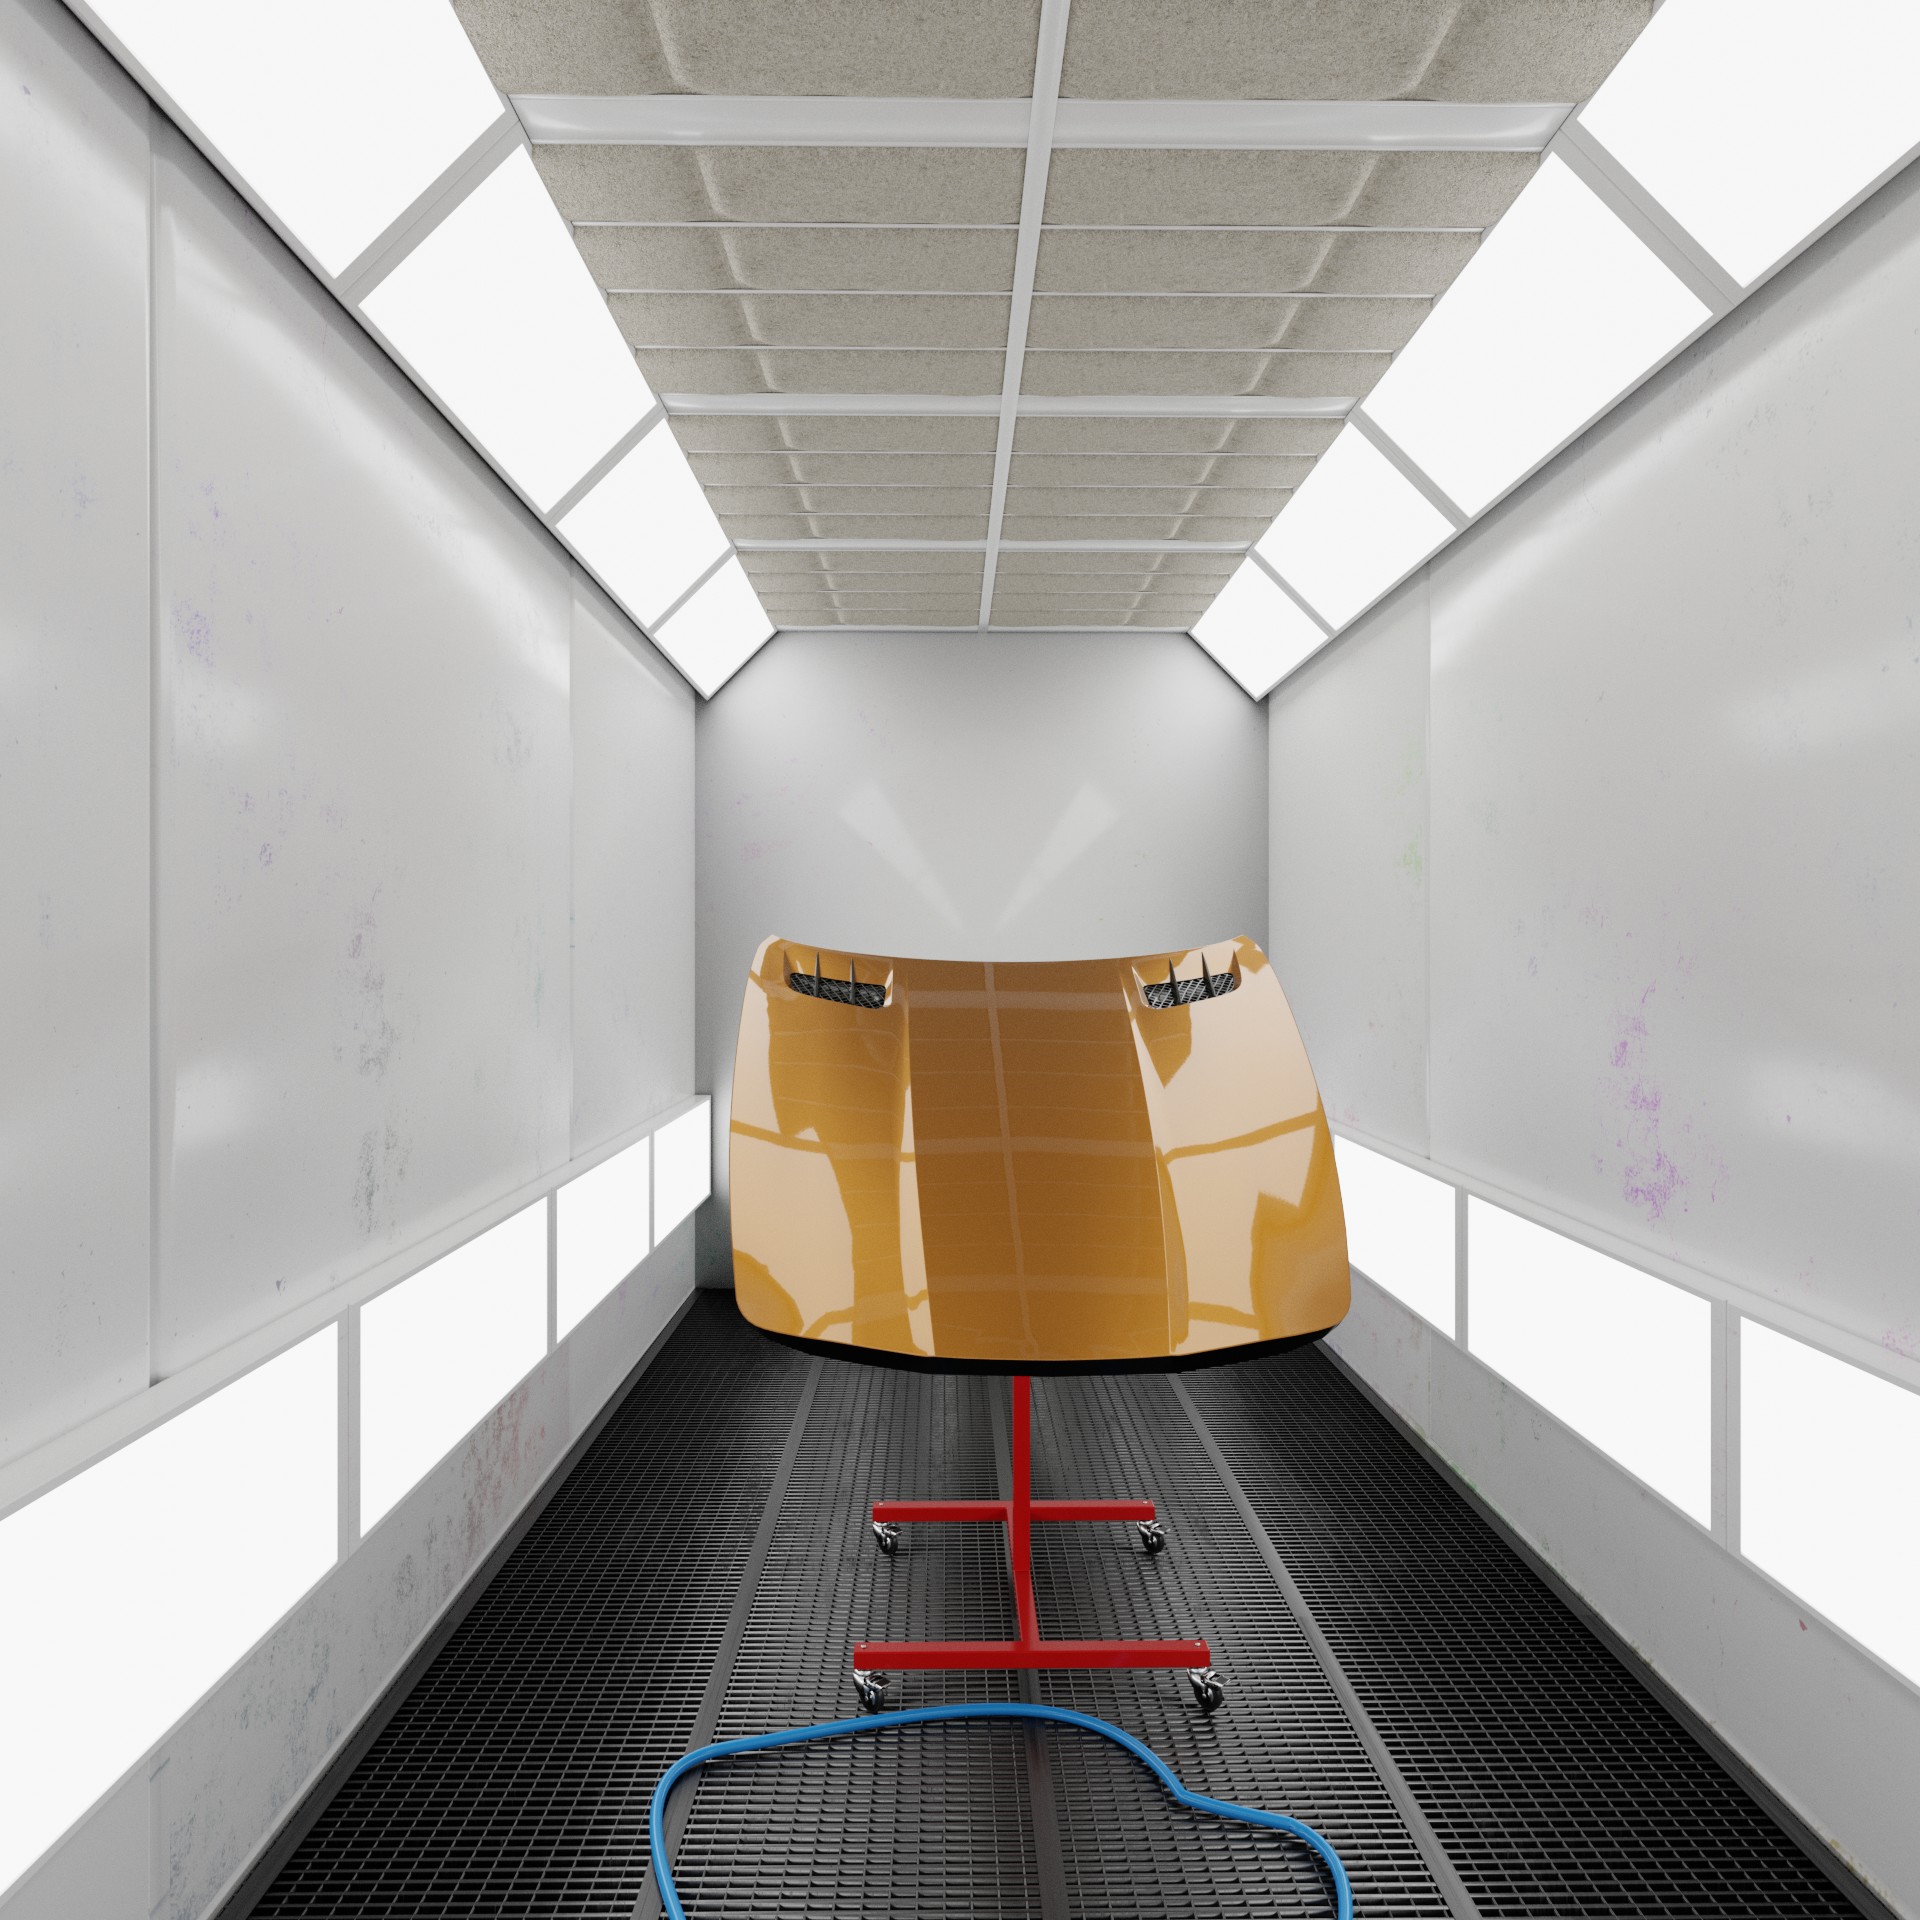
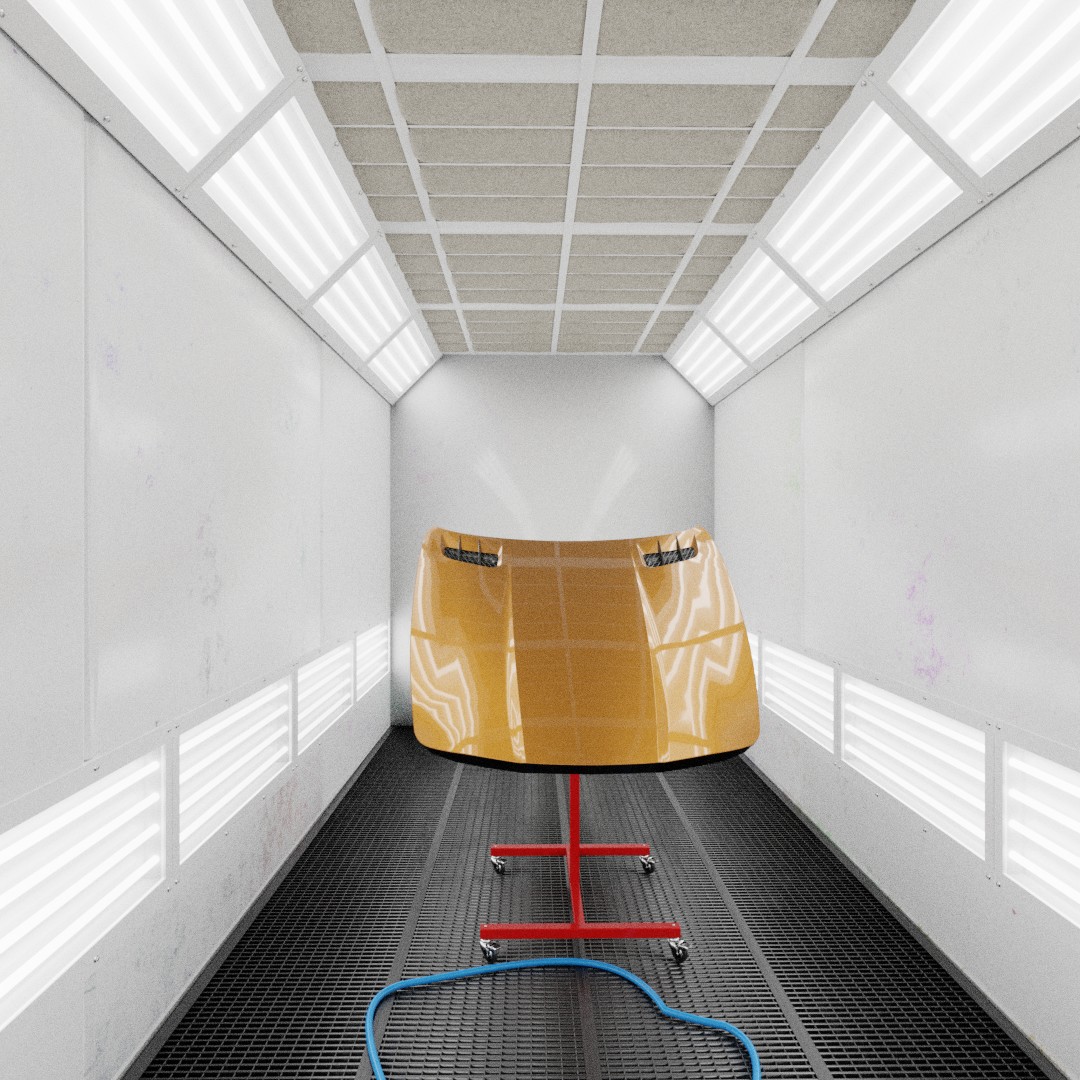
After watching many real world car paint videos,i was curios how the shader would be looking under paint booth lighting.For this reason i modeled one with some equipment objects.Rendering without denoise.
Flake distribution test.
From left to right on a 1 x 1 m box,gold flakes 5 microns to 5000 microns and bluesish effect platelets 5 microns to 6000 microns.each with a density of 10%.
For better particle visibility without clear coat.