Not sure if this is a compositing answer or not, But I am in the compositing stage.
To break down what i have … Full scene computer terminals, cables etc… sort of a cyberpunk hackers lair. Everything in the scene is Assets… no practicals. I filmed the 2 actors in front of a green screen. Keyed out in AE exported as an alpha .MOV. I imported the .mov as a “image as plane” into the scene.
In compositor… I created 2 layers. First layer is everything in the background. Second layer is just the 2 actors. I did this originally because I was hoping to match the plate (the 2 actors) to the rest of the scene. I am in cycles … Color Management is AGX. I am exporting openEXR, RGB, Float(half) and DWAB (lossy). The plate is 3840x2160 so I matched that resolution in the output format. Is sperating the layers helping or making it worse?
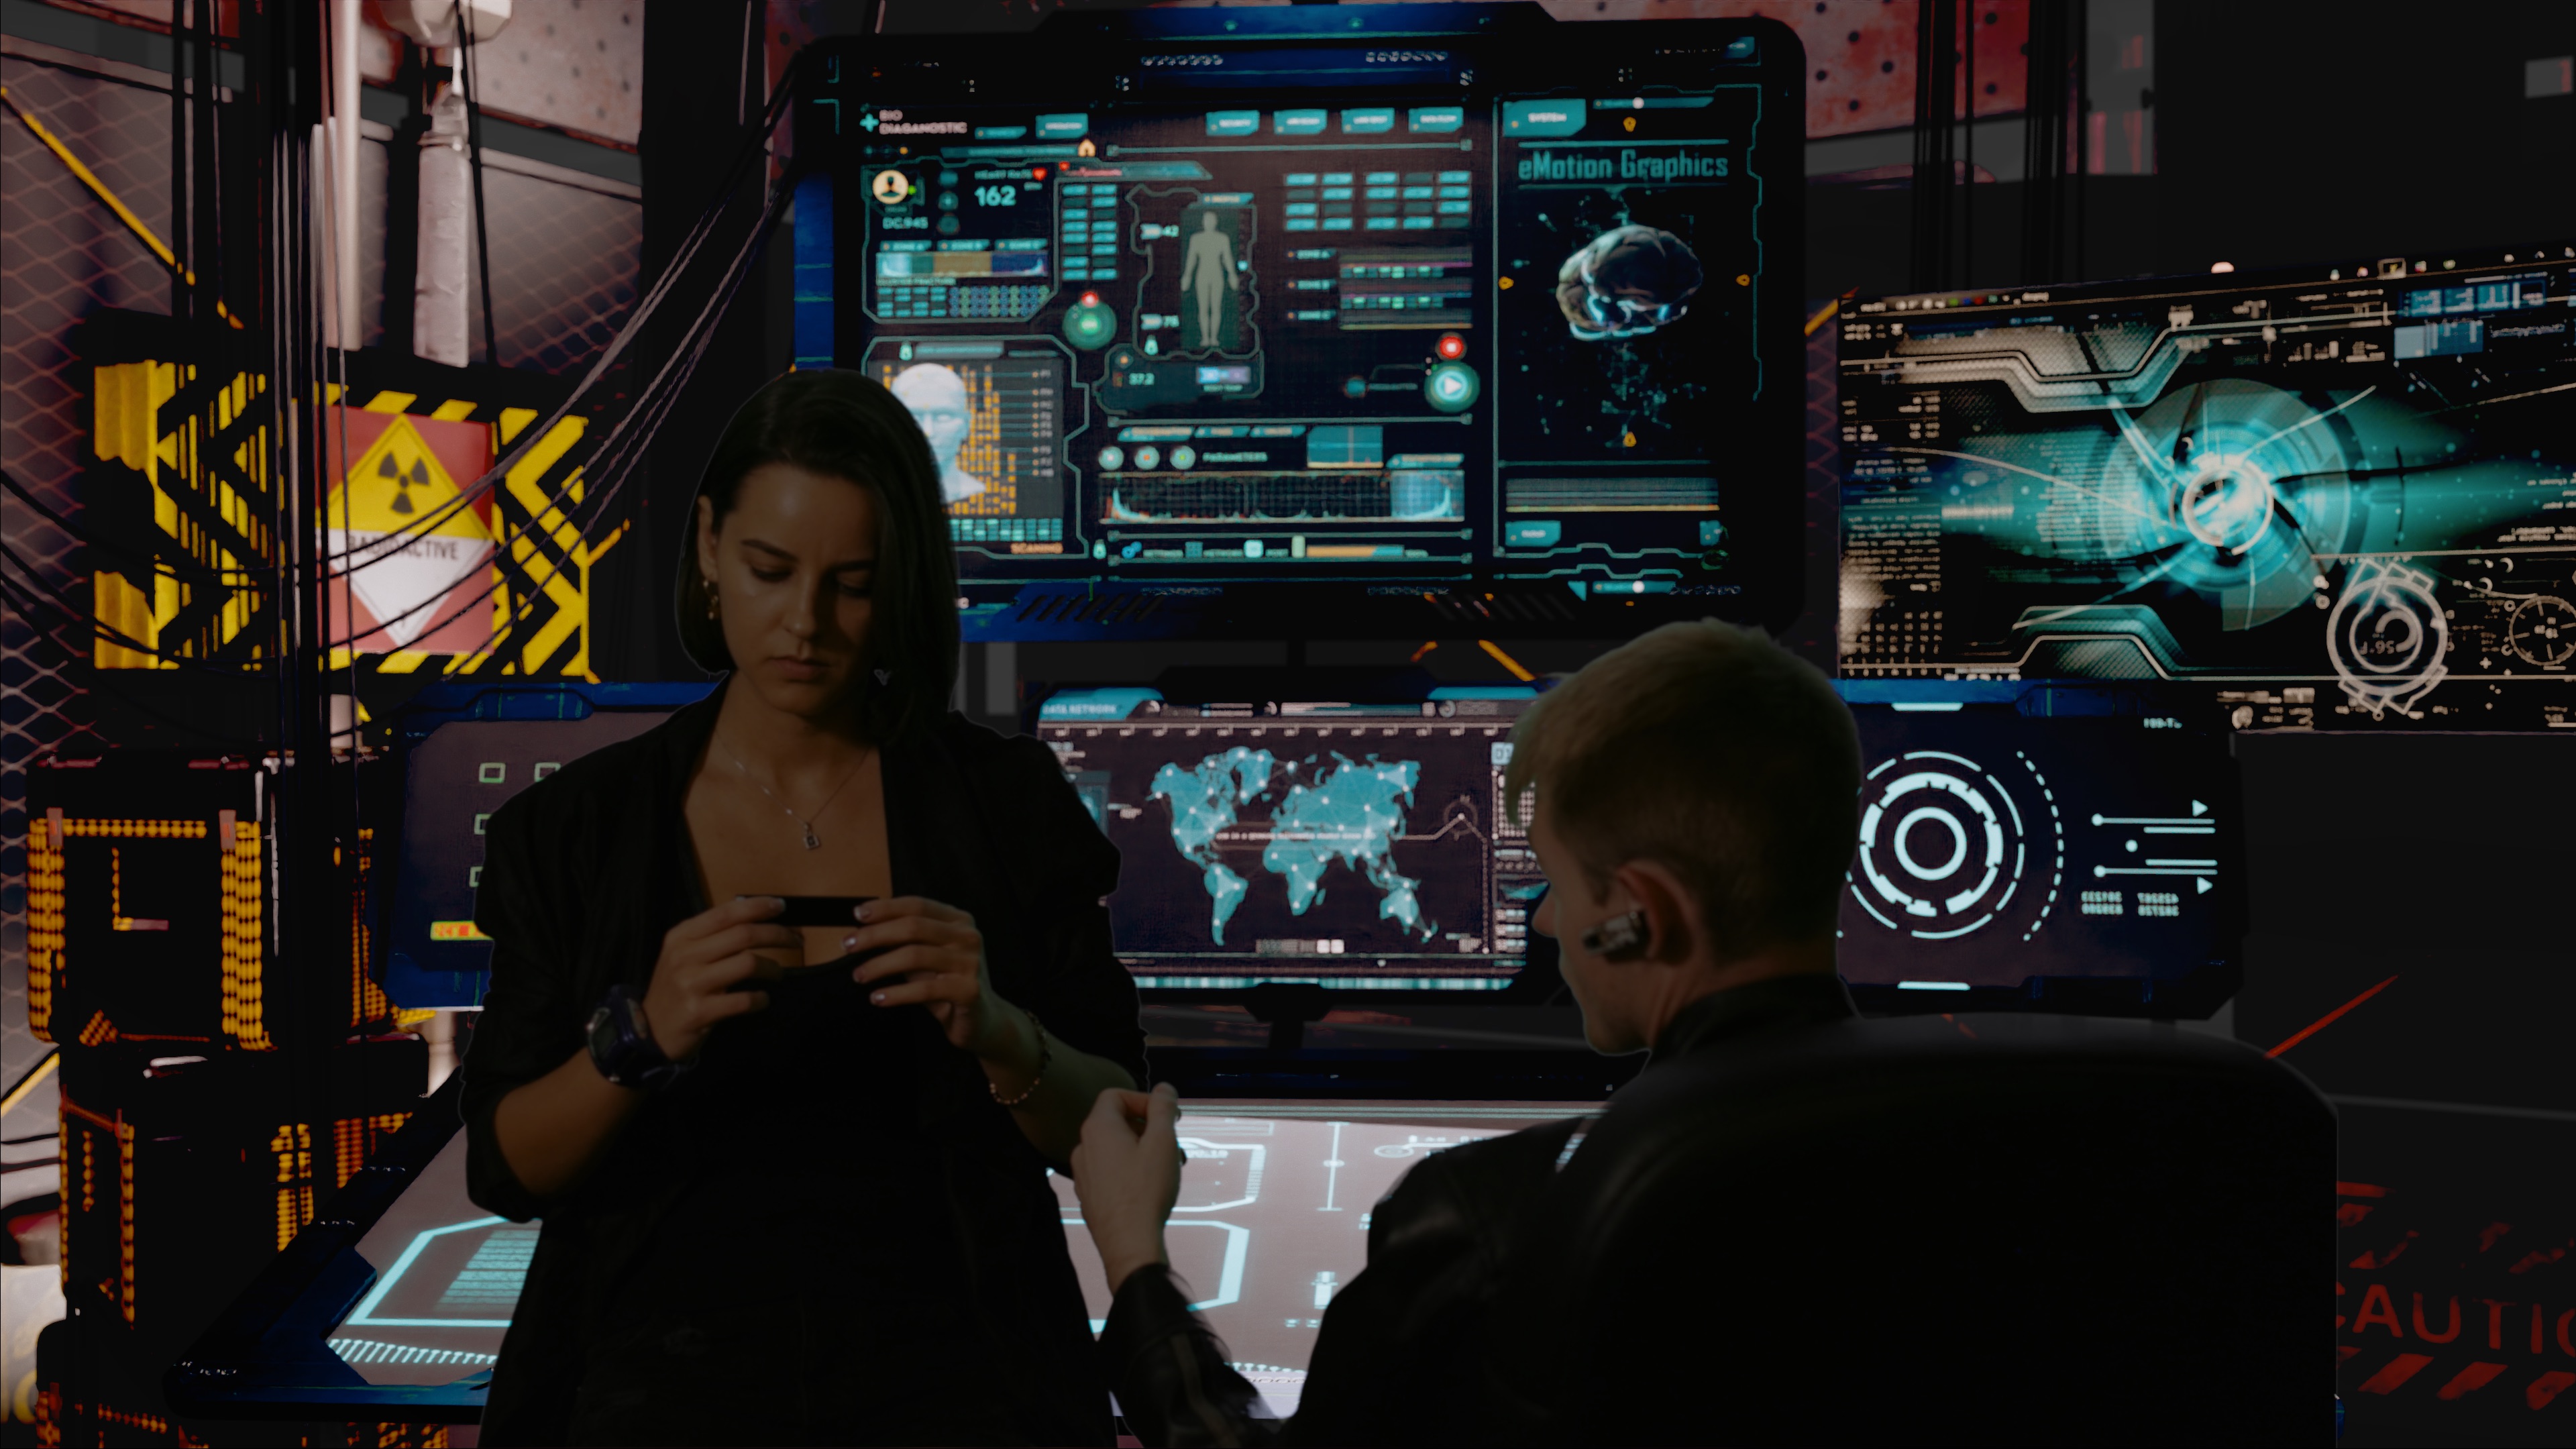
So as I said in the composite window I have a Background layer and a Plate layer and have tried everything to match so the actors do not look like they were placed in front of a green screen image, but that is what keeps happening. here is a still from the image sequence
obviously the exposure is a little too dark, color is off, textures are not that great etc etc, but I am looking for any suggestions. If I bump up the plate exposure they look even more like they are dropped into a background. Is there a node or setting I am missing? is the keying or filming bad? I have all the correct lighting temperatures, and angles to match the plate.
My two cents…
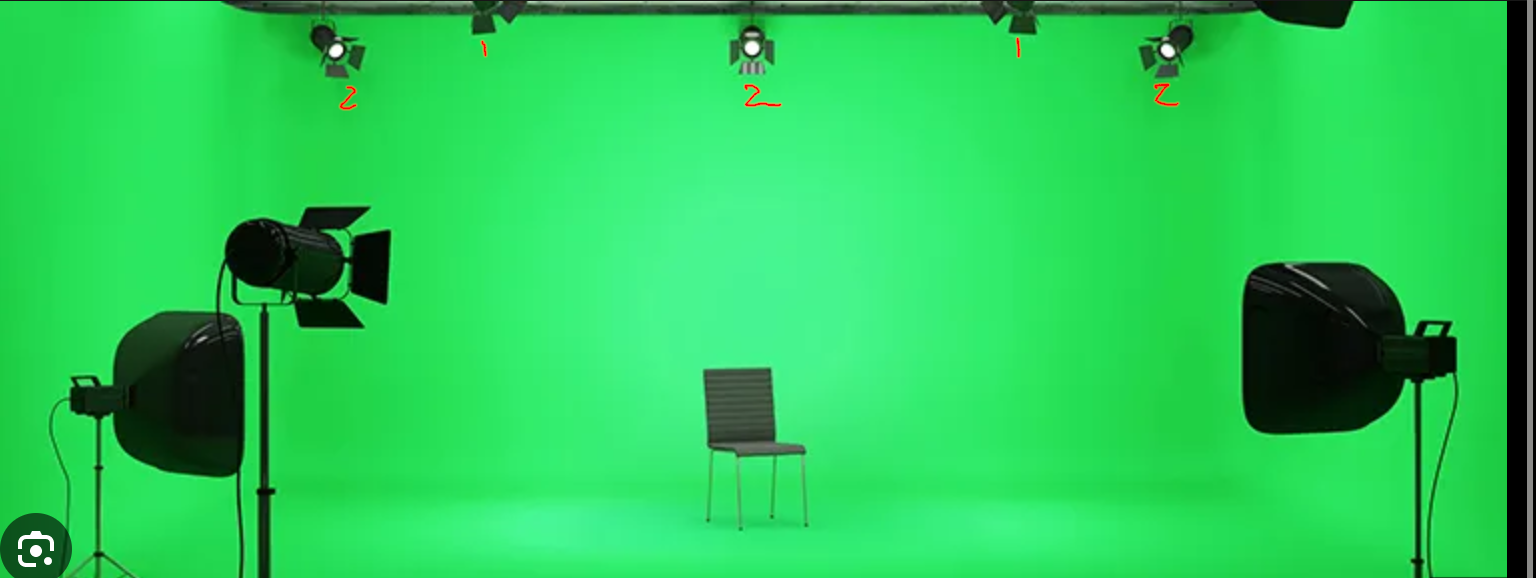
The lighting you used to shoot the actors doesn’t match the background. light is supposed to be cast from those screens and act like a rim light on the actors. That’s why the new LED background is used now in big productios. If you don’t have that tech. You better have the background in mind when lighting the shoot. Some some lights behind the actors where the monitors and the top light from the background could have helped.
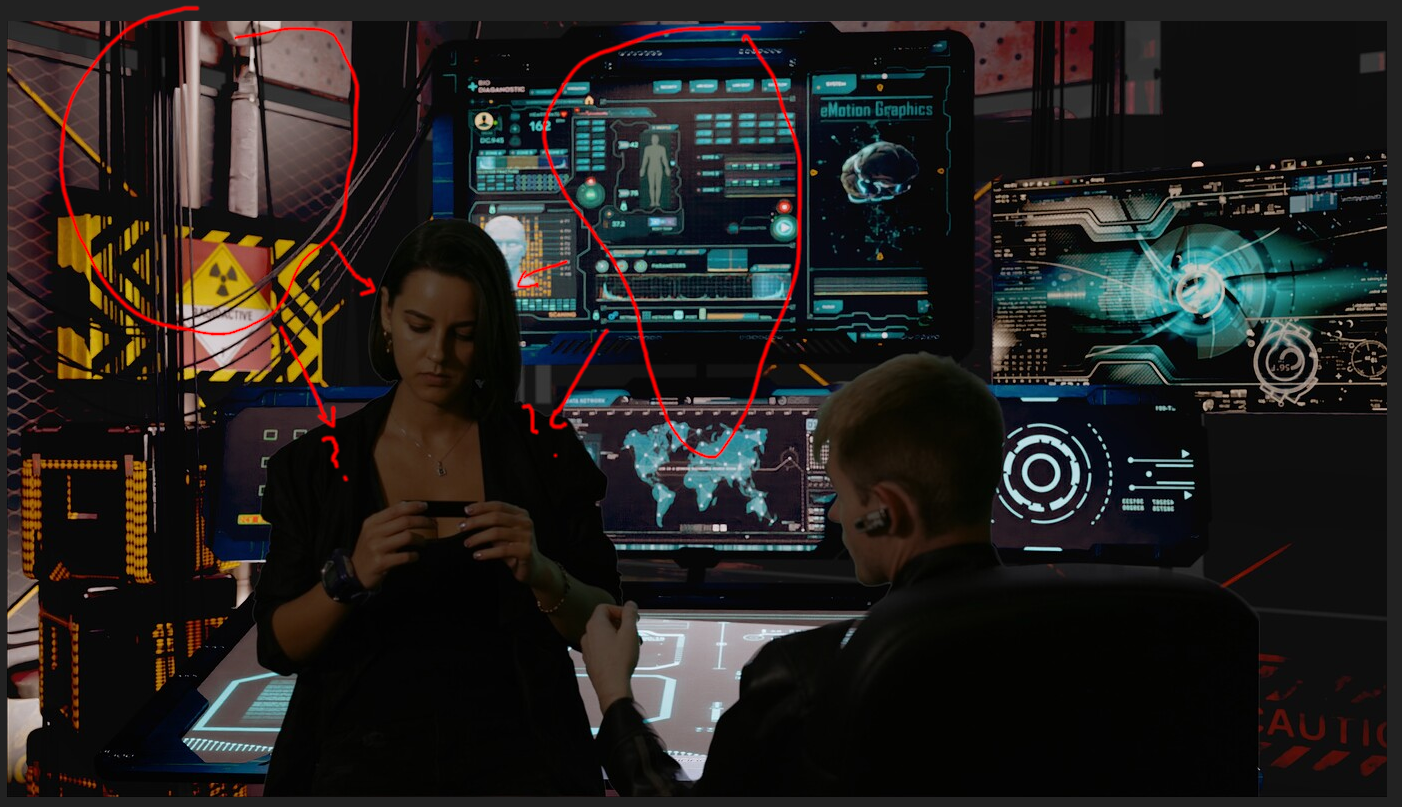
If you look at the hair of the women there is a visible edge. U need to tweak the keying
And better do the keying in the same compo scene so you tweak accordingly based on the result with the background.
Green screen bleed on the actors you need to deal with that too, color grade your plate to mach and reduce the green when needed. For a dark scene with artificial light blue screen can work better BTW
I agree with most of what you are saying. It is tough because my friends that comp ahsoka and Mandolorian say film first then build a set around what you filmed, so that is what I did hence using green screen and just lighting in white and no color. I did notice that having any behind light/hair light is definitely important to keep edges uniform and keying (which is far from easy for me) is also important. things like feathering!
One note that was given to me from my CG/VFX guys. They all said I am doing the job of 15 different departments. Writing,directing,filming,Keying,color correcting,3D world building,comping, editing etc etc etc. But I guess these days we need to do what we need to do to make content.
POSSIBLE FIX:
I did a little deep dive in things like Nuke and compositing. One thing I am trying is more layers. I was just comping with 2, the plate and the background. I noticed in Nuke when they composite they have many layers. So in blender I separated the fence way in the back as layer one, then the props in front of the fence layer two, then the desk layer three and finally the plate. Separating them in compositor gave me a lot more control of color, exposure and even some depth because I am matching them separately to the plate and not matching the full background.
Film first and build your set around means in your case less lights in your background now…and give your background a front light (for an easy comp you still can fix it with different layer like you’re saying ) a
I though Mandolorian used LED screens in the background?! they had the set ready on the screens behind the talents casting the right light on them
behind light here means too things:
1- lighting your green screen ITSELF, to have a uniform green background for easy keying
2- lighting your talents from behind to mach what is supposed to be in the environment they will be in (if needed)… if the environment is supposed to be dark no light shining from it at all so it will not be needed hence the (environment in mind. I didn’t mean you have to build a final set)
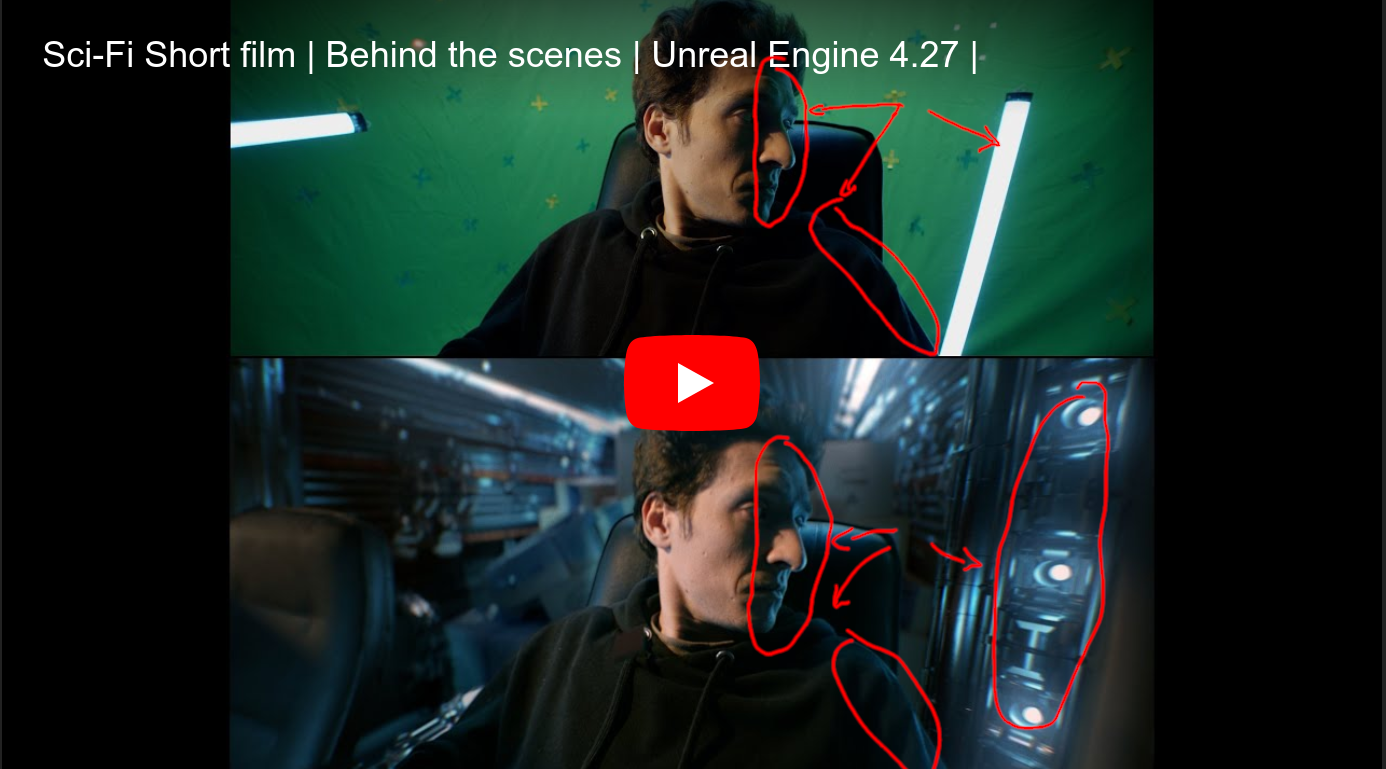
two actors talking with a bunch of high tech display behind them maybe we should light them from behind with a blueish light. if that background is animated. i will even think of using real monitors with blueish animation in them so the cast on the actor will change ( there is LED light with some effects that simulate TV and stuff now) and that’s something to focus on on the dark side of your actors
in your case the guy is easier to fix but the woman is hard. hat background light should scatter through her hair and give here a rim light effect like the example above (even tho you didn’t like his result that the way to do it IMO)
now to fix yours i think you need to compromise between the background lighting to match the actors lighting a bit and work on the plate with power widows in color grading to that you will have to track and adjust the lighting on the actors the right side of the women for example (right for us but her left) no way it will stay dark like that if she is really there (not sure of the new AI re-light option in resolve can help with this never used it seriously)
good luck cause :
is a fun challenge but really hard, in a big production team there will art design team with a concept and a VFX supervisor between them and the DP & gaffer
light isn’t just a color. it’s a color and a direction, the color is the easiest to fix in post so in the shoot you worry more about the direction
don’t forget to blur your background CG element, add grain, lens distortion and chromatic aberration to make them less CG and mach the camera
@cgPixel is right. The lighting of your background is completely different from the lighting on your characters. It’s not a small difference- every direction of light is different. That’s why turning up the exposure isn’t helping- you need to fix the lighting. If you can’t refilm, rebuild your background
It’s common for VFX shots where actors look disconnected from the background. There’s some information that will help at first, but compositing takes years to master and there’s always something new to learn. If you’re aiming for CG compositing you should start with scenes that have just a CG asset, like a car, a toy, and move on to more complex ones where there is some animation and maybe simulations. When you get good at those you can try compositing entire backgrounds. Studios call it set extension and usually are assigned to senior compositors. I believe you’re not trying to be a compositor but just to enhance that specific shot. It’s a lot of information and I’ll just give a superficial start.
Camera matches with real sensor size, focal length and scale. Last one is very important. Lighting match, export your files and do compositing in AE or Nuke, you’re probably more used to AE. There’s several lens effects to add, I’ll just send an intro video. Now, about keying and edge treatment also takes time, this playlist is probably the best keying tutorial for free and VFX studios use take technique and/or concepts at a more advanced level.
A very basic workflow to that shot would be:
Denoise footage
Undistort footage
Camera tracking/match
Modeling/LookDev
Light/Render
Tracking markers cleanup
Keying/Edge Treatment
Screen inserts, all your motion graphics would be added in the compositing stage using AOV’s.
Lens effects including lens distortion
Regrain
A simple fix to that shot would be color matching (blacks, whites, gamma and saturation), defocus and motion blur if there’s camera movement, light bleeds. Now for finer edge treatment, you will need Nuke. Blender is very bad at it, AE is very decent but Nuke is endgame.
This is an overview and you can follow along using Blender, yet I highly recommend Nuke, there’s a free non-commercial version:
I think this isn’t what you’re looking for, probably just need some easy fixing but the fact is that there isn’t. Connecting live action with CG isn’t a simple task, and it’s a paid profession.