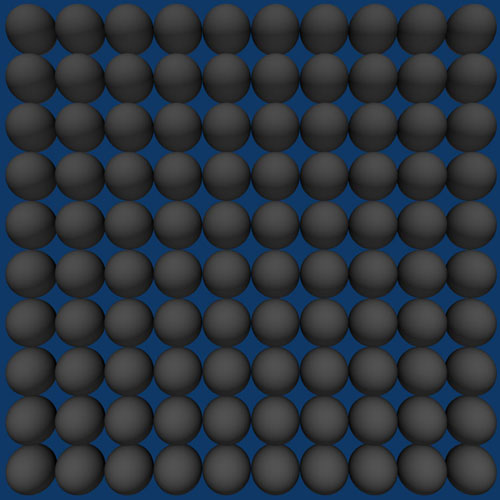
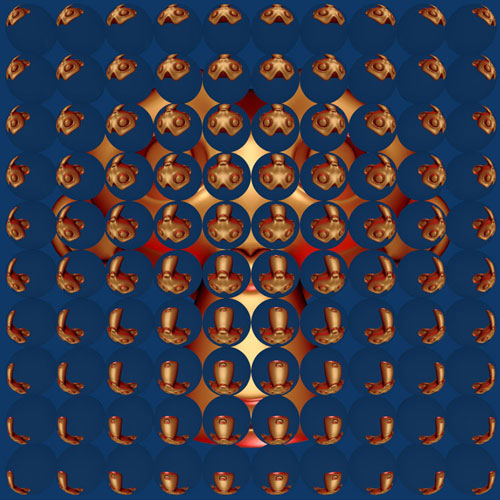
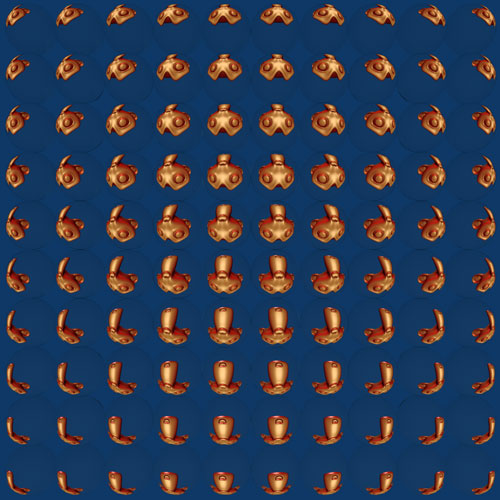
I have a model of Suzanne at the Origin (first pic). I have an array of glass spheres in front of Suzanne (second pic). When rendered, I get the glass spheres refracting Suzanne, and Suzanne is still in the background (third pic). However, I’d really like something like the glass spheres with Suzanne refracted in them, but withOUT suzanne in the background, and without edge artifacts and complicated post-processing of image3 (something like the 4th pic, which I was only able to create by post-processing). Any ideas on how to do this with compositing? From what I understand this could be very difficult to do with compositing?
whoa, awesome… i don’t know how to do that (I couldn’t figure it out just now). can you send the working .blend back to me and I will poke around in it? THANKS!!!
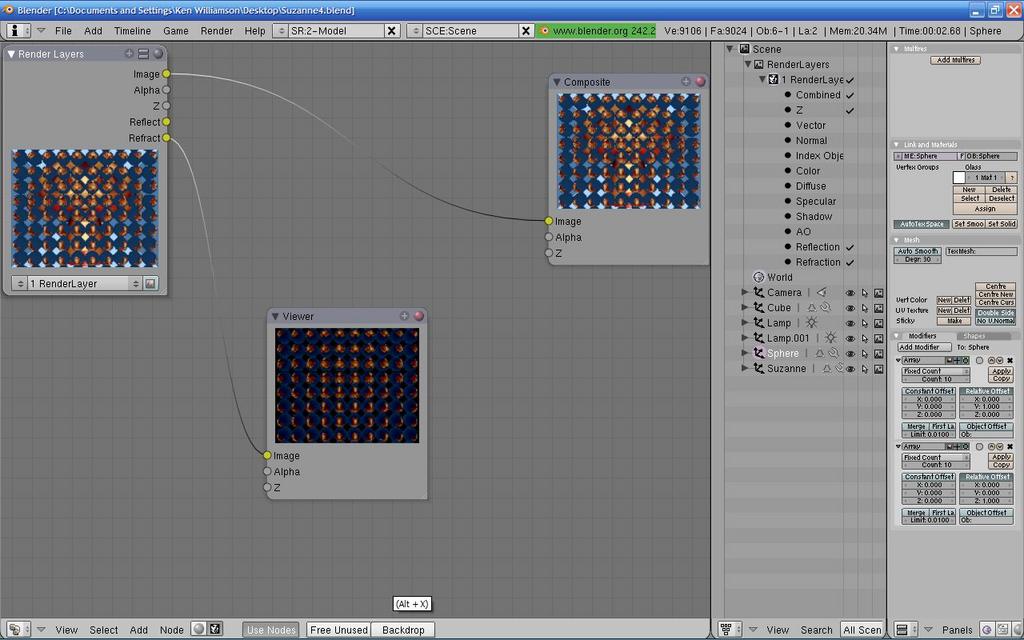
Actually, if you use the “Env” button then you won’t have any Suzanne to reflect into the scene. This is where you will want to set the spheres on one layer and suzanne on the other. On the render layers tab make sure that both layers are set to visible in the “Scene” section. Then, in the “Layer” section make sure that only the layer that has your spheres in it is set to visible… Following is a quote from the 2.42 change log and can be found here:
http://www.blender.org/cms/Render_pipeline.747.0.html
“It is important to realize that shadowbuffers and the Octree (for ray-tracing visibility) get generated in a preprocess, so these are identical for all RenderLayers as indicated.
That means you can separate a foreground from a background with RenderLayers, but still get a combined image as if it was rendered in a single pass.”
Note: there is no need to light the layer that is not actually rendered as it’s lighting will not be taken into account (it’s not visible, remember?). Also if you do not want to have a shadow cast bt your monkey make sure that any lights which would cause her to cast a shadow into your scene have ray shadow and or buffer shadow disabled. You can see her shadow in my image and you can also see that she is in between the camera and the spheres (in the 3D window), yet she is not rendered.
Ton really hooked us up with this new render pipeline. The days of other 3D artists trashing Blender are a thing of the past. This program can hold it’s own against any of them.
Cool, thanx Fligh, but move the monkey in between the camera and the spheres and see what happens. When I tried it with my own file I got nothing, nada, but then I had the render layers set up as mentioned in my above post. Your monkey, being on the same layer masked the spheres when placed in between them and the camera.
In all honesty I had been trying to figure out what the hell that function was good for and you just showed me. Turns out it has to be configured your way which is something that I probably would have never considered, so thanx, but in this particular situation I just don’t like it.
Hymie, I get very little love on these forums even though I try to, and probably do help out as much as anyone here (when I’m not on the road that is). Enthusiastic responses like your’s make it all worth while, even though your’s is the only one I’ve ever had. Thanx!
Great, just great. Keep up the excellent explanations.
This is actually for some scientific computation… the difficult to render one (takes 6.5 hours on a quad 2.5 GHz G5 with OSA of 16 with Blender set up with 4 rendering threads) that I didn’t show has 8,100 glass lenses and this trick will make it without any artifacts. Sweeeeeeeet!!
but move the monkey in between the camera and the spheres and see what happens.
Oops! Never thought to move it there, I mean on any file not just this one, probably because I know all the tooltips by heart. You’re dead right that had there been any geometry behind the munky it would have been blotted with sky color. Thanks for pointing that out.
I get very little love on these forums even though I try to
Now I feel like a douchebag. My reply was definitely not intended to hurt, more to humour and so my sincere apollogies. I just can’t bring myself to use smilies and you’ll have to forgive me for that.
No, no no, Fligh…you’re my hero bro…you’ve taught me more about Blender than everyone else combined. I can ALWAYS count on you to give me more insight with your posts, just like you gave me in this one. In fact I used what I learned here to answer another post. This is the easiest way imaginable to mask geometry within a render layer. And I liked the way you put it out there too. Reminded me of all those Italians that I liked taking to so much up in Jersey
Specifically - I was refering to the fact that on the rare occasions when I’m asking rather than answering questions here, about 90% of my posts will go totally unanswered, and half or more of the questions that I answer aren’t acknowledged…they just take the money and run. I really do a lot of research and experimentation to answer some of these.
BTW, I never thought to move it where you had it either. Guess we both learned something on this one.
Hymie, if you’re still tuned in, what kind of experiments are you running? Benchmarks maybe? I’m still working with that file of yours, but as proud as I was of this blistering little dual core that I just bought. You showed me how to bring it screeching to a grinding halt! 8 minutes to render 2/16 tiles at 800X600. That G5 must really be a smokin’ machine.
yup, definitely smokin’… 8GB RAM definitely helps, as well as being able to arbitrarily define how many threads you want the render to use (what a FANTASTIC new feature. just great.)… also command line rendering is quite a bit faster in blender than trying to use the GUI. Definitely true. In fact, my .blend crashes the GUI if I try to do 1500x1500 pixel rendering of the 8100 lenses with OSA 16, but does fine when done from the command line. Funny.
We’re doing simulations of lens arrays for this optical setup we’re making. I wanted to use these pics for “schematic” illustrations of the process we’re using since we can sculpt anything we want in 3D with Blender, but Blender is so damn good at rendering light I might be able to extend its use for us a bit more…
On a related note, anyone know of any .blend files lying around that have working simulations (with depth of field, etc.) of SLR cameras, or something simliar, or even where to start?