I have a concept in mind for an effect I’d like to create, but I definitely don’t know how to do it. I’m not asking for an exact step-by-step guide, but rather if anyone can steer me towards the major concepts I would need in order to create this effect, I would be much obliged. Please inform me where this would better be posted if it’s not suited here.
What I’m imagining is an almost pitch-black scene with a silhouetted human figure standing in a wide, open landscape. I want to create rings of light (like this but without the flickering) that originate centered on the human figure, as though being emanated from the figure itself, and spread outwards across the surface of the landscape. It’s important to me that 1. the rings of light behave as emissive, and 2. that the rings cling to the surface of the meshes like a material.
My beginner’s guess for how best to accomplish this would be to create a video texture of the rings with a black background and apply it as a material to the landscape. I think to make this approach work, I would have to join the figure and the landscape as a single object, which (I believe) would then mean that I wouldn’t be able to animate the figure anymore. I’m also not sure if using the Cycles emissive shader mixed with the video texture would look correct.
on ground mesh, create one uv channel you can use for the ground texture, and a second uv channel for the rings.
add a uv project modifier, chose the second uv channel, and your character as the projector (basically creating a set of coordinates that follow the character)
in the ground shader you can use this second uv set to drive whatever rings effect you want. you usually have to fiddle with a mapping node to make sure the scale and rotation are correct.
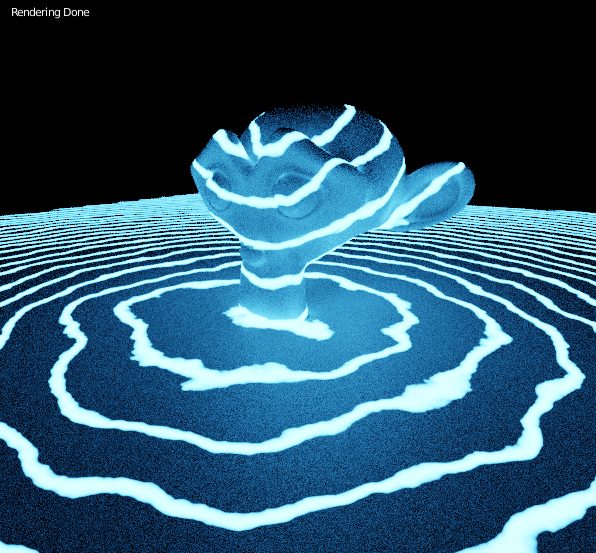
I animated the rings procedurally using a bit of trickery where a spherical gradient ramp not only masks the ring effect, but the gradient itself gets fed back as UVs on a wave texture, turning it into a repeating rings pattern. a mapping node is animated to control the motion.
as a hint of another technique for getting something to project onto a surface while following another object, I used a copy location constraint on a lamp to make it follow the character along the xy plane, and then a shrink-wrap constraint to project it onto the ground.
note the project was done in 2.8 beta for quick visual feedback with eevee, but the principles also work in 2.79 with cycles - and in fact you could probably get away without the uv project modifier since I think you can use another object’s coordinates directly in the shader.
Thank you so much! This is very close to the effect that I want. (Coincidentally, that is exactly the kind of blue I had in mind! It’s very encouraging to see it looking so good!) As far as the ground is concerned, it’s exactly what I want, except that I want the rings to increase in radius (without increasing in actual thickness, so not just a simple scale) as they get further away. That I can probably figure out with some tweaking, though. The main difference is that I want the character (who will be standing with feet on the ground) to actually be the origin of the light, as in the rings begin at the top of the character’s head and move down the body much like they do with the ground. Bonus points if I can get the character’s whole body to illuminate simultaneously at first and then transition into rings as it spreads away, but that’s not totally necessary.
So would major aspects of the approach change in order to accomplish this? Or would it basically be a matter of somehow including the character in the UV mapping?
if you’re using cycles rather than eevee, you have access to the object mapping node which keeps procedural textures in 3d space, so the wave/rings texture can be positioned to emanate from the top of the character, flow down and seamlessly into the floor just by using the same object coordinates when setting up the rings on each object.
you’ll have to play with how you’d make the rings expand. probably something with running the uv’s through a math/power node to make them grow non-linearly from the spawn point.
This is so awesome! Thanks so much for this! I needed to make a similar effect and I saw really complicated node setups to do it, but this one is quite elegant.