Hi,
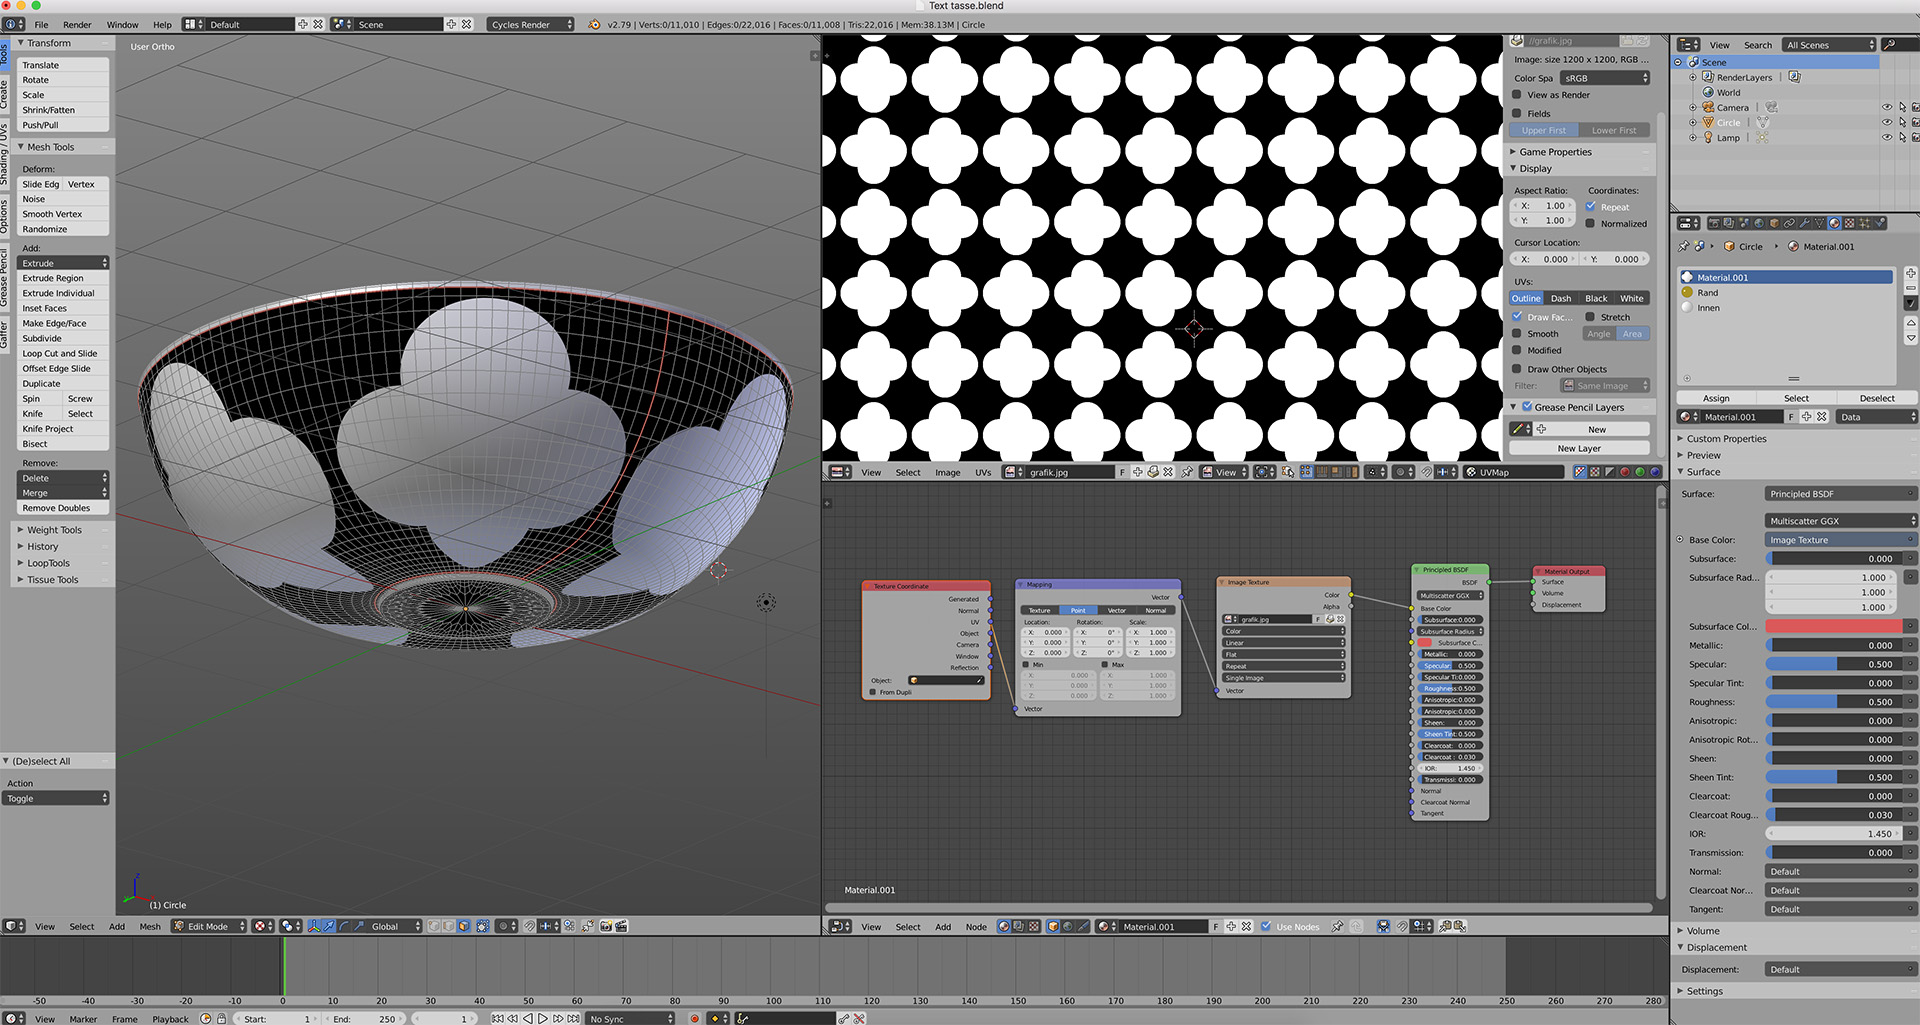
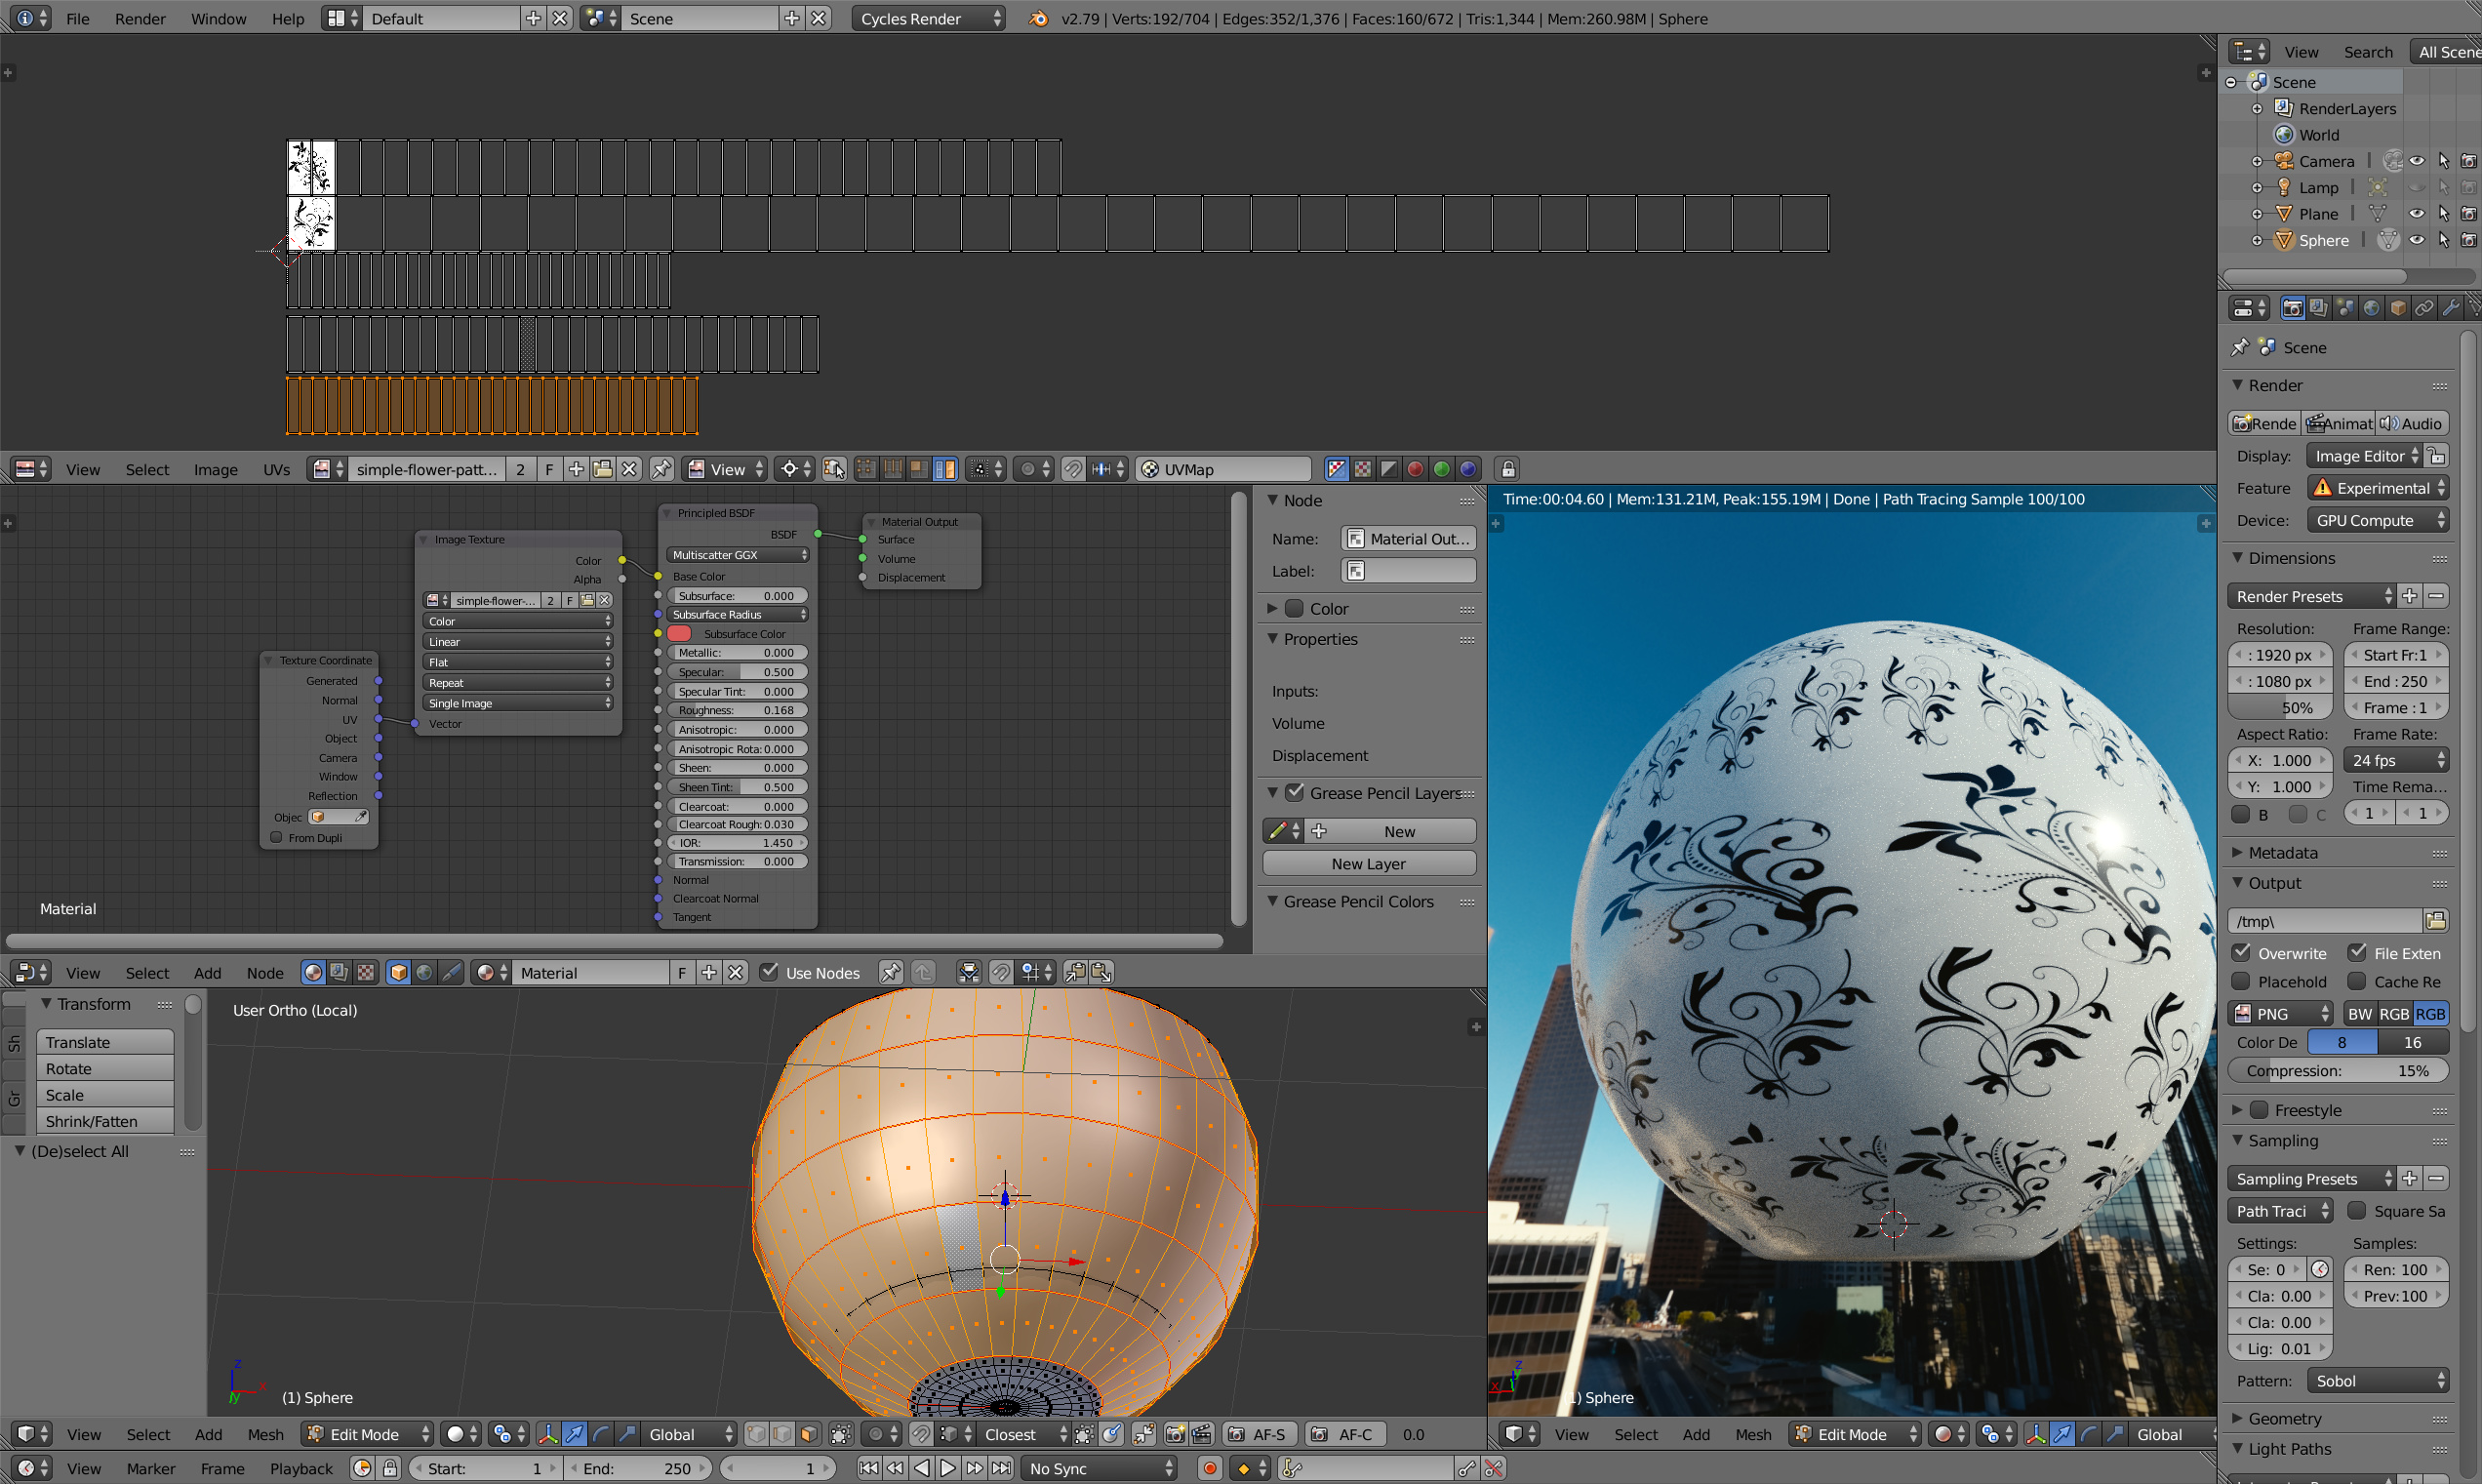
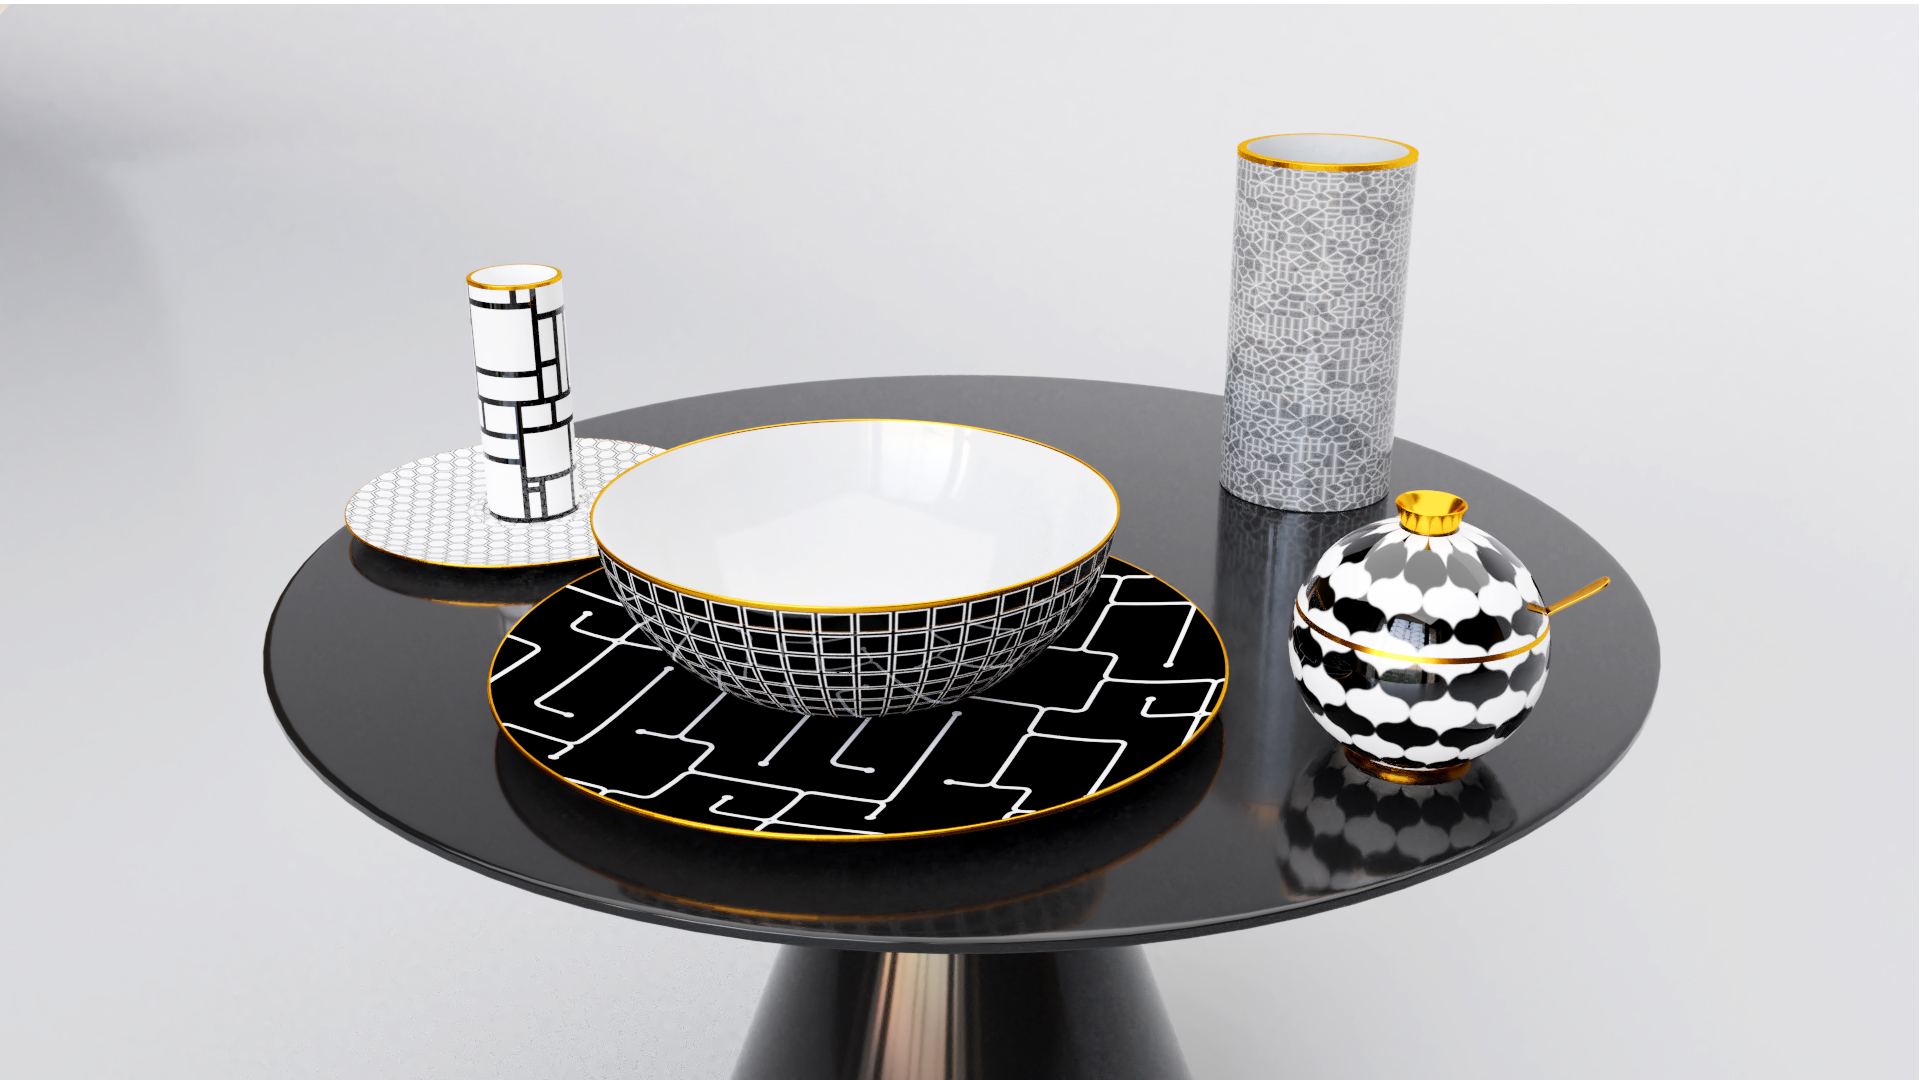
I am currently working on texturing round bodies, in this case a cup, bowl, teapot, etc. A pattern is to be mapped onto the fuselage of a cup/dish and finally look like applied to ceramic. (example in the appendix) My problem is the correct unwrap of the outer surface, so that the graphic looks reasonable. Currently, the graphic is always displayed distorted at the bottom. At the upper and lower area, as well as at a vertical edge, I placed Mark Seam. I have just drawn the unwrapped area in the Image Editor. I’ve looked at some Tuts and tried them, but somehow I’m too dumb… Does anyone have a hint?


You’re bound to get distortions on an object like that. If you’re going for “strips of patterns” that are separated (like your top image), you can unwrap those rings individually and scale it such that they have a varying count as the radius becomes less.
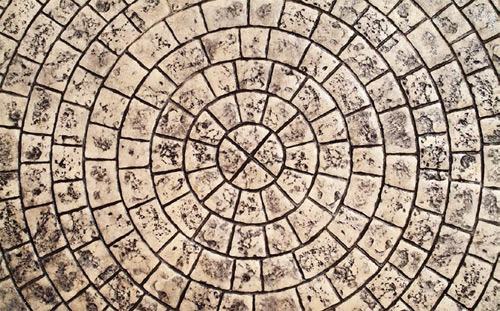
The idea is to make it something like this hole pattern.
You could also do it mathematically I guess. I’d try synaGlow’s patterns or bricks addon, I believe both can output radial squares which have their own texture coordinate and indexing outputs for texturing purposes.
Is the top one a photo or drawn? If drawn (considering only one viewing angle), it is possible to cheat but the object couldn’t be rotated.
Hi,
The samples are jpg or illustrator files, which I get from a graphics agency. These should then be clipped onto the objects, the patterns are individual. I’ll take a look at the add-ons. Thanks for your answer.
Here is a screenshot of how I would approach it “the UV way”.
The vertical alignment would need some work, and I deliberately misaligned the lowest strip horizontally, there the bad overlap is shown near the 3D cursor at the preview window. The purpose is to control the number of repetitions for each stripe as the radius changes. It’s mathematically impossible to have same number of counts without distortion while keeping the size constant.
And here is the setup I would use using synaglow’s hex nodes (don’t have bricks&tricks installed at work). It doesn’t use UVs at all, but I didn’t dive into the group to find out how to control the division output. The division using modulo happened to work for me, you’ll probably not be that luck and have to find another way. I multipled with the random color output for illustration:


