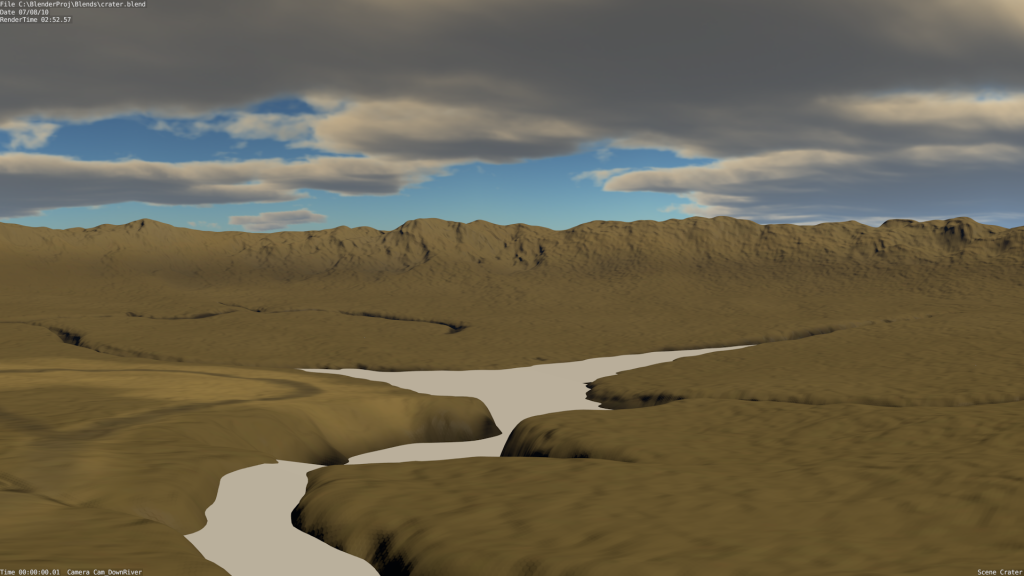
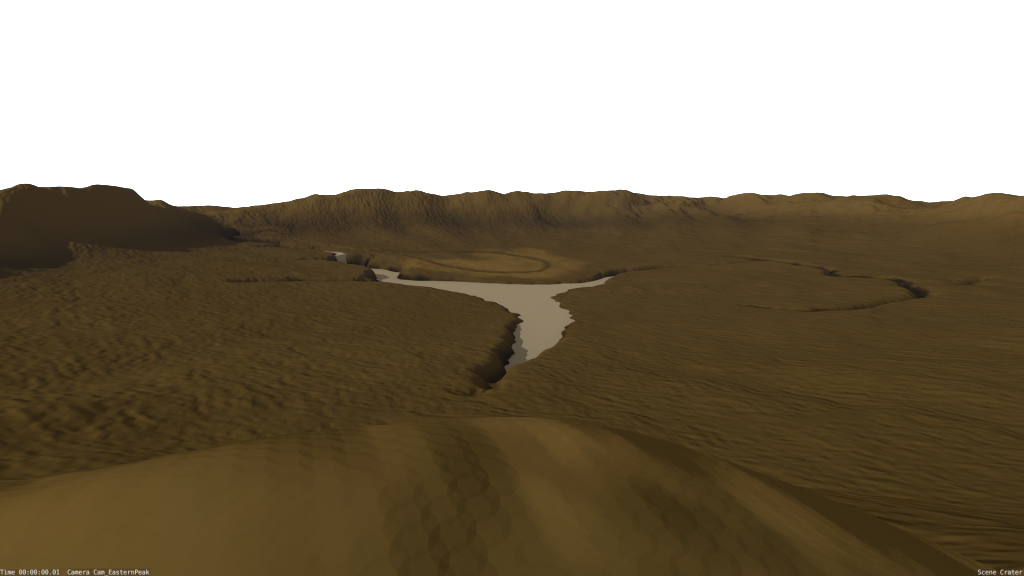
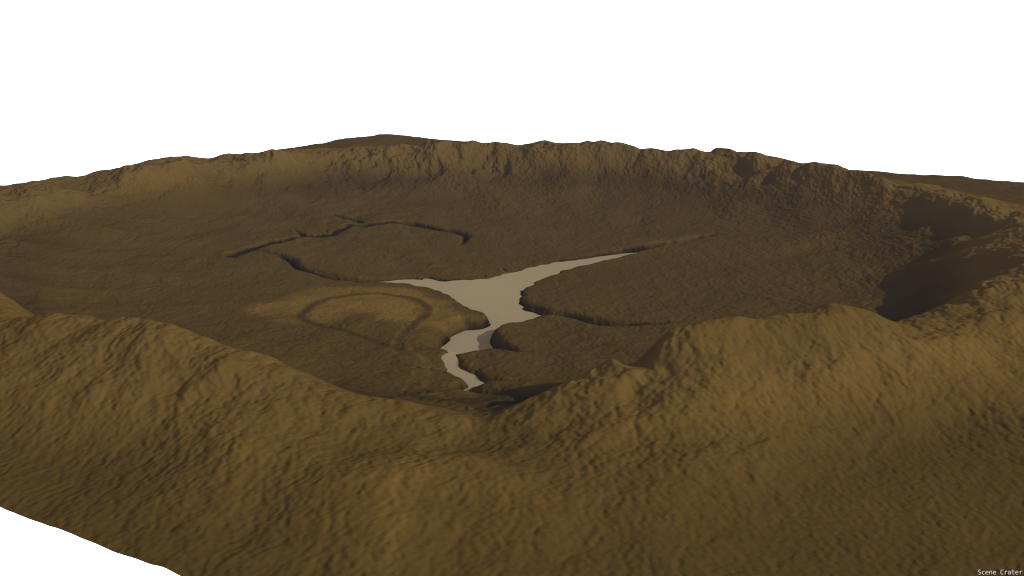
So I’m in the process of attempting to build the setting of what I hope to be a short animation. It’s going to be a crater with a shield dome built over the top of it. What you see here is a VERY new mesh. It’s taken me a while to design but it’s getting there.
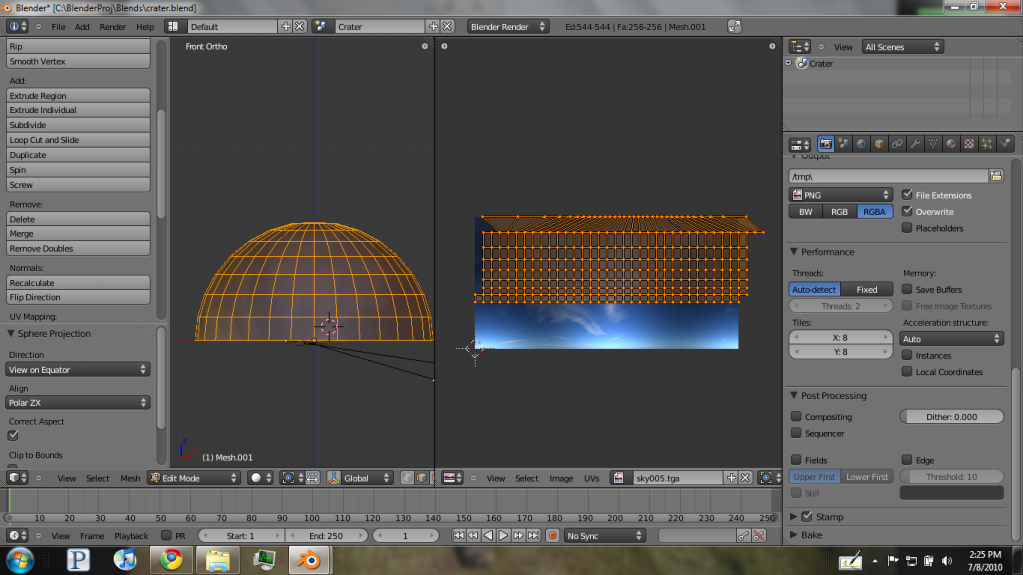
So here’s what I’ve done. The Crater mesh itself is fairly low poly for it’s size/level of detail. I have however applied a sub-surf modifier to the mesh cage to help relieve some hard-lines. It’s only a two level. To add detail though, I had multi-res’d the mesh to 4 before I applied the displacement map. Duplicated the model and baked the normals of the high-poly to the low. The result pleases me as far as “bump-mapping” goes. The water is obviously a WIP as right now I’m concentrating on working the waterline to have more natural, softer edges. Note: If anyone has some good tutorials or tips as far as water and waterfalls, please let me know, as those are going to be essential to this scene. So, enough banter, here’s the pix!
Okay, this is driving me nuts. I went on blendercookie for the skymaps, when I saw they were just deformed panos I had hope, all I had to do was apply them to my world texture and set it to sphere, real and blend or whatever I used to do. Unfortunately. Blender 2.5 doesn’t do that anymore or so it seems to me. Is there something that I’m missing? Everytime I try to do the “Tip” that is on blendercookie, I wind up unwrapping and MOST of the mesh comes out gridded in UV editor, but the uppermost vertices dont seem to like gridding out, they taper down. I did the whole deleting the top vert, extruding, and scaling down the mesh, and I made sure that it inst removing the doubles. But it isn’t working. Can anyone give me a hand?
That’s what I mean, when I delete that top vertice and extrude the circle loop and scale it down, the UV map that come out of it is all funky… most is gridded the way it needs to be but the very top row is tapered in.
“…back to blender:
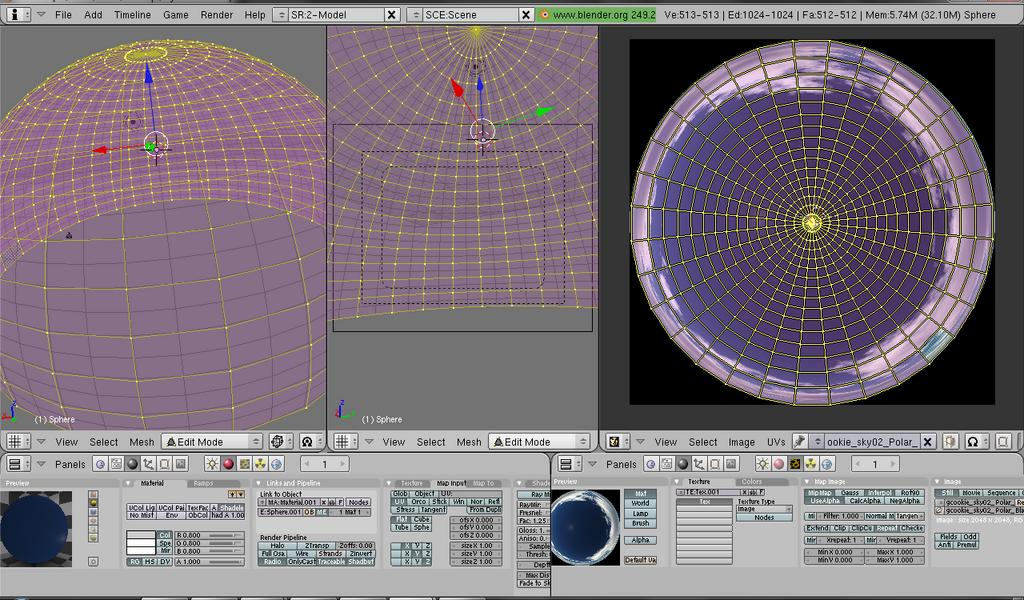
spawn a uv sphere and delete the lower half of it in edit mode, open the uv image editor, select all faces and hit ‘U’ to unwrap,
load up your new texture in the image window so u can see the uv layout on top of your img,…”
But before that, you have to edit those images in Gimp to deform them along the polar coordinates.
“…load the image into the gimp with open file u’ll see a broad image strip,
go to the filters tab->distort (or distortion…i have german version so can’t check back on the correct spelling)
in distort dropdown choose -> polar coordinates, you’ll see a preview of a circular image, hit okay
since the image is now circular and not filling the whole space,
use the rectangular selection tool and select the area with the sky circle,
double click on the rect.selection tool to bring up the tool properties,
u can scroll down there and you can make your selection perfectly square in the size/res slider, (in this case i think 2048×2048 is about whats right)
go to ->image tab choose -> crop to selection to crop your image,
save the image as a new file…”
But basically after you make it polar you crop it to 2048×2048 dont worry about the rectangular selection stuff…
(i know my screen i sin 2.59, but this should work in 2.5)
If you still dont get it, ill make a step by step explanation
I just checked, the technique you are using works fine with blender 2.49 (both sphere and cylinder from view), but in 2.52 i get weird stuff like you do.
So it might be an old tutorial you are looking at.
Lol the same link you gave, just scroll down to Nixson’s loong reply
[EDIT]:
AdamTM, plz plz plz, stop quoting the whole post every time you respond to people, instead, use @person if you fell the need to make your self clear to who you are talking or use the [ quote ] [ / quote ] to quote specific things, and not the whole post
There is a video on how to use them in the first post. If you need to apply them to a uvsphere, this is what you do:
Delete the bottom half of the uvsphere in editmode.
add the sky texture of your choice.
In the texture buttons, set the min Y value to -0.333
In the material buttons, set the map input to sphere, then turn on ‘shadeless’
Render
But there are more things to consider. For a start, if your scene uses raytracing, then using a uvsphere with a texture applied is much slower than just loading the texture into the worldbuttons. Try it and see.
The way around this is to disable ‘traceable’ and ‘shadowbuff’ in the material of the uvsphere. This will make the sphere invisible to raytracing and render a huge deal faster. At this point you’re probably thinking ‘well I need raytraced reflections in this scene, so how does that work?’
Fortunately, there is a solution to this too. Simply load the same texture into the worldbuttons and use that for your reflections. You can have your cake and eat it too.
Oh, forgot to add that the method I highlighted only applies to equirectangular images (The ones that say ‘spheremaps’ in that link I posted), it will not map correctly with Angularmaps.
Ok, with 2.5, you have to load the world textures via the texture buttons. Due to the context sensitivity of 2.5, you can’t just click the texturebutton icon, otherwise you’ll probably get the texture options for your materials. What you need to do is click the worldbutton icon first, then click the texture icon, so Blender understands what the context is. (weird, I know)
Then it’s just a case of loading the image, setting the mapping coordinates to ‘sphere’, then make sure it’s influencing the ‘Horizon’ value in the influence tab. Then you have to go back to the world buttons and activate ‘real sky’. That should do it.
The mapping of a uvsphere should by and large be the same as I described above. If you still have any problems, let me know.

 or a .blend, if you dont mind others to look at it