I was hoping to get some direction on being to apply a broken rock effect to a surface similar to the images in the link below:
I’m a complete begginner so I’m sure if this is a clear and easy answer. I’ve seen about 1 or 2 posts on other forums using a displacement map but it didn’t say much about steps to getting the final result.
I was thinking about creating a scene with something similar to the walls shown, and a floating island in the middle of it with the broken rock effect applied to the bottom of the island with a flat surface for a person to be photoshopped standing on it.
Any help/advice/links to tutorials would be greatly appreciated, thanks for your time.
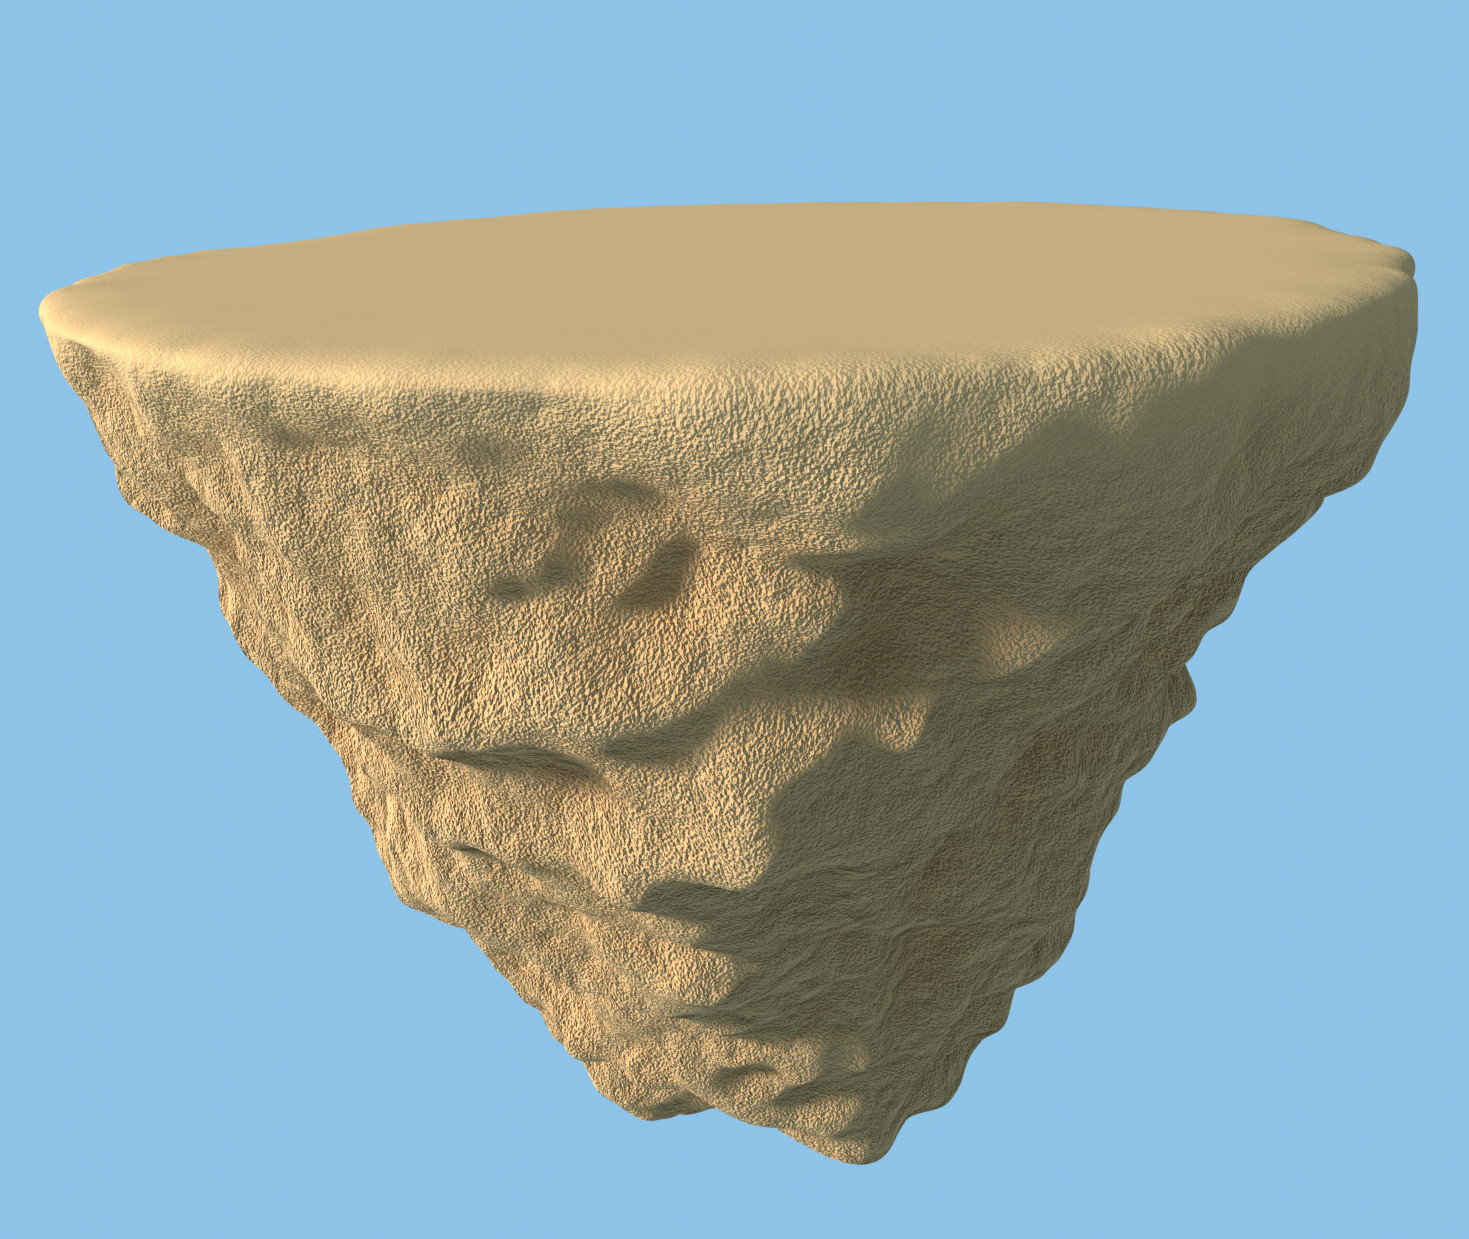
A detailed guide for a newbie I cannot provide, but I can give you a blend file to look through and improve. Take it as a starting point. It certainly is less than perfect, just something a put together in a hurry for you:
Please don’t hesitate to ask, if you don’t understand something. For starts a few remarks on what I did:
To get a smooth shiluette, you need a high subdivision level. I used an subdiv modifier with adaptive resolution (which is quite convenient here). One has to enable the experimental feature set for this to be available.
In principle one can use a displacement modifier, but what I did is use the displacement input of the material, which gives the same effect, but allows you to use node textures, which is more flexible.
For the fine details I used bump mapping, which works with less subdiv also.
To exclude the flat top from being rough, I used vertex colors, which are included as scaling factors in the material
Toy around with the nodes, until you get the look you want. If you want that actually ‘broken’ look, you need to come up a texture with more sharp corners, of course. Friends are the noise texture, voronoi texture and color ramp. Combine these with math nodes. Add them, multiply them together, tweak the parameters.
As far as the wall, add a plane and scale to the size needed. Rotate so it isn’t flat on the X-Y
Add 5 or 6 Loop Cuts Both directions on the plane.
Then I also added a Beizer Curve and Grabbed ends and extruded till I got a curved shape like the breaks in the wall ( I didn’t spend much time on this so could be better) make sure to Subdivide the Curve so you can pull single vertices around to add sharp areas…
Then I selected the curve and Joined it together.
With the view set to see the curve and the plane as flat objects ( Front or Right Views depends on how you set or rotated the plane) Press either 1 or 3 on the keypad.
Now left select the Curve and holding Shift select the Plane.
Go to edit Mode and under Mesh select Knife Project and you should see a the inside become a new face, hit delete and select Faces. Now you should have a hole.
Add a Solidify Modifier and set to the thickness you need…Even Thickness and Fill rim checked.
Now you should have a wall with a hole.
Add a Subdivision modifier and Multiresolution Modifiers.
Go to Sculpt tab and check Dynotopo and using the Included Brushes create the edges of the broken sections…I used Scrape / Crease and Pinch .