Hey guys, I just finished up the last part of my tutorial series on creating a combat knife game asset using Blender and Substance Painter. The series takes you through high and low poly modeling, UV unwrapping, baking normal maps in both Blender and SP, texturing in SP, and then exporting the textures. Hope you like it!
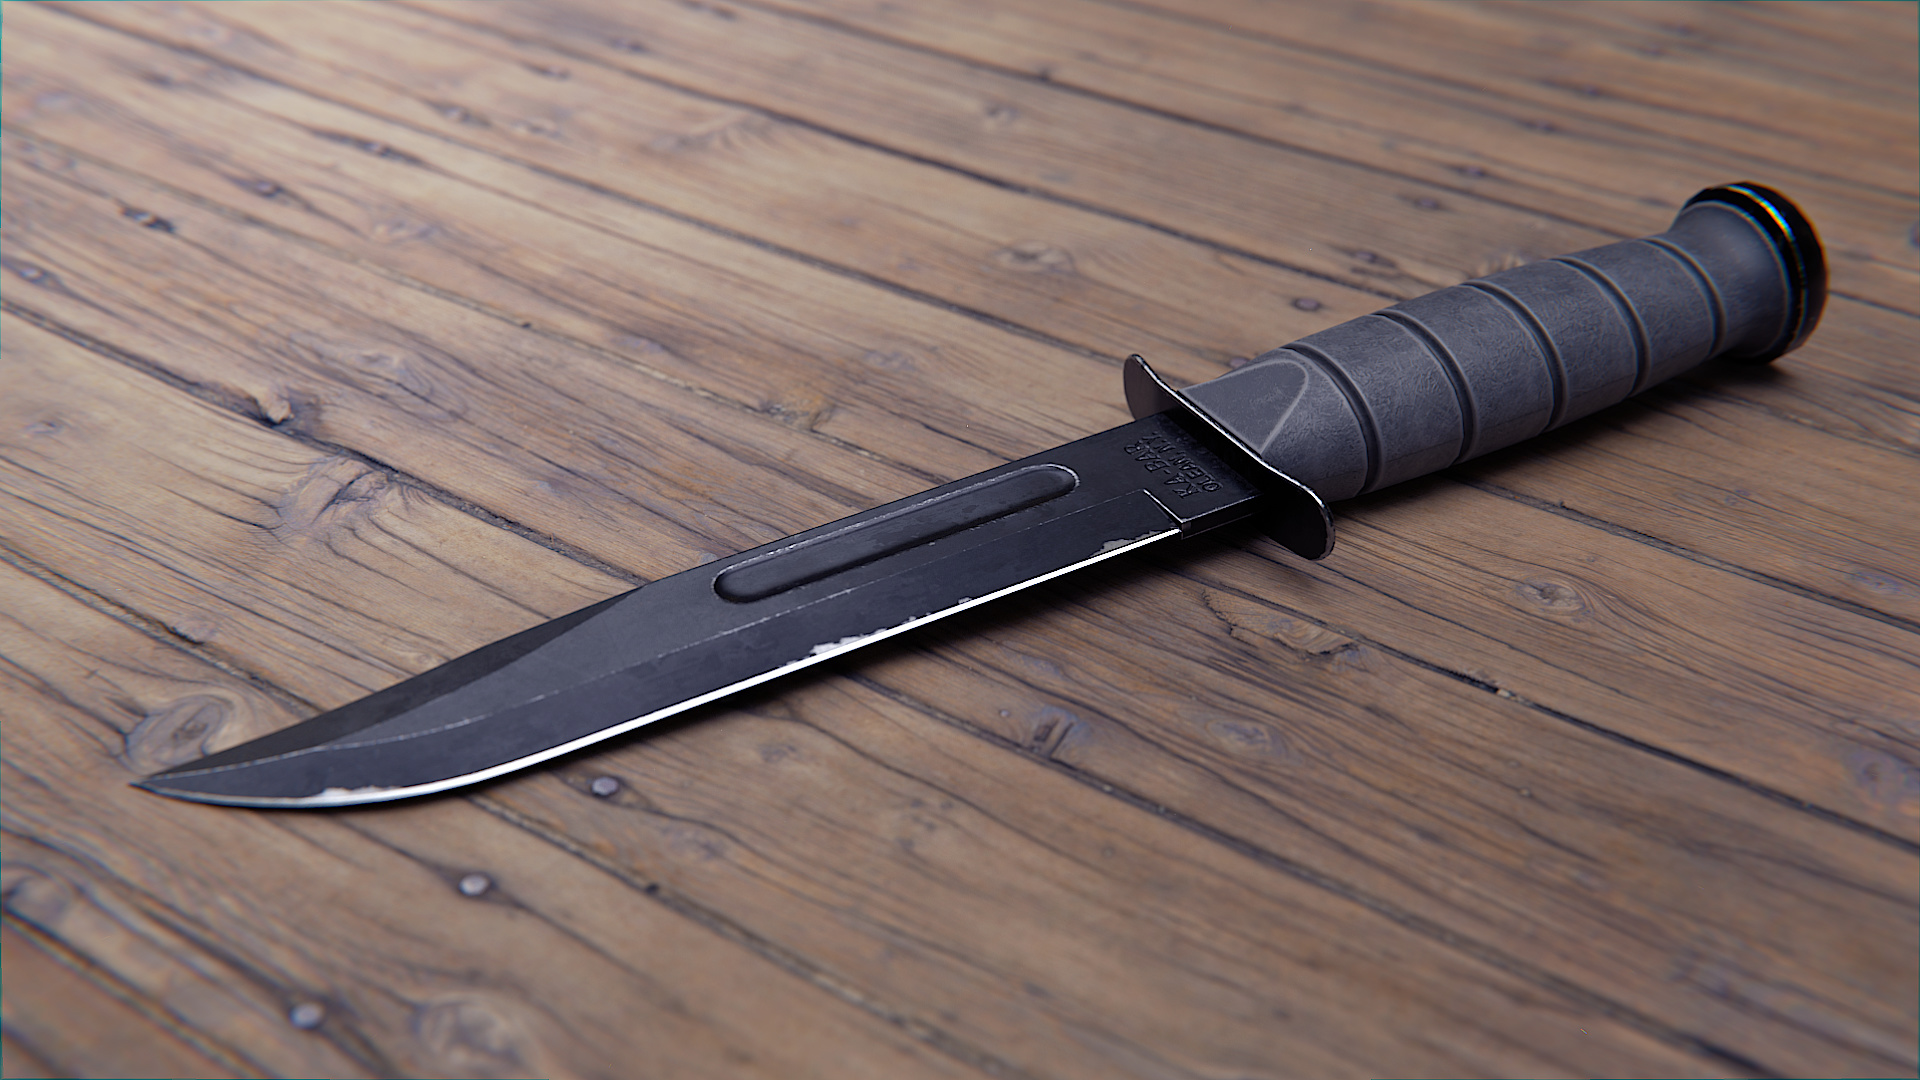
The final knife:
Part 1 - High Poly Modeling in Blender
This tutorial will teach you a lot of different hard surface modeling techniques and modeling tools including beveling, subsurf modeling, and non-destructive modifier methods. It’ll take you from setting up a reference photo in the background to completing a high quality, high resolution, 3d knife model.
Download the Reference Photo
Download the Final Blend File

Part 2 - Low Poly and UV Unwrapping in Blender
In the second part I’ll walk you through taking our low poly knife model and UV unwrapping it in Blender. You’ll learn how to specify how objects are unwrapped by manually adding seams to edges, how to modify and work with UVs, and how to look for UV stretching to make sure your textures will be applied without distortion.

Part 3 - Baking Normal Maps in Blender
In the third part of this step-by-step game modeling series I’ll show you how to bake a normal map for the knife using Blender. Whether you want to use this knife inside Blender or export it for a game engine like Unity or Unreal, I’ll show you how to make sure your model and its normal map look right in all other software.
I’ll also be showing you the steps for baking the normal map in 32-bit to avoid the color banding that the default 8-bit bakes produce. Then we’ll save the normal map as a 16-bit png file. This avoids color banding and gives you high quality normal map files.

Part 4 - Texturing in Substance Painter
This tutorial starts off with exporting meshes from Blender to use in Substance Painter. Then we’ll import the meshes into Substance and bake texture maps including automatically explode baking normal maps.
Then we’ll create masks for each part of the knife and then get down to texturing using all the insanely cool tools, materials, and mask generators Substance has to offer. It’s especially never been easier to create awesome edge wear for metal surfaces. Once we’re finished the knife we’ll export the textures.
Download the Project Files
Download the Final Knife Files

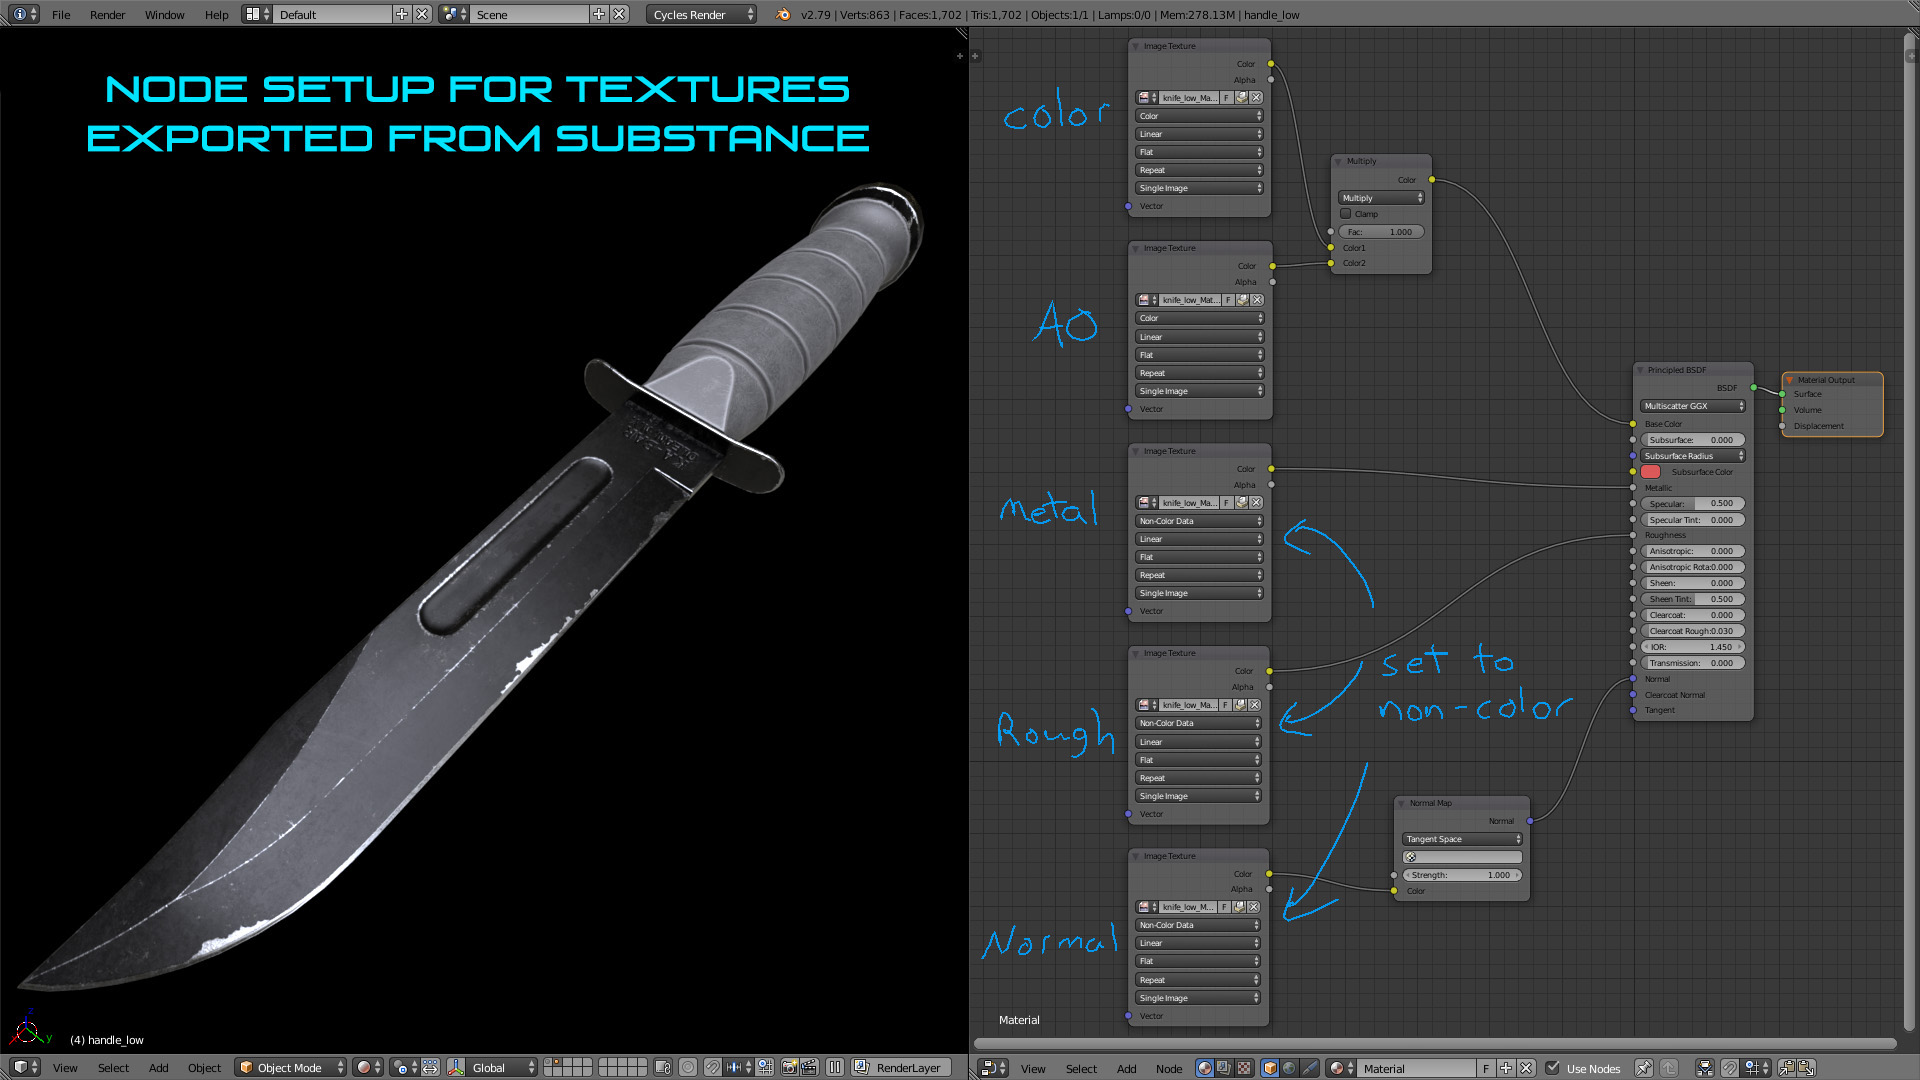
Part 5 - Rendering in Blender with Textures from Substance Painter
For rendering in Blender, here is an image of the Cycles node setup you can use with the textures exported from Substance Painter: