I have some video footage which I shot just for testing purposes. I want to change the color of the sky to dark blue. After finding a tutorial on YouTube, I’m trying to create a mask for the sky. I already found out how to draw a mask using Bézier curves, and I was also able to animate the mask using keyframes, but now I’m stuck. In the tutorial, there’s the footage visible behind the nodes, and although I have selected ‘backdrop image’, the footage doesn’t show up. I’m using the node editor for that. I’m hoping that I make myself clear. How do I create a mask like the mask in the tutorial? I’m attaching both the video sequence and the .blend file.
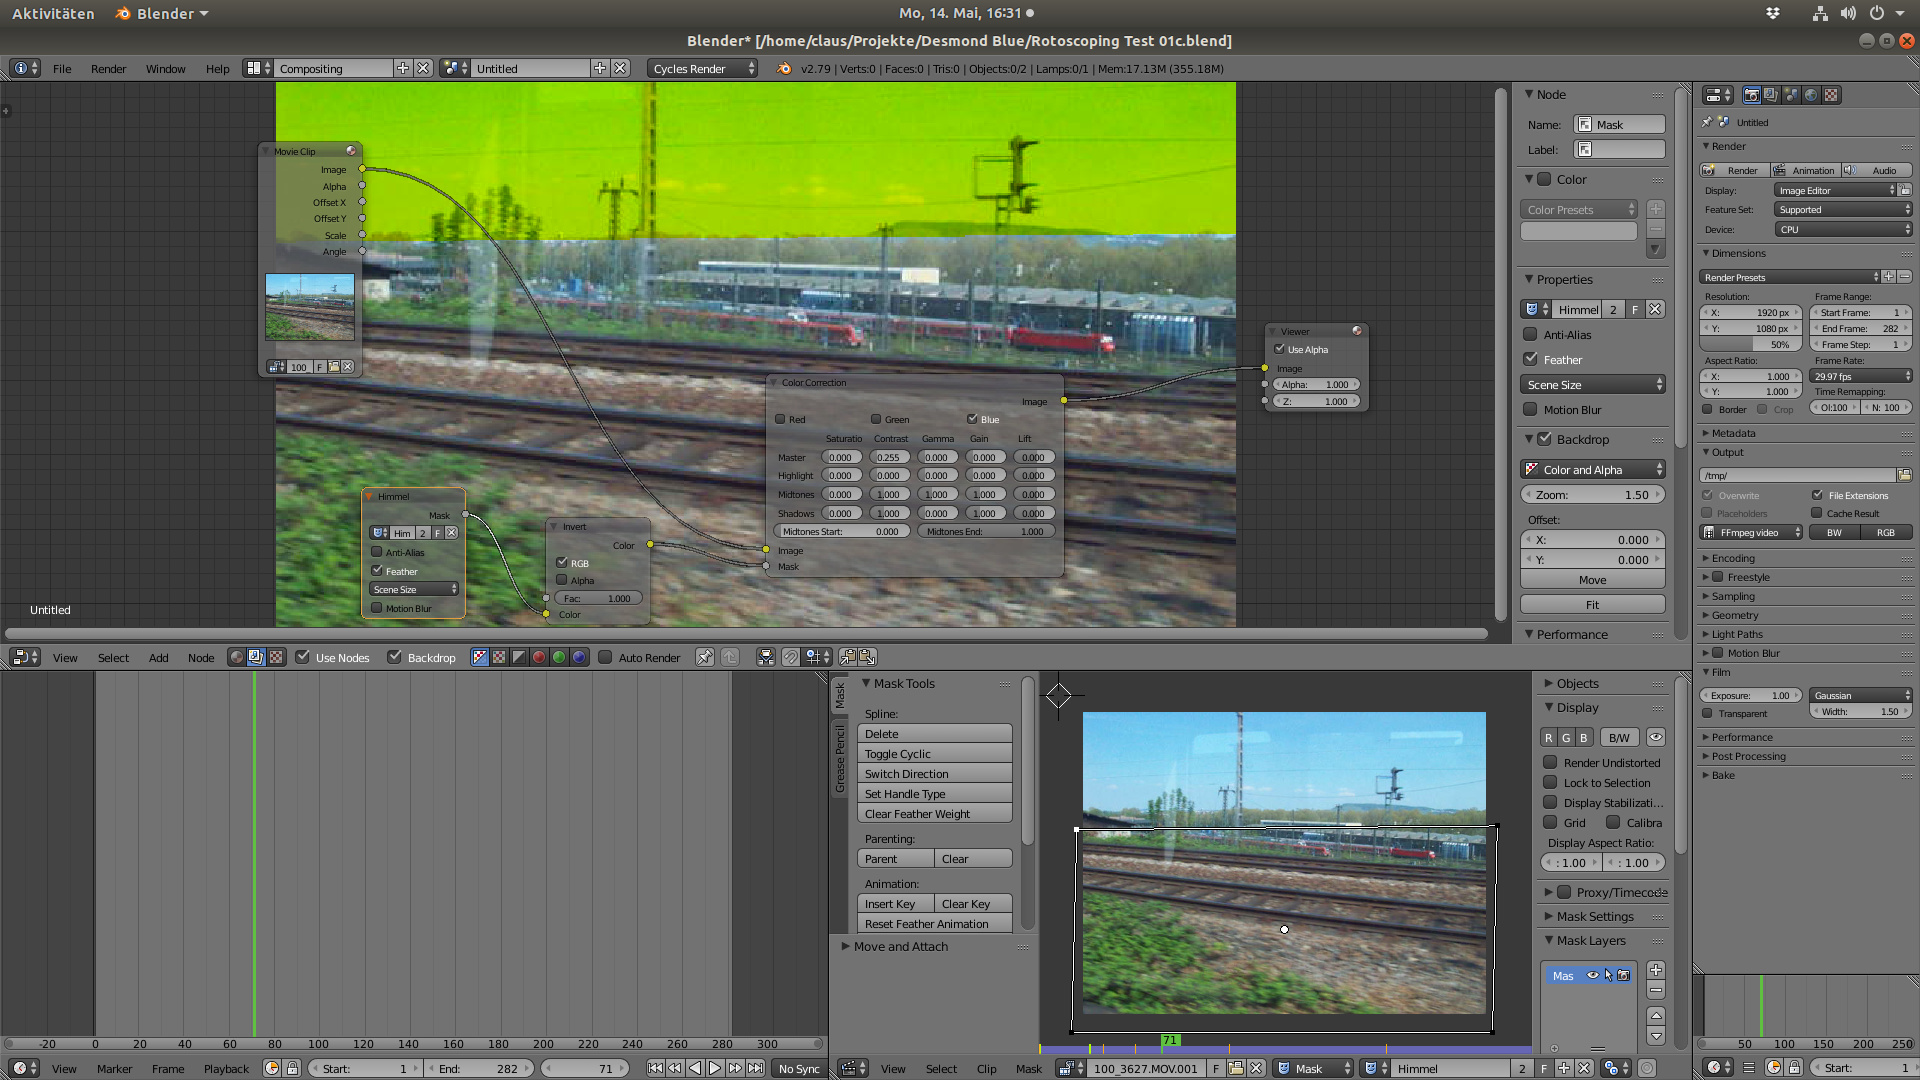
I’m attaching a screenshot of the Blender interface. Meanwhile, I found out how to insert the backdrop image (CTRL+SHIFT+LMB), but there’s apparently something wrong with the nodes.
If you spell out to yourself what each node is doing step by step and then think what should actually happen to make color correction with limiting mask, you will probably see why it doesn’t currently work.
You want color correction on your image to make blues darker, but only in sky area. Sky area is separated by mask, and mask is created by roto. I don’t see neither color correction nor roto mask used in your node graph…
As I suggested, spell out (write here) what you think the current order of operations is and how image is manipulated. Articulating to yourself what you want to happen is big part of compositing, without it you are just messing around with random nodes with little to no reasoning behind it. For example, what colorcorrection currently does in your comp and which image does it apply to?
Start your thinking process from the fundamental fact that image data in node graph moves from one node to another following the connecting lines: data moves from output socket of one node to input socket of another node.
I clicked the link and watched the tutorial you saw. Its the sort of tutorial that someone who hasn’t used blender or other compositing software would find hard to follow. Forgive me if what I’m about to explain is obvious, but I don’t know how well you know compositing software, so ill have to cover these concepts.
A mask is a black, white, and grey image that you can use to define which parts of an image to hide. In blender, you connect the mask image to the fac slot of the node you want to use it with. Ill use the mix node for my example. The black parts of the mask reveal pixels in the first slot, the white parts reveal the image in the second slot, and any shades of grey in the mask will mix the colors from the two images. Heres the type of workflow youll use when compositing.
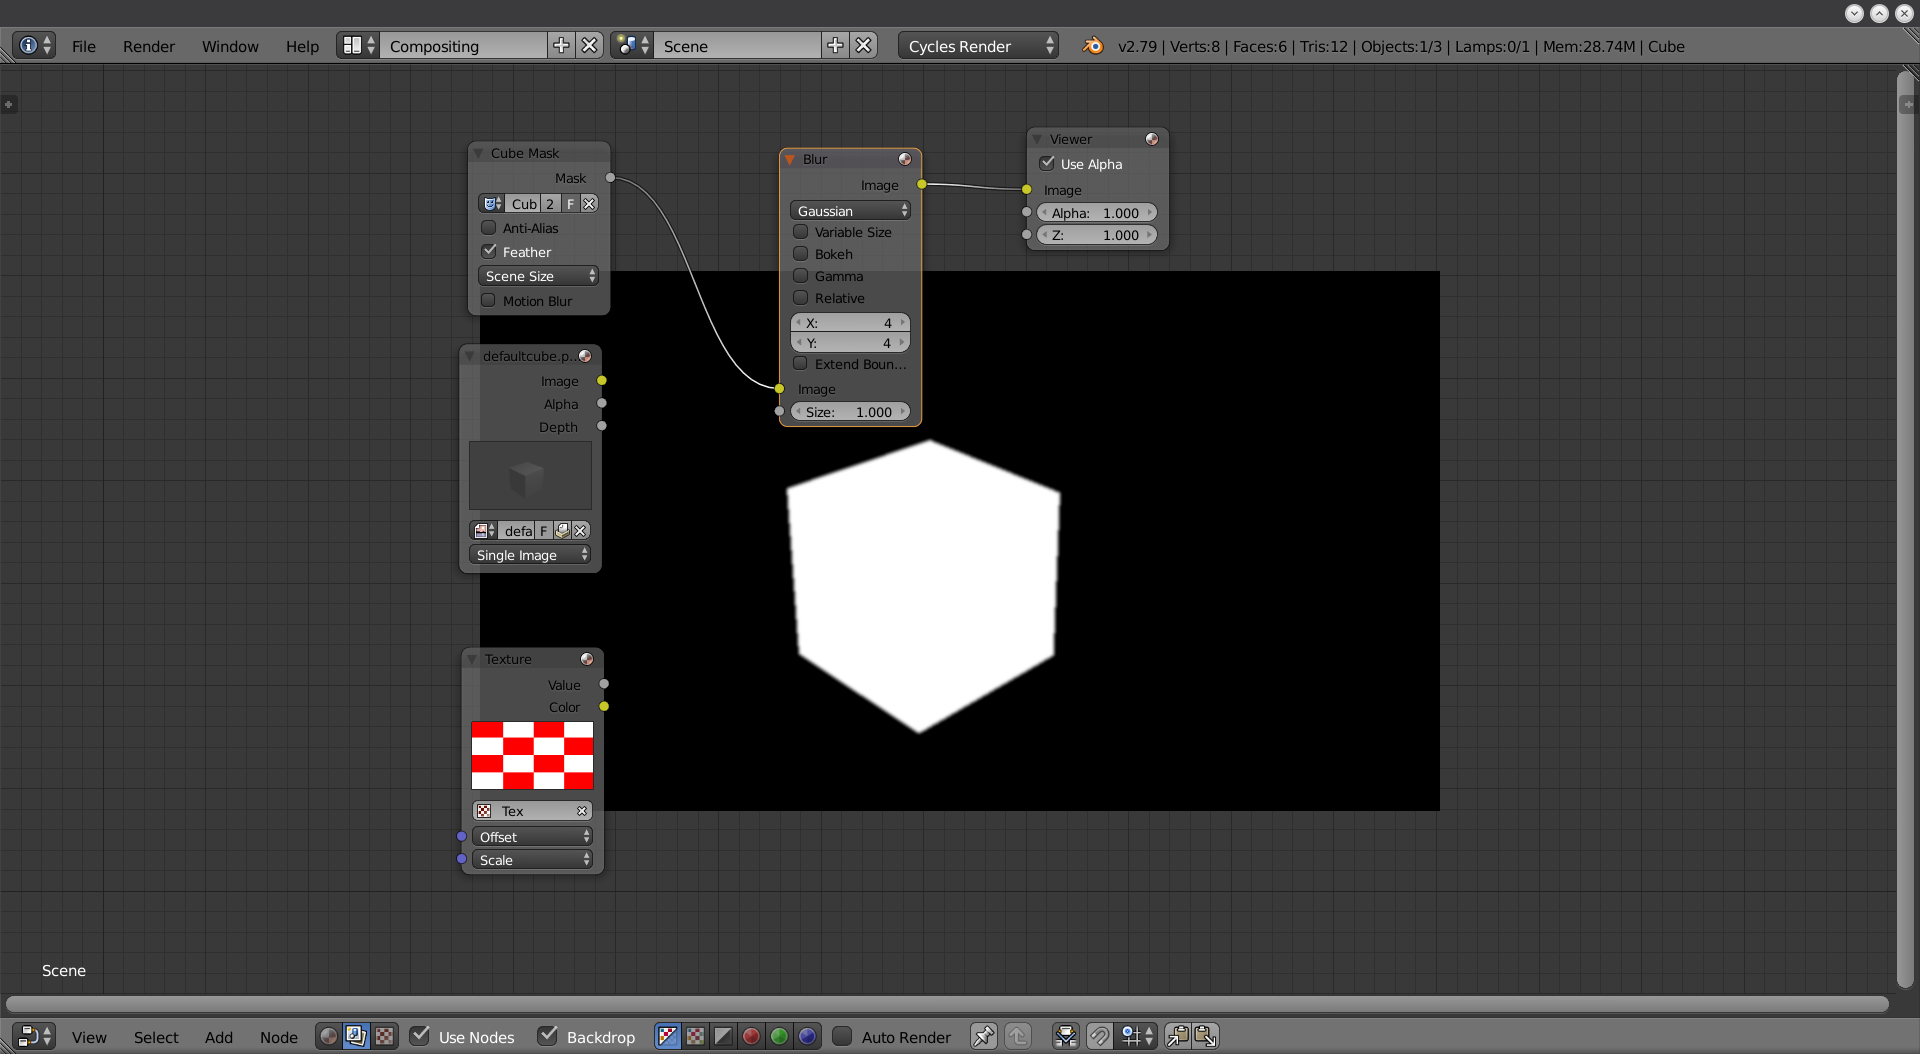
First ill make a mask and add a node for it in the compositor (Hook it to a viewer node in order to check the result):
Next ill add a node to the line between the mask and the viewer in order to modify the mask, in this example i just blurred the mask a little, but you can add any combination of nodes:
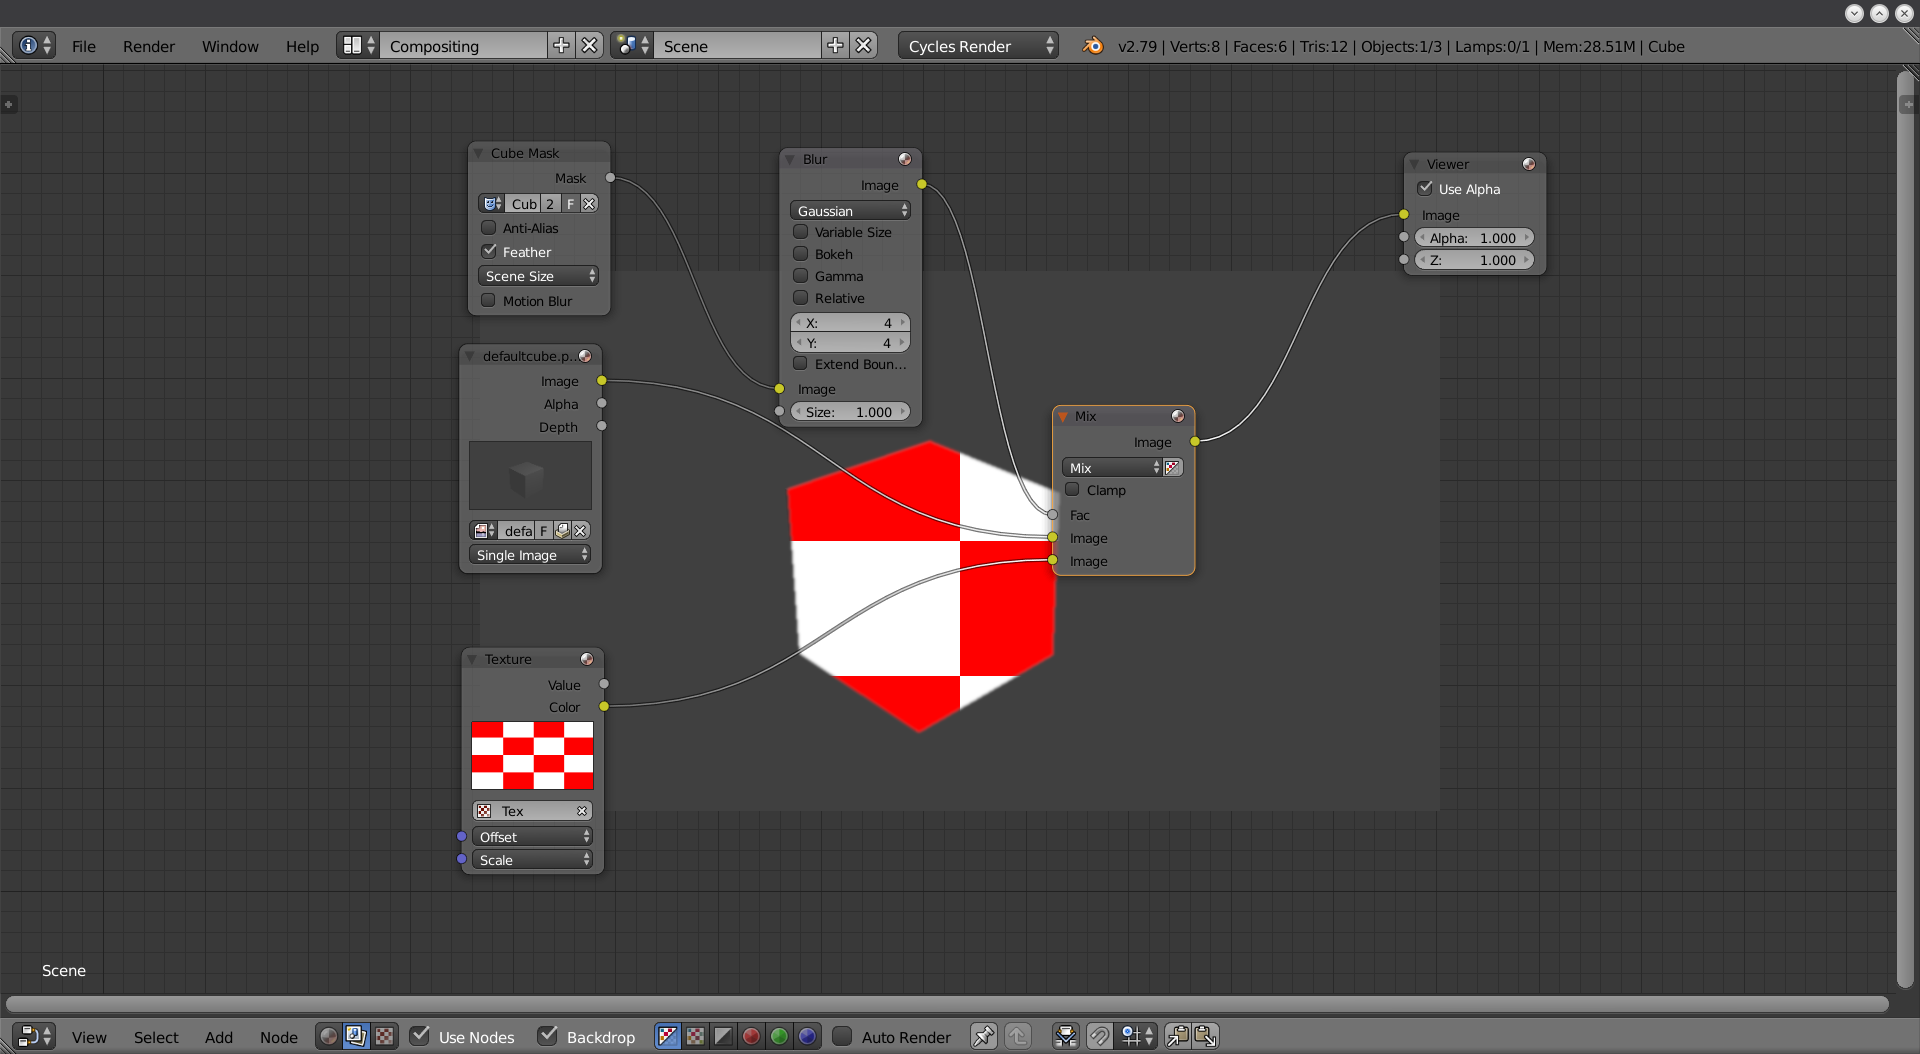
Now that I’m happy with how my mask looks, I’m going to hook the mask to the factor of a mix node, and hook the two images I’m compositing together to the image slots:
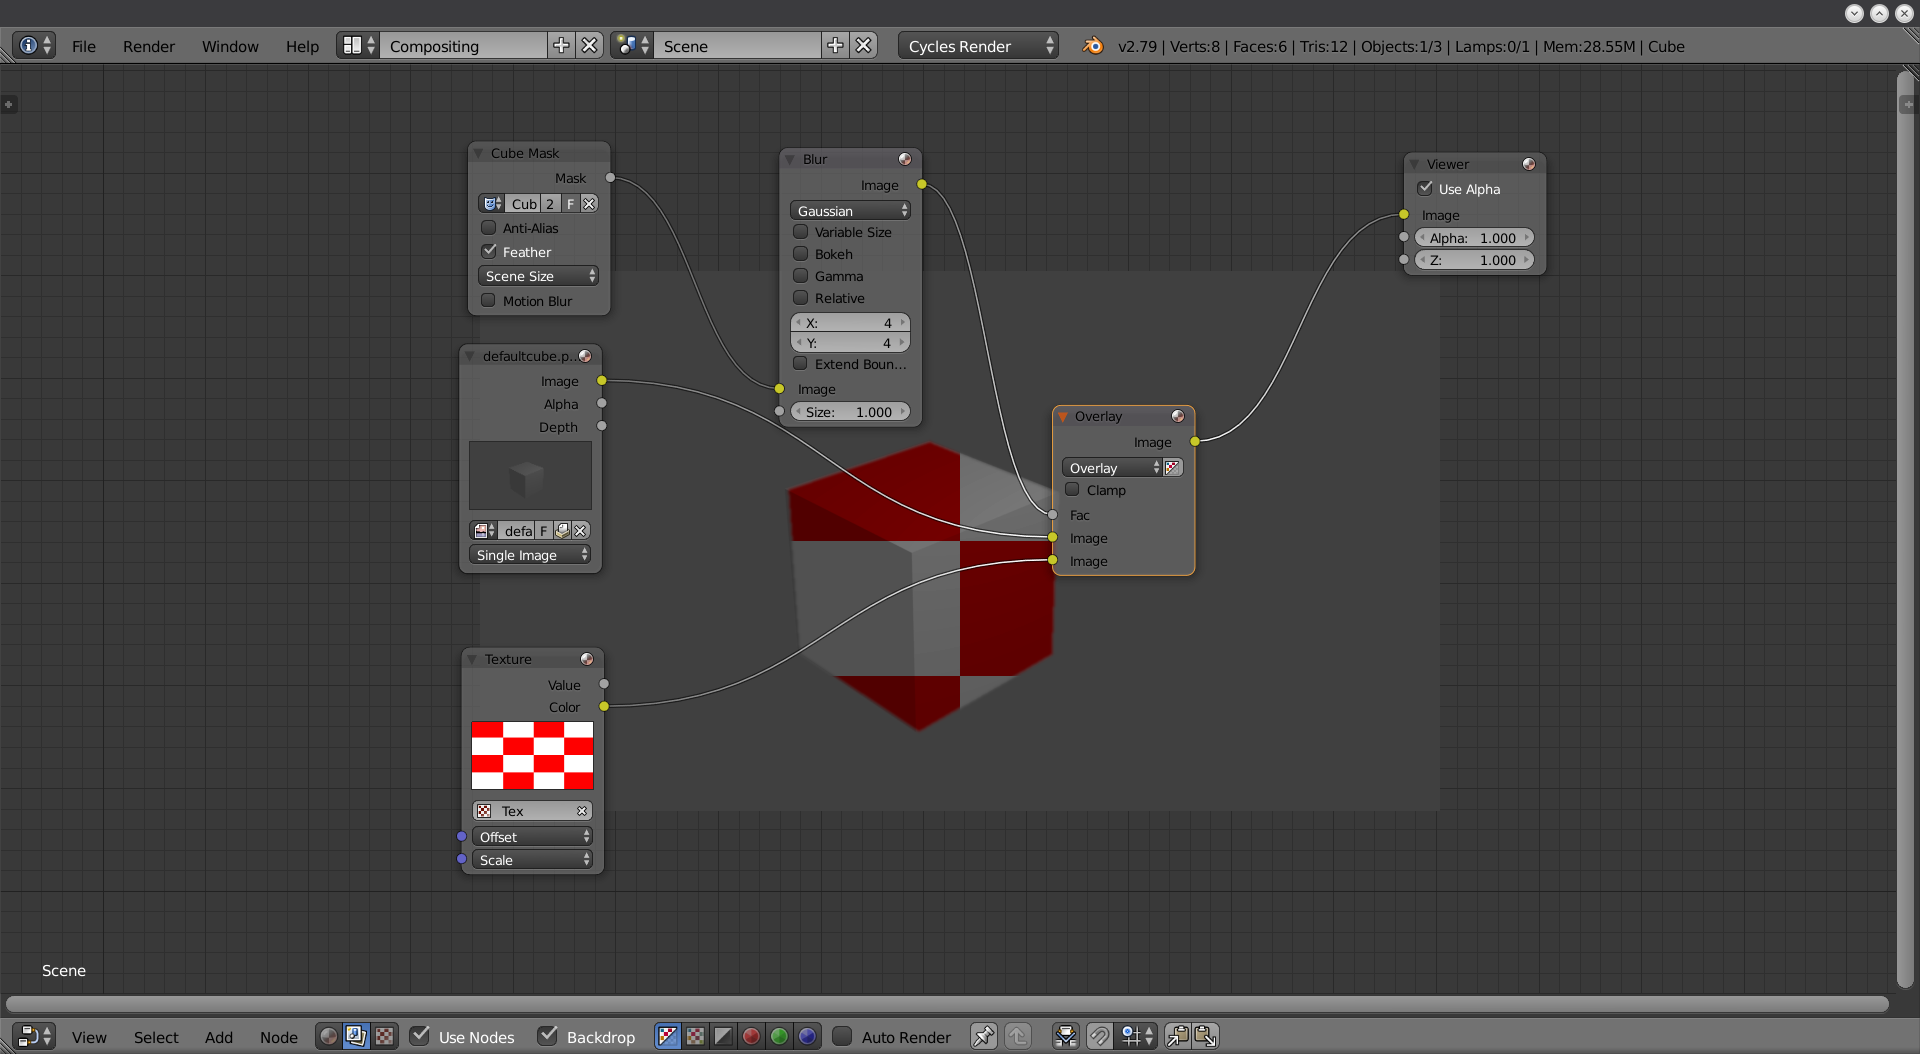
With the mix node, we aren’t limited to just mixing two images together, it also has compositing options which change the result. I’m going to switch it to overlay mode:
When you are happy with the result, remember to hook the last node in the chain to a composite or file output node, the viewer node is just for checking on the changes. I hope this helped, and I’m sorry if i just said a lot of obvious stuff.
I hope this helped, and I’m sorry if i just said a lot of obvious stuff.
Not at all. This is very helpfull. I tried your suggestion, and now the mask which I have drawn shows up. But this rectangular mask isn’t very accurate. I want the mask to look as in the third screenshot I posted. As I wrote above, my goal is to make the sky look dark blue.
You have the nodes plugged into the wrong slots. The mask should go into the factor if you want to use it with the mix node. Also you keep trying to put the color correction into slots by itself. That node only modifies an image, so you should plug the source image into it, then plug it into the composite or output node if you want to use it.
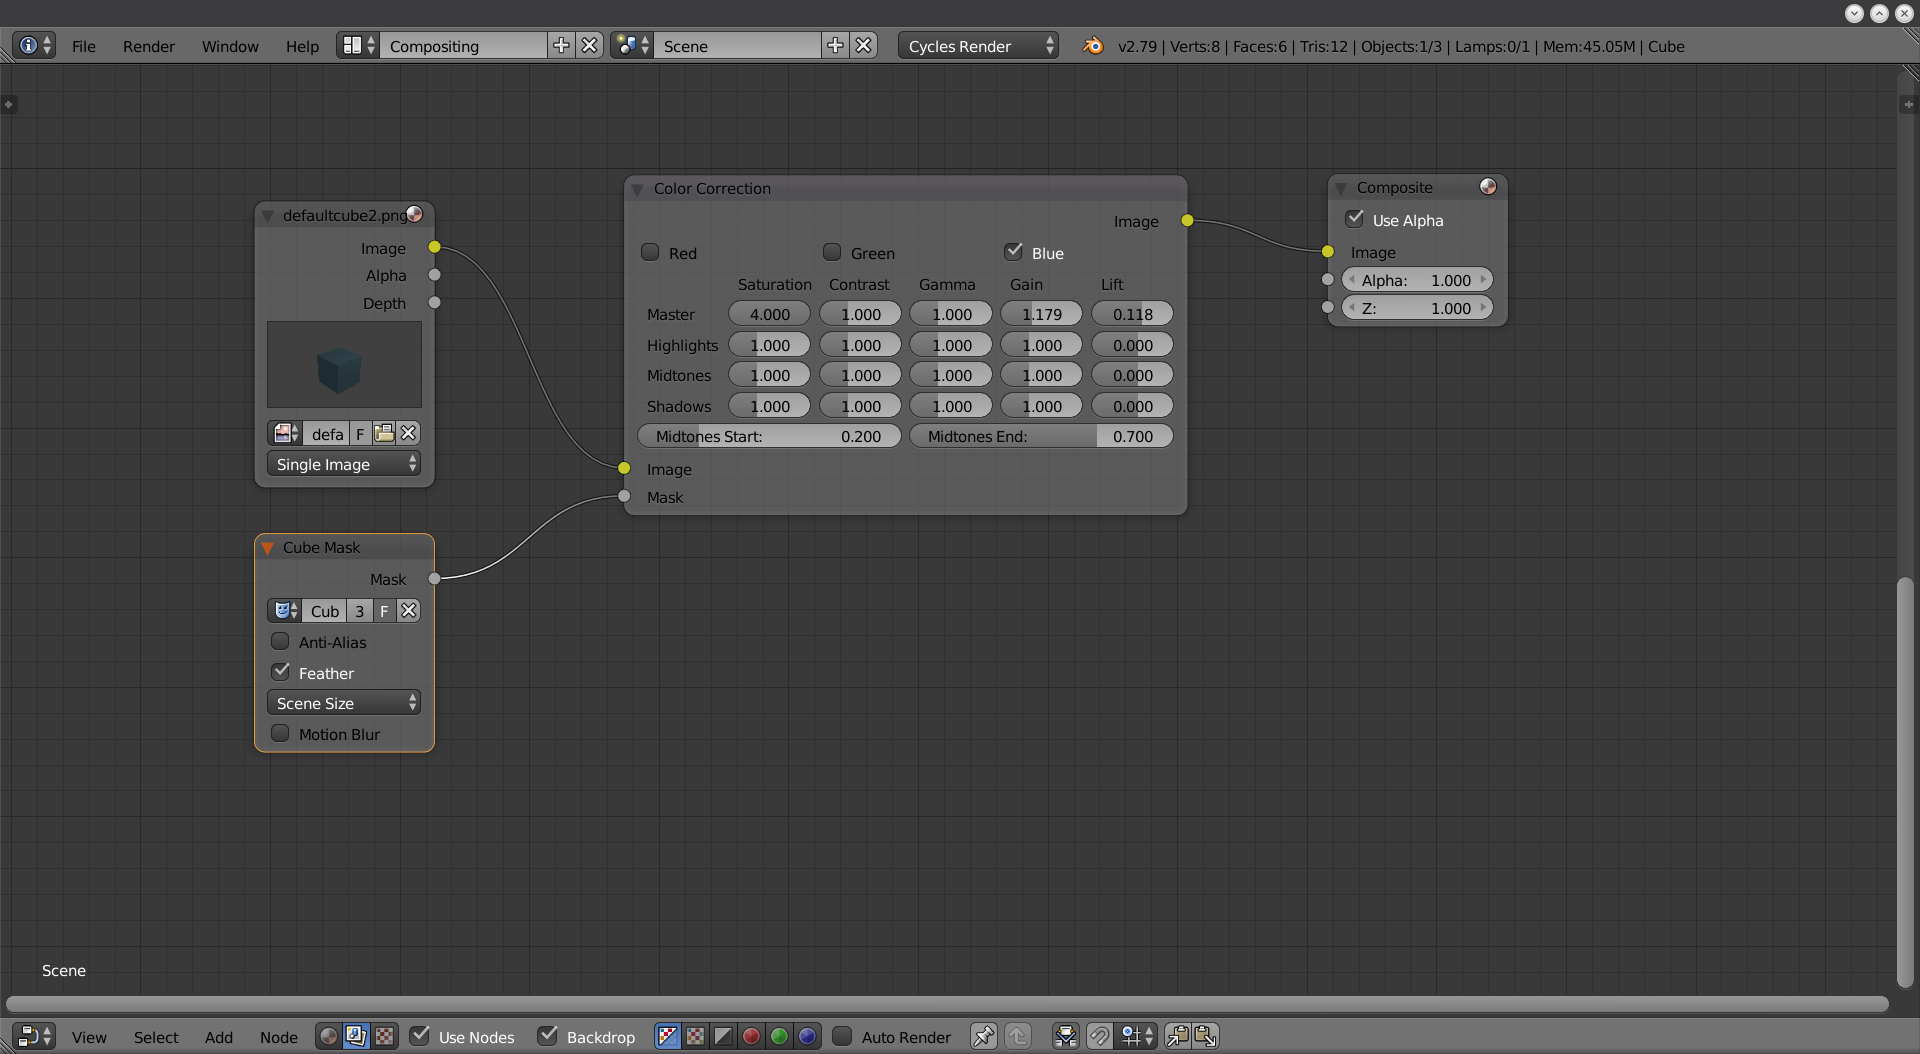
As a matter of fact, since you just want to do color correction, that node alone is all you need, it has a slot for masks built into it. Delete everything but your source image, the mask node, color correction, and add a composite node. Hook the mask into the mask input of the color correction node, place the source image into the image input, and hook the output of the color correction node to the composite node. Uncheck the red, and green boxes, and increase the saturation slider.
Your node graph should look like this when you are done:
Maybe I didn’t explain everything properly. The node editor is basically a flow chart. The stuff on the left hooks into the stuff on the right, and the nodes in between modify that data.
The data from lets say your source movie clip, moves from the left side of the chart to the right side. Its destination is the type of output node you use (viewer, composite, file output). On the way to the destination, the data is modified by the nodes you place on the lines between the nodes. The color correction node, as well as any node you would use to modify that clip needs to be between that clip’s node and the next node in order to do anything.
Your node graph should look like this when you are done:
I changed the setup, and now I can change the color of the sky, but I can’t make it blue, even if I have ‘Blue’ checked. Plus, the mask isn’t that accurate. But now I know at least the direction I should take. Thanks!
Claus
P. S.: Here’s what my nodes look like now. I’ve inverted the mask in order to change only the color of the sky.
You are on the right track. You should be able to get the result you want if you keep adjusting the settings in the color correction node. The default value for each setting in that node except lift is 1. set those to 1, then increase the saturation box to a value above 1 (its the first box in the first row).