Hey everyone, hope you are having a wonderful day! I have trouble creating a seamless texture for clothing. I´m using Gimp so here´s how the workflow goes:
I get a picture of the fabric I want the clothes to have
I load it into Gimp, click on Filters - Map - Make Seamless
Gimp turns the picture into a Seamless Map
BUT
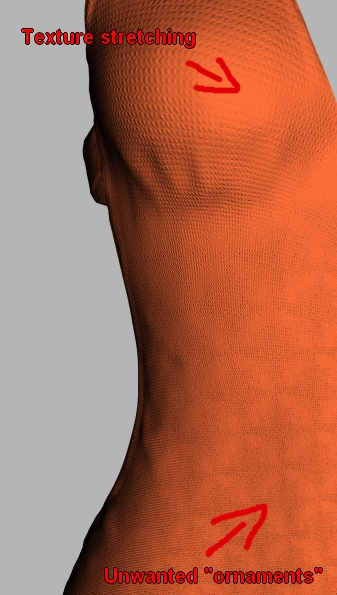
When I use it on my unwrapped UV map of the clothing I made (in this case a swimsuit) its not very good looking. As you can see, it creates a patter which is a circle with highlighted area around it and it just doesn´t look good.
Is there a way to create a texture using Gimp that won´t be doing that? Also as you can see on the breasts, the swimwears folds are stretching and deforming the UV map so the texture stretches as well. Is there a way to prevent that from happening and have the same amount of detail in the stretched areas as is in the lower part of the clothing for example?
I am posting a picture down below, please let me know what solutions you can come up with! Thank you.
‘seamless’ just means the left edge will blend with the right edge when two are placed side by side, and same-same for top-bottom. It looks to me like your original pic is lighter in the center than it is at the edge; hence when the two edges are placed you get this repeating square pattern. You want to flatten the spec on your original. Try decreasing the value (iirc) of the color of the image, or use a broader bounce flash when you take the picture. There is/was also an app that created great textures from pics; it would auto-detect a bump map, for example. someone here can remember the name of it.
Hey there, thanks for your reply! Decreasing the value of color of the seamless texture? The seamless texture is black/white and in the picture, I used it as a bump map. What does iirc stand for? And what exactly do you mean by broader bounce flash?
Unfortunately the “Make Seamless” filter is a very simple filter and it doesn’t give suitable results all the time. and as far as i know there is no way to automatically generate seamless textures with gimp. for creating it manually:
-You should have a proper photo, which means it should be taken in the right lightening condition(you shouldn’t have harsh highlights/shadows), and you should consider the depth of field when you are taking it and…
-Then you should offset it by x/2, y/2 and remove the seams with the help of the tools that gimp offers…(you can also tweak the levels/colors to avoid dark/bright areas in your texture)
But for the best result you’ll probably need to recreate the pattern… although you can give some apps such as PixPlant a try. it uses more complex algorithms and recognizes the patterns + it has the ability to equalize the colors/lightening.
And i think it’s the UV map which causes the stretching problem. could you upload your UV map?
Hey there thanks for responding! What exactly do u mean by offseting the texture and removing seams in Gimp? And speaking about color, the suggestion PapaSmurf made about the color of the texture not being the same in every area is probably true, any idea how to unite the color of the black and white fabric picture?
I downloaded two free texture creating apps, I will try them out tommorow and I will sort out the stretching problem with the UV map once I have a decent texture created.
You’re welcome,
Press Shift+Ctrl+O then you’ll have the “x/2, y/2” option for offsetting (more info) and when you offset your texture you’ll see the transition between edges of your texture in the middle of each axes (the seams). then you have to make them disappear by using tools such as clone/ healing so they don’t cause a problem when you tile your texture.
For equalizing colors/light you can use the “High Pass Filter” or follow this. you can also tweak the levels and such which may be less effective and harder to do.
Unwrap your object correct way so all your uv-tiles are about same size = no image streching. It doesnt matter if your image is tileable or not if your uv is not good.
Hey Hapoo, I did the offset but did not see any transition in the middle that would need to be fixed, also I tried the second method for uniting the color but I dont think it worked, I will try the High Pass Filter. Juha, do you mean I should manually edit the UV tiles to be about the same size??
So if you don’t see the transition then your current texture is good for tiling and you don’t need to do anything. here is an example (from cgtextures) to show a texture which is not tillable, after offsetting. to make this tileable you should make those harsh transitions disappear. but in your case it seems that there is no need to do so.
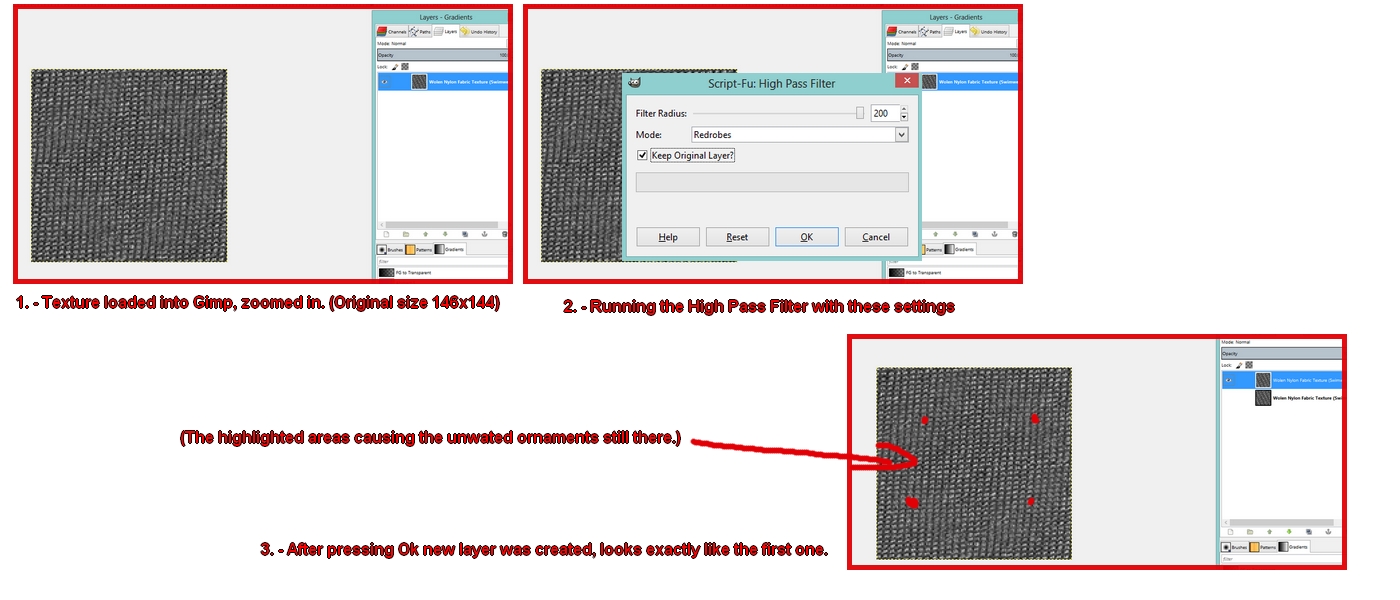
Hey there, thanks very much for the examples! I just clicked on the High Pass Filter link you gave me and downloaded the .scm file, does this file need further opening just like rar or zip files or can it be placed directly to the folder and the plugin will run?
You should copy the .scm file in the scripts directory then it will appear in Filters/Generic.
To see the path of scripts directory open the GIMP, go to Edit, Preferences: Folders → Scripts. (i am not using windows so i don’t know the exact path, sorry.)
Thanks a lot got the filter working now, I´m trying random settings but none of them seems to be unifying the color, any tips what to use to get the result resembling the two pictures you posted,
Using the Redrobes mode with a high filter radius (something around 180) should work fine. (i used similar settings for those examples)
Also note that lowering radius may give some unrealistic results but it’s not a bad idea to try them out too, depending on your texture.
Well, your texture seems blurred in some portions and i don’t know a way to simply fix it.(maybe someone else can help with that)
*Haven’t you accidentally used the “make seamless” filter on it? cause it creates the same result sometimes.
But in this situation and since your cloth pattern is fairly simple, it would be a good idea to model the pattern and then bake it as a bump/normal map.(and take a look at this, you can use the same method)
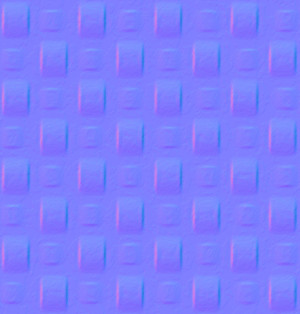
Also this may come in handy: (it’s one of the patterns that luxrender/mitsuba use for their cloth material)
So those 4 messed up (blurred) areas are because of the “make seamless” filter. you shouldn’t use it.
Just try your texture without that(make seamless) filter, and if it doesn’t tile well then go back and crop it from a portion that you see the pattern in it(so that it can tile well), then try again.
Thanks very much for all your suggestions, the ornaments are gone, now I need to get rid of the stretching. I guess it´s the unwrapped UV map causing this, here is a screenshot, please let me know your suggestions. Maybe I should manually edit the UV map so every face is the same size? I do hope there´s a better and faster solution : )