One long-time wish of mine is the ability to have the result of a Shadow Catcher in a rendering with transparent background, skipping the need for a Compositor setup just to render something with a shadow on a transparent background.

One long-time wish of mine is the ability to have the result of a Shadow Catcher in a rendering with transparent background, skipping the need for a Compositor setup just to render something with a shadow on a transparent background.
Is that what you are talking about ?
https://wiki.blender.org/wiki/Dev:Ref/Release_Notes/2.79/Cycles#Shadow_Catcher
No, I mean that I’d love to skip the Compositor part, and have the Shadow Catcher work directly in a rendering with a transparent background, so you can save the rendering including the shadow as a PNG with alpha right away, like in V-Ray or Keyshot.
It’s one of the reasons I still return to Keyshot every now and then, because I hate the Compositor hassle just for rendering an image with a shadow on a transparent background.
That’s pretty much the description of what I’ve just sent
That’s how it works now, just use a plane as ground, check the Shadow Catcher option on the cycles settings of the object and that’s it.
What we need now is a way to also have reflections and diffuse bounces on the shadowcatcher; the shadow alone is not enough in most cases
So you don’t need to go to the Compositor (anymore?) to save an image with shadow on a transparent background? I thought the Shadow Catcher just made adding a transparent shadow easier, but still required setting render layers and going to the Compositor to process the result.
But I hope I’m wrong and you guys are right. 

Just did a test. You’re right. I was so used to using Keyshot for this type of rendering that I missed the straightforwardness of the Shadow Catcher. I thought the workflow still needed render layers and Compositor hassle.
Thanks for letting me know.
I would love to see a solution that can capture diffuse bounces/light and reflections, but setting it up with [HDRs with Proximity] is going to be complicated.
On the plus side, you can do something pretty similar by baking the scene lighting on the ‘shadow catcher’ object and just using normal materials.
Lukas has published a patch fot Animation Denoising to be reviewed:
https://developer.blender.org/D3889
Maybe if Lukas could give us instructions on how to use it so that not very clever amateur beta testers like me can do tests 
I already have patched Blender compiled in Linux with Cycles standalone just in case 
PD: Yep, thanks to Tangent animation, again!
(And Lukas and cycles devs of course)
I just remembered this Redshift tutorial. Ideally, this is the sort of functionality we should have for Cycles too. Mainly the Catch Diffuse and Catch Reflections settings.
First render your animation with animated seed and Denoising Passes enabled in the render layer tab (no need to enable the denoiser itself) into a sequence of Multilayer EXRs with an output name containing fixed-length frame numbers (e.g. by setting the output to frame####.exr).
Then, open up the Text Editor, type in
import _cycles
_cycles.denoise('/path/to/your/frames/frame#.exr', '/output/path/denoised#.exr', frames='1-250')
and run the script (after replacing the three arguments with correct values of course). Your Blender UI will probably lock up, but if you start Blender from the console you’ll see a progress indicator.
Note that the frame number placeholder in the denoising call follows OpenImageIO convention, not Blender, so one # stands for four digits. If you want to specify a single digit, use @. Stupid, I know, I’ll have to change that…
Once that has completed, you’ll have denoised frames in the path you specified as output.
The function accepts various other arguments, see the code for details for now. A particularly interesting one is frameradius, which sets the amount of past and future frames used (default 2, using 0 disables the animation feature and just denoises each frame individually).
Thanks!
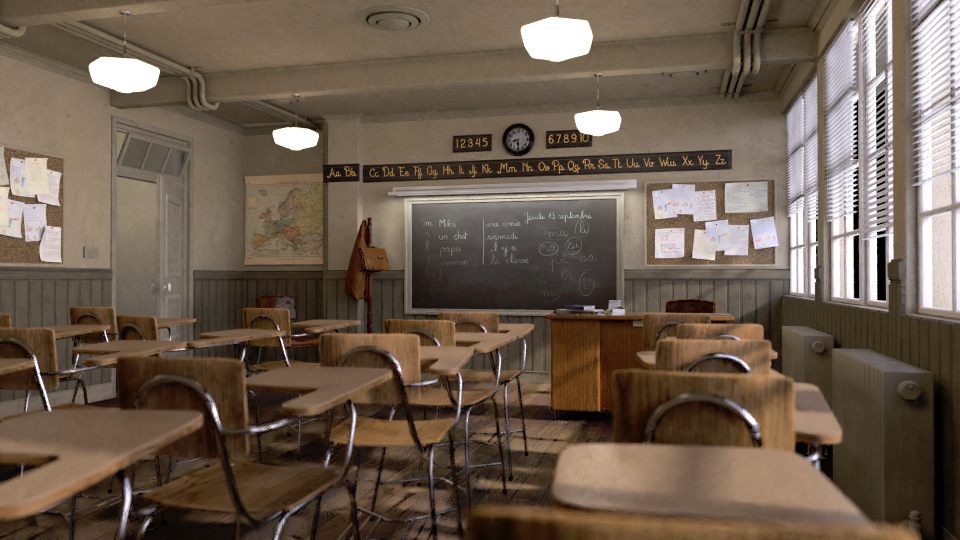
I am testing with everything related to Denoising by default in Classroom scene, with some adjustments in the scene to obtain fast renders. Image size at 50%.
Animation Denoising took approximately 90 seconds per frame on my i7-3770. I see in code that we can apparently use multiple devices, so that time I suppose could be reduced a lot in production and with multiple powerful hardware.
In the result of animation denoising you do not pay attention to the variation that appears in the window (maybe I am doing something wrong). Look at elements in the foreground and patches are reduced, which is important for animation. You can open each image in different tabs of your browser for better comparison. Tested in frame number 4 (I have rendered the 145 of classroom default animation):
Noisy:
Default denoising:
Animation denoising:
You should bear in mind that Denoising is mainly designed to eliminate residual noise, and in this example it is an extreme case with a lot of noise at low samples. So I think that people with more powerful hardware than mine can then do better tests showing complete animations.
Also, be aware that I can be wrong in many things that I have said and done.
Looking at how it works, can the code also be extended to denoise still images based on a certain number of image buffers?
The idea is that for tiled rendering, you would have a few image buffers each receiving a different set of samples (and then information from all of them would be used to generate a far higher denoising result than previously possible).
So if you have three image buffers and 1200 sample passes, each buffer would have 400 samples. I bring this up now because the denoiser can now take multiple frames with a different arrangement of samples.
@lukasstockner97
If you have some time available. How “list_devices” works to see available devices? And how should the instruction be written to use GPU and CPU if this were possible?
Yes, that would absolutely be possible.
In fact, I’ve written a helper for merging two EXR renders (with different seeds of course) about a week ago, I guess I could include that somehow.
@YAFU:
To list devices: _cycles.denoise(list_devices=True)
To use a certain device type, add , device='CUDA' (or OPENCL) to the call.
Also worth mentioning that GPUs help a lot for denoising speed - even if you don’t normally use GPUs for rendering, give it a try.
Isn’t this also called image stacking? And wasn’t it already explored and declared worse than regular full sampling? Or because of the denoising process now it is another story?
You only need to do a tab comparison of Yafu’s classroom renders to find out (far better preservation in small/thin highlights and edges).
Since Lukas also talked about a helper tool, I assume the stacking would be more sophisticated than simply mixing them.
Wow! My GTX 960 takes only 20 seconds per frame, against 90 seconds of my i7-3770
PD: I love that fearsome coil whine noise that indicates that my GPU is hard working ![]()
sure, the comparison shows a good improvement, but those where two renders with the same samples count. What I understood is that you are proposing to make a 1200 samples (+denoise) still vs a 400 samples (+animation-aware denoise), since the other 400+400 samples would in theory computed for frames that would not exist, except for that denoise algorithm
The samples would simply be divided among the buffers. If you need more samples, you just set the number to a higher value. In a sense, you could also argue that animation denoising is making use of
sample count * N(frames) samples as opposed to sample count / N(buffers)
That’s not to mention that I’m not talking about multiple frames, but just a single frame (since what I propose is a solution for still images).