How do I increase the range of my lighting in Cycles?
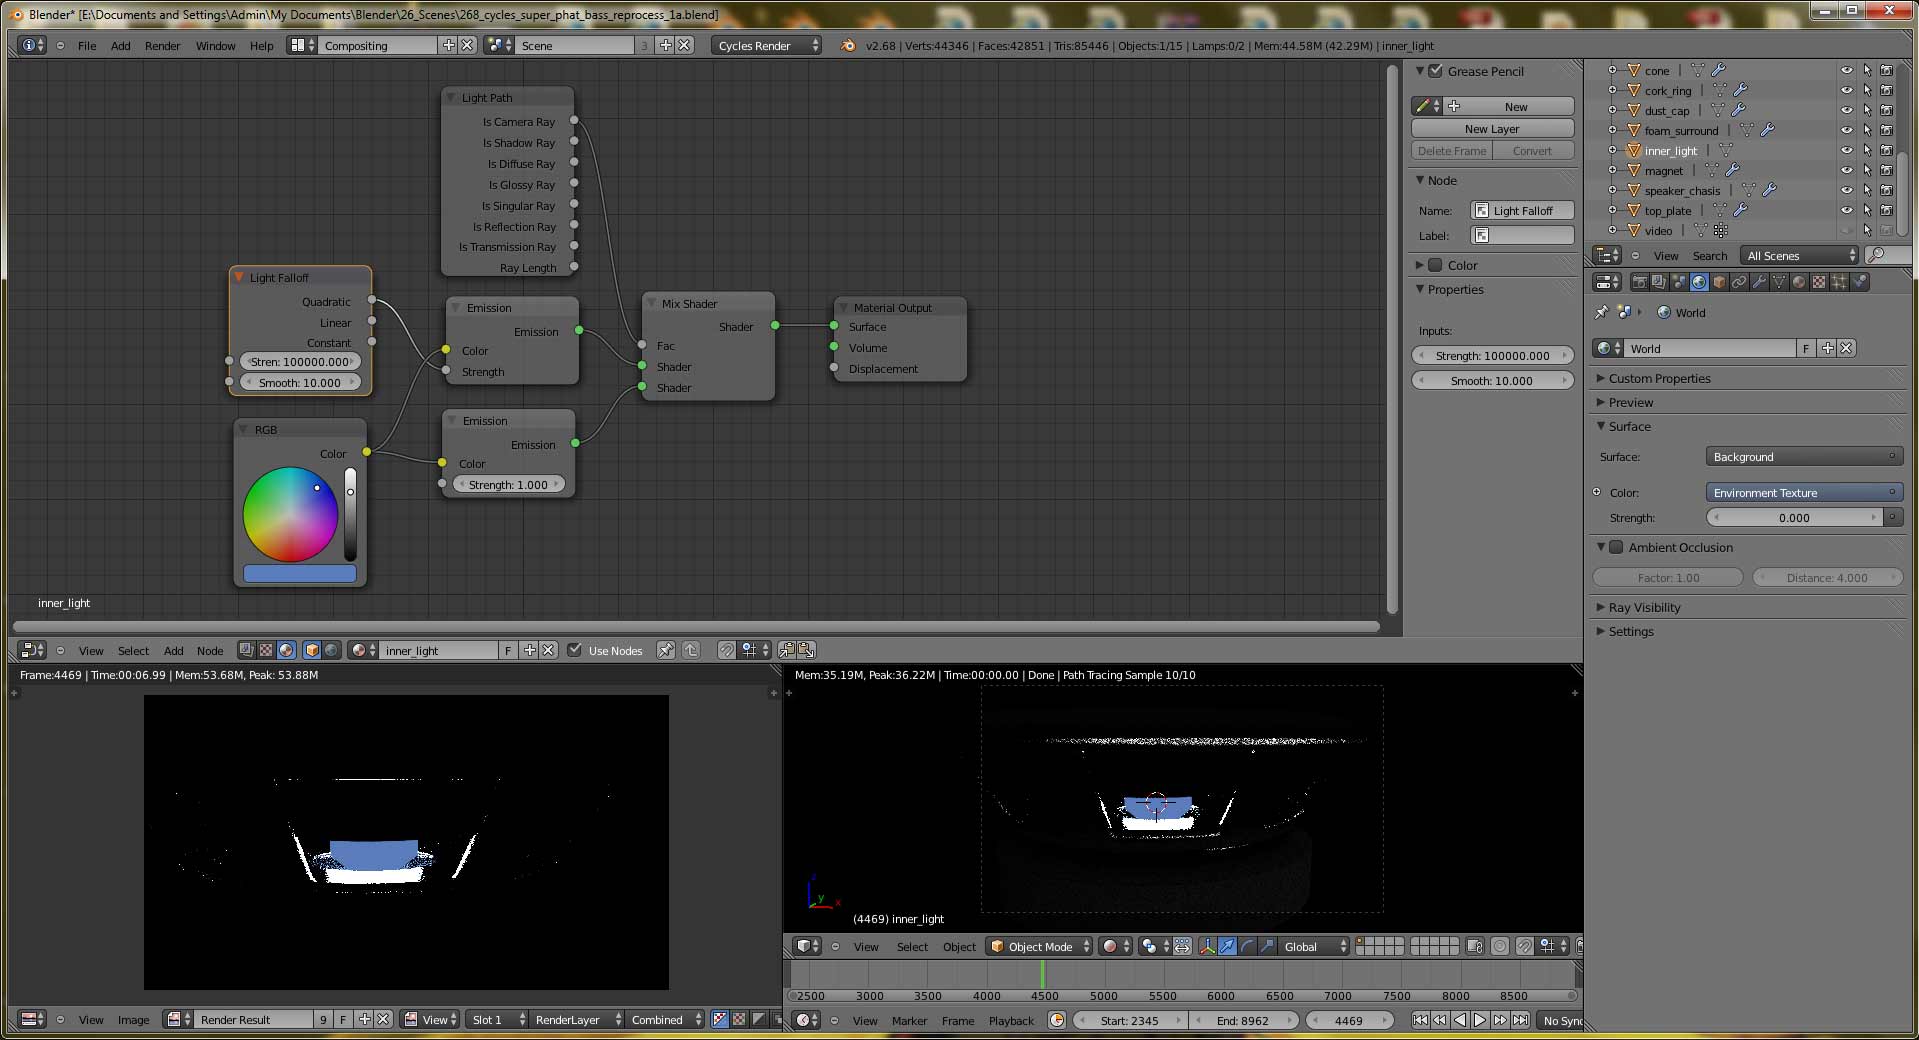
In the posted image the blue sphere has an Emission shader. I want this light to really light up the entire interior area of the speaker. I tried increasing the strength but that just makes the light white. I want a blue light illuminating the interior of my subject. As you can see in the mostly black image, below, the light barely illuminates anything…
You could set the original LED’s emission Falloff to linear or constant, which will light up the inside of the enclosure but also turn the LED white. Turn off the LED object’s Camera ray visibility, and composite in or add another LED object with the right blueness.
You could also just add a lamp near the LED location.
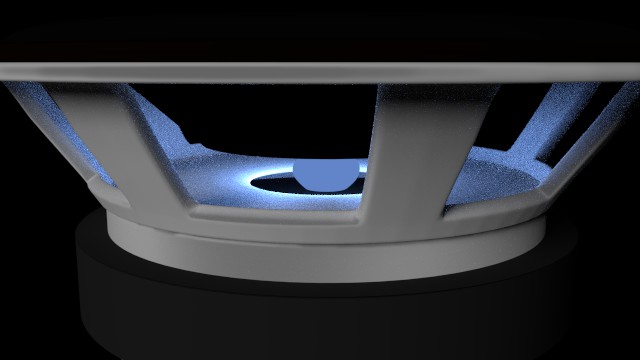
I was hoping for a non-compositing based solution, that just adds to render time. I did add a Light falloff and that helps a bit, but it still comes no where near as good as what Blender Internal can do, in this image. Notice how the blue light just fills the area within the specified range, quickly and smoothly.
What you should first do is make the emission source a whole lot brighter. The ball will look white, which I guess is the reason you did not turn it up. You can use a mix shader, with camera visibility attached to the fac, and use a low powered emission shader attached to the visibility, while the bright shader is attached to everything else.
I have setup a light node tree as you suggest and that technique does control the output color for the object based emitter. But there still seems to be no way to control the range of the light emitted.
In this example the illumination node is set to ONE HUNDRED THOUSAND TIMES STRONGER than the object based output but the effect of light in the scene is not 100,000x times stronger.
It seems like Cycles has a fixed range for emission.
Does anyone know how to extend the emission range?
I guess instead of trying to mix two shaders together you actually have to use two objects.
Object #1 is the renderable light object in the scene set with a low emission value.
Object #2 is the light range object that is invisible to the camera. This emission value can be adjusted very high as needed.
Pondering…I thought Cycles was supposed to “throw” light around yet here I am back to solving lighting problems with a direct light hack. (cough…cough).
Dont get it completely, Cycles have no any limitation on range except precision of 32 bit float point numbers and maybe internal math function precision issues as exp(), sqrt(), etc. But i really surprised that you can hit that limits in practice. Raise light “Strength” light parameter as noted in above posts , that is all. Falloff always must be only default, never change it. Can you share .blend of you still not solved that lighting ?
I don’t claim to know a huge amount about lighting in either cycles or BI, but I just threw something together because your results seemed a little odd to me.
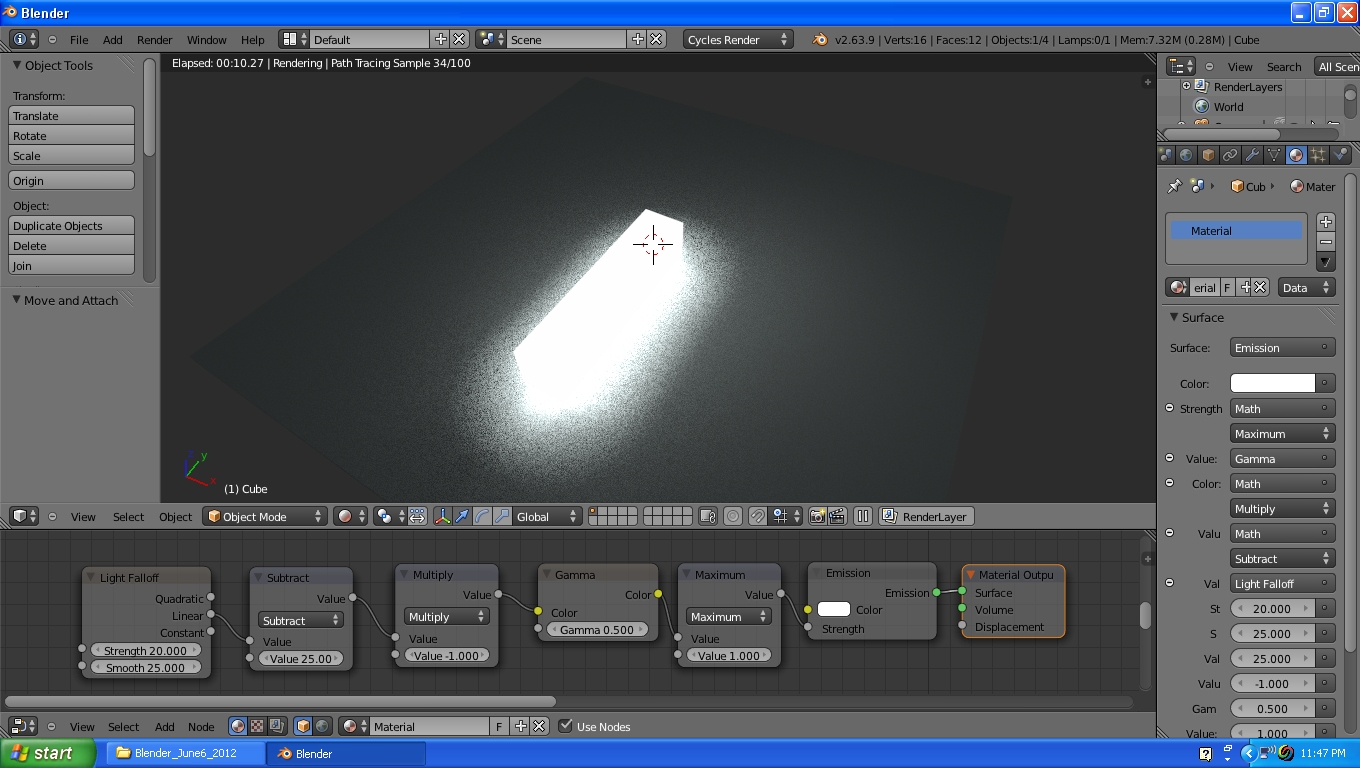
So I had a poke (ignore the crappy model, I just wanted to test some settings ) and it seems like as long as you’re OK making the LED stay blue by mixing a weaker emissive based on camera ray, as previously mentioned, there’s no reason you should need 10,000 x values.
One thing that might be worth checking is the number of bounces you’ve got the render settings set to allow. I think I just selected full-global illumination before rendering the screenshot here: http://daveleack.com/wp-content/uploads/2013/10/lightFalloff.jpg and it looks OK to me.
Another thing I did is put it all in a box so i could see what sort of travel I was getting on the rays and allow some back reflection to hit the outside of the model.
The screenshot should show all the relevant settings and material stuff to set it up like I have it here.
Hope I didn’t misunderstand your question… I have a habit of doing that sometimes.
Thanks for taking a look, I have attached the speaker scene in the screenshots.
The emission shader is setup as niverik2k mentions above. A mix shader with two emissions controlled by an IsCamera light path.
Even if I crank up the energy, I still do not get blue light. I get white light under Full Global Illumination. What I want is blue light over a larger area.
PS: I left the light_range object in the scene. Simply enable it to render the dual object solution.
Now understand. You never get what you want. With current handware level, monitors cannot make light that bright, and always clip max at some range. That white things is not bug, in reality colors in picture are blue. You can workaround that problem savin picture in float point format (EXR?) and do “tone mapping” trickery as post pro. Some commercial renderers and Luxrender can do that on fly, Cycles not.
If you not believe, little demonstration - open Color management panel settings, and try to change “Exposure” slider as scene rendering. You will get blue light as slider go left, but almost all image go black, as “dymanic range” of that scene is huge and not fit any monitor dynamic range.
P.S. I suggest use compositor, tone map with some “fog glow” will make you picture very “pro” look even with very high light strength, just tweak tonemap paremeters a bit ot seatch examples (keywords “fog glow” and “tone mapping” in compositor related forum)
@eppo: Thanks, using MIS and turning on the Sun does help a bit. I still wonder about actual time for an acceptable final render. Even if I increase samples dramatically I still get noise in the scene.
Here is my render stopped @1,500 samples. This took 3:31 seconds on my GPU accelerated machine. Yours is posted @576 samples but looks better. Were there any other tweaks you made before rendering?
Basically it works so: If the ray is Camera Ray, I use a mix of emission/glossy shaders with fresnel as factor; if not I use an emission shader. This let you to use different strengths so you can set a lower value for camera rays, avoiding the white spot in your render. Testing this I found that the result is better if you mix again the previous mix of emission/glossy shaders with another emission shader.
If you want to see the render with compositing glow effect it is here.
NOTE: The glossy effect in the emission is very light. You must tweak strengths in all the lights of your scene to see it. Also if you monitor don’t have a wide color range you won’t see it. You can check if you see glossiness in these renders (they have it!).
It would help if the metal supports were using an anisotropic shader. Lighting in cycles depends a lot on bounce. Much like the real world. If all the materials around the emitter are diffuse, much less light will be bounced around and that will result in less light overall.
Terribly sorry, since we are in different time zones: file is back home and i’ll add it in 5 hours or so. I was toying a bit with render parameters due to initially it was a bit grainy; that might have had some impact of course.
I think you are seeing the physically accurate part of cycles - imagine taking a photograph (digital or film) of a similar setup - you can get the light to be colored itself, but the surroundings will be invisible, and if you make your medium sensitive enough to see the surroundings, the light will have blown out.
An everyday example is to photograph someone in a room lit only by light from a window. If the window is in the picture it will be washed out, or the room will be too dark and you usually have to choose one or the other unless your camera does HDR.
I found out before, that you can actually alter the falloff of the light if you string the light falloff node’s linear output through a few math nodes (it won’t work on the quadratic version).


 ) and it seems like as long as you’re OK making the LED stay blue by mixing a weaker emissive based on camera ray, as previously mentioned, there’s no reason you should need 10,000 x values.


