Hello everyone,
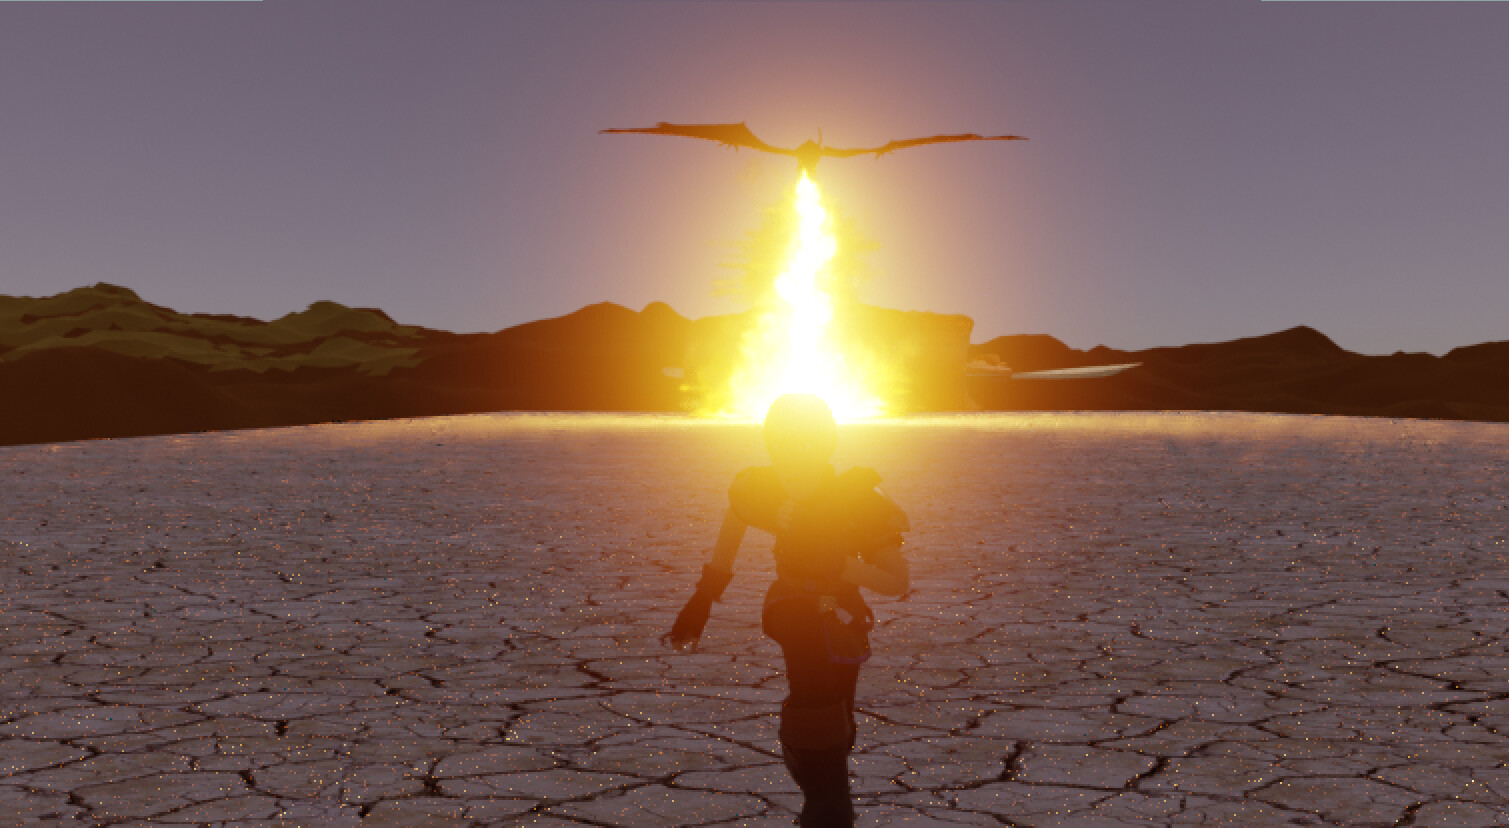
I’m trying to render a fire simulation in Cycles with transparent background to add it to my Eevee’s rendered animation in compositing / post processing.
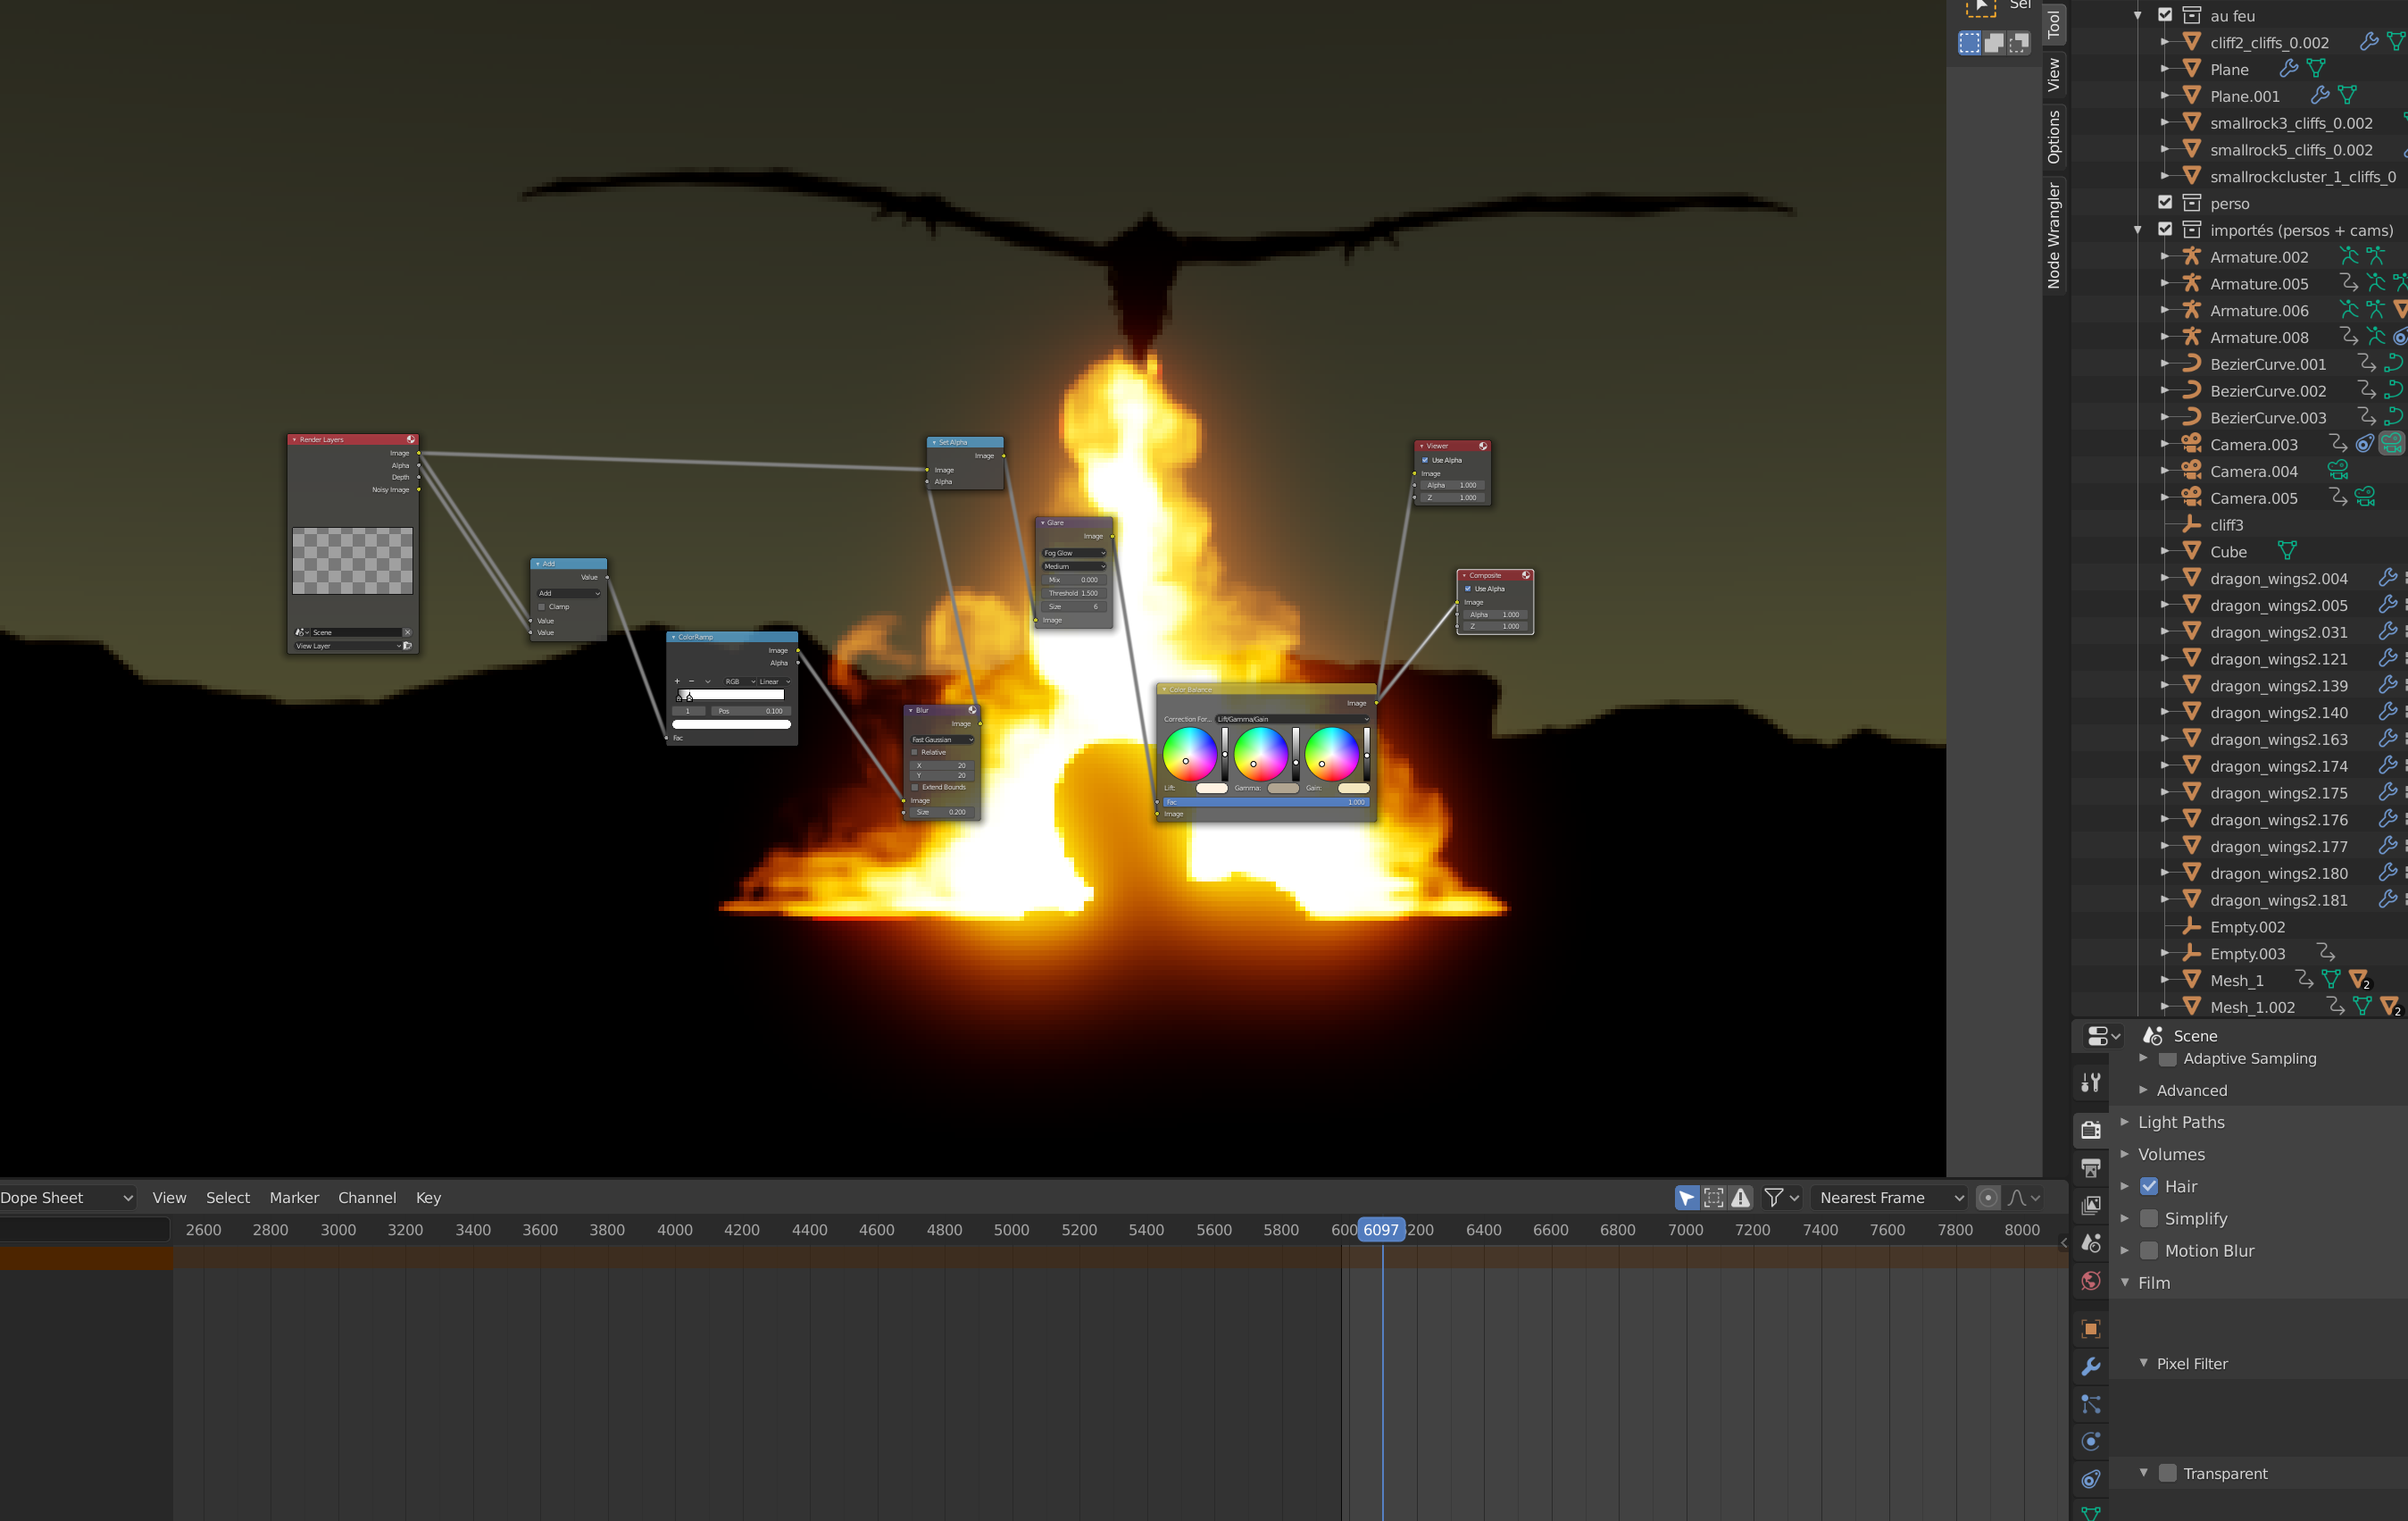
I love the result of the glare when the Transparent option is not activated, but when i activate it there’s no more Glare.
Is there a way to keep my Glare in the transparent render so it will be present when i’ll add it in post processing ?
If you would have some cool tricks to make a fire shader render better do not hesitate to share because i’m not yet satysfied with the fire look too
Thanks by advance!
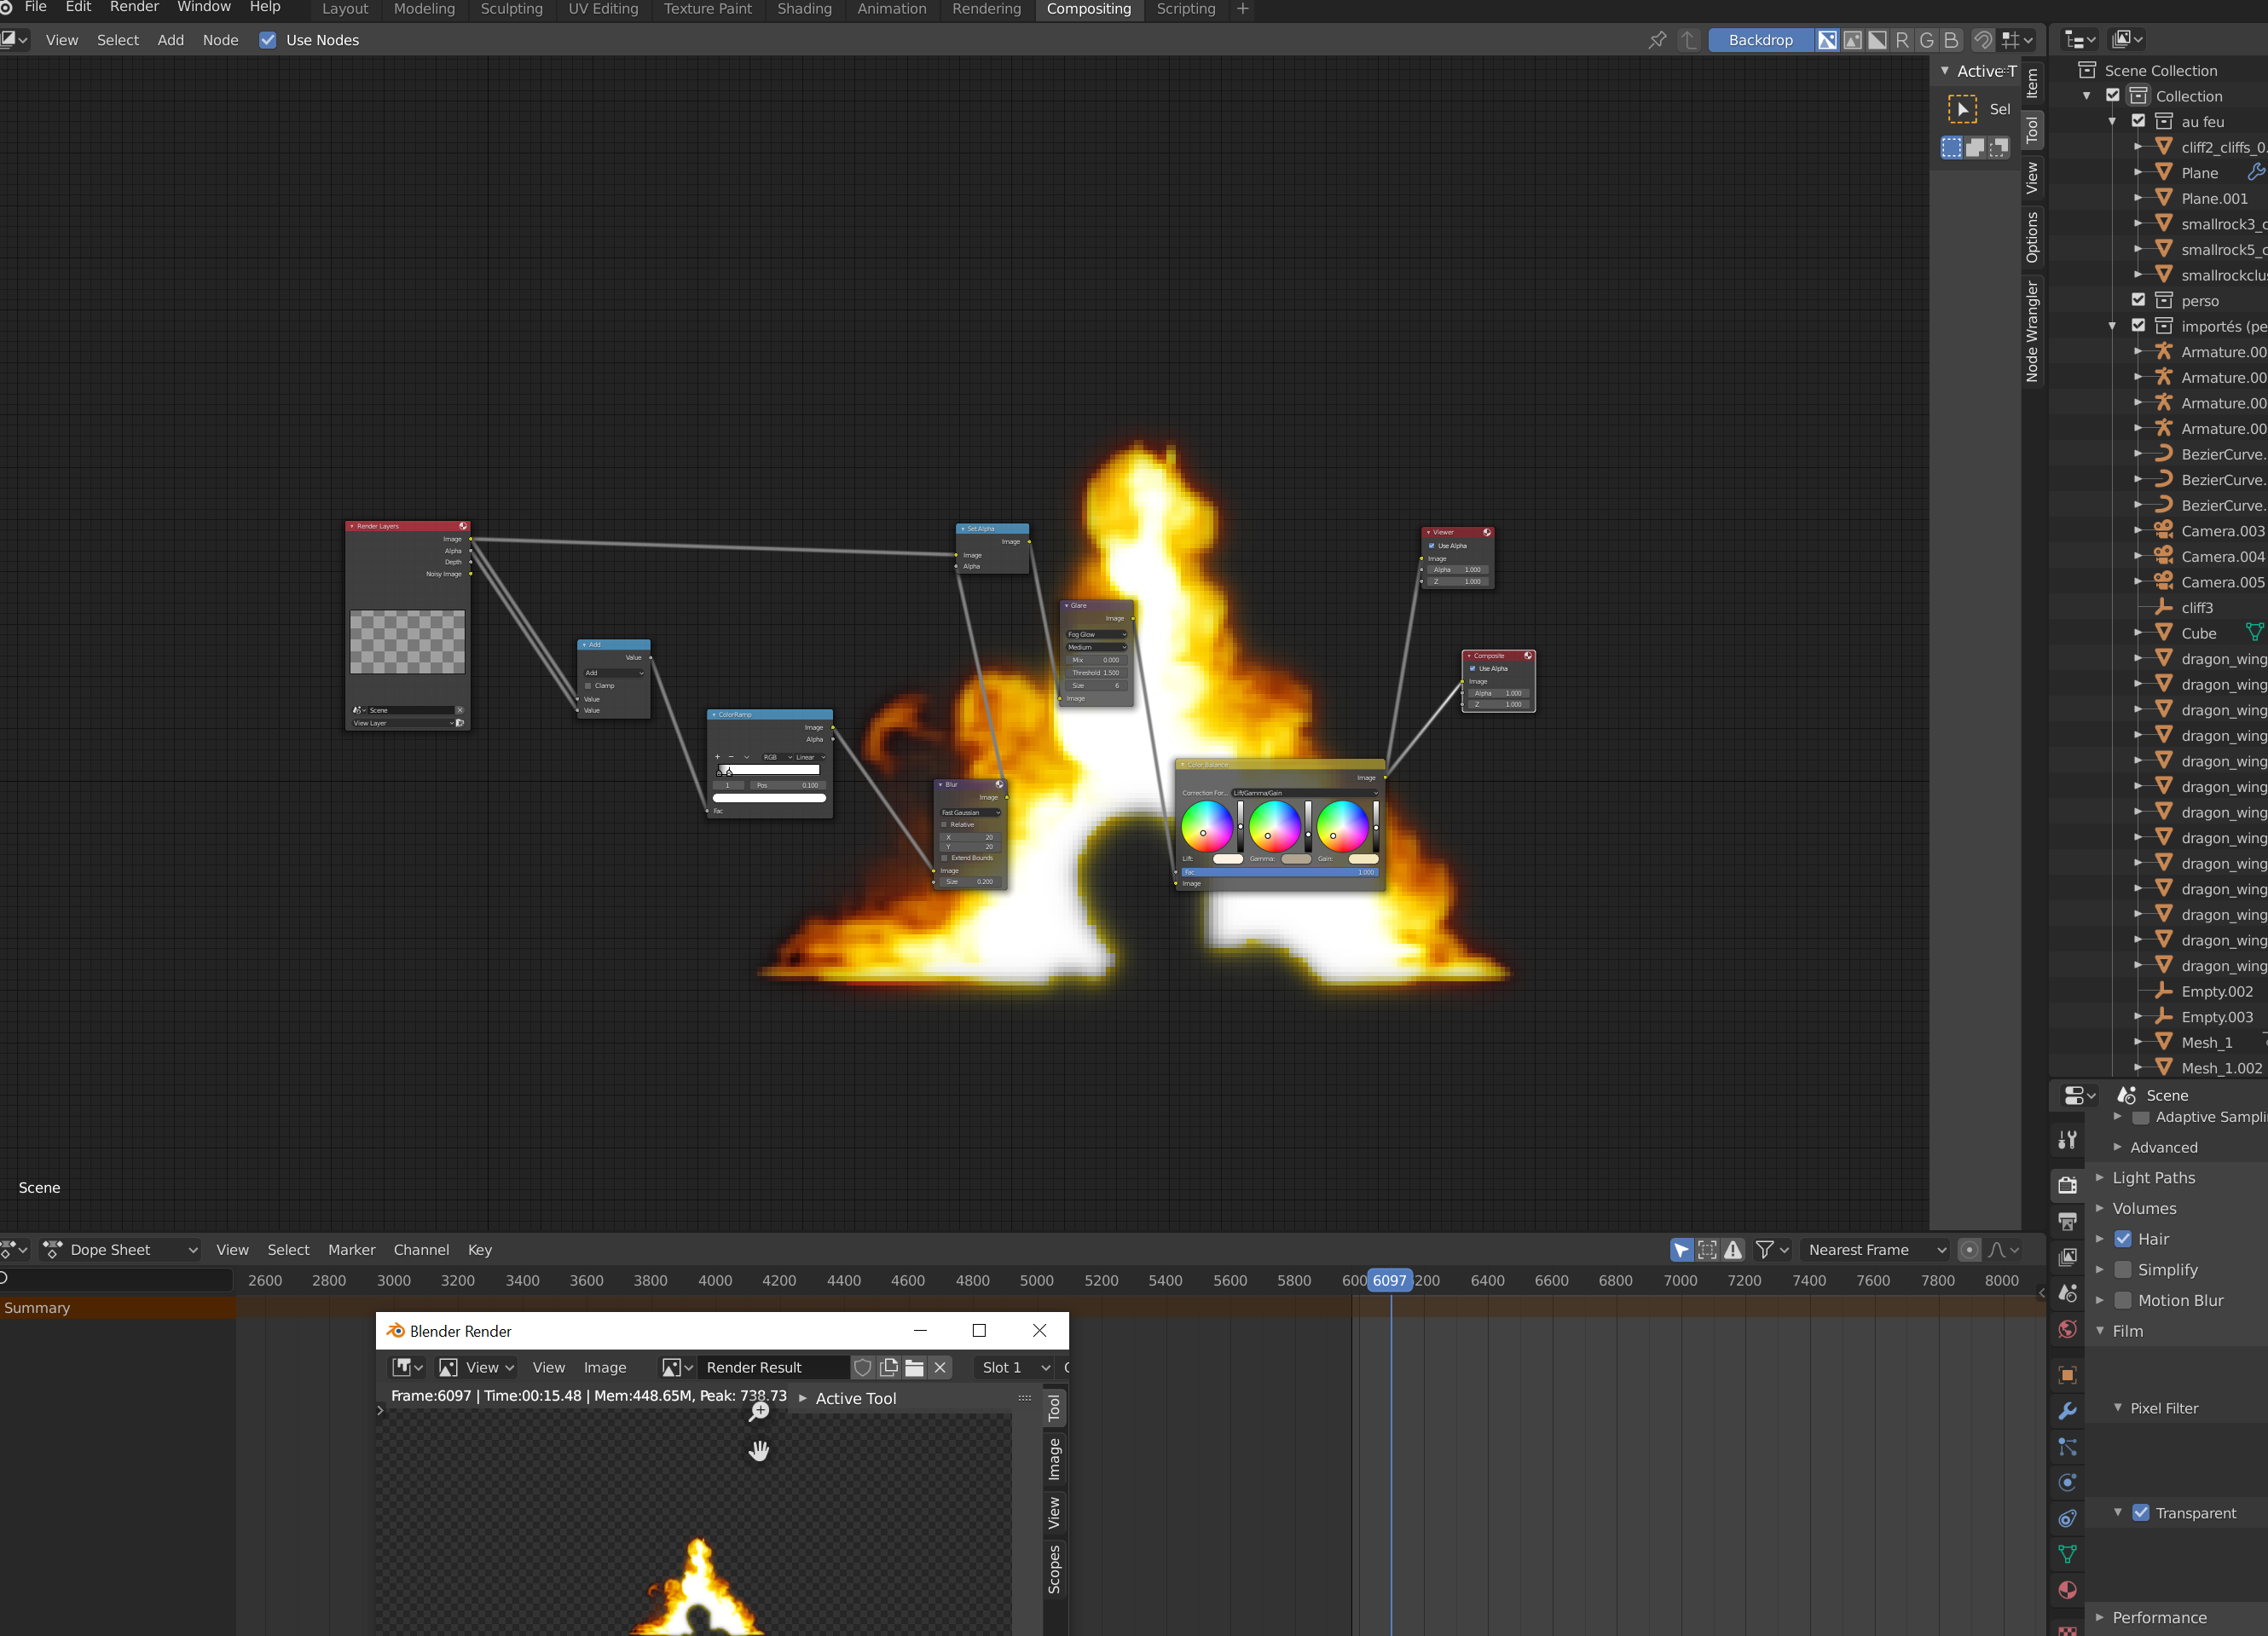
There is a thread on this very site with the same question posted years ago. I can’t seem to find the thread but I have an image from it with the node setup solving your problem.
i also have the sensation that the glare is acting on the light of the whole scene and so it will render better in the original scene anyways than compositing, but it’s already a good step, thanks again
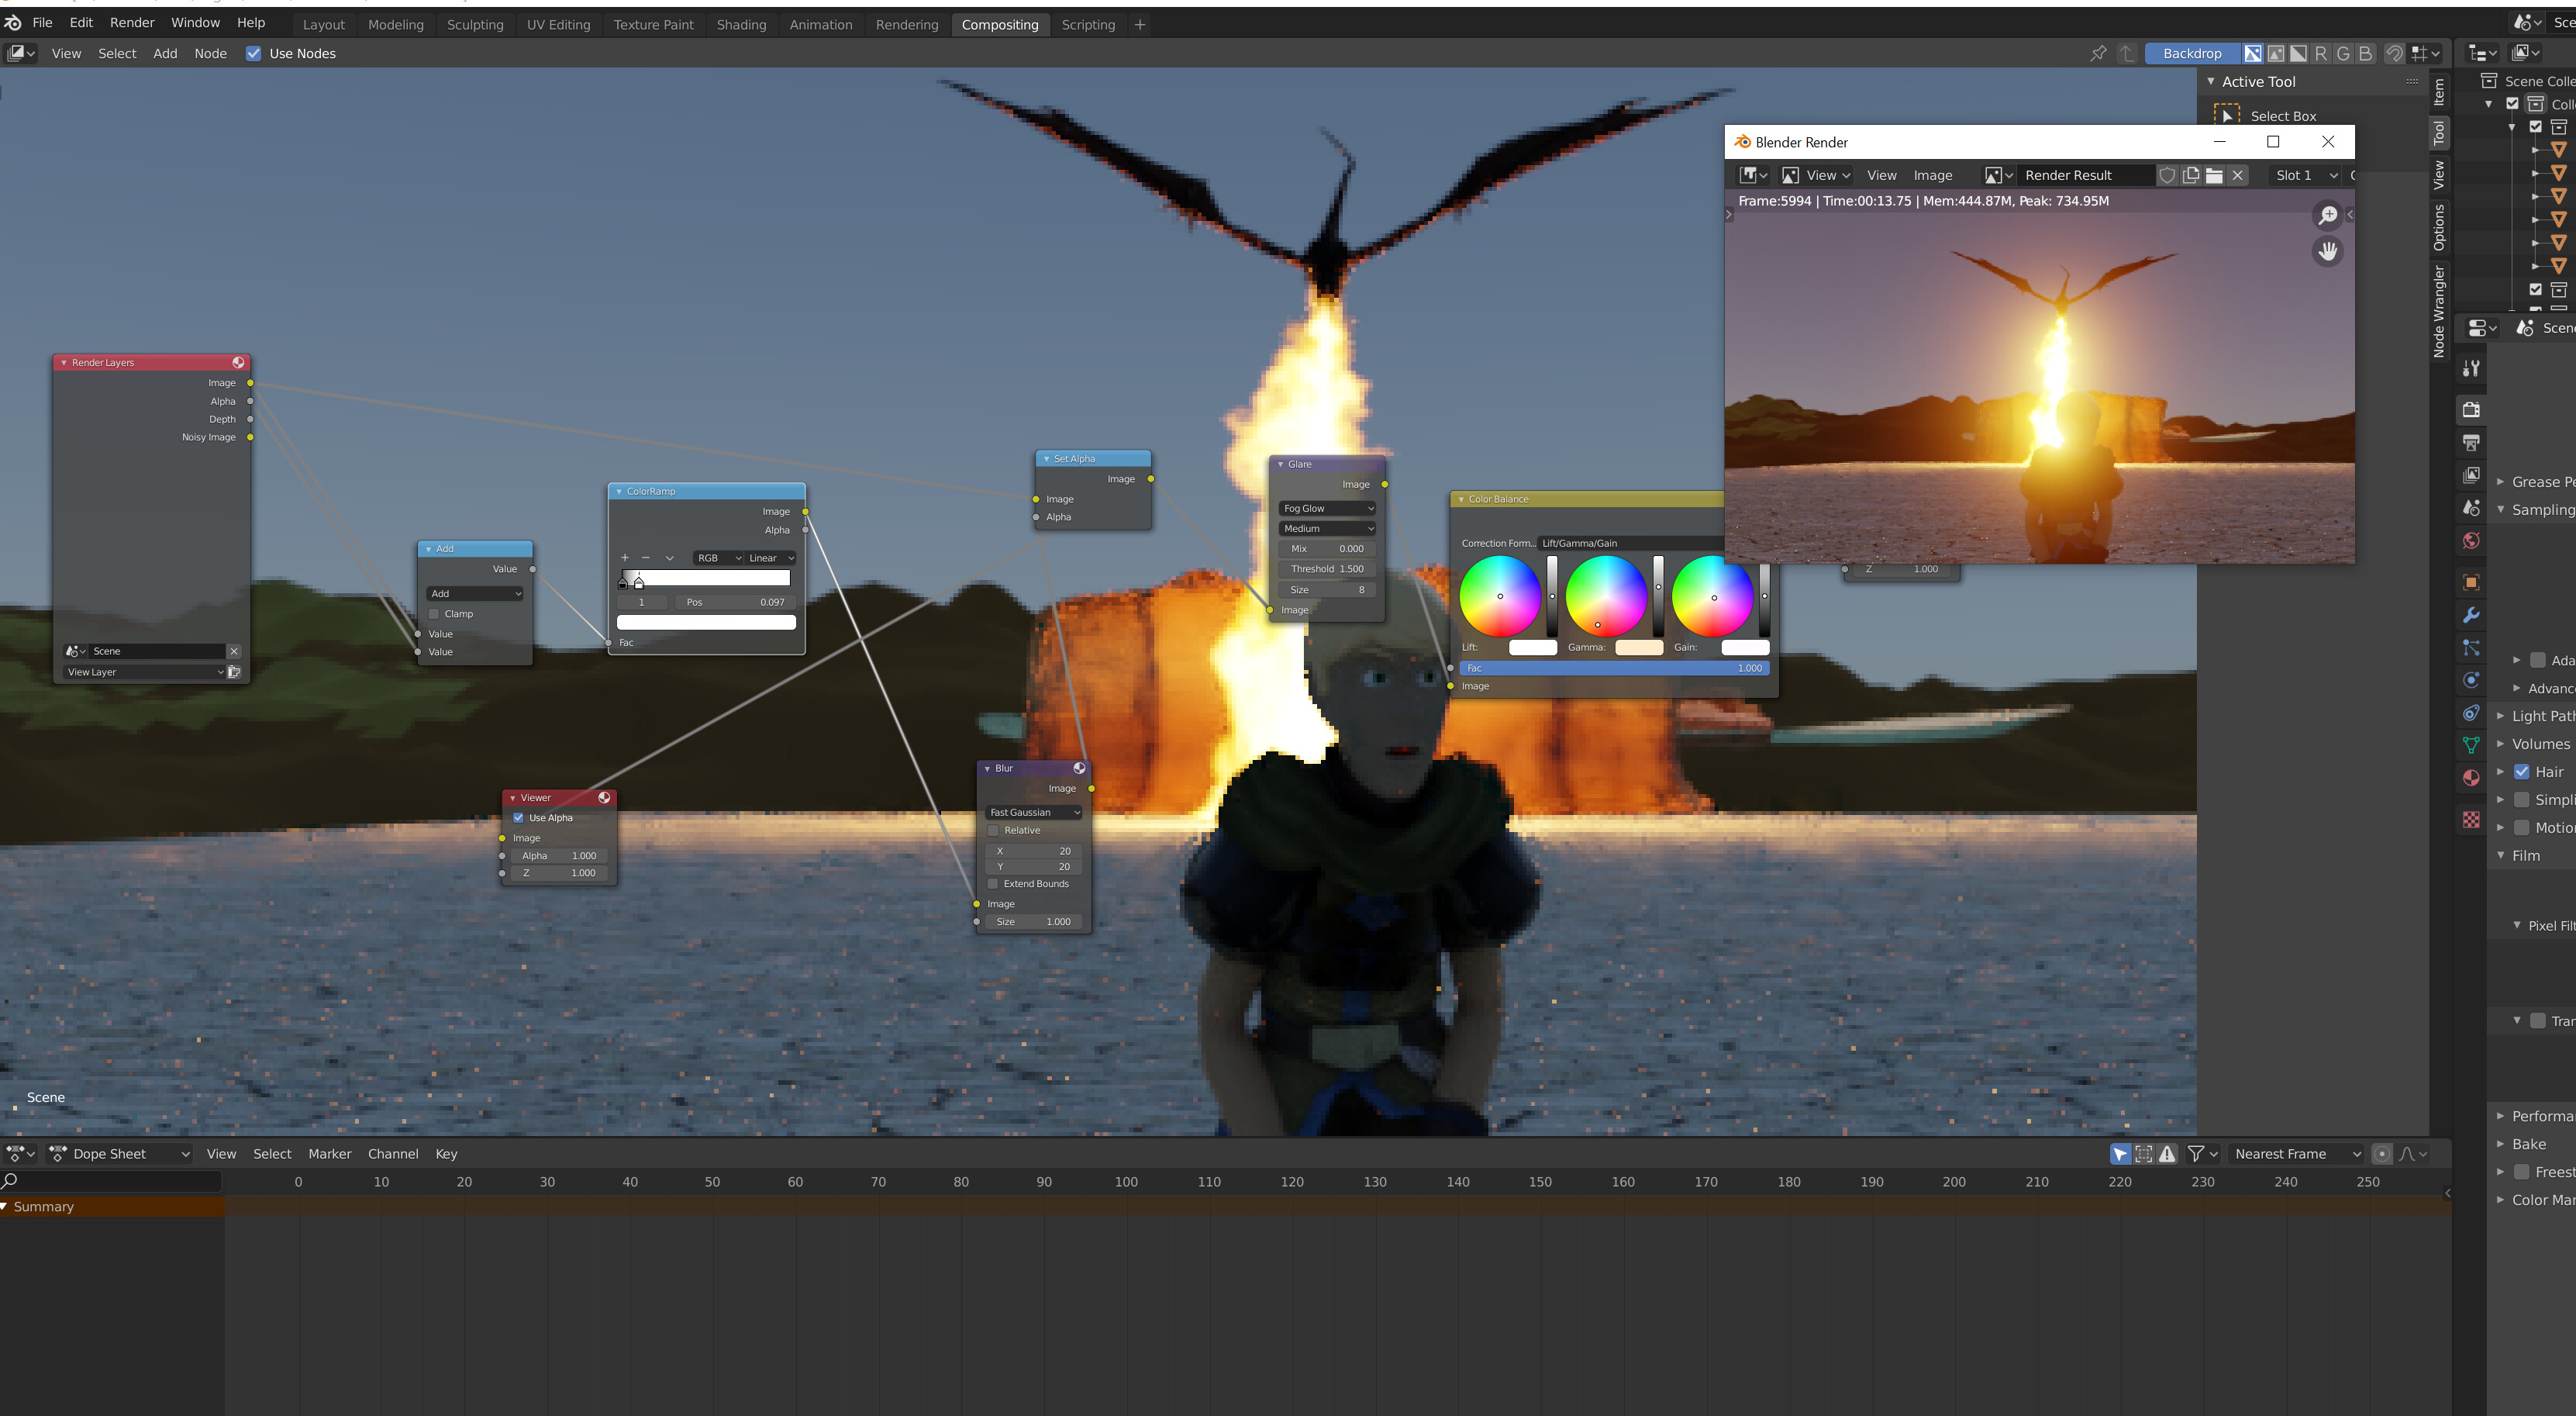
Like you see the glow here added in compositing is present but don’t have alpha value, it’s full of color and we can’t see the Eevee render on the glowing parts, that is looking weird compared to the Cycles one. I tried to play with the values but there’s always this big no transparent glow. If someone have an idea to make it looks more natural would be appreciated a lot
I don’t know anything about Eevee (since I don’t use it) but you can try another solution.
In the compositor, you can separate the flame from the rest of the image and apply the glare node on that separate part. Then add the result back to the rest of the image with a Color Add node, just before the Composite node.
I personnally ddidn’"t knew anything in compositing before this problem so i have no idea of how to realise that, but thanks you for the idea if it’s possible to assemble the flame only Cycles scene directly with the whole Eevee scene in Blender’s compositor, then it’s definitly the solution i need.
First, render your scene in Eevee with the compositor disabled and save it as an image.
Second, switch to Cycles. Here the flame will be separated in the compositor before applying the glare on it. It can be done in two ways: with an index pass or with Cryptomatte. I’m going to use the index pass because I find it more intuitive.
Select your flame object and go to the Object Properties tab. In the Relations panel, there is a field named Pass Index. Set its value to a number other than zero.
In the View Layer Properties tab, there is a check box named Object Index under the Passes panel. Check it.
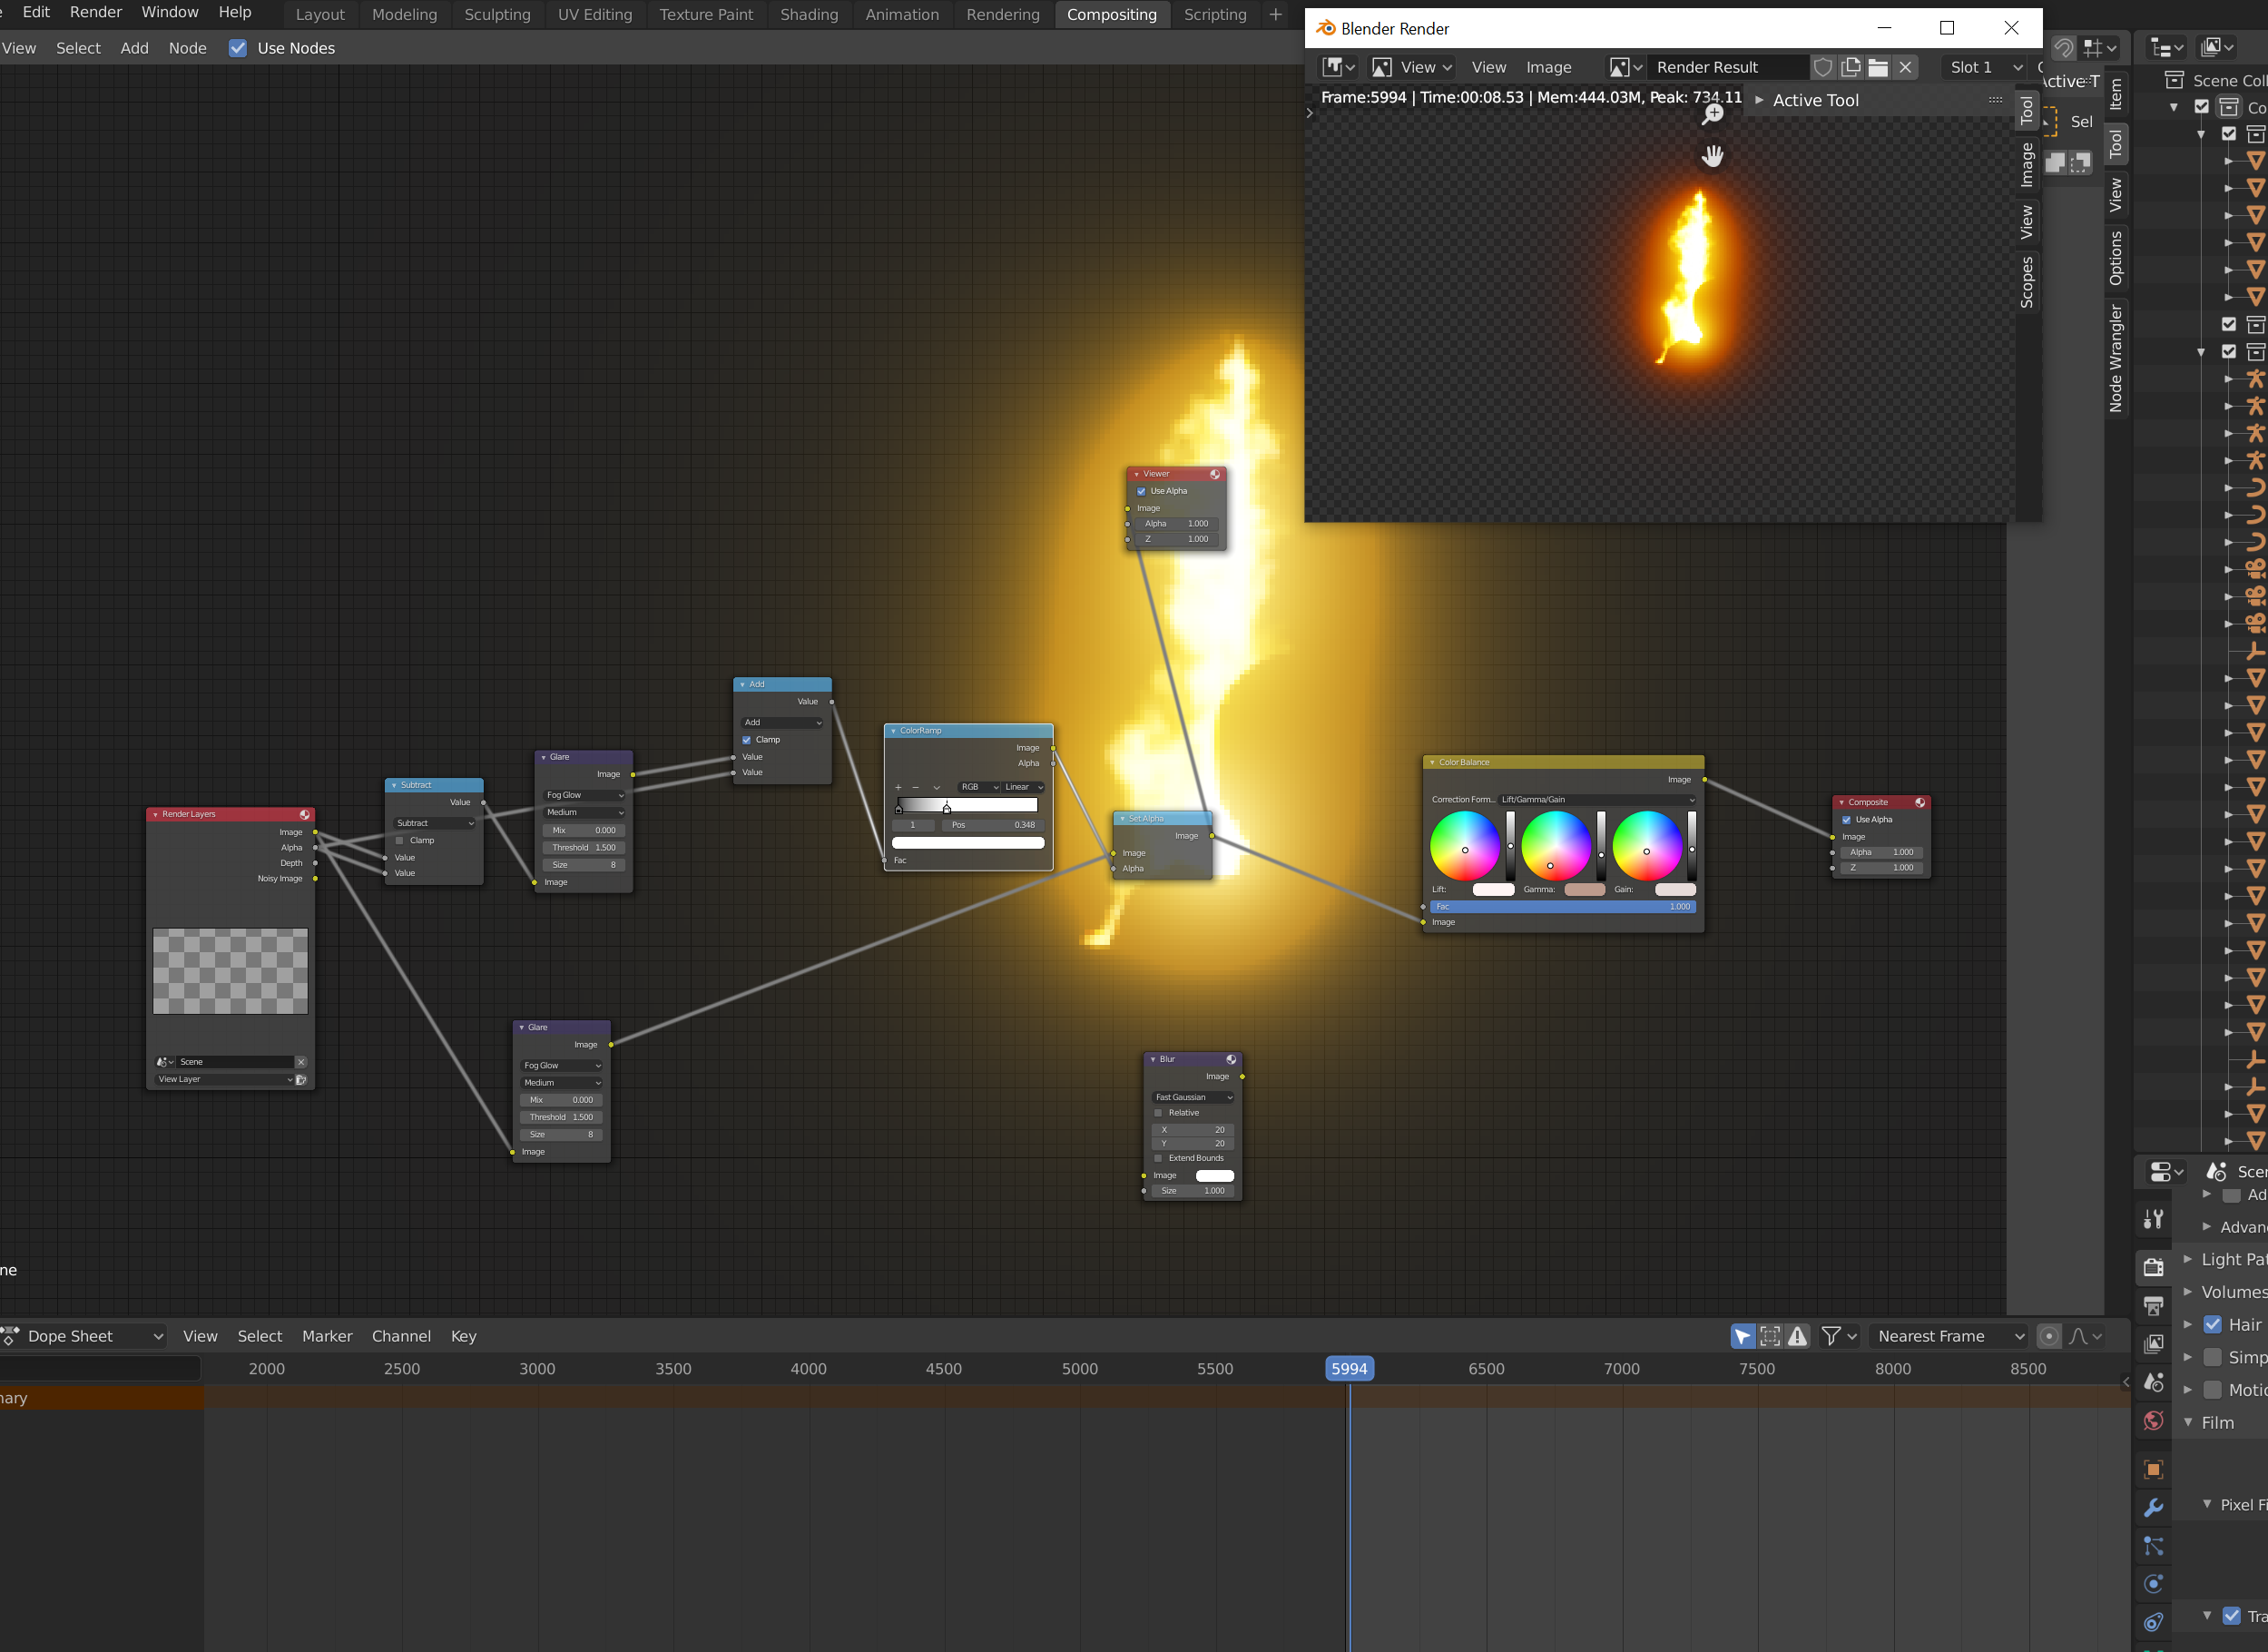
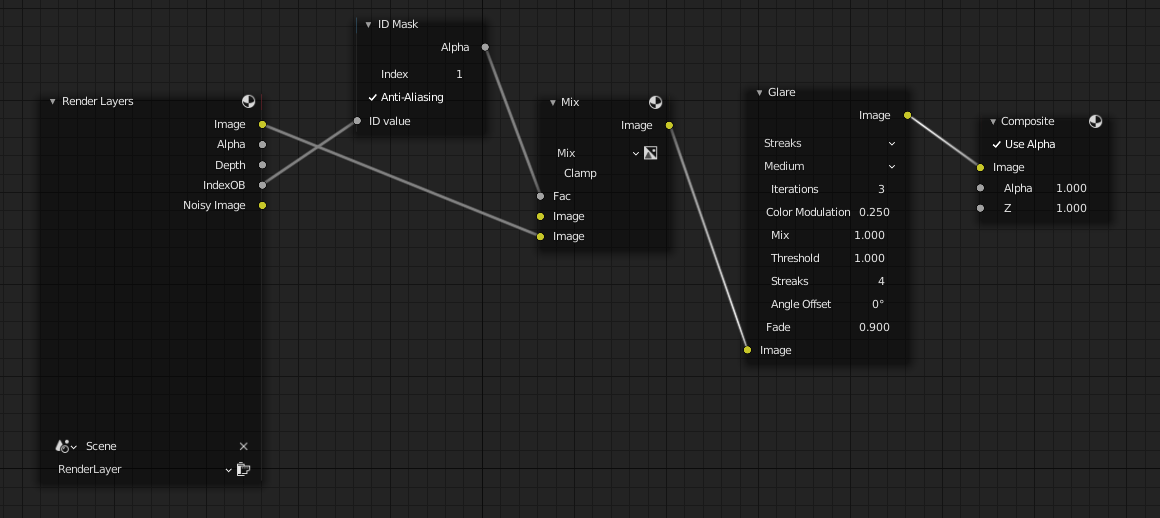
Now go to the compositor and do the following node setup:
In the Color Mix node, the unconnected image socket is set to black (it can’t be seen here). In the Glare node, the Mix factor is set to 1 because only the processed image is needed (otherwise the flame will be too bright later). The rest of the parameters in this node are set to your liking. In the ID Mask node, the Index parameter must have the same value as the one you set in the Pass Index field (in the Object Properties tab).
Render the scene with the compositor enabled and save it as an image.
Now, create a new blend file. Go to the compositor, add the two images you have rendered and combine them with a Color Add node.
Edit: if you think about it, rendering the scene in Cycles makes rendering the same scene in Eevee pointless. For the Cycles version, I would replace the material of every object (except the flame of course) with a solid black diffuse shader to save on the render time.
Hi, thanks a lot for this detailed workflow. Also i precise i need it for an animation at 60fps, 3 full sequences of around 10 seconds will be composited with the flames addition, so since you talke about images i hope this is possible to do with anim too.
( both scenes are using the same camera and setup, all the same, just the Cycles one is containing only the flames and all the elements that collide with it or pass in front of it as holdouts, and the Eevee scene is containing all the rest of the animation, characters, textures sky background etc…)
I’m doing this because i haven’t the funds to get a render farm and render my whole 60fps animation in Cycles, but rendering the flame simulation with it is a necessity to make it looks good. (also Eevee is offering cool render for the rest)
for now i’m struggling with physics to obtain a good fire colliding properly and have hard times with this step, but when i’ll get a good looking simulation i’ll come back here and it will help me a lot, ty!
It is possible with animation too. In the blend file where the two renders are combined, replace the Image node with a Movie Clip node. Of course, the renders in both render engines will need to be converted to video files beforehand.
I think you guys are over complicating this. Instead of rendering the flame with the glare in it, you should just render the flame with a transparent background, then after you composite that into the eevee footage with an alpha over node, add in the glare. Since the flames should be the brightest part of the image, you should be able to limit the glare to the flame without using a mask by just adjusting the settings on the glare node. This works the same with stills, image seqences, and videos. Its common to render the footage out as image sequences, then only render out as a video when everything is done.
Hi zanzio, that seems to be a simpler and cool idea. I honestly didn’t even thought about this because don’t know enough in compositing yet to know it’s possible to do (it’s the first time i’m using it). I also think that Eevee and Cycles are working different and so the Glare will look different and less good as the Cycles one this way, but maybe i’m wrong?
Anyways with these solutions u guys offer and some After Effects / Da vinci rework i’m sure the result will already be great, that’s just perfectionism now. thanks!
No, the compositor isn’t tied to the render engine. The glare node will work the same regardless of what engine you render the scene in. As a matter of fact you can use the glare node with any image, not just the images rendered inside blender.
I didn’t tought that worked like this that’s a great point to know, then i’ll go with this option of rendering Cycles flame with no glare and add Glare after to the whole scene in compositing, will be way simpler. I’ll still try the Mask option to exercice myself on compositing / nodes setup. ty to you both again!