Could someone please tell me how I can setup a color ramp so that the color on the left hand side of the ramp is in the centre of the object and the color on the right hand side of the ramp is on the outside of the object?
I thought a gradient texture alongside a color ramp would do this, but i’m not getting the results I expected.
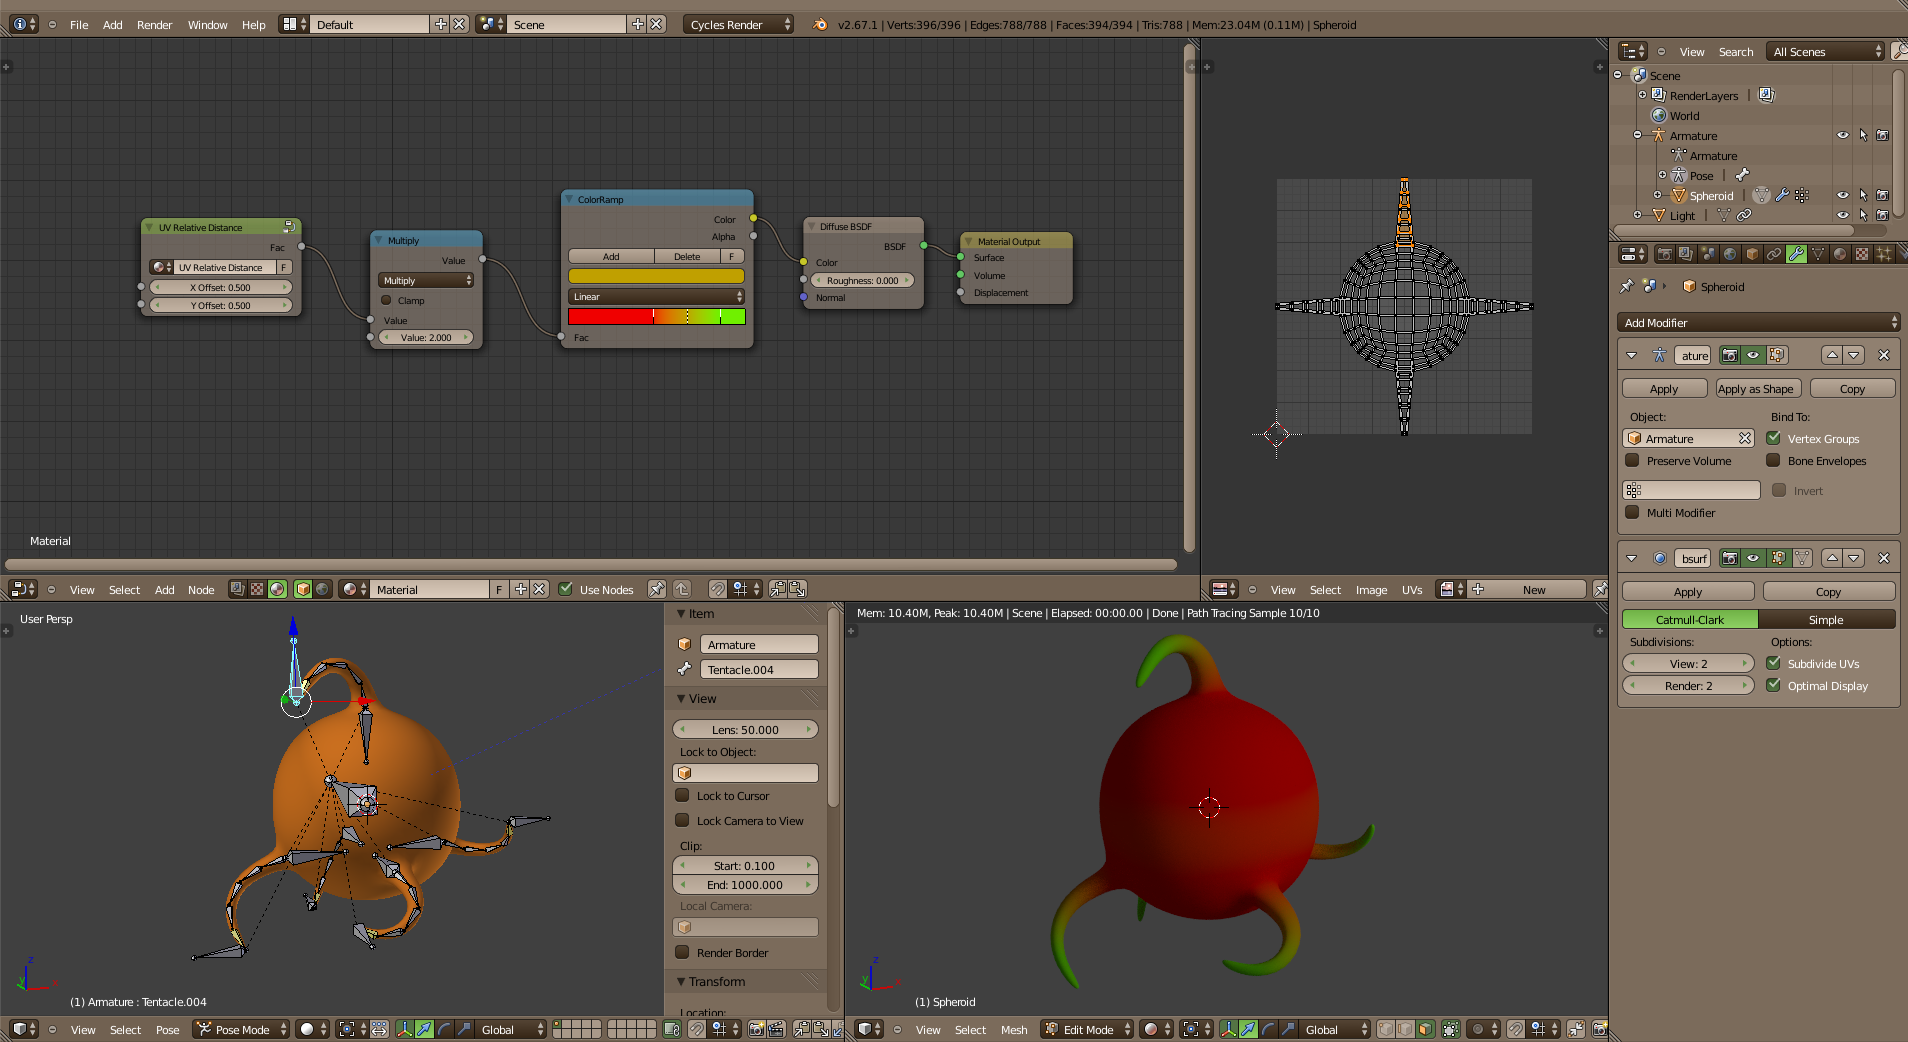
In the example below i’d like a red color in the middle and the end of the tentacles\outside of the sphere to be light green.
As you can see, I unwrapped and used an armature. I used an armature because I needed a regular shape to unwrap because UV coordinates are the only ones which remain constant despite the armature. (Kinda circular reasoning…) :eyebrowlift:
Any way, an armature is always a good idea to deal with tentacles. It’s easier to pose the tentacles than to rebuild them to change their position. Note that this armature is a bit light but it’s good enough for a forum quickie like that.
Note also that the UV map is fine as long as you don’t want to add details like eyes for example. I already have an idea how to do it but it will become tricky… trickier than it already is.
A bit of explanation. The node group “UV relative distance” calculates the distance of the “UV point” used by Cycles relatively to the center of the UV map (0.5, 0.5) and that’s the factor for the color ramp. Multiplied by 2 since the result is in the range 0 to 0.5 because of the offset. (More or less.) Easy. That’s also why the UV map is the way it is, with all the tentacles spread around the central sphere.
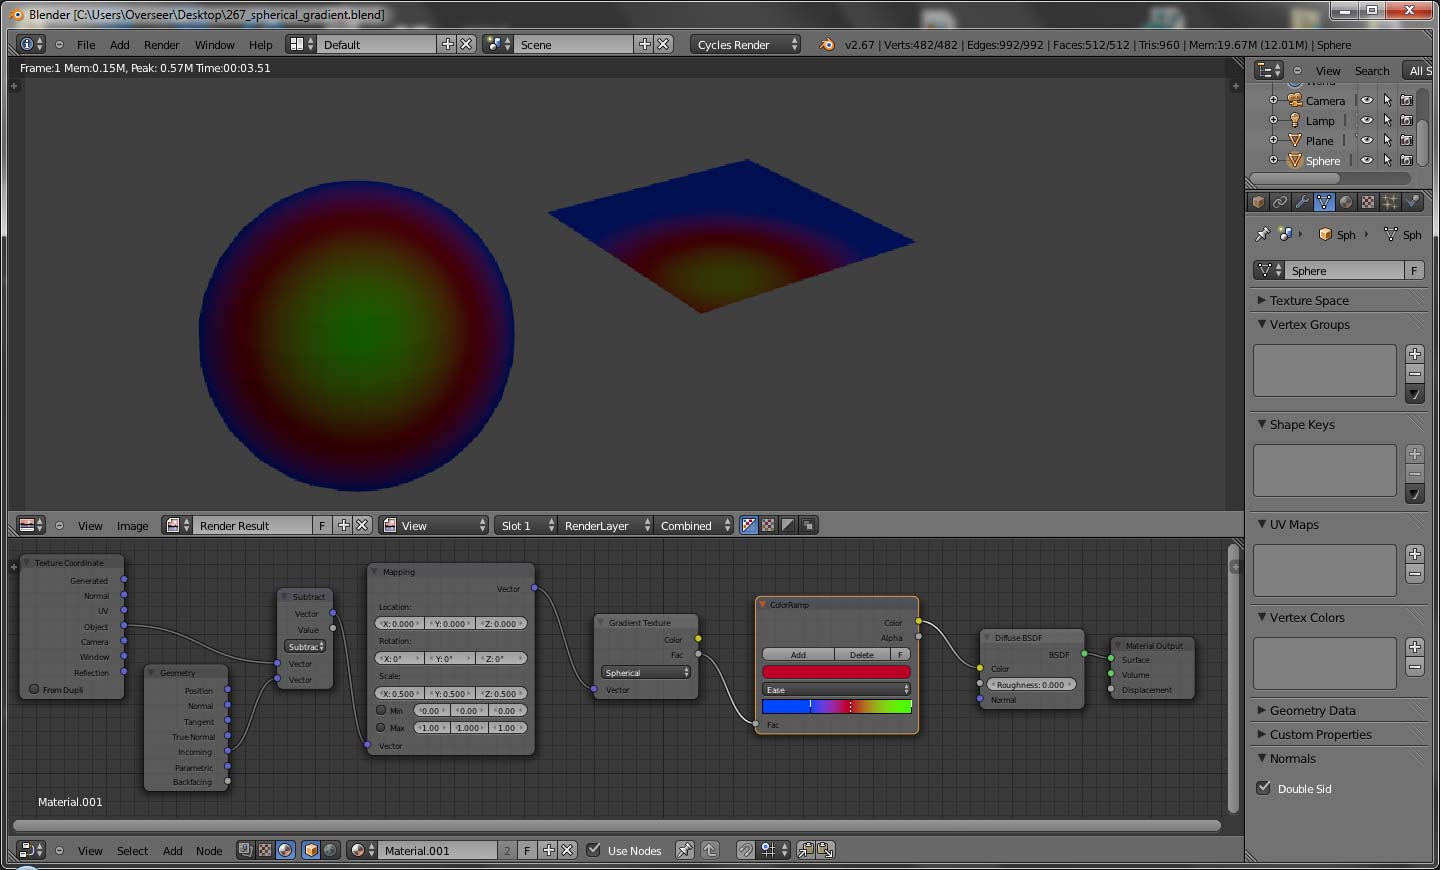
(Now that I’m thinking of it to try to write something which makes some sense, it would be simpler to use my UV map with a radial gradient as factor for the color ramp. Or even a regular gradient if you set UV map accordingly.)
Any way! It did it this way, this time and I find it a real pleasure to be able to pose your little creation or to change its colors and see the result in real time.
That’s a completely different way of thinking about it and it certainly does the job……but……yeah there’s a but.
I’d really like to get this working without having to use UV maps and armatures. I’m going to be applying this effect to a lots of different objects, some of which would be a nightmare to unwrap and some complicated sculpted shapes. Due to the amount of different objects I don’t really want to have to create armatures for each of them simply because of the material I’m using. I understand armatures can be useful for posing reasons, but for some of these objects this won’t be helpful.
I’m sure there must be a way to get this working using a gradient texture, I thought I did something like this years ago in BI using a blend texture which is similar to the gradient texture.
I very much appreciate your post Kaluura and I learnt something from it, but I’m hoping there’s an alternative way without the UV’s.
Well, to use a texture (and that includes a gradient), you need some UV map to tell Blender where to put the texture. It’s possible to use Object coordinates (and no armature) but you won’t be able to set the colors where you want. It will just depend on the distance from whatever center you set.
The other way I can think of from the top of my head is weight painting. All you have to do is to weight paint all the parts which stick out and must have another color… and to do smooth transitions because they will be visible. A lot of work in perspective…
Any way, lot of objects, lot of work. That’s to be expected.
Atom i’ve modified my node network to match yours and it’s working really well now, thanks. I don’t really understand what’s going on at the start though. If you could spare the time could you explain in simple terms what the different nodes are doing?
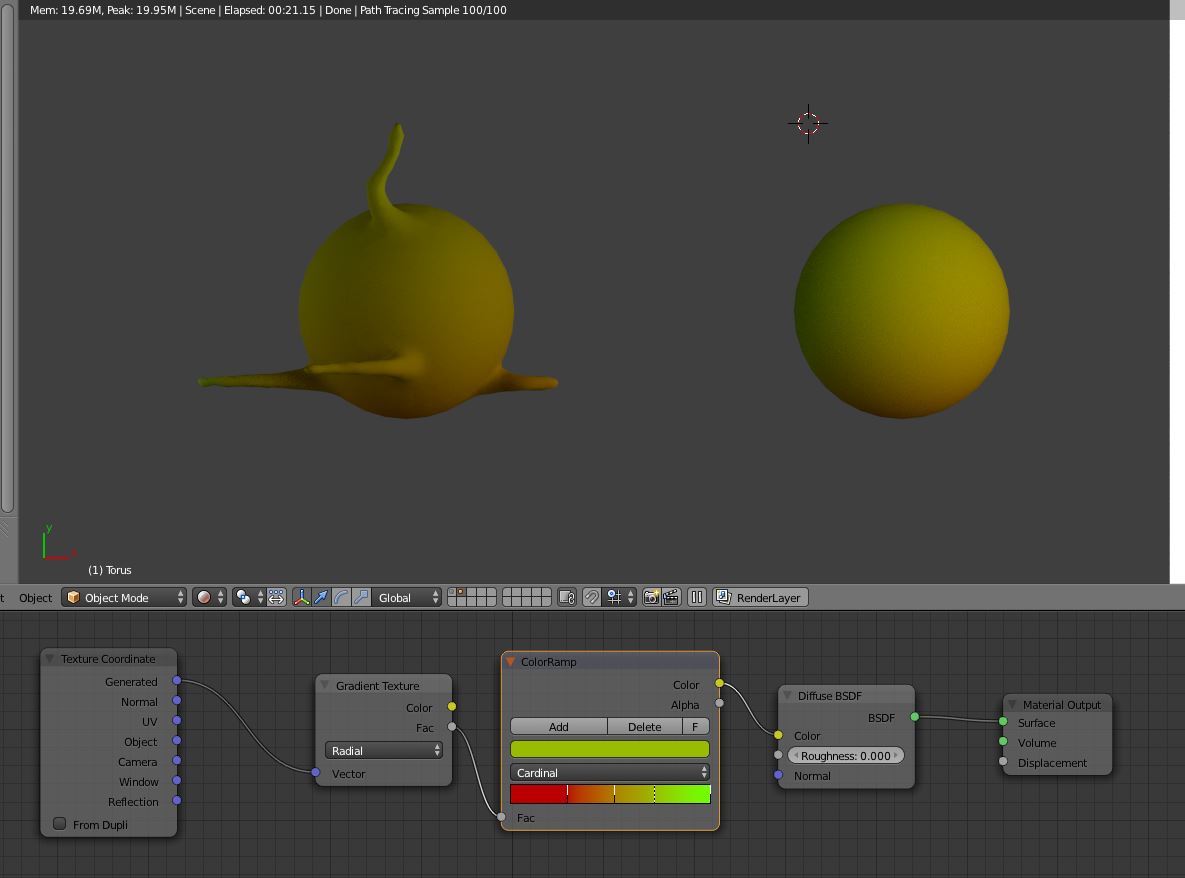
 I remembered I already did something like that… and it wasn’t straightforward to say the least.