Do people use this product? ![]()
i had to put something in it. So I suppose it could be used for some cool assets to look at?
Got it, thanks!
Email me and you’ll get one.
1 Like
I actually plan to something like that as well, once I get going again and start producing art this year. I was thinking of trying a gumroad substription product however. We’ll see.
I’ll do for the next time  Already bought it for $40, thank you, great addon!
1 Like
I guess that if we play with the levels of the height map after baking/atlasing, it’s probably more efficient to have a wider range of informations in the map by normalising values
Good to know! ![]()
Hmm, I’m not sure how similar this is to Unity or DM’s parallax, but the parallax node in UE does a number of “steps” in the shader logic to create flat slices which are used to make the height effect. This step count is proportional to the cost of the effect per pixel and controls the accuracy/quality.
Looking at the parallax node (and inside of it) I can’t see anything that would make me think it knows anything about the depth range of the source heightmap it’s using. So we can probably assume the number of slice steps are just distributed evenly through the possible height range from black to white.
If you have a heightmap with a really narrow range, you’d of course get a much shallower parallax using the same set up with a map using all of the available depth. You could crank up the height ratio of the shallow one to make it deeper, but then that spreads out the slices more, so then you need a higher step count, which in turn increases the pixel cost.
At least that’s how I understand it, I haven’t done any actual profiling on that so I could be wrong though.
Yes, it works the same in Blender and Unity. The steps are definitely not distributed evenly through the range of the height though. They are just repeating offsets layered on top of each other, modulated by the amount property, which is multiplied by the height value at any point in the map.
If the shader does 9 steps, you will have those 9 steps with a low-range height map, and you will have the same 9 stepes with a high-range height map. You just need a bigger amount value for the low-range map, to achieve the same depth (sum of all step offsets).
The way to change the performance of the parallax is to change the step count, lower being more performant, while making the individual steps more visible. But again, this can be done for any kind of height map, independed of its value range.
I don’t quite understand how it avoids wasting resources on the unused heightmap ranges, but I’ll take your word on it.
Though I wonder if Unreal does it a bit differently - I was actually able to quite visibly reduce artifacting by increasing the heightmap range (and reducing depth to compensate), even with the same number of steps:
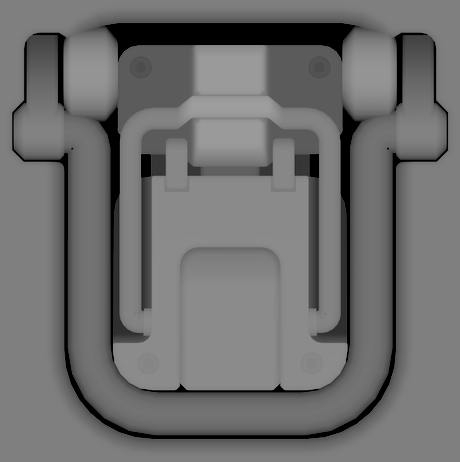
Shallow heightmap:

Deep heightmap:

And I still don’t understand why the value range in the height map should have any affect on performance/resources in the first place.
We are just picking values from a map here and multiplying them by another value. The shader instructions are the same, the amount of steps is the same. The image in memory should be the same too, if anything it should take more memory for the higher range image.
Unless Unreal does somehow have an adaptive step count based on the range in the map, there should be no difference in resources and performance.
This is surprising to me. Unless you are rebaking the height map, you aren’t adding any new information by increasing the value range, you are just remapping existing values. Please provide the height maps.
I’ve done the same in Blender and could not reproduce this.


low range ao_curv_height map

high range ao_curv_height map
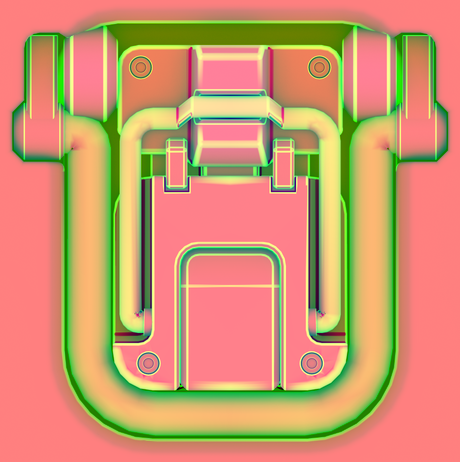
low range height map

high range height map
3 Likes
You’re right, from your images it looks like Blender at least gets the same or very similar results from the different maps.
Like you say, I don’t believe the higher-range heightmap contains any more information than a lower-range one (at least other just than the bit-depth accuracy of the image which I don’t think is the issue here, and you would need to re-bake for that to matter anyway)
But I do think it does matter to how the shader interprets the heightmap, in UE’s method at least, whether that’s just an assumption in the way it was written or perhaps an intentional optimisation.
Here’s the actual parallax code if you’re interested:
float rayheight=1;
float oldray=1;
float2 offset=0;
float oldtex=1;
float texatray;
float yintersect;
int i=0;

while (i<MaxSteps+2)
{
texatray=dot(HeightMapChannel, Tex.SampleGrad(TexSampler,UV+offset,InDDX, InDDY));

if (rayheight < texatray)
{
float xintersect = (oldray-oldtex)+(texatray-rayheight);
xintersect=(texatray-rayheight)/xintersect;
yintersect=(oldray*(xintersect))+(rayheight*(1-xintersect));
offset-=(xintersect*UVDist);
break;
}

oldray=rayheight;
rayheight-=stepsize;
offset+=UVDist;
oldtex=texatray;


i++;
}

float4 output;
output.xy=offset;
output.z=yintersect; output.w=1;
return output;
I don’t fully understand the math to calculate offsets from the intersection, but I am seeing is that rayheight starts at 1, and it burns through the steps and tex samples at different UV offsets, decreasing the rayheight until it reaches the sampled height value “texatray”. In this case wouldn’t it need to run fewer steps to reach higher height values?
“stepsize” here is also passed in as 1 / MaxSteps.
This leads me to believe the steps in UE are relative to to the 0-1 height space, whereas Blender might do it a different way like you say. Maybe this can explain the results we’re seeing.
Here are the maps I tried:
Low range ao_curv_height (default asset):
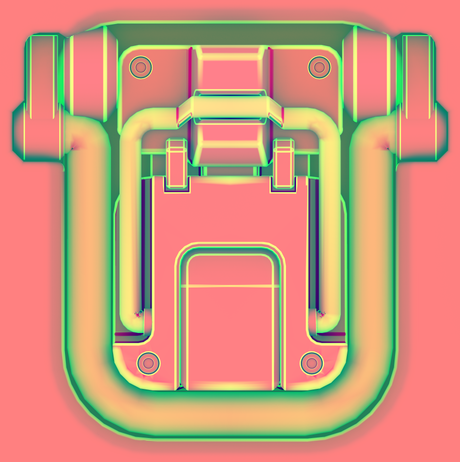
High range ao_curv_height:
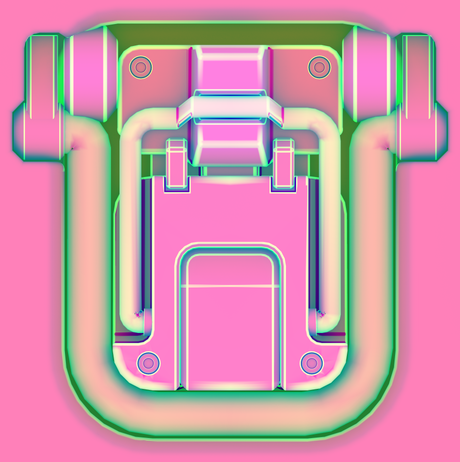
Low range height:

High range height:

1 Like
Oh man if you could make a youtube showing non shader guru people like me how to do this in UE4 that would be amazing
1 Like
I don’t think that’s what it does actually. The while loop runs MaxSteps + 2 times.
This looks like an (early?) exit condition for the loop.
I may be wrong though or just misunderstand what you are saying. I’m not too familiar with the internals of parallaxing or shader programming in general.
In any case, I notice that your high range height map, has the mid point offset from 50% grey to something much brighter. This shouldn’t explain your artefacting, but it’s probably not correct either way.
Can you try the maps I have provided please? Couldn’t the artefacts in your comparison be explained by a different quality setting how UE4 loads the image?
You don’t need to be a shader guru for that. Just google decal + parallax in context of UE4 and you should be able to find something.
I made my own UE4 Decalsystem:


It match not to 100% if you use POM but good enough in my mind. It use my Decals: https://gumroad.com/mrradioactiv
1 Like
That’s correct, but as far as I can see the while loop should always hit the exit condition and break early as long as the heightmap value is greater than zero. The camera ray descends through the slices until it intersects the 3D surface represented by the heightmap, where the loop then breaks.
50% grey might matter in Blender and/or Unity, but as I was just testing in UE where the reference plane can be set to any arbitrary value, it doesn’t matter in my case.
Here it is with your maps:


2 Likes
Thanks, will add the height normalization on the atlas.
2 Likes
Appreciated, looking forward to it! 
1 Like
I’m getting a complete Blender freeze/crash when using Epanel with any of the mod keys(alt/ctrl/shift) Regular left-click Epanel works fine. I’m on latest DM and 2.82.6.