Detective Pigeon! Again!
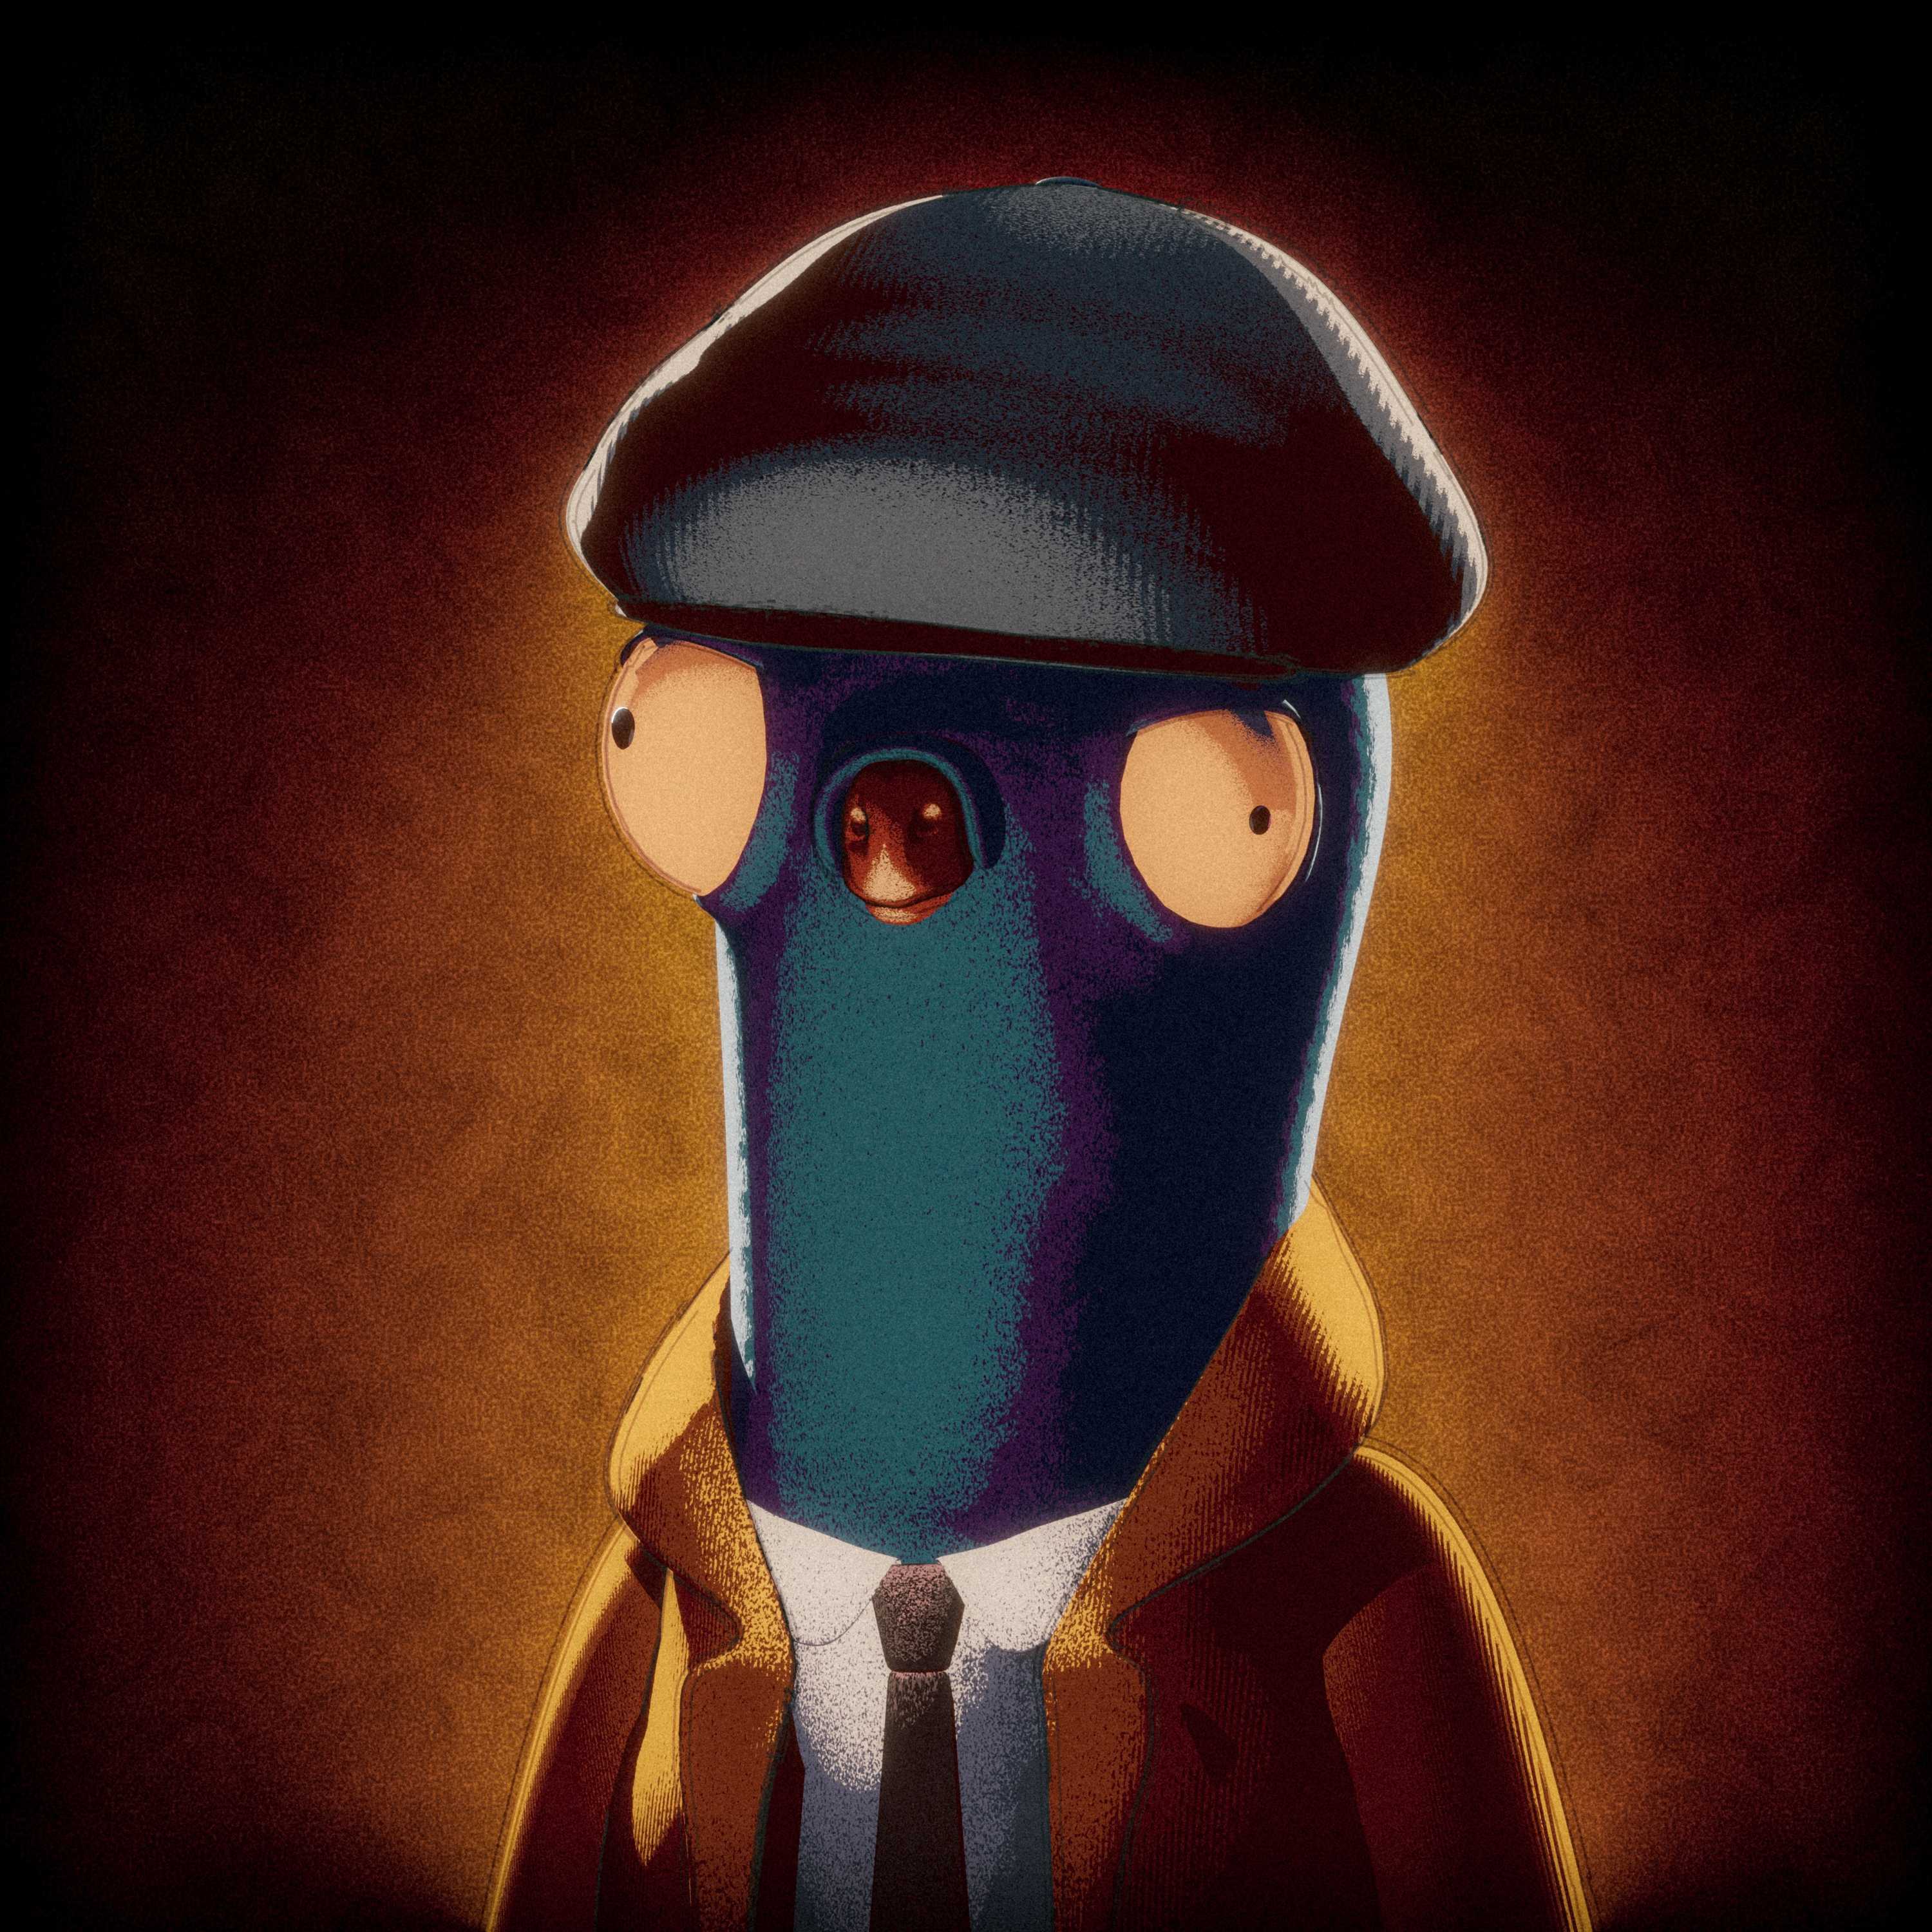
I just can’t seem to leave this pigeon alone, so here is another version!
Lately I’ve been getting more comfortable with my new art style, and i like remaking older projects to see my progress.
I’ll go a bit more in depth below for those who are interested ![]()
MODEL

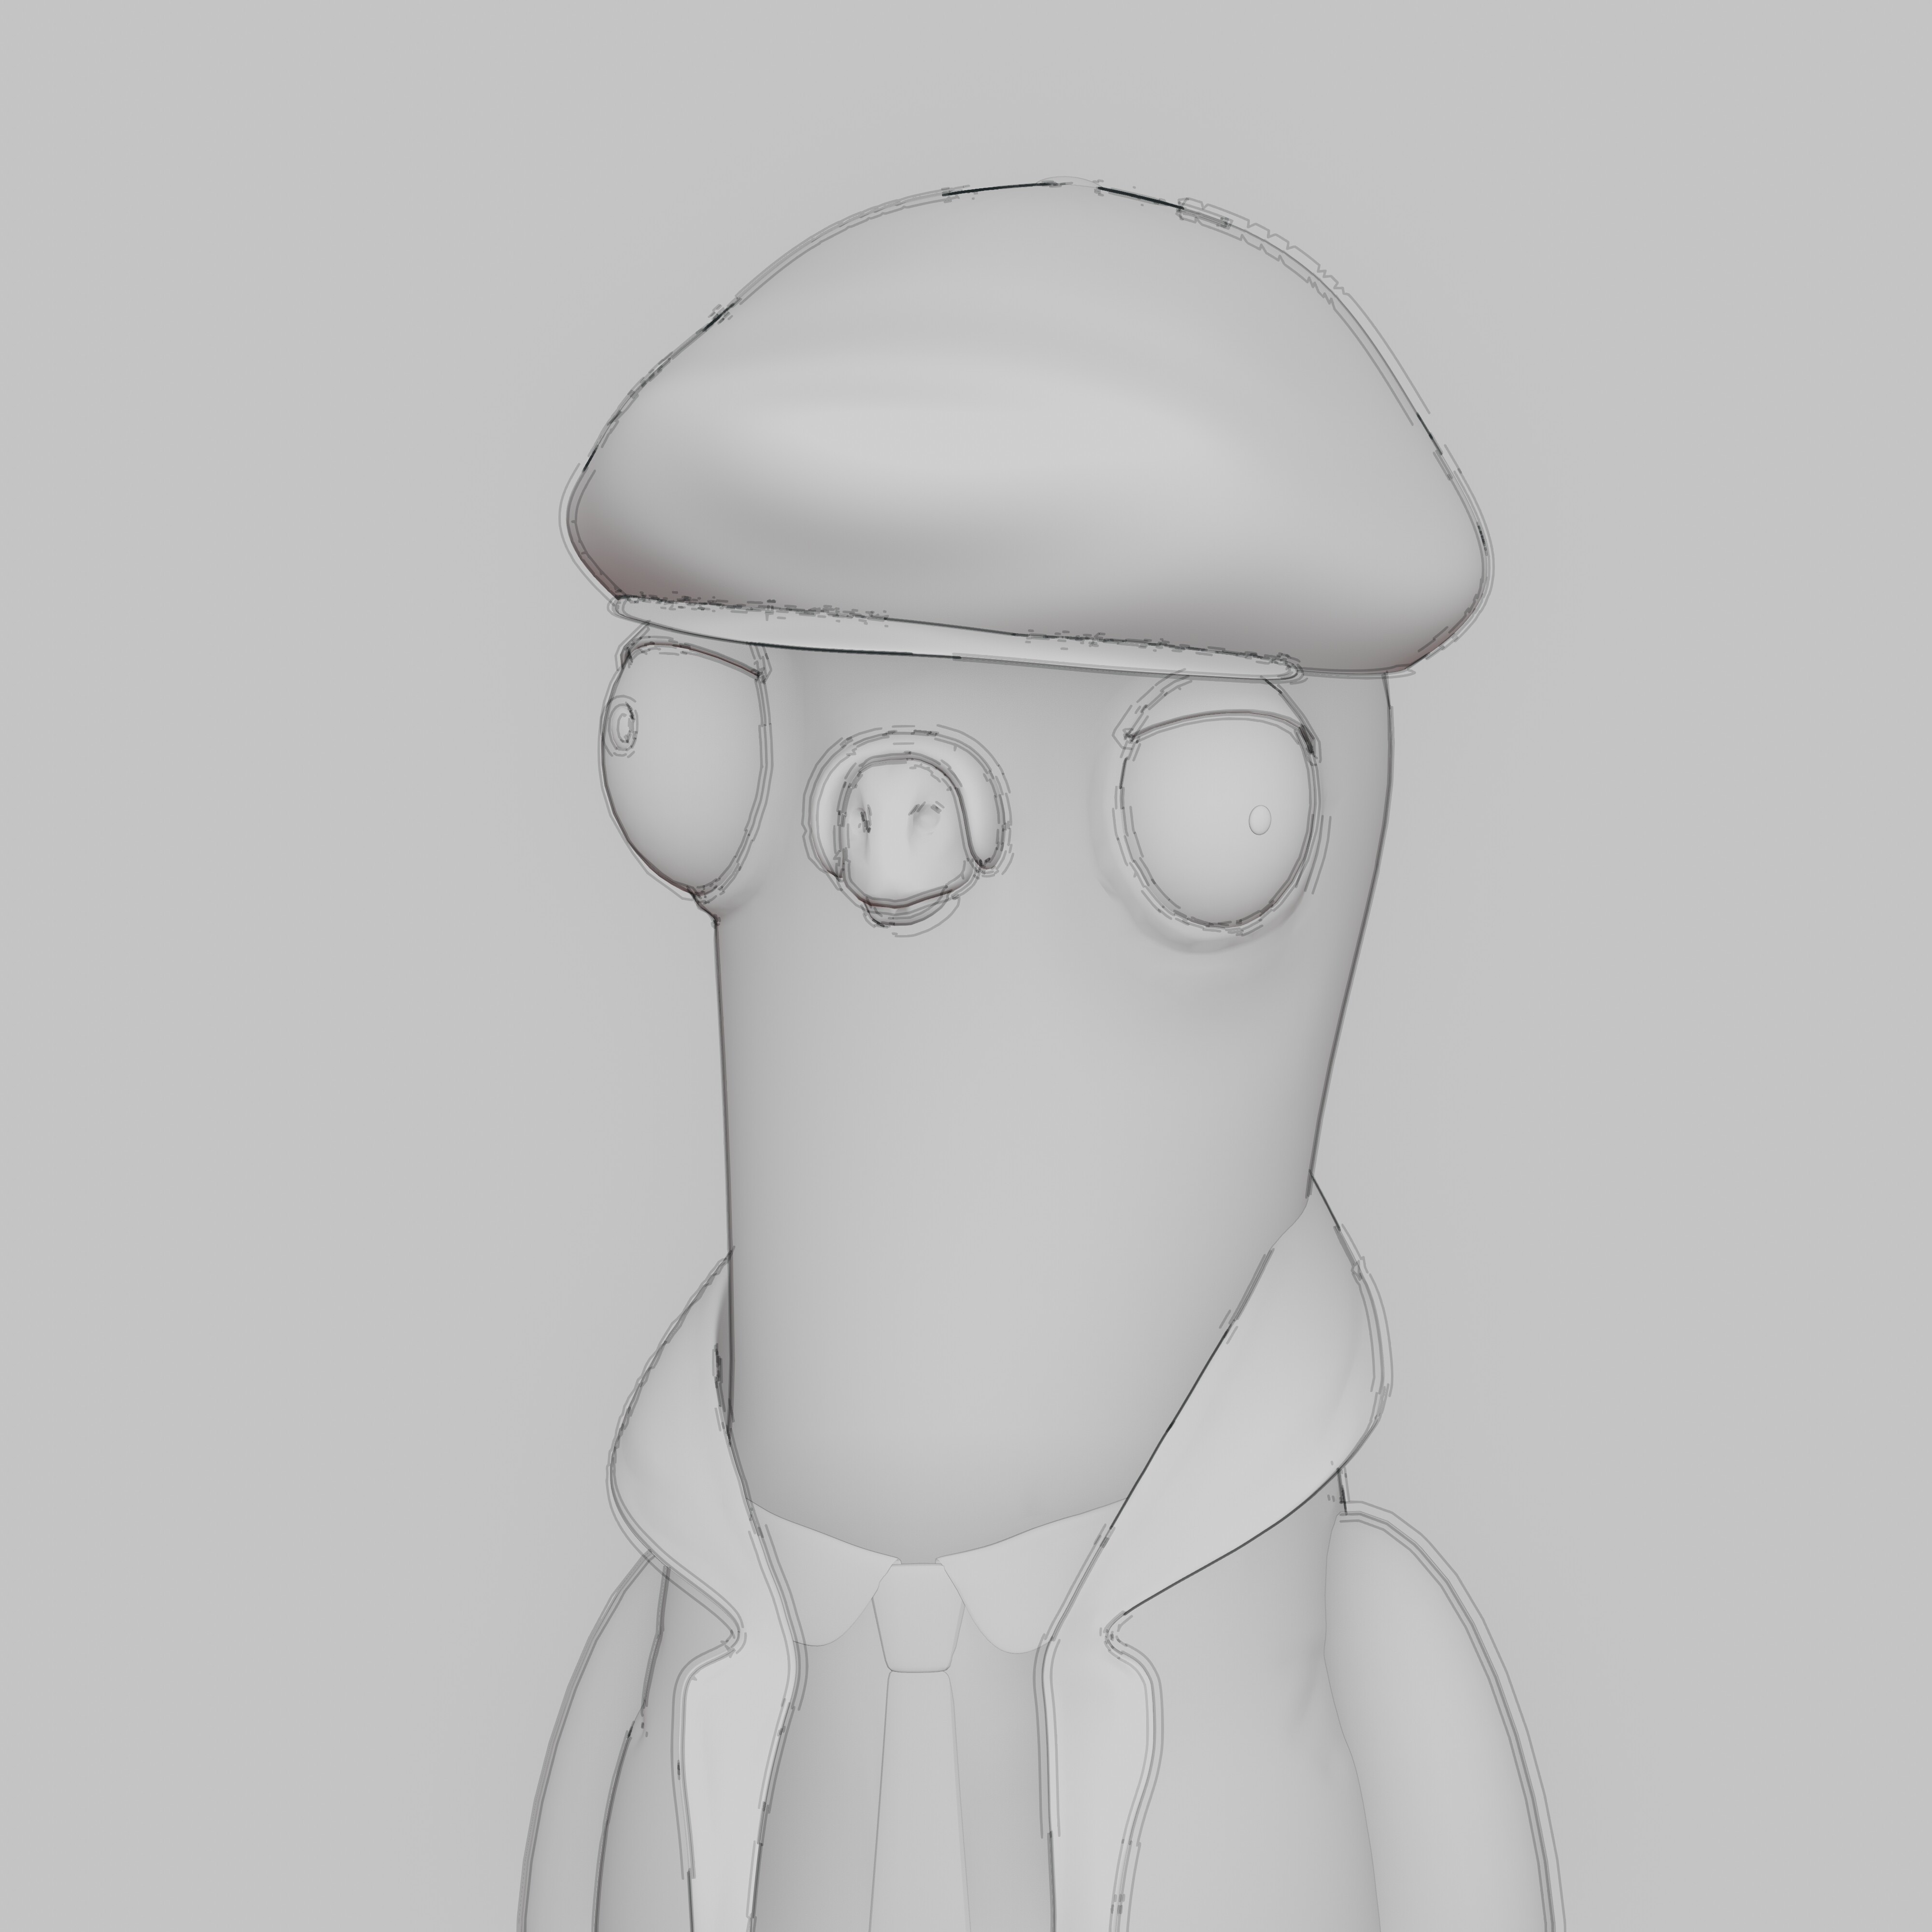
viewport model
For the model i used modifiers, so the base mesh stays mostly untouched. Subsurf and multires were my friends here and allowed me to quickly create an interesting silhouette. After some sculpting and adding details i move on to shading.
SHADING
Skin / Coat / Hat Textures
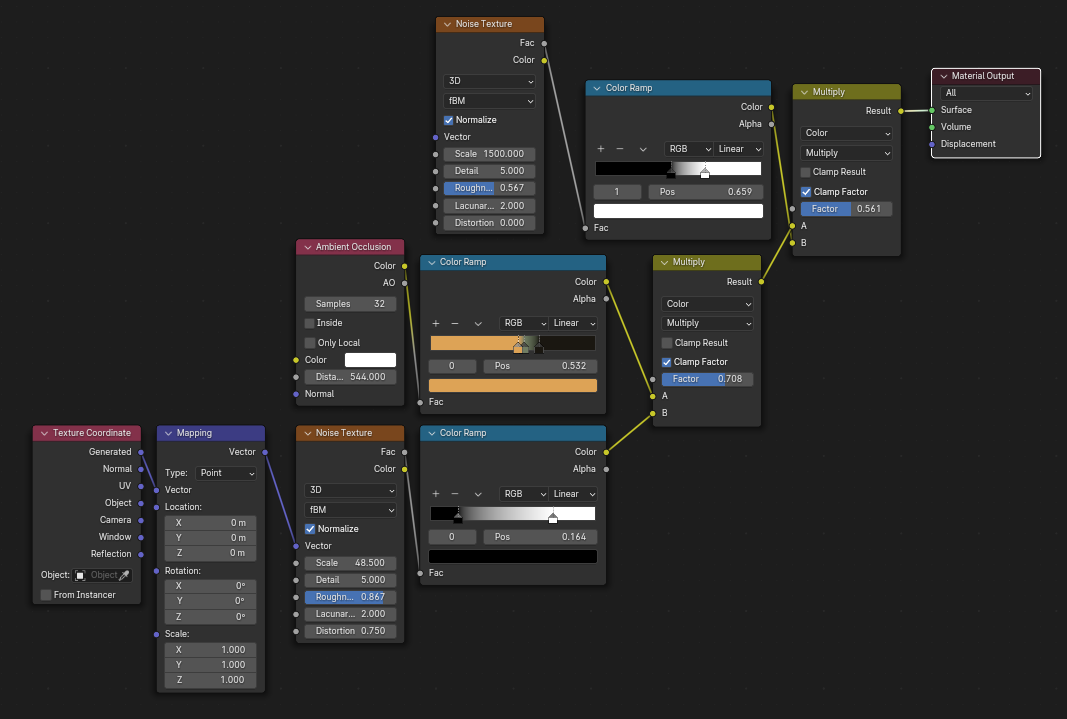
The shaders i made for these scene all come from the same base shader i’ve been using for most of my projects. Let me show how It’s made!
Base Shader
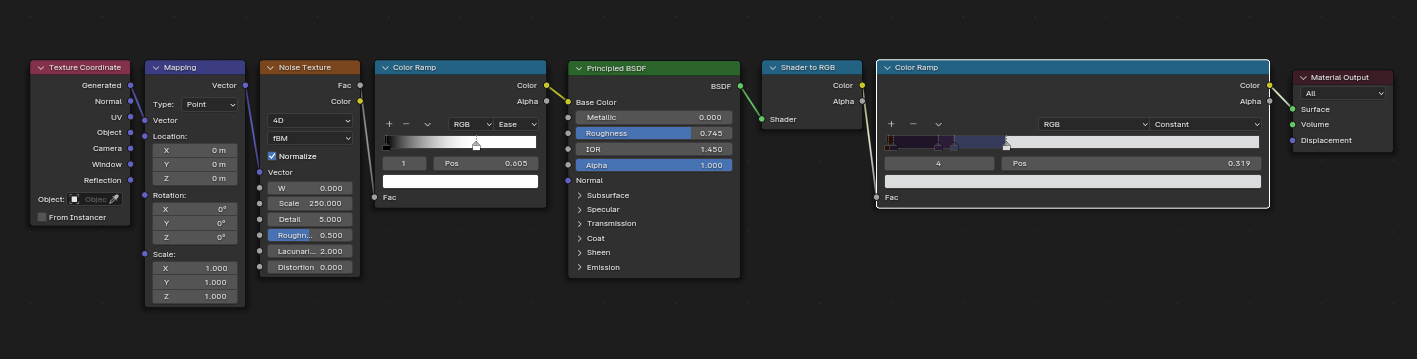
As you can see it’s not a very complicated shader, but it definitely does the job.
Using a ‘Shader to RGB’ node I can take a the lighting imput from the Principled BSDF and covert them to RGB channels. This, plugged into a color ramp, allowes me to have control over which parts are affected by the assigned colors based on the lighting info.
The noise texture that is being plugged into the base color of the BSDF shader creates a smoother transition between these colors and creates some nice texture to give the entire shader some more feel.
Coat texture
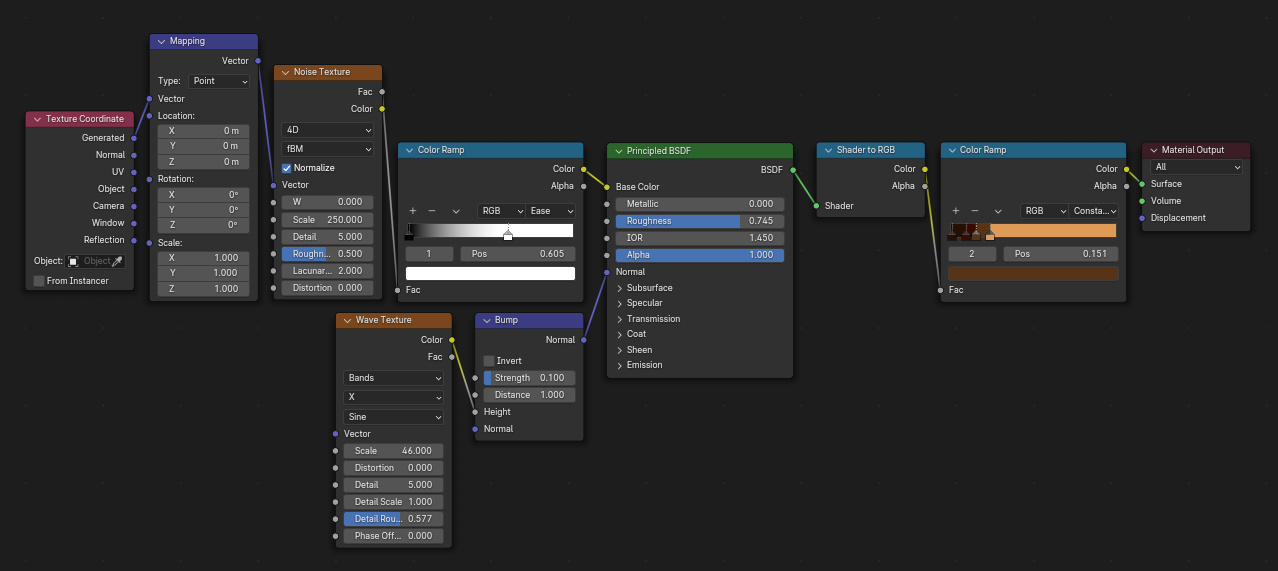
As you can see for the other shaders in the scene, I’ts the base shader with some extra bump added. The Wave Texture gave me the look i was looking for, but you can easily switch it out.
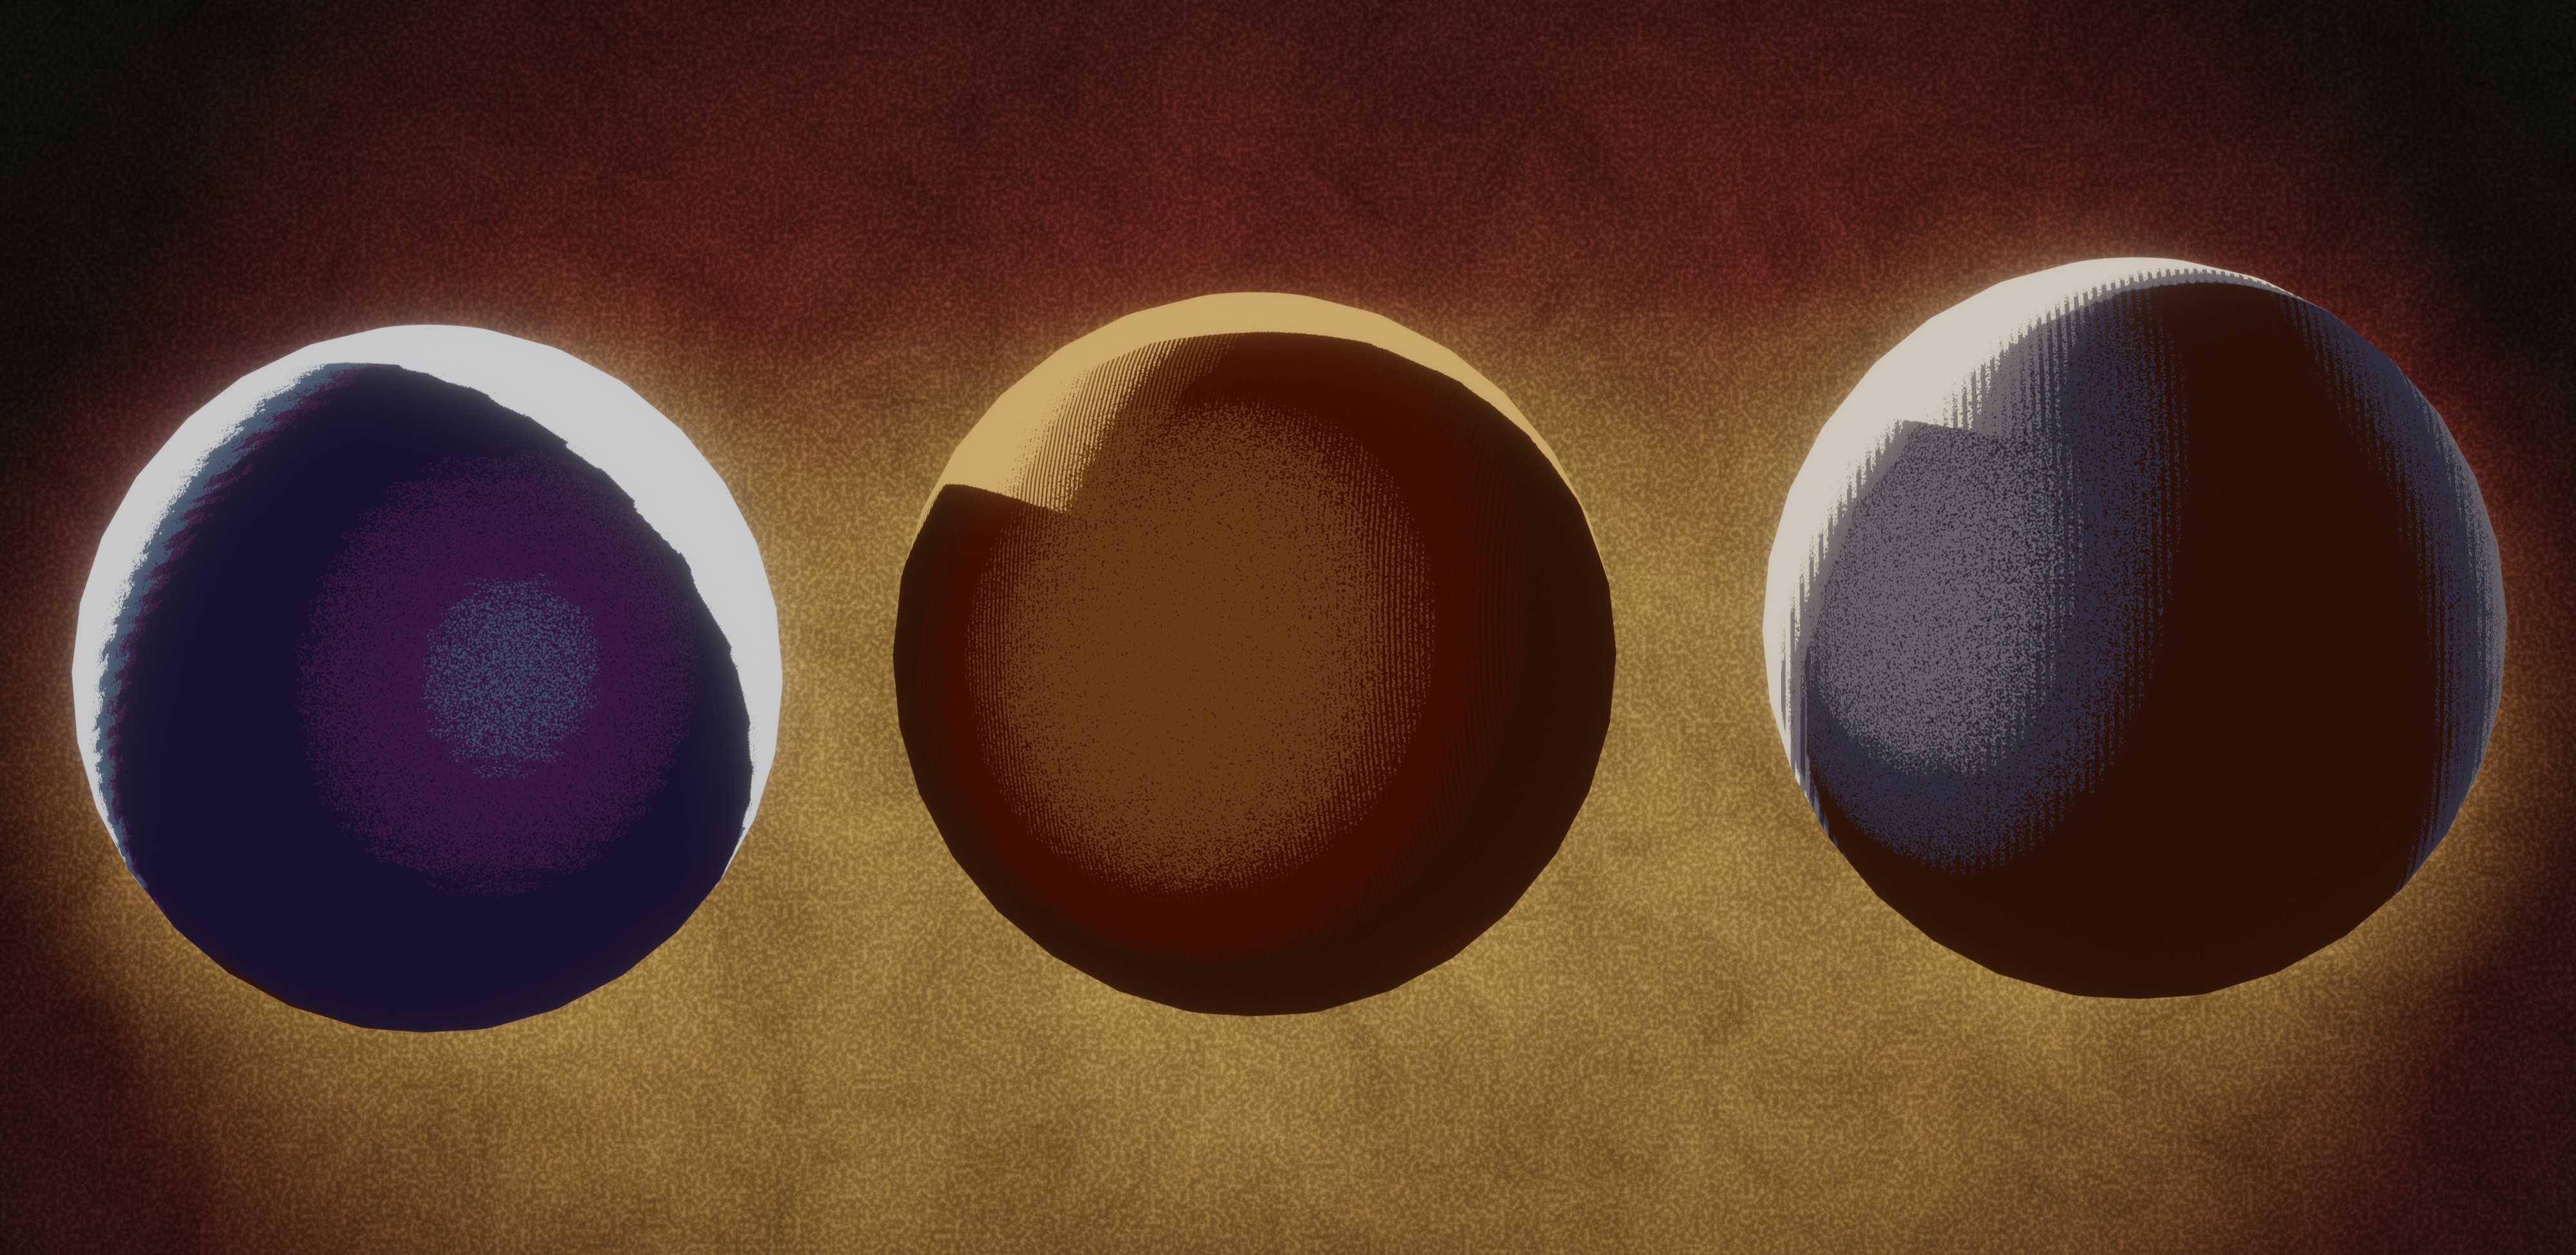
Background
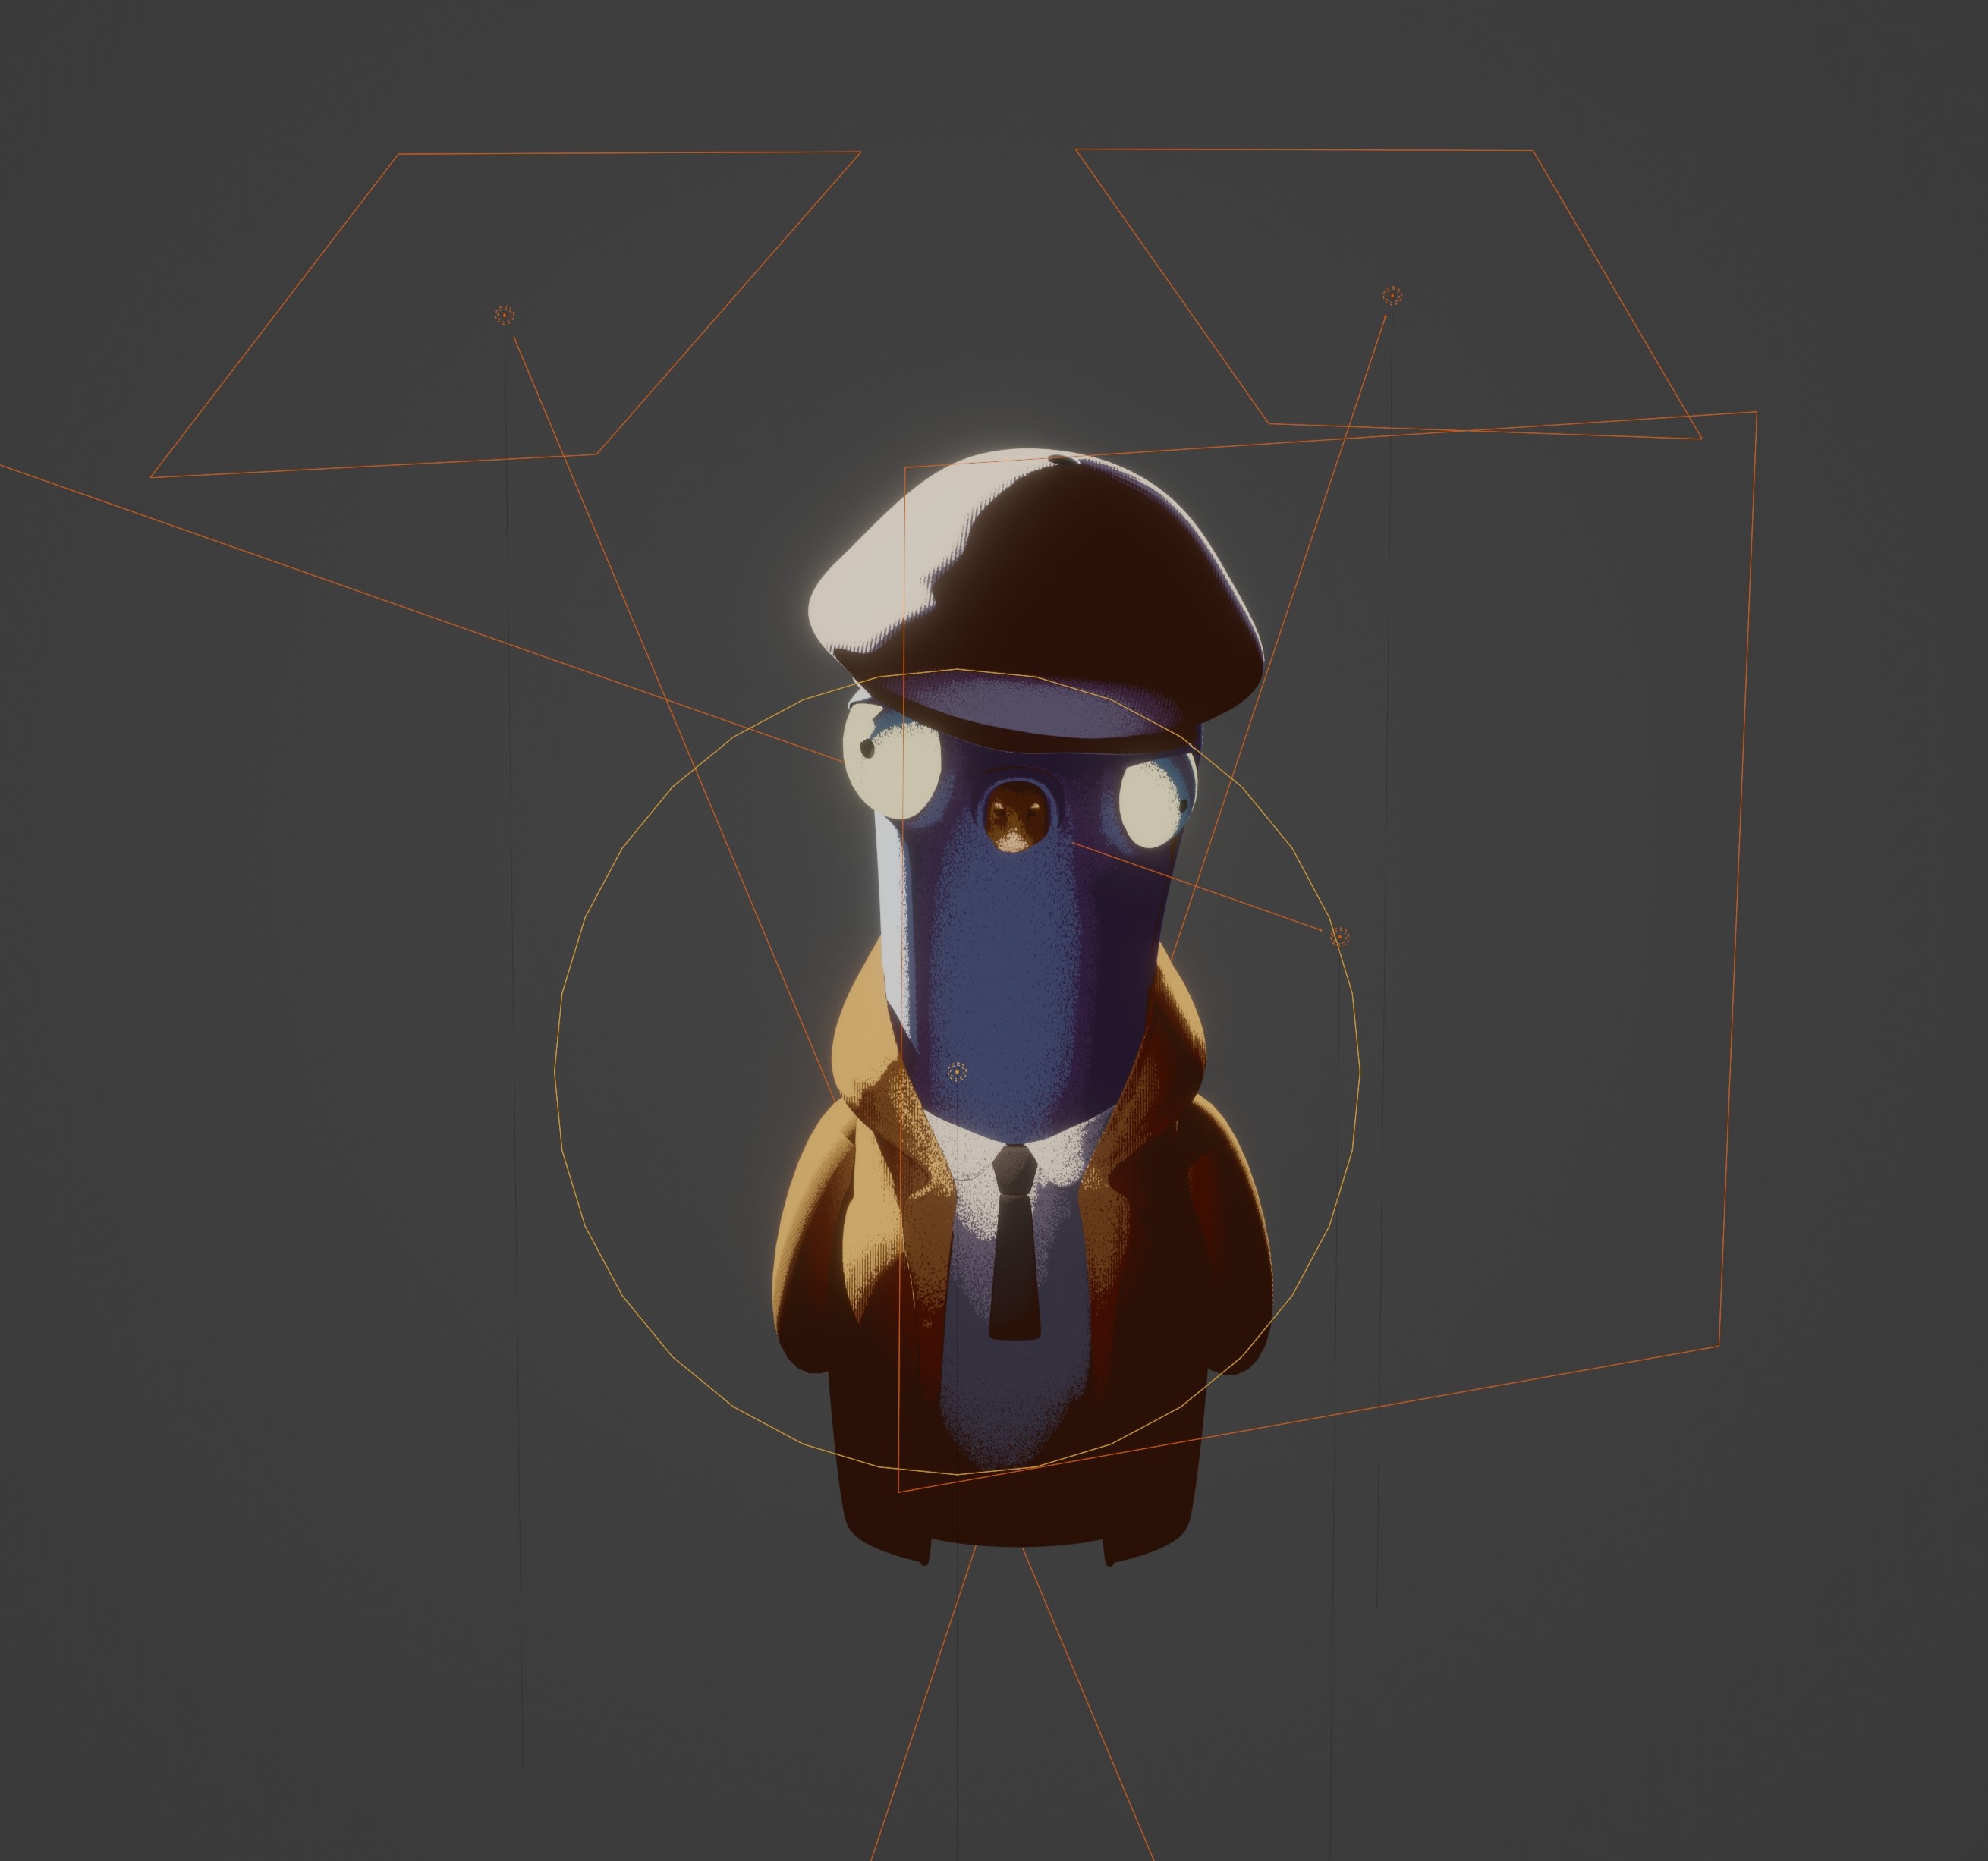
The background for this scene is actually pretty intresting, and i stumbled upon it completely by accident ![]()
The glow like silhouette you see around the character is all done by the shader, as you can see below:
It uses the Ambient Oclusion node to determine where the character and the background intercept, and creates an outline/glow based on that data. Some added noise and textures and voila!
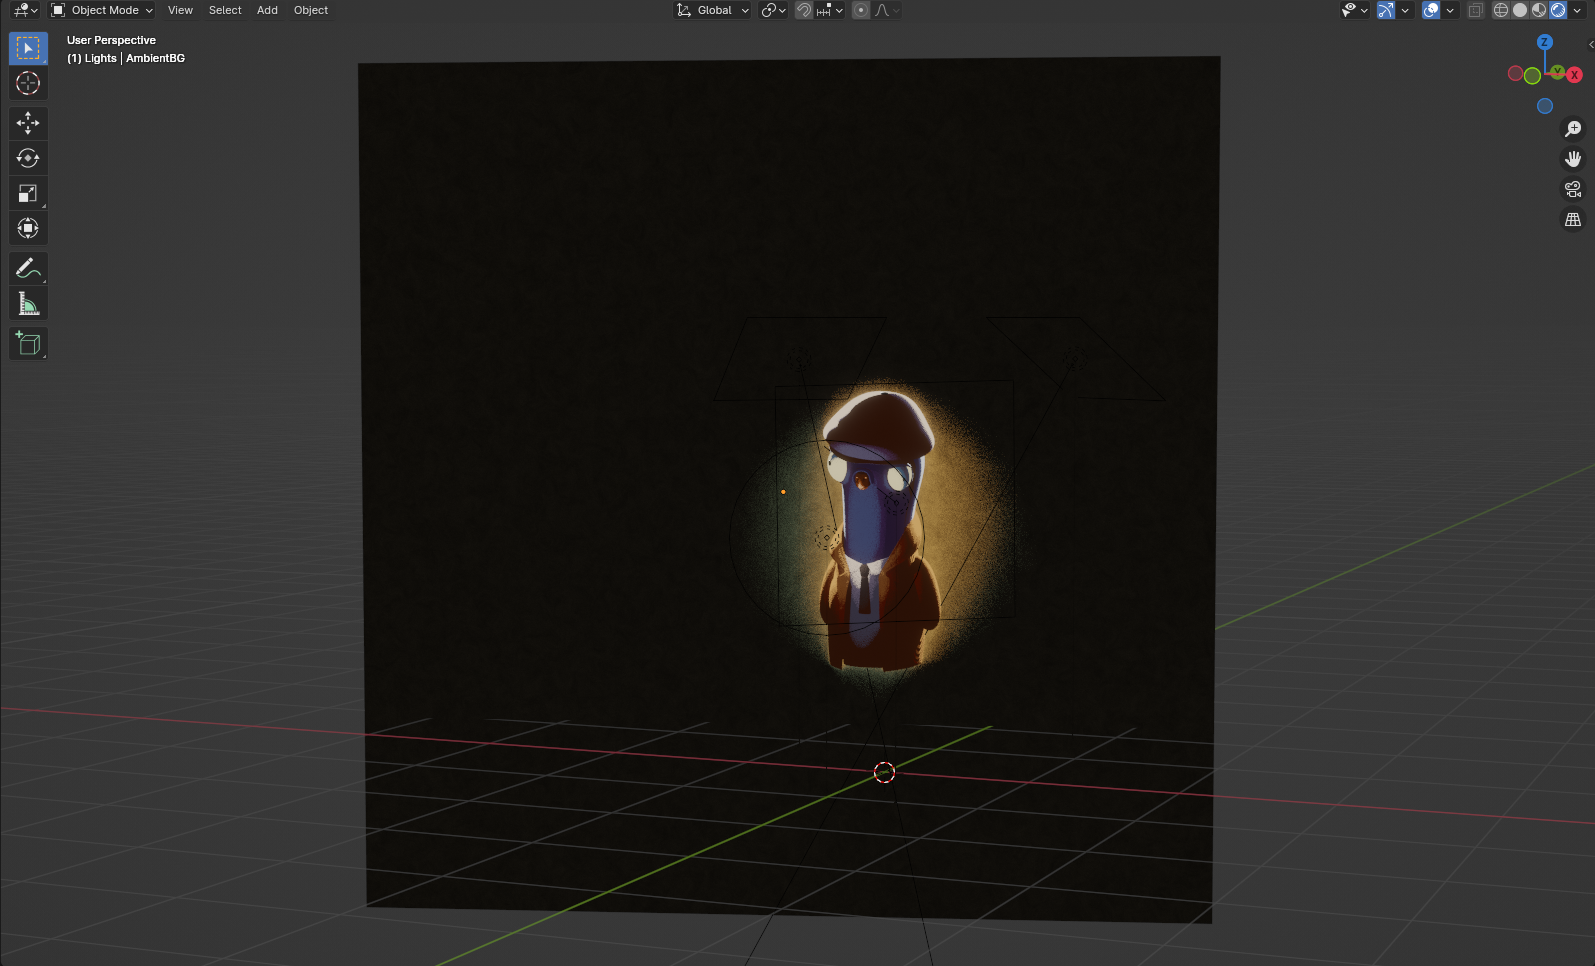
LIGHTING
I used a classic 3 point lighting setup for thise scene, but added a little point light in front to get a bit more interesting lighting. I usually tend to go way overboard with the amount a lights in my scenes, but usually just a few do the job.
FINAL TOUCHES
Now It’s time for the final little extra touches. I’ve been loving the grease pencil lately, so let’s add some!
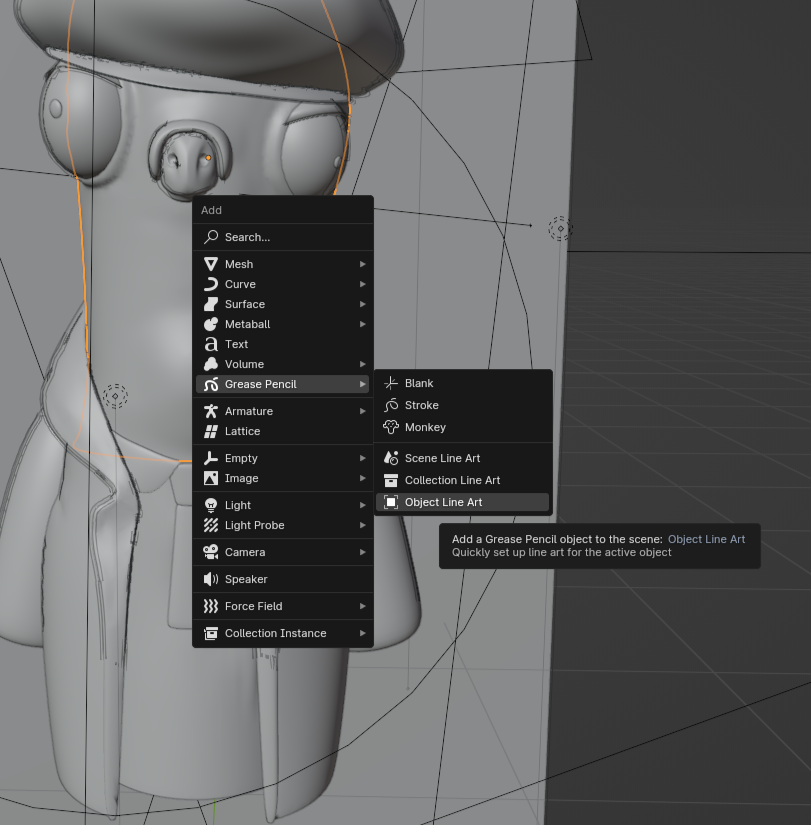
The Object Line Art option automaticaly adds an outline for your character and ,after adding some modifiers like noise and multiple strokes, and it’s done!
POST PROCESS
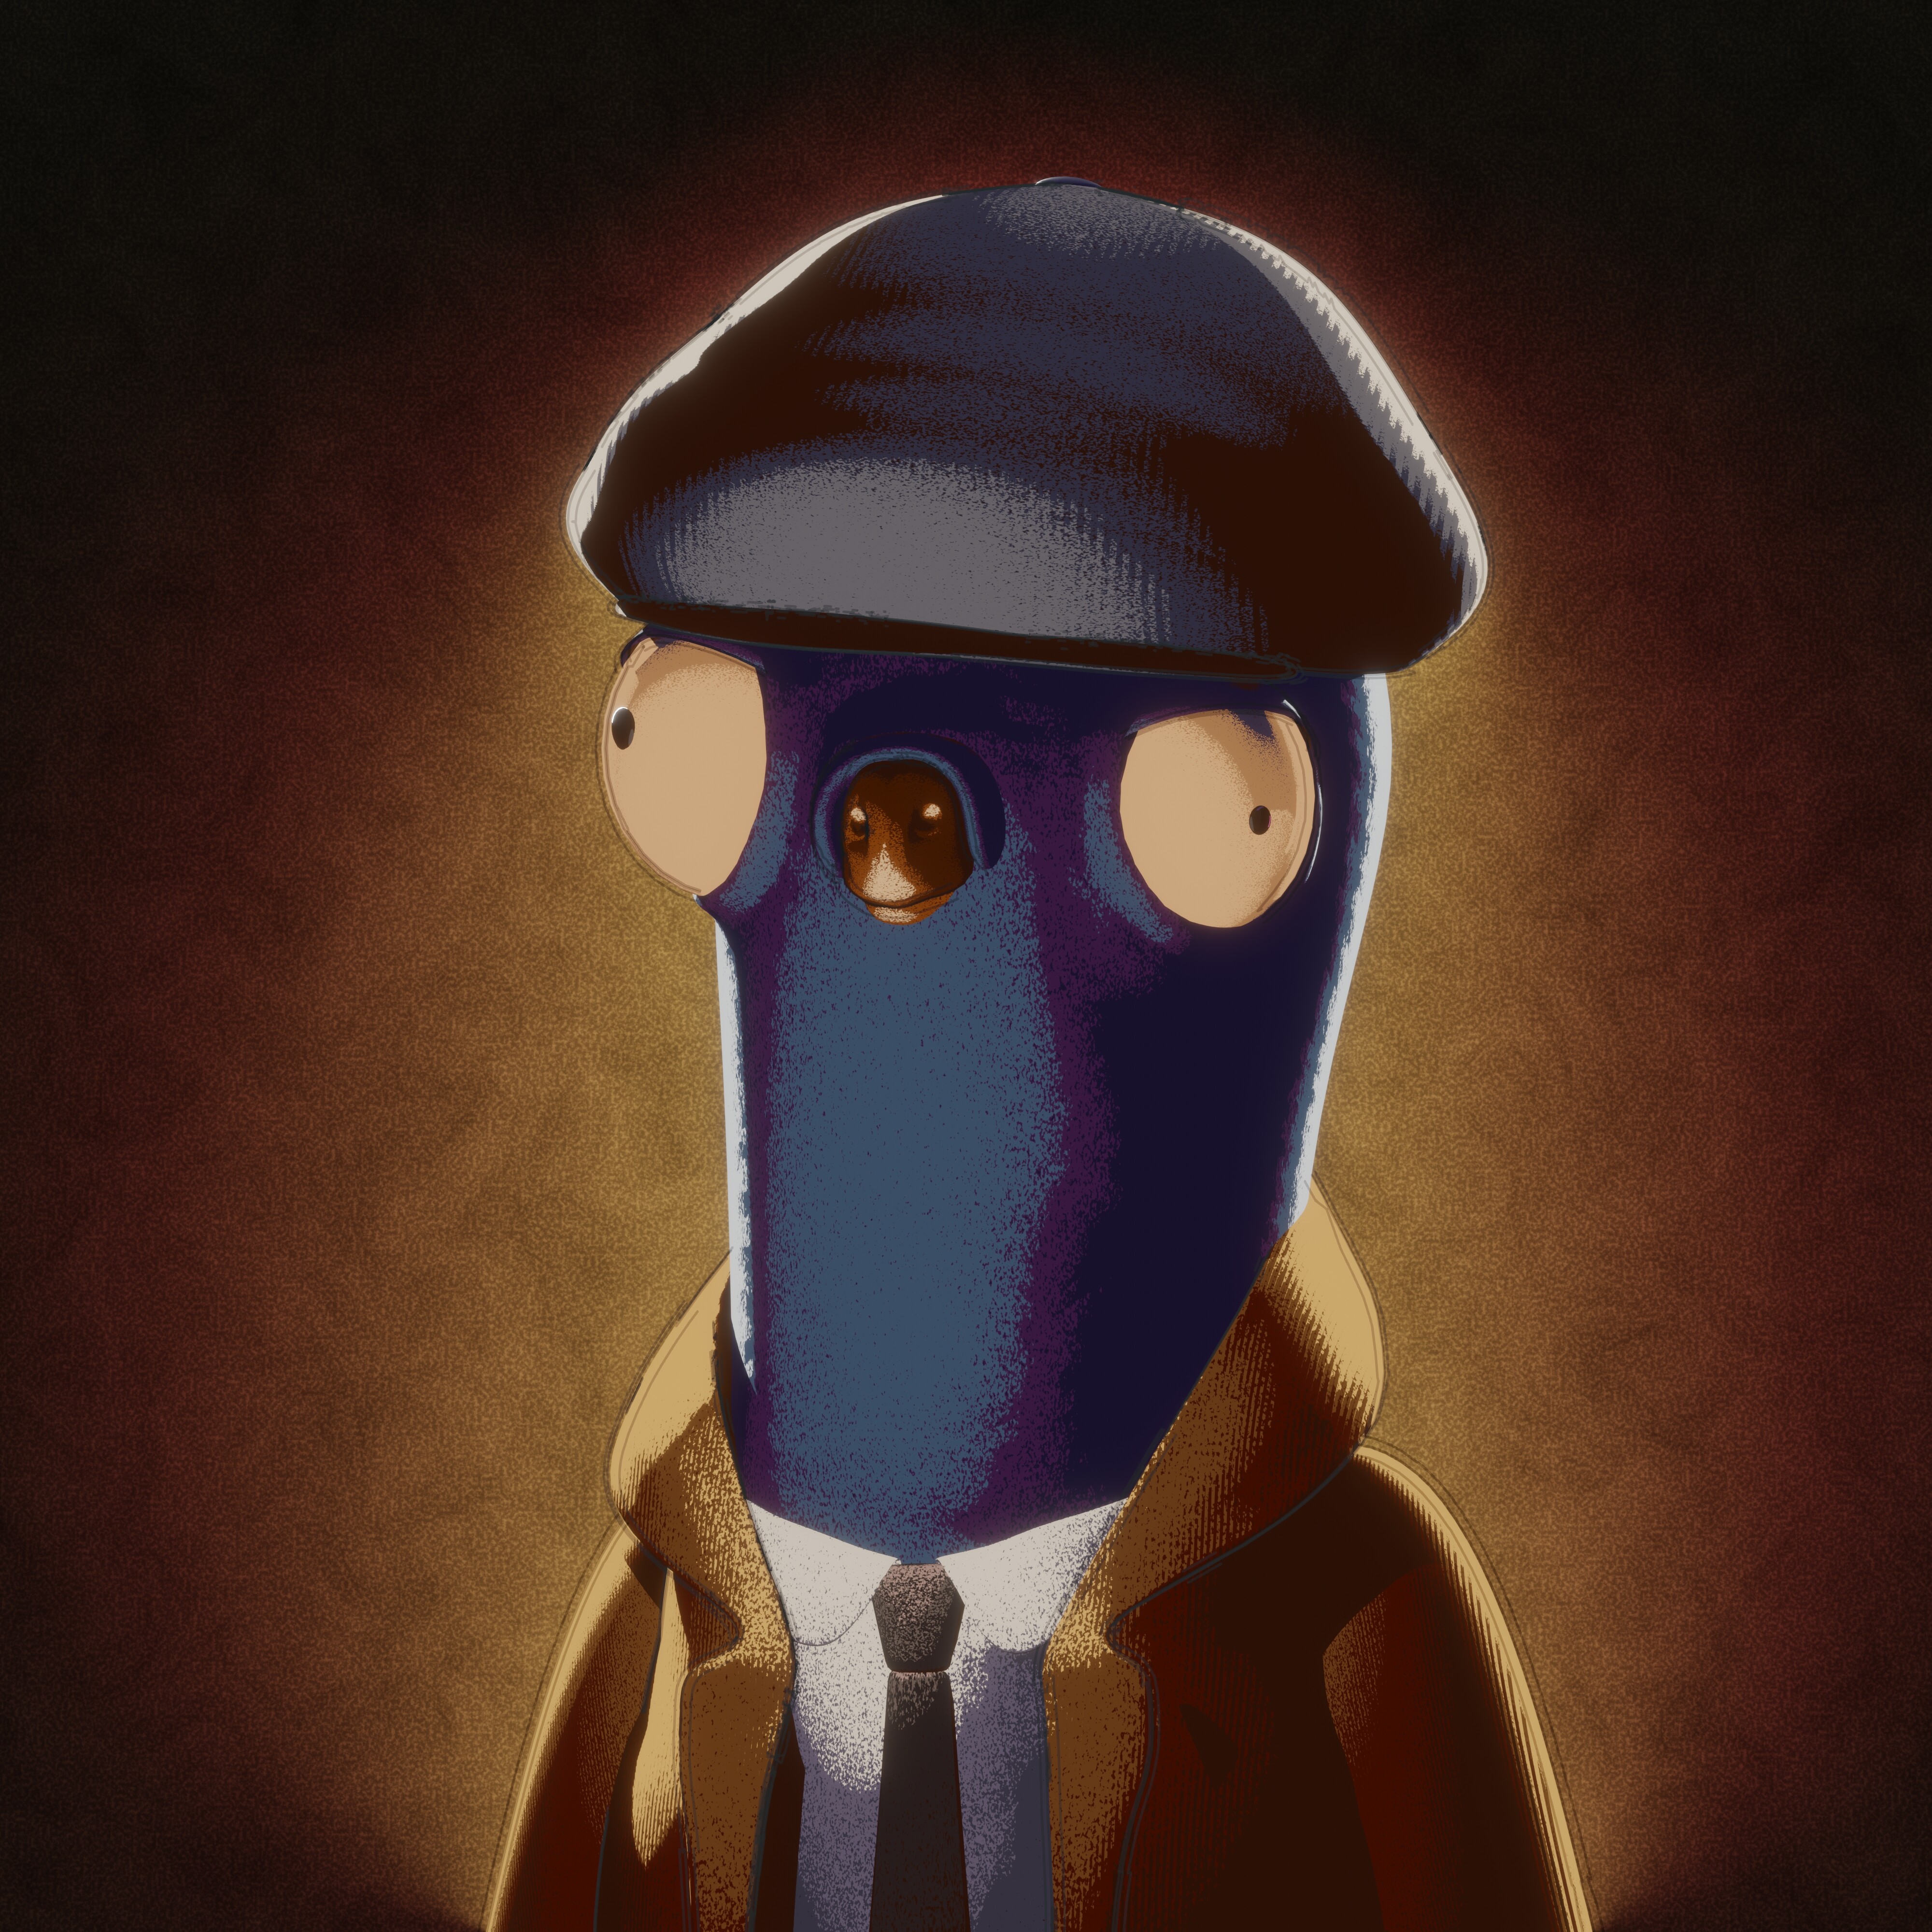
We have a pretty solid render now, but it can always be even solid-er?
Let’s hop into Lightroom and make this pigeon shine!
Beautiful! I love the colors, and the added noise really brings the whole thing together.
So anyway, thats was the breakdown of my latest project. I’m still amazed my how much Blender has to offer and by how much im still learning after 6 years.
So thank you for reading this and keep creating!
Jaimy out xx