Hey guys
So Im doing this simple character.
Im having difficulties create an oval nose, on the existing topology, without messing up the body’s smootness
This is what I did
!
!
!
!
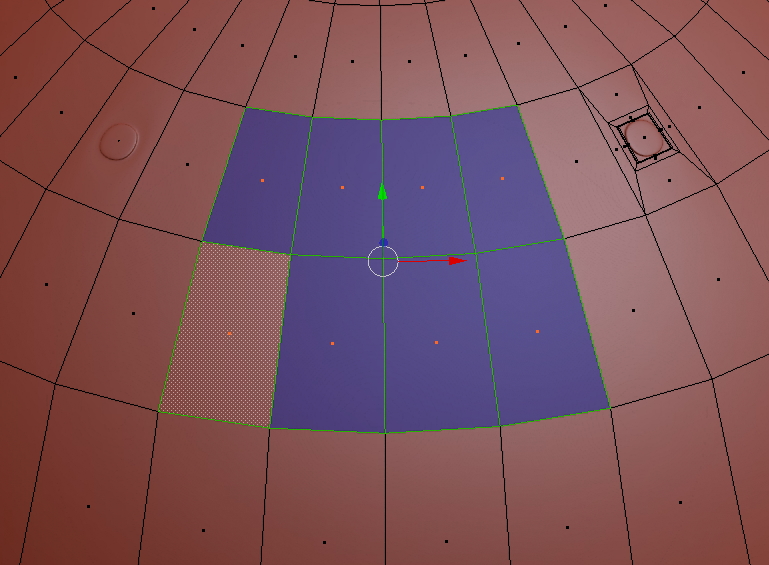
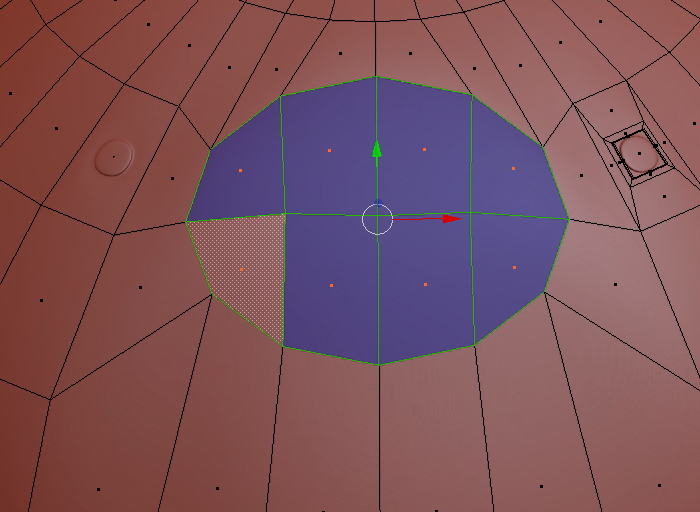
I didnt want to mess up the smoothness, so i selected the faces with roughly the right shape. Then I used looptools to create a circle in these faces. I then scaled the circle to make it an oval, using S and YY to keep scale in on the local axis. I then moved it on the local axis upwards because I want the nose between the eyes… then I extruded it.
It looks pretty good, but im seeing some problems in the smoothness of the character’s body around the nose. It propable because of the topology around the nose, that got distorted when I moved it. There are some strong diagonal edges that I think are the problem.
Can somebody tell me if this was a decent way of getting this oval nose on this characters topology? And how would i fix this topology?
Not really. You should try to keep singularities (vertices with either more or less than 4 connected edges) away from creases. Add an extra edge loop around the ‘nose’, flush with the surrounding surface. You can do so easily by selecting the nose and doing an Outset (which is a sub-mode of the Inset tool).
Hi Piotr,
Thank you for your reply…
I will try to fix it as you suggested and then come back to you
Is there anyway to search for those singulatiries?
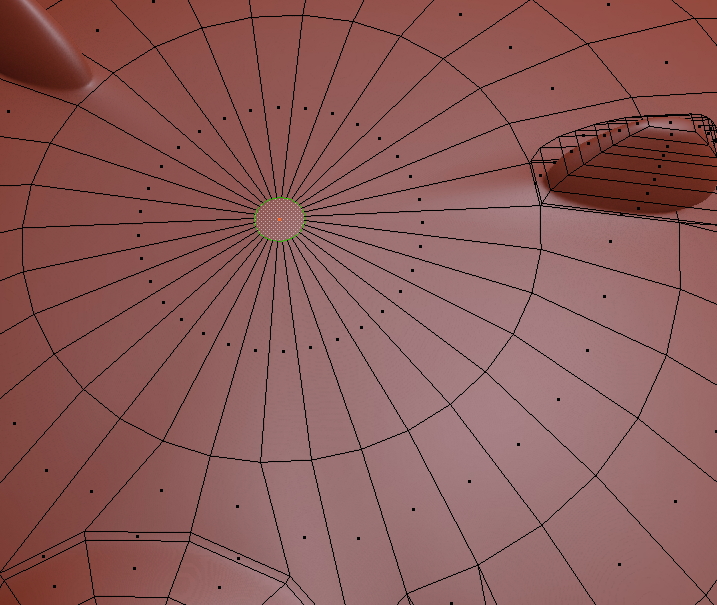
And… i have also searched for ngons and I found one: its the circular face on top of the bears head. Its where all the other faces come together…
whats the right way to close this circle?
Sure there is. Select a vertex with 4 edges, Shift-G->Amount of connected edges, Ctrl-I, and Bob’s your uncle.
As for the little circle on top, you can try to fill it with a grid of quads if you like, but IMHO it’s just not worth the polycount unless the top of this character’s head will be in full view, shiny and not covered in fur or some such. Just inset the circle for one extra loop and leave it as is.
If the top of the character’s head is super important for some reason, you’ve started with the wrong topology and you should start over.
Yeah with the spheres you will get pinching unless you use a lot of edge loops extruded inward till you get a tiny ngon at the center. You can select the center top vert and delete it then select the remaining ring do ctrl+f and select grid fill and it will help eliminate the pinching from subdivisions. You may have to porportional edit pull the center top vert up to get it back to a smooth sphere.