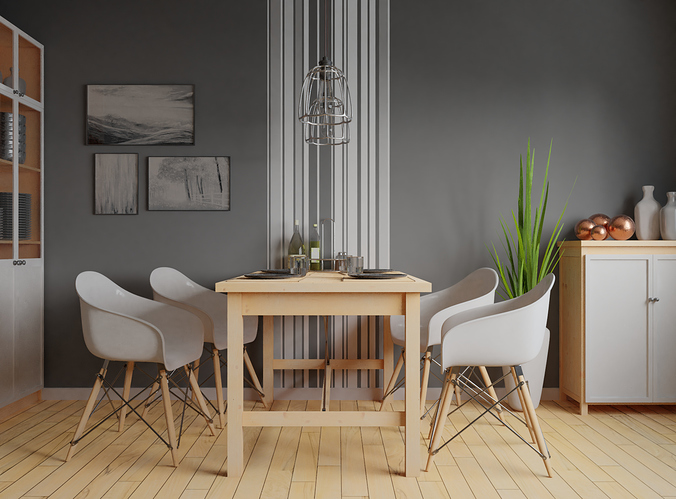
hello i made a new architcture scene and i m looking forward to getting critique to achive more realism. Also
i would be happy to her about some tips to speed up rendering because it took 2h what suprised me.
Nicely composed and rendered!
I have some possible suggestions for your consideration.
First I’ll show the example I prepared for you after the original - sort of a “before and after” approach so you can compare and come to your own conclusions.
In this new forum, if you click / tap the first image to zoom in, you can cycle between the images to compare differences:
“before”
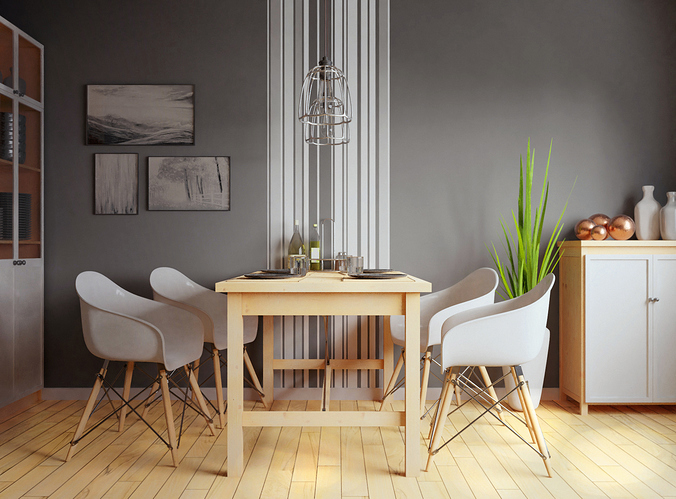
“after”
What was done in the “after” image (via GIMP):
-
Lighting was warmed up via a slight Curves boost in the Red area.
-
A slight Gradient (Overlay mode) was applied to reduce the relative flatness / evenness of lighting throughout the image. Here it is brighter right-to-left.
-
The interior of shelves were darkend a bit for de-emphasis and to better match this lighting setup
-
Noise was applied and then reduced by 50%
-
A slight manual blur was applied along objects in the back to give a subtle sense of depth-of-field
-
A slight boost in Saturation was applied.
-
The floor, which seemed just a tiny bit too sharp in the original image, was smoothed a bit via a light manual Blur
-
There was some very slight Dodging/Burning along the floor, wall, and left-side chairs and the left side of the cabinet at the right.
Again, just some subjective ideas =)
Your render is very nice and, to me, seems to need very few adjustments, just some subtle tweaks here or there, to your taste.
Best wishes on your project!
2 hours might be okay for such scene, depending your hardware and settings. So, what’s your hardware (CPU and GPU)? Did you use GPU rendering?
I think the “before” image is much better. The bright red shadows on the “after” version are very unrealistic.
Just my opinion.
You’re right about the redness.
I re-checked the example on my “better” display (vs. my laptop) and updated my “after” suggestion.
Thanks for the tips i would like to try out doing more in gimp to improve my renders. Do you know some good tutorials to learn gimp beacuse i can only do the real basics.
Yes it could be but i was a bit suprised because other interior scenes i made took maybe 15-30min in most cases. I m rendering with a gpu from amd the Radeon RX 580 with 8Gb video-ram. Maybe you can help me.( Maybe 2h could be the optimal render time i dont know)
Here are the main things to look for:
under Colors:
Hue/Saturation/Value - you can use this to alter the saturation of the entire image, or you can select a channel (R/G/B) to individually boost / cut / lighten / darken those colors (the range of which you can control via the Overlap setting)
Curves - This gives you more custom control over the dynamics / levels of the image. You can use this to brighten or darken the highs and/or lows of the image. Like the Hue/Sat/Val option, you can adjust the entire image or individual channels (e.g. too blue, try a slight downward curve, from the center, on the blue channel(.
Levels - This enables you to tweak the dynamic range of the illumination of the scene. This can be especially helpful when guarding against too-dark darks and too-light lights. Often, when doing work outside of/not requiring Blender, I will use this part of GIMP to ensure I’m not producing an image that is too dark or too bright/washed-out on different displays.
In Blender, there are comparable color correction features which I will use instead of GIMP when developing a Blender project. This enables you, after a render, to tweak the final result within Blender before saving the image. It’s instantaneous, does not require rerendering, and is very good at helping you reach a more finalized image - and to correct for slight deficiencies in illumination in your render.
Back to GIMP:
-
The Gradient tool can be immensely useful, along with the Dodge and Burn tool, for exerting control over color grading and/or illumination, gradually or in a specific area of an image.
-
The Blur tool can also be a great help when refining depth-of-field (DOF). Adjusting the Rate and Opacity can help you achieve a range of subtle to major selective blurring.
-
These two points above are marked with a star because I want to note that these, for me, are most effective when used with a soft-edged GIMP brush. When you select from the brushes, you will see a variety of textural and hard brushes along with a couple of soft circular brushes: these soft circular brushes, I find, work best with the above tools.
There are many other things GIMP can do, but, if you’re working mostly within Blender, I’d encourage you to learn more about Blender’s powerful compositor, its render nodes (especially the Color nodes), as well as its color management settings:
https://docs.blender.org/manual/en/dev/compositing/types/color/index.html
https://docs.blender.org/manual/en/dev/compositing/types/color/color_correction.html
Also, here are some links for GIMP tutorials:
Take care ![]()
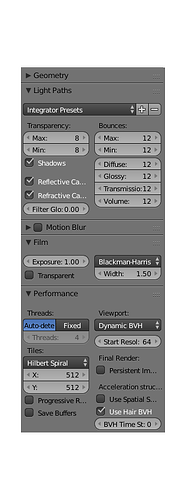
Your render it too long because you boosted all light path bounces up to 12!!!
Get back down to Blender default setting, which are already more than enough, and even go further down with the “Bounces - Max” setting after some tests if you like.


