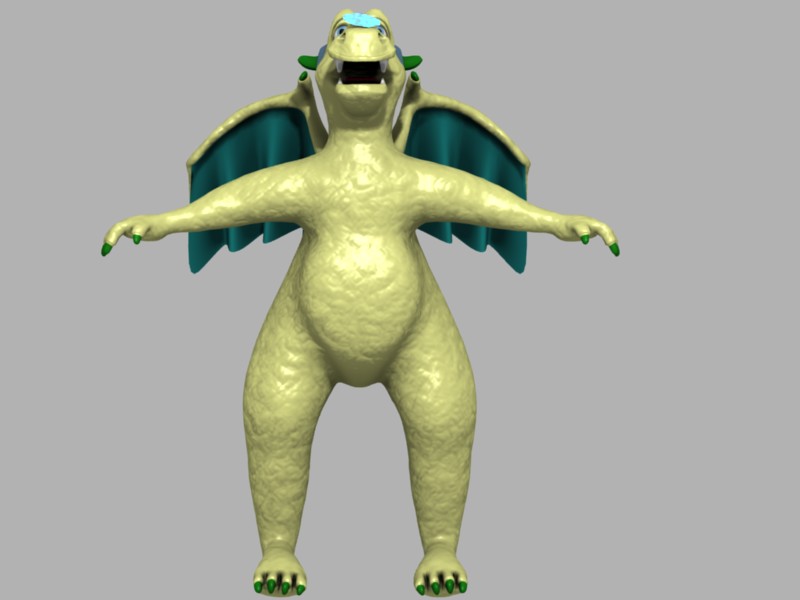
Maybe it should be that way, for a reptilian character at any rate, but now I find his calves are a bit narrow. His knees are rather wadded.
If it were me, I would make the legs broader overall to support the thick body, but that’s just my personal intuition.
Now that his face is turned up, I can’t really see if you’ve done any more work there, unless you’re done with that part.
And as was mentioned earlier, his stomach does rather lack detail. But unless you plan to add more vertices there, it will probably have to wait until texturing, if you decide to do that.
I feel the same about the calves, and changed it, and thickened the ankles a bit, as to me they looked like they would break trying to hold all that weight. Brought his arms back a little, moved his legs forward a little.
Yes his face is done, unless I inadvertently screw something up. :o
I am planning on texturing, if I can get something I like. I really suck at it.
Well, by wadded, I more or less meant “lacking definition”. His knees look like soft clay that’s been bunched up into one lump.
I’m probably making it sound worse than it is. All I mean is that it doesn’t really give the impression of a flexible joint.
As for textures, you can just add some Clouds with some a low-level Normal displacement, just to give it a rougher feel. I’m sure you could also find or whip up a scale texture that would work even better if UV mapped well.
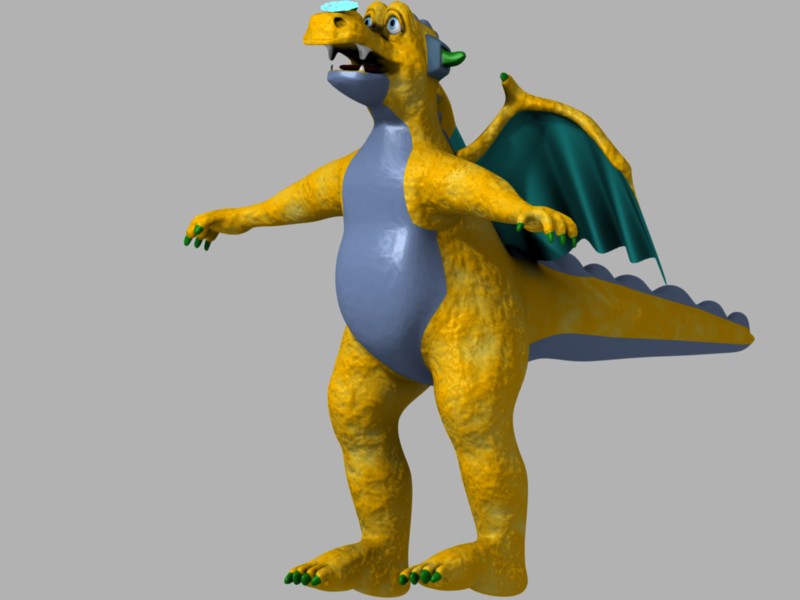
OK, here’s the latest update of him. Thickened thighs a smidge at the top. thickened ankles. Gave him a rough texture, which I know still needs work. Gave him a bigger stomach, which I personally rather like. Still working on defining the knees.
Also, if I hadnt said it before, thank you all for your comments and feedback.
I think this project turned more into inspiration than recreation, which is completely fine with me.
I had him rigged. Parts were moving. But it had issues. Moving left and right with the arrows made it go up and down. If I tried to move the leg, part of it would move and the rest would get stuck. I’m probably missing something important. Of course this is just trying from my own hand and not watched/read any tutorials.
Then, Blender crashed. Haven’t redone the rig yet.
I’m sorry to hear about Blender crashing. I can certainly identify with that feeling.
That said, how often do you save while working? Because after a while I began to involuntarily hit Ctrl+S in every program I use every time I would change something, however minor.
As for the newer dragon: looking very good so far. I always disliked the obvious face-seams when applying one material over another, but I guess that’s ultimately unavoidable. The new colors are interesting, but I liked the former chartreuse-yellow a bit better. The blue belly and jaw are fine, but a bit gluey (if that means anything). I would make it a prettier sky-blue to contrast with the rich orange.
He also seems to be rocking back on his heels a bit. Not really a problem, more of a nitpick.
I probably dont save as often as I should. But, now I am going too.
I had fixed his knees too altho its hard to see from the texture and angle (which I think may also be the cause of the rocking feet look) Yeah I hate the “seams” too. I suppose if I did a paint job in Photoshop or Gimp, I could make it less so.
Its still the chartreuse color, the orange is color mapped. I just didnt like the texture itself on the plain color. But I think your right, lighter blue would look better.
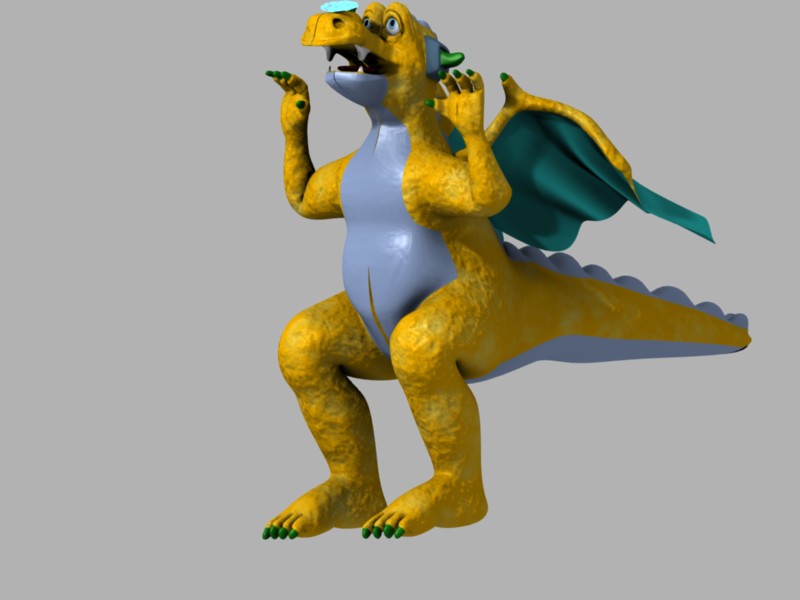
I got the rig to work! Its not complete yet. Im having some issues with it though. Seems as tho if I move parts, it causes him to get ripped open. Also, how do I make it STOP mirroring? If someone could take a look at it, and tell me if its decent or where I should change something, I would greatly appreciate it.
Bones are NOT named, simply for the fact, that if it wasnt right, I really didnt want to re-do all that typing.
Well, if you want to add bones successfully, you have to actually apply the Mirror modifier. Of course, you don’t want to do this on your good mesh. So, make a copy of the object with Mirror on, tuck it away on another layer or on a completely different .blend, then Apply the modifier to the new one.
However, you could also achieve a similar result by having the Armature modifier come after the Mirror in the stack. This only works if it’s a “real” modifier, not a virtual one (but you can make it real after the fact).
Thank you thank you thank you! I’m sure theres more I need to understand about how they work.
But, at least his body is rigged. I haven’t rigged his face yet, nor are is wings. Just so I know tho, since his eyes are a separate mesh, I would need to rig another armature to that right?
Not at all. Just make some eye bones on the main armature, then give the eyes the armature parent/child treatment just like the dragon mesh. They’ll both use the same armature object for their motion.
I havent made it much farther, as I ran into an issue I dont understand…
I was playing with the pose mode with his neck, and when I move the neck bone, the head moves, BUT the tip of his nose stays put?? Theres no bones in the face as of yet. I did try to do the eyes, but it didnt work. Could the lattice be an issue? Would I have to apply it like I did the mirror?
Ok as I was writing I got the eyes to work a little. But I’m more concerned about the tip of his nose…
Depends on the vertex groups. If you named your bones anything recognizable, then just go into the VGroups for the dragon and find the one for the head bone. Use “Select” to select all the vertices for that group. If I’m right – and I’m pretty sure I am – you’ll see that the nose vertices are not selected. Select them and click Assign to make them a part of the group.
Make sure you’re not using Envelopes for deformation, either.
Well, I been working away at this, and after much re-doing of things (by the way, I now hate weight painting ) I do have him taking 2 steps. I know the one arm is really fast so will be fixing that. My question is how do I make the texture move WITH the arms and legs? It looks weird the way it is now. Would this be where baking comes into play? The vid is only 3 seconds, so hopefully, you’ll catch what I mean.
Sorry that was the only way I could figure out how to get the link in.
It’s the way the textures are mapped. I think it’s using global or window in the map to options. Basically it causes the texture to always be mapped to the same part of the image not the same part of the object.

 ) I do have him taking 2 steps. I know the one arm is really fast so will be fixing that. My question is how do I make the texture move WITH the arms and legs? It looks weird the way it is now. Would this be where baking comes into play? The vid is only 3 seconds, so hopefully, you’ll catch what I mean.