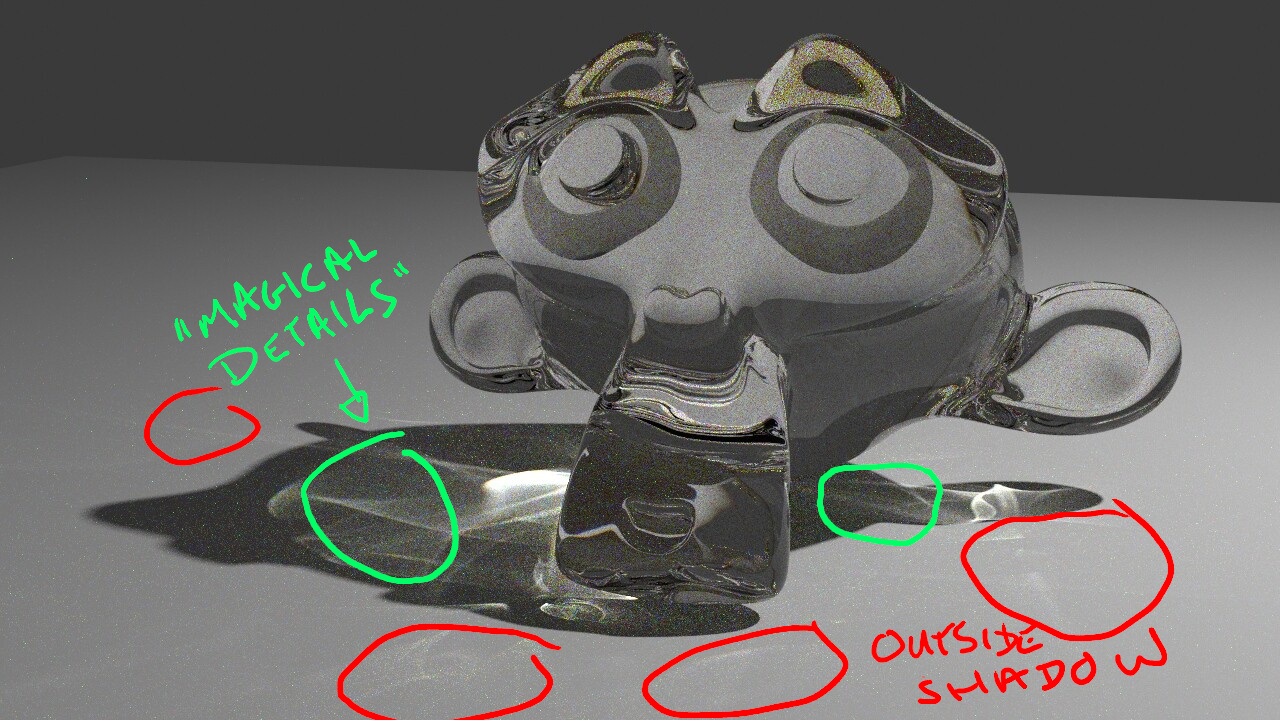
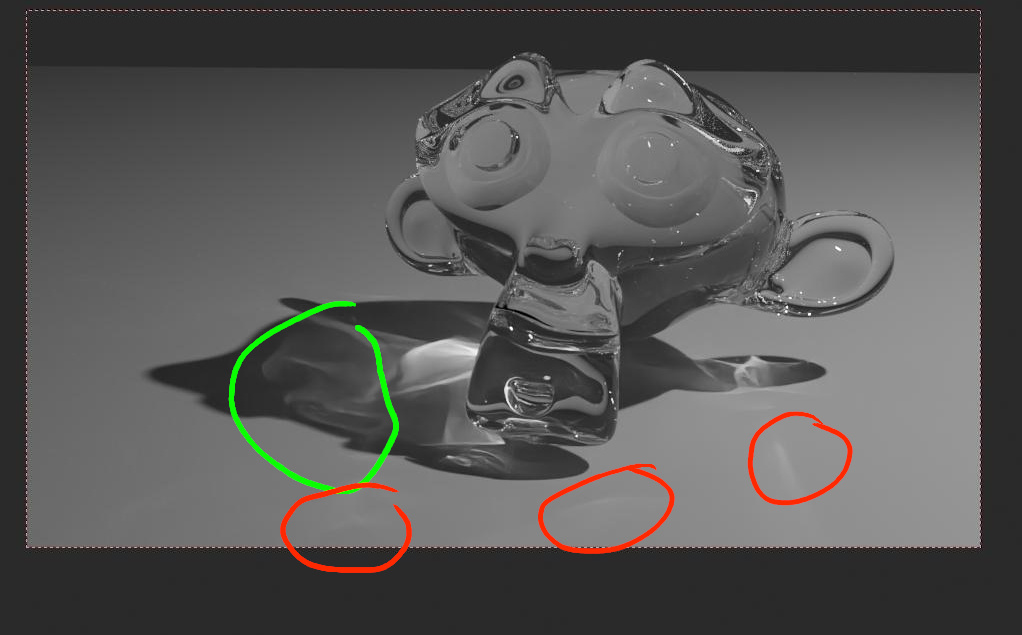
That is what I was referring to as “fake caustics”, Ok maybe they are “simplified” not totally fake.
I do not really know how it works under the hood, but the “emitter, caster, receiver” options are the only way to get fast clean shadow caustics in Blender, there is a bit of trickery behind this as they totally wipe out any caustics outside of the shadow and drastically simplify the shadow caustics to get a clean fast result.
This method gets rid of the fine details which make those “magical details” that are in your Luxcore render. Also note the reflective caustics that are not in the shadow, they are not there with the emitter-caster option in Blender.
When you turn off those options Cycles can get those caustic rays and caustics outside of the shadow, but it takes forever and gives noisy results needing many thousands of samples. Also you need to turn off the clamping options (direct and especially indirect) and turn off filter glossy (or use very low values). You will need to de-noise the result which will also mean loosing detail in those rays (like in my cycles examples).
In your own words, you were asking for a “setup for Cycles to be close to LuxCore glass realism”
You didn’t mention render times.
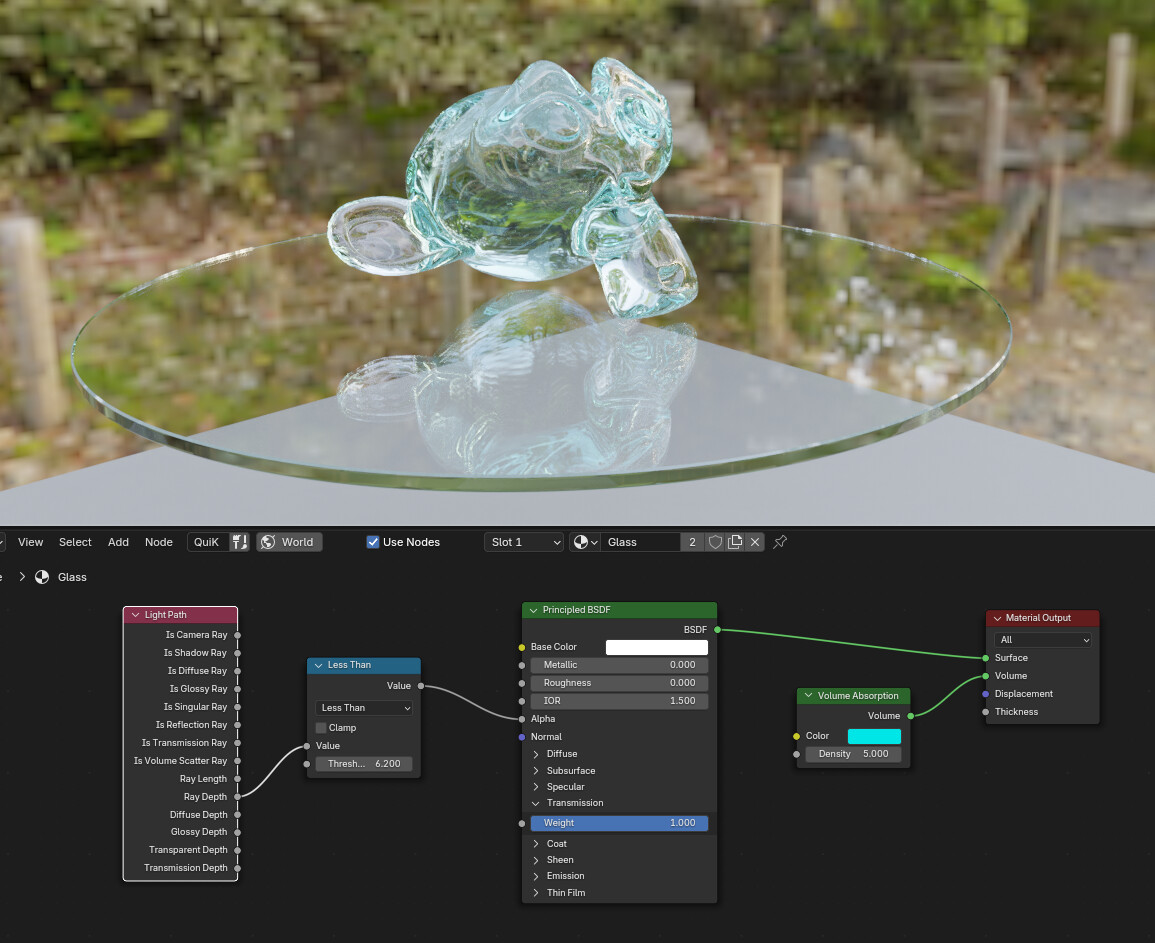
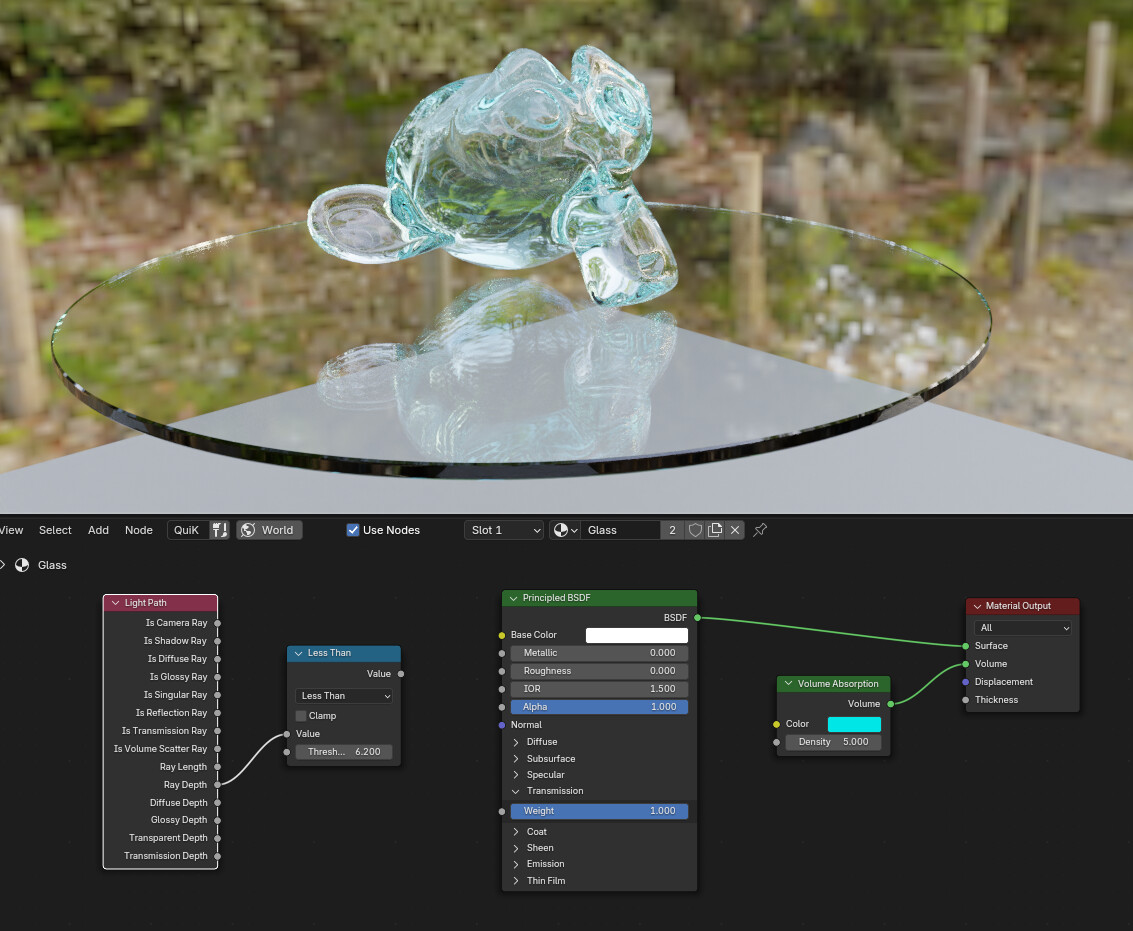
Anyway, to have a nicer glass in Cycles I always add a lightpath-raybounce → less than X and plug into alpha of a principled bsdf glass. Choose X between 5 and 10, and make sure the transmission raybounce is bigger than that number. As easy as this. This way I also get nice rims for glass slabs, provided I place a volume absorption as well
And you may also remove or reduce the influence on shadow and diffuse paths
I assume you mean the absorption color. You can choose any. I usually use a blue/green to simulate common glass (like in windows) slab profiles. .6 in the hue for convenience
Volume is usually the realistic way to color glass or liquid materials.
If you change the main color, you will get a material that acts like painted glass. This can exist in real life, but most transparent material have their color spread through their volume instead.
The 2 options will look different. If you color glass by volume, the thicker parts will have more color.
You could use that on the surface and also have a volume for additional color. Coloring the surface with dispersion is correct, as dispersion does happen on the surface.