Happy New Year everyone!
Has anyone encountered this problem in Blender when transferring a model from Zbrush? The problem is that the displacement map is not turned on correctly and you may see the “swollen” spikes at the ends. This happens on spikes and sci-fi parts of an armor in my practice. What’s the best way to solve this?
Personally, I have the option of making sharp particles visible objects, but this doesn’t save small, simple elements.
If you use Eevee, Eevee is not supported Displacement Shader. Use “Displace” modifier. And Displace Modifier a little bit different than Displacement Shader.
…someone can’t see if you have choosen Color Space: Non-Color…
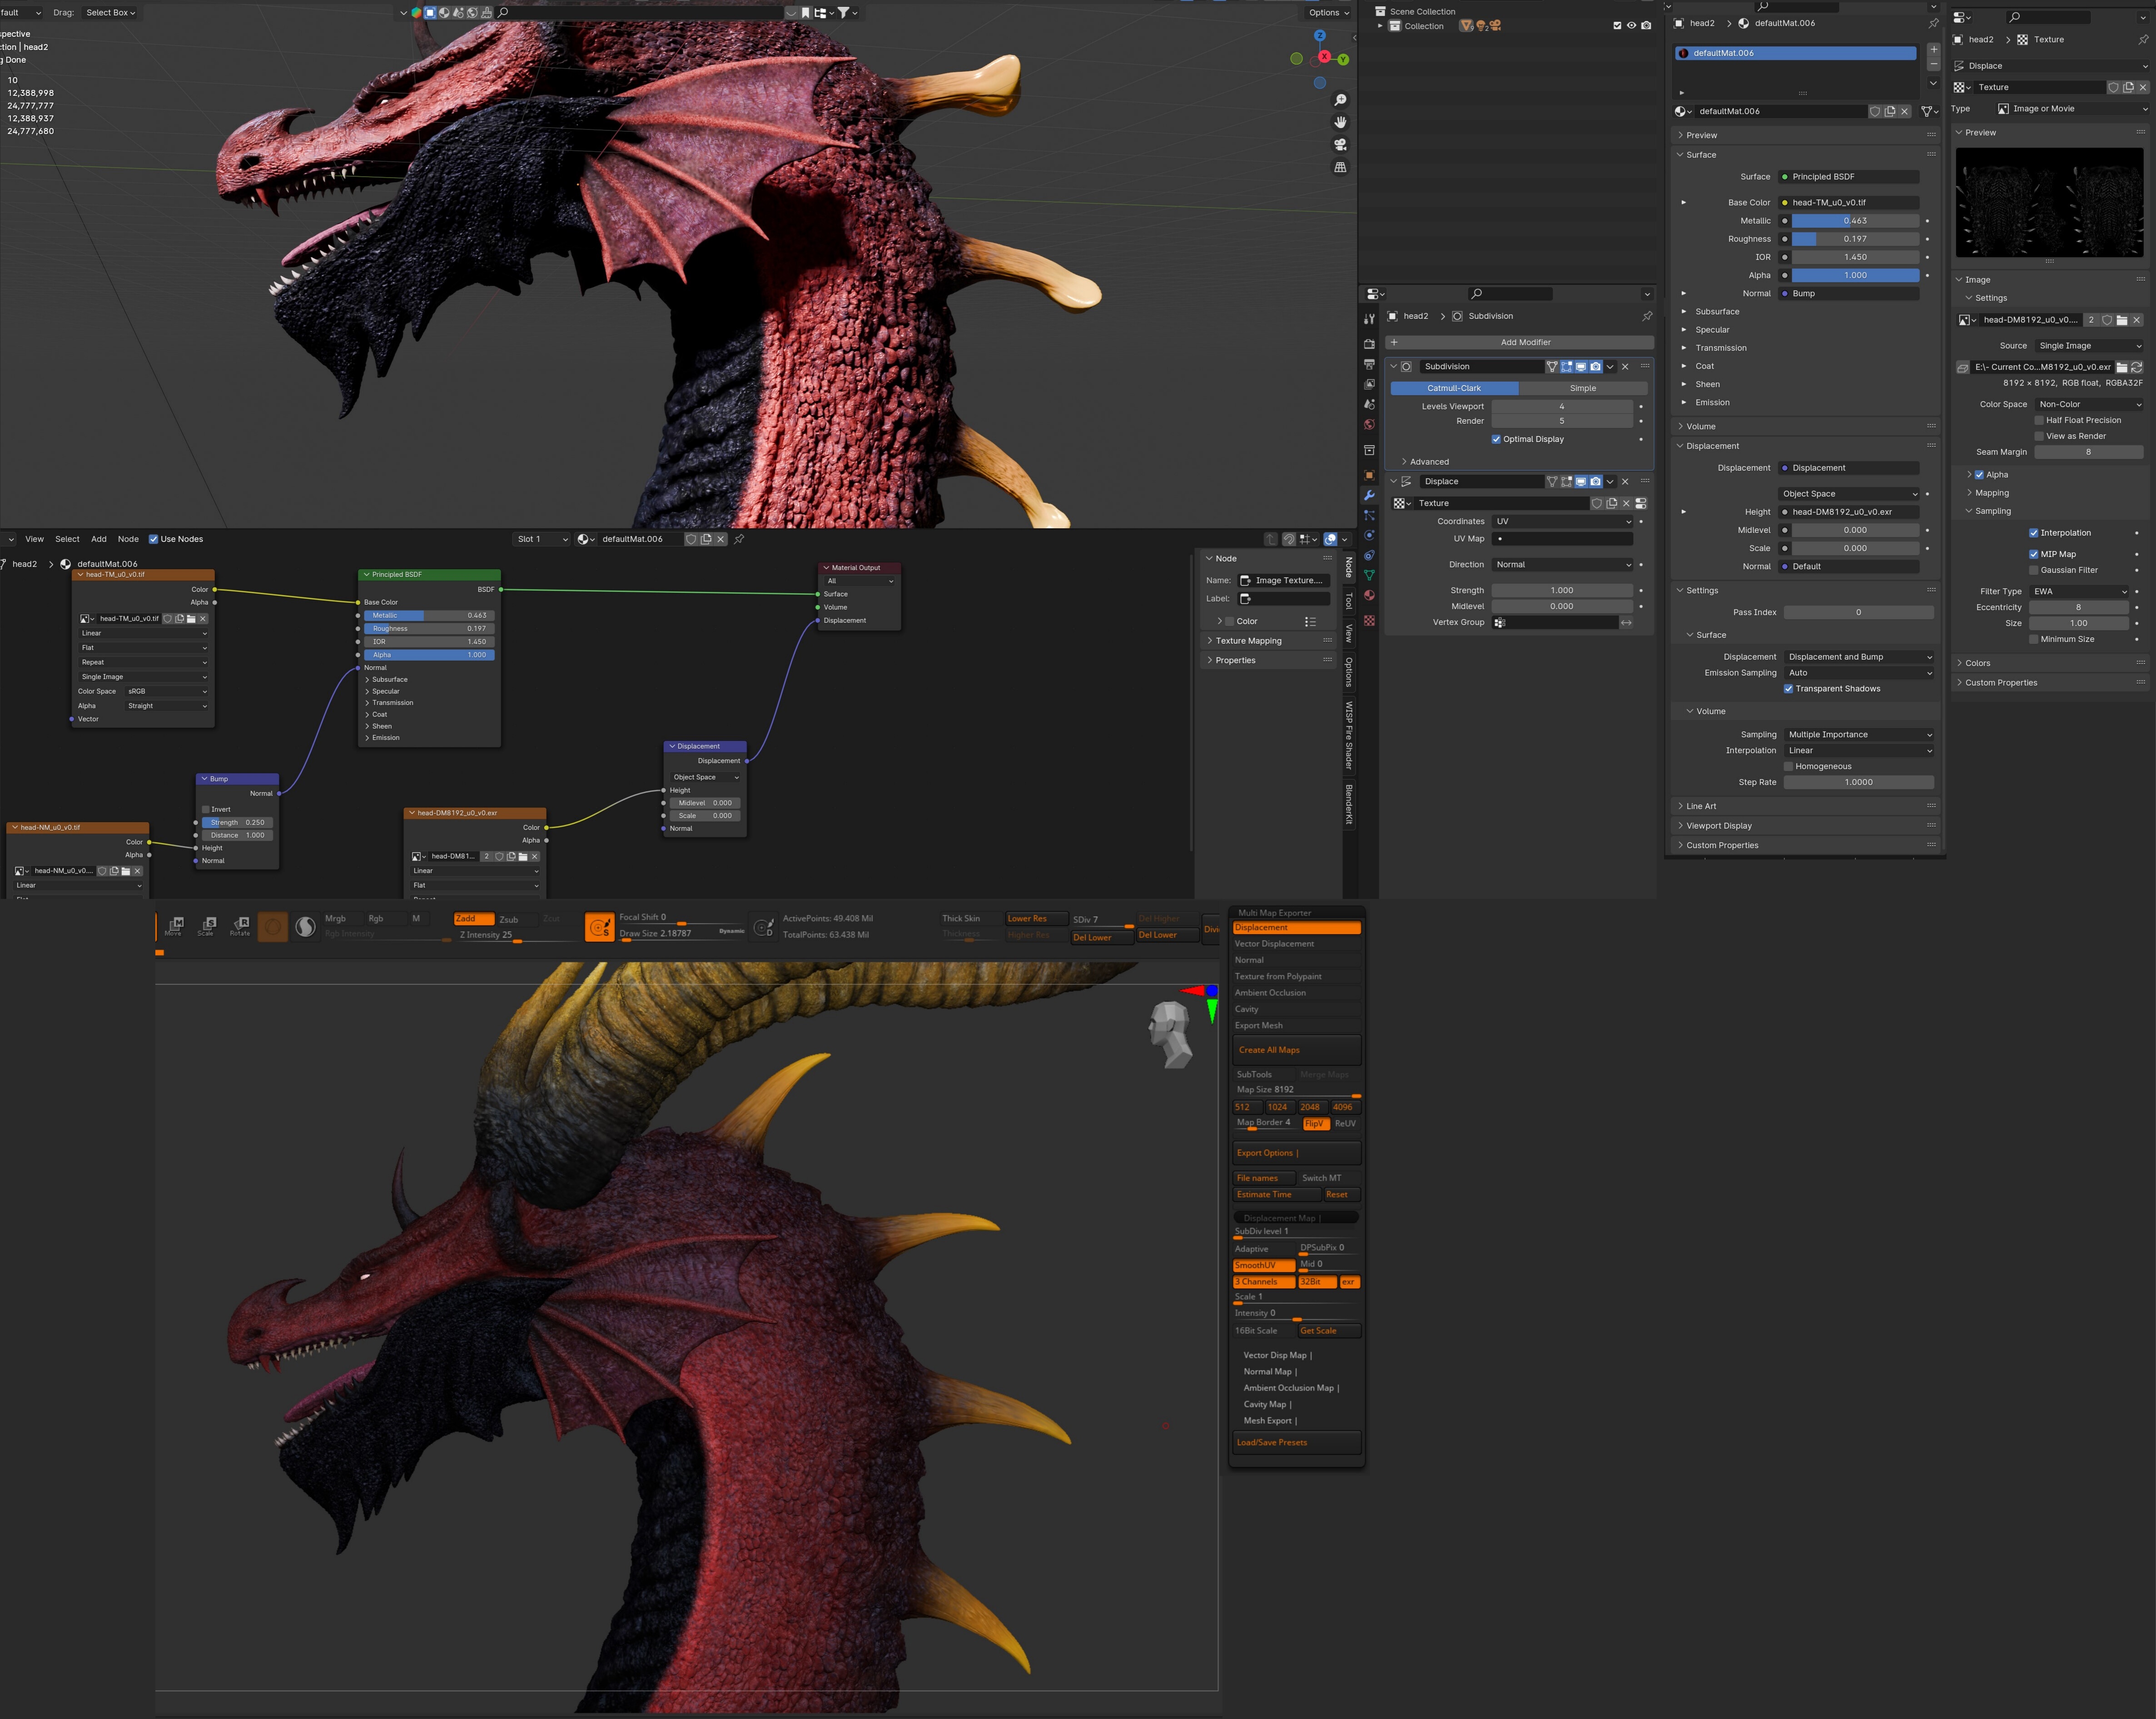
Also for cycles displacement feature the default is Bump Only… you may have to choose some with actual displacement…
You may also choose the “Experimental” feature: Adaptive Subdivision (then the Subdivision modifier has to be the last… ).
Anyway:
The Scale in the Displacement node is set to zero…
But then you also have added an Displace modifier… ?? …and that texture is… ???
Also Noted that Zbrush made a not very good UVs (I use automatic option). There the seam goes exactly down the middle of the back through all the spikes. Perhaps it also adds problems.
I’m not a super-pro in Blender. Migrated to it after Maya not a very long time ago and I don’t know many things. Mostly use Blender for rigging and animation. Main 3D models do in Zbrush with textures. So Displacement is kind of pain for me.
But I may say that it still works easier than in Maya with V-Ray (I had a hard time with them).
Check my previous message here, I just added more screenshots with settings. Again, as I said, I don’t know many things in Blender. And not fully know how Displacement properly works if the task is move it from Zbrush to Blender.
In some kind it worked for me but not perfectly. Also tried a lot of videos from Youtube about Displacement and unfortunately they didn’t solve my problem.
Just another thing …in your shader material you are plugging a Normal Map into a Bump Node…switch that Bump Node to a Normal Map Node and make sure to set it and the displacement to Non-Color Data ( In the images texture Nodes
Hey everyone! Thanks for all replies!
I guess I found how to fix the problem. Maybe it will be useful for others.
So the main problem was in bad retopology. I used automatic in Zbrush. It made a not very good low-poly model which gave the effect like in my first post. And I made a manual retopology, created all UVs and maps again and sent to Blender. And it works now good.
To be honest, I didn’t expect so much fuss with the sharp parts of the model. But it’s a nice experience.
Settings for displacement I almost didn’t changed. Just removed a second displace in nodes.
Plus thanks a lot for the Normal Map advice. It improved the whole view of the model.