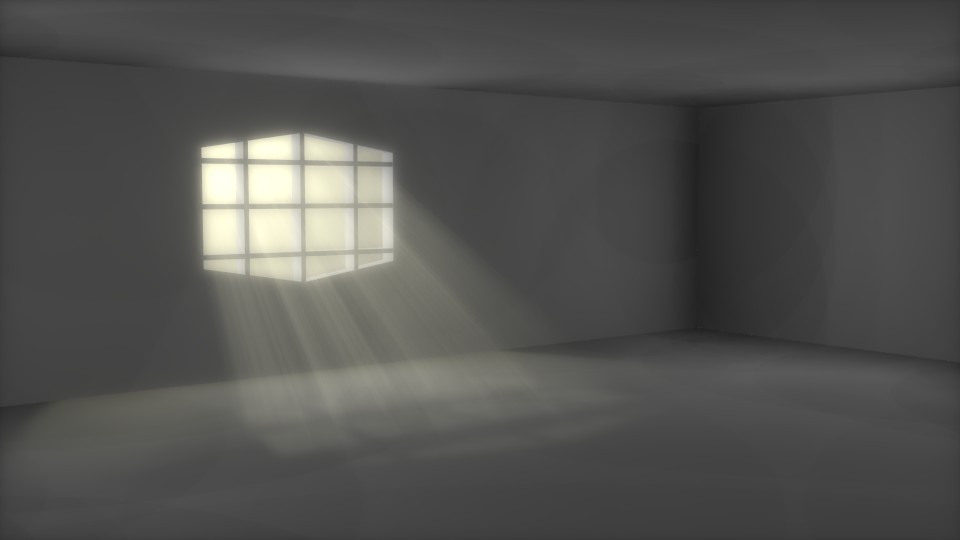
I have been experimenting with volumetric lighting. I have a very simple scene, a room with a window (a box with a hole) with a spot light shining through onto the floor.
You have confused Halo with volumetric. Halo is not volumetric, it is a post render fake for volumetric. All you can do is fake the look of a volumetric light, and only to a certain extent.
You also have a node based material applied to the room which is producing a black color for your final result. Turn off the node or simply create a new material for the room walls.
To me, the second shot of the three looks most dramatic, and that’s what I would be using in the final shot (in post #3). And I would be doing it using compositing. I probably would omit the window-light on the ceiling even if it is technically correct. Of more concern to me for the overall shot is the dark corners, especially the one opposite the camera.
I would composite this shot. First, I would add the inside of the window-frame to the model used in the second shot of post #1, and keeping the reflections-only plane where the floor is, then I would composite it into the shot in post #3, which had been taken with an Alpha=0.0 black hole where the window eventually will be. (The brilliant light from outside would wash-out any interior light on the frame to the point where I would presume it could be passably omitted.)
I would spend quite a bit of time lighting the set. There need to be soft shadows in the corners; not hard, and not banded. There also needs to be a warm and pleasant color-temperature to contrast with the shade that you pick for the sun. A slight splash of blue to correspond to sky-light, very diffuse throughout the scene, could also be added. All three of these being done separately through compositing. Use “MultiLayer OpenEXR” files to capture all the data so that you can render each piece separately, then do a “mix-down.”
Thanks for that advice sundail. It’s all a bit beyond me though, especially your second paragraph. I’m still getting the basics down at the minute, but this is the type of information I’ll definitely come back to at a later date to review.
Sure, makes sense. Let me explain just a bit what I meant in the 2nd PP…
In the shot in post #3, the inside of the window-frame is here. In post #1, it is conspicuous by its absence. But the only significant source of light for that frame probably comes from the outside glare. (That’s your decision of course.) Therefore it needs to be part of the shot in post #1.
I’m suggesting that you set up the shot in two separate renders, generating each one to a MultiLayer OpenEXR file output. The first is post #1. The second is post #3, but with a hole where the window (and frame) will be, and no light spilling on the floor. (But post #1does contain a reflection-only plane coinciding exactly where the floor is.) You now perfect the shot in post #3, getting the shadows in the corners just right.
Now, you create a blend-file, with the node-based renderer and an Image input-node pointing to each one of these intermediate files: the splash of light (and window), and the room. The file-format I suggested is specifically engineered to capture all of the digital data, separated into render-layers … it’s a digital data format. You can now blend the two images together, perhaps just with a Mix node but maybe with other color-correction steps; the world is your oyster.
You simplified your workflow into three steps, corresponding to three concerns, so that you can deal with each one separately: a clean halo of sunshine (and the window); a room into which the sunshine will flow; and mix-down of the two to produce the final image (or images).
This is “the ultimate digital darkroom,” and an eye-opening critical point to recognize … how the magic-tricks actually work. In the world of CG as in conventional photography, “the image might be captured in the camera, but it is made in the darkroom.” When you take a render and “it doesn’t look quite right to you,” realize that what the renderer produces is really a component, usually one of several, waiting for that final “darkroom” step. Computer graphics uses the same kind of “clean recordings followed by mix-down” process that’s used to make songs.