Hi,
I have restarted my creature modeling by sculpting the base mesh.
@Sol_Hunter
With your ideas and WIPs.
Happy Blending,
Shankar
Hi,
I have restarted my creature modeling by sculpting the base mesh.
Happy Blending,
Shankar
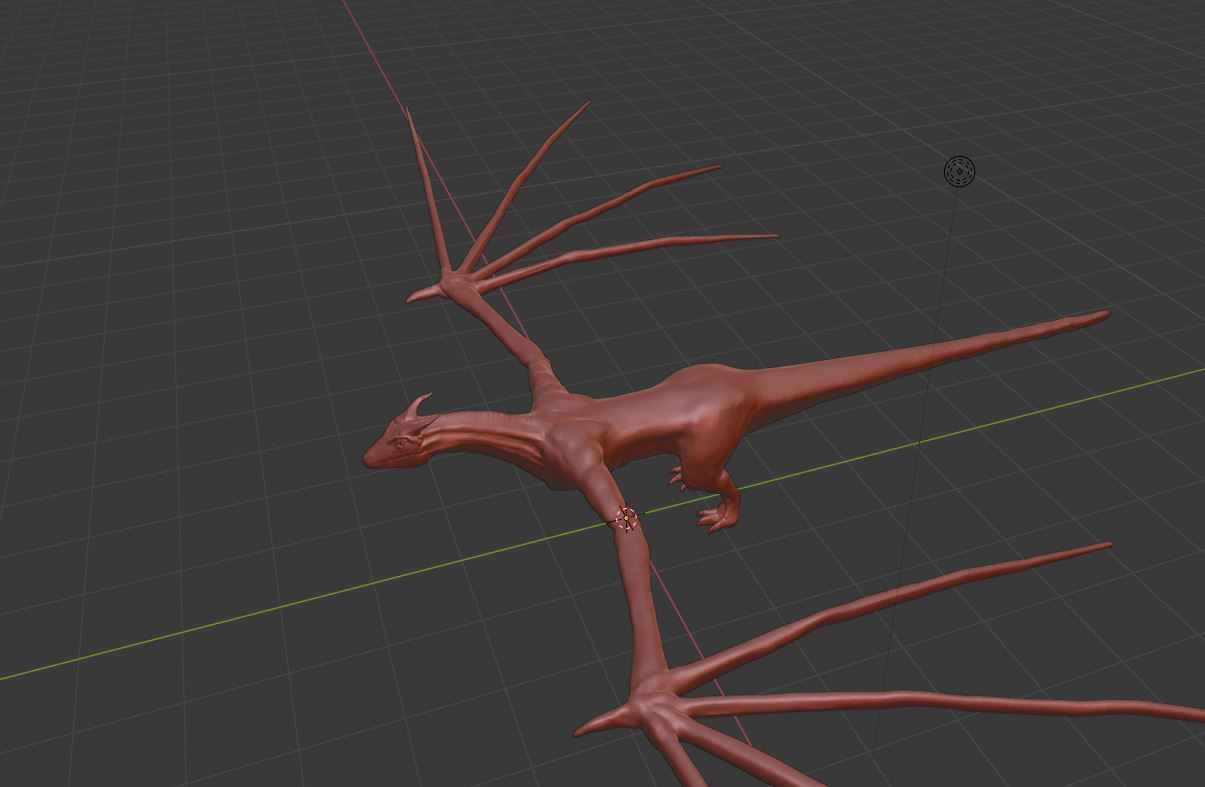
Hi all,
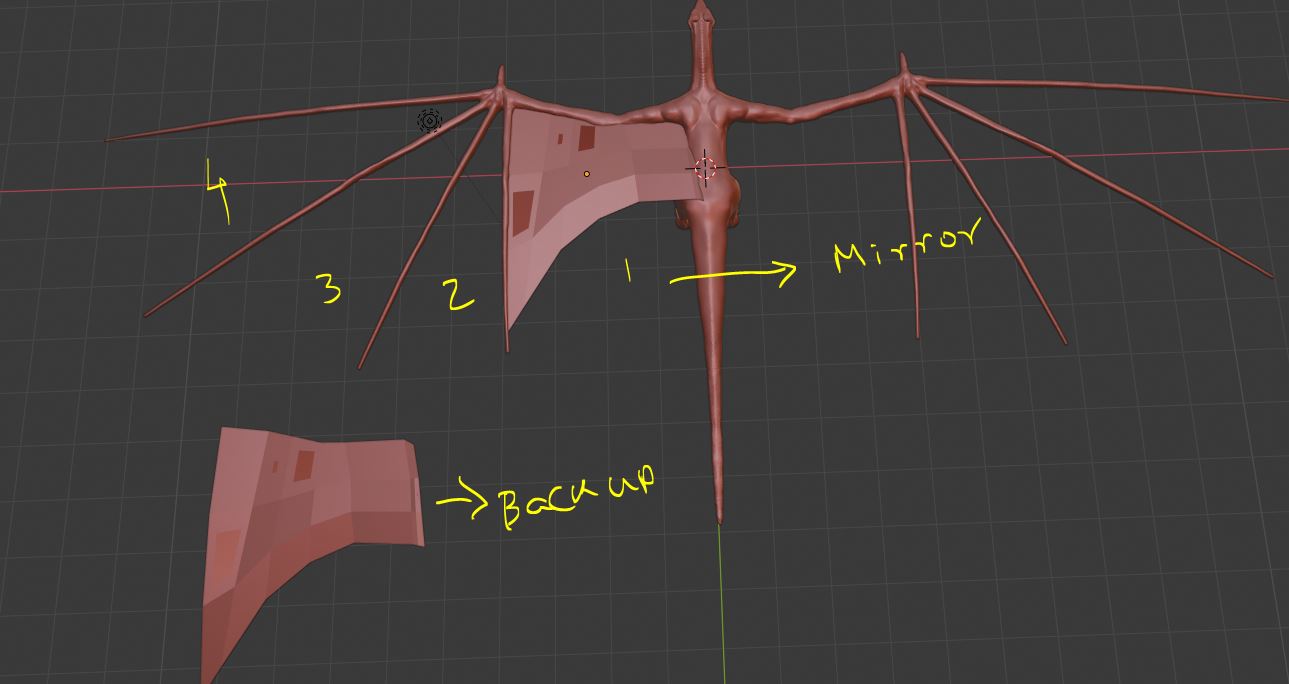
Initially i modeled the rough base mesh of the full wings.But after union with the body it behaves weird look and the application struggles to keep up.so i decided to model and attach every block
Hello all,
Thanks for the likes, which boosting me in this work.
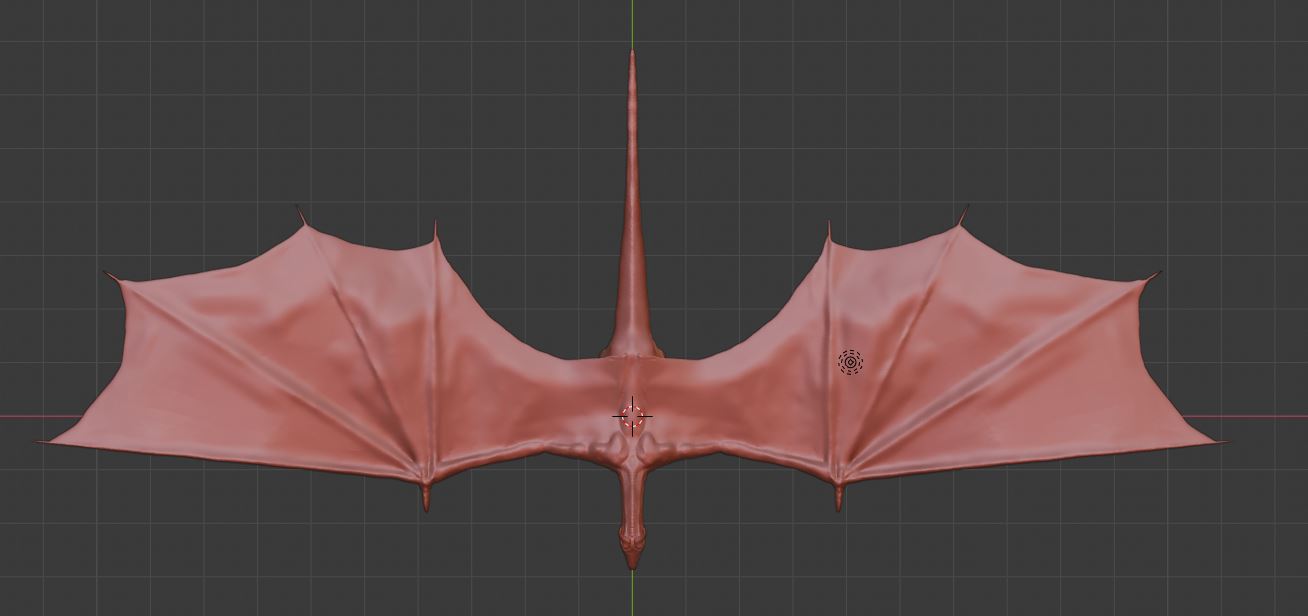
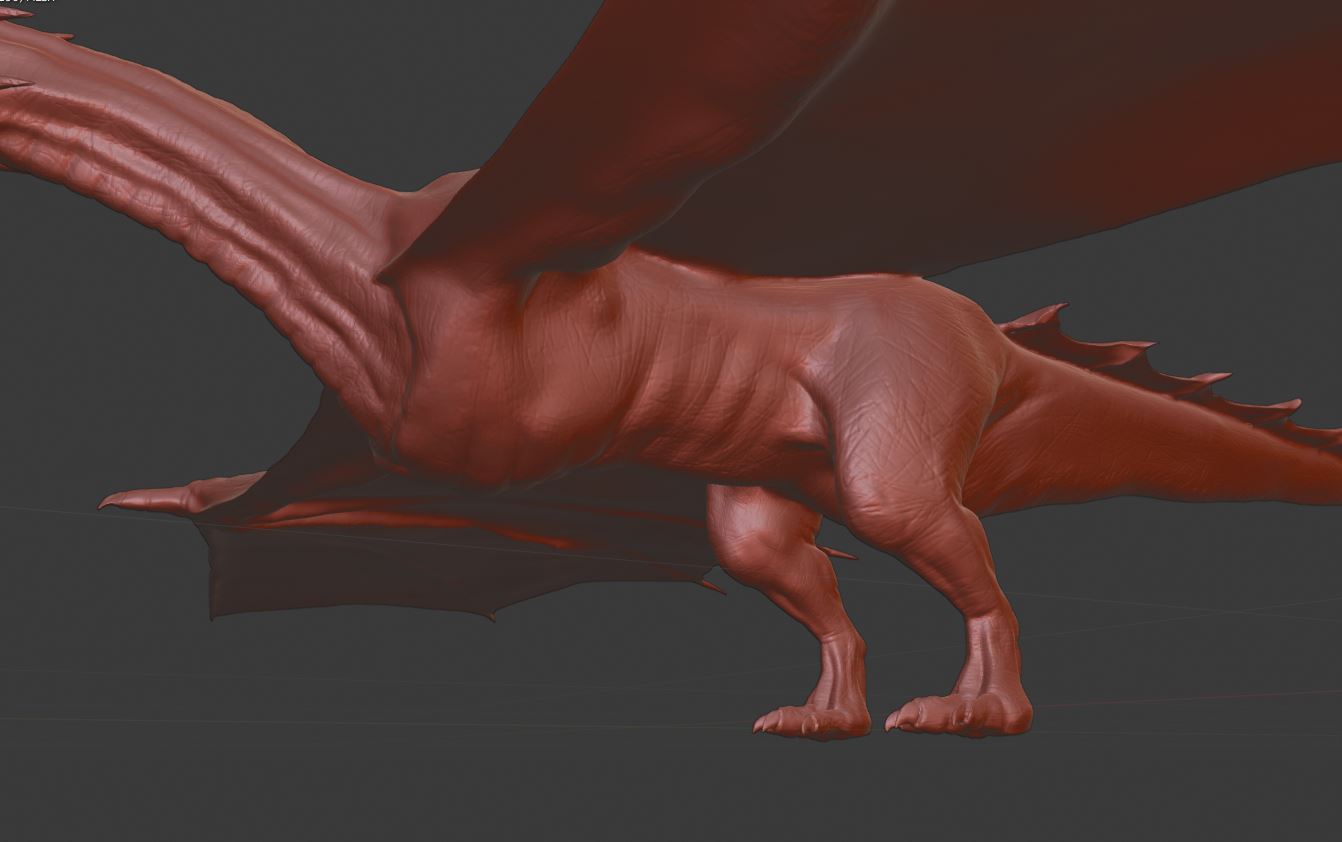
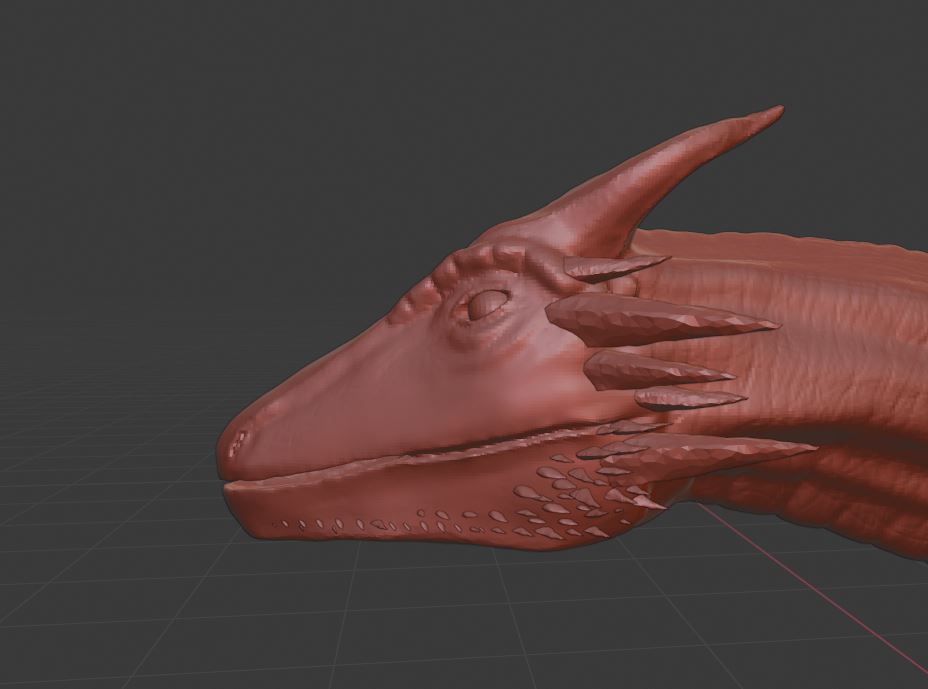
After a while as mentioned before i have created the wings and sculpted with the body.
Now its the time for doing midlevel details such as nails and facial muscles, thigh joints, may be having idea of adding some fin like spikes in the tail.
Nice work man! It’s looking great! Did you use the voxel remesher to attach the wings?
Thanks Man. i just added basic divisions for each membrane and applied Union in bool tools, then in the sculpt you have to apply minimal resolution on the meeting edges of the membrane and wing flap fingers, shoulders, body and apply smooth brush on the same region which relaxes the meshes in the area.
Hi,
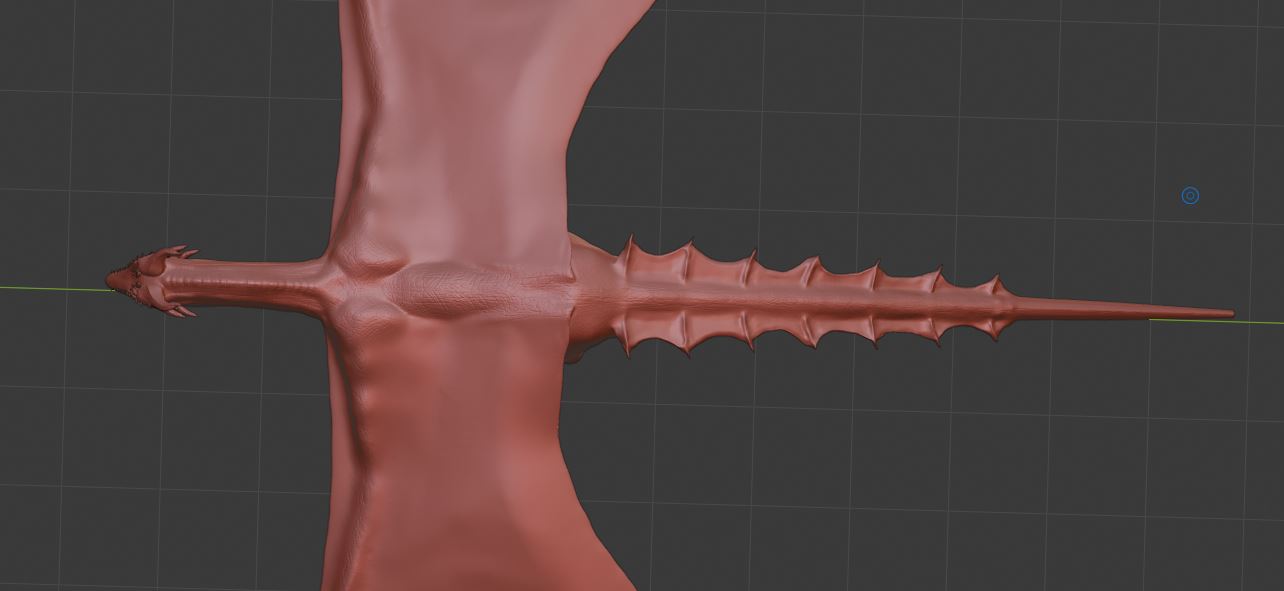
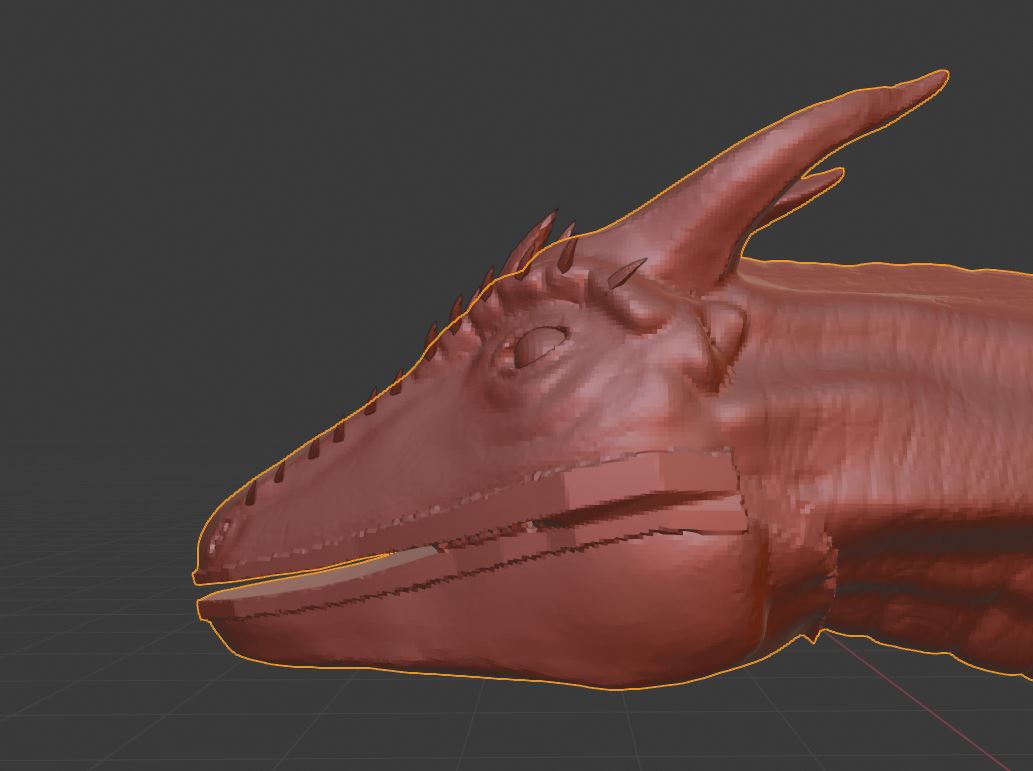
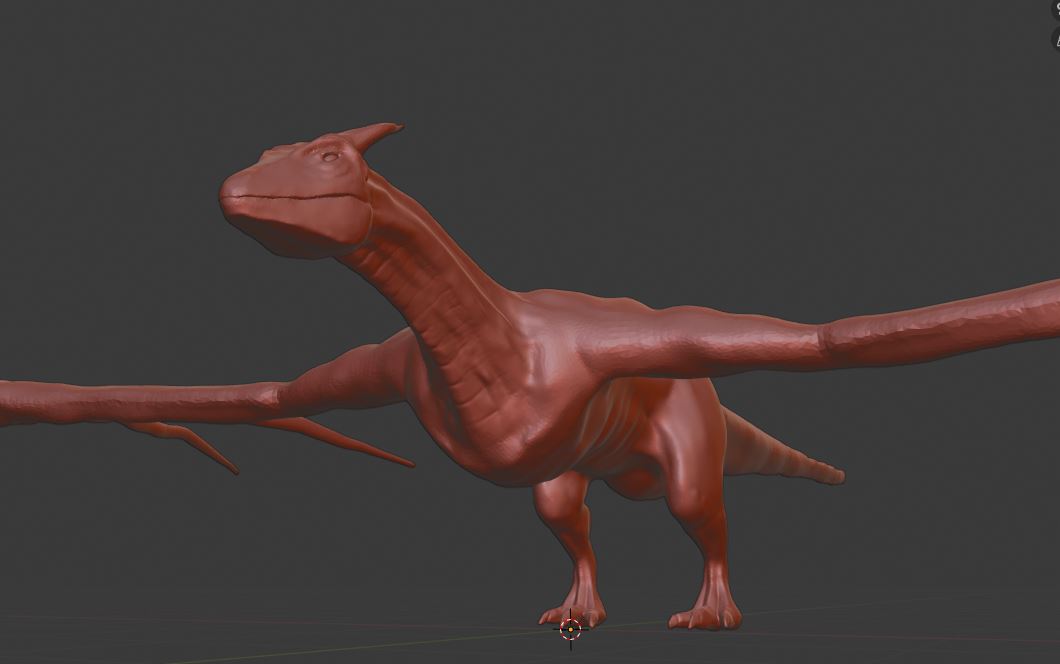
Here is the further update of the creature with toe nails, spikes on faces, fins on the tails and some wrinkles on the body joints for muscle appearance.

This link will be having the sequence of dragons in the series.
Hi,
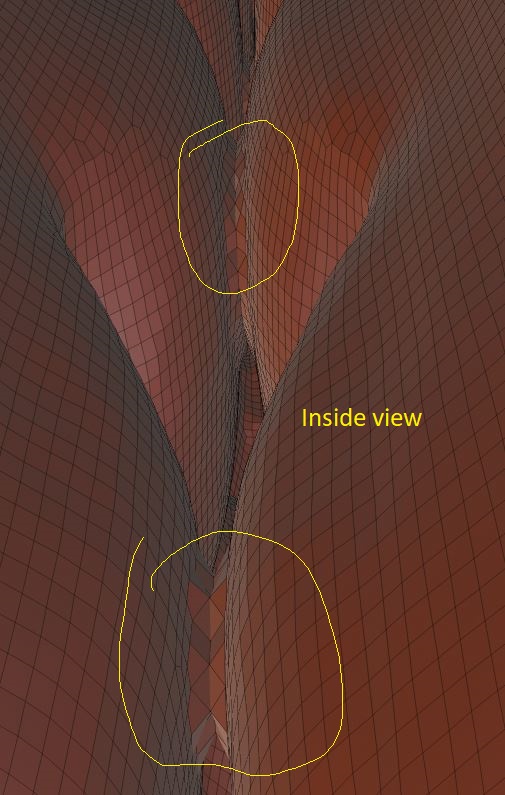
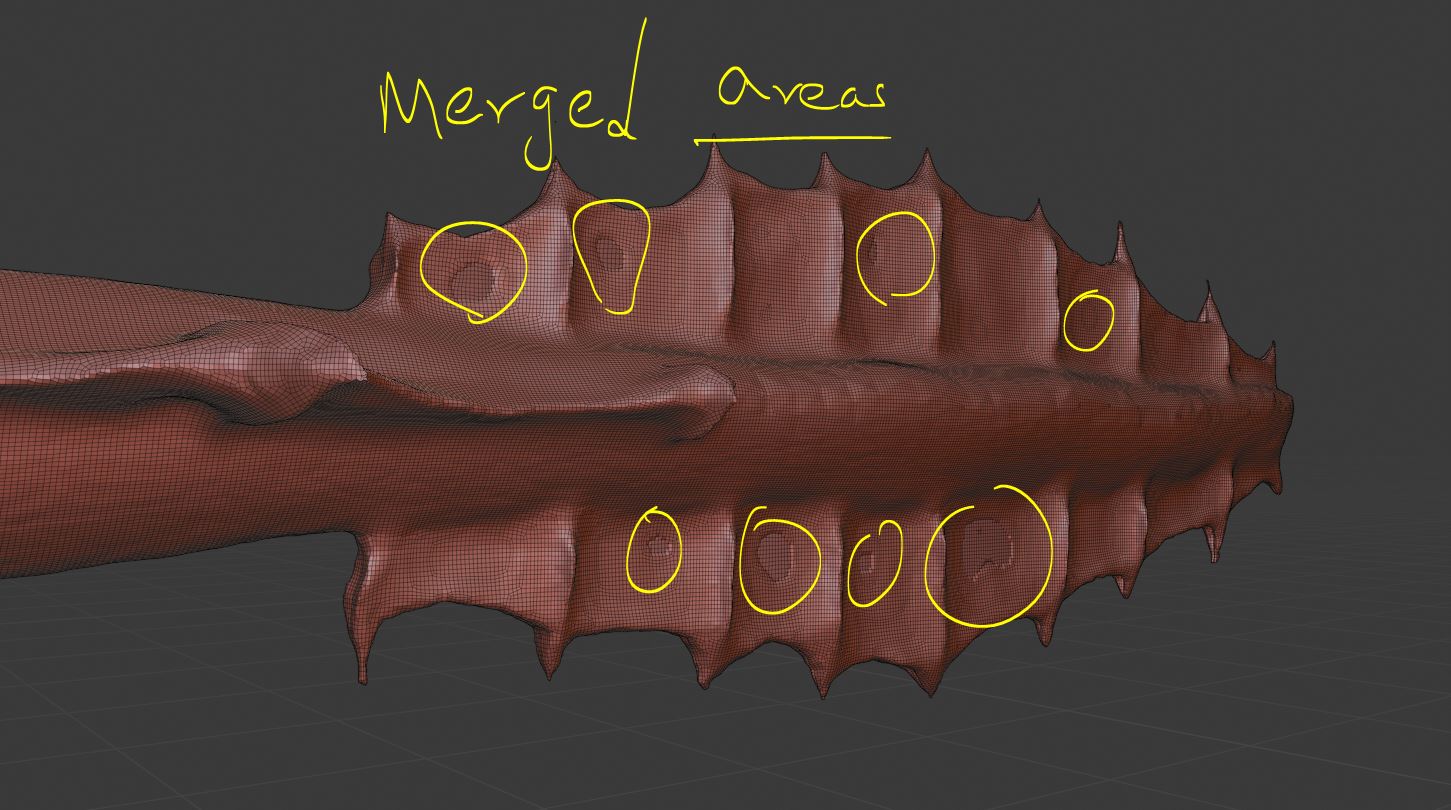
After some details, i remesh the model and missed noticing the areas of merged vertices.Help needed!!!
If you can’t undo far enough back and you don’t have a backup file from before you remeshed, I would go into edit mode and delete those faces. Then select all the vertices surrounding the hole and hit the F key to create a face between them. Once you do that for all the holes, you can make sure that those areas are farther apart and remesh again.
Are you using the remesh modifier or the remesher in sculpt mode?
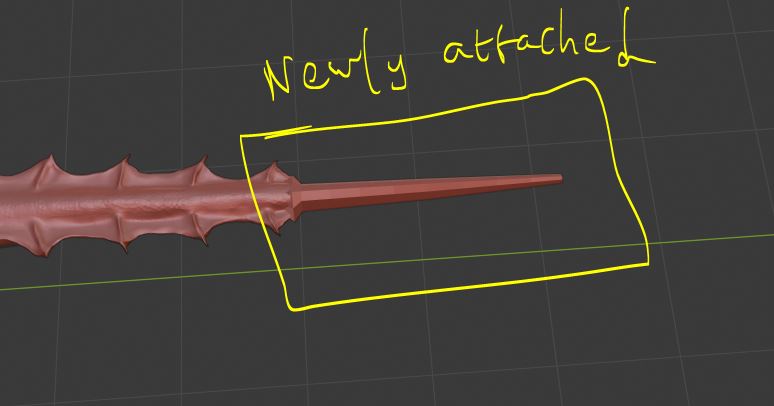
Hi Sol,
I have done the same as you told and i decided to keep it like this. so i can rework the tail fins separately and attach during rigging.
As a update i did some wrinkles and patterns of skin where i am going to detail.
Looking better and better!
Hi all,
Here is the update!
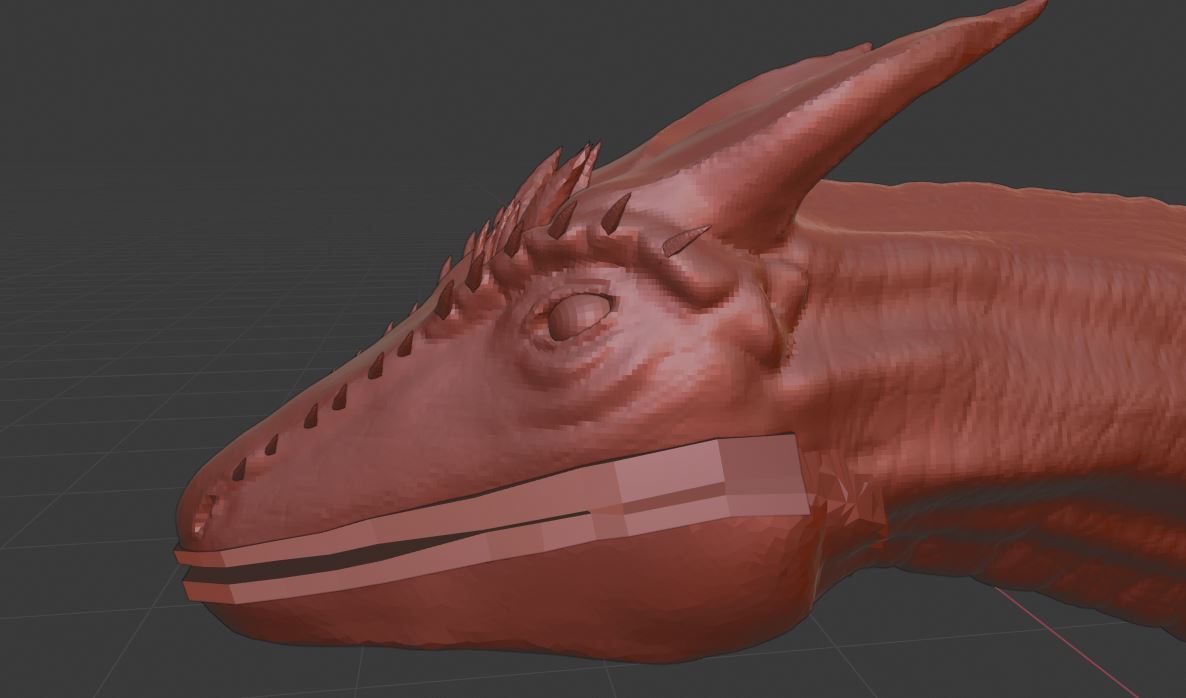
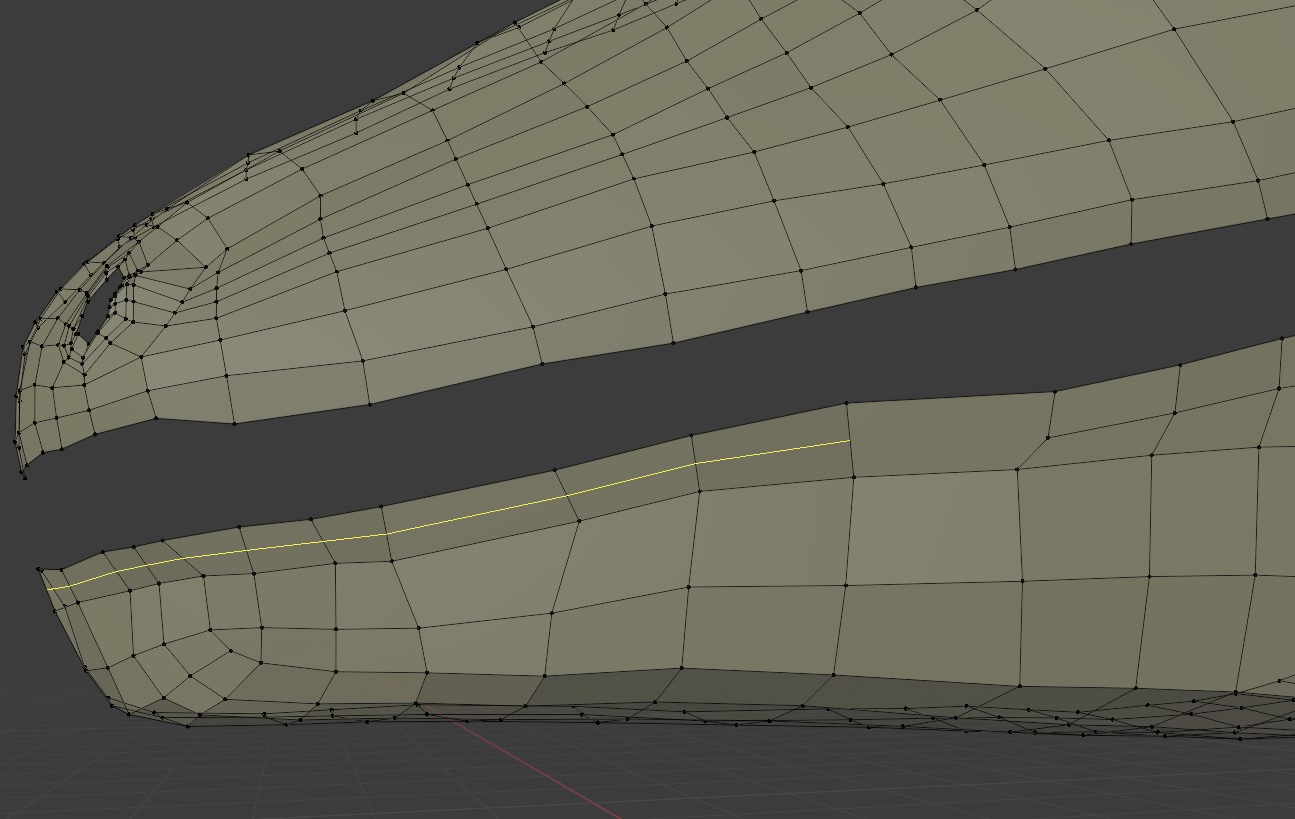
At first i sculpted the character with the closed mouth, after some level of details i came to know that the creation of mouth opening will be tough.
But anyway i tried finding solution and here i have attached the snapshots of what i did
Note: It took around 2.30 hrs to rectify.So plan your base mesh from the beginning to model with slight mouth open.
Hi,
I have reached the maximum remesh count. but i cant able to sculpt the scale for getting detail.Pls suggest.
@Sol_Hunter
Also, please let me know if i retopo this hires and in multires sculpting can i give the scale details and wrinkles?
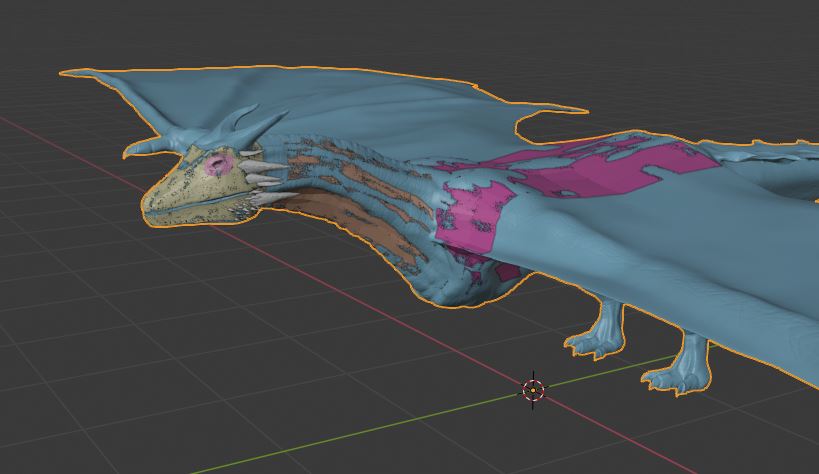
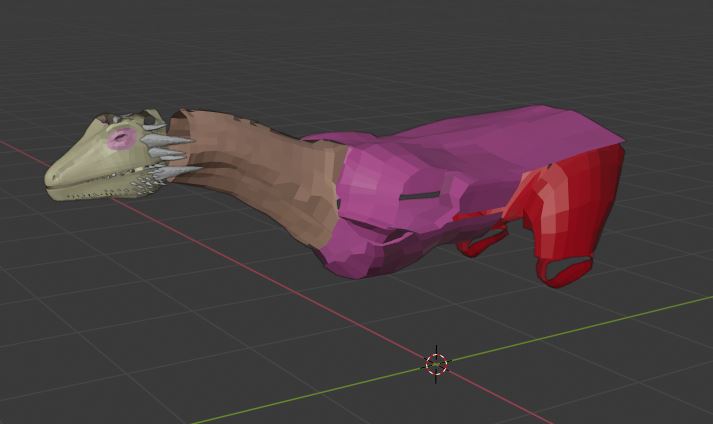
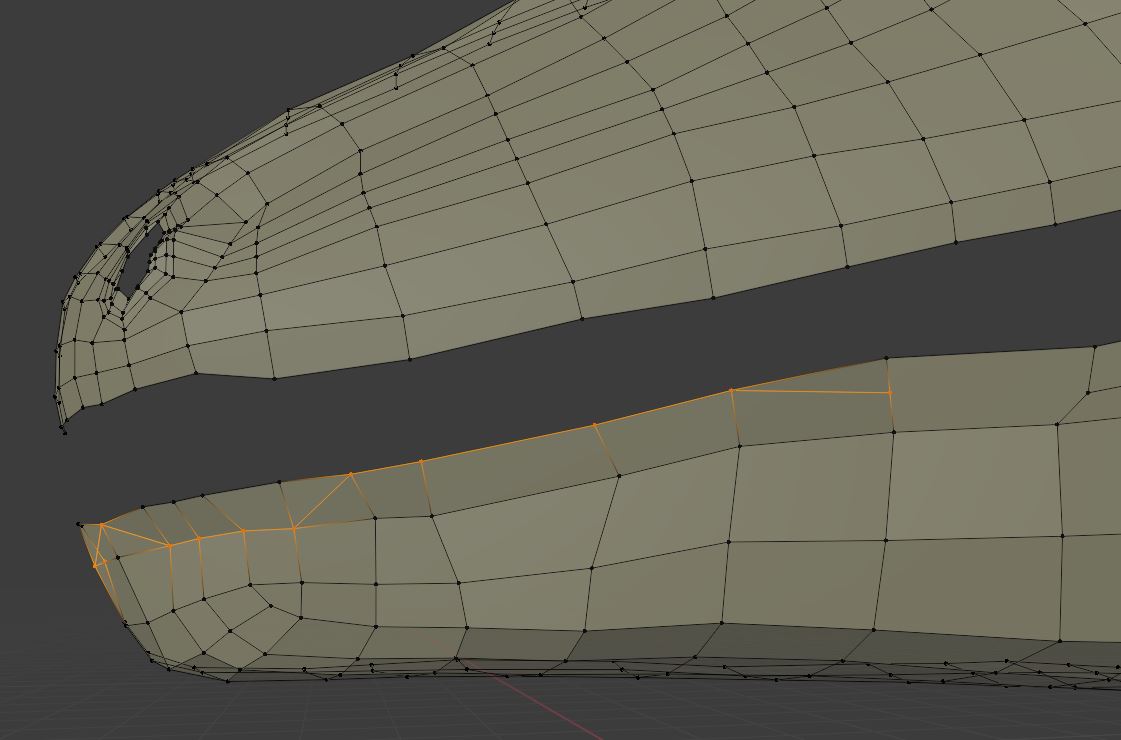
Hi,
I have started the retopology by breaking the parts with different materials.Each materials are planned for UV seams and it is easy to retopo the different parts. Though retopo is the paining process, it will give you the control of the mesh flow.Here is
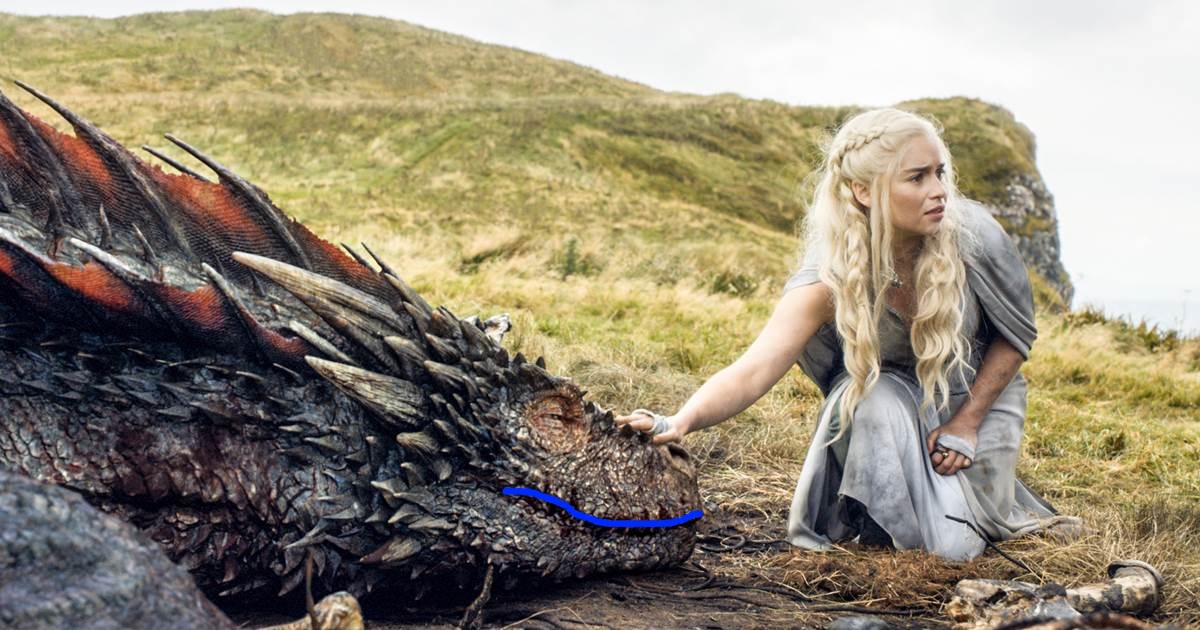
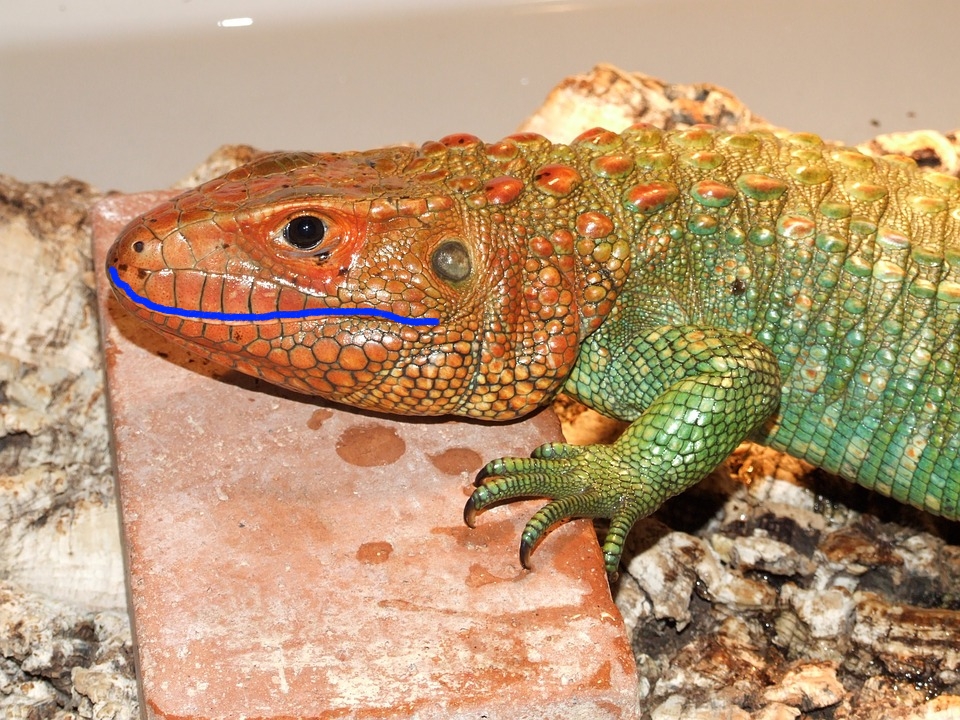
I would continue working on the base form more before finishing the retopology. Particularly the head. I would keep some reference images up at all times while sculpting, so you can keep looking back and forth while you tweak things. The thing i would work on first is the shape of the mouth. Most if not all reptile mouths have this basic shape.
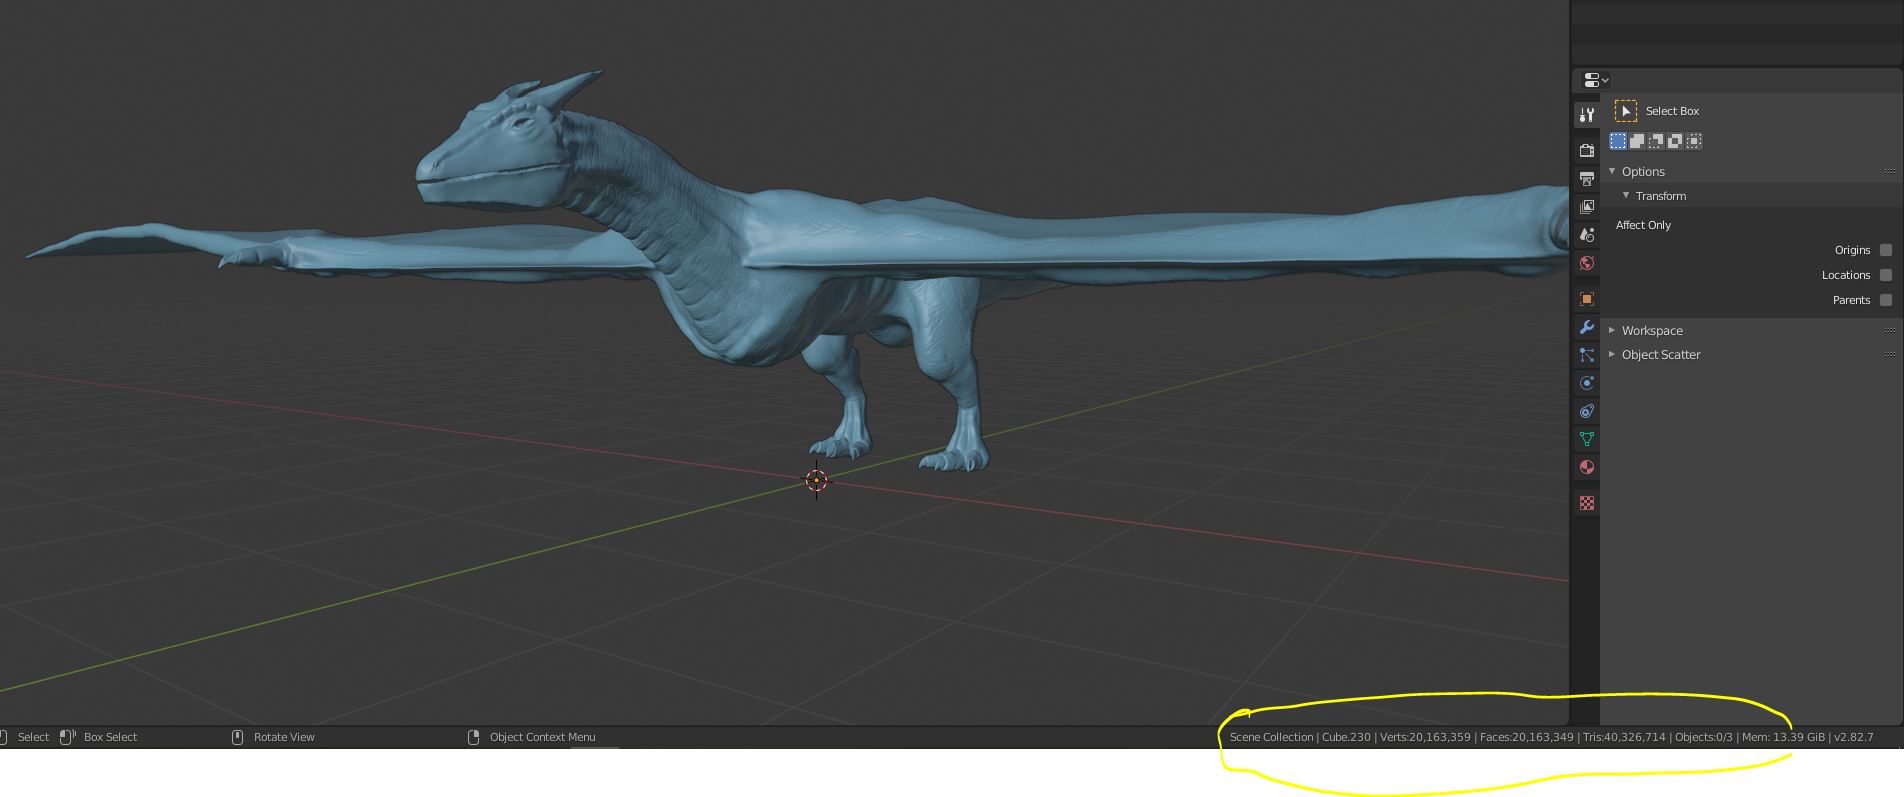
Dang! those wings take up a lot of verts… My gecko only had 7 million verts. If you can’t increase the resolution, you can add detail by painting a bump map on the retopologized mesh.
Hi! Exactly, that’s what i am planning for the retopology mesh. sure i will keep it in the mind about the mouth shape.Thanks!!
Hi!
Had a weird behavior of the loop cut.
When i press Ctrl+r, the loop creates and after i click on the region where i want , it slides and merge with near by vertices.
Also the tools works well on other objects like basic cube
If you have auto merge enabled you can either turn it off or lower the threshhold.

hi,
That works!! Thanks for the solution.I didn’t noticed.
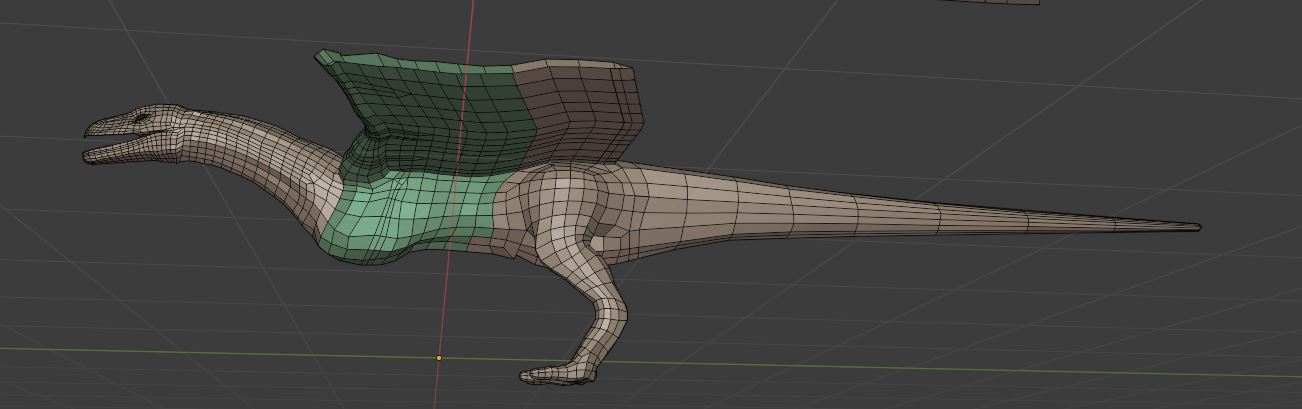
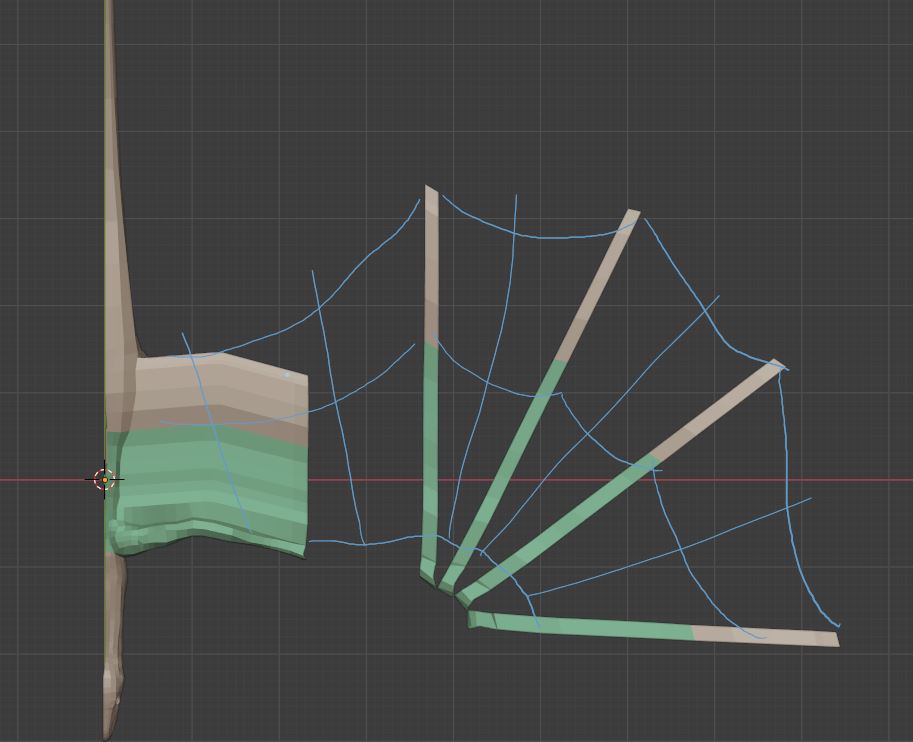
Guys,
After a while i have partially completed the retopo process and working on it.
Here i have updated the making of wing membranes and marked the wing flow which i am planning to make the wing mesh.
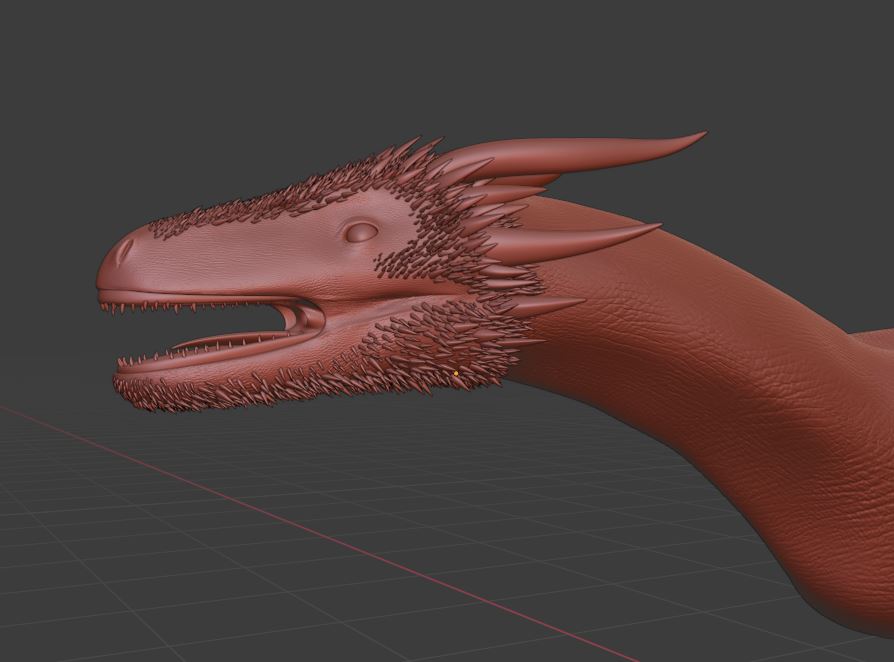
Hi all,
Due to hand pain, i needed to take rest for some days.
In the mean time, i sat to tweak some anatomy changes which made the model look bad!!
so i have changed the dragon anatomy.Also i have sculpted the details and paint the textures with the basic alpha maps.And i have started the rigging process. Hope it will come good!!