Draw2Paint addon for 3D View

https://github.com/artistCDMJ/Draw2Paint/blob/master/README.md

I got tired of not knowing how to get EZDraw working again so I went back to the ‘drawing’ board with this and adopted a simpler setup.

Still the same purpose, but a few different ways to go about making things happen.
TODO: still need to relearn how the crop tool used to work and get that back into the camera, as well as some of the smaller things still needed from EZPaint that were unique to that aside from the popups that are no longer needed with the dynamic brush menu addon shipped with blender.

Edit: Rewritten version doesn’t use Images From Planes addon or 4.2 new operator, but it’s own workflow of getting the active image in the Image Editor or from the Subject model to be painted.

Four ways to get a Canvas and Camera in there, but i will amke a video later to explain why stuff is the way it is.

Two ways to start - load a New Image in the Image Editor Pop up and go to Create panel and Generate the Canvas and Camera there to paint to, or select your object and add a paint slot image in Texture Paint mode and press Subject ot Canvas in the 3D Image Editor Work panel.

Either way, you can get to painting faster than before.

Draw2Paint Macros

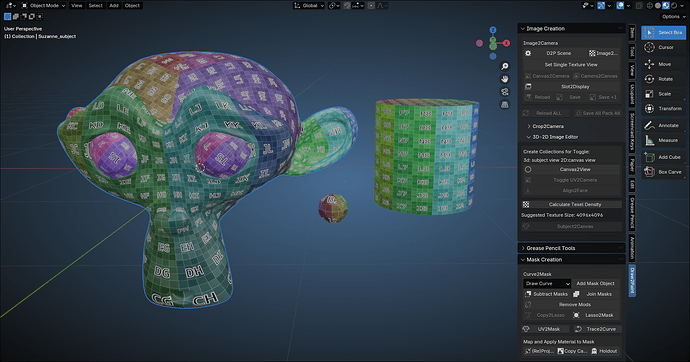
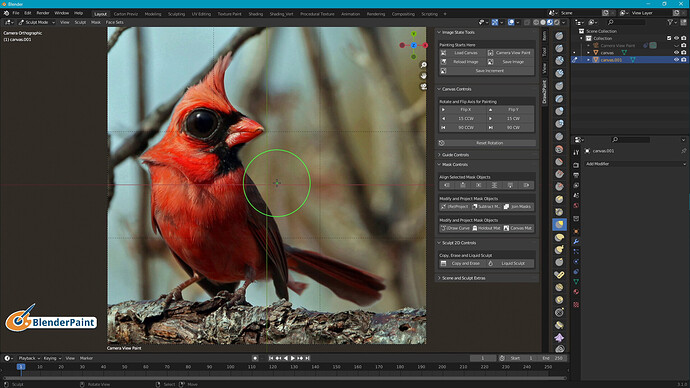
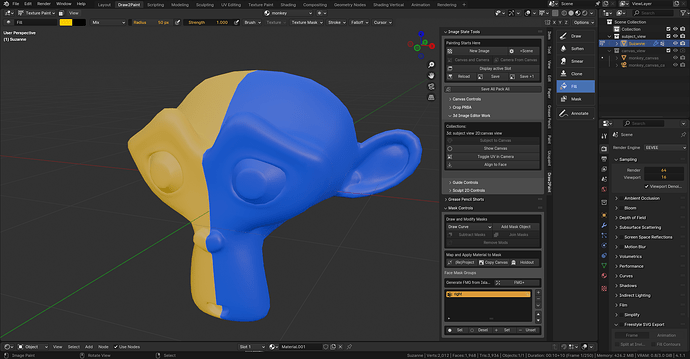
This is an add-on for 4.2 series Blender to enable manipulation of images. The panel can be found in the N panel once installed, and the plane must be in Texture Paint mode to begin work. Image State Tools

New Version Here!

New Image popup image editor for creating a new canvas image, open the Tool Bar to Create Panel to generate a Canvas and Camera from the new image

+Scene a clean new scene for working outside of your regular 3d file

Canvas and Camera if an image already exists in the file and is active, this will generate a Canvas and Camera for you

Camera from Canvas this is if you delete the camera by accident, new camera set to the selected image plane/canvas

Display Active Slot A pop-up Image Editor that is already displaying the current active paint slot - useful for creating iterations of brush images or isolating the details for examination

Reload reload the image

Save saves the image to previous disk location

Save+1 iteration of the image save to disk location

Save All Pack All this will attempt to save the images in the file that have been painted, or pack them to file if they haven’t been saved to disk, saving then keeps the changes in the packed images.

Canvas Controls

Flip X/ Flip Y these flip the canvas image on UV scaled to X or Y for checking composition

Rotate Canvas this rotates the canvas on the Z axis while still in Texture Paint Mode, and the icon to the right will reset rotation.

Crop PRBA this is a panel of crop controls for the image in the camera view, shamelessly stolen from Lapineige tools

3D Image Editor Work

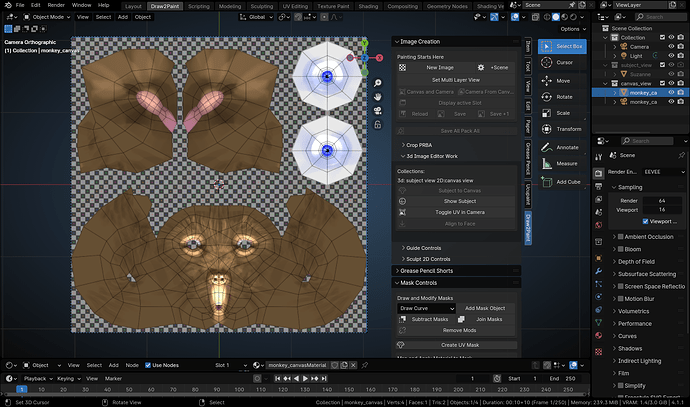
Subject to Canvas select your model to be texture painted, and press this to add a new Canvas and Camera linked to share the Subject’s material, UV Map is sent to the Camera foreground

Show Canvas/Show Subject
press this to toggle view and render between the Canvas View collection and the Subject View collection. Using this will help with masking, rotating, and even adding objects to the surface of the Canvas. TBD: maybe add all secondary objects to Canvas View collection with a button, as in Mask objects and additional 3d elements like GPencil.

Toggle UV in Camera this will toggle on and off the UV map in the Camera view over the Canvas

Guide Controls Guide sets the Empty Guide used for reposition of the Object Center for painting Symmetry, press a second time to reposition the Object Center

Recenter Guide press to snap the guide and the Obejct Center back to origin

Sculpt 2D Controls Copy and Erase duplicates the canvas and subdivides it, sets an Erase Alpha brush to eliminate unwanted areas for manipulation

Liquid Sculpt poor man’s liquid modifier using Sculpt tool in Blender - comes in handy for fixing errors in paintings

Grease Pencil Shorts New GPencil sets a new GPencil in play that is a child of the Canvas, so rotation of the Canvas will rotate the Gpencil

Mask Controls Draw Curve dropdown to choose what type of curve object to generate for making a mask

Add Mask Object adds the chosen mask object curve type and makes it a Child of the Canvas, so it will follow the rotation while painting

Subtract Masks difference bool of two masks, it adds a few modifiers to them to allow this

Join Masks union bool using a few modifiers as well

Remove Mods this makes the masks into mesh to use with the next step

Map and Apply Material to Mask

(Re)project project/reproject the Mask into the UV Layer of the Canvas throguh the Camera

Copy Canvas since the Mask Objects from curves already copy the canvas material, this can be used for anything manually added to the Camera View for painting

Holdout this adds a Holdout Shader to the selected mask object to make cutting out alphas much faster than manually erasing them repeatedly

Face Mask Groups

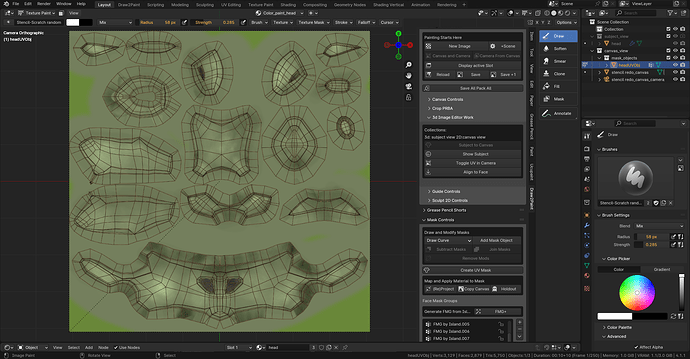
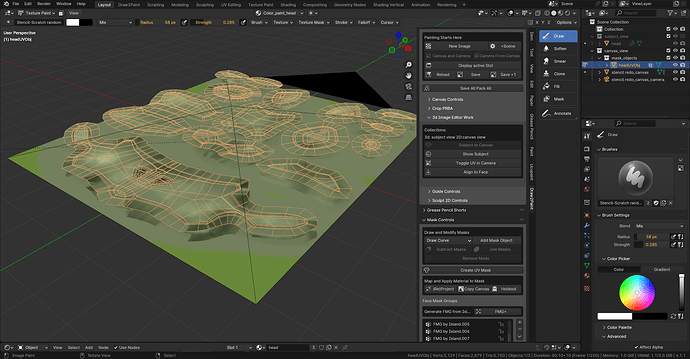
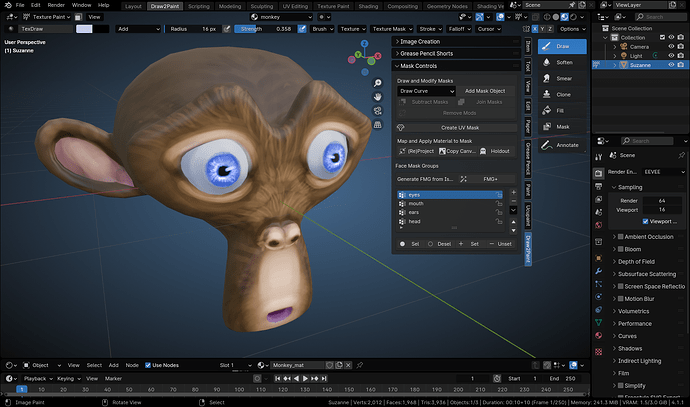
Generate FMG from Islands press FMG+ and the groups will popup for selecting the islands of the Subject for using in Face Mask Selection. Selection and Deselection, Set and Remove all work INSIDE TEXTURE PAINT

Mask objects or anything else will need to be arranged with the Align addon that ships with Blender. Import IMagesw as Planes is no longer necessary here for using Draw2Paint, as this uses a much simpler and direct approach.

EZPaint Additions - Press W for the Brush Pop-up, Alt-W for the Texture and Mask Popup, and Shift-W brings up a broken Vert Group and Texture Slot popup. I will be fixing these as I get time. D toggles Multiply and Add, Alt-D returns to Mix mode - Shift D toggles Screen, Color, and Soft Light. Have Fun.
7 Likes

Updated to include a bastardized version of the Vertex Group panel that works as Face Mask Groups in Texture Paint. The button on top, FMG+, generates automatic vert groups from islands thanks to some code from batFINGER on blender.stackexchange.com .

The groups are labeled as FMG.001 etc and come into play when painting complex mesh objects using Face Select Masking. The panel allows use of select/deselect, assign/unassign (set/unset) while in Texpaint mode because it toggles edit mode in the background like all the rest of my stuff does.

I did some modification to the subtract and join masks, and reordered the buttons to make more sense and updated the main page to describe it. Still looking at learning the enum property so I can make a dropdown for some of the mask primitive objects.

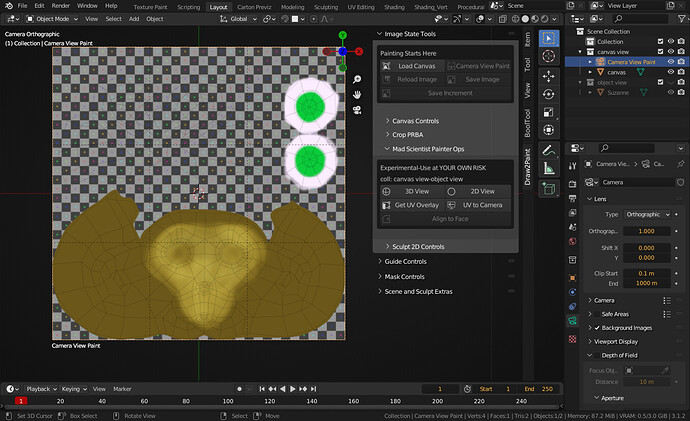
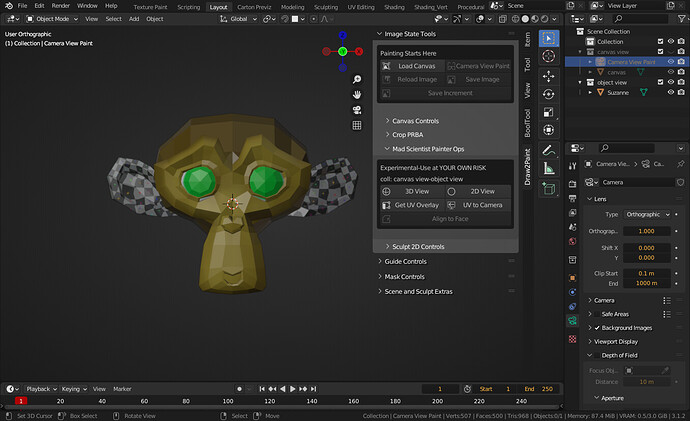
I added some experimental operators for 2d to 3d painting - have wanted to do this for some time now but finally started learning enough to rob bits of code and modify to get what I needed.

The 3D object needs to be in a collection named ‘object view’ and the camera and canvas need to be in a collection named ‘canvas view’ for it to work, but then you can swap view while to paint on either the 3d view or the 2d view. Selecting the 3d object with UV layer present, Get UV Overlay writes an export of the uv layout to C:\tmp and pressing UV to Camera loads that image to the scene camera.

I need to do some more work to add a place to input names for collections and a button to assign as well as input for the uv layout image name maybe. I also need to figure out the right way to prevent incorrect use before collections exist :wink:

Anyway, Mad scientist painter ops finally starting to come together! Too fun - but my wife just shakes her head at me when I try to explain, liek that meme of the guy with all the connecting strings on the white board…


2 Likes

I updated this for 4.1 and in the same effort decided to start experimenting with GPencil in my 2d painting with the texture paint. I added a GPencil panel with one operator to just add a single GPencil object and turn off lights for the session.

I added a popup for making a New Image in a floating 2D Editor so that precedes the Import Canvas, so the new flow would be to Add New Image to desired size and color, Save to disk, Import as Canvas and then set Camera to View. For now, the GPencil is just to View and I’m experimenting on what settings will work best like setting to Surface instead or parenting to Canvas.

I need to work on some personal mockups for acrylic paintings I want to do in meatspace, so this is more of the stuff that will help me explore compositions for that end.

2 Likes

So I have to say I got so wound up with the idea of adding a constraint to the Camera to follow the Canvas that I didn’t understand the simplicity I could have with just a Parent/Chil relationship with the two. The Camera is now a Parent of the Canvas so that the Child can rotate and reset without affecting the Parent Camera, and that eliminated the need for two buttons and about 20 lines of code. I also corrected the author line to reflect the peopel that I owe some fo the code to that I absorbed into this.

4 Likes

I absorbed the brush pop-up menus from EZPaint into Draw2Paint last night. The Vert Groups/Texture Slots menu is broken for now, but I did get the rest of the brush pop-up menus to work as well as the mix mode state toggles on the D key, Alt-D and Shift-D(broken). The Brush Pop-ups are on the W, Alt-W and Shift-W.

Much gratitude to Spirou4D for all his work on these, I hope to learn more from them.

2 Likes

I split up the long python file into a proper separate module setup now. I feel accomplished :smiley:

4 Likes

I am working on it but the addon seems to find every weakness I have in organizing code that previously worked before splitting it up. I suggest getting the version before the split, that was working great as a single file. Meanwhile, I will keep working on bugs.

Edit - I got the stuff to work after doing a lot of install/uninstall/edit/rezip/repeat lol

I did some digging and found code by stacker over on Blender.stackexchange that I expanded into generating a UVMask mesh object in camera view over the canvas from the selected subject. It affords me the ability to select islands for masking in the way we have always wanted from the 2d Image Editor, but it is in my 3d Image Editor lol.

I’m still testing everything to make sure it doesn’t break every time I use it. Main thing is to use the +Scene button to start an empty Draw2Paint scene from, avoids a lot of headache.

Pressing the Show Canvas/Show Subject button swaps between the two collections of Subject View and Canvas View, and I disable the Lock Object Modes so I can leave both in Texture Paint mode.


2 Likes

Small changes today - added a throwback to the old Multitexture GLSL /Single Texture days by setting up a toggle between Solid and Material view for painting. +Scene now sets the renderer to Eevee or Eevee Next depending on Blender version, and also sets the Color Management to simulate the flat look of the image so that Single Texture View and Multi-Layer View both capture the same look in the 3D View.


3 Likes

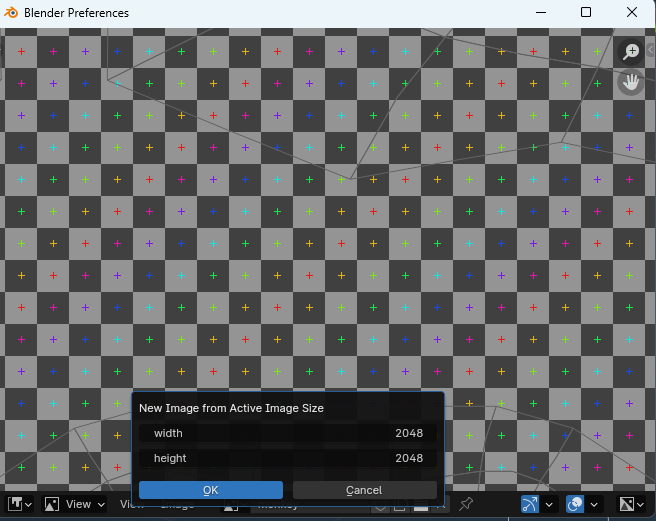
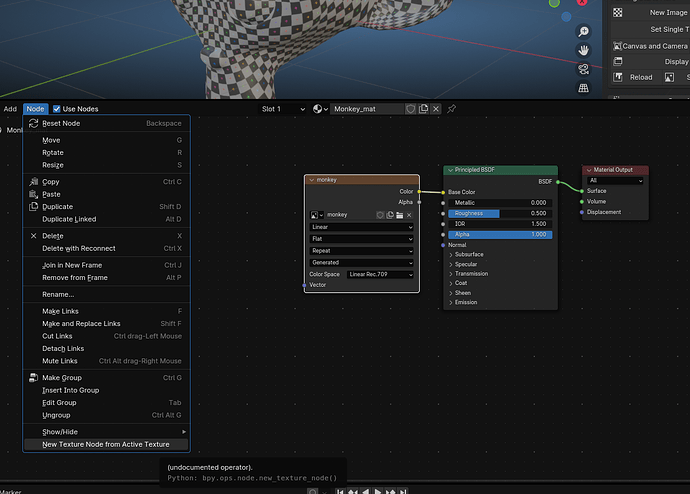
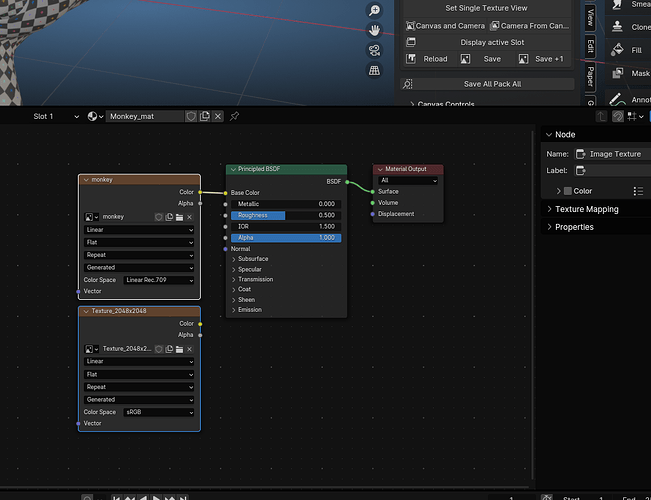
Added two new options for Image Size - a menu option in the Image Editor to generate a New Image dialog that is already adopting the size of the active image, and similar function for the Shader Node Editor where the Active Image Texture Node size is adopted and generates a new image sized and named for the size. I just have always been perturbed about setting a new image in the editors and having to remember or write down the size of the main canvas I am working on. Typing it out bugged me.


1 Like

New operator in the header for now generates color family palettes for the current brush color and names them by relationship and hex color number of the brush color. The Brush gets renamed the current hex code, but I’m not sure if I want to keep that.

edit: The button is moved to the Brush Tool above the palette interface.

I am trying to make a video set to illustrate and demonstrate the usage of the addon and in the process ended up finding and fixing two bugs and deciding to rename a lot of the options to shift to the “this2that” naming.

I have been testing it a lot working on some personal stuff, so I am happy this is coming together.

Edit: anyone else think they squashed all the possible ways things can go wrong until they are making documentation in the form of video where a corner case pops up and breaks the thing that worked fine not long ago? No? Just me I guess. I figured it out and then realized the fix was present in a different operation so I borrowed two lines and bam, back to running it.

1 Like

Three videos to cover, one is all just making my first painting before moving on to the different operations.

I added a Lasso2Mask operation to simplify the way I use BoolTool as a mask selection from time to time, but then decided I needed to remind others of how much easier it is to use the existing Mask Tool in texture paint.

1 Like

I started a Gumroad product page so I have somewhere to consistently share assets to. The Damage Brush set is free, just type in $0 for the sale and you can have it. I made these a little fancier with the images for the brushes - the 4.3 effort is stymied because as I set up brush assets, the program tends to crash when I hit ‘update’ to save the changes made to the assets.

Edit: Heads up for anyone actually using Draw2Paint - a new operator is set to K in Texture paint that allows to flip the active brush gradient color ramp while still painting. I got really aggravated with always having to dive over to the toolbar to press the little dash and choose ‘Flip Color Ramp’, so now this does it for us. Especially useful when the effect is needing to be reversed or when the color stop is at the end and just doesn’t quite express enough with the pressure of the pen.

1 Like

I am going to port the Gradient2ColorRamp into Draw2Paint but keep it separate, and I am wondering if maybe a lot of the smaller convenience UI things should also be set up as a separate addon for those that only want the conveniences and not the whole Draw2Paint panel workflow.

Gradient2ColorRamp is probably going to continue as a separate addon for now, as it has it’s own home.

I did add a small utility to calculate a suggested image texture size for painting or baking based on surface area. Calculate Texel Density will spit out a suggested texture size in power of 2, so make sure you apply the scale of the object before pressing.

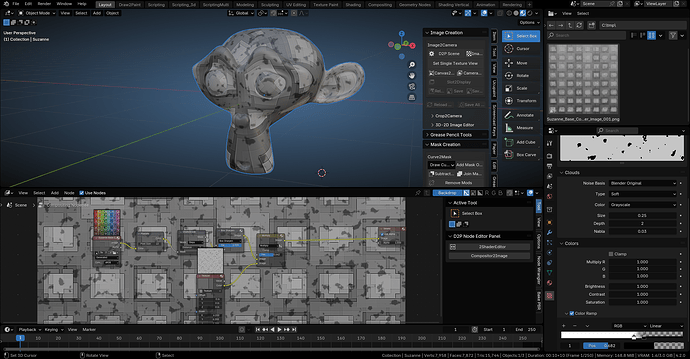
Added Image2Compositor and Compositor2Image on the bleeding branch for testing the best way to do this. We now have the ability to get the Active Image Node and copy that image to a new Image Node in the Compositor automatically connected to the Viewer Node.

This will allow to modify the image in the Compositor with all the bells and whistles and then send it back to the Shader Editor. It keeps overwriting the same image as you make changes and send but you can save iterations with the Save +1 operator in the Draw2Paint Image Creation Panel.

I’m pretty stoked, as I asked for this over and over for years now.


4 Likes

As I’m sick again, my wife won’t let me go to the shop to play with blender ideas today. In my sleeplessness I worked out an idea to manipulate the bump map to make a few masks directly for revealing scratches in the impression and discoloration on the heightened areas. I’m looking forward to trying to make it happen in the shader as a group node. It has me wondering what else could be worked up.