I. Overview
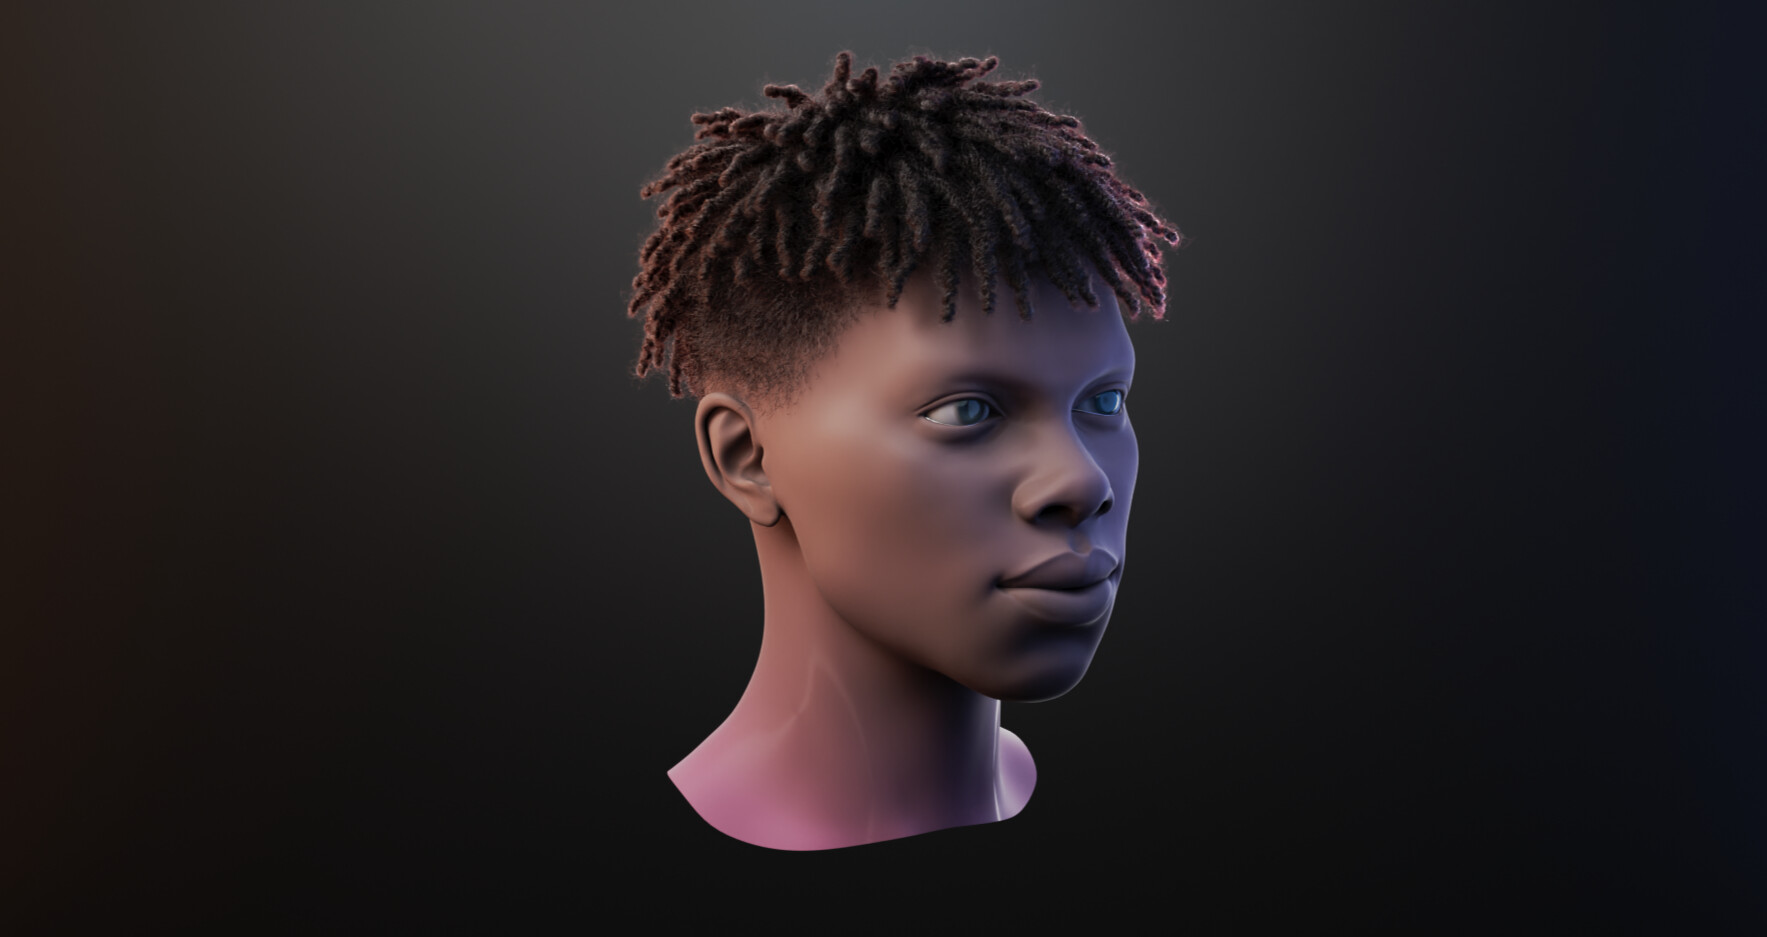
Hi, guys. Today I’m really excited to share the 3D works—dreadlocks. To give you a clear and thorough picture, I will walk you through the entire process, from reference analysis all the way to the final hairstyle. Meanwhile, I will involve some basic parameters in Blender, how to use them and how to integrate multi-layers of hair to achieve realistic work. Okay, without further ado, let’s get started now.
II. Pre-preparation
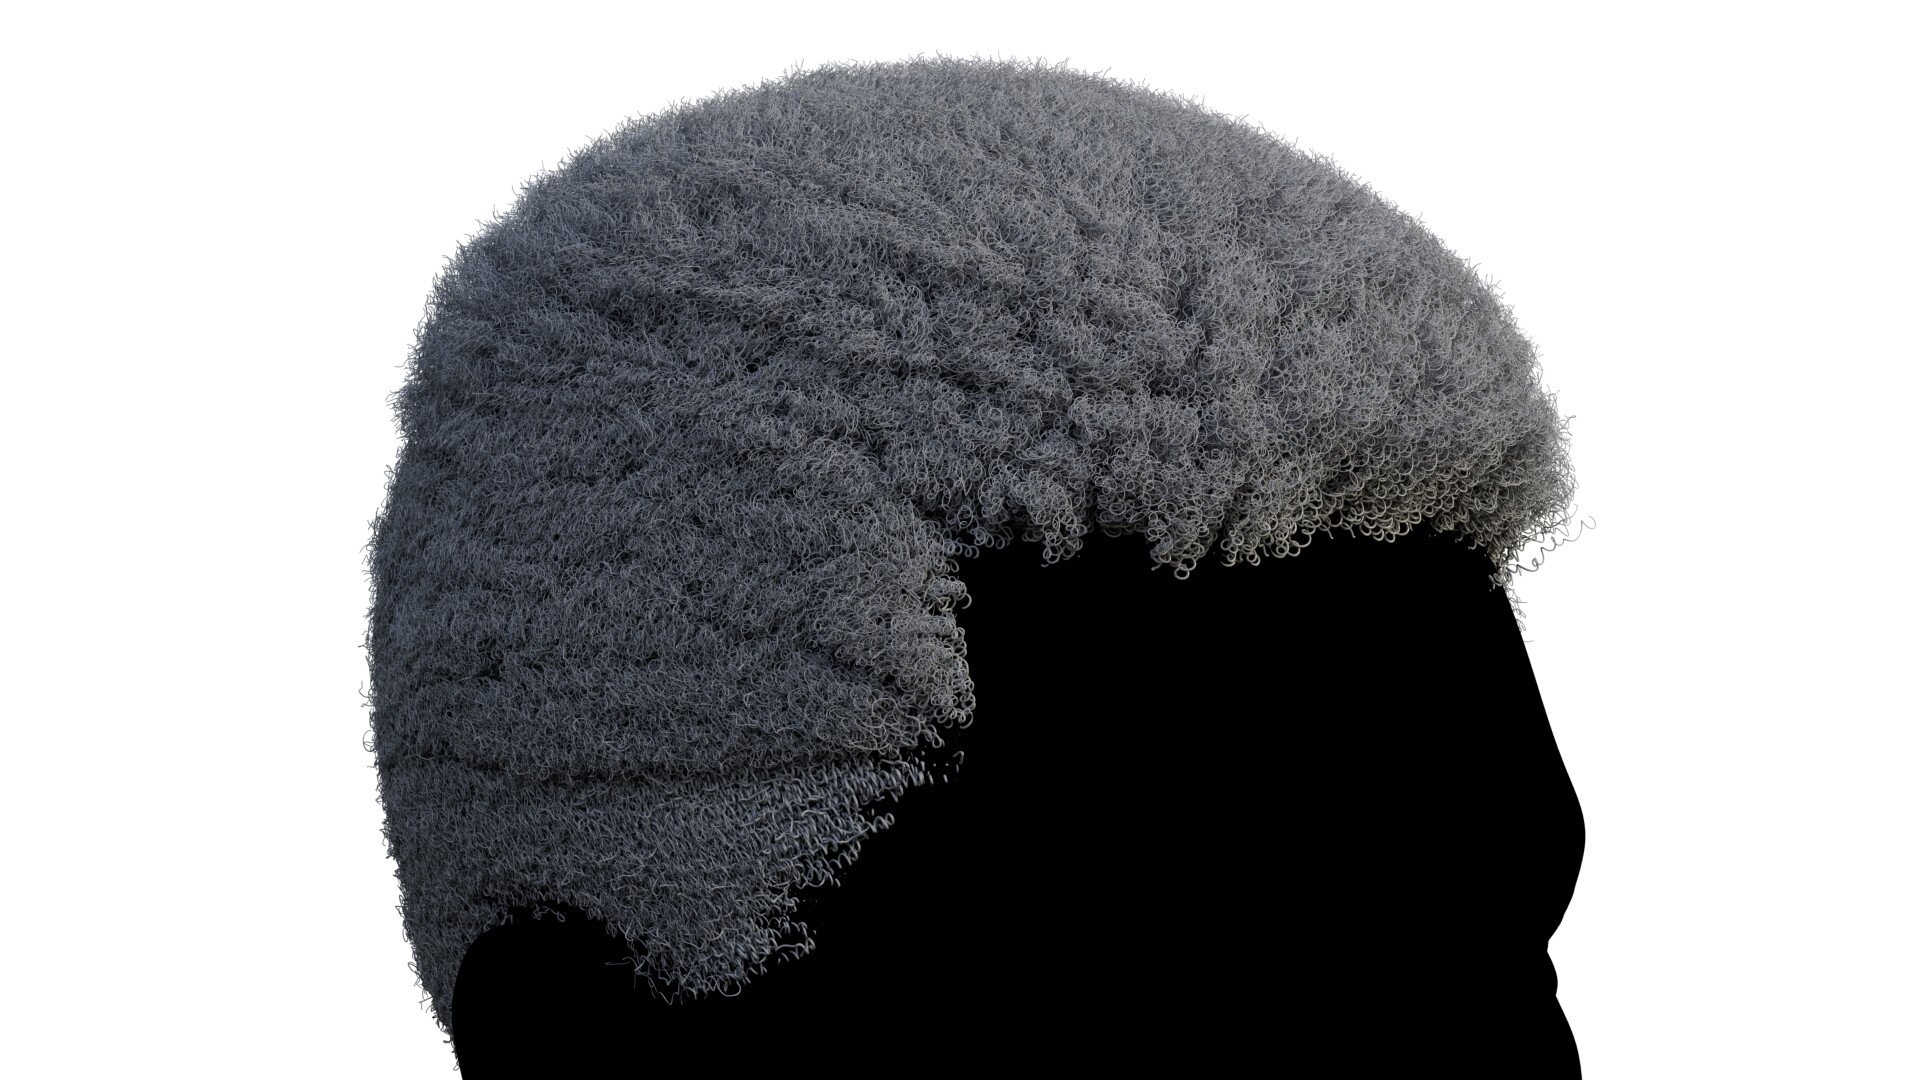
Enough knowledge and references are always the basics, coz they help us easily figure out a clear direction, as well as a convincing result.- First, learn the basic information/characteristics of the hair of black people via any searching engine like google, YoTube, etc. which will lay the foundation for the creation.
The characteristics: fine, curly.
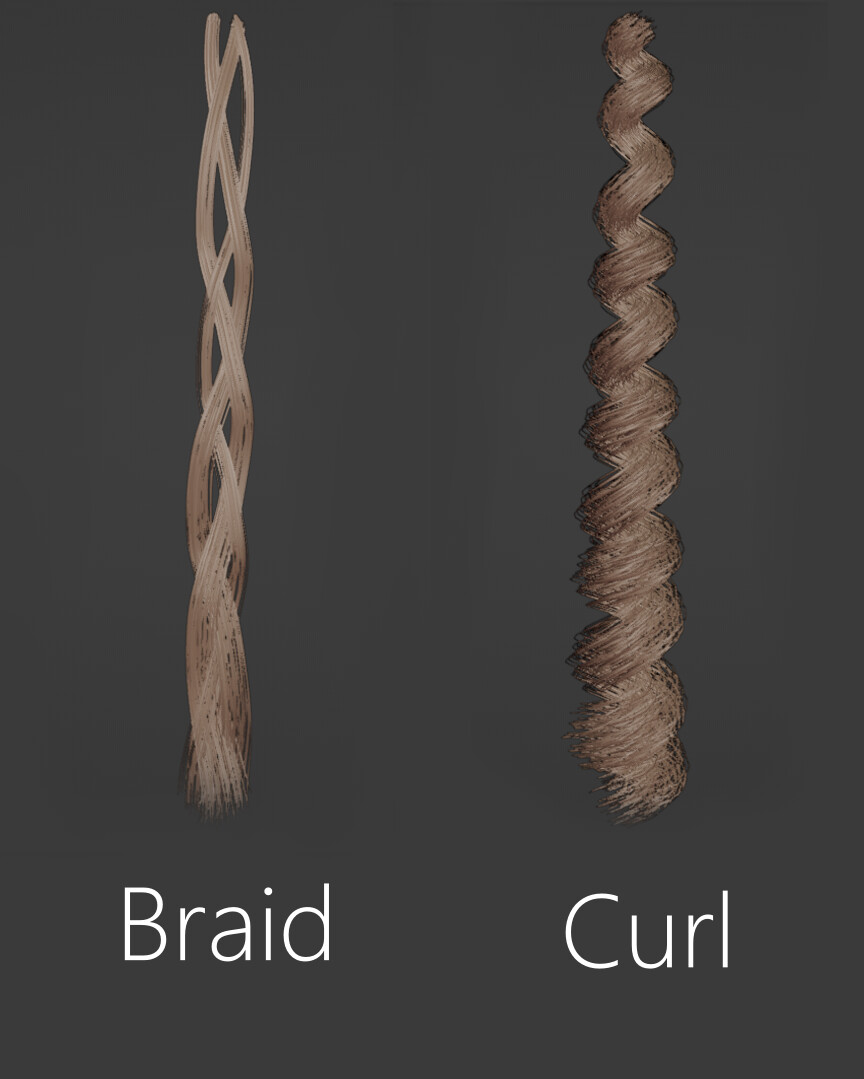
- Secondly, dreadlocks is made by a special weaving method, so it is also necessary to figure out how.
In 3D Hair Brush, we provide 2 methods to create dreadlocks: BRAID and CURL.
Note: This may be different from reality. Here I just want to give a clear production process, so I directly show you the parameter names. Dears, Do not be too serious about the names.
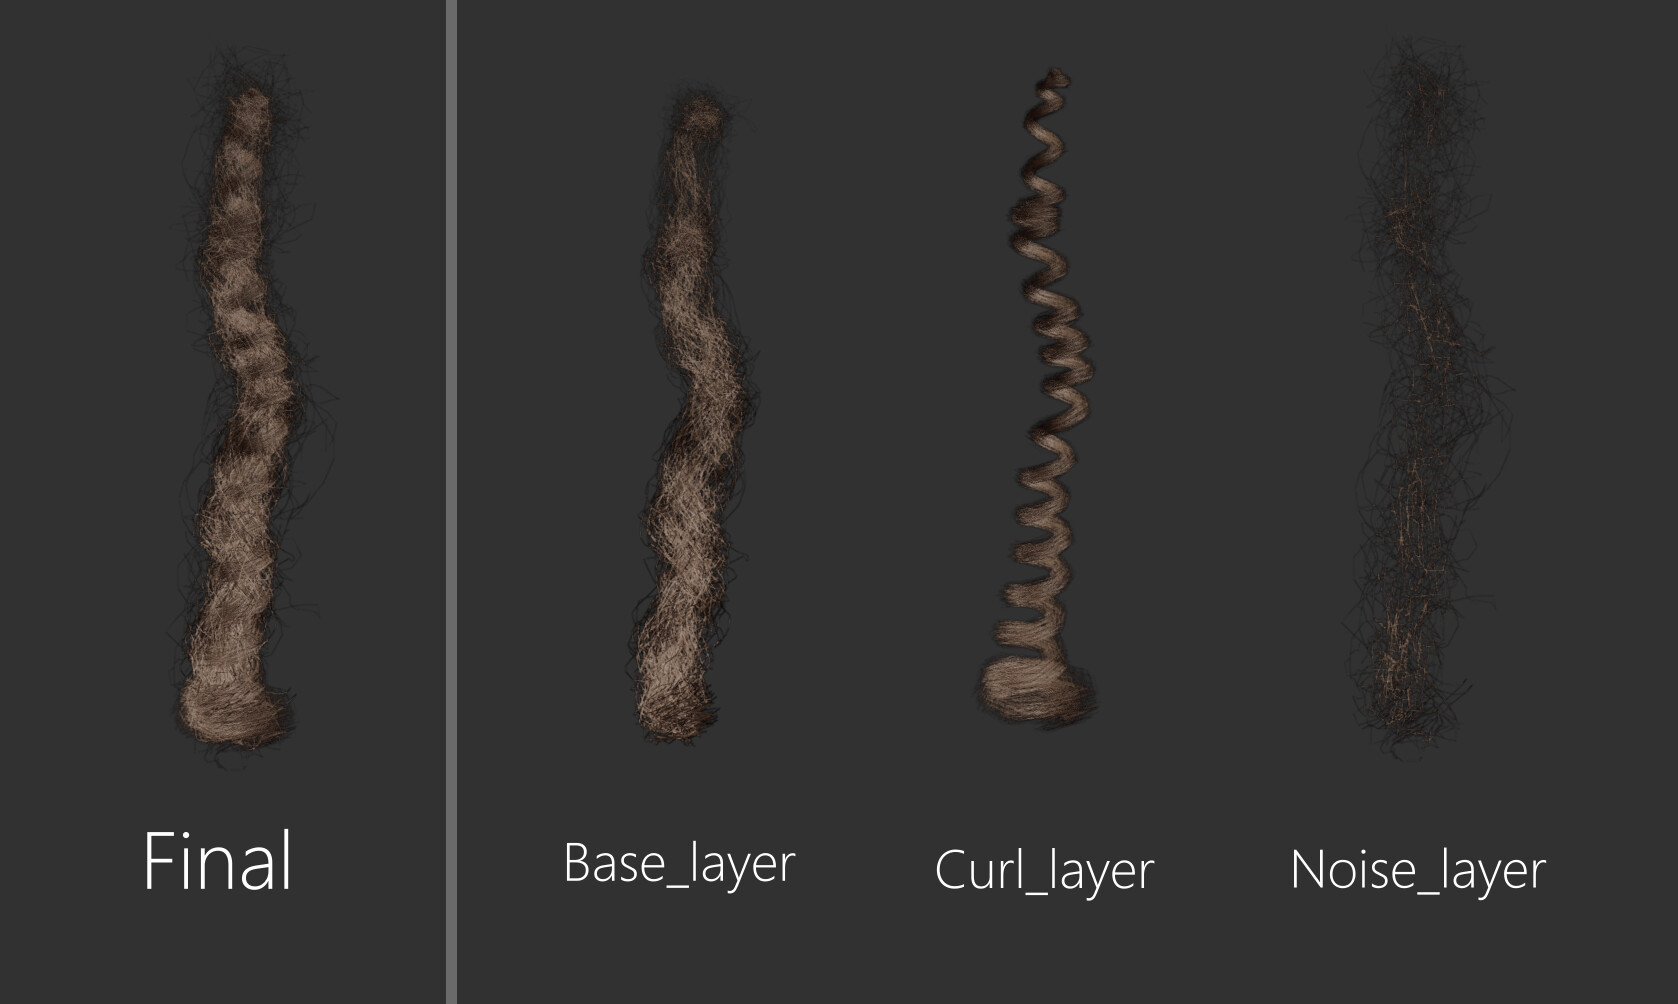
- Lastly, what matters is to separate the dreadlocks into multilayers, which determines how we achieve the hairstyle we want. Theoretically, any hairstyle can be combined with multiple layers and after that, it can be clear for the entire production.
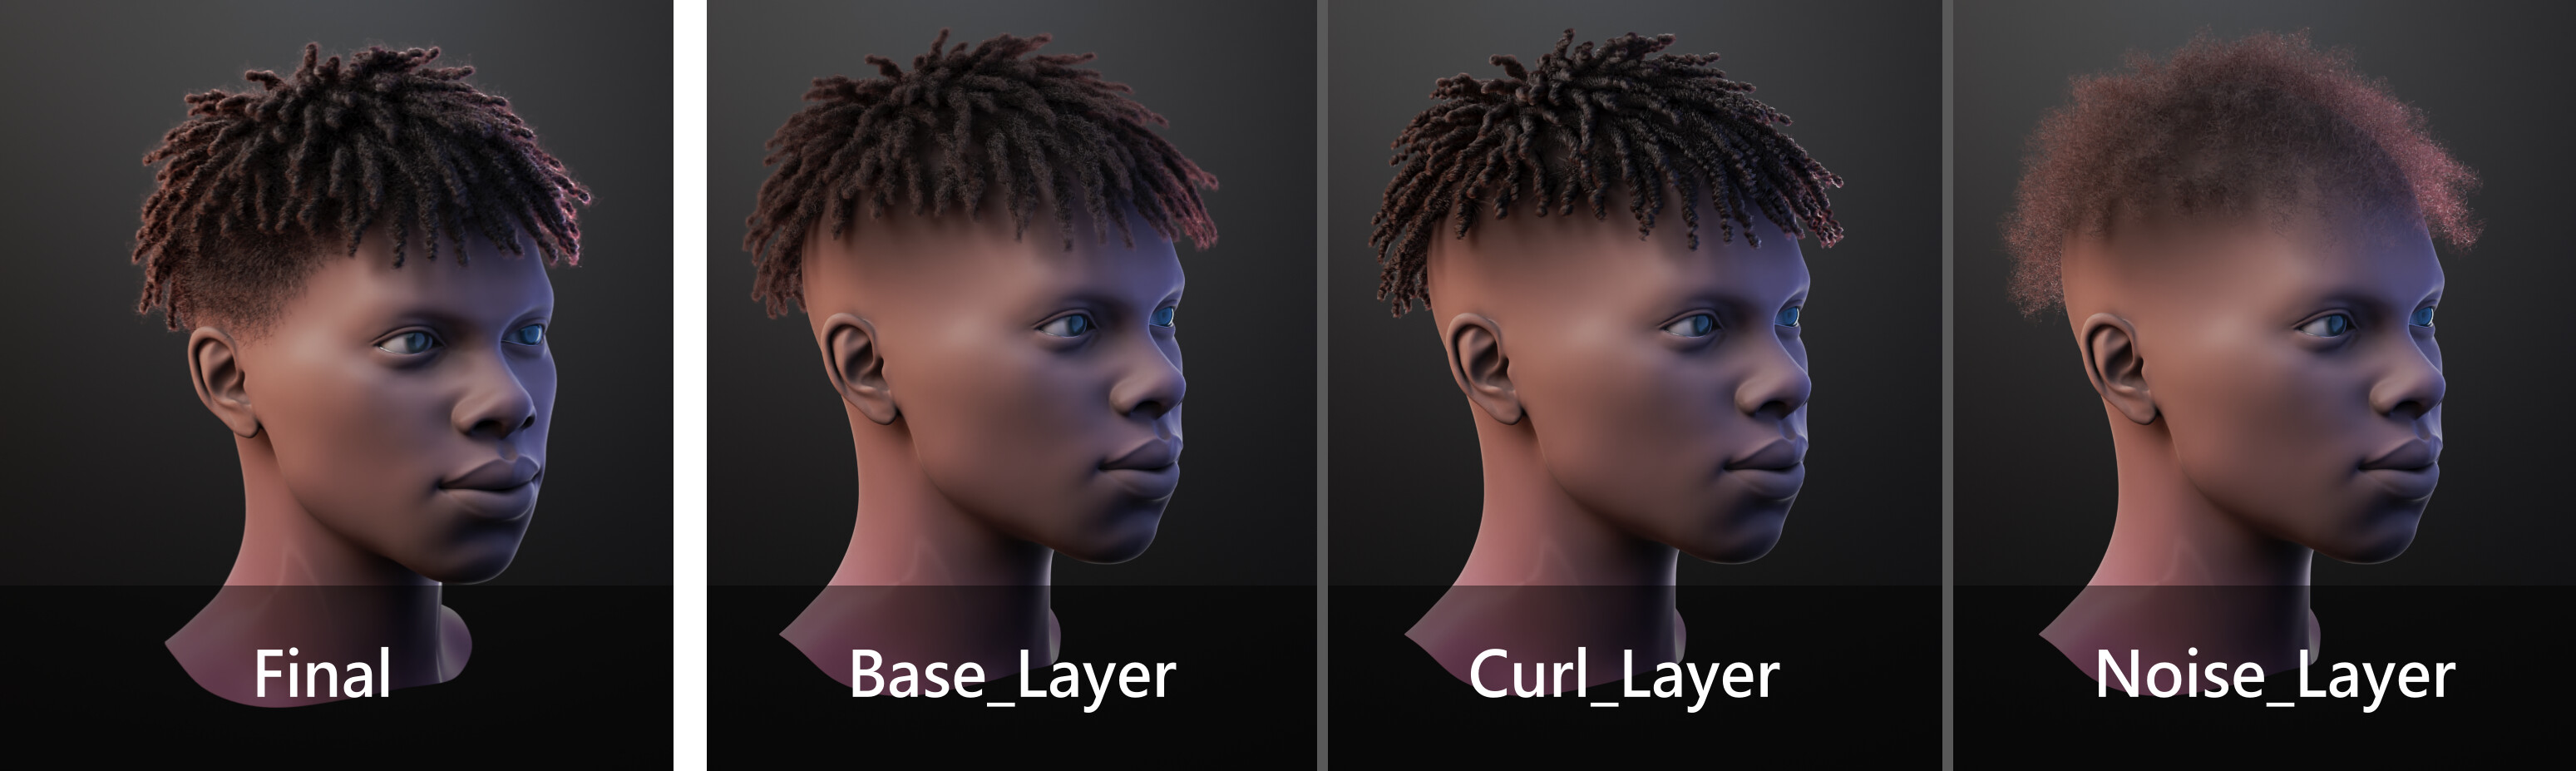
For this hairstyle, I’m going to split it into three layers: the base layer, its main feature is messy overall; Then the Curl layer, I mainly add curly hairs to achieve the feature of dreadlocks of CURL; The last one is Noise layer which is to retouch the whole hairstyle, so I’m gonna add a bit of messy and random hair at the edge, for a bit more realism and natural look.
III. Production
Note: Dears, to make you all clearer for the entire production process, so I omit the process of making hair flow.
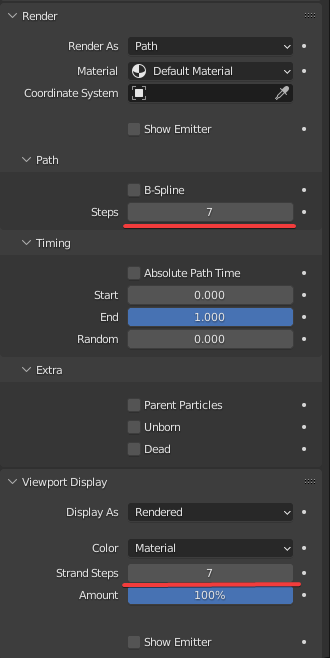
Alright, let’s dive into Blender. First, let’s set up a few parameters to visualize the effect properly. Dreadlocks requires relatively high steps to show the desired hairstyle.
So increase STEPS in the Render tab and Strand Steps in the Viewport Display tab. Theoretically, the larger they are, the more smooth hair we will get. But we are limited to hardware resources. I usually set it to 7, you can adjust it further according to your situation.
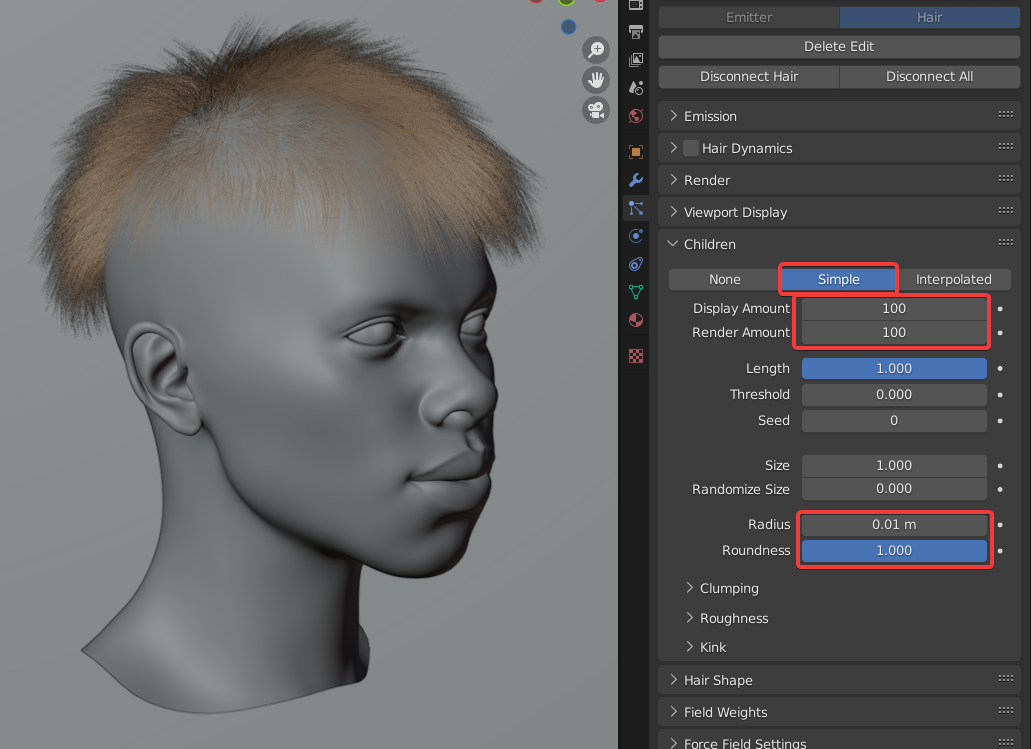
1. BASE layer
a. Enable Simple in Children tab, then set Amount to 100, Radius to 0.01, Roundness to 1.
Note: For a better result, I set a high amount here.
Let’s first focus on achieveing a natural clumping result: Set Clump to 1. Actually, it implies we turn on the effect of clumping after setting Clump to 1; Then set Twist to -0.8 to add some twist effect to the rigid Clumps; After that, we’re gonna adjust the parameters in the Kink according to the exact needs. Here I set Amplitude to -0.004, and set Frequency to 10, Clump tp 0.75.

Note: In this case, it’s not necessary to adjust the Endpoint, but it doesn’t mean this parameter doesn’t matter. Actually, it controls the tips of the hair spread, so you can apply it when needed.
2. CURL layer

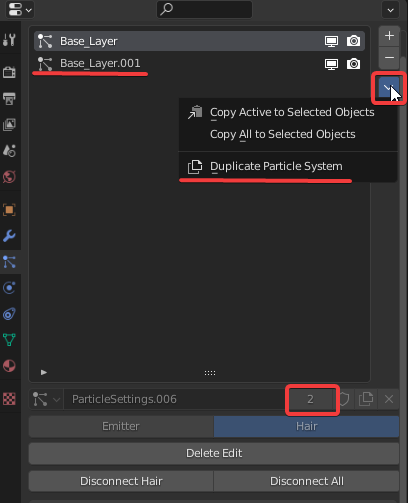
Here an independent particle settings is needed. We simply click the number on the right side of the particle settings to make it independent. Yet you may find the number is disabled to modify. Because by default, Blender is not allowed users to isolate the settings for any modified particle systems. ![]() I will share a tip to enable it at the end.
I will share a tip to enable it at the end.


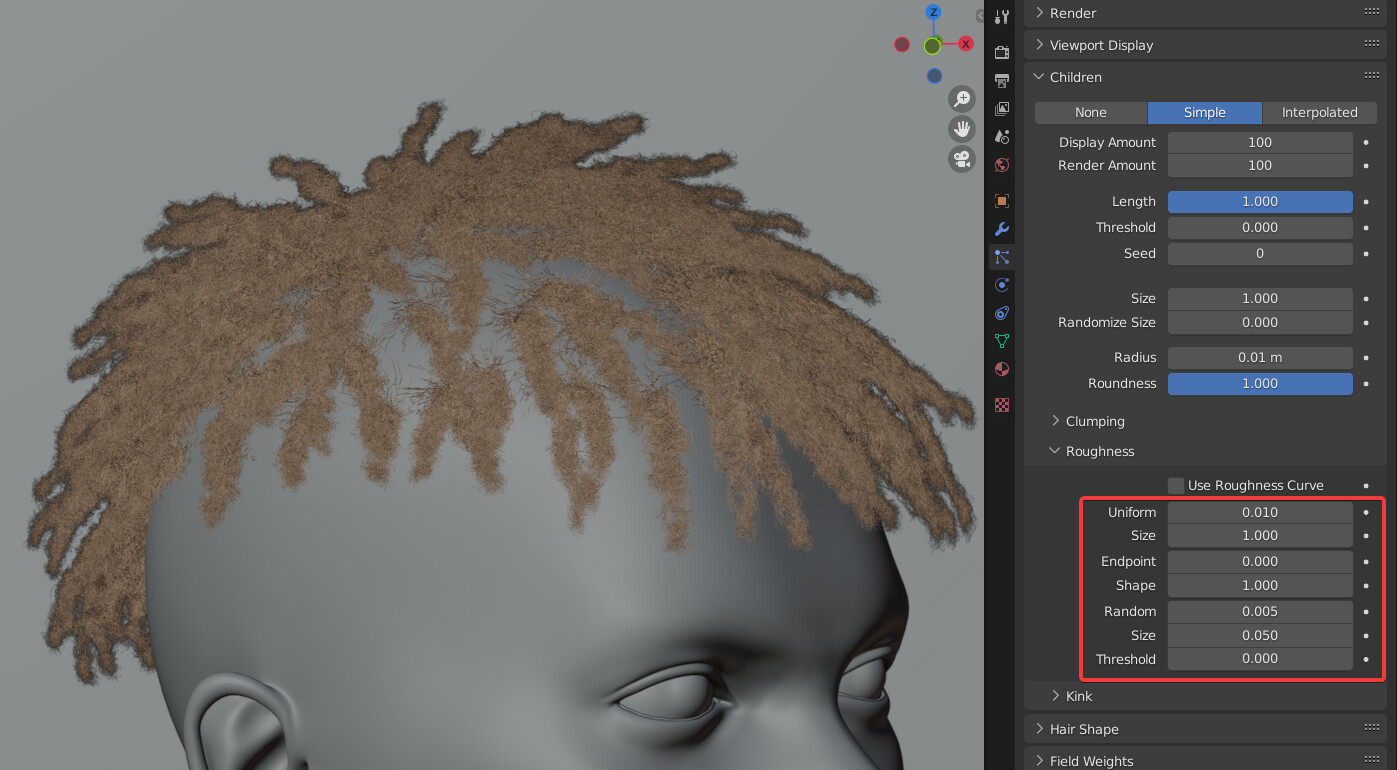
3. Noise layer
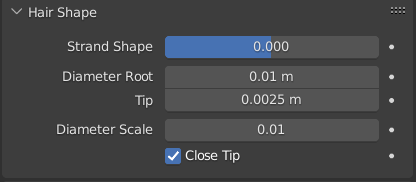
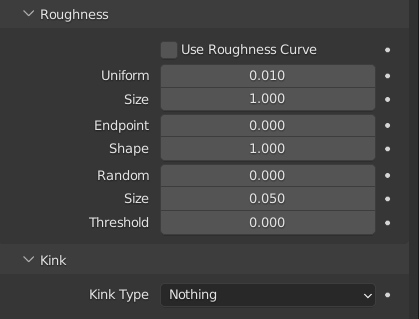
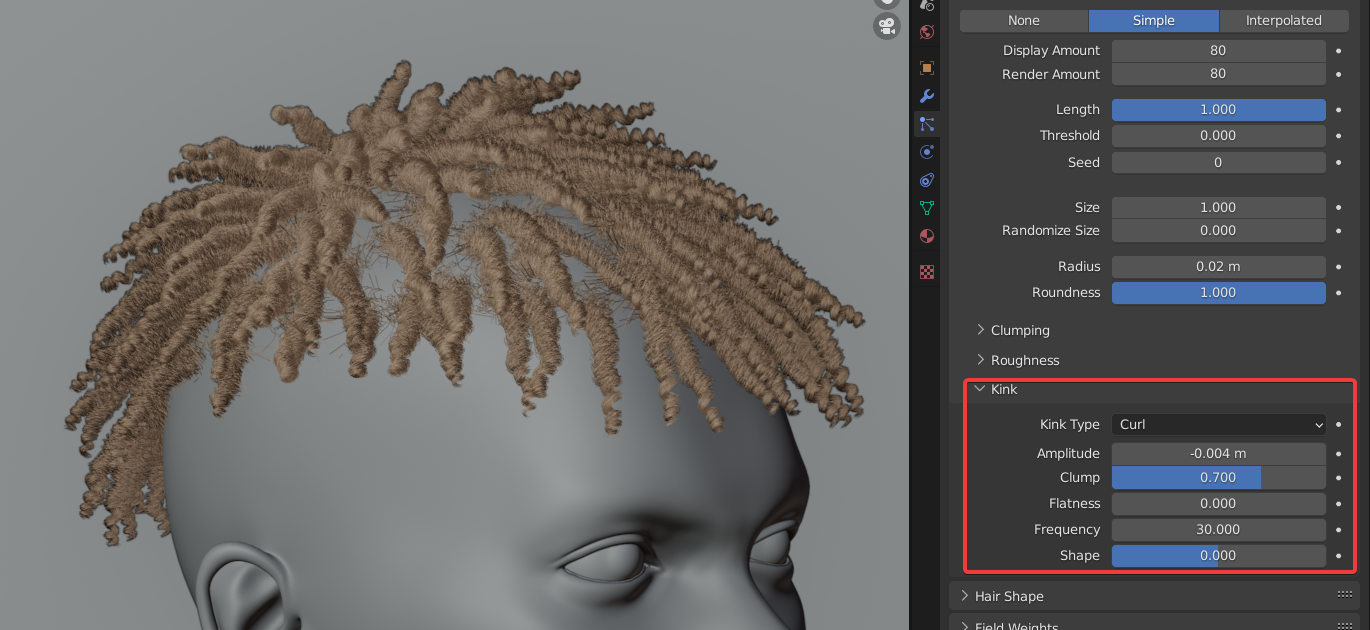
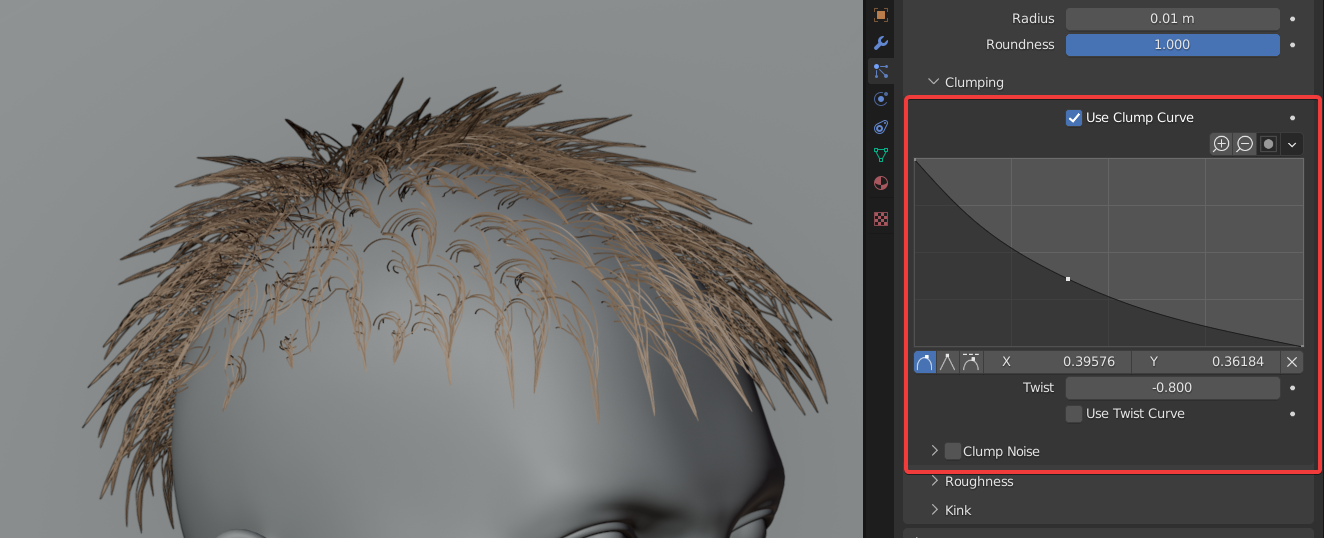
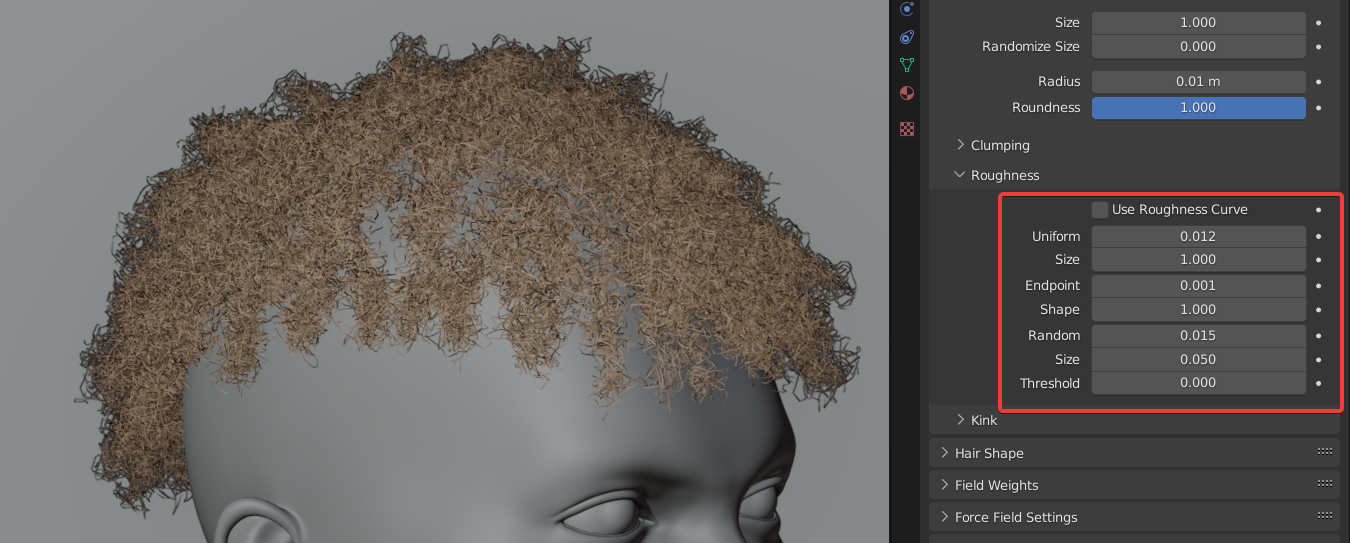
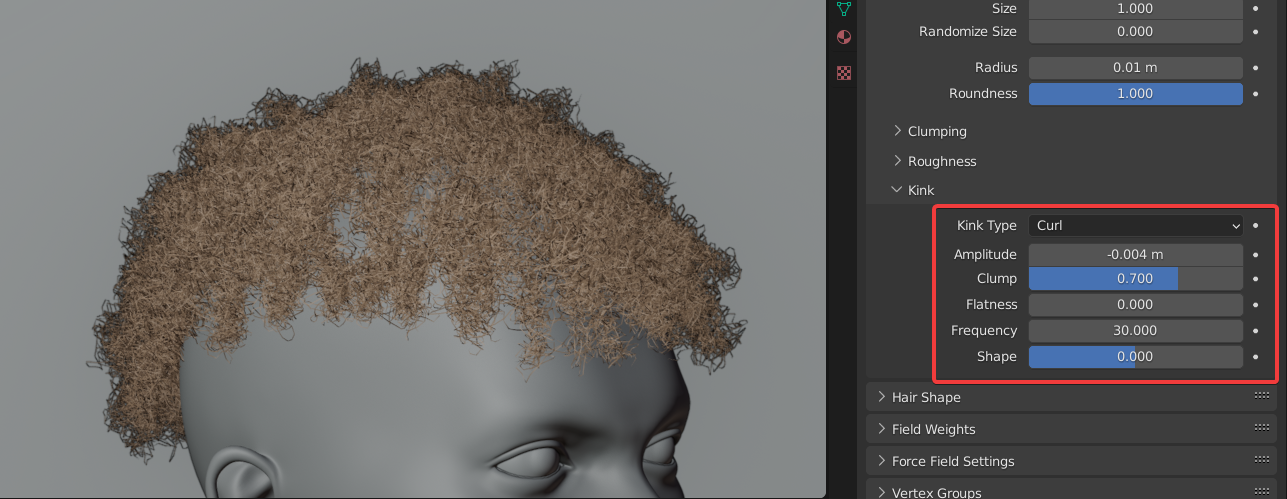
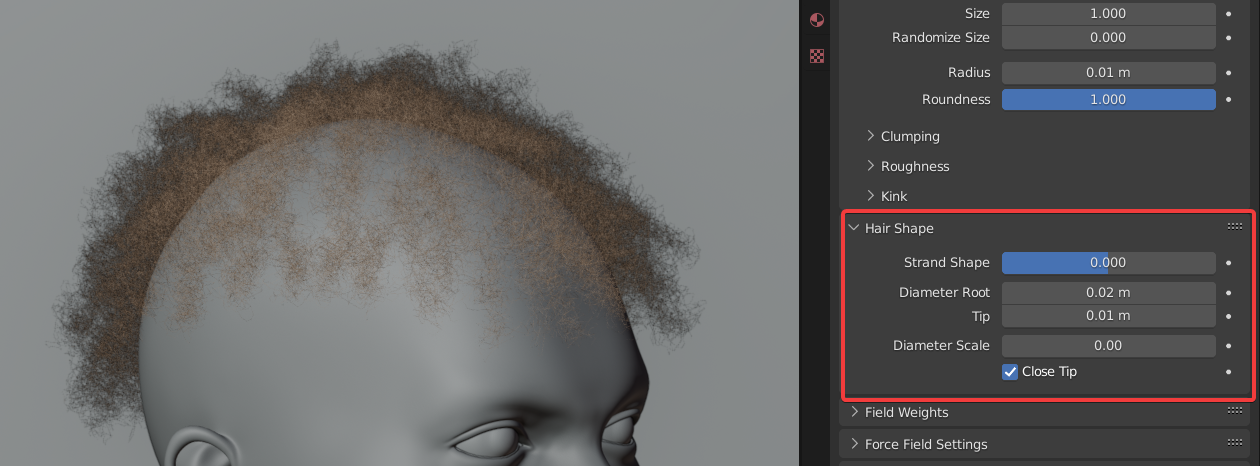
a. First, duplicate the Curl layer. We only need hair flow, so we reset all the parameters. Then set the amount of Simple to 10. This layer is just to retouch the whole style so no need to many hairs. Then set Radius to 0.01, and Roundness to 1. b. Increase Clump to 1, and then enable Use Clump Curve and adjust it for a desired result. Then set Twist to -0.8. c. Next, I'm going to mess the hair up a bit more. For the consistent curl hairs, I keep the same value of parameter Uniform in the three layers. That is 0.012. Then set Endpoint to 0.001. After that, I'm gonna try adjusting Random for a more messy but fine effect. So the final value of Random is 0.015 and the size is 0.05. d. After that, l'm gonna jump to Kink: Set KinK Type to Curl, and set Diameter Root to 0.02m, Clump to 0.7, Frequency to 30. Then you will find the whole hairs are more integrated. e. Adjust the hair texture. Here we need finer hairs, so I set Diameter Root to 0.02m, tip to 0.01m, and Diameter Scale to 0.003
4. Final touch layer
So far, a nice hairstyle of dreadlocks has finished. But the inevitable problem is that the scalp is exposed somewhat because Simple is mainly used. So to solve this problem, I recommend you add one more layer of hair to cover the scalp. It's simple, so I just offer the final value of all parameters that I've set.
IV. Summary
- In this tutorial, Duplicated particle systems are used repeatedly. Actually, we can effectively solve the problem of integration between the different hair layers that way.
- Before diving into creation, collecting enough info and references and careful analysis are necessary for a realistic and convincing effect.
Alright, the tutorial is over here. I believe you have understood the entire production process, so why not try it now?
Thanks for your reading my tutorial. Hopefully, it can be helpful for you to create your own excellent works.
V. Rendering Images
As promised, I’m going to share with you a method to isolate particle settings via modifying Blender’s external files.
Find out the dictionary of Blender: Blender Foundation\Blender 3.2\3.2\scripts\startup\bl_ui; then open the file ‘properties_particle.py’ using text editor; and then search for the string ‘row.enabled = particle_panel_enabled(context, psys)’ and add ‘#’ before it; After that, save the file; Restart Blender.
Note: Modifying the script is risky, so be cautious. It’s recommended to restore the Script after isolating particle settings.